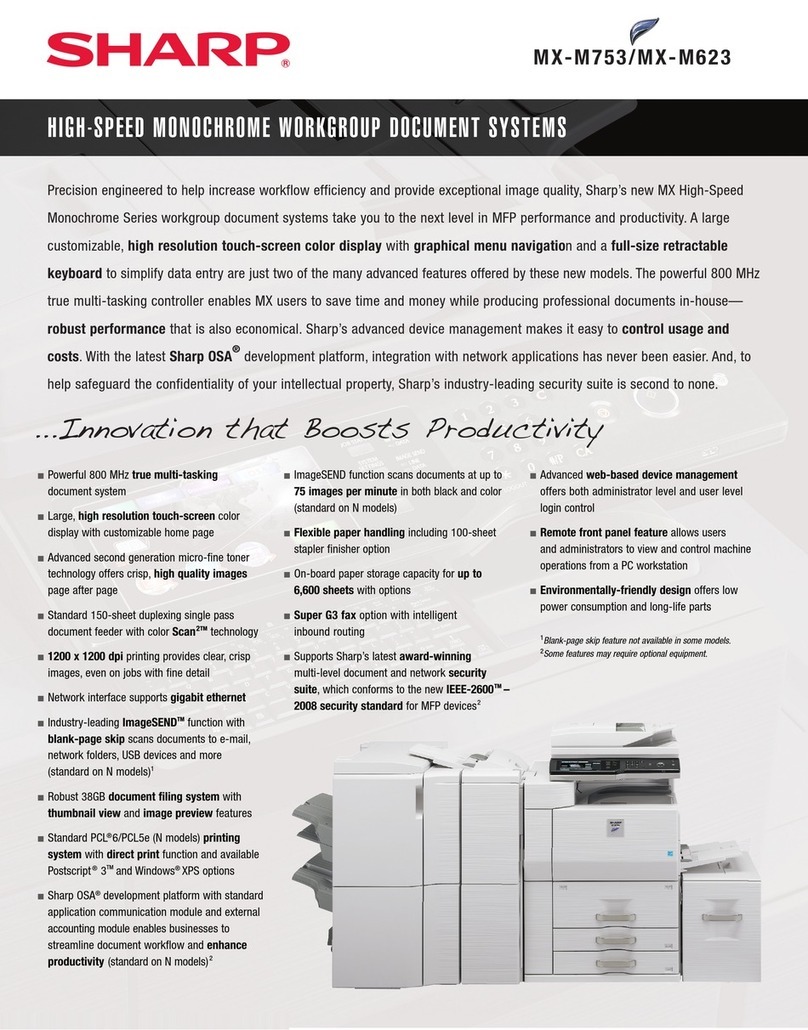
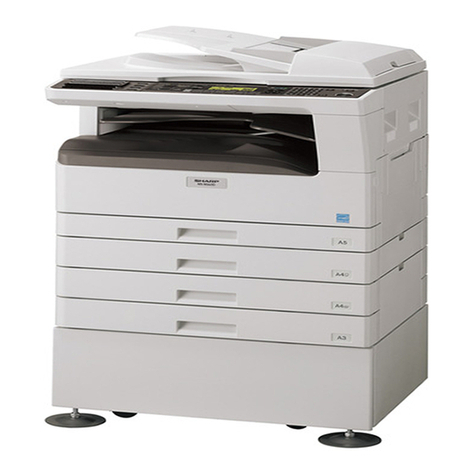
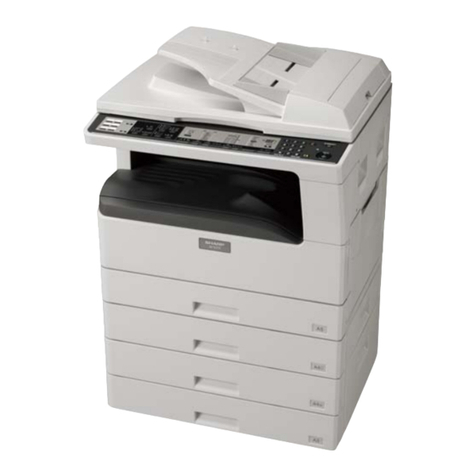
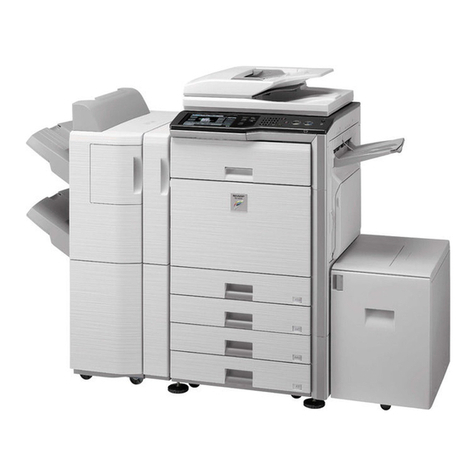
Sharp Z-50 User manual

z–a
SHARP SERVICEMANUAL
CODE :O0ZZ50SM///–E
MODEL Z-SO
[2] Operation paneland
+#
[3] Unpacking and instaIo
b#
[4] Supplies. .................Lw. .1
[51 comPonent location . . . . . . . . . . . .
[61COPYprocess... ...................!\
[7] Paperfeed andtransport section ...............
[81 Optical system...............................: .?.
[9] Fusersection +~i
. . ... . . . . . . . . . . . . . . . . . . . . . . . . . . . ........ .. .
[10] Others .....................................................!
[11]
[12]
<35
Electrical section ...................................................
Circuit diagramandtime chart ,...,.. . . . . . . . . . . . . . . . . . . . . . . . . . . . . . . . . . . 37 4
[13] Actual wiring chart. . . . . . . . . . . . . . . . . . . . . . . . . . . . . . . . . . . . . . . . . . . . . . . . . . . 50
SHARP CORPORATION J

Z–ti
[1] BASIC SPECIFICATIONS
Type:
Desktop
Copying system:
Dry-type electrostatic plain pmer copier
Kinds of originals:
Sheets, book
Thickness: 30 mm (1.18 inch) maximum with the
original cover in use.
Weight: 1.8 kg (4 Ibs) maximum
Original size:
A4 maximum
Copy size:
(Cassette feed)
A4, B5, A5 (56 to 80 g/m2 )
or 8% x5%” to 8% x11” (14.9 lbs to 21.3 Ibs)
(Manual feed)
A4 to A6, postcard, businesscard (52 to 1309/m2 )
or 8Y2x11” to8Y2x5%” (13.8 lbs to 34.5 Ibs)
COPYspeed:
8copies/minute (all sizes)
First COPY:
11 seconds (time required until the copy paper is de-
livered to the exit tray after depression of the PRINT
switch for A4 or letter size paper.)
Warmup time:
20 seconds at rated voltage, room temperature at 20 to
25°C (68° to 77°F), 65%RH.
Multicopying:
1to 19 copies, countdown type, with auto repeat
Magnification ratio:
1:1*1%
Exposure system:
Slit exposure by moving table.
Paper feed system:
Cassette and manual feeds
Developing system: -*
Magnetic brush development (2-component developer)
Fusing system:
Heat roller type
Light source:
Halogen lamp (1OOV series 200W, 200V series 215W)
Power requirements:
Local supPly voltage +10%.
Power consumption:
1.15 kW maximum, 50 wh standby (power down mode)
Physical dimensions:
411 (W) x41O(D) x209(H) mm
16.44(W) x16.4(D) x8.36(H) inch.
Weight:
16 kg (35.2 Ibs)
Display Functions:
PRINT: The green lamp turns ON when the copier
is ready for copying, turns OFF during
the warmup time, and flashes when in the
power down mode.
MU LTICOPY: Multicopy number dispiayed on LED,
normally O.
MISFEED: The red lamp flashes when the paper is
amisfed.
1—
TONER: Flasheswhen the toner box is empty.
DRUM: ON after 8,000 copies. Starts to flash
after 9,000 copies and the machine stops.
Accessories:
Semi-universal cassette x 1
Instruction manual X1
Power supply cord x 1
Options:
Drum urtridge
TD cartridge (black, red, blue, brown) ~~~
Machine stand (ZT-50D)
The term “TD cartridge” means the “Toner Developer
cartridge”.
l–

z–w
[2] OPERATION PANEL AND INDICATOR
FUNCTIONAL DESCRIPTION
y
I
1
Power switch and power ~upply cord
Power is turned on and off using the power lever.
Upper frame release button
Used to release the frame lock when amisfeed occurs
or the drum cartridge hasto be replaced.
Doorswitch
Used to check the front door position.
If the front cover is opened, the misfeed and multicopy
indicator wi II be reset.
Auto exposure control
Selects appropriate exposure rate depending on the
contrast and background color of the original.
Exposure control lever
It has three set positions.
For most originals, set at the center position.
To make the copy darker, move to DARK.
To make the copy lighter, move to LIGHT.
Misfeed indicator
When amisfeed occurrs, this lamp turns ON. .
TD cartridge replacement indicator
The lamp flashes when the TD cartridge needs replace-
ment.
Drum cartridge replacement indicator
Afier 8,000 copies, the indicator will start to flash.
An additional 1,000 copies can be made. At this time
the indicator will stop flashing and stay ON. No
additional copies can be made until the Drum canridge
is replaced.
Multicopy
Copy numbers between 1and 19 mn be entered
using the (–) or (+) key. Depression of the (–) key
while “O” is displayed brings “19” into the display,
and continued depression of the key reduces the
number. When the (+) is depressed after “19”, the
number is returned to, ::0”. Every time acopy is
produced in the multicopy mode, the number in the
display coun~ down. When the (–) isdepressed in the
middle of multicopy operation, the number of copies
already made is displayed.
Auto repeat ,j,.,, ~<.<.., ,,,, (
Upon completion of copying in the multicopy mode,
the copy number previously set returns to the copy
numberset.display.Use of the CLEAR key resets the
number. One minute after completion of copying,
the number @the auto repeat functions are auto-
matically cleared.
Paper feed alarm (P indication)
If ash~t of paper is not transferred to the paper stop.
par after depre~ion of the PRINT switch, or the cas-
sette is empty,“P” is “displayed in the copy number
wind~~. :If the COPY. NUMBER key or the CLEAR
key is depressed or the MANUAL FEED switch is
Wb:’ti ‘~~ief”ti b~ned, the “P” indication is also
cancalled.
@Clear !~,+: [
Multimpy and auto repeat modes are cleared with the
‘) ‘CLEAR key.~~ne rnlnuti after completion of copy
.-..-
‘;’:? fifi@;ati6nJ~&~~Qt n~rnbar and the repeat functions
are automatically *-tid.” i‘ “
@PRINTswitch
~,; ~~ ~ saconds:aftar-powar isturned on, the READY lamp
turns ON indicating ”-tit” the copier is ready for
cOPying. if left unoparatad for go ~conds, the
copier$tha ~into the power save mode and the {
READY lamp changes from ON to flashing. When
the PRINT switch is pressed while the READY lamp
is on, the machine immediately starts to copy. When
the PRINT ~itch is pressedwhile the READY lamp is
fkshin~ thepower~va mode is cancalled, the original
table rn&’’”to:’~+@py -~fi position, and it starts the
armup cycle.
is dependent
it will be less t
the PRINT
,.
–2–
....---- ‘... . ..
;. .... ~.......
,’ ,. .,..,.,
. . ,.--. --.”..:..... .,..,*..-,.K,:

z–%
[31 UNPACKING AND INSTALLATION
1. Unpacking
(1)Open the carton in the following sequence.
@Cut the tape around the top of the package and
open the flaps.
@Remove the accesso~ container top padding and take
out accessories.
@Remove the upper packing cushion and take out the
reachinc.
Dustcover,instructionmanual,
andotherprintedmaterials
\Itainer
)
,
.
,
,
,
.
~Cassette
-upper paCkin9
CUShiOn
,Lowerpackingcushion
–3–
..-.

-
2. Installation
Installation requirements:
Please note the following requirements when installing the
copier.
Machine Environment
Avoid installation in direct sunlight or bright locations
near awindow.
Direct sunlight may cause the plastic components and
the original cover to deform. Frosted glass may also
produce the same effect.
.=—-.
‘r s..! ‘-’ ‘:%2
:‘. —.
,, —-.—
11---
Avoid installation in ahot, damp place or where
rapid changes in humidity occur (for example; near an
air conditioner).
This may cause paper to dampen or moisture inside the
copier, and may lead to amisfeed and deterioration in
copy quality.
Avoid installation in aplace where the ventilation or
air circulation is poor.
Never install the copier near inflammable materials or
in the presence of ammonia fumes.
Installation near adiazo copy machine may lead to a
deterioration of copy quality or amachine malfunc-
tion.
Install the copier near the wall outlet. 4
(2) Space around the copier
The copier requires at least IOcm of clearance between the
rear side and the wall. This space is required for proper
cooling fan ventilation. Adequate working space around the
machine should also be allowed for easeof operation.
..... /.. ,:.
.-.
:.4*$-,:,
The recommended environmental conditions are: ,;,.~i, -
20 to 25 degrees C(68 to 77 degrees F.), 65%*5%RH:. ~:
The nominal environment conditions are: ‘‘.”>:;~~. -} “. ~~.,:.’”. .,
\
10 to 30 degrees C. (40 to 86 degrees F.), Ot~85%RH..~=~~ “’+S.:.- -
. .
If the copier is to be installed in an area~of<higher<,~>..<:,~:
temperature the humidity must be lower: Example;,.’ .,,<;’; .”
If the temperature, is 35 degrees C. (95 de;&~F\4$’’w:;. ‘‘~
the humidity should be 65%. -. ,\..’” .
~~““’’>”< ‘“>1 I‘: -
Avoid installation in aplace where dust or.<b~>~<~ I,,. ,“
ooeratingran9e I
encountered. ~~;”~~~~i~ur~ “
Dust deposit inside of the copier may lead to ade <
ioration of copy quality or machine trouble.
‘T
1me power SUPPIYline should have acapacity of more
than 15A, capable of supplying more than 90% of the
-..
/.-\
&
-..
~.. ‘“:” .‘-”’’” .. ,,~ ~@‘::e:::’tageatfu” ‘oad.
use an extension cord, or operate any other
—
—. .
—
-— aq~ipment from the same wall outlet.
~,
z-m~
~p
.
install the machine on alevel surface. .\/ ..... “
The toner density and copy quality may be affected
..-
unlessthe machine is installed in alevel condition.
Do not install the copier on an unstable or uneven
surface. The copier must be placed on alevel surface to (4) Ground connection
@Use aproperly grounded (three prong) wall outlet
permit proper functioning. only.
–4–
.- ...-,.-..— -

3. Installation procedure
@Remove the poly bag and tapeings that secure the
original table and the exit tray. Remove the desiccant.
●Desiccant is used in the USA and Canada only.
ATapeing
z-so >
f
Desiccant is used to protect the drum from moisture
absorption, it should discarded upon unpacking.
@Open the front cover.
Push the front cover open buttons located at both sides
of the copier. open buttons
~Install the drum cartridge (Except USA, Canada)
a. Open the front cover.
b. Open the upper frame.
c. Remove the cover from anew drum cartridge.
d. Push in the drum cartridge all the way, then close
the upper frame.
Protectivecover
&
-——
ODOD!D
Never expose the drum to direct sunlight or touch the
drum surface with your fingers.
-
Open the box containing the TD cartridge.
Remove the TD cartridge from the bag and shake
horizontally four or five times.
c
.U
,~,
\,&j
;--~
it
Remove the cover from the TD cartridge.
Save the TD cartridge cover. It should be used to seal
the TD cartridge if the copier must be shipped for
servicing or in case you move.
// Cover
Slide the TD cartridge in until it locks in place.
LJ
Close the front cover.
Remove the paper cassette from the bag.
Fan the copy paper and insert it into the cassette.
(Maximum: 100 sheets)
f5
I
—5–
----
,-. .,,

a. Push the pressure plate unti Iit locks in position.
r1
1Pressu;eplate J
b. Adjust the paper guides in the cassette to the COPY
paper width and length.
;OPVpaper
ength
paper
width
c. Fan the copy paper and insert it into the cassette.
Make sure the edges go under the corner hooKs.
Swing the exit tray down.
Plug the power cord into the copier and then into the
nearest outlet.
Turn the power on.
After machine installation or TD cartridge replacement,
the ready lamp may require alonger period (No
minutes or less) before it turns ON.
\
~~ -#
t-’.
ihe~~c plug that
P. :: -- comas with the
&-.. ,
*F2:T:..:. .. Prduct matches
ymr wall outlet.
..-—..-..-.-—-.
4. How to mke acopy
@Opentheoriginal qver.
@Place tie orig~~~i”’the upper right corner, and close
the originalcwer..
@Selectthenurnhr of copies desired.
●If ami~ake is made, press the key to clear the entry
or hold the copy quantity key down. The maximum
‘number’’of-&-pi& is ,9. .,.,
.“O” will make asinglecoPY.
,..~,..- .:
@Toam~e~~&oli9ht or dark originals.
.NO**~y~ttO*e cenmr position.
. . *t &,.DARK +:*km.~e COPY.
.Set to L1’GHTtoli@*n~~e coPY.
@~=Wfi~keY when the green light indicates that
-@&&-- ‘---@ Joidarea
————— —-—... ~(approx.(gmm), 3/8”)
–6–

.,
[4] SUPPLIES
1. Drum ~~idm, TD ~Wid~
TD cartridge
., . . L. . .
●Life Storage conditions
Description Product name Approx. (temperature and humidity)
Drum canridge x 1 8,000 %M
Instructions x 1 ~-50DR copies t“----
TD cartridge For USA ExceptUSA
x1, (including Blink ZT-50TD1 ZT-500Cl
devdoper and ZT-50TD2 ZT-50D
toner) JIye ZT-50TD3 ZT-50
Brown ZT-50TD4 ZT-50DC4
DE$ %.U –St 4or
.x 3,W0 ~pias for black (2,700 mpies for color) for ●These are estimates only, life will vary depending on
A4 or letter size with 5% toned area. actual usaaga.
NOTE: How to identify the lot number
(TD ~rtridge)
xl.
2.
4.
Developer kind
Serial number
Last digit of production year 6–1986‘\
Production month (1, 2,3, ....0, X, Y)
Black developer (JAPAN) 5. Blue developer
Black developer (EXPORT) 6. Brown developer
Red developer O. No classification
Lot number
\
MG roller
(Drum =~ridge)
%me as TD urtridge.
Artnumber
L-
Rear frame sideof the drum cartridge
–7 –

.
z–s
2. Replacingthe drum @rtrid@
@T“r” power offa”d OPe”thefro”t cover
@Press down on the catch and pull out the TD cartridge.
Lock lever
I
TO ~rtrid~
Front cover
@Move the original table to the left, andpress the uPPer
frame release button to open the copier.
Upperframeralmw button
@Grasp the handle of the drum cartridge and pull the
drum cartridge out.
NOTE: Thedrum cartridge cannot beremovedorinwned
unlessthe upper frame is open.
Remove the protective cover from the new drum
cartridge.
Push in the drum cartridge all the way in, then CIO*
the upper frame.
,
.
.;.
.“’ . ,
..:
.: -, ,
.=
..
-..—
/iy .x .c...,2 ,r”;t!.,.,.%..
——...._...-—..- .. . . .
T-.1
....... ...... ... .....----
—---.-—.—-
--- --
A. A.- -—
Insert the TD cartridge, then close the front cover. !. ;‘~.!
$
Turn power on and make sure that the DRUM r- ~~ —..—- ~:=,..
placement lamp isextinguished. -..--..—-__.:”——.
‘“,
,, ---
.....
.. ...
‘.. .’
%Tt’..a:a:?::..:. .
,
–“8 –

z–m
[51COMpONENT LOCATION
1. External
@Operation panel @Original cover @Front cover open button
(paper entrv side)
@POWER switch lever @Manudfeedgutie @Powersupplycord
oQmvinghandk(wperentwtide) @colorcheckw~dow @Etittray
)
@Businesscard releaselever
2. Open view ?
2
.,
~Drum cartridge @Cleaning lever @Upper frame release button
o@Fuser @Transfer corona unit @Fuser accessinglever
~Transfer corona cleaner
–9–

Z–N
...,—---- .~
3. Front frame side
~CLR PWB @Drum ca~ridge @Clea”i”g lever
@To”er alletiion co”@i”er @TD cartridge @Doorswitch
(interlined for the main switch)
4. Rear frame side
0’(
Table start position sensor [M=)
@;~~;~~l~e~j~;~;;;rrun ~%nsorati”atorarm @Highvoltaw transformerunit
(MTHVG)
@Powertransformer @Main PWB @Powerswitchlever
{
–lo– —,. -..-,. .—..-.-.--,-,-- --.= ,.

5. Crosssection
Z–M
/
~Discharge lamp @Copy lamp @Main corona
@SELFOC lens @Auto exposure sensor @OPC drum
-*
~TD cartridge @MG roller @Toner concentration”sensor
@Paper entry sensor (MS 1) Manualfeedpaparentrysensor
o (MS ~) @PaperfeedrollerB
@Paperfeadroller A@ps plate @Cassettepaper feed solenoid (PFS)
@Transfer corona QSeparation roller @Lower heat roller
@Heater lamp @Upper heat roller @Paper exit sensor (MS 2)
@Thermistor/thermal fuse/thermal
breaker @Cooling fan (main motor driven)
i
–11–

z–%
.
.Switch, sensor,solenoidlo~tions
Name
MS 1
Ms 2
MS 3
MS 4
MS 5
MSW
DVSW
Toner sensor
AE sensor
Thermistor
Thermal breaker
PSF
TFS
TRS
Type
Switch
Switch
Switch
Microswitch
Microswtich
Switch
Microswitch
Magnetic sensor
Photosensor ,,.
Thermistor .-
Thermal rasat . .‘ ~
Solenoid ,“‘i ,..;.
..
e.. ., ...
\
Solenoid ‘“’ “~~;:.
.. .;
Solenoid
7. Motor, transformer, lamp locations
Symbol
MM
TM
PT
MTHVG
DL
CL
HL
Function
Paper entry sensor >.
Paper exit sensor .:-
Manual faad paper entry~sansor
Table mafi-~sition.~’~~’~~.---~~~,. ~.. .
.-.—...- -- ——.+—. .
. . . ~-+ —-—---- -... ....—
Table home/ovarmn posmion sen~.,~=-=- ~~LŠ---
,, ‘ /’
Power switch-’- ----+1,.=- ,,
Sensesi~llation,of-~e TD’,’~.tigs in tie copier.If the TD cartridge is not
g:~:~:h:.rn,:rga< s.
.m+o~~e ~uss po~r is not sug~lied to the main
w
Name
Main motor
Toner motor
Powar transformer
Main and transfer high
voltage units
Discharge lamp
Copy lamp
Heater lamp
Function
..,-.. ,,,. , !
Main drive motor alsodr.n the cooling fan.
... . . .
Tonar supply motor ..
“...4, ~.~....
Powartransformer. . .
.,. -- ‘;.
Maincoronaandtiansfarcoronahigh voltage supply units
For remml Of ‘-tiual ~on tha drum surface
if. 2?4,>;
For exposure of original. .:..
For heat roller heating:: ;:G ,
PT
,
!
&
i

[61COPYpROcE~ 2. Exposure
1. *sic mpy process Light from the copy lamp, reflected from the original, is
A. Copyprocess projected onto the drum surface through the SELFOC lens.
1.Charge The resistance of the OPC layer decreases for the area
Auniform negative charge is applied to the OPC drum exposed by the light (corresponding to the light area of the
surface by the main corona.
Originaltable
~
‘ainmrona~$j
NWative \/
A
8. Discharge u
Prior to charge, light from the discharge lamp is projected
over the drum to reduce electrical resistance of the OPC
layer and remove any residual charge to evenly neutralize
the drum surface.
~
Discharge lamp
‘o
t
original). The light neutralizes the negative charge. The dark
areas of the original do not reflect the light and an electro-
static latent image is formed on the drum surface.
1,
~~4
Copy lamp- \
/
Selfoc lens
m-
3.
T
ve
Remove any residual
lamp ........... .
u
7. Cleaning
Residual toner on the drum surface is collected by the
cleaning blade.
\I
/
- - -- Latent imWe
B. Copy processflow
Main highnltege unit
i
IMain wrens
IDi=hane lamp
D
Wtie toner wlletiion
\
C. Functional diagram
Y/T
SWration roller
bwer heat roller
“
1’
–13–
--/
~.,... .....:,-

/eloping
?ctrostatic latent image in the drum surface is con-
into avisible image by the toner.
LTD canri@e
(MG roller )
Toner I
i
Dwelopar 1
4. Trantier
The visible image on the drum sufiace is transferred onto
the copy paper by applying anegative charge from the
transfer corona to the back of the copy paper.
Ir1
Paper
P
J
\Transfer corona )
5.¶tion
The paper is separated from the drum by the remover tape
and the separation roller.
~I\k. /
T-” .,*
6. Fusing
Through ammbination of heat and pressure, the image is
fused into the copy paper.
\Lower heat roller 1
–14–

z–x
2. imageforming processsteps
Image forming:
Acharge is applied to the drum surface by the main corona,
and the image of the original is exposed by the COPYlamp.
The charge in alight image area is dissipated according to
the degree of density to form avisible image on the drum
surface with toner.
Step-1:
Step-2:
Step-3:
Step-4:
Step-5:
Step-6:
Step-7:
Optical discharge
Residual charge on the drum surface is removed.
Charge
7Latent image isformed on the drum.
Exposure
Developing
Latent image formed on the drum isthen developed
into avisible image with toner.
Transfer
The visible image (toner image) on the drum is
transferred onto the copy paper.
Cleaning
Residual toner on the drum surface iscollected by
the cleaning blade.
Optical discharge
Residual charge on the drum surface is remoyed.
3. Description of process
Step-1: Optical discharge (by the discharge lamp)
Prior to charge, light from the discharge lamp is projected
over the drum to reduce electrical resistance of the OPC
layer and remove any residual charge to evenly neutralize
the drum surface. As the electrical resistance is decreased,
the positive charge in the aluminium layer moves to neutral-
ize the negative charge present in the OPC layer.
c
Dischargelamp
F
+
+/
=
Step-2: Charge
Auniform negative charge is applied over the OPC drum
surface by the main corona unit.
Step-3: Exposure (copY lamp, SELFOC lens)
Light from the coPy lamp, reflected from the original, is
projected onto the drum surface through the SELFOC lens.
The resistance of the OPC layer decreases for an area
exposed by the light (corresponding to the light area of the
original). The light neutralizes the negative charge. The dark
areas of the original do not reflect the light and an electro-
static latent image is formed on the drum surface.
rSELFOC Ians
—
Exposure
(COpylamp) =
!, , 1
II [1 [11
Drum sutiace charge
aftar the exposure IOPC layer
1I~Pigment
~la~er
++++++ t+
~_Aluminium
1
IaVer
Imaga area Half-tone Non-image area
area =
Step-4: Developing (–230V DC bias)
The electrostatic latent image in the drum surface is con-
verted into avisible image by the toner. Abias potential of
-230V is applied to the carrier (MG roller) in this two
component magnetic brush developing method, and the
toner is charged positive through friction with the carrier.
O:Carrier (magnetized particle)
●:Toner (charga positive by friction)
(N) (S) :parmanent magnet
(provided in three locations)
?
!,,
p
.,,
,,
.: -., ,, -- -
... --—
-—
+++ {
–15–
,. r... .......... ~-,Lv .
<

z–x
-700’ rImage area
I
–600’ /
h,
~1/
“1
pcharge &Expos”re_DeveloPin9 -Transfer~i~ch~~harge
—Time
~Area
Toner is not attracted to the non<mage areason the drum
because of the developing bias. Thus, if thedeveloPin9 bias
were to fail, the residual charge would attract the tonerso
that abackground would appear in the non-image areas of
the coPy.
Step-5: Transfer
The visible image on the drum surface is transferred onto
the COPY paper by applying ane9ative charge from the
transfer corona to the back of the copy paper.
As the transfer effect is 70 to 80%, 20 to 30% of the image
remains on the drum (residual toner) even after the transfer.
Step-6: Cleaning
Toner remaining on the drum is collected by the cleaner
blade and stored in the toner collecting container.
Cleaner
Residual toner /&
Step-7: Discharge (same as Step-1)
Step-8: The transferred image is fixed permanently on the
copy paper by the action of the fuser unit through a
combination of heat and pressure, the toner is fused into
the COPY paper.
4. Photocondu~or
An OPC drum is used for the photoconductor.
(Structure of the OPC drum layers)
OPC layer
=(1 7~i~ron~ thick)
.
.... .,.. ... ,.. .
.. .....
.................. ‘.,.. .......... !. ‘“::’ ‘_Pigment Iaver (0.2 to I
/0.3 microns thick)
_Aluminium drum
I

.. ........... ,--
z–s
[7] PAPER FEED AND TRANSPORT SECTION
1. Papertransport route and operational
description aP.pertr.nspOrtro.*e
paper
~,
Paper feed roller CF~aper fed roller
General Description:
Copy paper is introduced into the copier in one of two
ways, from the supply of paper in the cassette or manually
through the by-pass. The cassette holds approximately 100
sheets of COPYpaper.
The cassette supplied with the copier may be loaded with
either 81/2 x11” (A4) or 51/2 x 81 /2” (A5) copy paper,
The Separator Tabs in the cassette ensure that only one
sheet is fed at atime.
The copy paper isfed out of the cassette by the Paper Feed
Roller A. These roller make one rotation for each sheet of
paper. The rotation of the feed rollers is controlled by the
Paper Feed Clutch (a Sprjng Clutch) and Paper Feed
Solenoid. When the Print Button is depressed, the Main
PWB energizes the Paper Feed Solenoid (pFS). When the
solenoid arm retracts, it releases the spring clutch and al-
lows the Paper Feed Roller Ato make one(l) rotation. The
rotating Paper Feed Rollers pick up the top sheet of copy
paper and start the paper moving into the copier.
The COPY paper is transported to paper feed roller Band
trips the paper entry sensor MS1. Paper feed roller Bcon.
tinues to rotate until the lead edge of the copy paper con-
tacts the paper stopper plate. The PS sensor block (located
on the original table) lifts the paper stopper plate and al-
lows the coPy paper to continue through the paper guide
to paper feed roller C. The copy paper passesbetween the
transfer corona and the drum and the image is transferred
to the copy paper. The remover tape strips the COPY paper
from the drum and the separation roller transports it to the
fuser rollers. The fuser rollers transport the copy paper,
tripping the exit sensor MS-2, to the exit tray.
During manual feed the inserted paper actuates the manual
feed paper entry sensor MS-3 and the main motor turns ON.
The paper is then transported by paper feed roller Buntil
the lead edge contacts the PS plate. The rest of the paper
transport operation is the same as described for the cassette
feed. There is no need to push the print switch during the
manual feed operation.
paper feed roller A
feed trav
B
The following discussesthe cassette feed and manual feed
operations.
A. Operation during cassette feed
@The illustration below shows the relationship be~een
paper feed roller A, paper feed clutch sleeve, and the
paper feed latch locations when the copier is at an 4
initial state before the PRINT switch is pressed and
after the READY lamp is ON.
(The paper feed latch is in contact with the clutch
sleeve protrusion. )
paperfeadlatc~ apaPerfe@ rollerA
3
Paper
Paper feed frame Paper feed gear
\f
\II /ClutchsPrin~
n
II IIB-@ I/
*$;’P
Paper feed roller A
,Clutch sleeve
II protrusion
Spring-clutch
(
–17–
,:.,.-
.

.-..IL
i
)
,-,
At the moment the PRINT switch is pressed, the drive
motor starts to turn the drive gears. The paper feed
gear also starts to be driven, but the rotation of the
gear is not conveyed to the paper feed roller shaft and
the paper feed roller does not rotate because the paper
feed latch is holding the clutch sleeve protrusion.
~Rotating section
Paper feed frame
\Paper feed gear
/9
rfeed
Paper feed roller-A II Clutch sleeve
protrusion
\/
Spring clutch
0.9 seconds after the start of the main motor, the
paper feed solenoid (PFS) actuates momentarily so
that the paper feed latch disengages from the clutch
sleeve protrusion. Now, the rotation of the paper
feed gear is conveyed to the paper feed roller shaft
so that paper feed roller Astarts rotating to feed the
paper.
uPaper feed roller A
Paper feed frame nRotating
\, Paper feed gear section
\ / Clutch sprin9
@Meanwhile, the paper fed into the machine is trans-
ported to paper feed roller Band the paper entry
sensor (MS1 ). There, the paper is held temporarily by
means of the PS plate, in order to synchronize with the
lead edW of the image on the drum. Since paper feed
roller Bis continues to rotate, the paper will be evenly
pressed against the PS plate to correct for any paper
feed skew.
Tension roller \
PS plate mPaper
\ .,
#
Paper feed roller A..” Spring clutch
~=rfed
@As the original table starts to move, the PS plate is
mechanically raised to allow the paper to continue to
the transfer area.
PS plate releasemechanism original lead edge
Original table PS sensorarm
\-/ /SELFOC lens
\/
I
,. —-.—.
Lead edge of the ima9e
!PS senwr block
I
PSjoint plate
Drum
\\Lead edge of paper ,/
After the PS plate has been released, the paper is
transferred to the transfer unit via paper feed roller
C. The paper is separated from the drum by the
remover tape and the separation roller.
aPaper
Tension rollef \Drum )
Remover tape
Separation roller Transfer corona
@AfierpaperfeedrollerAmakesonefullturn, the clutch
sleeve protrusion is again caught by the paper feed
latch so that paper feed roller Astops rotating.
–la–

@
-
The paper separated from the drum is transported to
the exit tray through the fuser paper guide, fuser heat
roller, and the paper exit sensor (MS2)
The following shows the timing chart for the above opera-
tion. 04
PRINT switch nPRINT switch
(Psw) depression
Main motor Main motor
(MMR) ,‘~rotation
“ina’tab’a~“’ina’tab’e
‘:’’;:’)=’’’’”e
B.Operation during manual feed
@When paper is inserted in the manual paper feed tray,
MS3 is actuated and the main motor starts to turn the
drive gears.
The paper inserted is then taken up by paper feed
roller Band is transported until its lead edge comes in
contact with the PS plate. The rest of the copy paper
operation is identical to the cassette feed operation
described in: (A- @-@)
The following shows the timing chart for the above opera-
tion.
Manualfaed
paper entry -
sensor(M~) J
READY
lamp (RPL) “~
Papar entry
sansor(MSI) 1..J
Original table
faed iI
PS plate n
t—About 14 seconds—q
n
J
Paper detect
.,;,
C. Condition to establish apaper misfeed ,.
-.’
At power on ;
If MS1 or MS2 ison at power on.
Manual paper feed
If the MS1 were to fail to actuate within 3seconds
after the actuation of the MS3. Q
In the course of copying
a.
b.
c.
If the paper lead edge does not actuate MS2 within
2.3 seconds from the first actuation of MS5 after
the table started to advance.
If MS2 is still actuated in 1.4 seconds after the
discharge lamp turned off at the last copy in the
single copy or multicopy mode.
If MS1 is not actuated at the timing that the PFS
turns on, during cassette paper feed.
2. Major component removal
A. Paper feed unit
@Turn the copier OFF and disconnect the power cord
from the wall outlet.
@Open the upper frame, disconnect the paper feed
solenoid connector, remove the paper feed unit holding
screws (A -D). Loosen screw E, and remove the paper
feed unit. Transfer corona unit
READY lamp
atiuatiofl
Main motor
rotation
Paper detect
Original tabla
feed
PS plate release
Paper detect
–19–
B. Transferguide,transfercoronaunit
@Remove the paper feed unit (A-o).
@Remove the two transfer guide tension springs from
the paper feed unit, then remove the transfer guide.
@Remove the three transfer corona securing screwsfrom
the paper feed unit, then remove the transfer corona
unit. Paparfeed rollerA
paperfeedroller BITransfer guide
/Tran~fer corona unit
Transfer guide tension spring
Other manuals for Z-50
1
Table of contents
Other Sharp All In One Printer manuals

Sharp
Sharp MX-M356N User manual

Sharp
Sharp AR-5618 Guide

Sharp
Sharp MX-3050N User manual

Sharp
Sharp MX-7090N User manual

Sharp
Sharp AR-M237 IMAGERs User manual

Sharp
Sharp SF-1020 User manual

Sharp
Sharp IMAGER AR-5316 User manual

Sharp
Sharp AR-BC320 User manual

Sharp
Sharp MX-7001 User manual

Sharp
Sharp SF-2040 User manual

Sharp
Sharp MX-C312 User manual

Sharp
Sharp MX-C381 User manual

Sharp
Sharp AL-1655CS User manual

Sharp
Sharp MX-2300N Guide User manual

Sharp
Sharp AL-1651CS User manual

Sharp
Sharp MX-C381 Installation and operating manual

Sharp
Sharp MX-C301W User manual

Sharp
Sharp AR-5618 User manual

Sharp
Sharp MX-B707F User manual

Sharp
Sharp AR-M162 User manual