Sharp XE-A212 User manual

XE
-A212
XE-A212
ELECTRONIC CASH REGISTER
ELEKTRONISCHE REGISTRIERKASSE
CAISSE ENREGISTREUSE ELECTRONIQUE
CAJA REGISTRADORA ELECTRONICA
ELEKTRONISCHE KASSA
INSTRUCTION MANUAL
BEDIENUNGSANLEITUNG
MANUEL D’INSTRUCTIONS
MODEL
MODELL
MODELE
MODELO
MODEL
MANUAL DE INSTRUCCIONES
GEBRUIKSAANWIJZING

CAUTION:
The cash register should be securely fitted to the supporting platforms to avoid instability
when the drawer is open.
CAUTION:
The socket-outlet shall be installed near the equipment and shall be easily accessible.
VORSICHT:
Die Netzsteckdose muß nahe dem Gerät angebracht und leicht zugänglich sein.
ATTENTION:
La prise de courant murale devra être installée à proximité de l’équipement et devra être
facilement accessible.
AVISO:
El tomacorriente debe estar instalado cerca del equipo y debe quedar bien accesible.
VARNING:
Det matande vägguttaget skall placeras nära apparaten och vara lätt åtkomligt.
LET OP:
Het stopcontact dient in de buurt van de kassa en gemakkelijk toegangbaar te zijn.
CAUTION:
For a complete electrical disconnection pull out the mains plug.
VORSICHT:
Zur vollständigen elektrischen Trennung vom Netz den Netzstecker ziehen.
ATTENTION:
Pour obtenir une mise hors-circuit totale, débrancher la prise de courant secteur.
AVISO:
Para una desconexión eléctrica completa, desenchufar el enchufe de tomacorriente.
VARNING:
För att helt koppla från strömmen, dra ut stickproppen.
LET OP:
Trek de stekker uit het stopcontact indien u de stroom geheel wilt uitschakelen.
A212(Cover2-3) 03.7.3 11:12 AM Page C2

1
English
English
INTRODUCTION
Thank you very much for your purchase of the SHARP Electronic Cash Register, Model XE-A212.
Please read this manual carefully before operating your machine in order to gain full understanding of
functions and features.
Please keep this manual for future reference. It will help you if you encounter any operational problems.
Never install the batteries into the cash register before initializing it. Before you start operating the cash
register, you must first initialize it, then install three new R6 or LR6 batteries (“AA” size) on the register.
Otherwise, distorted memory contents and malfunction of the cash register will occur. For this procedure,
please refer to page 9.
IMPORTANT
• Be very careful when removing and replacing the printer cover, as the cutter mounted on it is very
sharp.
• Install the cash register in a location not subject to direct sunlight, unusual temperature changes,
high humidity or splashing water.
Installation in such locations could cause damage to the cabinet and the electronic components.
• Never operate the register with wet hands.
The water could seep into the interior of the register and cause component failure.
• When cleaning your register, use a dry, soft cloth. Never use solvents, such as benzine and/or
thinner.
The use of such chemicals will lead to discoloration or deterioration of the cabinet.
• The register plugs into any standard wall outlet (official (nominal) voltage).
Other electrical devices on the same electrical circuit could cause the register to malfunction.
• For protection against data loss, please install three R6 or LR6 batteries (“AA” size) after initializing
the cash register. When handling the batteries, please observe the following:
Incorrectly using batteries can cause them to burst or leak, possibly damaging the interior of the cash
register.
• Be sure that the the positive (+) and negative (–) poles of each battery are facing in the proper
direction for installation.
• Never mix batteries of different types.
• Never mix old batteries and new ones.
• Never leave dead batteries in the battery compartment.
• Remove the batteries if you do not plan to use the cash register for long periods.
• Should a battery leak, clean out the battery compartment immediately, taking care to avoid letting
the battery fluid come into direct contact with your skin.
• For battery disposal, follow the corresponding law in your country.
• For complete electrical disconnection, disconnect the main plug.
CAUTION!
For Easy Set-up, see
“GETTING STARTED” (page 8).
A212_1 03.7.5 8:00 AM Page 1

CONTENTS
INTRODUCTION ............................................................................................................................................1
IMPORTANT ..................................................................................................................................................1
CONTENTS....................................................................................................................................................2
PARTS AND THEIR FUNCTIONS.................................................................................................................4
1 External View ........................................................................................................................................4
2 Printer....................................................................................................................................................4
3 Mode Switch and Mode Keys................................................................................................................5
4 Keyboard ...............................................................................................................................................5
5 Displays.................................................................................................................................................7
6 Drawer Lock Key ...................................................................................................................................7
GETTING STARTED......................................................................................................................................8
BASIC SALES ENTRY ................................................................................................................................13
1 Basic Sales Entry Example .................................................................................................................13
2 Error Warning ......................................................................................................................................14
3 Item Entries .........................................................................................................................................15
Single item entries ........................................................................................................................15
Repeat entries ..............................................................................................................................16
Multiplication entries .....................................................................................................................16
Single item cash sale (SICS) entry...............................................................................................17
PLU level shift (for direct PLU key)...............................................................................................17
4 Displaying Subtotals............................................................................................................................19
5 Finalization of Transaction ..................................................................................................................19
Cash or cheque tendering ............................................................................................................19
Cash or cheque sale that does not require tender entry ..............................................................19
Credit sale ....................................................................................................................................20
Mixed-tender sale .........................................................................................................................20
6 Computation of VAT (Value Added Tax)/tax .......................................................................................20
VAT/tax system ............................................................................................................................20
OPTIONAL FEATURES...............................................................................................................................21
1 Auxiliary Entries...................................................................................................................................21
Percent calculations (premium or discount) .................................................................................21
Deduction entries..........................................................................................................................22
Refund entries ..............................................................................................................................22
Non-add code number entries and printing ..................................................................................23
2 Guest Look-up (GLU) ..........................................................................................................................23
3 Auxiliary Payment Treatment ..............................................................................................................25
Currency exchange ......................................................................................................................25
Received-on account entries ........................................................................................................26
Paid-out entries ............................................................................................................................26
No sale (exchange) ......................................................................................................................26
4 Automatic Sequence Key (akey) Entries.........................................................................................26
CORRECTION .............................................................................................................................................27
1 Correction of the Last Entry (direct void).............................................................................................27
2 Correction of the Next-to-last or Earlier Entry (indirect void)...............................................................27
3 Subtotal Void .......................................................................................................................................28
4 Correction of Incorrect Entries not Handled by the Direct or Indirect Void Function ...........................28
FOR THE OPERATOR
2
A212_1 03.7.5 8:00 AM Page 2

PRIOR TO PROGRAMMING ......................................................................................................................29
BASIC FUNCTION PROGRAMMING (For Quick Start) ............................................................................34
1 Date and Time Programming ..............................................................................................................34
2 Tax Programming................................................................................................................................34
Tax rate programming ..................................................................................................................35
AUXILIARY FUNCTION PROGRAMMING .................................................................................................36
1 Department Programming ...................................................................................................................36
2 PLU (Price Look-Up) and Subdepartment Programming ....................................................................37
3 Miscellaneous Key Programming........................................................................................................40
Rate for %and V.....................................................................................................................40
Amount for -..............................................................................................................................41
Percent rate limitation for %.......................................................................................................41
Function parameters for %and -............................................................................................41
Function parameters for V.........................................................................................................42
Function parameters for r, o, X, Y, c, band A.......................................................42
4 Text Programming...............................................................................................................................43
ADVANCED FUNCTION PROGRAMMING ................................................................................................48
1 Register Number and Consecutive Number Programming .................................................................48
2 Various Function Selection Programming 1 ........................................................................................49
Function selection for miscellaneous keys ...................................................................................49
Print format ...................................................................................................................................50
Receipt print format ......................................................................................................................50
PLU level shift and GLU function parameters ..............................................................................51
Other programming ......................................................................................................................51
3 Various Function Selection Programming 2 ........................................................................................56
Power save mode.........................................................................................................................56
Logo message print format...........................................................................................................56
Thermal printer density.................................................................................................................57
Language selection ......................................................................................................................57
EJ memory type............................................................................................................................57
Training clerk specification for training mode ...............................................................................58
AUTO key programming...............................................................................................................58
4 EURO Programming ...........................................................................................................................59
5 Reading Stored Programs...................................................................................................................61
TRAINING MODE ........................................................................................................................................63
READING (X) AND RESETTING (Z) OF SALES TOTALS.........................................................................64
EJ REPORT READING AND RESETTING .................................................................................................68
OVERRIDE ENTRIES ..................................................................................................................................69
CORRECTION AFTER FINALIZING A TRANSACTION (Void mode).......................................................69
EURO MIGRATION FUNCTION ..................................................................................................................70
OPERATOR MAINTENANCE......................................................................................................................73
1 In Case of Power Failure.....................................................................................................................73
2 In Case of Printer Error .......................................................................................................................73
3 Cautions in Handling the Printer and Recording Paper.......................................................................73
4 Replacing the Batteries .......................................................................................................................74
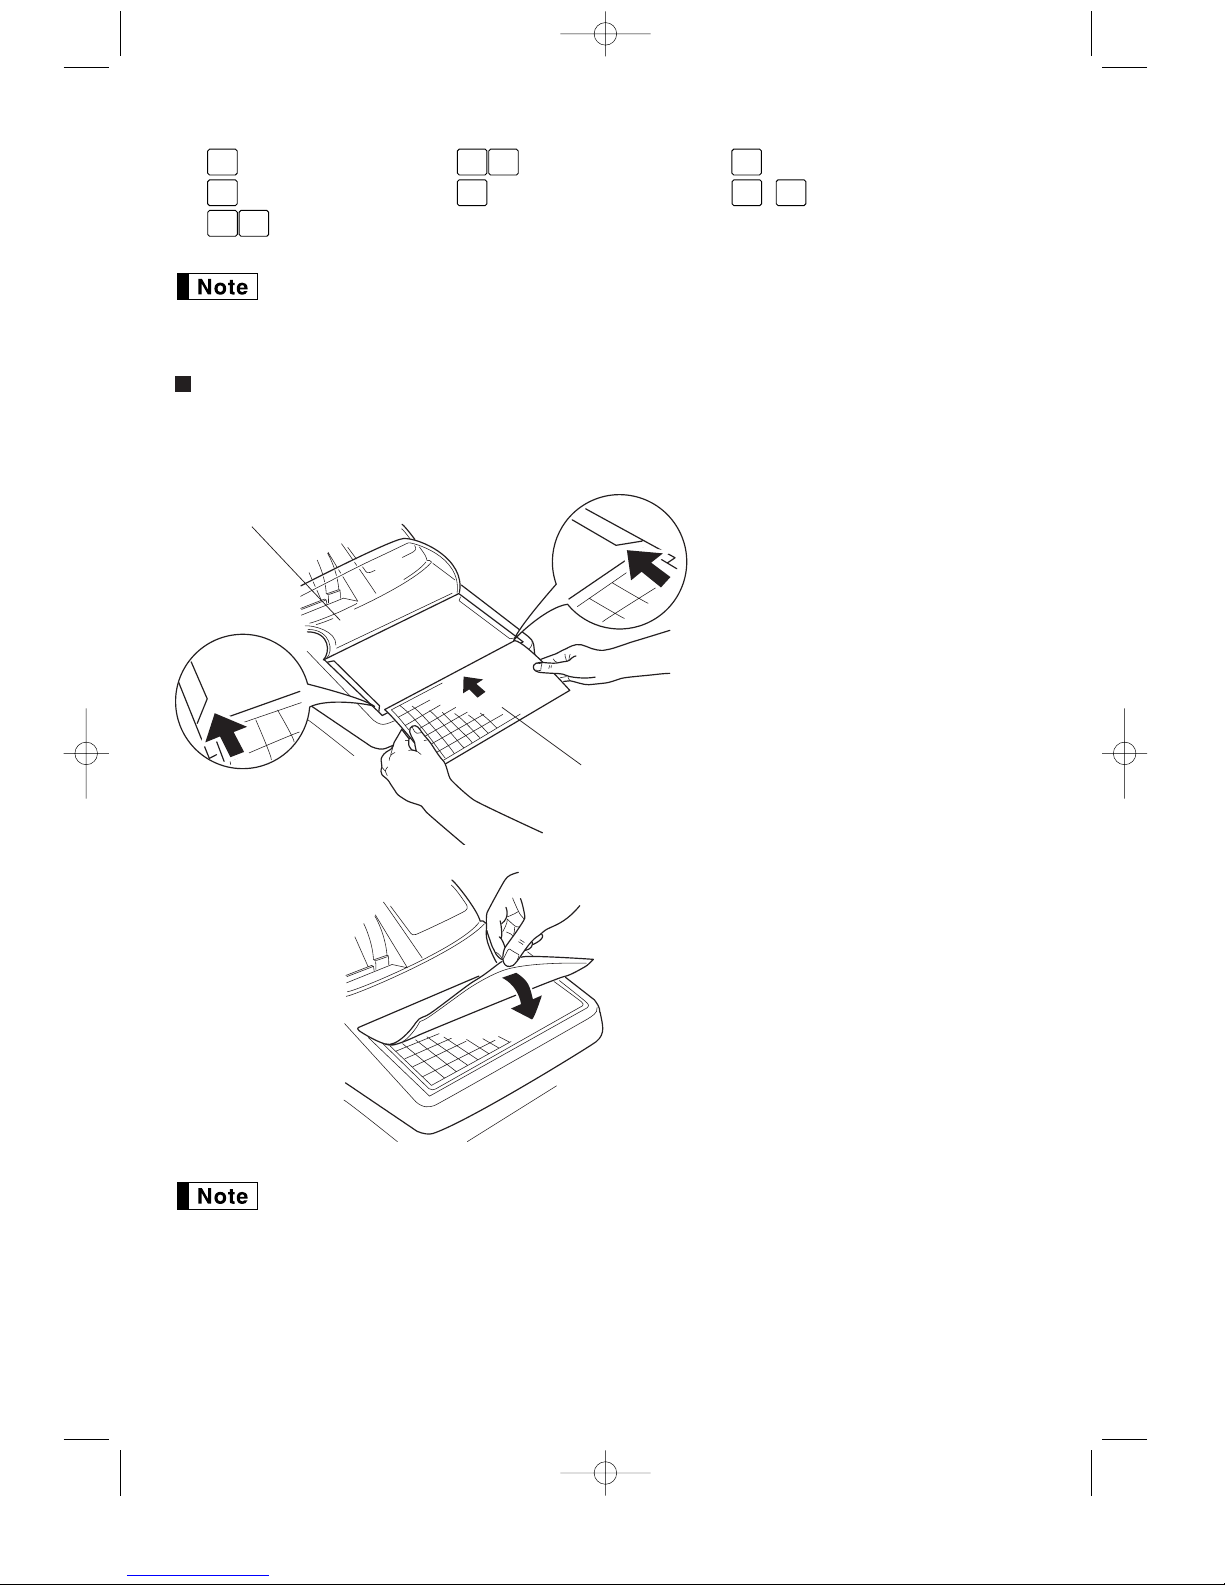
5 Replacing the Paper Roll.....................................................................................................................75
6 Removing a Paper Jam.......................................................................................................................77
7 Cleaning the Printer (Print Head / Sensor / Roller) .............................................................................77
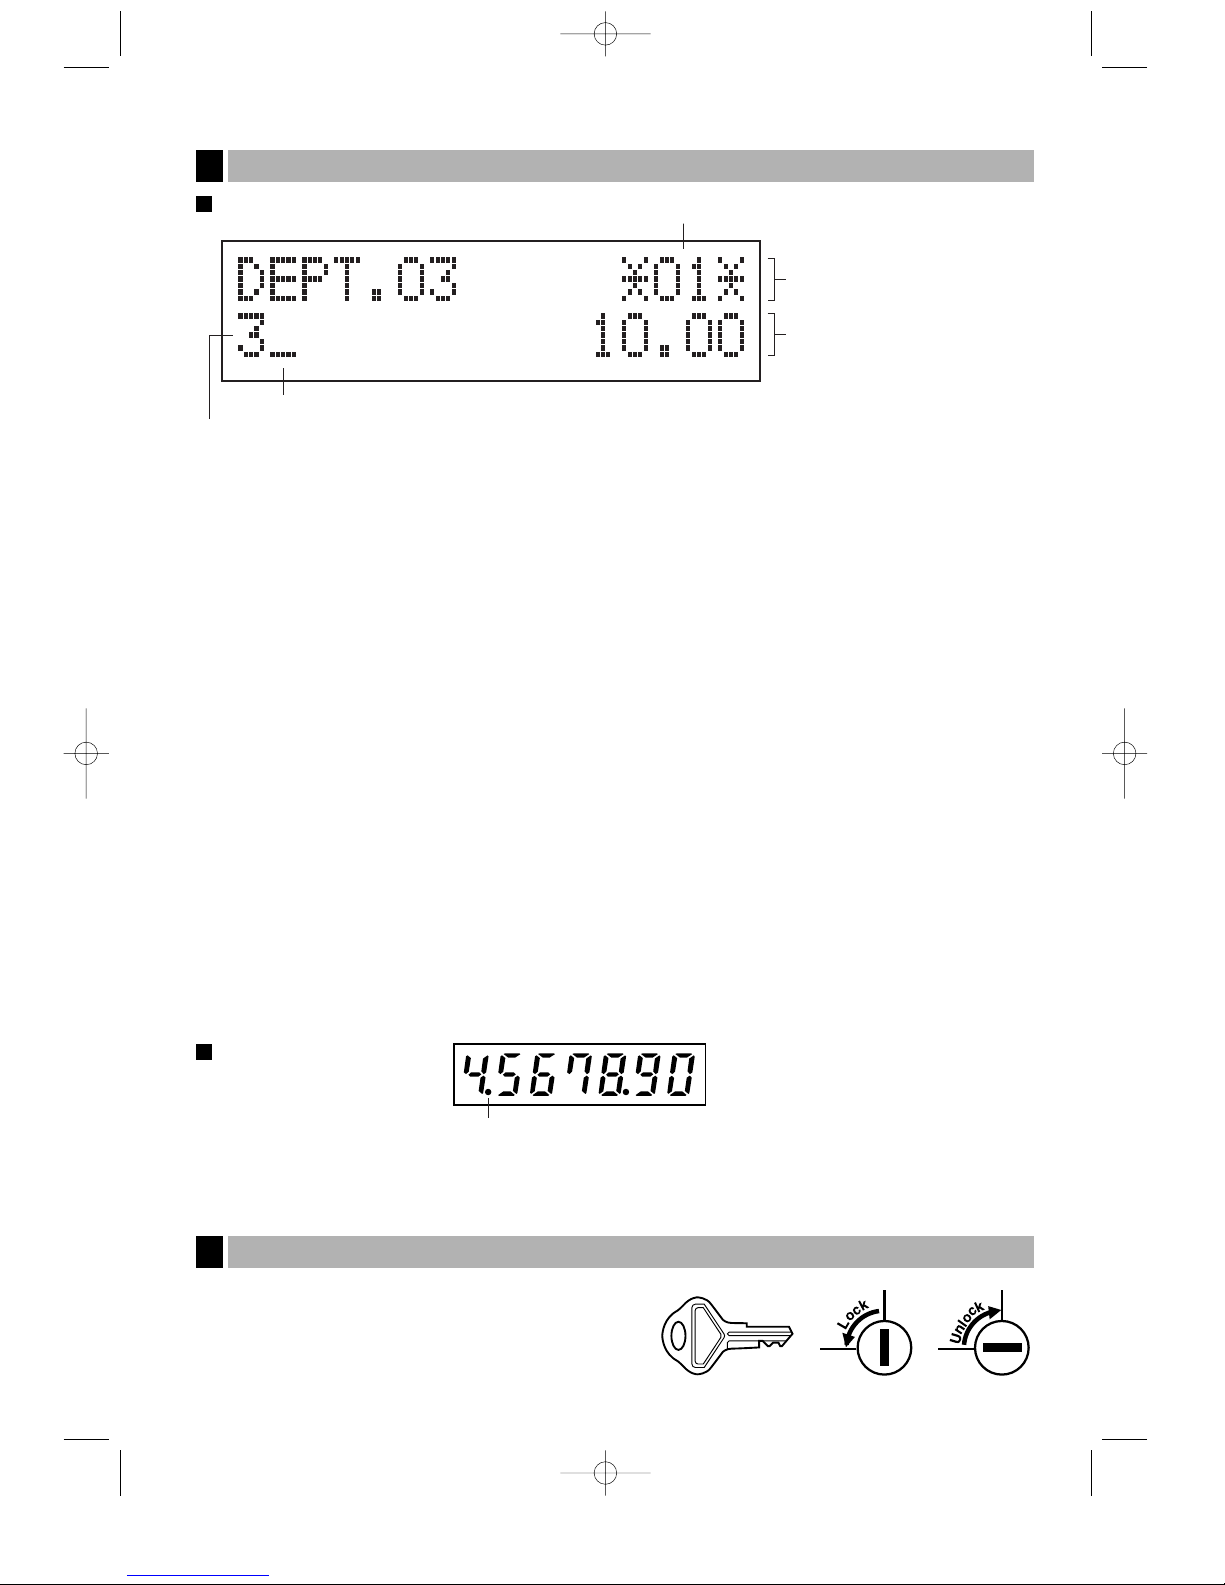
8 Removing the Till and the Drawer .......................................................................................................78
9 Opening the Drawer by Hand..............................................................................................................78
10 Before Calling for Service....................................................................................................................79
Error message table .....................................................................................................................79
SPECIFICATIONS .......................................................................................................................................80
FOR THE MANAGER
3
A212_1 03.7.5 8:00 AM Page 3

4
PARTS AND THEIR FUNCTIONS
Front view Rear view
External View
1
The printer is one station type thermal printer, therefore it does not require any
type of ink ribbon or cartridge.
Lift the rear of the printer cover to remove. To re-install, hook the pawls on the
cabinet and close.
Caution: The paper cutter is mounted on the printer cover. Be careful not
to cut yourself.
Printer
2
Operator display
Receipt paper
Drawer lock
Drawer
Printer cover
Customer display
(Pop-up type)
Mode switch
AC power cord
Keyboard
Take-up spool
Print roller
release rever
Print roller arm
Inner cover
Paper roll cradle
Paper positioning guides
Do not attempt to remove the paper roll
with the print roller arm is locked. This
may result in damage to the printer and
print head.
A212_1 03.7.5 8:00 AM Page 4

5
The mode switch can be operated by inserting one of the two supplied mode keys - manager (MA) and operator
(OP) keys. These keys can be inserted or removed only in the “REG” or “ ” position.
The mode switch has these settings:
:This mode locks all register operations. (AC power turns off.)
No change occurs to register data.
OP X/Z: To take individual clerk X or Z reports, and to take flash reports.
It can be used to toggle receipt state “ON” and “OFF” by pressing
the Rkey.
REG: For entering sales.
PGM: To program various items.
:Enters into the void mode. This mode allows correction after
finalizing a transaction.
MGR: For manager’s entries. The manager can use this mode for an
override entry.
X1/Z1: To take the X/Z report for various daily totals
X2/Z2: To take the X/Z report for periodic (weekly or monthly)
consolidation
Keyboard layout
Key names
Keyboard
4
MA OP
Manager key (MA)
Operator key (OP)
Mode Switch and Mode Keys
3
7
6
5
4
3
2
1
14
13
12
11
10
9
8
21
20
19
18
17
16
15
28
27
26
25
24
23
22
35
34
33
32
31
30
29
42
41
40
39
38
37
36
49
48
47
46
45
44
43
56
55
54
53
52
51
50
63
62
61
60
59
58
57
70
69
68
67
66
65
64
1
2
3
4
5
6
0
123
456
789
CL
00
GC
RCPT
ESC
RCPT EX
VAT
#
PO RA
%
RF NS ST TL
CH1CH2
CR1CR2
GLU NBAL
DEPT
#L1
AUTO
L2
L3
CLK
#
SUB
PLU
RA Received-on account key
RCPT
Receipt print key
#
Paid-out key
ESC
Escape key
Void key
Clerk code entry key
RF Refund key
%Percent keys
PO
CLK
#
Foreign currency
exchange key
EX
Value added tax key
VAT
PLU/Subdepartment key
PLU
/SUB
Discount key
Department keys
~
16
Multiplication key
Department code entry key
DEPT
#
AUTO
Automatic sequence key
~PLU level shift keys
L1 L3
Decimal point key
Clear key
~Numeric keys
90
00
CL
No sale key
NS
•
Non-add code/Time display
key
Paper feed key
GC
RCPT Guest check receipt key
A212_1 03.7.5 8:00 AM Page 5

6
Keyboard sheet
Two types of keyboard sheets are installed on the cash register; one for ordinal use and one for text
programming.
To reinstall the keyboard sheet or a new sheet, please follow the procedure below.
•Do not spread the keyboard cover too far as it might tear the tabs.
•Replace the keyboard sheet with a new one if chance it gets wet. Use of a wet keyboard sheet
may cause problems.
•Be sure to use only SHARP-supplied keyboard sheets. Thick or hard sheets can make key
operations difficult.
•Place the keyboard sheet evenly under the keyboard cover.
•The keyboard cover will eventually wear out. If your keyboard cover is dirty or broken, replace the
cover with a new one. For details, please contact a nearby authorized SHARP dealer.
Keyboard sheet
Keyboard cover ➀Turn over the keyboard cover.
➁Insert the keyboard sheet into a slit.
➂Close the keyboard cover.
In this manual, key tops are shown in one line, such as pfor easy reading. Department keys
are shown like !, and numeric keys are indicated with simple number indication, such as 1,
unless otherwise specified.
Cheque 1 and 2 keys
CH1 CH2
CR1 CR2
Credit 1 and 2 keys
GLU Guest look up key
ST Subtotal key
NBAL
New balance key
TL Total key
Direct PLU keys~
170
A212_1 03.7.5 8:00 AM Page 6

7
This key locks and unlocks the drawer. To lock it, turn 90
degrees counterclockwise. To unlock it, turn 90 degrees
clockwise.
Drawer Lock Key
6
Operator display
•Clerk code or Mode name
The mode you are in is displayed. When a clerk is assigned, the clerk code is displayed in the REG or
OP X/Z mode. For example, “?01?” is displayed when clerk 01 is assigned.
•Repeat mark
The number of repeats is displayed, starting at “2” and incremental with each repeat. When you have
registered ten times, the display will show “0”. (2 ➞3 ......9 ➞ 0 ➞1 ➞2...)
•Power save mark
When the cash register goes into the power save mode, the power save mark (decimal point) lights up.
•Function message display area
Item labels of departments and PLU/subdepartments and function texts you use, such as %, (–) and
CASH are displayed. For the details of function texts, please refer to pages 45.
When an amount is to be entered or entered, “AMOUNT” is displayed: When an amount is to be
entered, ------- is displayed at the numeric entry area with “AMOUNT”. When a preset price has been
set, the price is displayed at the numeric entry area with “AMOUNT”.
•Numeric entry display area
Numbers entered using numeric keys are displayed here.
Date and time display
Date and time appear on the display in the OP X/Z, REG, or MGR mode. In the REG or MGR mode, press
the Nkey to display the date and time.
Error message
When an error occurs, the corresponding error message is displayed in the function message display area.
For details of error messages, please refer to “Error message table” on page 79.
Customer display
(Pop-up type)
Power save mark (Mark only lights up in the power save mode.)
Displays
5
SK1-1
Function message display area
Clerk code or mode name
Numeric entry display area
Receipt OFF indicator
Repeat / Power save mark
A212_1 03.7.5 8:00 AM Page 7

8
GETTING STARTED
Please follow the procedure shown below.
Unpack the cash register and make sure all accessories are included. For details of accessories,
please refer to “Specifications” section.
For installing the cash register, find a stable surface near an AC outlet where the cash register will not subject to
water sources or direct sunlight, then install the register using the fixing angle bracket provided with the register.
The fixing angle bracket prevents the register from moving when the drawer opens. By hooking the register on
the bracket, you can secure the register to the position.
Follow the procedure shown below for the installation.
How to install the fixing angle bracket
1. Thoroughly clean the location where the fixing angle bracket
(B) is to be placed.
2. Peel off the adhesive tape on the fixing angle bracket.
3. Hook the angle bracket onto the hook (A) that is located at the
bottom rear of the register.
4. Firmly stick the fixing angle bracket to the table surface that
you cleaned above.
How to remove the register from the fixing angle bracket
1. Lift up the front of the register and pull the register towards
you.
Installing the cash register
1
A
B
A212_1 03.7.5 8:00 AM Page 8

9
Initializing the cash register
In order for the cash register to operate properly, you must initialize it before operating for the first time.
Follow this procedure.
1. Insert the manager (MA) key into the mode switch and turn it to the REG
position.
2. Insert the plug of the AC power cord into the AC outlet. The buzzer will sound
three times.
IMPORTANT: This operation must be performed without batteries installed.
3. The cash register has now been initialized. The register display will show
“0.00” with “NO BATTERY”.
If the buzzer does not sound when the plug is inserted, the initialization has not been done
successfully. (This will occur when the voltage is high because you operated the cash register
before starting initialization.) Wait at least one minute after pulling out the plug and insert the plug
again.
REG
OPX/Z MGR
PGM
X1/Z1
X2/Z2
2
NO BATTERY
0.00
Three new R6 or LR6 batteries (“AA”size) must be installed in the cash register to prevent the data and
user-programmed settings from being erased from the memory, when the AC cord is accidentally disconnected
or in case of power failure. Once installed, the batteries will last approximately one year before needing
replacement. At this time, the warning message “LOW BATTERY” will appear on the display to indicate the
batteries are low and must be replaced within two days. If the warning message “NO BATTERY” appears, you
must install the batteries at once.
Install three new R6 or LR6 batteries (“AA”size) according to the procedure shown below with the AC cord
connected and the mode switch set to the REG position:
1. Push the printer cover forward and detach it.
Be careful with the paper cutter, so as not to cut yourself.
2. Open the battery compartment cover next to the paper roll cradle.
3. Install three new R6 or LR6 batteries (“AA”size) as per the diagram.
When the batteries are properly installed “NO BATTERY” message on the
display will disappear.
4. Close the battery compartment cover.
• Be sure to observe precautions shown on page 1 when handling
batteries.
• If you press a key by mistake, an error message “PAPER EMPTY”
may be displayed. Press the lkey to clear message after
installing paper rolls.
Installing batteries
3
A212_1 03.7.5 8:00 AM Page 9

10
Precaution: The paper cutter is mounted on the printer cover. Take caution when removing and
installing the cover.
The register can print receipts or journals. For the printer, you must install the paper roll provided with the
register, even when you program the register for not printing receipts or journals.
Install the paper roll according to the procedure shown below with the AC cord connected and the mode switch
set to the REG position:
1. Lift up the print roller release lever to unlock and open the
print roller arm.
2. Set a paper roll in the paper roll cradle as per the diagram.
3. Feed the end of the paper along with
the paper positioning guides as per
the diagram.
4. While holding down the paper, slowly close the print roller
arm, and push down the arm until you hear a click locking
the arm. Make sure securely you push down the center of
the wing part of the arm as per the diagram. The paper will
be fed automatically.
If the print roller arm is not securely locked,
printing is not done right. If this problem occurs,
open the arm, and close the arm as instructed
above.
To the printer
Incorrect
To the printer
Correct
Installing a paper roll
4
Print roller
release lever
Print roller arm
Paper positioning guides
A212_1 03.7.5 8:00 AM Page 10

11
5. When not using the take-up spool (using as receipt paper):
• Cut off the excess paper using the edge of the inner cover, and
replace the printer cover. Press the Fkey to make sure the
paper end comes out of the printer cover and clean paper
appears.
If the paper end does not come out, open the printer
cover, and pass the paper end between the paper cutter
and the paper guide of the printer cover, and replace the
cover.
When using the take-up spool (using as journal paper):
• Insert the end of the paper into the slit in the spool. (Press the F
key to feed more paper if required.)
• Wind the paper two or three turns around the spool shaft.
• Set the spool on the bearing, and press the Fkey to take up
excess slack in the paper.
• Replace the printer cover.
When using a paper roll as journal paper, you must change
the printing style. Refer to “Print Format” in “Various
Function Selection Programming 1” section (Job code 6)
for changing the printing style.
The cash register provides text languages of English, German, French and Spanish. It is preset to
English. If you want to change the language, you must change it before programming. Refer to
“Language selection” in “Various Function Selection Programming 2” (Job code 88) section for
changing the language.
Before you can proceed with registration of sales, you must program:
•date •time •VAT/tax
Please refer to the BASIC FUNCTION PROGRAMMING section for details (page 34).
Programming date, time and VAT/tax
5
A212_1 03.7.5 8:00 AM Page 11

12
Now you are ready for sales registration.
Starting sales entries
7
While the cash register is pre-programmed so it can be used with minimal setup, it does provide you
with optional functions. Especially to use direct PLU keys effectively, you should program for
PLU/subdepartments. Before you start programming, please read through the sales operations section to
understand optional functions.
Decimal point position (tab) setting for domestic currency
By default, “2” is selected. When your country has a different tab setting, you must change the setting. Please
refer to "Other programming" of “Various Function Selection Programming 1” (Job code 61) on page 51.
Rounding system
When your country has a special rounding system, such as Australia, Switzerland, Norway, Sweden, Denmark
and South Africa, you must change the setting to suit your country. For the setting for Australia, Switzerland,
Norway and South Africa, please refer to “Other programming” of “Various Function Selection Programming 1”
(Job code 67) on page 53. For the setting for Sweden and Denmark, please refer to “Other programming” of
“Various Function Selection Programming 1” (Job code 69) on page 55.
VAT/tax
The cash register provides 6 kinds of VAT/tax. Select an appropriate VAT/tax system first, then set tax rates (up
to 4 rates) and assign taxable status to departments. By default, VAT 1 is assigned for all departments.
Department programming:
The cash register is pre-programmed for departments as follows:
Department: Allow open price entry in normal department, taxable status- taxable 1 for all departments.
PLU/subdepartment programming:
The cash register is preprogrammed for PLUs/subdepartments as follows:
PLU/subdepartment selection: PLU is selected for all PLU codes so that you only have to program unit prices
and associated departments for them (by default, unit price is set to 0 and associated department is set to
department 1). Function parameters including tax status depend on the status of associated department.
• For direct PLU keys, PLU codes 1 through 70 are assigned for PLU 1 through 70 keys respectively. In case
you use the PLU level shift keys, you can add number of direct PLU keys. For the function details, please refer
to “PLU level shift (for direct PLU key)” on page 17 and for the programming details, please refer to "Direct PLU
key programming" on page 37.
Programming other necessary items
6
A212_1 03.7.5 8:00 AM Page 12

13
BASIC SALES ENTRY
Listed below is a basic sales entry example when selling items by cash. For operation details, please refer to
each section.
Mode switch setting
1. Turn the mode switch to the REG position.
Clerk assignment
2. Enter your clerk code. (For example, clerk code is 1. Enter 1 using the numeric
key and press the Lkey.) The clerk code 1 is automatically selected just after
initialization of the cash register.
Item entries
3. Enter the price for the first department item. (For example, for 15.00, enter 1500 using the numeric keys, and
press the appropriate department key.)
For department 7 and above, enter the department code using numeric keys and press the dkey, then
enter the price and press the dkey again.
4. Repeat step 3 for all department items.
Displaying subtotals
5. Press the skey to display the amount due.
Finalizing the transaction
6. Enter the amount received from the customer. (You can omit this step if the amount tendered is the same as
the subtotal.)
7. Press the Akey, and the change due is displayed and the drawer is opened.
8. Tear off the receipt and give it to the customer with his or her change.
9. Close the drawer.
Receipt printKey operation example
Basic Sales Entry Example
1
REG
OPX/Z MGR
PGM
X1/Z1
X2/Z2
(In this example, tax system is set to automatic
VAT 1 and the tax rate is set to 6.25%.)
* !": indicate department keys.
1 L
1500 !*
2300 "*
s
4000
A
Item
entries
Clerk
assignment
Displaying
subtotal
Finalizing
the transaction
CLERK 01
?
01
?
-01-
DEPT.01
?
01
?
15.00
DEPT.02
?
01
?
23.00
SUBTOTAL
?
01
?
38.00
?
01
?
4000
CHANGE
?
01
?
2.00
Logo message
Date/Time/Clerk code
Register number
/Consecutive number/Clerk name
Items
Price
Not printed when
non-taxable items
only are sold.
Total amount
Cash tendering/amount received
Change
Total quantity
FOR THE OPERATOR
A212_2 FOR THE OPERATOR 03.7.5 8:01 AM Page 13

14
Clerk assignment
Prior to any item entries, clerks must enter their clerk codes into the register. However, the code entry may not
be necessary when the same clerk handles the consecutive transactions.
Receipt ON/OFF function
When you use the printer to issue receipts, you can disable receipt printing in the REG mode to save paper
using the receipt ON/OFF function. To disable receipt printing, press the Rkey in the OP X/Z position. This
key toggles the receipt printing status ON and OFF. When the function is in the OFF mode, the receipt off
indicator “_” is illuminated.
The register will print reports regardless of the receipt state, so the paper roll must be installed.
To issue a receipt when receipt ON/OFF function is set to OFF:
If your customer wants a receipt after you finalized a transaction with the receipt ON/OFF function being OFF
status, press the Rkey. This will produce a receipt. However, if more than 30 items were entered, the receipt
will be issued in a summary receipt.
Copy receipt
You can print a copy receipt by pressing the Rkey when the receipt ON/OFF function is in the “ON” status. To
realize this function, you must enable the function. Please refer to page 52 (Job code 63).
Power Save Mode
The register will enter into power save mode when no entries are performed based on the pre-programmed time
limit (by default, 30 minutes).
When the register goes to the power save mode, all display lights will turn off except the decimal point at the
leftmost position of the lower line. The register will return to the normal operation mode when any key is
pressed or a mode is changed with the mode key. Please note when the register is recovered by a key entry, its
key entry is invalid. After the recovery, start the key entry from the beginning.
L
Clerk code
To display the signed-on clerk code
LL
■Sign-off (in REG, MGR, mode)■Sign-on (in REG, MGR, mode)
In the following examples, your register will go into an error state accompanied with a warning beep and a
corresponding error message. Clear the error state by pressing the lkey and take the proper action.
Please refer to the error message table on page 79.
• Enter over a 32-digit number (entry limit overflow): Cancel the entry and re-enter the correct number.
• An error in key operation: Clear the error and continue operation.
• An entry beyond a programmed amount entry limit: Check to see if the entered amount is correct. If it is
correct, it can be rung up in the MGR mode. Contact your manager.
• An including-tax subtotal exceeds eight digits: Delete the subtotal by pressing the lkey and press the A,
X, Y, cor bkey to finalize the transaction.
Error escape function
To quit a transaction due to an error or an unforeseen event, use the error escape function as shown below:
The transaction is voided (treated as a subtotal void) and the receipt is issued by this function. If you have
already entered a tendered amount, the operation is finalized as a cash sale.
l
Transaction
To clear the error state
EE
Error Warning
2
A212_2 FOR THE OPERATOR 03.7.5 8:01 AM Page 14

15
Single item entries
1. Department entries
The cash register provides a maximum of 50 departments for a merchandise classification. Group attributes,
such as taxable status, are applied to items when they are entered to the departments.
• When using the department keys (for department 1 to 6)
For department 1 to 6, enter a unit price and press a department key. If you use a programmed unit price,
press a department key only.
* Less than the programmed upper limit amounts
When zero is entered, only the sales quantity is added.
• When using the department code entry key
Enter a department (dept.) code and press the dkey, then enter a unit price and press the dkey again. If
you use a programmed unit price, enter a dept. code and press the dkey.
* Less than the programmed upper limit
amounts
When zero is entered, only the sales
quantity is added.
2. PLU/subdepartment entries
For another merchandise classification, the cash register provides a maximum of 1200 PLUs/subdepartments.
PLUs are used to call up preset prices by pressing direct PLU keys or entering PLU codes with a press of the
pkey. Subdepartments are used to classify merchandise into smaller groups under the departments.
Every PLU and subdepartment has a code from 1 to 1200, and should belong to a department to obtain
attributes of that department.
By default, the cash register is preprogrammed to be able to use 1 to 210 codes, and these 210 codes are set to
PLU mode and zero for unit price.
To extend the number of PLU codes to 1200, please refer to “EJ memory type” on page 57, and for other
PLU/subdepartment programming, refer to “PLU and Subdepartment Programming” on page 37.
• PLU entries
• Subdepartment (open PLU) entries
* Less than the programmed upper limit amounts
When zero is entered, only the sales quantity is added.
PLU code pUnit price *
(max. 8 digits) p
Direct key entry
PLU code entry
Direct PLU key
Unit price *
(max. 8 digits)
PLU code
Direct key entry
p
Direct PLU key
PLU code entry
Dept. code
(1 to 50)
Unit price *
(max. 8 digits)
When using a programmed unit price
(In case only preset price entry is allowed.)
dd
Department keyUnit price *
(max. 8 digits)
When using a programmed unit price
Item Entries
3
A212_2 FOR THE OPERATOR 03.7.5 8:01 AM Page 15

16
Repeat entries
You can use this function for entering a sale of two or more of the same items. Consecutive pressing of a
department key, dkey, a direct PLU key or pkey is as shown on key operation example below.
Multiplication entries
When selling a large quantity of items, it is convenient to use the multiplication entry method. Enter quantity
using numeric keys and press the @key before starting item entry as shown in the example below.
When programmed to allow fractional quantity entries, you can enter up to four integers and three
digit decimal, though the quantity is counted as one for sales reports. To enter a fractional quantity,
use the decimal point key between integer and decimal.
1200 ""
$$
50 d1500 dd
41 dd
80 pp
500 fifi
85 p1200 pp
A
Subdepart-
ment entry
PLU entry
Department
entry
Receipt printKey operation example
Subdepartment
entry
PLU entry
Department entry
1200 "
$
50 d1500 d
41 d
80 p
500 fi
85 p1200 p
A
Receipt printKey operation example
A212_2 FOR THE OPERATOR 03.7.5 8:01 AM Page 16

17
Single item cash sale (SICS) entry
• This function is useful when a sale is for only one item and is for cash. This function is applicable only to those
departments that have been set for SICS or to their associated PLUs or subdepartments.
• The transaction is complete and the drawer opens as soon as you press the department key, dkey, the
direct PLU key or pkey.
If an entry to a department or PLU/subdepartment set for SICS follows the ones to departments or
PLUs/subdepartments not set for SICS, it does not finalize and results in a normal sale.
PLU level shift (for direct PLU key)
This shift can double or triple the number of direct PLU keys on your register without adding additional direct
PLU keys. You can use direct PLU keys in three levels by utilizing shift keys Ò, Ú, and Æ. These keys have
the following functions.
Ò: Shifts the PLU level from level 2 or 3 to level 1 (ordinary level).
Ú: Shifts the PLU level from level 1 or 3 to level 2.
Æ: Shifts the PLU level from level 1 or 2 to level 3.
You can select one of the two PLU level shift modes — automatic return mode* and lock shift mode** — and
decide whether to allow PLU level shift in both the REG and MGR modes or in the MGR mode alone.
* The automatic return mode automatically shifts the PLU level back to level 1. You can select whether the
PLU level should return to level 1 each time you enter one item or each time you finalize one transaction.
** The lock shift mode holds the current PLU level until pressing of a PLU level shift key.
For finishing
the transaction
250
!
Receipt printKey operation example
3 @1200 "
5 @$
3 @50 d1500 d
5 @41 d
3 @
5 @80 p
3 @500 fi
5 @85 p1200 p
A
Subdepart-
ment entry
PLU entry
Department
entry
Receipt printKey operation example
A212_2 FOR THE OPERATOR 03.7.5 8:01 AM Page 17

18
By default, you can operate PLU level shift in both the REG and MGR modes under the automatic return mode
(returning to level 1 after an item entry). To change the setting, please refer to “PLU level shift and GLU function
parameters” on page 51.
• Automatic return mode
Returning to level 1 after an item entry (default)
Returning to level 1 after finalizing a transaction
• Lock shift mode
If you select the automatic return mode, it is not necessary to use the Òkey on the keyboard, but
if you select the lock shift mode, it is necessary to use the key.
When your machine has been programmed for the automatic return mode (returning to level 1 after an item
entry):
When your machine has been programmed for the lock shift mode:
Ò¡
Ú¡
™
¡
Ò¡
A
The machine keeps
the level 2 until other
level shift key is
pressed.
Receipt printKey operation example
The machine returns to
level 1 automatically.
¡
Ú¡
™
¡
A
Receipt printKey operation example
Numeric entry
(Q'ty, @)
(Keep the current level)
To shift the level of another PLU
Ò
Ú
Æ
Direct PLU key
Numeric entry
(Q'ty, @)
(Return to level 1)
Ú
ÆDirect PLU key Payment
Numeric entry
(Q'ty, @)
(Return to level 1)
Ú
ÆDirect PLU key
A212_2 FOR THE OPERATOR 03.7.5 8:01 AM Page 18
Other manuals for XE-A212
4
Table of contents
Languages:
Other Sharp Cash Register manuals

Sharp
Sharp UP-600 User manual

Sharp
Sharp ER-4700 User manual

Sharp
Sharp ER-A450T User manual

Sharp
Sharp XE-A207 User manual

Sharp
Sharp XE-A155 Owner's manual

Sharp
Sharp XE-A101 User manual

Sharp
Sharp ER-A411 Operating and maintenance manual

Sharp
Sharp XE-A22H User manual

Sharp
Sharp XE-A106 User manual

Sharp
Sharp XE-A202 - Electronic Cash Register User manual

Sharp
Sharp XE-A301 User manual

Sharp
Sharp XE-A20S User manual

Sharp
Sharp XE-A137 User manual

Sharp
Sharp XE-A107 User manual

Sharp
Sharp ER-A410 Owner's manual

Sharp
Sharp ER-A570 Owner's manual

Sharp
Sharp XE-A110 User manual

Sharp
Sharp ER-A310 User manual

Sharp
Sharp UP-800F Quick manual

Sharp
Sharp XE-A207W Quick manual