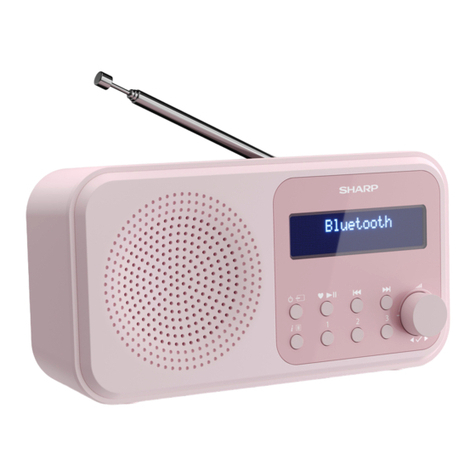
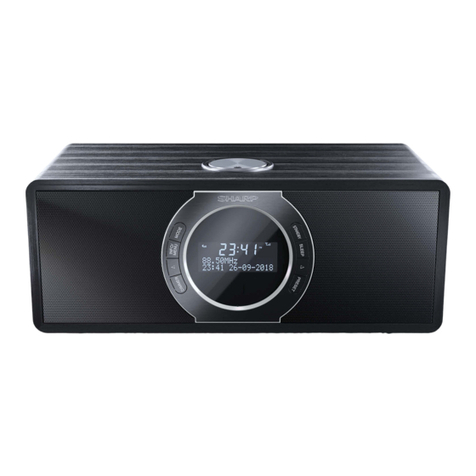
Sharp DR-P320 User manual

Quick start guide
Product images are for illustration purposes only. Actual product may vary.
NL
BG
LV
TR
NO
HR
ET
UA
EN
HU
SU
EL
SV
SR
CZ
HE
PT
RO
LT
RU
DK
SL
SK
DR-P320 | Portable Digital Radio

1 2
5
6
7
8
3 4

1
10 11 129

2
EN
Before using your product, read all safety
instructions. For full instructions please refer to
the user guide available to download from the
website sharpconsumer.eu
Panels/Controls
See pictures on the rst page.
Picture 1 - FRONT PANEL:
1. Display screen
2. Source/Standby – Press to switch on
the unit.
Press and hold to switch o the unit.
Press to switch between DAB and FM
mode when the radio is on.
3. Stations/Save – short press takes you
to“preset recall” i.e. saved stations.
Long press takes to you“preset store”to
choose location number where you save
a station.
4. Select/Scan, Volume (Scroll) – Press
and hold the Select/Scan button to auto
scan for available radio stations, press
it again to stop the auto scan and enter
the Menu.
Volume +/- knob – Turn to adjust the
volume level or to scroll the cursor within
Menu.
5. Info/Menu – Press the button to change
display options.
Press and hold the button to enter or exit
the menu.
6. – In FM mode pressing will manually
change the frequency by +0.05MHz,
press and hold to scan forward to the
next available radio station on the fre-
quency. In DAB mode pressing takes you
to the list of available stations.
7. – In FM mode a pressing will manu-
ally change the frequency by -0.05MHz,
press and hold to scan back to the next

3
available radio station on the frequency.
In DAB mode pressing takes you to the
list of available stations.
8. Pre-set buttons (1/2/3/4) – Press the
corresponding button to select saved/
preset radio station 1-4.
Long press the coresponding number to
store current radio station in to preset
number.
Picture 2 - REAR PANEL:
9. Battery compartment cover
10. Switch - DC power on / Battery power on
11. DC IN (micro USB)
12. Telescopic antenna/aerial
Battery installation
1. Remove the battery compartment cover
on the rear panel of the unit.
2. Install 4 x AA/R6 (1,5V) batteries (not
included) into the battery compartment
making sure that the battery have been
inserted with the correct polarities
matching the symbols +/- as indicated
inside the battery compartment.
3. Replace the cover.
FM tuner Operation
1. Short press Source/Standby to power
on. Short press Source/Standby again to
enter FM tuner mode.
2. To automatically search for the next/
previous available radio station, press
and hold for 2 seconds the or
button.
3. Press and hold Select/Scan button when
in FM mode and it will automatically scan
the frequency range and save presets
for radio stations discovered. To access
“preset recall” press the Stations/Save
button.

4
FM Menu
Press and hold the Info/Menu button while
in FM mode to enter the FM menu. Inside the
menu you can scroll between the following
menu items and functions using the volume
dial . (Press the Select/Scan button
to conrm a selection. To exit menu items and
the menu press the Info/Menu button once
or twice until the menus close.):
[Scan setting]: Select the scan sensitivity
(strong stations only or all stations)
[System]:The system menu included sleep,
Alarm, Time, Backlight (brightness), Language,
Factory Reset and SW version options.
Sleep: The sleep function enables you to set
a timer after which the unit will turn itself
into standby mode automatically. The sleep
times included are: Sleep o/15/30/45/60/90
minutes. To cancel the sleep function, select
the Sleep o option.
Alarm: The Alarm timer allows you to
congure 2 dierent alarms.
The alarm setup is done through an assis-
ted process (wizard). To begin choose Alarm
setup 1 or 2, set the: on time, duration,
source, cycle (days), volume and on/o -
once the cycle is complete you will return
to the System menu.
Time: The Time setting includes set Time/
Date, Auto update, Set 12/24 hour and Set
date format options.
Backlight: The Backlight (brightness) setting
has three options: Timeout, On level and Dim
level, these options can be used to set the
desired Backlight level.
Language: choose your preferred system
language from: English, Dutch, Italian or
French.
Factory Reset: reset the unit (No/Yes).
SW version: View software version.
5
Manually Store Radio Stations
This unit enables you to store up to 20 radio
stations:
1. Tune to a radio station which you would
like to store.
2. Press and hold for 2 seconds the Sta-
tions/Save button. The display will show
“Preset Store”.
3. Select a desired preset (1 - 20) on which
you want to store the current frequency
using the volume dial to scroll.
4. Press the Select/Scan button to conrm
your setting. “Preset xx stored” will be
shown on the display.
5. To recall a stored station/frequency, press
the Station/Save button and use the
volume dial to scroll the desired
station/frequency, press Select/Scan
button to conrm.
DAB Operation
DAB (Digital Audio Broadcasting) provides
a larger choice of radio programmes with
improved sound quality and allows more
data/information to be transmitted.
Press the Source/Standby button to select
the DAB source, when in DAB mode, press
and hold the Select/Scan button to complete
an auto-scan of available stations. Select
the desired radio station by pressing the
or button to enter the Station List,
scroll using the volume dial and then press
the Select/Scan button to play the selected
station.
DAB Menu
Press and hold Info/Menu to enter the
DAB Menu. Inside the menu you can select
between the following menu items and
functions via the volume dial .

6
• [Full scan]: scan and store all the available
DAB radio stations.
• [Manual tune]: tune to a DAB station
manually.
• [DRC]: select (dynamic range control)
DRC /o.
• [Prune]: remove all the invalid stations from
the station list.
• [TA]: select on/o for local trac announce-
ments.
• [System]: adjust system settings,for details
please refer to the FM system.
Manually storing DAB Stations
This unit enables you to store up to 20 radio
stations:
1. Tune to a radio station which you would
like to store.
2. Press and hold for 2 seconds the Sta-
tions/Save button, this will take you to
the “Preset Store”.
3. Select a desired preset location (1 - 20)
in which you want to store the current
station by using the volume dial
to scroll.
4. Press the Select/Scan button to conrm
your setting. “Preset xx stored” will be
shown in the display.
To recall a stored frequency, press the
Station/Save button to access the
“Preset Recall”.
Info Display
To toggle the information shown on the
display (which is broadcast by the radio
station), repeatedly press the Info/Menu
buton on the unit.

7
PT
Antes de usar o seu produto, leia todas as
instruções de segurança. Para instruções
completas, veja o guia do utilizador disponível
para download na página web sharpconsumer.
eu
Painéis/controlos
Ver imagens na primeira página
Imagem 1 - PAINEL DIANTEIRO:
1. Visor do ecrã
2. Fonte/Standby – Carregue para ligar a
unidade.
Carregue e mantenha para desligar a
unidade.
Carregue para alternar entre o modo DAB
e FM quando o rádio estiver ligado.
3. Estações/Guardar – um toque leve faz
“abrir as predenidas”, isto é, as estações
guardadas. Um toque longo leva-o até às
“predenidas guardadas”para escolher
o número da posição onde quer guardar
uma estação.
4. Selecionar/Pesquisar, Volume (Des-
lizar) – Carregue e mantenha o botão
Selecionar/Pesquisar para pesquisar
automaticamente estações de rádio
disponíveis, carregue novamente para
parar a pesquisa automática e entrar
no Menu.
Manípulo Volume +/- – Gire para ajustar
o nível do volume ou para deslizar o
cursor dentro do Menu.
5. Info/Menu – Carregue no botão para
alterar as opções do mostrador.
Carregue e mantenha o botão para entrar
ou sair do menu.
6. – No modo FM, carregar irá alterar
manualmente a frequência +0.05MHz.
Carregue e mantenha para pesquisar
para a frente, até à próxima estação de

8
rádio disponível na frequência. No modo
DAB, ao carregar irá entrar na lista de
estações disponíveis.
7. – No modo FM, carregar irá alterar
manualmente a frequência -0,05MHz.
Carregue e mantenha para pesquisar
para trás, até à próxima estação de rádio
disponível na frequência. No modo DAB,
ao carregar irá entrar na lista de estações
disponíveis.
8. Botões predenidos (1/2/3/4) – Carre-
gue no botão correspondente para sele-
cionar as estações de rádio guardadas/
predenidas 1-4.
Carregue prolongadamente no número
correspondente para armazenar a
estação de rádio atual no número
predenido.
Imagem 2 - PAINEL TRASEIRO:
9. Cobertura do compartimento da
bateria
10. Interruptor - Alimentação CC ligada /
Alimentação por pilhas ligada
11. Entrada CC (micro USB)
12. Antena telescópica
Instalação da pilha
1. Retire a cobertura do compartimento da
pilha do painel traseiro da unidade.
2. Insira 4 pilhas AA/R6 (1,5V) (não
incluídas) no compartimento das pilhas,
certicando-se de que estas foram
inseridas com as polaridades corretas a
combinar com os símbolos + - , tal como
indicado no interior do compartimento
das pilhas.
3. Volte a colocar a cobertura.

9
Função de sintonizador
FM
1. Carregue brevemente em Fonte/
Standby para ligar. Carregue outra vez
brevemente em Fonte/Standby para
entrar no modo de sintonia FM.
2. Para procurar automaticamente a
estação de rádio seguinte/anterior
disponível, carregue e mantenha durante
2 segundos o botão ou .
3. Carregue e mantenha o botão
Selecionar/Pesquisar quando
estiver no modo FM e irá pesquisar
automaticamente o alcance de
frequências e guardar as estações de
rádio descobertas nas predenidas. Para
aceder a“abrir as predenidas”, carregue
no botão Estações/Guardar.
Menu FM
Carregue e mantenha o botão Info/Menu
quando estiver no modo FM para entrar no
menu FM. Dentro do menu poderá deslizar
entre os seguintes pontos e funções do menu
com o botão do volume . (Carregue
no botão Selecionar/Pesquisar para
conrmar uma seleção. Para sair dos pontos
do menu, carregue uma ou duas vezes no
botão Info/Menu até o menu fechar.):
[Denições da pesquisa]: Selecione a
sensibilidade da pesquisa (apenas estações
fortes ou todas as estações)
[Sistema]: O menu do sistema inclui a opção
dormir, alarme, hora, luz de fundo (brilho),
língua, reposição de fábrica e versão do SW.
Dormir: A função de dormir permite-lhe
denir um temporizador que, quando chegar
ao m, coloca a unidade automaticamente
no modo de espera (standby). Os tempos
de dormir incluídos são os seguintes: dormir

10
desligado/15/30/45/60/90 minutos. Para
cancelar a função de dormir, selecione a
opção dormir desligado.
Alarme: O temporizador do alarme permite-
lhe congurar 2 alarmes diferentes.
A denição do alarme é feita através de
um processo assistido (assistente). Para co-
meçar, escolha a denição do alarme 1 ou
2, dena: a hora, duração, fonte, repetição
(dias), volume e ligado/desligado - assim
que o ciclo estiver terminado, regressará ao
menu do sistema.
Hora: A denição da hora inclui a denição
das opções de hora/data, atualização
automática, denir 12/24 horas e denir o
formato da hora.
Luz de fundo: A denição da luz de fundo
(brilho) tem três opções: opção de tempo
esgotado, nível ligado e nível de brilho. Estas
opções podem ser usadas para denir o nível
de luz de fundo desejado.
Língua: escolha a sua língua preferida do
sistema dentre: inglês, holandês, italiano ou
francês.
Reposição de fábrica: repor a unidade (Não/
Sim).
Versão do software: Ver a versão do
software.
Guardar manualmente estações
de rádio
Esta unidade permite-lhe guardar até 20
estações de rádio:
1. Sintonize uma estação de rádio que
gostaria de guardar.
2. Carregue e mantenha durante 2
segundos o botão Estações/Guardar.
O mostrador apresentará a indicação
“Preset Store”.
3. Selecione a predenição desejada (1 - 20)
onde quer guardar a atual frequência
usando o botão do volume para
deslizar.
4. Carregue no botão Selecionar/Pesquisar

11
para conrmar as suas denições. A
indicação“predenição armazenada”
aparecerá no mostrador.
5. Para abrir uma estação/frequência
armazenada, carregue no botão Estação/
Guardar e use o botão do volume
para deslizar até à estação/
frequência desejada, carregue no botão
Selecionar/Pesquisar para conrmar.
Função DAB
DAB (Digital Audio Broadcasting) oferece uma
escolha mais ampla de programas de rádio,
com qualidade do som melhorada e permite
a transmissão de mais dados/informações.
Carregue no botão Fonte/Standby para
selecionar a fonte DAB. Quando estiver no
modo DAB, carregue e mantenha o botão
Selecionar/Pesquisar para completar
uma pesquisa automática das estações
disponíveis. Selecione a estação de rádio
desejada carregando no botão ou
para entrar na Lista de Estações. Deslize
usando o botão do volume e depois carregue
no botão Selecionar/Pesquisar para
reproduzir a estação selecionada.
DAB Menu
Carregue e mantenha Info/Menu para entrar
no menu DAB. Dentro do menu poderá
selecionar entre os seguintes pontos e
funções do menu com o botão do volume
.
• [Full scan]: procura e armazena todas as
estações de rádio DAB disponíveis.
• [Manual tune]: sintoniza estações DAB
manualmente.
• [DRC]: selececionar (dynamic range control)
DRC /desligar.
• [Prune]: remove todas as estações inválidas
da lista de estações.

12
• [TA]: ligue ou desligue para ouvir as infor-
mações de trânsito.
• [System]: ajusta as denições do sistema.
Para mais detalhes, veja osistema FM.
Guardar manualmente estações
DAB
Esta unidade permite-lhe guardar até 20
estações de rádio:
1. Sintonize uma estação de rádio que
gostaria de guardar.
2. Carregue e mantenha durante 2 segun-
dos o botão Estações/Guardar. Isto
levá-lo-á a “Predenidas guardadas”.
3. Selecione a localização desejada para a
predenição (1 - 20) onde quer guardar a
estação atual usando o botão do volume
para deslizar.
4. Carregue no botão Selecionar/Pesquisar
para conrmar a sua deniçõe. A indi-
cação“predenição xx armazenada”
aparecerá no mostrador.
Para abrir uma frequência armaze-
nada, carregue no botão Estações/
Guardar para aceder a “Predenidas
guardadas”.
Mostrador de informação
Para alternar a informação apresentada no
mostrador (que é transmitida pela estação de
rádio), carregue várias vezes no botão Info/
Menu na unidade.

13
NL
Lees alle veiligheidsinstructies door voordat u
uw product gebruikt. Voor volledige instructies
verwijzen wij u naar de gebruikershandleiding
die u kunt downloaden op sharpconsumer.eu
Panelen/bediening
Zie afbeeldingen op de eerste
pagina.
Afbeelding 1 - FRONTPANEEL:
1. Displayscherm
2. Source/Standby – Druk op deze knop
om het apparaat in te schakelen.
Houd deze knop ingedrukt om het
apparaat uit te schakelen.
Druk op deze toets om te schakelen
tussen DAB- en FM-modus als de radio is
ingeschakeld.
3. Stations/Save - druk kortop deze knop
om naar“preset recall”te gaan, d.w.z. op-
geslagen radiostations. Door deze knop
lang in te drukken, kiest u met “preset
store”het locatienummer waaronder
ueen radiostation opslaat.
4. Select/Scan, Volume (Scroll) – Houd
de knop Select/Scan ingedrukt om
automatisch scannen naar beschikbare
radiozenders. Druk opnieuw op knop om
het automatisch scannen te onderbreken
en het menu te openen.
Volumeknop +/- – Draai aan deze knop
om het volume aan te passen of om met
de cursor binnen het menu te scrollen.
5. Info/Menu – Druk op deze knop om de
displayopties te wijzigen.
Houd deze knop ingedrukt om het menu
te openen of te verlaten.
6. – Als u in de FM-modus op deze
knop drukt, dan kunt u de frequentie
handmatig met +0,05 MHz veranderen.

14
Houd de knop ingedrukt om vooruit te
scannen naar het eerstvolgende beschik-
bare radiostation op de frequentie. Als
u in de DAB-modus op deze knop drukt,
dan gaat u naar de lijst met beschikbare
radiostations.
7. – Als u in de FM-modus op de knop
drukt, dan kunt u de frequentie hand-
matig met -0,05 MHz veranderen. Houd
de knop ingedrukt om terug te scannen
naar het eerstvolgende beschikbare
radiostation op de frequentie. Als u in
de DAB-modus op deze knop drukt,
dan gaat u naar de lijst met beschikbare
radiostations.
8. Vooraf ingestelde knoppen (1/2/3/4)
- Druk op de betreende knop om het
opgeslagen/vooraf ingestelde radiostati-
on 1-4 te selecteren.
Houd het betreende nummer lang
ingedrukt om het huidige radiostation op
te slaan onder het huidige voorinstel-
lingsnummer.
Afbeelding 2 - ACHTERPANEEL:
9. Deksel batterijvak
10. Schakelaar - DC-voeding aan/batterij-
voeding aan
11. DC IN (micro-USB)
12. Uitschuifbare antenne
Installatie van batterijen
1. Verwijder het deksel van het batterijvak
op het achterpaneel van het apapraat.
2. Plaats 4 × AA/R6-batterijen (1,5 V, niet
meegeleverd) in het batterijvak en zorg
ervoor dat de batterijen zijn geplaatst
met de juiste polariteit, overeenkomstig
de symbolen +/- zoals aangegeven in het
batterijvak.
3. Plaats het deksel terug.

15
Bediening FM tuner
1. Druk kort op Source/Standby om het
apparaat in te schakelen. Druk nogmaals
kort op Source/Standby om de FM
tuner-modus te activeren.
2. Om automatisch te zoeken naar het vol-
gende/vorige beschikbare radiostation,
houd u de of -knop gedurende 2
seconden ingedrukt.
3. Houd de knop Select/Scan ingedrukt
in de FM-modus. Het frequentiebereik
wordt automatisch gescand en slaat
de ontdekte radiostations op onder de
vooringestelde radiostations. Om“preset
recall”te opene, drukt u op de knop
Stations/Save .
FM-menu
Houd in de Fm-modus de knop Info/Menu
ingedrukt om het FM-menu te openen. In het
menu kunt u met behulp van de volumeknop
door de volgende menu-items en functies
scrollen . (Druk op de knop Select/
Scan om een selectie te bevestigen. Om de
menu-items en het menu te verlaten, drukt u
één of twee keer op de knop Info/Menu tot
de menu’s sluiten):
[Scaninstelling]: selecteer de
scangevoeligheid (alleen stations met sterke
frequentie of alle stations)
[Systeem]: het systeemmenu omvat
de opties Sleep, Alarm, Time, Backlight
(helderheid), Language, Factory Reset en
SW-versie.
Sleep: met de slaapfunctie kunt u een timer
instellen waarna het apparaat automatisch in
de stand-bymodus schakelt. De slaaptijden
zijn: Sleep o/15/30/45/60/90 minuten. Om
de slaapfunctie te annuleren, selecteert u de
optie“Sleep o”.
Alarm: Met de alarmtimer kunt u 2
verschillende alarmen congureren.

16
U stelt het alarm in door middel van een
ondersteunend proces (wizard). Kies eerst
Alarminstelling 1 of 2. Stel het volgende in:
de tijd, duur, bron, cyclus (dagen), volume
en aan/uit - zodra de cyclus is voltooid,
keert uterug naar het Systeemmenu.
Time: De Tijdinstelling omvat de volgende
opties: tijd/datum, Auto update, 12/24 uur
instellen en datumformaat.
Backlight: De instelling van Backlight
(helderheid) heeft drie opties: de opties
Time-out (uit), On level (aan) en Dim level
(gedimd). Deze opties kunt u gebruiken om
de gewenste achtergrondverlichting in te
stellen.
Taal: kies de systeemtaal van uw voorkeur:
Engels, Nederlands, Italiaans of Frans.
Factory Reset: het apparaat resetten (nee/ja).
SW version: bekijk de softwareversie.
Handmatig radiostations
opslaan
Op dit apparaat kunt u max. 20 radiostations
opslaan:
1. Stem af op een radiostation dat u graag
wilt opslaan.
2. Houd de knop Stations/Save gedurende
2 seconden ingedrukt. Het scherm toont
“Preset Store”.
3. Selecteer de gewenste voorinstelling
(1 - 20) waar u de huidige frequentie
wilt opslaan, door met de volumeknop
te scrollen.
4. Druk op de knop Select/Scan om de
instelling te bevestigen. De melding
“Preset xx stored” verschijnt op het
display.
5. Om een opgeslagen radiostation/fre-
quentie op te roepen, drukt u op de knop
Station/Save. Gebruik de volumeknop
om door de gewenste radiosta-
tions/frequenties te bladeren. Druk op de
knop Select/Scan om te bevestigen.

17
Bediening DAB
DAB (Digital Audio Broadcasting) biedt een
grotere keuze aan radioprogramma’s met
een verbeterde geluidskwaliteit en maakt
het mogelijk om meer data/informatie uit
te zenden.
Druk op de knop Source/Standby om de
DAB-bron te selecteren in de DAB-modus.
Houd de knop Select/Scan ingedrukt om
een automatische scan uit te voeren van
de beschikbare radiostations. Selecteer het
gewenste radiostation door op de knop
of te drukken. De radiotationlijst wordt
geopend. U kunt door de lijst scrollen met
de volumeknop. Druk op de knop Select/
Scan om het geselecteerde radiostation af
te spelen.
DAB-Menu
Houd de knop Info/Menu ingedrukt om het
DAB-menu te openen. In het menu kunt u
met behulp van de volumeknop
één van de volgende menu-items en functies
selecteren.
• [Full scan]: alle beschikbare DAB-radiostati-
ons scannen en opslaan.
• [Manual tune]: handmatig afstemmen op
een DAB-station.
• [DRC]: selecteer (Dynamic Range Control)
DRC/uit.
• [Prune]: alle ongeldige stations uit de
radiostationlijst verwijderen.
• [TA]: selecteer aan/uit voor lokale ver-
keersmeldingen.
• [System]: de systeeminstellingen aanpas-
sen, zie voor details het FM-systeem.

18
Handmatig DAB-radiostations
opslaan
Op dit apparaat kunt u max. 20 radiostations
opslaan:
1. Stem af op een radiostation dat u graag
wilt opslaan.
2. Houd de knop Stations/Save gedurende
2 seconden ingedrukt om“Preset Store”
te openen.
3. Selecteer de gewenste vooronstelling
(1-20) waar u het huidige radiostation
wilt opslaan door met de volumeknop
te scrollen.
4. Druk op de knop Select/Scan om de
instelling te bevestigen. De melding
“Preset xx stored” verschijnt op het
display.
Om een opgeslagen frequentie op te
roepen, drukt u op de knop Station/
Save om “Preset Store”te openen.
Weergave van informatie
Om de informatie op het display (die door
het radiostation uitzendt) te wijzigen, drukt
u herhaaldelijk op de knop Info/Menu op
het apparaat.
Other manuals for DR-P320
2
Table of contents
Languages:
Other Sharp Radio manuals

Sharp
Sharp FV-1800 User manual

Sharp
Sharp GF-9191H User manual

Sharp
Sharp QT-15XW User manual

Sharp
Sharp DR-450(GR) User manual

Sharp
Sharp QT-CD131H User manual

Sharp
Sharp DR-430 User manual

Sharp
Sharp DR-430 User manual

Sharp
Sharp FV-310GB User manual

Sharp
Sharp Tokyo User manual

Sharp
Sharp DR-S460 User manual