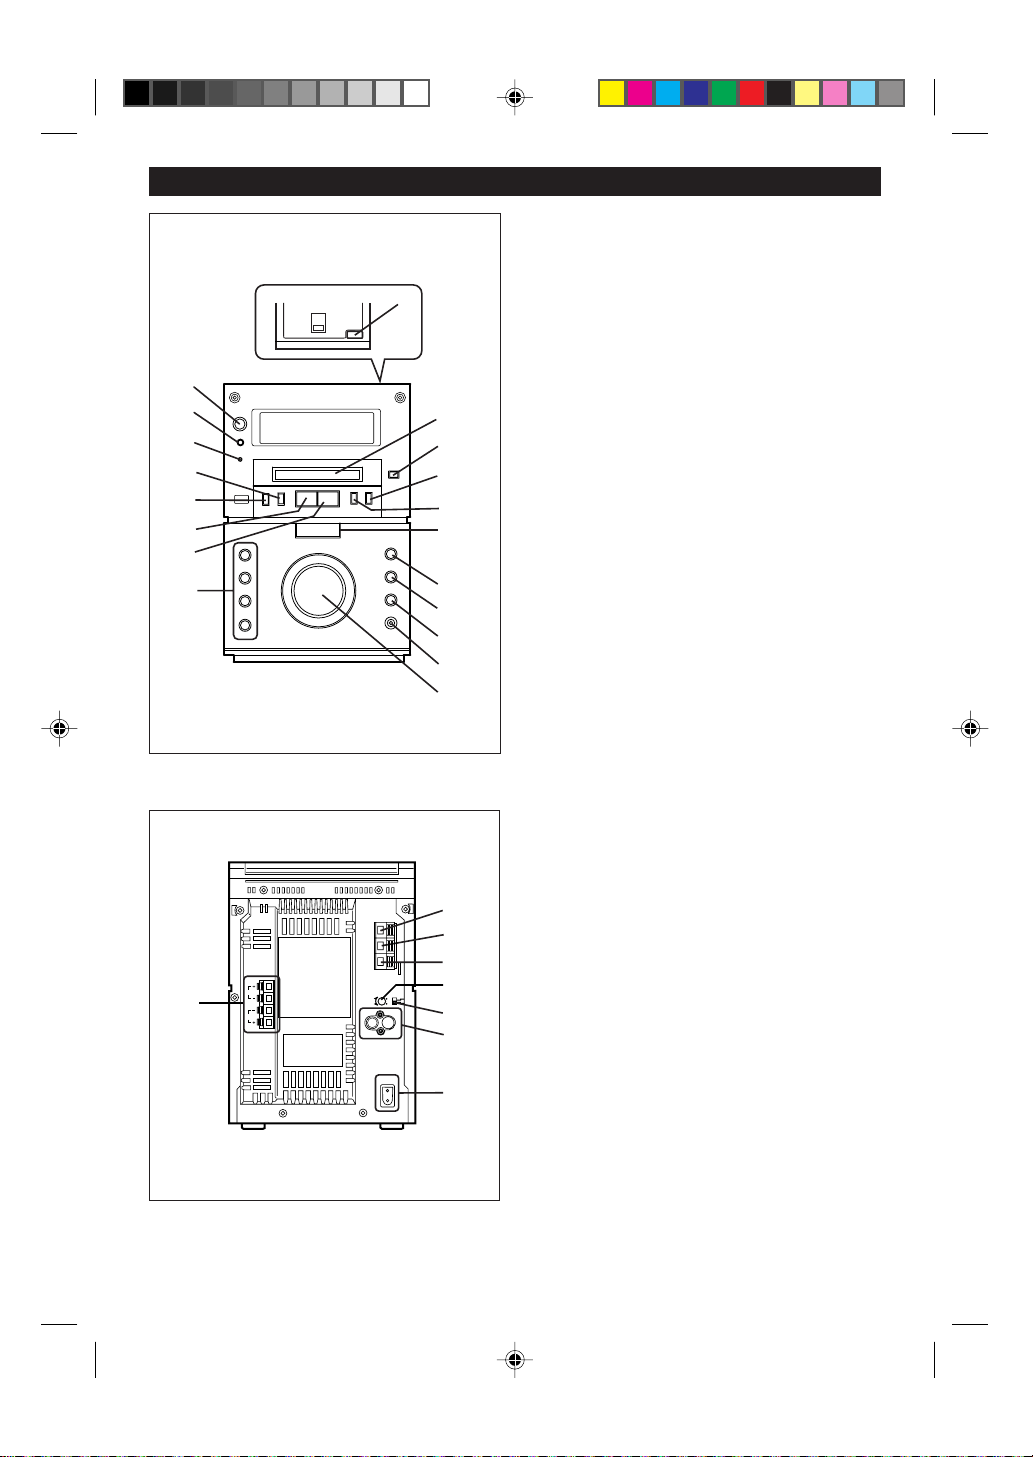
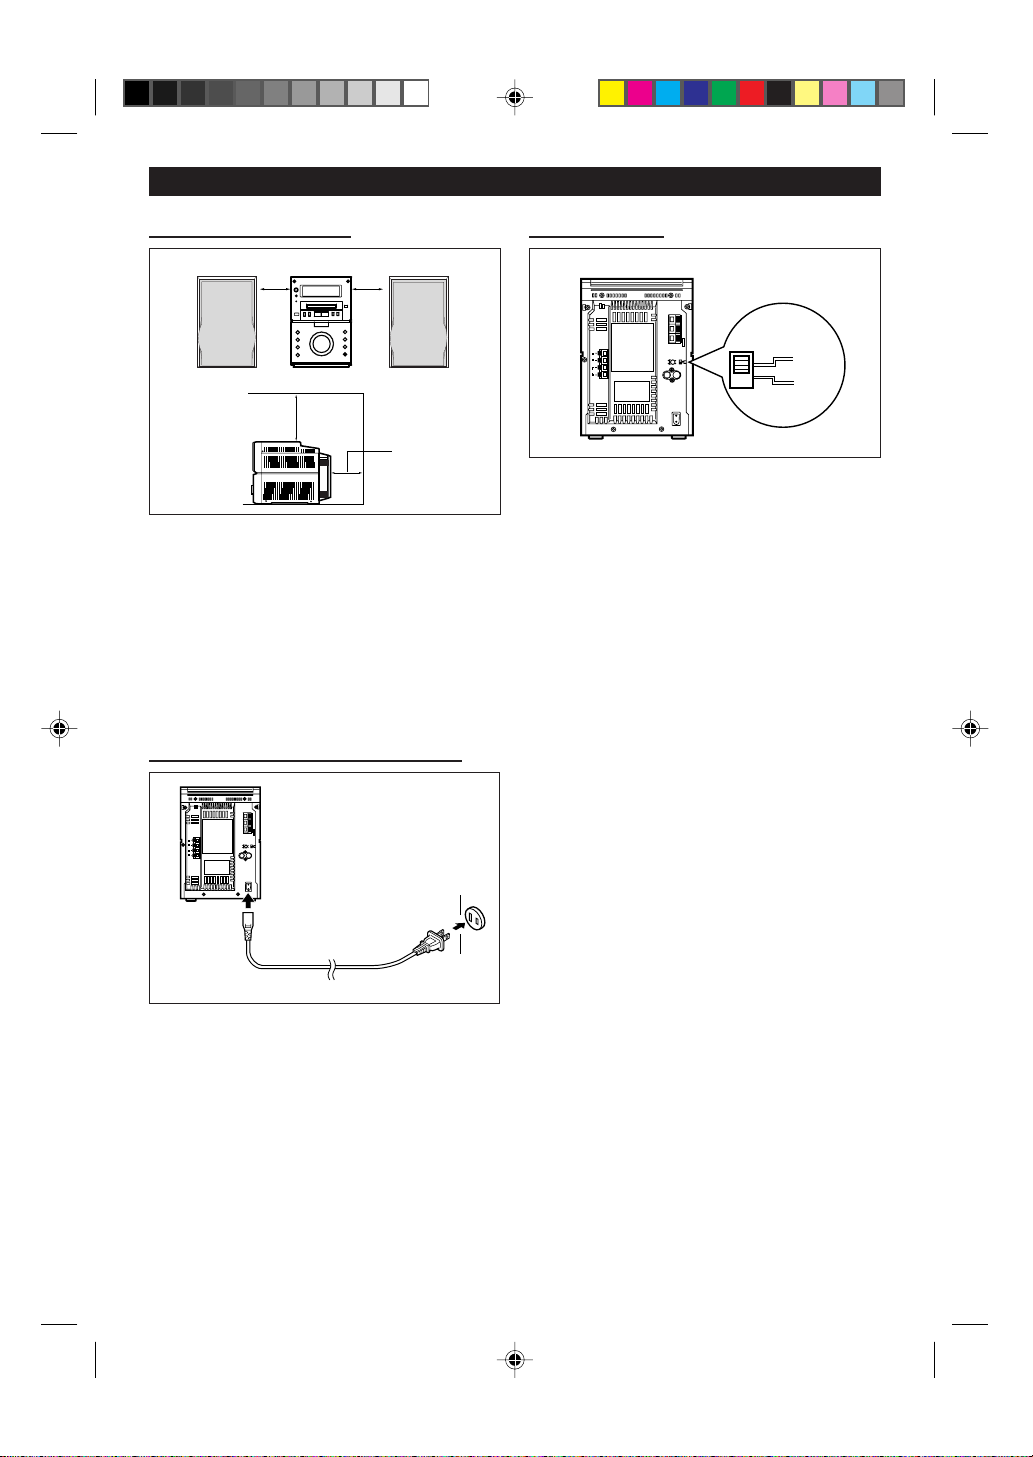
Sharp MD-M1 User manual

1
Note:
Thisequipmenthasbeentestedandfoundtocom-
ply with the limits for a Class B digital device, pur-
suant to Part 15 of the FCC Rules.
These limits are designed to provide reasonable
protection against harmful interference in a resi-
dential installation.
This equipment generates, uses, and can radiate
radiofrequencyenergyand,ifnot installedandused
in accordance with the instructions, may cause
harmful interference to radio communications.
However, there is no guarantee that interference
willnotoccur in a particularinstallation.Ifthisequip-
ment does cause harmful interference to radio or
television reception, which can be determined by
turning the equipment off and on, the user is en-
couraged to try to correct the interference by one
or more of the following measures:
●Reorient or relocate the receiving antenna.
●Increase the separation between the equipment
and receiver.
●Connecttheequipmentinto an outlet on a circuit
different from that to which the receiver is con-
nected.
●Consult the dealer or an experienced radio/TV
technician for help.
WARNING
FCC Regulations state that any unauthorized
changes or modifications to this equipment not ex-
pressly approved by the manufacturer could void
the user’s authority to operate this equipment.
●It is the intent of Sharp that this product be used
in full compliance with the copyright laws of the
United States and that prior permission be ob-
tained from copyright owners whenever neces-
sary.
●US and foreign patents licensed from Dolby
Laboratories Licensing Corporation.
FOR YOUR RECORDS
For your assistance in reporting this unit in
case of loss or theft, please record below the
model number and serial number which are
located on the rear of the unit.
Please retain this information.
Model number ______________________
Serial number_______________________
Date of purchase____________________
Place of purchase ___________________
CAUTION
RISK OF ELECTRIC SHOCK
DO NOT OPEN
The lightning flash with arrowhead
symbol, within an equilateral triangle,
is intended to alert the user to the
presence of uninsulated "dangerous
voltage" within the product's enclosure
that may be of sufficient magnitude to
constitute a risk of electric shock to
persons.
CAUTION: TO REDUCE THE
RISK OF ELECTRIC SHOCK, DO
NOT REMOVE COVER (OR
BACK).
NO USER-SERVICEABLE PARTS
INSIDE. REFER SERVICING TO
QUALIFIED SERVICE PERSON-
NEL.
The exclamation point within an equi-
lateral triangle is intended to alert the
user to the presence of important
operating and maintenance (servic-
ing) instructions in the literature ac-
companying the appliance.
Caution - use of controls or adjustments or per-
formance of procedures other than those specified
herein may result in hazardous radiation exposure.
WARNING: TO REDUCE THE RISK OF
FIRE OR ELECTRIC SHOCK, DO NOT EX-
POSE THIS APPLIANCE TO RAIN OR
MOISTURE.

2
CAUTION
All the safety and operating instructions should be
read before the appliance is operated, and should
be retained for future reference.
Electrical energy can perform many useful func-
tions.This unit has been engineered and manufac-
tured to assure your personal safety. Improper use
can result in potential electrical shock or fire haz-
ards.In order not to defeatthe safeguards, observe
the following basic rules for its installation, use and
servicing.
1Heed Warnings - All warnings on the appliance
and in the operating instructions should be ad-
hered to.
2FollowInstructions-All operatinganduse instruc-
tions should be followed.
3Water and Moisture - The appliance should not
be used near water - for example, near a bath-
tub, washbowl,kitchen sink, laundrytub, in a wet
basement, or near a swimming pool, etc.
4Cartsand Stands-The applianceshouldbeused
only with a cart or stand that is recommended by
the manufacturer.
●Anapplianceandcartcombina-
tion should be moved with care.
Quick stops, excessive force,
andunevensurfacesmaycause
theapplianceandcart combina-
tion to overturn.
IMPORTANT SAFEGUARDS
5Wall or Ceiling Mounting -The appliance should
be mounted to a wall or ceiling only as recom-
mended by the manufacturer.
6Ventilation -The appliance should be situated so
thatitslocationorpositiondoes not interferewith
itsproperventilation.For example,the appliance
should not be situated on a bed, sofa, rug, or
similar surface that may block the ventilation
openings;or, placed in a built-ininstallation, such
as a bookcase or cabinet that may impede the
flow of air through the ventilation openings.
7Heat - The appliance should be situated away
from heat sources such as radiators, heat regis-
ters, stoves, or other appliances (including am-
plifiers) that produce heat.
8Power Sources - The appliance should be con-
nected to a power supply only of the type de-
scribed intheoperatinginstructions or as marked
on the appliance.
9Power-Cord Protection - Power-supply cords
should be routed so that they are not likely to be
walked on or pinched by items placed upon or
againstthem,paying particularattention to cords
atplugs,conveniencereceptacles,and the point
where they exit from the appliance.
10Do not use liquid cleaners or aerosol cleaners.
Use a damp cloth for cleaning.
11Power Lines - An outdoor antenna should be
located away from power lines.
12Outdoor Antenna Grounding - If an outside an-
tenna is connected to the receiver, be sure the
antenna system is grounded so as to provide
some protection against voltage surges and
built-up static charges. Section 810 of the Na-
tionalElectrical Code,ANSI/NFPANo.70-1984,
provides information with respect to proper
groundingof the mast and supporting structure,
grounding of the lead-in wire to an antenna dis-
charge unit, size of grounding conductors, lo-
cation of antenna-discharge unit, connection to
grounding electrodes, and requirements for the
grounding electrode.
13Nonuse Periods - The power cord of the appli-
anceshouldbeunpluggedfromtheoutletwhen
left unused for a long period of time.
14Object and Liquid Entry - Care should be taken
so that objects do not fall and liquids are not
spilled into the enclosure through openings.
15Damage Requiring Service - The appliance
should be serviced by qualified service person-
nel when:
AThe power-supply cord or the plug has been
damaged; or
BObjects have fallen, or liquid has been spilled
into the appliance; or
CThe appliance has been exposed to rain; or
DThe appliance does not appear to operate nor-
mally or exhibits a marked change in perform-
ance; or
EThe appliance has been dropped, or the enclo-
sure damaged.
16Servicing -The user should not attempt to serv-
ice the appliance beyond that described in the
operatinginstructions.Allother servicingshould
be referred to qualified service personnel.
17 Grounding or Polarization - Precautions should
be taken so that the grounding or polarization
means of an appliance is not defeated.
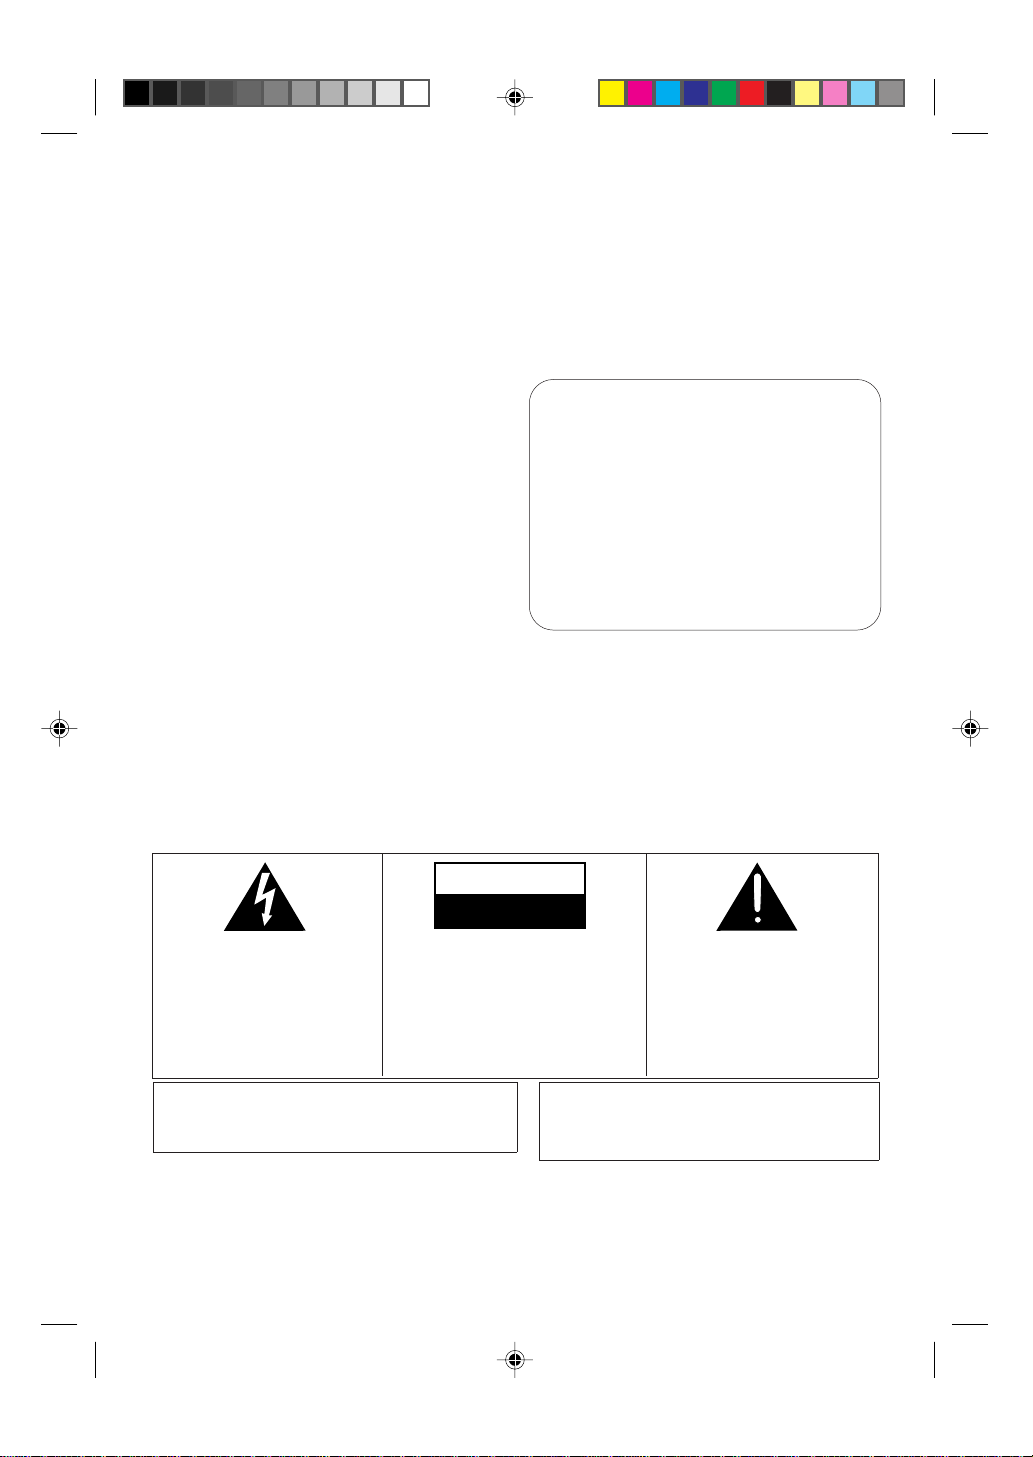
ANTENNA LEAD
IN WIRE
ANTENNA DISCHARGE
UNIT
(NEC SECTION 810-20)
POWER SERVICE GROUNDING
ELECTRODE SYSTEM
(NEC ART 250, PART H)
GROUNDING CONDUCTORS
(NEC SECTION 810-21)
GROUND CLAMPS
NEC - NATIONAL ELECTRICAL CODE
S2898A
ELECTRIC
SERVICE
EQUIPMENT
GROUND
CLAMP
EXAMPLE OF ANTENNA GROUNDING AS PER
NATIONAL ELECTRICAL CODE

3
Page
ACCESSORIES ................................................. 3
PRECAUTIONS ................................................. 4
NAMES OF CONTROLS AND INDICATORS
.... 5-7
PREPARATION FOR USE............................ 8-10
SETTING THE CLOCK .................................... 11
SOUND CONTROL ......................................... 12
COMPACT DISC OPERATION........................ 13
MINIDISC OPERATION ................................... 14
CONVENIENT CD AND MD OPERATIONS ....
15-17
RADIO OPERATION .................................. 18-19
RECORDING ............................................ 20-23
EDITING ..................................................... 24-30
Page
TIMER OPERATION ................................... 31-33
USING EXTERNAL UNITS ........................ 34-35
WHAT IS A MINIDISC? ................................... 36
MINIDISC SYSTEM LIMITATIONS .................. 37
TROUBLESHOOTING................................ 37-38
ERROR MESSAGES ....................................... 39
RESETTINGTHE MICROCOMPUTER ........... 40
MAINTENANCE .............................................. 40
SPECIFICATIONS ........................................... 41
CONSUMER LIMITED
WARRANTY ................................... Back cover
CONTENTS
ACCESSORIES
Remote control
(RRMCG0190AWSA)
×1
AC power cord
(QACCD0025AWZZ)
×1
Note:
Parts and accessories mentioned in this operation manual other than those in the drawing are not included.
AM loop antenna
(QANTL0009AWZZ)
×1
FM antenna
(92LFANT1746A)
×1

4
PRECAUTIONS
■General
●Please ensure that the equipment is positioned
in a well ventilated area and ensure that there is
at least 4" (10cm) of free space along the sides
and back.There must also be a minimum of 8"
(20cm) of free space on the top of the unit.
●Do not use oil, solvents, gasoline, paint thinners
or insecticides on the unit.
●Do not expose the unit to moisture, to tempera-
tureshigherthan140°F (60°C)ortoextreme low
temperatures.
●Keep the unit away from direct sunlight, strong
magnetic fields, excessive dust, humidity and
electronic/electrical equipment (home comput-
ers, facsimiles, etc.) which generate electrical
noise.
●Hold the AC power plug by the head when re-
moving it from the AC outlet, since pulling the
cord can damage internal wires.
●Do not remove the outer cover, as this may re-
sult in electric shock.
Referinternalservice to yourlocalSHARPserv-
ice facility.
●Use the unit on a firm, level surface free from
vibration, and do not place anything on the top
of the unit.
●If the unit malfunctions while in use, press the
POWERbuttontoenterthestand-by mode,then
disconnect the AC power cord from the AC out-
let. Plug the AC power cord back in, and then
press the POWER button to turn the power on.
●If an electrical storm is taking place near you, it
is suggested that you disconnect the AC power
cord from the AC outlet for safety.
Warning:
The voltage used must be the same as that speci-
fied on this unit. Using this product with a higher
voltage other than which is specified is dangerous
and may result in a fire or other type of accident
causing damage. SHARP will not be held respon-
sible for any damage resulting from use of this unit
with a voltage other than that which is specified.
■Volume control
The sound level at a given volume setting depends
onacombination of speakerefficiency, location and
various other factors.
It is advisable to avoid exposure to high volume
levels, which occur while turning the unit on with
the volume control setting up high, or while con-
tinually listening at high volumes.
■Condensation
Sudden temperature changes, storage or opera-
tioninanextremelyhumid environmentmaycause
condensation inside the cabinet (CD pickup, MD
pickup, etc.) or on the transmitter LED on the re-
mote control.
Condensation can cause the unit to malfunction.
If this happens, leave the power on with no disc in
the unit until normal playback is possible (about 1
hour).Wipe off any condensation on the transmit-
ter LED with a soft cloth before operating the unit.
Warning:
CD players use a laser pickup which can damage
theeyesifvieweddirectly.Do not lookatthepickup,
and do not touch the pickup directly.

5
■Front panel
1. Power Button
2. (MD) Display Button
3. Timer Stand-by Indicator
4. (MD) Record Button
5. (CD/MD/TUNER) Memory Button
6. (CD/MD) Stop Button
(TUNER)Tuning Down Button
7. (CD/MD) Play/Pause Button
(TUNER)Tuning Up Button
8. Function Selector Buttons
9. CD Eject Button
10. MD Compartment
11. MD Eject Button
12. (CD/MD)Track Up/Cue Button
(TUNER) Preset Up Button
13. (CD/MD)Track Down/Review Button
(TUNER) Preset Down Button
14. CD 0MD Edit Button
15. Surround Button
16. Preset Equalizer Button
17. Extra Bass Button
18. Headphone Jack
19. Volume Control
■Rear panel
1. SpeakerTerminals
2. FM 75 Ohms AntennaTerminal
3. Antenna GroundTerminal
4. AM Loop AntennaTerminal
5. Auxiliary Input (Analog) Level Control
6. Demo Switch
7. Auxiliary Input (Analog) Jacks
8. AC Power Input Jack
NAMES OF CONTROLS AND INDICATORS
1
2
310
4
5
6
7
8
11
12
13
14
15
16
17
18
19
9
2
3
5
6
7
8
1
4

6
■Display window
1. Level Meters
2. Character Information Display
3. Surround Indicator
4. Extra Bass Indicator
5. FM Stereo Indicator
6. FM Stereo Mode Indicator
7. (CD/MD) Disc Indicator
8. (CD/MD)Track Indicator
9. (CD/MD/TUNER) Memory Indicator
10. (CD/MD) Repeat Indicator
11. (CD/MD) Play/Pause Indicator
12. (MD)TOC Indicator
13. (CD/MD) Random Play Indicator
14. (CD/MD)Total Indicator
15. (CD/MD) RemainingTime Indicator
16. Timer Record /Timer Play Indicator
17. CD Indicator
18. MD Indicator
19. (MD) Record Indicator
20. AM/PM Indicator
21. Sleep Indicator
8
L
R
OVER
ST
DISC TOC
SURROUND
X-BASS
TRACK
MEMORY
RANDOM
TOTAL
REMAIN
REC
PLAY
RECkHz
MHzSLEEP
AM PM
8888888 88
1
2
8
L
R
OVER
REC
PLAY
RECkHz
MHzSLEEP
AM PM
8888888 88
8
ST
DISC TOC
SURROUND
X-BASS
TRACK
MEMORY
RANDOM
TOTAL
REMAIN
3
4
5
6
7
8
9
10
11
12
13
14
15
16
17
18
19
20 21
(Continued)
■Speaker section
1. Full-Range Speaker
2. Bass Reflex Duct
3. Speaker Wire
3
1
2

7
■Remote control
1. Remote ControlTransmitter LED
2. Surround Button
3. Clock Button
4. Timer Button
5. Name/TOC Edit Button
6. Sleep Button
7. (TUNER) Preset Up/Down Buttons
8. Extra Bass Button
9. Preset Equalizer Button
10. (MD) Display Button
11. Enter Button
12. Clear Button
13. Character Select Buttons
14. (CD/MD/TUNER) Memory Button
15. (CD/MD)Time Button
16. (CD/MD) Play Mode Button
17. (CD/MD)Track Down/Review Button
18. (CD/MD)Track Up/Cue Button
19. (MD) Record Button
20. (CD/MD) Stop Button
21. (CD/MD) Play/Pause Button
22. Power Button
23. Dimmer Button
24. Function Selector Buttons
25. Volume Buttons
(Continued)
1
2
3
5
7
48
9
10
11
1312 14
15 16 17
19 21
20
24
22
23 25
18
6

8
PREPARATION FOR USE
■Antenna connection
■Speaker connection
●Unplug the AC power cord from the AC out-
let before connecting or disconnecting any
component.
Connect each speaker wire to the SPEAKER ter-
minals as shown.
Use speakers with an impedance of 4 ohms or
more, as lower impedance speakers can damage
the unit.
Notes:
●Connect the black wire to the minus (–) terminal,
and the red wire to the plus (+) terminal.
●Do not mix the right channel and left channel
wiring when connecting the speakers to the unit.
●Do not let bare speaker wires touch each other
as this may damage the amplifier and/or speak-
ers.
●The speaker grille is not removable.
123
FM antenna AM loop antenna
1
2
3
AM
FM
75 OHMS
GND
49 feet (15 m)
Ground rod
AM
FM
75 OHMS
GND
Outdoor FM
antenna
25 feet (7.5 m)
Ground wire 75 ohm
coaxial cable
Outdoor AM
antenna
Supplied FM antenna
Connect the FM antenna wire to the FM 75 OHMS
terminal and position the FM antenna wire in the
directionwhere thestrongestsignal canbereceived.
Supplied AM loop antenna
Connect the AM loop antenna wire to the AM and
GND terminals.
Position the AM loop antenna for optimum recep-
tion. Place the AM loop antenna on a shelf, etc., or
attach it to a stand or a wall with screws (not sup-
plied).
Notes:
●When static is still heard even after adjusting the
position of the AM loop antenna, try reversing the
wire connections.
●Do not place the AM loop antenna and the FM
antenna wire on the unit. It may result in noise
generation, since the unit is equipped with digital
electronics.
Place the AM loop antenna and the FM antenna
wire away from the unit for better reception.
●If the AM loop antenna and the FM antenna wire
are placed near the AC power cord, interference
may result.
Outdoor FM antenna
Use an outdoor FM antenna (75 ohm coaxial cable)
if you require better reception.Consult your dealer.
Note:
●When an outdoor FM antenna is used, discon-
nect the supplied FM antenna wire from the FM
75 OHMS terminal.
Outdoor AM antenna
Use an outdoor AM antenna if you need better re-
ception.Consult your dealer.
Note:
●When using an outdoor AM antenna, be sure to
keep the wire of the AM loop antenna connected.
Right speaker Left speaker
Red
Red
Black
Black
LEFT
RIGHT
RATESD SPEAKER
IMPEDANCE :
4 OHMS MIN.
123

9
(Continued)
■Connecting the AC power cord
Connect the AC power cord to the AC INPUT jack,
then connect the AC power cord plug to an AC out-
let.
Notes:
●Unplug the AC power cord from the AC outlet if
the unit will not be in use for a prolonged period
of time.
●Never use a power cord other than the one sup-
plied. Use of a power cord other than the one
supplied may cause an electric shock or fire.
4" (10 cm) 4" (10 cm)
8" (20 cm)
4" (10 cm)
■Demo mode■Placing the system
●Besuretokeepspace between the units forven-
tilation.
●Keep the top of this unit at least 8" (20 cm) away
from the wall, and the back at least 4" (10 cm)
away.
Note:
●Do not place the system or speakers near the
television set as the magnetic fields produced
may cause irregular colours to be displayed.
To an AC outlet
To AC INPUT
AC 120 V, 60 Hz
DEMO
ON
OFF
WhentheAC powercordisfirst connected, the unit
will enter the demonstration mode and the words
will scroll across the display continuously.
To cancel the demonstration mode:
When in the demonstration mode, set the DEMO
switch to OFF.
Then turn the power on and then enter the stand-
by mode to cancel the demonstration mode and to
enter the low power consumption mode.
Note:
●When the unit is in the low power consumption
mode, the display will disappear.
To return to the demonstration mode:
Set the DEMO switch to ON.Then turn the power
on and then enter the stand-by mode.

10
15
●2 "AA" size batteries (UM/SUM-3, R6, HP-7
or similar)
●Batteries are not included.
15
Remote
sensor
(0.2 m - 6 m)
8" - 20'
(Continued)
■Remote control ■To change the brightness of the
display
Ï
●When inserting or removing the batteries, push
them toward the battery terminal.
●Installingthebatteries incorrectly maycause the
unit to malfunction.
Precautions for battery use:
●Insert the batteries according to the direction in-
dicated in the battery compartment.
●Replace all old batteries with new ones at the
same time.
●Do not mix old and new batteries.
●Remove the batteries if they are weak or if the
unit will not be used for long periods of time.
This will prevent potential damage due to battery
leakage.
Caution:
Donotuserechargeablebatteries (nickel-cadmium
battery, etc.).
Notes concerning use:
●Replace the batteries if the operating distance is
reduced or if the operation becomes erratic.
●Periodically clean the transmitter LED on the
remote control and the sensor on the main unit
with a soft cloth.
●Exposing the sensor on the main unit to strong
light may interfere with operation. Change the
lighting or the direction of the unit.
●Keep the remote control away from moisture,
excessive heat, shock, and vibrations.
1Press the POWER button to turn the power on.
2Press the DIMMER button.
●The display will become dimmer.
To return to the original brightness:
Press the DIMMER button again.
(Remote control operation)
When bright
When dark

11
SETTINGTHE CLOCK
1Press the POWER button to turn the power on.
2Press the CLOCK button.
DISC TOC
TRACK
MEMORY
RANDOM
TOTAL
REMAIN RECkHz
MHzSLEEP
3Within 5 seconds, press the ENTER button.
DISC TOC
TRACK
MEMORY
RANDOM
TOTAL
REMAIN RECkHz
MHzSLEEP
4Press the or button to select the time
display mode.
DISC TOC
TRACK
MEMORY
RANDOM
TOTAL
REMAIN
"0:00" →The 24-hour display will appear.
→(0:00 - 23:59)
"12:00 AM" →The 12-hour display will appear.
→(AM or PM 12:00 - 11:59)
"0:00 AM" →The 12-hour display will appear.
→(AM or PM 0:00 - 11:59)
●Note that this can only be set when the unit is
first installed or it has been reset (see page 40).
5Press the ENTER button.
DISC TOC
TRACK
MEMORY
RANDOM
TOTAL
REMAIN RECkHz
MHzSLEEP
6Adjust the hour by pressing the or button.
DISC TOC
TRACK
MEMORY
RANDOM
TOTAL
REMAIN RECkHz
MHzSLEEP
●Whenthe buttonis pressed once,thetimewill
increaseby1hour.Whenthe buttonis pressed
once, the time will decrease by 1 hour.
●When the 12-hour display selected, “
AM
” will
change to “
PM
” automatically.
7Press the ENTER button.
DISC TOC
TRACK
MEMORY
RANDOM
TOTAL
REMAIN RECkHz
MHzSLEEP
8Adjust the minutes by pressing the or
button.
DISC TOC
TRACK
MEMORY
RANDOM
TOTAL
REMAIN RECkHz
MHzSLEEP
●When the button is pressed once , the time
will increase by 1 minute. When the button is
pressedonce,the time will decreaseby1 minute.
●The hour setting will not advance even if min-
utes advance from "59" to "00".
9Press the ENTER button.
DISC TOC
TRACK
MEMORY
RANDOM
TOTAL
REMAIN RECkHz
MHzSLEEP
●The clock starts operating from "0" seconds.
(Seconds are not displayed.)
To see the time display:
Press the CLOCK button.
●The time display will appear for about 5 seconds
even if stand-by mode.
Note:
●Theclockdisplaywillflashonandoffatthepush
of the CLOCK button when the AC power supply
is restored after a power failure occurs or after
the AC power cord is disconnected.
If this happens, follow the procedure below to
change the clock time.
To change the clock time:
1
Press the CLOCK button.
2
Within 5 seconds, press the ENTER button.
3
Perform steps 6 - 9 above.
To change the time display mode:
1
Reset the microcomputer (see page 40).
2
Perform steps 1 - 9 above.
In this example, the clock is set for the
24-hour (0:00) system.
4,6,8
2
1
3,5,7,9

12
SOUND CONTROL
■Volume
(Main unit operation)
WhentheVOLUMEcontrol is turnedclockwise,the
volumewillincrease.When itisturnedcounterclock-
wise, the volume will decrease.
(Remote control operation)
Press the VOLUME button to increase the
volume and theVOLUME buttontodecreasethe
volume.
■Pre-programmed equalizer
FLAT
VOCALSOFT
HEAVY
(Main unit) (Remote control)
(Remote control)
(Main unit)
X-BASS
X-BASS
SURROUND
SURROUND
(Remote control)
(Main unit)
RDS
DISC TOC
TRACK
MEMORY
RANDOM
TOTAL
REMAIN
EON TP TI PTY TA PTYI
RECkHz
MHzSLEEP
AM PM
0 1 2 29 30 MAX
.....
(Main unit) (Remote control)
REC
SLEEP
■Extra bass (X-BASS)
Press the X-BASS button to emphasize the bass
region of the frequency spectrum.
●"X-BASS ON" will appear.
Press the X-BASS button again to cancel the extra
bass mode.
●"X-BASS OFF" will appear.
■Surround
When the EQUALIZER button is pressed, the cur-
rent mode setting will be displayed.To change to a
different mode, press the EQUALIZER button
repeatedly.
FLAT: The sound is not modified.
HEAVY: Bass and treble are emphasized.
VOCAL:Vocals (midrangetones)areemphasized.
SOFT: Treble is reduced.
Press the SURROUND button to allow you to
enjoy music that seems to surround you.
●"SURROUND" will appear.
Press the SURROUND button again to cancel the
surround mode.
●"PASS" will appear.

13
COMPACT DISC OPERATION
■CD playback
DISC TOC
TRACK
MEMORY
RANDOM
TOTAL
REMAIN RECkHz
MHzSLEEP
Total number of tracks Total playing time
TOTAL
Flash
1Press the POWER button to turn the power on.
2Press the CD button.
3Press the 7CD EJECT button to open the CD
compartment.
4Place the CD on the spindle, label side up.
5Close the CD compartment by firmly pushing
the corner marked "PUSH CLOSE".
●The total number of tracks and the total playing
time will be displayed.
6
Press the 0 6 button to start playback from track 1.
●When the last track has been played back, the
unit will stop automatically.
To interrupt playback:
Press the 0 6 button.
●“6” will appear.
●Press the 0 6 button again to resume playback
from the same point.
To stop playback:
Press the ■button.
After use:
Press the POWER button to enter the stand-by
mode.
Caution:
●Do not open the CD compartment during play-
back (or while paused).
●Keepforeignobjects outoftheCDcompartment.
●Subjecting the unit to shock or vibration may
cause mistracking.
●Whentheunitisnotbeingused,besuretoclose
the CD compartment. If it is left open, the lens
may become covered with dust and the unit may
not operate properly.
●Playing certain compact discs at a high volume
may cause mistracking. In this case, listen at a
lower volume.
●If TV or radio interference occurs during CD op-
eration, move the unit away from the TV or radio.
2
1
6
6
1
2
H
H
3
4
PUSH CLOSE
5

14
MINIDISC OPERATION
1Press the POWER button to turn the power on.
2Press the MD button.
3LoadaMiniDiscinthedirectionindicatedbythe
arrowontheMiniDisc,with the labeled side fac-
ing up.
●The total number of tracks and the total playing
time on the MiniDisc will be displayed.
4Press the 0 6 button.
●If the MD has a track name, the name will ap-
pear and scroll across the display. Then, the
elapsed playing time will appear.
●If the MD has no track names, the elapsed play-
ing time will appear.
●When the last track has been played back, the
unit will stop automatically.
To interrupt playback:
Press the 0 6 button.
●" 6" will appear.
●Press the 0 6 button again to resume playback
from the same point.
To stop playback:
Press the ■button.
To remove a MiniDisc:
Press the 7MD EJECT button.
Notes:
●IfTV or radio interferenceoccurswhenusingthe
MD, move the unit away from the TV or radio.
●Although MiniDiscs will not normally skip due to
vibration, you may hear a skip in the sound if
there is continuous vibration.
If the volume is turned up too high, a skip may
occur depending on the contents of the MD.
If this happens, turn the volume down and the
skipping should stop.
●If an error message is displayed during MD
operation, see "ERROR MESSAGES" on
page 39.
■MD playback
2
1
4
7
4
H
1
2
H
3
DISC
MEMORY
RANDOM
TOTAL
REMAIN RECkHz
MHzSLEEP
Disc name
Flash
DISC TOC
TRACK
MEMORY
RANDOM
TOTAL
REMAIN RECkHz
MHzSLEEP
Total number of tracks
(Displayed only when a disc name has
been programmed)
Total playing time

15
06
2 4
5 3
5 3
2 4
06
CONVENIENT CD AND MD OPERATION
■APSS (Auto Program Search
System)
APSS automatically locates the beginning of any
track.
■Repeat and random play
1Select the desired program source, CD or MD.
2Press the P-MODE button.
●Each time this button is pressed, the mode will
change in the following order:
Repeat indicator Random indicator Disappears
3Press the 0 6 button to start playback.
Repeat play
After the last track has been played, playback will
return to the first track and begin again.
Random play
When the 0 6 button is pressed, all of the tracks
will be played at random, and then playback will
stop.(Thesame trackwill not beplayed back twice.)
To cancel repeat or random play:
Press the P-MODE button until the " R" or "RAN-
DOM" display disappears.
To repeat playback of selected tracks:
Enter the program for the tracks you want and start
repeat play.
You can program a single track and play it
repeatedly (Refer to page 16).
Notes:
●During APMS play, random play is not possible.
●When random or repeat play is selected during
CD or MD playback, random or repeat play will
start at that point.
●When using repeat play, be sure to press the ■
button after you have finished listening. Other-
wise, the disc will play continuously.
To listen again to the track being played:
Press the 5 3 button for less than 0.5 seconds
during playback.
To move to the beginning of the next track:
Press the 2 4 button for less than 0.5 seconds
during playback.
To skip a number of tracks:
Pressthe5 3 or 2 4 buttonrepeatedly until
the desired track number is shown.
To start playing at a desired track:
Press the 5 3 or 2 4 button while in the
stop mode to select the track number, and then
press the 0 6 button.
■Cue and review
1Load a disc and begin playback.
2Hold the 2 4 button down for audible fast
forward, and hold the 5 3 button down for
audible fast reverse.
3Normal playback will resume when the 2 4
or 5 3 button is released.
Notes:
●When the beginning of the first track is reached,
normal playback will start.
●Whentheendof the last trackis reached, "END"
will light, and the unit will pause.
If you want to listen to a portion of a track again,
press the 53 button to return to the point in
the track you want to listen to.
To search very quickly:
When fast forward or fast reverse is used while in
thepausemode,the playbackpoint will move more
quickly than when using audible fast forward or
audible fast reverse playback.
●In this mode, no sound is heard.Therefore, you
should refer to the time display.
●When you lift your finger, the unit will re-enter
the pause mode.
06
H
P-MODE
MD
CD
(Remote control operation)

16
■APMS (Automatic Programmable
Music Selector)
1Select the desired program source, CD or MD,
by pressing the CD or MD button.
2Press the MEMORY button.
MEMORY
MEMORY
REC
3Press the 5 3 or 2 4 button.
TRACK
MEMORY
REC
Selected track number
TRACK
4Press the ENTER button.
MEMORY
TOTAL
Playback order
TOTAL
5Repeat steps 3 and 4 for any other tracks up to
20 tracks (P-20) can be programmed.
6Press the ■button.
MEMORY
TOTAL
Total playing time
Total number of tracks
MEMORY
7Press the 0 6 button to start playback of the
programmed selections.
●After all of the programmed tracks have finished
playback, the unit will automatically stop.
(Continued)
3
CLEAR
1
2
6
7
4
(Remote control operation)
To clear the programmed selections:
Press the CLEAR button while the “MEMORY”
indicator is flashing.
●Each time the button is pressed, one track will
be cleared, beginning with the last track pro-
grammed.
To cancel the APMS:
While the unit is stopped in the APMS mode, press
the CLEAR button to turn off the “MEMORY” dis-
play.
●The program contents will be erased.
●When you open the CD compartment or a
MiniDisc is ejected, the APMS mode will be can-
celed.
To check which tracks are programmed:
While the unit is stopped in the APMS mode, press
the 5 3 or 2 4 button.
Playback order
Track number
Adding tracks to the program
If a program has been previously stored, the
“MEMORY” indicator will be displayed. Then
follow steps 2 - 6 to add additional tracks, the new
tracks will be stored after the last track of the origi-
nal program.
Notes:
●It is not possible to insert an additional track
between programmed tracks that have already
been entered.
●Programming and canceling are not possible
during playback or in the pause mode.

17
DISPLAY
DISPLAY
■Switching the time display
Each time the TIME button is pressed during play-
back or when in the pause mode, the display will
change.
TIME
(Remote control operation)
1
The elapsed playing time for current track will
be displayed.
TRACK
REC
No display
TRACK
2
The remaining playing time for the current track
will be displayed.
TRACK
REMAIN REC
REMAIN
3
The total remaining playing time for the disc
from the point being played at that time will be
displayed.
TRACK
TOTAL
REMAIN REC
TOTAL
REMAIN
Notes:
●During random play, the total remaining playing
time cannot be displayed.
●DependingonaCDor MD to be played, the play-
ing time display may not match the total playing
time which is indicated on the CD or MD jacket,
as the time between the tracks is not included.
■Changing the display during MD
playback
Each time the DISPLAY button is pressed during
playback or when in the pause mode, the display
will change as described below.
1
The track name will be displayed.
TRACK
REC
TRACK
Note:
●When the MD does not have a track name, this
display does not appear.
2
The total number of tracks and the remaining
recording time will be displayed.
TRACK
(Continued)

18
RADIO OPERATION
2,3,5
1
1
2,3,5
4
■Tuning
1Press the POWER button to turn the power on.
2Press the TUNER (BAND) button.
3Press the TUNER (BAND) button to select the
desired frequency band. (FM ST, FM or AM)
4Press theTUNING (Xor W) button to tune into
the desired station.
Manual tuning:
Press theTUNING (Xor W) button as many times
as required to adjust the frequency shown on the
display to the frequency of the desired station.
Auto tuning:
When the TUNING (Xor W) button is pressed for
more than 0.5 seconds, scanning will start auto-
matically and the tuner will stop at the first receiv-
able broadcast station.
Notes:
●Whenradiointerference occurs during auto scan
tuning, auto scan tuning may stop automatically
at that point.
●Ifaweakstation signal is foundduring auto scan
tuning, the station will be skipped.
●To stop the auto tuning, press the TUNING (X
or W) button again.
5Toreceivean FM stereo transmission,pressthe
TUNER (BAND) button so that the "ST" indica-
tor on the display lights up.
●"j" will appear when an FM broadcast is in
stereo.
●If the FM reception is weak, press the TUNER
(BAND) button so that the "ST" indicator goes
out.
●The reception changes to monaural, the sound
becomes clearer.
After use:
Press the POWER button to enter the stand-by
mode.
Notes:
●The last station tuned in will be recalled, even
after changing the tuning band or the function,
or after switching the unit to the stand-by mode.
●If the unit's tuner interferes with the reception of
a nearby TV or radio, move the unit as far away
from these items as possible.

19
(Continued)
2,4
2,4 3
3
■Preset tuning
You can store up to 40 stations in memory (40 sta-
tions consisting of any combination of AM and FM
stations you like) and recall them.
To enter stations into memory:
1Perform steps 1 - 5 in the "Tuning" section.
2Press the MEMORY button.
MEMORY
MEMORY
3Within 5 seconds, press the PRESET (Xor W)
buttonto make the preset channel numberflash
in the display.
MEMORY
●Store the stations in memory, in order, starting
with preset channel 1.
When isdisplayed,astationhasalreadybeen
stored in this preset number memory.
4Within 5 seconds, press the MEMORY button
to store that station in the selected station pre-
set number memory.
MEMORY
MEMORY
●If the "MEMORY" and preset number indicators
go out before the station is memorized, repeat
the operation from step 2.
5Repeat steps 1 - 4 to set other preset stations,
or to change a preset station.
●When a new station is stored in the selected sta-
tion preset number memory, the contents previ-
ously memorized will be erased.
1To scan the preset stations, press the PRESET
(Xor W) button for more than 0.5 seconds.
●The station preset number will flash and the pro-
grammed stations will be tuned in sequentially,
for 5 seconds each.
2Press the PRESET (Xor W) button again to
stop the memory scan at the desired station.
Note:
When the preset memory does not have any sta-
tions stored in it, the preset memory scan will not
function.
To erase all memorized stations:
When the unit is in the stand-by mode, hold and
presstheTUNERandTUNING Xbuttons,and then
press the POWER button.
●"PRESET CLR" will appear.
To erase the memorized station:
1Recallthememorizedstationto erase bypress-
ing the PRESET button.
2Press the CLEAR button.
●"MEMORY" and preset number will flash.
3Within 5 seconds, press the MEMORY button.
4Repeatsteps1-3toerase other memorizedsta-
tions.
To recall a memorized station:
Press the PRESET (Xor W) button for less than
0.5 seconds to select the desired station.
●"MEMORY" will appear.
●The stations (preset channel number, frequency
and frequency band) which have been stored in
memory will appear in the display in numerical
order, irrespective of the frequency bands.
Backup function:
The backup function protects all station presets for
a few hours should there be a power failure or the
AC power cord is removed from the AC outlet.
■Preset memory scan
The stations saved in the preset memory can be
scanned automatically.
PRESET
(X W)
PRESET
(X W)
Table of contents
Other Sharp Stereo System manuals

Sharp
Sharp CD-E600H User manual

Sharp
Sharp CD-BA250H User manual

Sharp
Sharp DK-KP82P User manual

Sharp
Sharp GBOXS0072AWM1 User manual

Sharp
Sharp XL-DV60 User manual

Sharp
Sharp XL-60H User manual

Sharp
Sharp XL-LS703B User manual

Sharp
Sharp CD-XP300 - Compact Stereo System User manual

Sharp
Sharp SD-EX220H User manual

Sharp
Sharp CD-MPX100E User manual

Sharp
Sharp CD-C430H User manual

Sharp
Sharp CD-BH20 User manual

Sharp
Sharp CD-XP250E User manual

Sharp
Sharp CD-BA150 User manual

Sharp
Sharp XL-1100H User manual

Sharp
Sharp XL-UH242 User manual

Sharp
Sharp XL-55H User manual

Sharp
Sharp System-CD555H User manual

Sharp
Sharp CD-BA250H User manual

Sharp
Sharp CD-BA120 User manual