Sharp XL-DV50H User manual

03/8/20 XL-DV50H(A)_FRONT.fm TINSEA027SJZZ
Thank you for purchasing this SHARP product.
To obtain the best performance from this product, please read this
manual carefully. It will guide you in operating your SHARP product.
DVD MICRO SYSTEM
XL-DV50H DVD Micro System consisting of XL-DV50H (main unit), CP-
DV50HF (front speakers) and CP-DV50HSW (subwoofer).
XL-DV50H(A) TINSEA027SJZZ 1
MODEL
OPERATION MANUAL
XL-DV50H
Downloaded from www.Manualslib.com manuals search engine
Downloaded From Disc-Player.com Sharp Manuals

2
04/3/19 XL-DV50H(A).fm TINSEA027SJZZ
XL-DV50H
Important Instruction
Special notes
WARNINGS
!When the ON/STAND-BY button is set at STAND-BY position,
mains voltage is still present inside the unit. When the ON/
STAND-BY button is set at STAND-BY position, the unit may be
brought into operation by the timer mode or remote control.
!This unit contains no user serviceable parts. Never remove cov-
ers unless qualified to do so. This unit contains dangerous volt-
ages, always remove mains plug from the socket before any
service operation and when not in use for a long period.
!To prevent fire or shock hazard, do not expose this appliance to
dripping or splashing. No objects filled with liquids, such as
vases, shall be placed on the apparatus.
CAUTION
!This product is classified as a CLASS 1 LASER product.
!Use of controls, adjustments or performance of procedures other
than those specified herein may result in hazardous radiation
exposure.
As the laser beam used in this unit is harmful to the eyes, do not
attempt to disassemble the cabinet. Refer servicing to qualified
personnel only.
Laser Diode Properties
Material: AIGaAs/AIGaInP
Wavelength: 785 nm/650 nm
Emission Duration: continuous
Laser Output: max. 0.6 mW
Downloaded from www.Manualslib.com manuals search engine
Downloaded From Disc-Player.com Sharp Manuals

3
8
7
6
5
4
3
2
1
9
10
04/3/19 XL-DV50H(A).fm TINSEA027SJZZ
XL-DV50H
General Information
Copy Protection:
This unit supports Macrovision copy protection.
On DVD discs that include a copy protection code, if the contents of
the DVD disc are copied using a VCR, the copy protection code pre-
vents the videotape copy from playing normally.
Accessories
Please confirm that the following accessories are included.
Note:
Only the above accessories are included.
"DTS" and "DTS Digital Out" are trademarks of Digital Theater Sys-
tems, Inc.
Manufactured under license from Dolby Laboratories. "Dolby" and
the double-D symbol are trademarks of Dolby Laboratories.
Copyright Information:
!Unauthorised copying, broadcast, public display, transmission,
public performance and rental (regardless of whether or not
such activities are for profit) of disc contents are prohibited by
law.
!This system is equipped with copy protection technology that
causes substantial degradation of images when the contents of
a disc are copied to a videotape.
Apparatus Claims of U.S. Patent Nos. 4,631,603, 4,577,216,
4,819,098, and 4,907,093, licensed for limited viewing uses only.
This product incorporates copyright protection technology that is
protected by method claims of certain U.S. patents and other intel-
lectualpropertyrightsowned byMacrovisionCorporationand other
rights owners.
Use of this copyright protection technology must be authorised by
Macrovision Corporation, and is intended for home and other limit-
ed viewing uses only unless otherwise authorised by Macrovision
Corporation.
Reverse engineering or disassembly is prohibited.
Remote control 1 AM loop aerial 1
FM aerial 1 Video cable 1
AC power lead 1 "AA" size battery (UM/SUM-3,
R6, HP-7 or similar) 2
Downloaded from www.Manualslib.com manuals search engine
Downloaded From Disc-Player.com Sharp Manuals

4
04/3/19 XL-DV50H(A).fm TINSEA027SJZZ
XL-DV50H
General Information
Contents
Page
"General Information
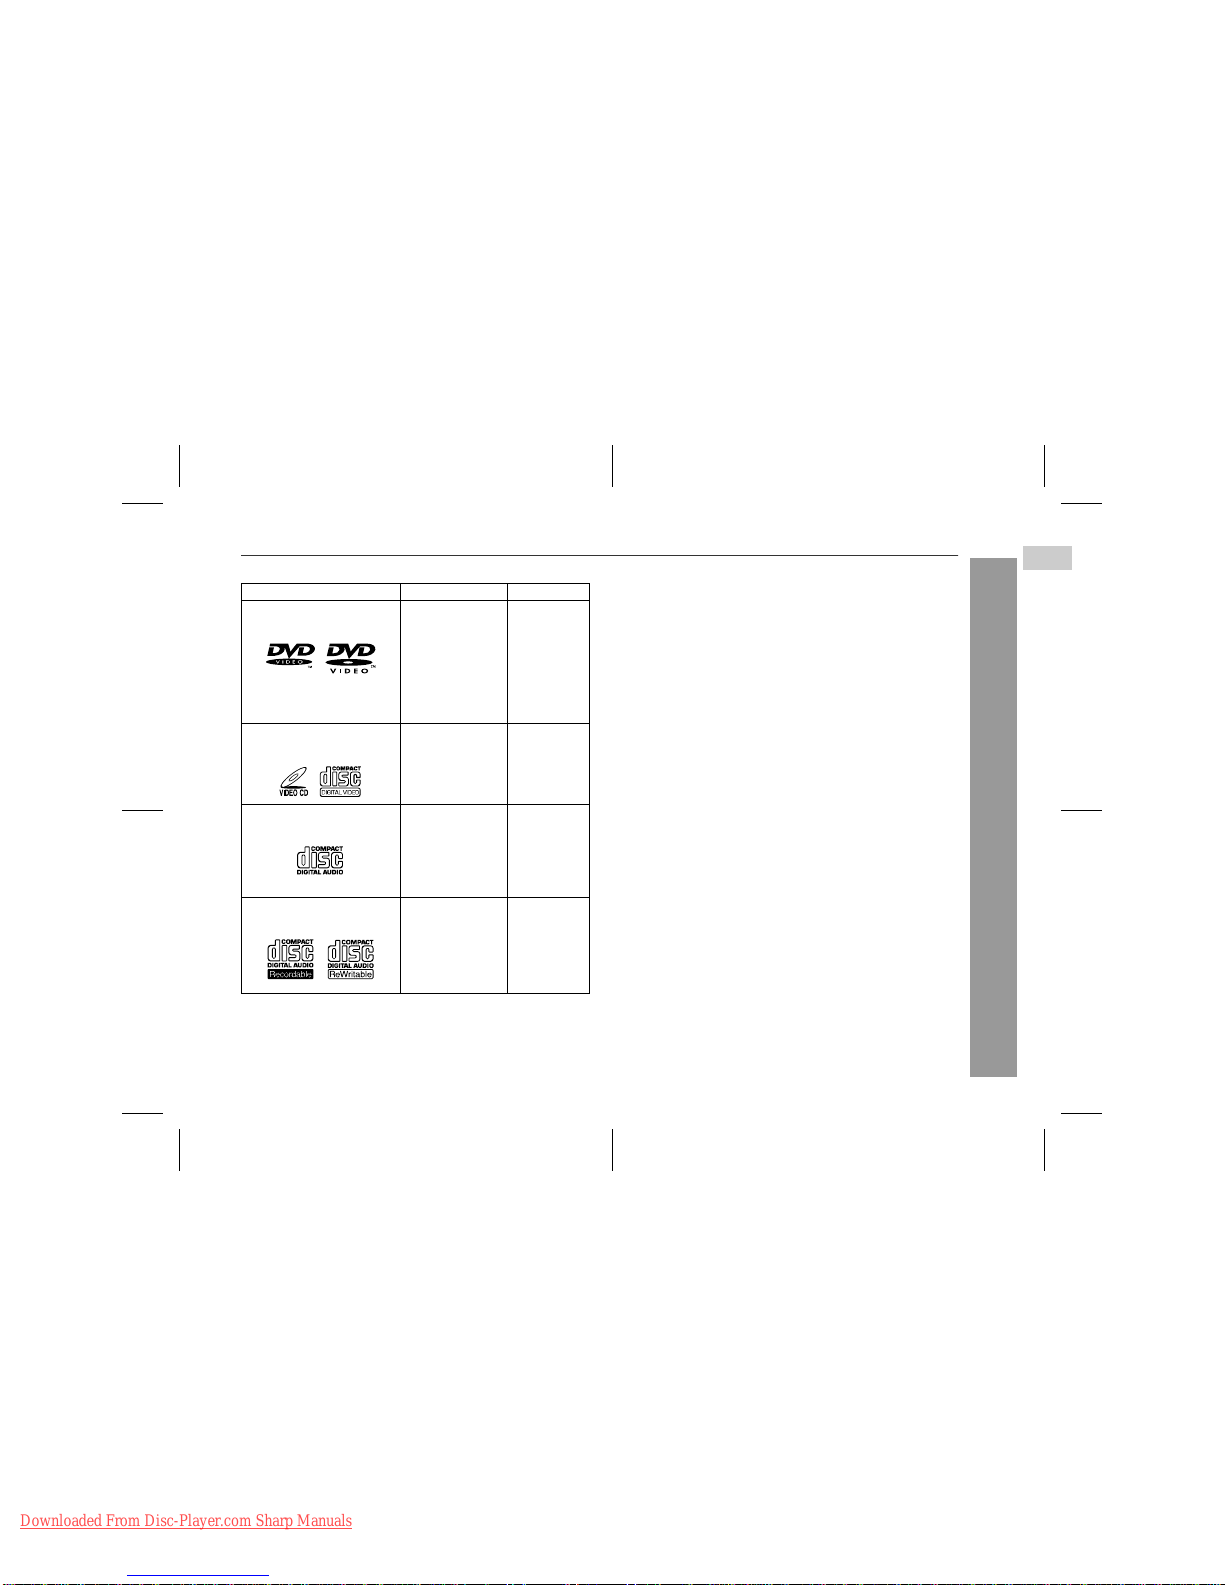
Types of playable discs . . . . . . . . . . . . . . . . . . . . . . . . . . . . . . . . 5
Description of discs . . . . . . . . . . . . . . . . . . . . . . . . . . . . . . . . . 6, 7
Precautions . . . . . . . . . . . . . . . . . . . . . . . . . . . . . . . . . . . . . . . . . . 8
Controls and indicators . . . . . . . . . . . . . . . . . . . . . . . . . . . . 9 - 11
"Preparation for Use
System connections . . . . . . . . . . . . . . . . . . . . . . . . . . . . . 12 - 16
Remote control . . . . . . . . . . . . . . . . . . . . . . . . . . . . . . . . . . . . . . 17
General control . . . . . . . . . . . . . . . . . . . . . . . . . . . . . . . . . . . . . . 18
Setting the clock . . . . . . . . . . . . . . . . . . . . . . . . . . . . . . . . . . . . . 19
"DVD Operation
Playing a disc . . . . . . . . . . . . . . . . . . . . . . . . . . . . . . . . . . . 20 - 22
Basic operation
To locate the beginning of a chapter/track (skip) . . . . . . . . . . 23
Fast forward/Fast reverse (search) . . . . . . . . . . . . . . . . . . . . . . 23
To start playback from the desired point (direct play) . . . 24, 25
Still picture/Frame advance . . . . . . . . . . . . . . . . . . . . . . . . . . . . 25
Slow-motion play . . . . . . . . . . . . . . . . . . . . . . . . . . . . . . . . . . . . 25
Useful features
To play repeatedly (repeat play) . . . . . . . . . . . . . . . . . . . . . 26, 27
To play the contents between the specified points
repeatedly (A-B repeat) . . . . . . . . . . . . . . . . . . . . . . . . . . . . . . . 27
Various settings
To change the audio language (audio output) . . . . . . . . . . . . . 28
To change the subtitle language . . . . . . . . . . . . . . . . . . . . . . . . 29
To change the angle . . . . . . . . . . . . . . . . . . . . . . . . . . . . . . . . . . 29
To select a title, subtitle or audio language, etc.
from the top menu or menu of the disc . . . . . . . . . . . . . . . . . . 29
To zoom in on an image (zoom) . . . . . . . . . . . . . . . . . . . . . . . . 30
To brighten an image . . . . . . . . . . . . . . . . . . . . . . . . . . . . . . . . . 31
To improve the image quality . . . . . . . . . . . . . . . . . . . . . . . . . . 31
To change the display on TV screen . . . . . . . . . . . . . . . . . . . . 32
"Video CD Operation
Playing a video CD
To play a video CD with P. B. C. (playback control) . . . . . . . . 33
Page
"Audio CD Operation
Playing an audio CD
To play in random order (random play) . . . . . . . . . . . . . . . . . . 34
To start playback from the desired point (direct play) . . . . . . 34
To play in the desired order (programmed playback) . . . . . . . 35
"MP3 and JPEG Disc Operation
Playing an MP3 and JPEG disc . . . . . . . . . . . . . . . . . . . . . . 36, 37
"Radio
Listening to the radio . . . . . . . . . . . . . . . . . . . . . . . . . . . . . . 38, 39
Using the Radio Data System (RDS) . . . . . . . . . . . . . . . . 40 - 43
"Advanced Features
Changing the initial setting of DVD . . . . . . . . . . . . . . . . . 44 - 49
Timer and sleep operation . . . . . . . . . . . . . . . . . . . . . . . . 50 - 52
Enhancing your system . . . . . . . . . . . . . . . . . . . . . . . . . . . . . . . 53
"References
Troubleshooting chart . . . . . . . . . . . . . . . . . . . . . . . . . . . . . 54, 55
Error indicators and warnings . . . . . . . . . . . . . . . . . . . . . . . . . 55
Maintenance . . . . . . . . . . . . . . . . . . . . . . . . . . . . . . . . . . . . . . . . 56
Specifications . . . . . . . . . . . . . . . . . . . . . . . . . . . . . . . . . . . . 56, 57
WARRANTY . . . . . . . . . . . . . . . . . . . . . . . . . . .End of the manual
About "Using the Radio Data System (RDS)":
The RDS function does not work in Australia and New Zealand.
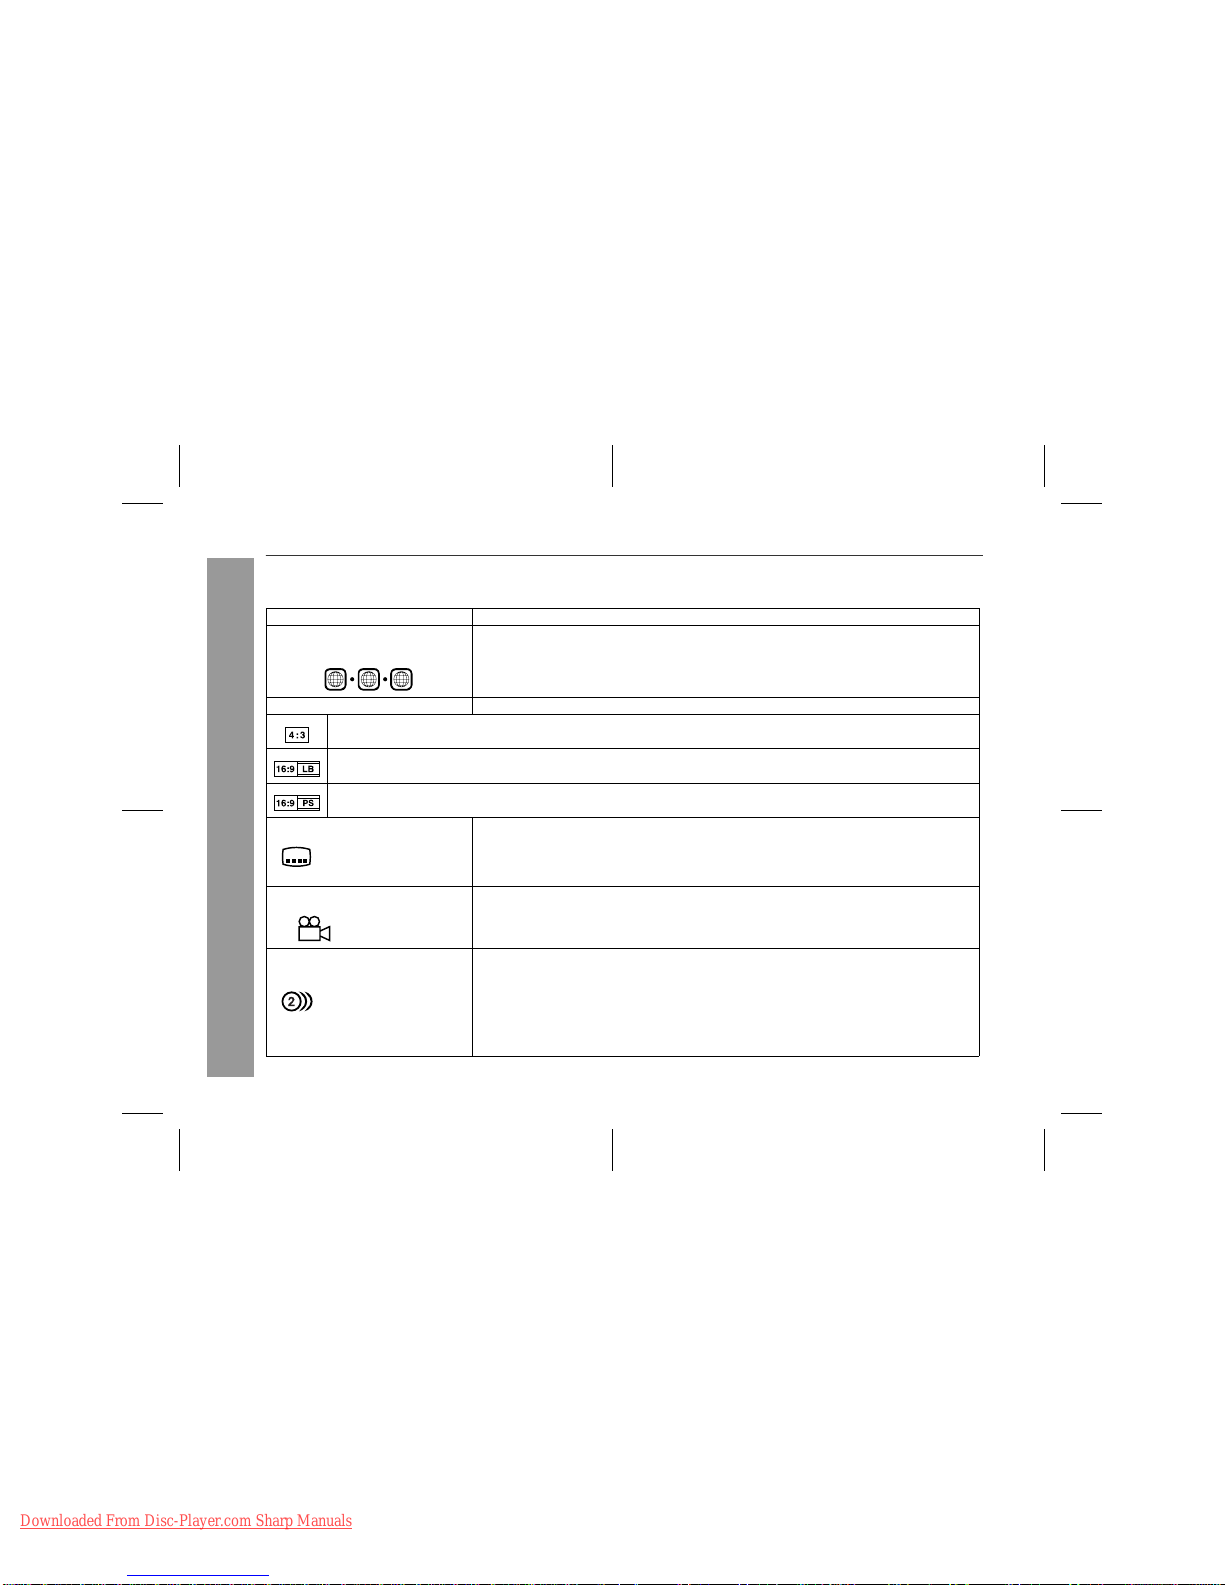
Icons used in this operation manual
Some functions may not be available depending on discs. The fol-
lowing icons indicate the discs that can be used in the section.
... Indicates DVDs.
... Indicates video CDs.
... Indicates audio CDs.
... Indicates CD-R/RW with MP3 recording.
... Indicates CD-R/RW with JPEG recording.
!Some operations may not be performed depending on discs
even if they are described in this manual.
!During operation, " " may be displayed on the screen. This
means that the operations described in this manual are prohib-
ited by the disc.
Downloaded from www.Manualslib.com manuals search engine
Downloaded From Disc-Player.com Sharp Manuals

5
8
7
6
5
4
3
2
1
9
10
04/3/19 XL-DV50H(A).fm TINSEA027SJZZ
XL-DV50H
General Information
Types of playable discs
The unit can play back discs bearing any of the following marks:
!For unplayable discs, see page 7.
Disc type Disc contents Disc size
DVD Video Disc Audio and video
(movies) 12 cm (5")
8 cm (3")
Or DVD-R/DVD-RW/DVD+R/
DVD+RW recorded in video
mode (*1)
Video CD Audio and video
(movies) 12 cm (5")
8 cm (3")
Audio CD Audio 12 cm (5")
8 cm (3")
Or CDV (*2)
CD-R/CD-RW (*3) Audio and picture 12 cm (5")
8 cm (3")
CD-R/CD-RW re-
corded in MP3 for-
mat (*4), JPEG
format (*5)
(*1): Discsincluding DVD-R/DVD-RW/DVD+R/DVD+RWmay notbe
played back due to properties and scratches on the disc, dirty
optical pickup lens, etc.
(*2): Only the audio on the CDV can be played.
(*3): The CD-R/CD-RW may not be played back properly depending
on the recording equipment or the disc.
(*4): If the sampling frequency is 44.1 or 48.1 kHz and the fixed bit
rate is 128 kbps or higher, MPEG 1 Audio Layer 3 (MP3) files
can be played. However, some of them may not be played de-
pending on their conditions or formats.
(*5): JPEG or JPG picture discs also play on this unit. However, pic-
tures may not be clear (depends on resolution and recording
method).
Downloaded from www.Manualslib.com manuals search engine
Downloaded From Disc-Player.com Sharp Manuals

6
04/3/19 XL-DV50H(A).fm TINSEA027SJZZ
XL-DV50H
General Information
Description of discs
"Icons used on DVD discs
Check the icons on the DVD case before playing your discs.
Display Description
Region number (playable area num-
ber) DVD discs are programmed with region numbers indicating countries in which they can be played.
This system can play discs with region number "4" or "ALL".
Format recorded on the DVD To adopt the video format to the connected TVs ("wide-screen TV" or "4:3 size TV").
Recorded in 4:3.
You can enjoy wide images on a wide-screen TV, and letterbox size images on the 4:3 size TV.
You can enjoy wide images on a wide-screen TV and 4:3 images with the side edges cut on the 4:3 size TV.
Type of subtitles recorded Recorded subtitle languages.
Example: Language can be selected with the SUB TITLE/SURROUND button.
1: English
2: French
Number of camera angles Number of angles recorded on the DVD.
Angles can be selected with the ANGLE button.
Number of audio tracks and audio
recording systems The number of audio tracks and audio recording systems are indicated.
Example: !The audio recorded on the DVD can be switched by using the ZOOM/AUDIO button.
1: Original <English> (Dol-
by Digital 5.1 Surround) !The number of audio tracks and recording systems vary depending on the DVD. Check them in
the DVD's manual.
2: English (Dolby Digital 2
Surround)
446
1
ALL
2
2
Downloaded from www.Manualslib.com manuals search engine
Downloaded From Disc-Player.com Sharp Manuals

7
8
7
6
5
4
3
2
1
9
10
04/3/19 XL-DV50H(A).fm TINSEA027SJZZ
XL-DV50H
General Information
"Discs that cannot be played
!The discs above cannot be played at all, or no sound is heard
although images appear on the screen or vice versa.
!Faulty playback may damage the speakers and can have an
adverse effect on your hearing when played at high volume set-
tings.
!You cannot play illegally produced discs.
Notes:
!A disc with scratches or fingerprints may not play properly. Refer
to "Care of discs (page 56)" and clean the disc.
!Do not play the discs of special shapes (heart or octagon
shaped) as they can be ejected whilst rotating and cause injury.
"Title, chapter and track
DVDs are divided into "titles" and "chapters". If the disc has more
than one movie on it, each movie is a separate "title". "Chapters" are
subdivisions of titles.
Video CD and audio CD are composed of "tracks". Tracks are equiv-
alent to songs on a CD.
Note:
Title, chapter, or track numbers may not be recorded on some discs.
MP3, JPEG discs consist of "folders" and "tracks".
!DVDs without the region num-
ber "4" or "ALL". !DVD-Audio
!CDG
!Photo CD
!DVDs with SECAM system !CD-ROM
!DVDs with MPEG sound !SACD
!DVD-ROM !Discs recorded in special for-
mats, etc.
!DVD-RAM
Chapter 1
Title 1 Title 2
Chapter 2 Chapter 3 Chapter 1 Chapter 2
Track 1 Track 2 Track 3 Track 4
MP3
disc JPEG
disc
Track 1
Folder 1
Track 2 Track 1
Folder 2
Track 2Track 3
XL-DV50H(A) TINSEA027SJZZ 2
Downloaded from www.Manualslib.com manuals search engine
Downloaded From Disc-Player.com Sharp Manuals

8
04/3/19 XL-DV50H(A).fm TINSEA027SJZZ
XL-DV50H
General Information
Precautions
"General
!Please ensure that the equipment is positioned in a well venti-
lated area and ensure that there is at least 10 cm (4") of free
space along the sides, top and back of the equipment.
!Do not place anything on top of the unit.
!Do not expose the unit to moisture, to temperatures higher than
60°C (140°F) or to extremely low temperatures.
!If your system does not work properly, disconnect the AC power
lead from the wall socket. Plug the AC power lead back in, and
then turn on your system.
!The ventilation should not be impeded by covering the ventilation
openings with items, such as newspapers, tablecloths, curtains,
etc.
!No naked flame sources, such as lighted candles, should be
placed on the apparatus.
!Attention should be drawn to the environmental aspects of bat-
tery disposal.
!This unit should only be used within the range of 5°C - 35°C
(41°F - 95°F).
Warning:
The voltage used must be the same as that specified on this unit.
Using this product with a higher voltage other than that which is
specified is dangerous and may result in a fire or other type of acci-
dent causing damage. SHARP will not be held responsible for any
damage resulting from use of this unit with a voltage other than that
which is specified.
"Volume control
The sound level at a given volume setting depends on speaker effi-
ciency, location, and various other factors. It is advisable to avoid
exposure to high volume levels. Do not turn the volume on to full at
switch on and listen to music at moderate levels.
!Use the unit on a firm, level surface free from
vibration.
!Keep the unit away from direct sunlight,
strong magnetic fields, excessive dust,
humidity and electronic/electrical equip-
ment (home computers, facsimiles, etc.)
which generate electrical noise.
!In case of an electrical storm, unplug the
unit for safety.
!Hold the AC power plug by the head when
removing it from the wall socket, as pulling
the lead can damage internal wires.
10 cm (4")
10 cm (4") 10 cm (4") 10 cm (4")
!Do not remove the outer cover, as this
may result in electric shock. Refer inter-
nal service to your local SHARP service
facility.
Downloaded from www.Manualslib.com manuals search engine
Downloaded From Disc-Player.com Sharp Manuals

9
8
7
6
5
4
3
2
1
9
10
04/3/19 XL-DV50H(A).fm TINSEA027SJZZ
XL-DV50H
General Information
Controls and indicators
!Front panel Reference page
1.Equaliser Mode Select Button . . . . . . . . . . . . . . . . . . . . . . 18
2.Extra Bass/Demo Mode Button . . . . . . . . . . . . . . . . . . 16, 18
3.Timer Indicator . . . . . . . . . . . . . . . . . . . . . . . . . . . . . . . . . . . 51
4.On/Stand-by Button . . . . . . . . . . . . . . . . . . . . . . . . . . . . . . . 16
5.DVD/CD Button . . . . . . . . . . . . . . . . . . . . . . . . . . . . . . . . . . . 20
6.Tuner (Band) Button . . . . . . . . . . . . . . . . . . . . . . . . . . . . . . 38
7.Video/Auxiliary Button . . . . . . . . . . . . . . . . . . . . . . . . . . . . . 53
8.Disc Compartment . . . . . . . . . . . . . . . . . . . . . . . . . . . . . . . . 20
9.Headphone Socket . . . . . . . . . . . . . . . . . . . . . . . . . . . . . . . . 53
10.Remote Sensor . . . . . . . . . . . . . . . . . . . . . . . . . . . . . . . . . . . 17
11.Stop or Tuning Down Button . . . . . . . . . . . . . . . . . . . . . 21, 38
12. Play or Tuning Up Button . . . . . . . . . . . . . . . . . . . . . . . 21, 38
13. Chapter (Track) Skip Down or Fast Reverse,
Tuner Preset Down Button . . . . . . . . . . . . . . . . . . . . . . 23, 39
14.Chapter (Track) Skip Up or Fast Forward,
Tuner Preset Up Button . . . . . . . . . . . . . . . . . . . . . . . . . 23, 39
15.Memory/Set Button . . . . . . . . . . . . . . . . . . . . . . . . . . . . . . . 19
16.Disc Compartment Open/Close Button . . . . . . . . . . . . . . . 20
17. Disc Number Select Buttons . . . . . . . . . . . . . . . . . . . . . . . . 21
18.Volume Control . . . . . . . . . . . . . . . . . . . . . . . . . . . . . . . . . . . 18
!Display Reference page
1.Disc Number Indicators . . . . . . . . . . . . . . . . . . . . . . . . . . . . 21
2.Play Indicator . . . . . . . . . . . . . . . . . . . . . . . . . . . . . . . . . . . . 21
3.Pause Indicator . . . . . . . . . . . . . . . . . . . . . . . . . . . . . . . . . . 21
4.Repeat Play Indicators . . . . . . . . . . . . . . . . . . . . . . . . . . . . . 26
5.Disc Type Indicators . . . . . . . . . . . . . . . . . . . . . . . . . . . . . . 21
6.Extra Bass Indicator . . . . . . . . . . . . . . . . . . . . . . . . . . . . . . 18
7.Traffic Programme Indicator . . . . . . . . . . . . . . . . . . . . . . . . 40
8.RDS Indicator . . . . . . . . . . . . . . . . . . . . . . . . . . . . . . . . . . . . 42
9.Traffic Announcement Indicator . . . . . . . . . . . . . . . . . . . . . 40
10.Sound Mode Indicators . . . . . . . . . . . . . . . . . . . . . . . . . . . . 21
11.Memory Indicator . . . . . . . . . . . . . . . . . . . . . . . . . . . . . . 35, 39
12.Angle Indicator . . . . . . . . . . . . . . . . . . . . . . . . . . . . . . . . . . . 29
13.Surround Mode Indicator . . . . . . . . . . . . . . . . . . . . . . . . . . 18
14.Sleep Indicator . . . . . . . . . . . . . . . . . . . . . . . . . . . . . . . . . . . 52
15. FM Stereo Mode Indicator . . . . . . . . . . . . . . . . . . . . . . . . . . 38
16.FM Stereo Receiving Indicator . . . . . . . . . . . . . . . . . . . . . . 38
17.Timer Play Indicator . . . . . . . . . . . . . . . . . . . . . . . . . . . . . . . 51
About "Using the Radio Data System (RDS)":
The RDS function does not work in Australia and New Zealand.
10
18
11
12
13
14
15
16
17
321 4 5687 9 10
1715 1611 12 1413
4
8
9
1
2
3
5
6
7
Downloaded from www.Manualslib.com manuals search engine
Downloaded From Disc-Player.com Sharp Manuals

10
04/3/19 XL-DV50H(A).fm TINSEA027SJZZ
XL-DV50H
General Information
Controls and indicators (continued)
"Rear panel Reference page
1.AC Power Input Socket . . . . . . . . . . . . . . . . . . . . . . . . . . . . 16
2.Speaker Terminals . . . . . . . . . . . . . . . . . . . . . . . . . . . . . . . . 13
3.SCART Output Socket . . . . . . . . . . . . . . . . . . . . . . . . . . . . . 15
4.Cooling Fan . . . . . . . . . . . . . . . . . . . . . . . . . . . . . . . . . . . . . . 16
5.FM 75 Ohms Aerial Socket . . . . . . . . . . . . . . . . . . . . . . . . . 13
6.AM Loop Aerial Socket . . . . . . . . . . . . . . . . . . . . . . . . . . . . 13
7.Video/Auxiliary (Audio Signal) Input Sockets . . . . . . . . . . 53
8.Video Output Socket . . . . . . . . . . . . . . . . . . . . . . . . . . . . . . 14
9.S-video Output Socket . . . . . . . . . . . . . . . . . . . . . . . . . . . . . 15
10.Optical Digital Audio Output Socket . . . . . . . . . . . . . . . . . . 53
"Front speaker
1.Tweeter
2.Woofer
3.Bass Reflex Duct
4.Speaker Wire
"Subwoofer
1.Sub Duct Pipe
2.Subwoofer
3.Speaker Wire
1
3
6
7
4
8
5
9
10
3
3
4
2
1
2
1
2
Downloaded from www.Manualslib.com manuals search engine
Downloaded From Disc-Player.com Sharp Manuals

11
8
7
6
5
4
3
2
1
9
10
04/3/19 XL-DV50H(A).fm TINSEA027SJZZ
XL-DV50H
General Information
!Remote control Reference page
1.Remote Control Transmitter . . . . . . . . . . . . . . . . . . . . . . . . 17
2.DVD Setup Button . . . . . . . . . . . . . . . . . . . . . . . . . . . . . . . . 44
3.On/Stand-by Button . . . . . . . . . . . . . . . . . . . . . . . . . . . . . . . 17
4.RDS Display Mode Select Button . . . . . . . . . . . . . . . . . . . . 40
5.
RDS Programme Type/Traffic Information Search Button . . . 40
6.RDS ASPM (Auto Station Programme Memory) Button . . 42
7.Direct Number Buttons . . . . . . . . . . . . . . . . . . . . . . . . . . . . 24
8.Chapter (Track) Skip Down or Fast Reverse,
Tuner Preset Down, Time Down Button . . . . . . . . . 19, 23, 39
9.Cursor Buttons . . . . . . . . . . . . . . . . . . . . . . . . . . . . . . . . 21, 44
10.Zoom or Audio Select Button . . . . . . . . . . . . . . . . . 28, 30, 37
11.Repeat Play Button . . . . . . . . . . . . . . . . . . . . . . . . . . . . . . . 26
12.Frame Advance or Pause Button . . . . . . . . . . . . . . . . . 21, 25
13.A - B Repeat Button . . . . . . . . . . . . . . . . . . . . . . . . . . . . . . . 27
14.Memory/Set Button . . . . . . . . . . . . . . . . . . . . . . . . . 19, 35, 39
15. Top Menu or Return Button . . . . . . . . . . . . . . . . . . . . . . 29, 44
16.Subtitle or Surround Mode Select Button . . . . . . . . . . 18, 29
17.Shift Button . . . . . . . . . . . . . . . . . . . . . . . . . . . . . . . . . . . . . 18
18.Extra Bass or Digital Picture Select Button . . . . . . . . 18, 31
19.DVD/CD Button . . . . . . . . . . . . . . . . . . . . . . . . . . . . . . . . . . . 20
20.Equaliser Mode Select or Digital Gamma Button . . . . 18, 31
21.Tuner (Band) Button . . . . . . . . . . . . . . . . . . . . . . . . . . . . . . 38
22.Menu or On Screen Display Select Button . . . . . . . . . 29, 32
23. Disc Number Select Buttons . . . . . . . . . . . . . . . . . . . . . . . . 21
24.Direct Button . . . . . . . . . . . . . . . . . . . . . . . . . . . . . . . . . . . . 25
25.Chapter (Track) Skip Up or Fast Forward,
Tuner Preset Up, Time Up Button . . . . . . . . . . . . . . 19, 23, 39
26.Enter Button . . . . . . . . . . . . . . . . . . . . . . . . . . . . . . . . . . 21, 44
27.Angle or NTSC/PAL Select Button . . . . . . . . . . . . . . . . 14, 29
28.Play Button . . . . . . . . . . . . . . . . . . . . . . . . . . . . . . . . . . . . . . 21
29.Stop Button . . . . . . . . . . . . . . . . . . . . . . . . . . . . . . . . . . . . . 21
30.Random Button . . . . . . . . . . . . . . . . . . . . . . . . . . . . . . . . . . 34
31.Clear Button . . . . . . . . . . . . . . . . . . . . . . . . . . . . . . . . . . . . . 35
32.Timer/Sleep Button . . . . . . . . . . . . . . . . . . . . . . . . . . . . 50, 52
33.Clock Button . . . . . . . . . . . . . . . . . . . . . . . . . . . . . . . . . . . . . 19
34.Video/Auxiliary Button . . . . . . . . . . . . . . . . . . . . . . . . . . . . . 53
35. Volume or Subwoofer Level Up and Down Buttons . . . . . 18
About "Using the Radio Data System (RDS)":
The RDS function does not work in Australia and New Zealand.
1
2
29
28
30
31
32
33
35
34
27
26
25
24
23
22
8
9
10
11
12
13
14
15
16
17
18
19
20
21
3
7
4
5
6
Downloaded from www.Manualslib.com manuals search engine
Downloaded From Disc-Player.com Sharp Manuals

12
04/3/19 XL-DV50H(A).fm TINSEA027SJZZ
XL-DV50H
Preparation for Use
System connections
Front speaker (left)Front speaker (right)Subwoofer
Wall socket
(AC 230 - 240V, 50 Hz)
Speaker connection (see page 13)
FM aerial
Make sure to unplug the AC power lead before any connections.
Aerial connection (see page 13)
TV connection
(see pages 14 - 15)
Connecting the AC power lead (see page 16)
AM loop aerial
TV
Downloaded from www.Manualslib.com manuals search engine
Downloaded From Disc-Player.com Sharp Manuals

13
8
7
6
5
4
3
2
1
9
10
04/3/19 XL-DV50H(A).fm TINSEA027SJZZ
XL-DV50H
Preparation for Use
!Aerial connection
Note:
Placing the aerial on the stereo system or near the AC power lead
may cause noise pickup. Place the aerial away from the stereo sys-
tem for better reception.
Installing the AM loop aerial:
External FM aerial:
Use an external FM aerial if you require better reception. Consult
your dealer.
!Speaker connection
Insert the front speaker plugs (black) into the FRONT terminals.
Insert the subwoofer plug (red) into the SUBWOOFER terminal.
Caution:
!Front speaker grills are removable
Supplied FM aerial:
Connect the FM aerial wire to the FM 75 OHMS
socket and position the FM aerial wire in the di-
rection where the strongest signal can be re-
ceived.
Supplied AM loop aerial:
Connect the AM loop aerial to the AM LOOP
socket. Position the AM loop aerial for optimum
reception. Place the AM loop aerial on a shelf,
etc., or attach it to a stand or a wall with screws
(not supplied).
< Assembling > < Attaching to the wall >
Wall Screws (not supplied)
External FM aerial
"The supplied speakers are exclusively for XL-DV50H. Do not
connect them to other equipment, and do not connect other
speakers to XL-DV50H. It may cause malfunction.
"Use speakers with an impedance of 6 ohms or more, as lower im-
pedance speakers can damage the unit.
"Do not mistake the right and the left channels. The right speaker
is the one on the right side when you face the unit.
"Do not allow any objects to fall into or to be placed in the bass re-
flex ducts.
"Do not stand or sit on the speakers. You may be injured.
Make sure nothing comes into contact with the
speaker diaphragm when you remove the
speaker grilles.
Speaker or subwoofer plug in with the rising
side facing to the right.
Black
Red
Front speaker
(right)
Subwoofer Front speaker
(left)
Downloaded from www.Manualslib.com manuals search engine
Downloaded From Disc-Player.com Sharp Manuals

14
04/3/19 XL-DV50H(A).fm TINSEA027SJZZ
XL-DV50H
Preparation for Use
System connections (continued)
!Placing the speaker system
Notes:
"Place the TV halfway between the front speakers.
"The bass sound from the subwoofer is omni-directional, however,
it is recommended to place it as close as left and right speakers.
"The subwoofer vibrates whilst reproducing bass. Place it on a
stable sturdy surface.
"Keep the free space of at least 10 cm (4") along the right side of
the subwoofer.
!Magnetically shielded speakers
The speakers are magnetically shielded.
Therefore, they do not affect the display even you use them near the
TV. However, some colour variation may occur, depending on the
type of TV used.
If colour variation occurs...
Turn off the TV (from the power switch).
After 15 - 30 minutes, turn the TV on again.
If the colour variation is still present...
Move the speakers further away from the TV.
If any kind of magnet or an electromagnet is placed too close to the
TV and the system, irregular colours may appear on the TV screen.
!TV connection
Three types of sockets (VIDEO OUT, S-VIDEO OUT and SCART
OUT) are available for connection of a TV and this unit. Connect
according to your TV.
Connecting to a TV with a video input socket:
You can enjoy DVD images by connecting your TV and this unit with
the supplied video cable.
Front speaker
(left) Subwoofer
Same distance
Front speaker
(right)
Same distance
Set the video output mode to "S-Video" (default setting). For the
procedure, refer to "Changing the initial setting of DVD" on pages
44, 46.
Change the input mode on the TV accordingly.
Press the SHIFT button and ANGLE/NTSC/PAL button on the re-
mote control.
Each time these buttons are pressed, the mode will change in the
following order:
TV
To video
input socket
Video signal
Video cable (supplied)
NTSC
PAL
Select this mode for the NTSC TV.
Select this mode for the PAL TV.
Downloaded from www.Manualslib.com manuals search engine
Downloaded From Disc-Player.com Sharp Manuals

15
8
7
6
5
4
3
2
1
9
10
04/3/19 XL-DV50H(A).fm TINSEA027SJZZ
XL-DV50H
Preparation for Use
Connecting to a TV with an S-video input socket:
If your TV is equipped with an S-video input socket, you can enjoy
higher quality images by connecting it with an S-video cable (not
supplied).
Note:
When the video and S-video cables are both connected, the images
from the S-video input socket appears on your TV.
Connecting to a TV with SCART socket:
If your TV is equipped only with a SCART input socket (without
video), connect a SCART cable (not supplied) to enjoy images.
Set the video output mode to "S-Video" (default setting). For the
procedure, refer to "Changing the initial setting of DVD" on pages
44, 46.
TV
To S-video
input socket
Video signal
S-video cable
(commercially available)
Set the video output mode to "SCART". For the procedure, refer
to "Changing the initial setting of DVD" on pages 44, 46.
Notes:
"Change the TV input in accordance with the connected socket.
"Do not connect other equipment (VCR, etc.) between the TV
and this unit. Pictures may be distorted.
"Refer to the operation manual of the equipment to be connect-
ed.
"Insert the plugs fully to avoid fuzzy pictures or noise.
TV
To SCART input
socket
Video signal
SCART cable (commercially available)
XL-DV50H(A) TINSEA027SJZZ 3
Downloaded from www.Manualslib.com manuals search engine
Downloaded From Disc-Player.com Sharp Manuals

16
04/3/19 XL-DV50H(A).fm TINSEA027SJZZ
XL-DV50H
Preparation for Use
System connections (continued)
!Connecting the AC power lead
After checking all the connections have been made correctly, con-
nect the AC power lead to the AC power input socket, then plug the
AC power lead of this unit into the wall socket. If you plug in the unit
first, the unit will enter the demonstration mode.
Notes:
"Never use a power lead other than the one supplied. Otherwise, a
malfunction or an accident may occur.
"Unplug the AC power lead from the wall socket if the unit will not
be in use for a prolonged period of time.
!Demonstration mode
!To turn the power on
Cooling fan:
A cooling fan is built into this unit for better heat radiation. Do not
cover the opening in this section with any obstacles to avoid dam-
age to the unit.
Wall socket
(AC 230 - 240V, 50 Hz)
The first time the unit is plugged in, the
unit will enter the demonstration mode.
You will see words scroll.
To cancel the demonstration
mode:
When the unit is in the power stand-
by mode (demonstration mode),
press the X-BASS/DEMO button.
The unit will enter the low power
consumption mode.
To return to the demonstration mode:
When the unit is in the power stand-by mode, press the X-BASS/
DEMO button again.
Note:
When the power is on, the X-BASS/DEMO button can be used to se-
lect the extra bass mode.
Press the ON/STAND-BY but-
ton to turn the power on.
After use:
Press the ON/STAND-BY button to enter the power stand-by
mode.
Downloaded from www.Manualslib.com manuals search engine
Downloaded From Disc-Player.com Sharp Manuals

17
8
7
6
5
4
3
2
1
9
10
04/3/19 XL-DV50H(A).fm TINSEA027SJZZ
XL-DV50H
Preparation for Use
Remote control
!Battery installation
Precautions for battery use:
"Replace all old batteries with new ones at the same time.
"Do not mix old and new batteries.
"Remove the batteries if the unit is not to be used for long periods
of time. This will prevent potential damage due to battery leak-
age.
Caution:
"Do not use rechargeable batteries (nickel-cadmium battery, etc.).
"Installing the batteries incorrectly may cause the unit to malfunc-
tion.
Notes concerning use:
"Replace the batteries if the operating distance is reduced or if the
operation becomes erratic. Purchase 2 "AA" size batteries (UM/
SUM-3, R6, HP-7 or similar).
"Periodically clean the transmitter on the remote control and the
sensor on the unit with a soft cloth.
"Exposing the sensor on the unit to strong light may interfere with
operation. Change the lighting or the direction of the unit if this
occurs.
"Keep the remote control away from moisture, heat, shock, and
vibrations.
!Test of the remote control
Check the remote control after checking all the connections (see
pages 12 - 16).
Point the remote control directly at the remote sensor on the unit.
The remote control can be used within the range shown below:
Press the ON/STAND-BY button. Does the power turn on? Now, you
can enjoy music.
1 Remove the battery cover.
2 Insert the supplied batteries according to the direction indi-
cated in the battery compartment.
When inserting or removing the batteries, push them towards the
battery terminals.
3 Replace the cover.
0.2 m - 6 m
(8" - 20')
Remote sensor
Downloaded from www.Manualslib.com manuals search engine
Downloaded From Disc-Player.com Sharp Manuals

18
04/3/19 XL-DV50H(A).fm TINSEA027SJZZ
XL-DV50H
Preparation for Use
General control
!Volume control
!Subwoofer volume control
!Bass control (X-BASS)
!Equaliser
When the EQUALIZER (EQ-MODE) button is pressed, the current
mode setting will be displayed. To change to a different mode, press
the EQUALIZER (EQ-MODE) button repeatedly until the desired
sound mode appears.
!Surround
Note:
When the input source is "TUNER" or "AUX", the surround mode is
not available.
Main unit operation:
When the VOLUME control is turned
clockwise, the volume will increase.
When it is turned anti-clockwise, the
volume will decrease.
Remote control operation:
Press the VOLUME (+ or -) button to increase or decrease the volume.
Press the SHIFT button on the re-
mote control, and adjust the volume.
30 (MAXIMUM)
290 .....
30 (MAXIMUM)
290 .....
When the power is first turned on,
the unit will enter the extra bass
mode which emphasises the bass
frequencies, and "X-BASS" will ap-
pear. To cancel the extra bass
mode, press the X-BASS/DEMO (X-
BASS) button.
To enter the surround mode, press
the SHIFT button and SUB TITLE/
SURROUND button on the remote
control.Repeatthisoperationtoexit.
ROCK
FLAT
CLASSIC
The sound is not modified.
Bass and treble are emphasised.
POPS Bass and treble are slightly emphasised.
JAZZ Treble is slightly emphasised.
Treble is cut a little.
VOCAL Vocals (midrange tones) are emphasised.
Downloaded from www.Manualslib.com manuals search engine
Downloaded From Disc-Player.com Sharp Manuals

19
8
7
6
5
4
3
2
1
9
10
04/3/19 XL-DV50H(A).fm TINSEA027SJZZ
XL-DV50H
Preparation for Use
Setting the clock
In this example, the clock is set for the 24-hour (0:00) display. To confirm the time display:
Note:
The "CLOCK" or time will flash at the push of the CLOCK button
when the AC power supply is restored after a power failure or
unplugging the unit.
Readjust the clock as follows.
To readjust the clock:
Perform "Setting the clock" from step 1. If the "CLOCK" is not flash-
ing in step 1, step 2 (for selecting the 24-hour or 12-hour display) will
be skipped.
To change the 24-hour or 12-hour display:
1Press the CLOCK button and within 8 seconds, press the
MEMORY/SET button.
2Within 30 seconds, press the PRESET ( or ) button to
select 24-hour or 12-hour display and then press the MEM-
ORY/SET button.
"0:00" The 24-hour display will appear.
(0:00 - 23:59)
"AM 12:00" The 12-hour display will appear.
(AM 12:00 - PM 11:59)
3Within 30 seconds, press the PRESET ( or ) button to
adjust the hour and then press the MEMORY/SET button.
Press the PRESET ( or ) button once to advance the time
by 1 hour. Hold it down to advance continuously.
4Within 30 seconds, press the PRESET ( or ) button to
adjust the minutes and then press the MEMORY/SET but-
ton.
Press the PRESET ( or ) button once to advance the time
by 1 minute. Hold it down to advance continuously.
Press the CLOCK button.
The time display will appear for
about 8 seconds.
1 Clear all the programmed contents. [Refer to "Clearing all the
memory (reset)" on page 55 for details.]
2 Perform "Setting the clock" from step 1.
Downloaded from www.Manualslib.com manuals search engine
Downloaded From Disc-Player.com Sharp Manuals

20
04/3/19 XL-DV50H(A).fm TINSEA027SJZZ
XL-DV50H
DVD Operation
Playing a disc
Turn on the TV, and switch the input to the "VIDEO 1" or "VIDEO 2",
etc. accordingly.
1Press the ON/STAND-BY button to turn the power on.
2Press the DVD/CD button.
3Press the OPEN/CLOSE button
to open the disc compartment.
All trays open in tiers.
4Place the disc on the disc tray 1, label side up.
Be sure to place 8 cm (3") discs in the middle of the disc trays.
5To place discs in the trays 2 - 5
1. Slide in the tray with a disc to-
ward the unit.
2. Place a disc in an empty tray.
12 cm (5") 8 cm (3")
Downloaded from www.Manualslib.com manuals search engine
Downloaded From Disc-Player.com Sharp Manuals
Other manuals for XL-DV50H
2
Table of contents
Other Sharp Stereo System manuals

Sharp
Sharp XL-60H User manual

Sharp
Sharp XL-G5000DVD User manual

Sharp
Sharp CD-XP350W User manual

Sharp
Sharp CD-MPX860H User manual

Sharp
Sharp CD-BA250H User manual

Sharp
Sharp GF-575H User manual

Sharp
Sharp QT-CD180H User manual

Sharp
Sharp QT-CD180W User manual

Sharp
Sharp QT-CD180 User manual

Sharp
Sharp CMS-55H(GY) User manual

Sharp
Sharp CD-MPS660E User manual

Sharp
Sharp CD-C662 User manual

Sharp
Sharp XL-3500H User manual

Sharp
Sharp CD-BA1700H User manual

Sharp
Sharp MD-E9000H User manual

Sharp
Sharp QT-CD161H User manual

Sharp
Sharp SD-NX10 User manual

Sharp
Sharp CD-BK300W User manual

Sharp
Sharp XL-UH220H User manual

Sharp
Sharp CD-BA160H User manual