– 9 –
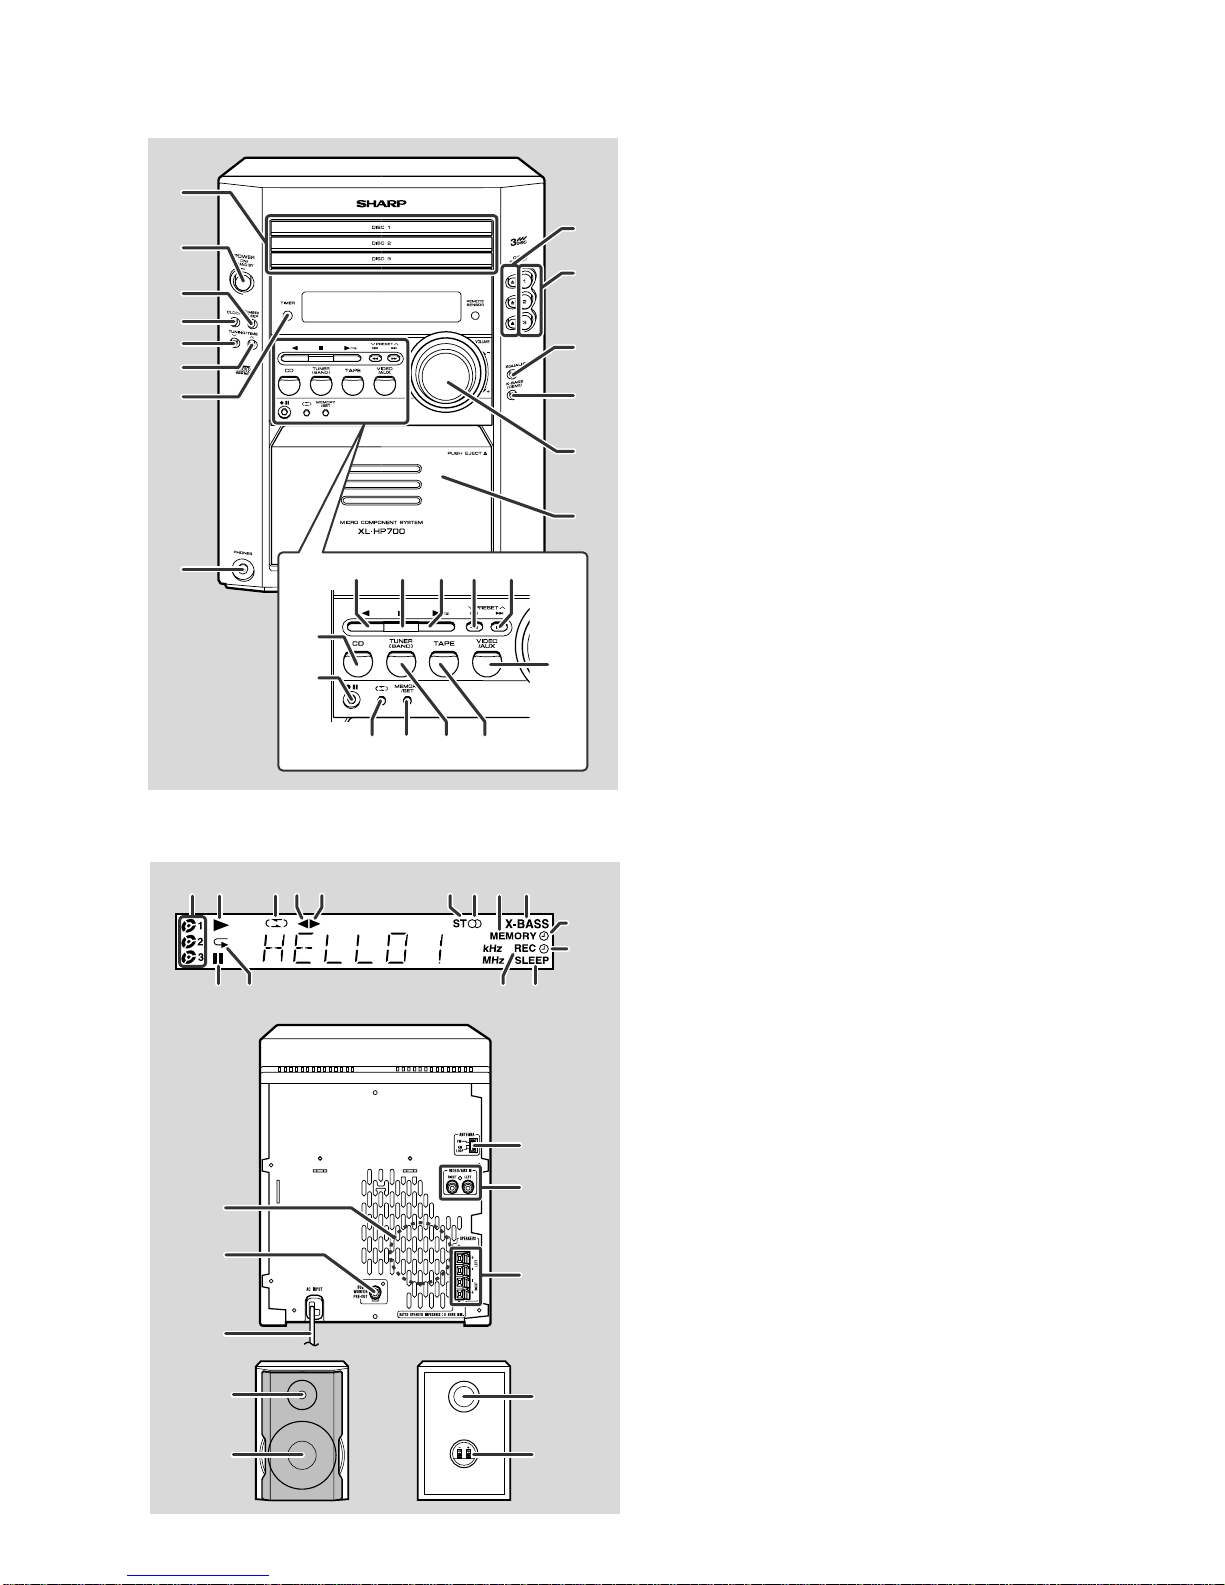
XL-HP700
CD ERROR CODE DESCRIPTION
Error Explanation
01 When Pickup set inner position, inner switch
cannot detect 'ON' level for 10 secs.
10* CAM error. Can't detect CAM switch when CAM is
moving.
11* When it detect CAM operation error during initialize
process.
20* TRAY error. Can't detect TRAY switch when TRAY is
moving.
21* When it detect TRAY operation error during initialize
process.
22* When it detect invalid TRAY switch during normal
operation.
23* When it detect invalid TRAY switch during initialize
procecss.
31 When it change to CD function, DSP cannot read
initial data.
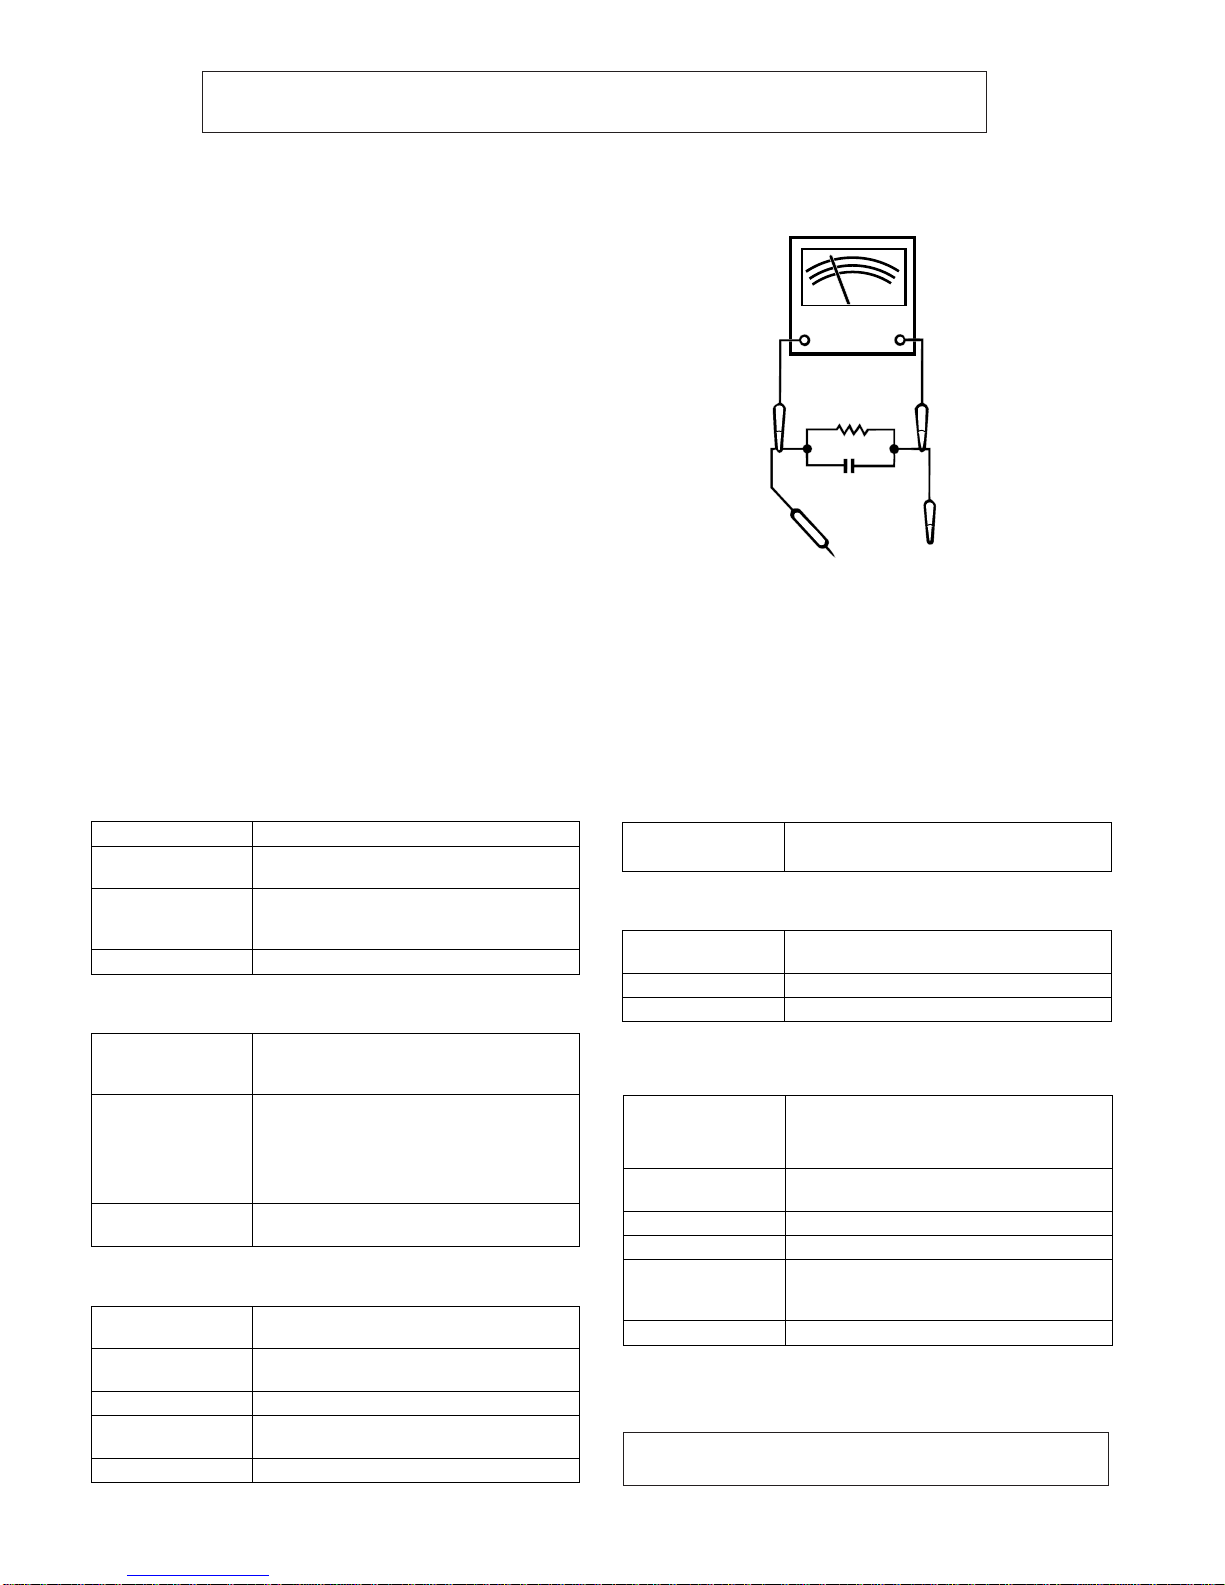
Test Stage Frequency Frequency
Display Setting/
Adjusting
Parts
Instrument
Connection CD SECTION
••
••
•
AM IF/RF
Signal generator: 400 Hz, 30%, AM modulated
*1. Input: Antenna Output: TP302
*2. Input: Antenna Output: TP301
TUNER SECTION
fL: Low-range frequency
fH: High-range frequency
AM IF 450 kHz 1,602 kHz T351 *1
AM Band — 531 kHz (fL): T306 *2
Coverage 1.1 ±0.1 V
AM Tracking 990 kHz 990 kHz (fL): T303 *1
Figure 9-2 ADJUSTMENT POINTS
Items adjusted automatically
(1)Offset adjustment (The offset voltage between the head
amplifier output and the VREF reference voltage is
compensated inside the IC.)
* Focus offset adjustment
* Tracking offset adjustment
(2) Tracking balance adjustment
(3)Gainadjustment(ThegainiscompensatedinsidetheIC
sothattheloopgainat the gain crossover frequency will
be 0 dB.)
* Focus gain adjustment
* Tracking gain adjustment
•Adjustment
Since this CD system incorporates the following automatic
adjustment functions, readjustment is not needed when
replacingthepickup.Therefore,different PWBsandpickups
can be combined freely.
Each time a disc is changed, these adjustments are
performed automatically. Therefore, playback of each disc
can be performed under optimum conditions.
R357
FM/AM
LOOP
ANTENNA
IC302
T351
IC303
T303
T306
T301
T302
L312
CNP302
IC301
MAIN PWB-A1
TP302
TP301
AM TRACKING fL
AM BAND
COVERAGE fL
AM IF
FM IF
FM RF
FM OSC
* 'CHECKING'
If Error is detected, 'CHECKING' will be displayed instead of
'ER-CD**'.'ER-CD**'displaywillonlybedisplayedwhenerror
had been detected for the 5th times.
ADJUSTMENT
MECHANISM SECTION
••
••
•Driving Force Check
Torque Meter Specified Value
Play: TW-2111 Over 80 g
•Torque Check
Torque Meter
Play: TW-2111 30 to 80 g.cm
Fast forward: TW-2231 70 to 180 g.cm
Rewind: TW-2231 70 to 180 g.cm
Specified Value
Specified
Value
Adjusting
Point Instrument
Connection
Test Tape
Normal MTT-111 Variable 3,000 ±30 Hz Speaker
speed Resistor in Terminal
motor. (Load
resistance:
6 ohms)
••
••
•Tape Speed
Figure 9-1
TAPE MECHANISM
Tape
Motor
Variable Resistor in motor
*1. Input: Antenna Output: TP301
*2. Input: Antenna Output: Speaker terminal
••
••
•FM RF
Signal generator: 1 kHz, 40 kHz dev., FM modulated
FM Band — 87.50 MHz T301 (fL): *1
Coverage 1.3 V ±0.1 V
FM RF 98.00 MHz 98.00 MHz L312 *2
(10-30 dB)
Test Stage Instrument
Connection
Frequency Frequency
Display Setting/
Adjusting
Point
••
••
•FM IF
Signal generator: 10.7 MHz, FM modulated
IF 10.7 MHz 98 MHz T302 *1
(Turn the
core of trans-
former T302
fully counter-
clock wise)
Test Stage Instrument
Connection
Frequency Frequency
Display Setting/
Adjusting
Point
*1. Input: Antenna Output: TP301


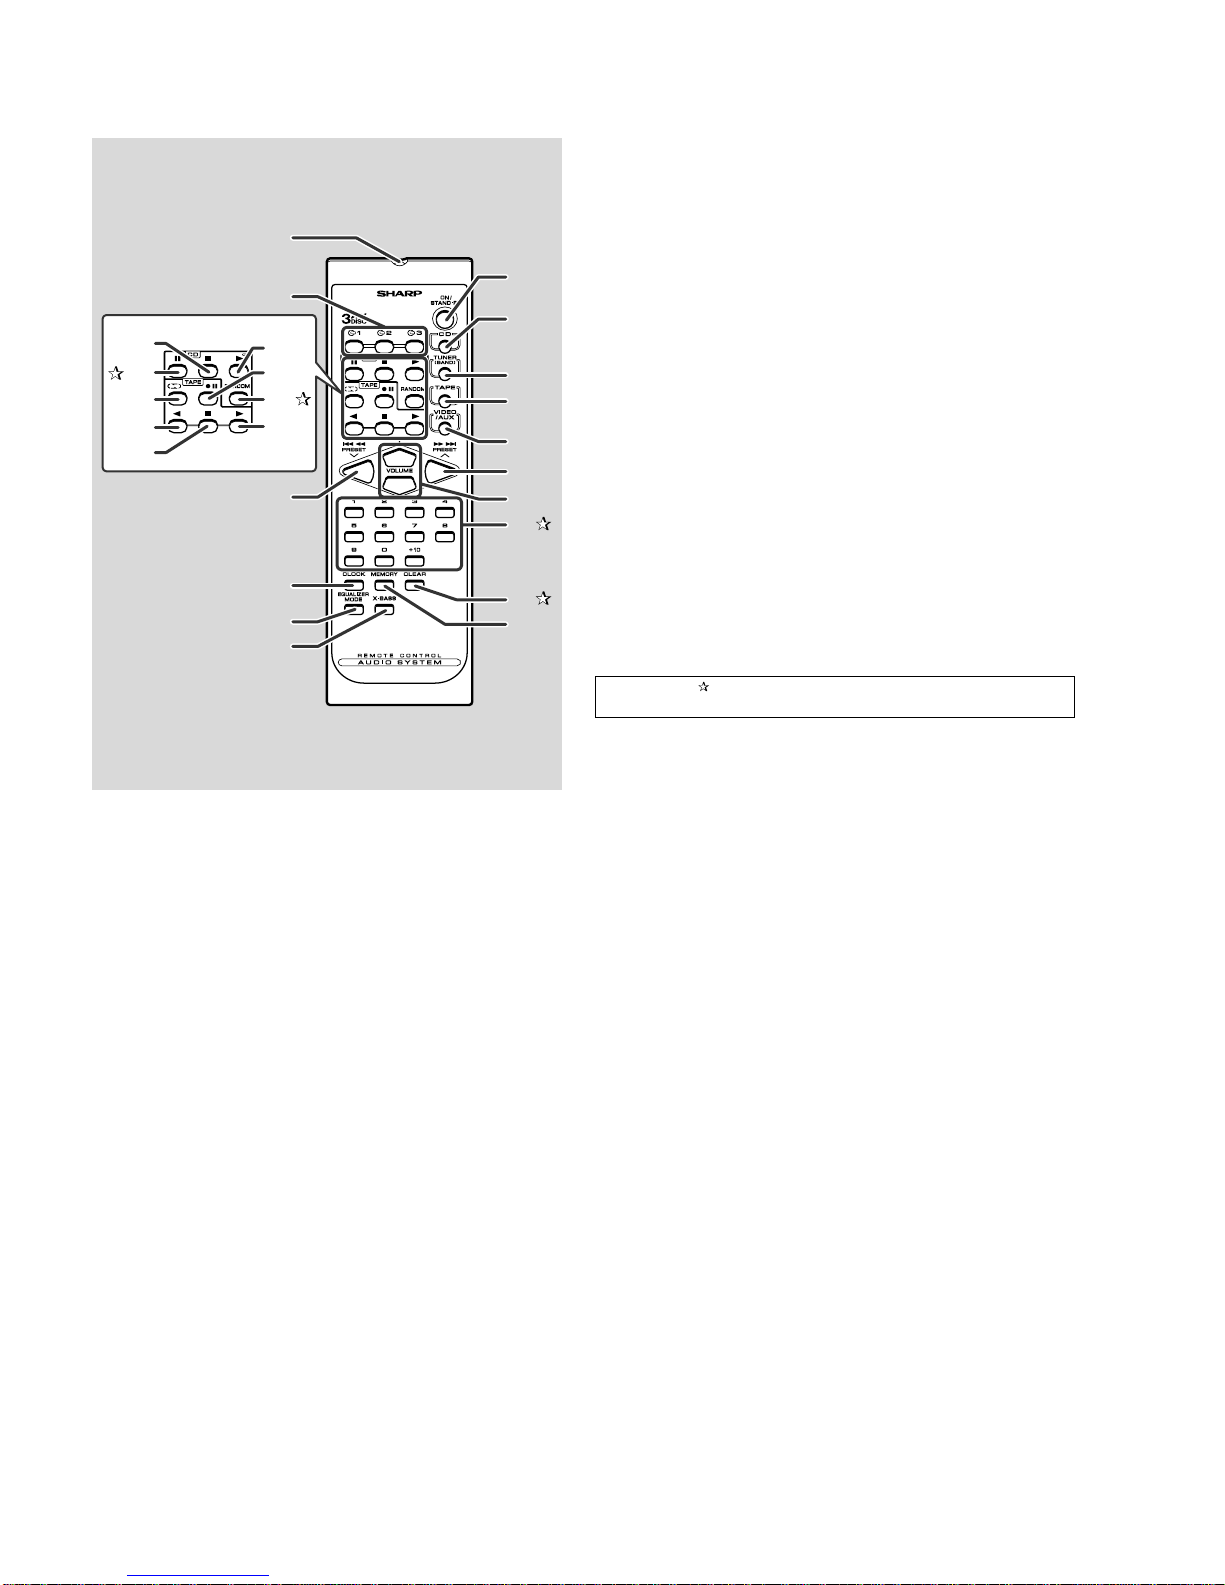
 User manual")