MADE IN MALAYSIA
TINS-C657WJZZ
06P09-MSF
Damage
Turn off the power and unplug
the power cord from the wall
outlet immediately if the TV set begins to make
any unusual noises or gives off smoke or an
unusual smell. Then call your dealer for service.
Unstable surface
and shocks
Do not place this TV set on an
unstable cart, stand, shelf, or table. The TV set
may fall, causing serious injury to a child or
adult, and serious damage to the set. Sharp
recommends securing the TV set to a stable
surface or wall to prevent the set from falling
due to sudden shocks or impact.
Moisture
To prevent electrical shock, do
not use the TV set in an
excessively damp place.
Liquid entry
Do not place a flower vase
or anything else containing liquid
on the TV set, as liquid spilt on the TV set can
cause electrical shock or failure.
TV Set position
Do place the TV set onto an even
stand, table or rack which size is
bigger than the TV set.
If the TV set is put onto a smaller
size or uneven stand, table or rack may cause
the TV cabinet to distort.
Do not put or insert anything between TV set
and the stand, table or rack.
Ventilation
Do not place this TV set in a
confined area, such as on a
bookshelf or in a built-in case. Leave adequate
space behind the TV for proper ventilation.
Servicing
To reduce the risk of electric
shock, do not remove the back
of the cabinet. This TV set
contains dangerous voltage.
Power-cord
protection
To prevent electrical shock, do
not subject the AC power cord to damage by
bending or twisting it, or by placing heavy items
on top of it and do not place the AC power cord
under the TV set. If the AC power cord becomes
damaged, unplug it from the wall outlet
immediately and call your dealer for service.
Water
To prevent fire or electrical
shock, do not place the TV set
near a bathroom, swimming pool or other area
where it may become wet.
Object entry
Never insert or drop any metallic
or inflammable objects into the
ventilation openings of the TV set, as this can
cause fire, electrical shock, or electrical failure.
Uneven surface and
excessive force
Television equipment and cart
combination should be moved with care. Quick
stops, excessive force, and uneven surfaces
may cause the equipment and cart combination
to overturn.
Fire prevention
To prevent fire, never place any
type of candle or naked flames on
the top or near the TV set.
OPERATION MANUAL
COLOUR TELEVISION
21K-FH1RU
Please read this operation manual
carefully before using the colour
television.
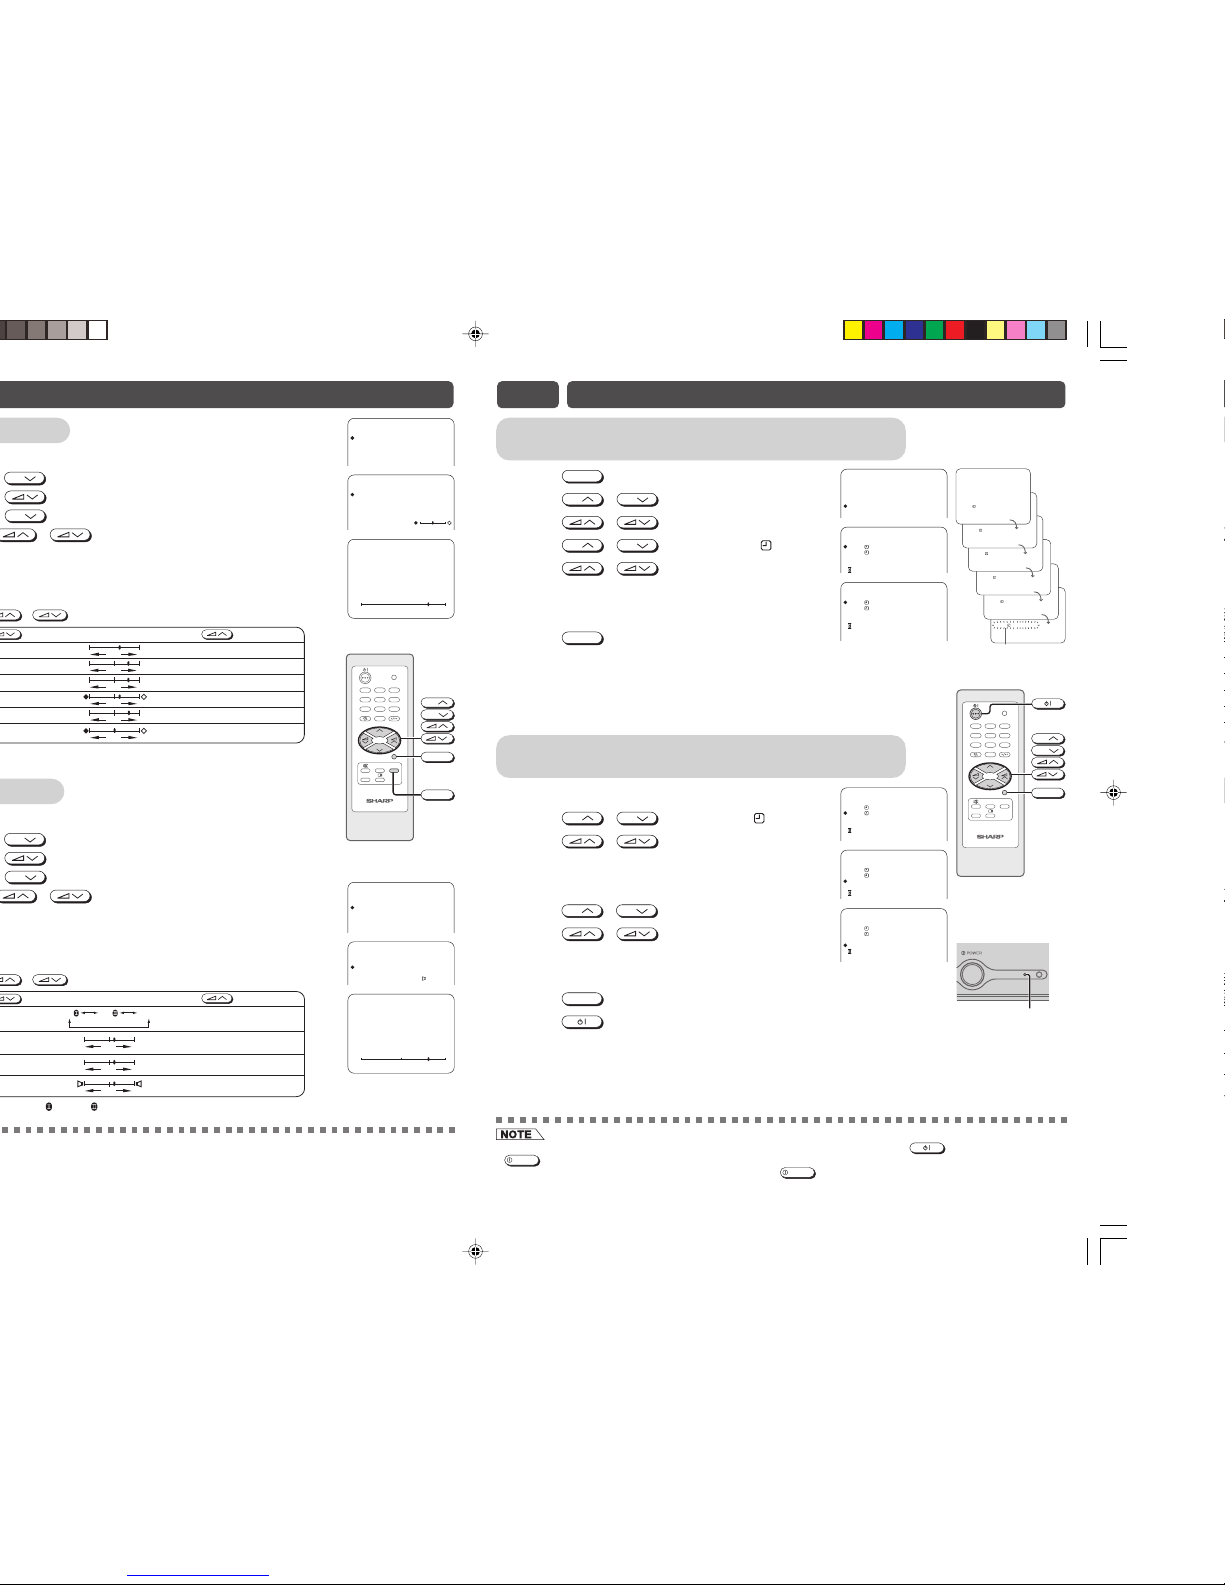
E6 [ BASIC OPERATION ]
• Turn on the power
• On-screen display
language selection
• Channel selection
• Adjusting volume
E7 [ PRESETTING
CHANNELS ]
• Auto channel tuning
• Manual channel tuning
E8 [ SETTING AND
ADJUSTMENT ]
• Channel setting
• Picture adjustment
• Sound adjustment
E9 [ TIMER SETTING ]
• Off timer
• On timer
• Reminder on-screen
timer
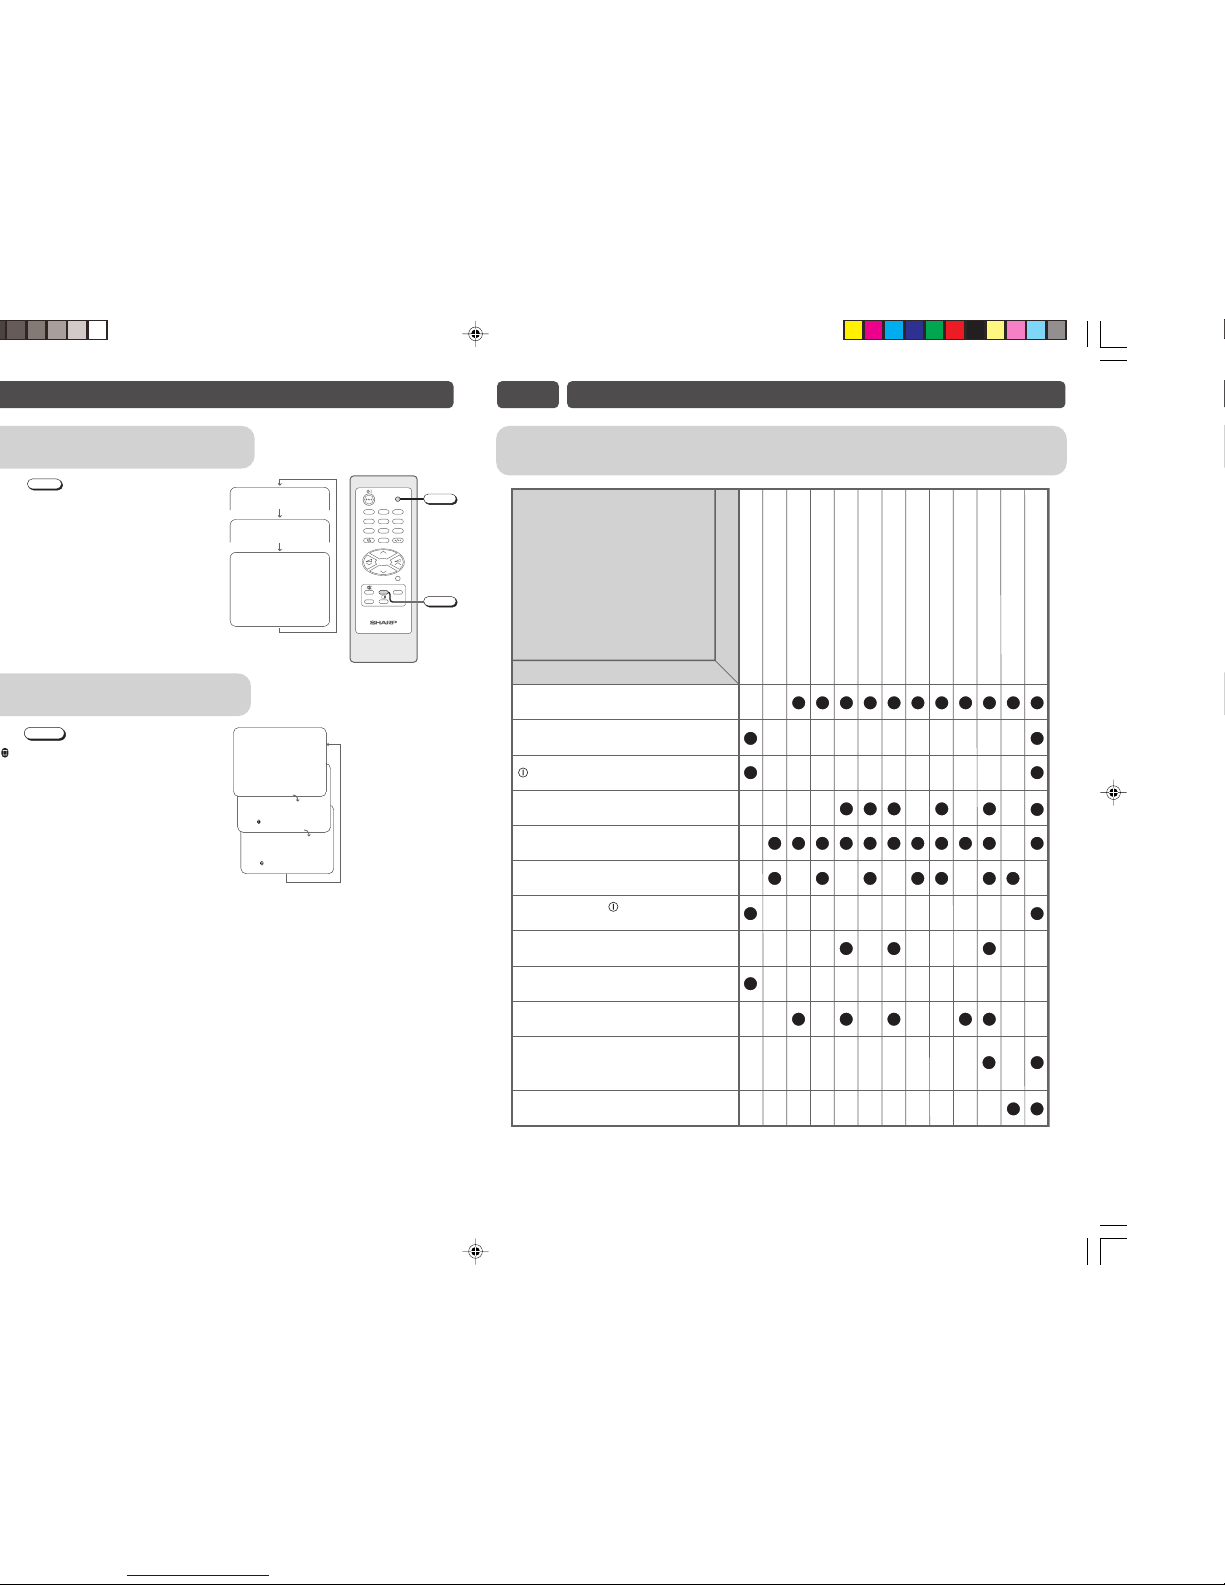
E10 [ FEATURES ]
• Blue screen
E
11
[ USEFUL
FEATURES ]
• Channel/Timer display
• Mute
• Channel recall
• TV/Video selection
• Surround sound
E
12 [
TROUBLESHOOTING
]
E
13
[ SPECIFICATION ]
Contents
E1 SAFETY PRECAUTIONS
E1 [ SAFETY
PRECAUTIONS ]
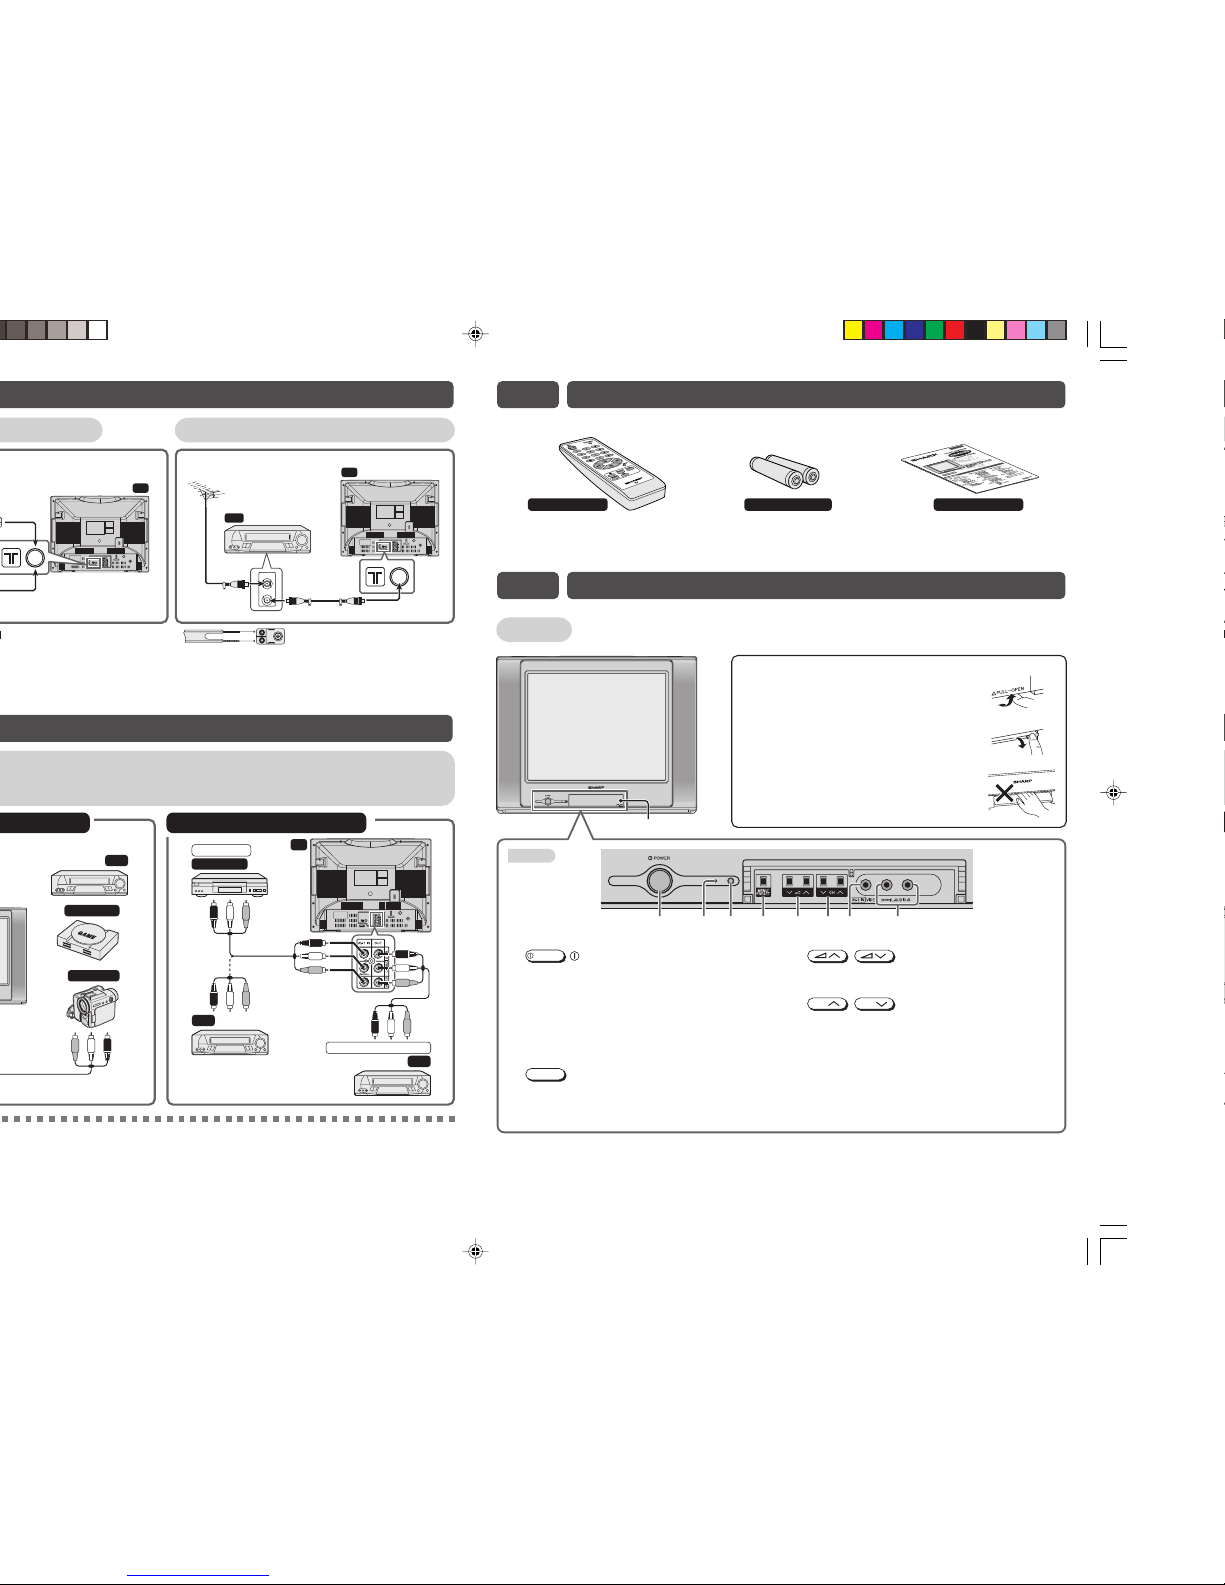
E2 [ ANTENNA
CONNECTION ]
• Connecting to an
antenna
• Connecting to an
antenna via a VCR
E3 [ CONNECTING TO
OTHER
EQUIPMENTS ]
E4 [ ACCESSORIES ]
E5 [ PART NAMES ]
• TV set
• Remote control
• Installing batteries in the
remote control unit
ENGLISH РУССКИЙ
(Nazad)
21K-FH1RU_EN 7/20/06, 5:39 PM1