Shining 3D AccuFab-L4D User manual

AccuFab-L4D & L4K_User Manual_V3.2.20_June 2021 1
Foreword
General
The Manual introduces functions, installation, usage and maintenance of the printer (hereinafter referred to
as "the Printer").
Safety Instructions
Signal
Meaning
Additional information for particular situation.
Improper actions or conditions that may damage the product or injury, and
consequently void your warranty or service contract or lose the patient data or
system data.
The safety instructions that you must precisely follow to avoid injury. Failure to
observe can cause damages to your product, or result in personal injuries, or even
death.
Revision History
No.
Version
Revision Content
Release Date
1
V3.2.20
First release.
June, 2021
FCC Regulations
Please note that changes or modifications not expressly approved by the party responsible for
compliance could void the user’s authority to operate the equipment.
This equipment has been tested and found to comply with the limits for a Class B digital device, pursuant
to part 15 of the FCC Rules. These limits are designed to provide reasonable protection against harmful
interference in a residential installation. This equipment generates, uses and can radiate radio frequency
energy and, if not installed and used in accordance with the instructions, may cause harmful interference to
radio communications. However, there is no guarantee that interference will not occur in a particular
installation. If this equipment does cause harmful interference to radio or television reception, which can be
determined by turning the equipment off and on, the user is encouraged to try to correct the interference by
one or more of the following measures:
⚫Reorient or relocate the receiving antenna.
⚫Increase the separation between the equipment and receiver.
⚫Connect the equipment into an outlet on a circuit different from that to which the receiver is
connected.
⚫Consult the dealer or an experienced radio/TV technician for help.
RF exposure statement

AccuFab-L4D & L4K_User Manual_V3.2.20_June 2021 2
⚫This equipment complies with radio frequency exposure limits set forth by the FCC for an
uncontrolled environment.
⚫This equipment should be installed and operated with a minimum distance of 20 cm between the
device and the user or bystanders.
⚫This device must not be co-located or operating in conjunction with any other antenna or
transmitter.
To Users
Dear users:
Thank you for choosing SHINING 3D AccuFab 3D printer (hereinafter referred to as the "Printer") and for your
support of SHINING 3D brand. We will adhere to the enterprise tenet of "Creating Value for Customers" to bring
better service for every user of this product. We declare that the AccuFab 3D printer is independently developed by
SHINING 3D TECH CO., LTD. with imported projection device, independently designed software, and hardware
systems, which provides reliable technical solutions for the application of the dental industry.
Supporting high-quality digital model printing, the Product is designed to assist clinics and dental Labs to quickly
complete digital printing of dentistry, with a wide application range and high printing precision. It also supports
unattended offline printing and online transmission control printing to fully meet users’ needs for convenient
operation and high accuracy of 3D printing.
This User Manual mainly introduces the installation, use, and maintenance of this Product for your quick
understanding of AccuFab. Read the User Manual carefully before using, and keep it properly for future reference.

AccuFab-L4D & L4K_User Manual_V3.2.20_June 2021 3
Table of Contents
FOREWORD ...............................................................................................................................................1
1. SAFETY ...............................................................................................................................................1
1.1. PRINTING MATERIAL..................................................................................................................................1
1.2. EMERGENCY MEASURES.............................................................................................................................1
1.3. LIGHT SOURCE..........................................................................................................................................1
1.4. ALCOHOL (ETHANOL)SOLVENT....................................................................................................................1
1.5. SHARP ACCESSORIES..................................................................................................................................1
1.6. ELECTROMAGNETIC INTERFERENCE...............................................................................................................1
2. INSTRUCTIONS FOR OPERATION ENVIRONMENT .................................................................................2
2.1. SITE REQUIREMENTS..................................................................................................................................2
2.2. COMPUTER RECOMMENDED CONFIGURATION ...............................................................................................2
2.3. MATERIAL STORAGE ..................................................................................................................................2
2.4. OTHERS...................................................................................................................................................2
3. PRODUCT INTRODUCTION...................................................................................................................4
3.1. ACCUFAB PRINTER ....................................................................................................................................4
3.1.1. Structure Preview ...........................................................................................................................4
3.1.2. Technical Parameters......................................................................................................................5
3.2. STANDARD ACCESSORIES ............................................................................................................................5
3.3. PREVIEW OF CURING BOX STRUCTURE ..........................................................................................................6
4. INSTALLATION ....................................................................................................................................7
4.1. UNPACK THE PACKAGE...............................................................................................................................7
4.2. INSTALL THE PRINTER.................................................................................................................................7
4.3. ADD MATERIAL.........................................................................................................................................8
4.4. NETWORK CONNECTION.............................................................................................................................9
4.4.1. Network Cable Connection .............................................................................................................9
4.4.2. Wi-Fi Connection.......................................................................................................................... 10
4.5. SOFTWARE UPDATE FUNCTION................................................................................................................. 11
4.6. ACCUWARE SOFTWARE .......................................................................................................................... 11
4.6.1. Installation ................................................................................................................................... 11
4.6.2. Interface....................................................................................................................................... 12
4.6.3. Function Description.................................................................................................................... 13
4.6.4. Use Description............................................................................................................................ 15
4.7. PRINTING FLOW CHART........................................................................................................................... 27
4.8. LOCAL DISK PRINTING ............................................................................................................................. 28
4.9. USB FLASH DRIVE PRINTING.................................................................................................................... 28
4.10. PRINTING STATUS VIEW AND CONTROL...................................................................................................... 29
5. PROCESS MODEL...............................................................................................................................31

AccuFab-L4D & L4K_User Manual_V3.2.20_June 2021 4
5.1. TAKE OUT MODEL ................................................................................................................................. 31
5.2. CLEAN.................................................................................................................................................. 32
5.2.1. Model........................................................................................................................................... 32
5.2.2. Build Platform .............................................................................................................................. 32
5.3. CURE MODEL ........................................................................................................................................ 34
5.4. STRIPING SUPPORT................................................................................................................................. 36
6. PRODUCT CARE AND MAINTENANCE .................................................................................................37
7. FAQS AND TROUBLESHOOTING .........................................................................................................38
CONTACT US ............................................................................................................................................40

AccuFab-L4D & L4K_User Manual_V3.2.20_June 2021 1
1. Safety
1.1. Printing Material
The printing material of AccuFab printer is a photo-polymerized resin material independently developed by
SHINING 3D. The resin solution is stable, safe, and no substances harmful to the human body were found in the test,
but direct contact with skin may cause adverse irritating reactions. During use, operators should strictly follow of the
Material Safety Data Sheet (MSDS) instructions for each material.
1.2. Emergency Measures
Direct skin contact may cause skin irritation dermatitis. During use, operators should wear rubber oil-resistant
disposable gloves.
⚫Skin contact: Take off contaminated clothing and wash skin thoroughly with soap and clean water.
⚫Eye contact: Open the upper and lower eyelids immediately, rinse with running clean water or normal
saline for at least 15 minutes, and seek medical attention.
⚫Ingestion: Rinse mouth and drink water immediately, induce vomiting, perform lavage and seek medical
attention.
Note:
For resin material contact and leakage hazard treatment, please refer to the latest Material Safety Data Sheet
(MSDS) or call the National Chemical Accident Emergency Response Hotline.
Warning:
No smoking, eating, or drinking in the workplace. Keep the resin solvent properly and keep it away from children.
1.3. Light Source
⚫During the printer and post-curing box device operation, the light source emits light with a wavelength of
405 nm, which is harmful to your eyes. Please avoid direct contact.
⚫Do not open the chamber door during printing.
1.4. Alcohol (Ethanol) Solvent
⚫Alcohol solvent is a flammable and explosive chemical. Please store in a cool and ventilated environment,
and keep the bottle cap of the container closed. Keep away from children.
⚫Alcohol solvent is used as the recommended solution to clean the liquid resin (the recommended
concentration is 95% or above) for post-processing of the printed parts of AccuFab.
⚫Wear disposable gloves when treating parts and surfaces with alcohol or uncured resin. Avoid direct skin
contact.
1.5. Sharp Accessories
AccuFab 3D printer accessories include sharp tools such as flat-headed tweezers, cleaning shovels, and utility
knives. Personal safety protection is required when using these tools for model stripping and support removal.
1.6. Electromagnetic Interference
Electromagnetic, produced by AccuFab 3D printer and Fab Cure post-curing box products during operation, has
passed CE/FCC standard test and is complied with Class A digital device limits, and will not cause harm to the human
body.

AccuFab-L4D & L4K_User Manual_V3.2.20_June 2021 2
2. Instructions for Operation Environment
2.1. Site Requirements
AccuFab 3D Printer
Power Supply
100-240V/360W
Temperature
20°C-30°C
Humidity
40%-60%
Printing Environment
The working platform shall be clean and smooth, avoid direct sunlight and
strong light, and keep away from the dust-borne device.
Frequency Range
2400–2483.5MHz
Maximum Output
Power
18dBm
Fab Cure Post-Curing Box
Power Supply
100-240V
Temperature
20°C-30°C
Humidity
40%-60%
Working Environment
The working platform shall be clean and level, avoid direct sunlight and
strong light, and keep away from the dust-borne device.
2.2. Computer Recommended Configuration
AccuWare
Operation System
Win10 (Recommended)
CPU
E3-1230 3.30GHz and above (Recommended configuration: I5 8500)
Memory
8G and above (Recommended configuration: 16G)
Graphics Card
GTX 750 Ti and above (Recommended configuration: GTX1050)
2.3. Material Storage
Resin Materials
Temperature
10° C -30° C
Storage Conditions
Storage conditions: Store in a cool and ventilated room and avoid direct
sunlight.
Other instructions: The storage container shall be kept closed at all times
to avoid contact with fire sources. The resin material is a mixture, and it is
easy to form a small amount of sediment after standing for a while. It is
recommended to shake the storage container before use to reduce the
probability of sediment formation.
2.4. Others
⚫Ensure that the AccuFab 3D printer only uses the original consumables and accessories. Any change to the
printer without the manufacturer's permission will result in device failure, which will invalidate your warranty.
⚫Ensure that the AccuFab 3D printer works in the recommended printing environment, and the incongruent

AccuFab-L4D & L4K_User Manual_V3.2.20_June 2021 3
printing environment will affect the printing accuracy and printing success rate.
⚫To guarantee the printing quality of the model, keep the chamber door closed during operation or just
finished the operation, and do not touch the model, resin tank, platform, or other parts of the device by hand.

AccuFab-L4D & L4K_User Manual_V3.2.20_June 2021 4
3. Product Introduction
3.1. AccuFab Printer
3.1.1. Structure Preview
Front view
Printer components
No.
Name
No.
Name
1
Light shield
2
Touch screen
3
Power button
4
USB port
5
Build platform bracket
6
Build platform
7
Resin tank
—
—
Note:
Take proper protective measures as the surfaces of the build platform and resin tank is easy to wear. Slight dirt
and scratches on the surfaces will not cause printing failure.
Side view

AccuFab-L4D & L4K_User Manual_V3.2.20_June 2021 5
Printer components
No.
Name
No.
Name
1
Network port
2
Power port
3
B-type USB port
4
Power button
3.1.2. Technical Parameters
Parameter
Description
Model
AccuFab-L4D;AccuFab-L4K
Optics
Light Engine
Mono LCD
Resolution
3840 × 2400
Pixel Size
0.05 mm
Light Source
LED
Wavelength
405 nm
Light Intensity
>3 mw/cm^2
Print
Print Volume (W x D x H)
192 mm × 120 mm × 180 mm
Print Speed
10 mm/h-50 mm/h. Print speed varies on materials and layer
thickness.
Print Accuracy
±0.05 mm
Layer Thickness
0.025 mm/0.05 mm/0.075 mm/0.1 mm
Material Compatibility
Shining 3D material; certified 3rd party material
Printer
Printer Dimensions
360 mm × 360 mm × 530 mm
Weight
19 kg
Operating Temperature
20℃-30 ℃
Operating Humidity
40%-60%
Power Requirements
100 V-240V AC; 50/60 Hz; 360 W
Connectivity
USB dongle; Wi-Fi; Ethernet
Printer Control
5" touchscreen
Alerts
Touchscreen alerts; LED status indicators; buzzer alerts
Packing Dimensions
480 mm × 480 mm × 660 mm
Packing Weight
25 kg
Certification
FCC/CE/ROHS
3.2. Standard Accessories
Device Module
Components
Quantity
Printer Host
Printer
1
220V power adapter
1
Build platform
1
Build platform bracket
1
Accessories
Warranty card
1
Manufacturer certificate
1

AccuFab-L4D & L4K_User Manual_V3.2.20_June 2021 6
Quick start guide
1
Silicone scraper
1
Double-faced velvet mirror cloth
2
Soft rubber brush
1
Flat pry knife
1
Putty knife
1
Electronic scissors
1
PET sheet
20
Disposable gloves
10
Cleaning box (accessories)
1
USB flash drive
1
Harness-network cable (2m)
1
USB cable
1
Resin tank
1
3.3. Preview of Curing Box Structure
For more details, refer to Fab Cure Post-Cure Oven_User Manual_V2.0.
Components
No.
Name
No.
Name
1
Shading door
2
Display screen
3
UV lamp
4
Acrylic turntable
5
Knob
6
Power button
7
Power port
—
—

AccuFab-L4D & L4K_User Manual_V3.2.20_June 2021 7
4. Installation
4.1. Unpack the Package
Step 1: Remove the package and place the printer on the table. Remove the foam ③inside the printer.
Step 2: Take out accessory box ④ from fixing foam ③ inside the printer.
4.2. Install the Printer
Step 1: Insert build platform ⑤ into the guide slot and tighten the screw on the platform.

AccuFab-L4D & L4K_User Manual_V3.2.20_June 2021 8
Step 2: Insert resin tank ⑥ into the position. Lock the buckles ⑦ of the resin tank to lock the resin tank.
Step 3: Connect the power supply as the picture shows, and press the power button on the right side of the
printer.
4.3. Add Material
Shake well before pouring material into the resin tank. Note that the resin level should be between the
indicator lines of minimum and maximum.

AccuFab-L4D & L4K_User Manual_V3.2.20_June 2021 9
Note:
You can also add resin during printing without pausing.
4.4. Network Connection
Connect the printer with a network cable or Wi-Fi.
4.4.1. Network Cable Connection
⚫Select "harness-network cable (2m)" in the accessories list. Plug one end of Ethernet cable 18 into RJ-45
interface 19 on the back panel of AccuFab, and insert the other end to the Internet.
⚫Enter the "Settings-Network Settings" interface of the device, and set the Wired Network so that the Status
is "On" and the Automatic Acquisition status is "Yes."

AccuFab-L4D & L4K_User Manual_V3.2.20_June 2021 10
⚫After the device accesses the network, the acquired IP address is the LAN sending address.
4.4.2. Wi-Fi Connection
⚫Start the device to enter the "Settings-Network Settings" interface of the device, and set it in the Wireless
Network so that the Status is "On" and the Automatic Acquisition status is "Yes."
⚫Select the network to display the connected WIFI signal. If no WIFI is connected, it will display "None."
When accessing the network for the first time, click "Select Network" status, and the device will display the
connectable WIFI signal. Select the same WIFI as the computer where the software is located, enter the WIFI
password and click “OK” to confirm.
⚫After the WIFI connection is successful, return to the "Settings-Network Settings" interface, and the
acquired IP address in the wireless network interface is the LAN sending address.

AccuFab-L4D & L4K_User Manual_V3.2.20_June 2021 11
4.5. Software Update Function
⚫Network update function: Enter interface - “About” through Device Connecting Network, and long-press
Network Update button. When there is a new system or software, the Update Reminder interface pops up. Click
Confirm to download the latest version. After the download is completed, follow the steps shown in the prompt
interface (if there is a system update, turn on the device manually after shutdown). If there is no new version, the
screen will prompt that it is the latest version at present, and no update is needed.
⚫USB flash disk update function: Insert the USB flash disk with version/system into the device, and select
the software to be updated. Follow the steps displayed in the prompt interface (if there is a system update, turn on
the device manually after shutdown).
4.6. AccuWare Software
The matched slicing software of AccuFab 3D printer is AccuWare model processing software independently
developed by SHINING 3D (hereinafter referred to as "software"), which has the Office interface style and is easy to
use and operate.
AccuFab 3D printer only supports "*.slp4" format model printing files. Before printing, the 3D model file in STL
format shall be arranged and sliced with AccuWare software, and the sliced "*.slp4" file can be provided to AccuFab
printer to be printed into 3D objects. Here is a description of the installation steps of AccuWare software in the
Windows system.
4.6.1. Installation
Step 1: Insert the USB flash disk as shown on the accessories list into the computer, find the installation file (.exe)
in the USB flash disk file list, and double click to run it.
Step 2: Enter the software installation wizard, click Next to enter the License Agreement interface, and click I
Agree.
Step 3: Select the software installation path and click "Install" to automatically install the software.
Step 4: Click Finish to exit the installation wizard and finish the installation of AccuWare.

AccuFab-L4D & L4K_User Manual_V3.2.20_June 2021 12
Step 5: After installation, double-click the desktop software icon (shown in the figure) to open the
software.
Note:
For first-time software start, all machine types are selected by default.
4.6.2. Interface

AccuFab-L4D & L4K_User Manual_V3.2.20_June 2021 13
Parameter description
No.
Parameter
Description
1
Printer information
Machine type: current device type.
Machine name: current device name.
Material: current printing material.
Layer thickness: layer thickness of printing material.
2
Top menu
Printing settings, open file, layout, support, slice.
3
More settings
Click the expandable list button to set relevant parameters.
4
Settings
Loading project, saving project, machine list, layer preview, change
language, remote assistance, dongle, material management, import
to machine, software update, About.
Note:
Selected devices are displayed by default on the machine list.
5
View
Model display from different perspectives.
6
Main display area
Model display preview.
7
Printer information
Device name, model printing layer thickness, and time estimation
information.
8
Import STL
Open file, a record of recently imported files, drag STL.
9
Model list
Displays name of imported model.
4.6.3. Function Description
No.
Function
Module
Function
Name
Icon
Function Description
1
File
Open File
Insert STL file selected by the user in the current file.
2
Recent File
Link to the recently used STL model, and click it to load the
model into the software.

AccuFab-L4D & L4K_User Manual_V3.2.20_June 2021 14
3
Exit
Close the software and exit the program directly.
4
Edition
Select All
—
Select all models.
5
Copy
—
Copy the selected model.
6
Hide
—
Hide the selected model.
7
Delete
—
Delete the selected model.
8
Details
—
Display the name, path, dimensions, occupied space, triangle
patch of the model, and whether any problem with the model.
9
Move Model
Move the model in XYZ axial directions.
10
Rotate Model
Rotate the model in XYZ axial directions.
11
Scale Model
Scale the model in XYZ axial or equal scale.
12
Automatic
Layout
Intelligent layout of the loaded model in XY plane.
13
Automatic
Support
Set support parameters for the model file and automatically
generate support.
14
Manual
Support
Set support parameters for the model file and manually
generate the support.
15
Slice
Generate a "*.slp4" path file for the data whose printing
parameters have been set, and set the path of exportation.
16
View
Default View
View the model selection area from "upper front."
17
Front View
View the model selection area from "front."
18
Back View
View the model selection area from "back."
19
Left View
View the model selection area from "left."
20
Right View
View the model selection area from "right."
21
Top View
View the model selection area from "top."
22
Bottom View
View the model selection area from "bottom."
23
Settings
Settings
Contains some file contents and tools in the software. Click this
button in the upper right corner to view for operation.

AccuFab-L4D & L4K_User Manual_V3.2.20_June 2021 15
24
Loading
Engineering
—
Import the saved *.accu file order into the software.
25
Storage
Engineering
—
Save the current order locally.
26
Machine List
—
Display the name of the printer for connection.
27
Layer Preview
—
View the current model by layer.
28
Accuracy
Calibration
—
Calibration settings for the accuracy of printed models.
29
Material
Management
—
Display local material information.
30
Import to
Machine
—
Import new machine parameters from PC/LAN.
31
System
Settings
—
Change Language
Chinese/English system language conversion
settings.
Remote Assistance
TeamViewer technical support remote
assistance shortcut entrance.
Dongle
Dongle driver installation and registration
access.
Software Update
Accept update push, and prompt update
when connecting with dongle.
About
Enter/exit administrator rights, display
dongle information, etc.
4.6.4. Use Description
Printing Settings
Open AccuWare software to display the printing setting interface, which can select the machine type, machine
name, material and layer thickness of the printer to be printed, and set the rotation angle, scaling offset and contour
offset of the imported model.
Other manuals for AccuFab-L4D
1
This manual suits for next models
1
Table of contents
Other Shining 3D 3D Printer manuals
Shining 3D
Shining 3D einstart-c User manual
Shining 3D
Shining 3D Einstart User manual
Shining 3D
Shining 3D Transcan-C User manual

Shining 3D
Shining 3D einstart-c User manual
Shining 3D
Shining 3D AccuFab-D1s User manual
Shining 3D
Shining 3D EinScan-SE User manual
Shining 3D
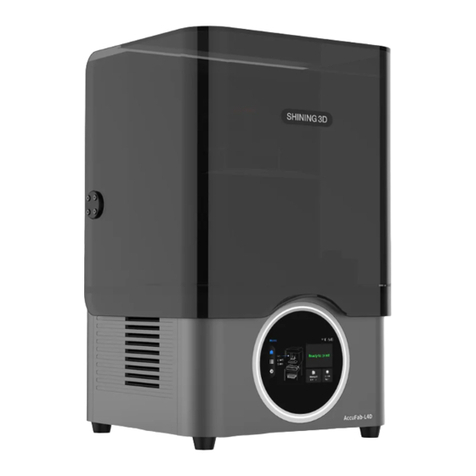
Shining 3D AccuFab-L4D User manual

Shining 3D
Shining 3D einstart-c User manual

Shining 3D
Shining 3D AccuFab L4D User manual

Shining 3D
Shining 3D AccuFab-D1s User manual

