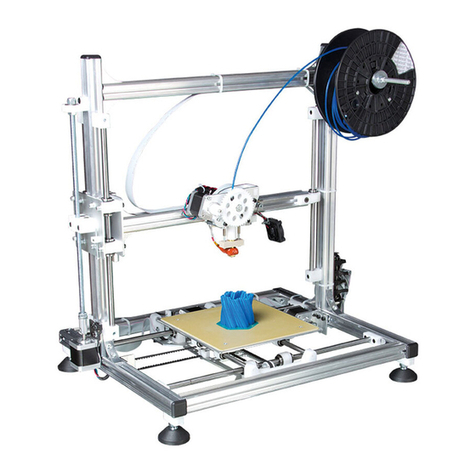
Shining 3D Einstart User manual

3D Printer User Manual
1
Einstart 3D Printer
User Manual
V2.1

3D Printer User Manual
www.shining3d.com
2
COPYRIGHT
This document is copyrighted and contains proprietary information that is the property
of Hangzhou Shining 3D Tech Co., Ltd .The user does not have the right to copy,
reproduce, or translate this document in any way or to any media without the prior
written consent of Hangzhou Shining 3D Tech Co., Ltd.
DISCLAIMER
This user manual is an instruction for installation, operation, and maintenance, but not
product warranty. All efforts have been made to ensure the accuracy and
completeness of the information in this manual. However, Shining3D Tech Co., Ltd.
accepts no responsibility for any errors or omissions contained in the documentation
and reserves the right to explain and revise the publishing and fault of this manual.
The information in this manual is subject to change without notice.

3D Printer User Manual
3
TABLE OF CONTENTS
1. Introduction ............................................................................................ 4
1.1. How to use this manual .............................................................. 4
1.2. Precautions ................................................................................. 4
1.2.1. Safety ............................................................................... 4
1.2.2. Protection ......................................................................... 4
2. Overview ............................................................................................... 5
2.1. Appearance ................................................................................ 5
2.2. Axes ............................................................................................ 5
3. Installation ............................................................................................. 6
3.1. Install printer ............................................................................... 6
3.1.1. Connect power adapter and USB cable ........................... 7
3.1.2 Set Platform ....................................................................... 7
3.1.3 Spread glue ....................................................................... 8
3.1.4. Install filament ................................................................... 9
3.1.5 Print the model .................................................................. 9
3.2.Windows OS Software installation ............................................. 13
3.2.1. Software Installation ....................................................... 13
3.2.2 Program registration ........................................................ 18
3.3. Mac OS software installation .................................................... 20
3.3.1.Drive installation ..................................................................... 20
3.3.2. Program registration .............................................................. 23
4. Print Steps .......................................................................................... 25
5. The Basic Functions of Software ........................................................ 29
5.1. Menu ......................................................................................... 30
5.2. Short guide area ....................................................................... 30
5.3. Setting and status area ............................................................. 30
5.4. Edit area ................................................................................... 30
6. Print setting references ....................................................................... 32
6.1. Path generator setting .............................................................. 32
6.2. Extruder control ........................................................................ 33
6.3. Pause/restart printing ................................................................ 35
6.4. Set Z axis Height ...................................................................... 36
6.5. Level platform ........................................................................... 39
6.6.Firmware Update ....................................................................... 42
7. Maintenance ....................................................................................... 44

3D Printer User Manual
www.shining3d.com
4
7.1. Changing the Material ............................................................... 44
7.2. Cleaning the Nozzle .................................................................. 44
7.3. Accessories .............................................................................. 44
7.4. Packing list ............................................................................... 44
7.5. Specification ............................................................................. 45
8 FAQ...................................................................................................... 45
9. Contact Us .......................................................................................... 48
1. Introduction
1.1. How to use this manual
This User Manual is divided into five sections which covers the Introduction, Overview,
Installation, Operation, and Troubleshooting. Please study this manual carefully
before installation, and use the printer according to these instructions. Keep this
manual handy and refer to it when necessary.
1.2. Precautions
Please read this section carefully before using the printer.
1.2.1. Safety
The printer can only be used with the power adapters supplied by this company, or the
product may be damaged, with a risk of fire. To avoid burning, or model deformation,
do not touch the model, nozzle, or the platform by hand,or any other part of the body,
while the printer is working or immediately after it has finished printing.
Protective glasses should always be worn when removing support material. There is a
slight smell from filament material when it is being extruded. The smell is, however,
not too unpleasant. Operate in a well ventilated room but draught free, as draught will
cause warping.
1.2.2. Protection
•The printer must not be exposed to water or rain to avoid damage.
•Do not shut down the printer or pull out the USB cable when loading a digital model
or the model data may be lost.
•The printer is designed to work properly at an ambient temperature of between 15°C
and 30°C and humidity of between 20% and 50%. Operating outside these limits may
result in low quality model.
• Please turn off the printer when SD card needs to be inserted or pulled out.
• We are not responsible for any damage caused by filament material from outside
which not authorized by our company。

3D Printer User Manual
www.shining3d.com
5
2. Overview
Thank you for choosing Einstart 3D Printer. It is designed with ultimate portability and
simplicity in mind. The system and software allows you to print great models with only
a few keystrokes, even if you have never used a 3D printer before. The system uses a
nozzle to deposit molten plastic to make a solid object layer by layer, so printed parts
are strong and durable.
2.1. Appearance
Figure 2.1 is the front view and side view of printer.
Figure 2.1
① Framework OLED Screen ② Platform③
④Extruder Nozzle ⑤Tube Fan ⑥Spool Holder
⑦Power ⑧USB SD card⑨
⑩Switch
2.2. Axes
In the figure 2.2, the direction of arrow is the forward direction of the axes.

3D Printer User Manual
www.shining3d.com
6
Figure 2.2
3. Installation
3.1. Install printer
The printer was tied up to avoid damage during transportation. Please remove these
protective parts before use the printer .
Figure 3.1

3D Printer User Manual
www.shining3d.com
7
① Rope
② Sponge Mat
3.1.1. Connect power adapter and USB cable
As figure 3.1.1 shown, there are USB connection and power interface on the side of
the printer, please connect the printer and computer via a USB cable and connect the
power adapter.
Figure 3.1.1
a: connect USB
b: connect Power adapter
3.1.2 Set Platform
As figure 3.1.2 show, placing three outstanding magnetic point into slot to set stably
the printing platform.

3D Printer User Manual
www.shining3d.com
8
Figure 3.1.2
3.1.3 Spread glue
First step: spread glue on the build platform.
Second step: make the glue joint the platform evenly.
Third step: ensure the glue shape is fit properly.
Fourth step: place the platform in right place.
Figure 3.1.3

3D Printer User Manual
www.shining3d.com
9
3.1.4. Install filament
First step: make sure the head of filament is neat.
Second step:set up the filament through the hole inside the printer.
Third step:insert filament tube to the top hole.
Fourth step:put filament on the tray.
Figure 3.1.4.1
Figure 3.1.4.2
3.1.5 Print the model
1)Start up:power on, and press the“ ” button for 3 seconds.
2)Menu:press the“ ” button to choose “Fast operation”.

3D Printer User Manual
www.shining3d.com
10
Figure 3.1.5.1
3)Load filament:press the“ ” button to load filament, put the filament in the hole
and wait for the temperature rise.
Figure 3.1.5.2
4)Return:press the“ ”or“ ” button to exit when the filament is extruded from the
nozzle.
Figure 3.1.5.3

3D Printer User Manual
www.shining3d.com
11
Figure 3.1.5.4
5) Build:get back to the “Fast Operation” and press the “ ” button to choose model.
Figure 3.1.5.5
6) Select:press“ ”“ ” to choose model ,and press“ ”to print the model you
want.
Figure 3.1.5.6
7)Pause:If you wanna pause, press“ ”to exit,and press“ ”to confirm it.

3D Printer User Manual
www.shining3d.com
12
Figure 3.1.5.7
Figure 3.1.5.8
8)Resume: used for change filament,see figure 3.1.5.9.
Figure 3.1.5.9
9) “Save-Shut Down”: it will save the model file, you can resume printing the model
after reboot the machine.“Stop”: just cancel the printing.

3D Printer User Manual
www.shining3d.com
13
Figure 3.1.5.10
3.2.Windows OS Software installation
3dStar supports the operating system Win7 32/64bit, Win8.1 and Mac OS X. Please
refer to “Read Me file” before setting up the software.There are printing software
3dStar, driver, and STL models in the SD Card.
3.2.1. Software Installation
For install all drivers successfully, please insert SD card into your PC with USB to SD
card converter. If you system is windows, find “Windows” folder, open “3dStar” folder,
then click xxx_setup.exe file, entering the program installation interface as the picture
shown below.
Figure 3.2.1.1
1. Click “next”, and select “ I Agree” to continue next step.

3D Printer User Manual
www.shining3d.com
14
Figure 3.2.1.2
2. Select the installation directory, and Click “Install” to start the SETUP
WIZARD
Figure 3.2.1.3

3D Printer User Manual
www.shining3d.com
15
Figure 3.2.1.4
3. In a while, the following interface will appear, please select ““I have read and
accept the license terms ”, and click “install”.
Figure 3.2.1.5
4. Click“Finish” in the pop-up dialog, and the installation is successfully

3D Printer User Manual
www.shining3d.com
16
installed. .
Figure 3.2.1.6
Notice: if either of the below two interface appears, it means that the latest version of
Microsoft Visual C++ 2010 x86 Redistributable operation environment has been
installed. Click “Cancel” to complete the installation.

3D Printer User Manual
www.shining3d.com
17
Figure 3.2.1.7
Figure 3.2.1.8
5.Install the driver of USB to serial port.
Figure 3.2.1.9
Click ”Extract”,do as the guide shows,see figure 3.2.1.9.

3D Printer User Manual
www.shining3d.com
18
Figure 3.2.1.10
Click ”finish” in the follow dialog to exit the guide, see figure 3.2.1.11.
Figure 3.2.1.11
3.2.2 Program registration
Program registration has been done after software setup. If a new key should be
registered, do as follows:
1. Open 3dStar folder, double-click “License Install.exe”, see figure 3.2.2.1.

3D Printer User Manual
www.shining3d.com
19
Figure 3.2.2.1
2. Click open, select key file(*.reg or *.lic)
Figure 3.2.2.2
3. click“install” to finish registration.

3D Printer User Manual
www.shining3d.com
20
Figure 3.2.2.3
3.3. Mac OS software installation
If your system is Mac OS, choose “Mac” folder. Before setting up the software, you
should refer to Read Me file.
3.3.1.Drive installation
1. Double click “3dStar.dmg”, a virtual device is showed on desktop, see figure
3.3.1.1.
Figure 3.3.1.1
This manual suits for next models
1
Table of contents
Other Shining 3D 3D Printer manuals

Shining 3D
Shining 3D einstart-c User manual
Shining 3D
Shining 3D AccuFab L4D User manual
Shining 3D
Shining 3D AccuFab-D1s User manual
Shining 3D
Shining 3D Transcan-C User manual

Shining 3D
Shining 3D AccuFab-D1s User manual

Shining 3D
Shining 3D einstart-c User manual

Shining 3D
Shining 3D einstart-c User manual
Shining 3D
Shining 3D EinScan-SE User manual

Shining 3D
Shining 3D AccuFab-L4D User manual

Shining 3D
Shining 3D AccuFab-L4D User manual
