Shor-Line.com
3
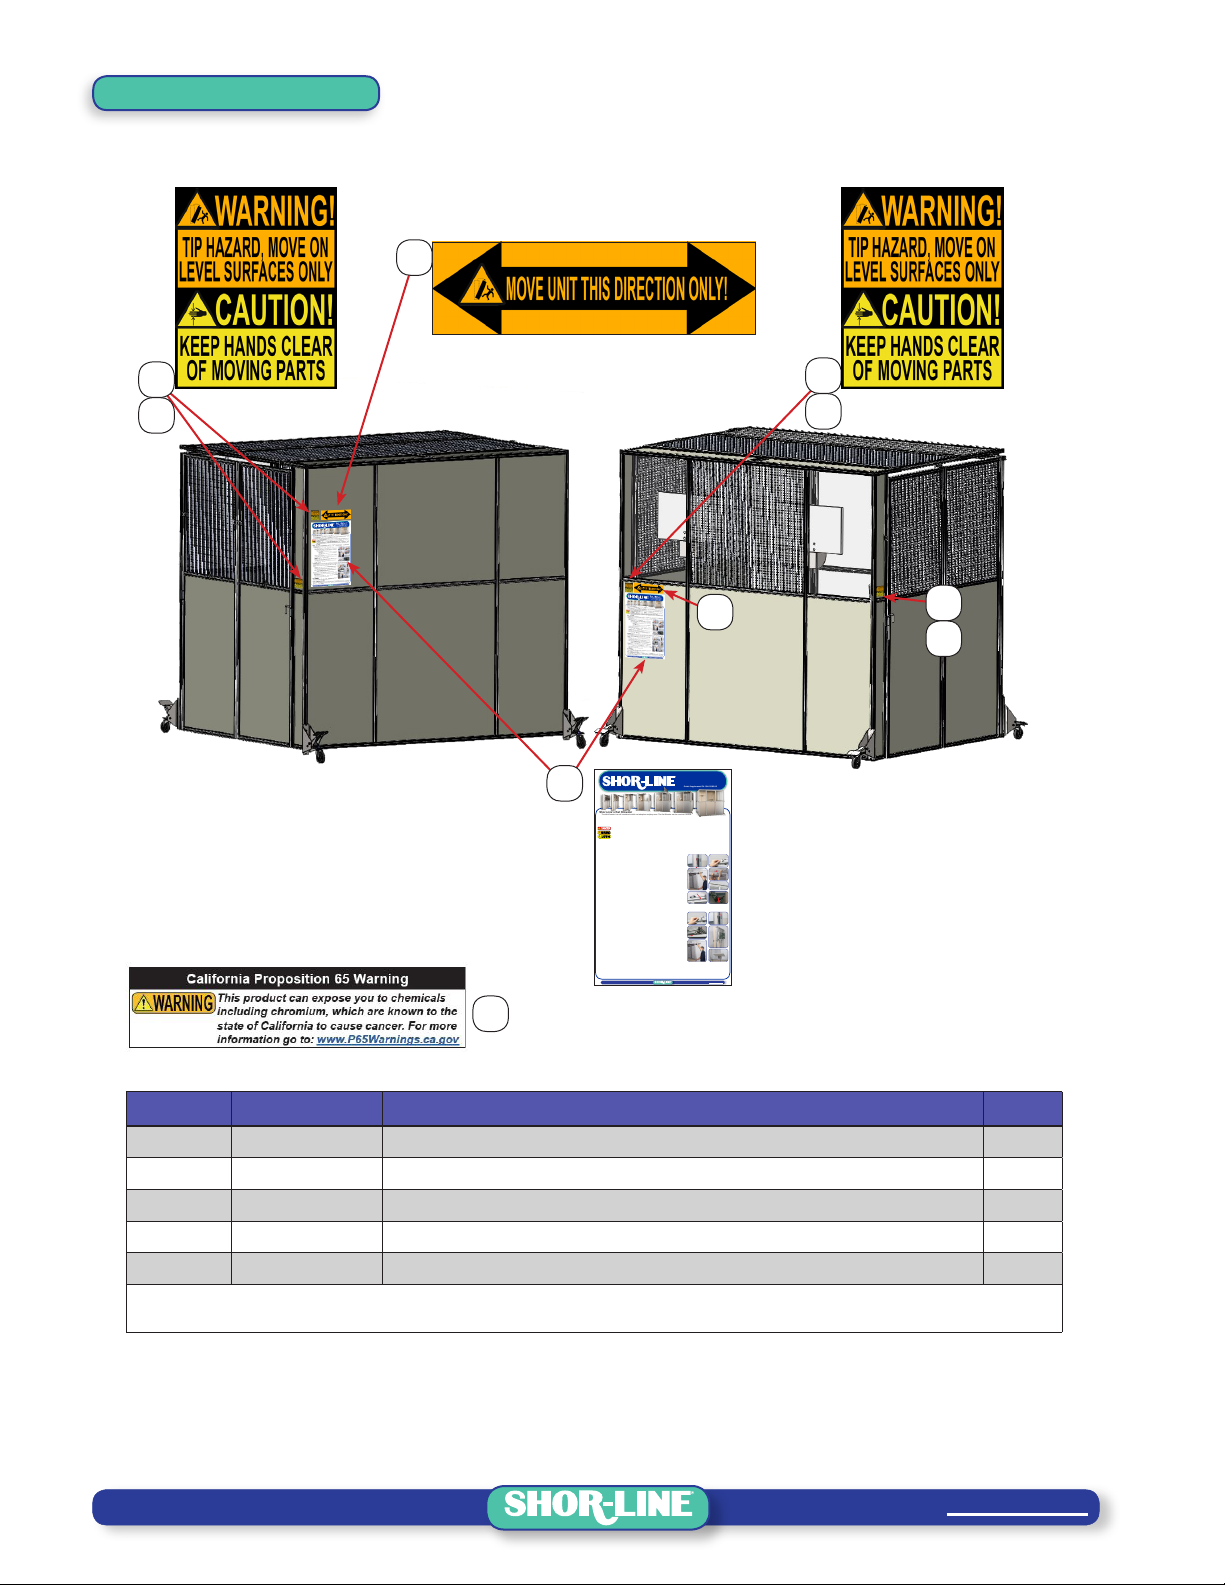
SAFETY
Safety Decal Locations
Kat Klowder Safety Decal Locations
LOCATE ON BACK
05
Kat Klowder
Mobile Cat Play Area
Set-up · Collapse · Stow Instructions
GuideSupplement PN: 006.9080.00
511Osage · KansasCity · Kansas 66105 (800)444-1579 · (913)281-1500 · Shor-Line.com
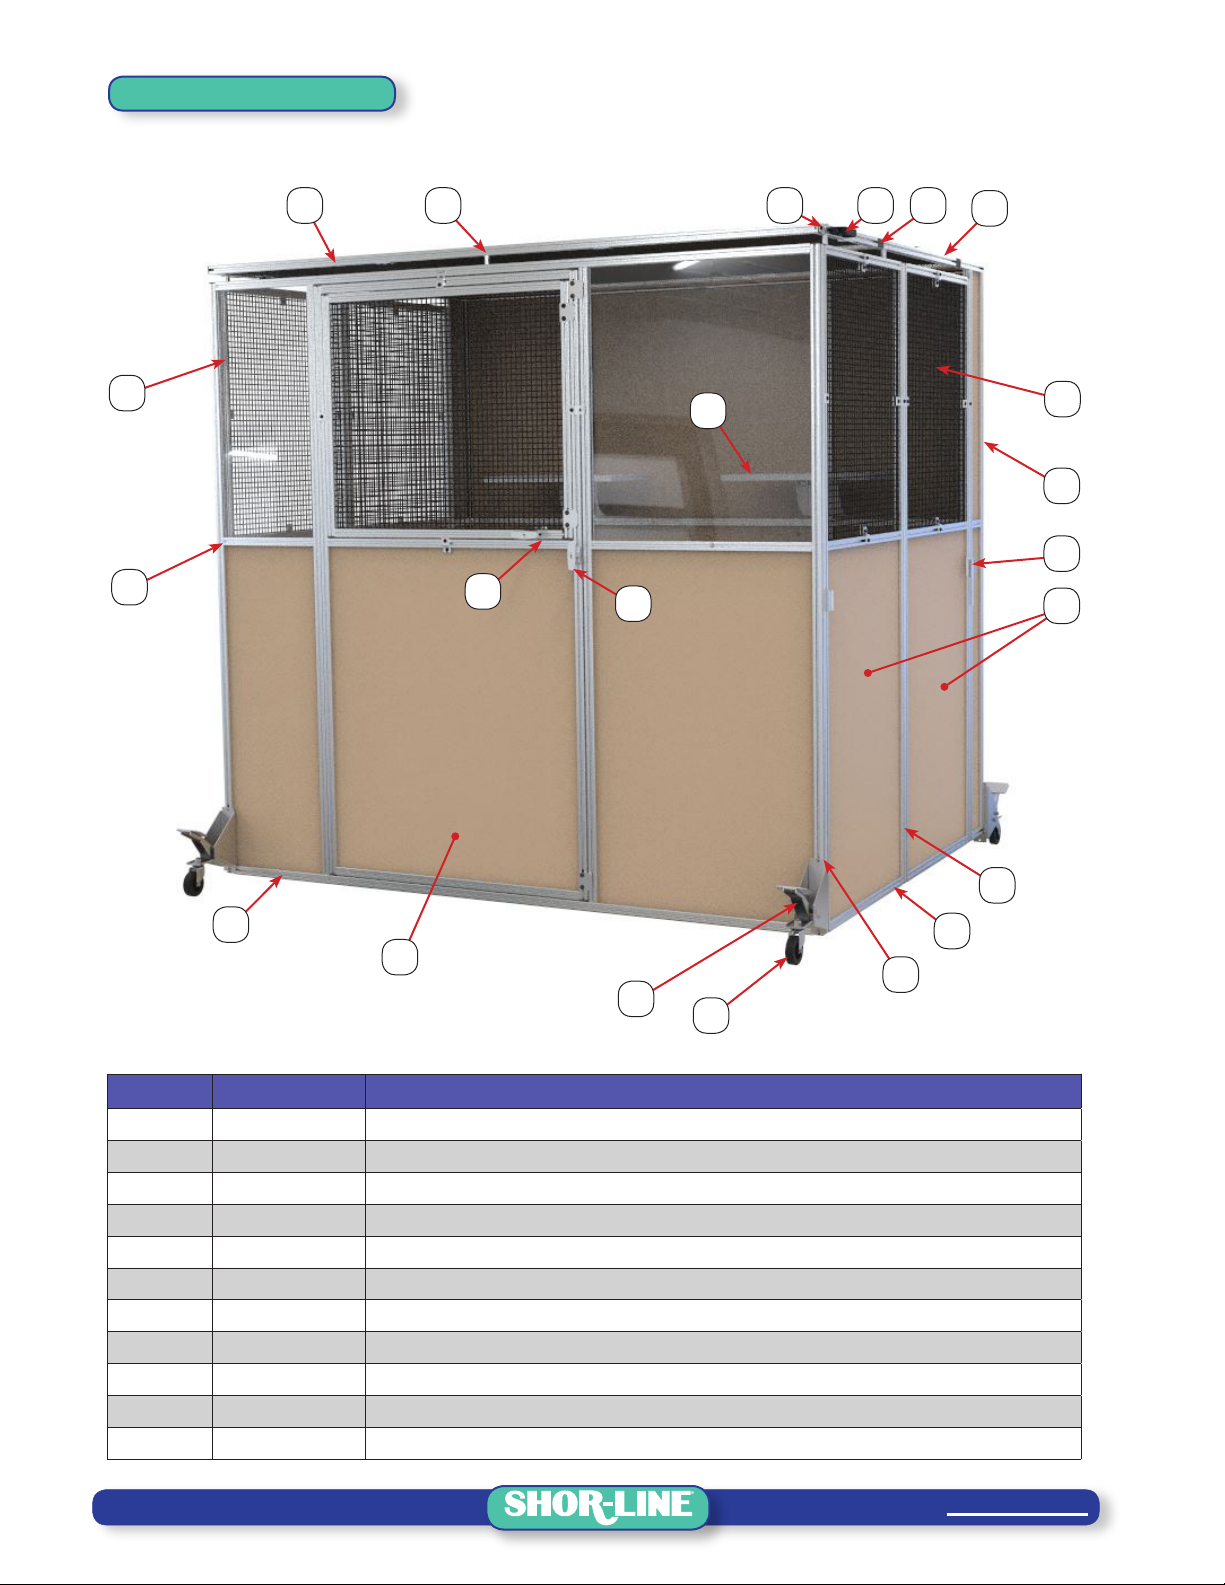
Shor-Line’s Kat Klowder
The Kat Klowder is a self-contained mobile cat adoption and play area. The Kat Klowder can be used as a mobile
displayfor c at adoptions, disaster response holding space and as a cat play area.
The Kat Klowder utilizes; PVC lower panels, either clear acrylic or PVC coated wire mesh upper panels, PVC coated wire mesh top panels and PVC (opaque)
back panels combined with lightweight framing providing a manageable display unit that can be easily erected and moved safely with two people. Onc e the
uniti s removedf rom the shipping materials, follow the procedures below.
READ ALL WARNINGS AND PROCEDURES COM PLETELYBEFOR E USING THE PRODUCT, AND THOROUGHLY UNDERSTAND AND
FOLLOWALL SAF ETY INSTRUCTIONS.
Ensure the Kat Klowder is level during assembly and when stowed to prevent po ssible tipping which, if not avoided, could result in
SERIOUS INJURY or DEATH.
Thisp roduct is intended to be used for animals only. Do not use for anything other t han the intended purpose.
Keephan ds clear of possible pinch areas when assembling par ts which, if not avoided, could result in MINOR to MOD ERATEI NJURY.
Do NOTat tempt to set-up, collapse or move the Kat Klowder with one person . Tipping, causing personal injury and/or damage to the
unitcould occur.
Set-up Procedures
The following procedures require two people to safely set-up the Kat Klowder. Both sides of the unit must unfold simultaneously. The front casters should be
engaged (touching the oor) and the back casters should be disengaged (raised above oor) for these procedures. Use the foot operated pedal to raise and
lowert he casters as needed.
STEP1: Retaining pin - Slide the pin out and rotate out of the pin receiver. Repeat this step for both
the right and left sides.
STEP2: Unfold the Panels - Simultaneously (both sides) lift the top panel up to clear the panels
while pulling out the front panel. Careful to raise the top panel high enough to clear the
front and side panels until they are fully extended. Hand placement is important while
unfoldingt he wallpan els.
Righthand sid e:Right hand on top panel han dle,lef t hand on wall panel handle.
(Left hand side shown)
Left hand side: Left hand on top panel handle, right hand on wall panel handle.
(Left hand side shown)
STEP3: Side Panel Pins - Align the pin of the top panel with the side panel track. Repeat this step
for both the right and left sides.
STEP4: Top Panel Latch - Unlatch the top panel by rotating the latch lever clear of the screw head.
Repeatt his step for both the right and left sides.
STEP5: Flip the top panel over to meet the front panel top rail.
STEP6: FrontPanel Pin - Ali gn the top panel pin (centered on door) with front panel top track. Pull
the front panel outward to help align the center pin with track.
STEP7: Casters - Once the Kat Klowder is in the correct location and is clear of people and
obstructions, safely lower the casters.
Collapse Procedures
The following procedures require two people to safely collapse (fold) the Kat Klowder. Both sides of the unit must be folded simultaneously. Do not attempt to
collapse the Kat Klowder while the space is occupied, clear the Kat Klowder of all animals and debris. Fold (up) all perch shelves in their full upright position.
The front casters should be engaged (touching the oor) and the back casters should be disengaged
(raised above oor) for these procedures. Use the foot operated pedal to raise and lower the casters
asne eded.
STEP8: Flip the top panel over onto the other half of the top panel, secure by using the latch on
both ends.
STEP9: Simultaneously (both sides) lift the top panel up to clear the panels while pushing in
slightly the side panels at the middle seam to clear the top panel pin.
STEP10: Raise the top panel high enough to clear the front and side panels until they are fully
collapsed while sliding the front panel towards the back panel. Hand placement is
important while folding the wall panels.
Righthand sid e:Lef t hand on top panel handle, right hand on wall panel handle. (Left hand side shown)
Left hand side: Right hand on top panel handle, left hand on wall panel handle. (Left hand side shown)
NOTE:Apply inward pressure to the side panels to encourage simultaneous folding of the side panels.
STEP11: Rotate and slide the retaining pin into the pin receiver and lower the front casters. Repeat
for both the right and left sides.
STEP12: Slowly lower the top panel down-over the front panel.
Product Care Recommendations
Avoidammonia -based cleaners that are typically used on glass windows. These chemical cleaner s can damage acrylic surfaces, leaving them looking cloudy
and dull. Do NOT use any commercial window cleaning sprays unless they are non-abrasive and specically recommended for acr ylic. Always use soft, clean
microber cloth for cleaning and blot drying acrylic surfaces. M ild soap and water mixture (3 drops/gal of water) is recommended for cleaning acrylic surfaces.
Blot dry all surfaces to help deter water spots.
APRIL 2019
(Panelstyles and nishes may vary)
Shelf Operation
During movement and storage, the Perch Shelves should be in the stowed position, upright. The Shelves
pivoton t heir wall brackets. Rotatet he shelf upward for the stowed position.
STEP 8
STEP 10
STEP 9
STEP 1
STEP 2
STEP 3
STEP 4
STEP 5
STEP 6
STEP 7
STEP 11
SHELF
STEP 12
04
02
03
04
02
03
01
02
03
Item Part # Description Qty
01 006.9080.00 INSTRUCTION SHEET, Set-up And Use 1
02 - SAFETY DECAL, Caution - Keep Hands Clear 3
03 - SAFETY DECAL, Warning - Tip Hazard 3
04 - SAFETY DECAL, Warning - Unit Path Of Travel 1
05 - SAFETY DECAL, Warning - Proposition 65 1
NOTE 1 - Contact Shor-Line Technical Service Department (1.800.444.1579)
NOTE 2 - Quantities reect decal count per unit.
Read all warning, danger and caution decals before equipment is operated. Never use
equipment if decals are missing, hidden, improperly placed, damaged or altered. Keep
safety decals clean and legible.
Contact Shor-Line (800.444.1579) for replacement safety decals.