Shugart SA800 User manual

SASOO/SOl
~
Diskette
Storage
Drive
~[]
~
@
2)
@!J
2)
©
@
~
@!J
2)
~
@!J
C==J
.
~®ShUgart
Associates

SA800/801
~
Diskette
Storage
Drive
~[]
~
@
2)
@!J
2)
©
@
~
@)
2)
~
@)
C==J
©
Copyright
1977
Shugart
Associates

TABLE
OF
CONTENTS
Section
Maintenance
Features
Page
2
3
4
5
6
7
8
9
Diagnostic
Techniques
Preventive
Maintenance.
Removals
Adjustments
.
Physical Locations . .
SAS09Exerciser
Connections
SASOO/SOl PCB
Component
Locations
SASOO/SOl L.ogic
Manual.
. .
SASOO/SOl
Schematic
Diagrams
3
5
7
17
21
22
23
31


1.0
MAINTENANCE
FEATURES
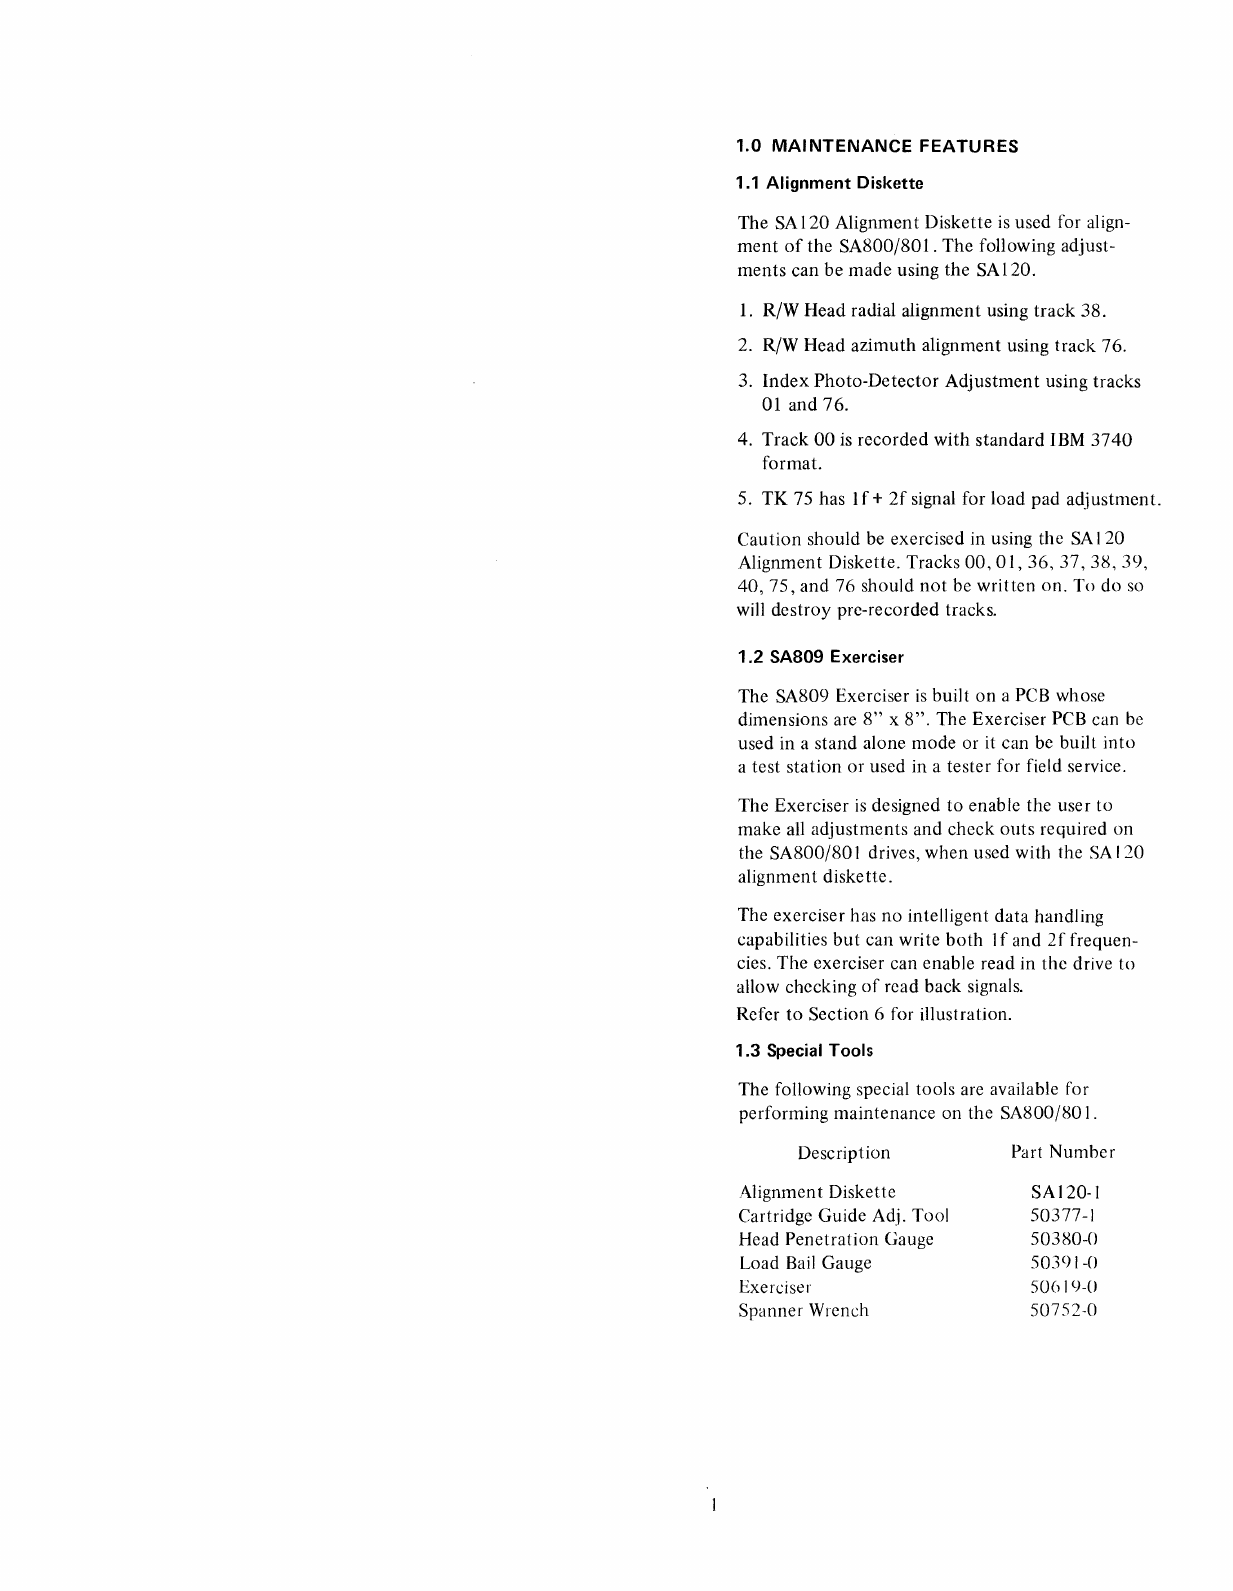
1.1 Alignment Diskette
The
SA
120 Alignment Diskette
is
used for align-
ment
of
the
SA800/80I.
The
following adjust-
ments
can be
made
using the SA120.
1.
RjW
Head radial alignment using
track
38.
2. R/W Head azimuth alignment using track 76.
3.
Index
Photo-Detector
Adjustment
using tracks
01
and 76.
4. Track
00
is
recorded with standard IBM
3740
format.
5.
TK
75 has 1f +
2f
signal for load pad adjustment.
Caution should be exercised in using the
SA
120
Alignment Diskette. Tracks
00,
01,
36,
37,38,39,
40,
75,
and 76 should
not
be written on. To do so
will destroy pre-recorded tracks.
1.2
SA809 Exerciser
The SA809 Exerciser
is
built on aPCB whose
dimensions are
8"
x
8".
The Exerciser PCB can be
used in astand alone mode or it can be built into
atest station
or
used in atester for field service.
The Exerciser
is
designed
to
enable the user to
make all adjustments and check
outs
required
on
the
SA800/80
1drives,
when
used with the
SA
120
alignment diskette.
The exerciser has
no
intelligent
data
handling
capabilities
but
can write
both
1fand
2f
frequen-
cies. The exerciser can enable read in the drive to
allow checking
of
read back signals.
Refer
to
Section 6for illustration.
1.3
Special Tools
The following special tools are available for
performing maintenance on the SA800/80
I.
Description
AlignmentDiskette
Cartridge Guide Adj. Tool
Head Penetration Gauge
Load
Bail
Gauge
Exerciser
Spanner Wrench
Part
Numher
SA120-1
50377-1
50380-0
50391-0
SOC)
19-0
50752-0


3
2.0
DIAGNOSTIC
TECHNIOUES
2.1 Introduction
Incorrect
operating
procedures,
faulty
program-
ming, damaged diskettes,
and
"soft
errors"
created
by airborne
contaminants,
random
electrical noise,
and
other
external
causes
can
produce
errors
falsely
attributed
to
drive failure or
misadjustment.
Unless visual inspection
of
the drive discloses
an
obvious misalignment
or
broken
part,
attempt
to
repeat
the
fault
with
the original
diskette,
then
attempt
to
duplicate fault
on
second
diskette.
2.2 "Soft Error" Detection
and
Correction
Soft
errors
are usually caused
by:
1.
Airborne
contaminants
that
pass
between
the
read/write
head
and
the disk. Usually these
contaminants
can be removed by
the
cartridge
self-cleaning wiper.
2.
Random
electrical noise
that
usually lasts for a
few
11
sec.
3. Small
defects
in
the
written
data
and/or
track
not
detected
during
the
write
operation
that
may
cause asoft
error
during
aread.
4. Worn or defective
load
pad.
The following
procedures
are
recommended
to
recover from
the
above
mentioned
soft
errors:
I. Reread
the
track
ten
(10)
times
or
until
such
time as
the
data
is
recovered.
2.
If
data
is
not
recovered
after
using
step]
,access
the
head
to
the adjacent track
in
the
same
direction previously
moved,
then
return
to
the
desired
track.
3.
Repeat
step
1.
4. If
data
is
not
recovered, the
error
is
not
recoverable.
2.3 Write Error
If
an
error
occurs during awrite
operation,
it will
be
detected
on the
next
revolution
by
doing aread
operation,
commonly
called a
"write
check."
To
correct
the error,
another
write
and
write check
operation
must be
done.
If
the write
operation
is
not
successful
after
ten
(10)
attempts
have been
made, aread
operation
should be
attempted
on
another
track
to
determine
if the media or the
drive
is
failing. If the error still persists the diskette

2.6
Test
Points··
800/801
should be replaced and the above procedure
repeated. If the failure still exists, consider the
drive defective. If the failure disappears, consider
the original diskette defective and discard it.
2.4
!Read
Error
Most errors that occur will
be
"soft"
errors.
In
these cases, performing
an
error recovery
procedure will recover the data.
2.5 Seek
Error
I. Stepper malfunction.
2.
Improper carriage torque.
To recover from aseek error recalibratc to track
00 and perform another seek
to
the original track.
TP
2
3
4
5
6
7
10
II
12
16
21
24
25
26
27
Read Data Signal
Read
Da
ta Signal
Read Data (Differentiated)
Read Data (Differentiated)!
Signal Ground
Signal Ground
Signal Ground
-Index
+Head Load
-Index and 80 ISector Pulses
+Read Data
-Data Separator Time +I
-Data Separator Time +2
+Write Protect
+Detect Track 00.
+Gated Step Pulses
2.7
Test
Point
Locations
1 • •
••
J5
10
••
11
0
7J2
P2
025
26 0
012 A
20
P1
J1
•
~
J6.
27 •
49
0
V
21
10
0 0 16
0
0
24
21
0010
~
0
6
J3i
04350
000P3
4

3.0
PREVENTIVE
MAINTENANCE
3.1 Introduction
The prime objective
of
any preventive maintenance
activity
is
to provide
maximum
machine avail-
ability to the user. Every preventive maintenance
operation should assist
in
realizing this objective.
Unless apreventive maintenance operation cuts
machine downtime, it
is
unnecessary.
Visual inspection
is
the first step
in
every sched-
uled maintenance operation. Always
look
for
corrosion, dirt, wear, binds, and loose connections.
Noticing these items during
PM
may save down-
time later.
Remember, do
not
do
more
than recommended
preventive maintenance on
equipment
that
is
operating satisfactorily.
3.2
Preventive Maintenance Procedures
Details
of
preventive maintenance operations are
listed in Figure
1.
During normal preventive
maintenance,
perform
only those operations listed
on the
chart
for
that
preventive maintenance
period. Details on adjustments
and
service checks
can be found in the maintenance manual. Observe
all safety procedures.
3.3
Cleanliness
Cleanliness
cannot
be overemphasized in maintain-
ing the SA800/80
1.
Do
not
lubricate
the
SA800/
801;
oil will allow dust and dirt
to
accumulate.
The read/write head should be cleaned only when
signs
of
oxide build
up
are present.
uns
ment
reas
ws,
es
FREQ
UNIT
MONTHS
CLEAN
OBSERVE
Read/Write Head
12
Clean Read/Write Head Oxide build up
ONLY IF NECESSARY
R/W Head Load
12*
Replace
Button
Stepper
Motor and
12
Clean
off
all oil,
dust,
Inspect for nicks and b
Lead Screw
12
and dirt
Belt
12
Frayed
or
weakened a
Base
12
Clean base Inspect for loose scre
connectors, and switch
Read/Write Head
12
Check for proper align
*Assumes
normal
usage Figure 1PM Procedures
5
7
4.0
REMOVALS,
ADJUSTMENTS
For parts location, see Section
5.
4.1 Motor Drive
4.1.1 Drive Motor Assembly: Removal
and
Installation
a.
Extract 3contacts to disconnect
motor
from
AC
connector.
b. Loosen two screws holding capacitor clamp
to
the base. Remove rubber
boot
and disconnect
motor
leads from capactior.
c. Remove connectors from
PCB
and remove PCB.
d. Remove belt from drive pulley.
e.
Remove 4screws holding the
motor
to the base
casting and remove motor.
f. Reverse the procedure for installation.
Note: Insure ground lead
is
installed between
capacitor clamp and base.
4.1.2
Motor
Drive Pulley
a.
Loosen set screw and remove pulley.
b. Reverse procedure for installation.
Note: When installing anew pulley, the drive
pulley must be aligned with the spindle
pulley
so
that
the belt tracks correctly.
4.2
Side
Cover: Removal
a.
Retract screw from upper casting wall suffi-
ciently to allow the side cover to be rocked out.
b.
Lift
cover
off
screw in lower casting wall.
4.3
Cartridge Guide
Access
a.
Remove side cover (Section 4.2).
b. Position head
to
approximate center
of
head
load bail (to prevent load arm damage).
c.
Loosen 2screws holding cartridge guide to door
latch plate.
d. Swing cartridge guide out.
e.
When the guide
is
swung in, it must be adjusted
as
per Section 4.9.2.

4.4
Sector/Index
LED
Assembly: Removal and
Installatlion
a. Remove side cover (Section 4.2).
b. Disconnect the wires
to
the
LED terminals
(solder joints).
c. Remove
the
screw holding the LED assembly
to
the cartridge guide.
d. Reverse the procedure for installation.
e. Check index timing
and
readjust
if
necessary.
4.5
Write Protect Detector: Removal
and
Installatiion
a.
Remove
connectors
from PCB
and
remove PCB.
b.
Extract
wires from P2
connector,
pins L3, L4,
R5
(E), and R8 (S).
c. Remove cable clamps.
d. Remove side cover (Section 4.2).
e. Remove screw holding
the
detector
bracket
and
remove assembly.
f. Reverse procedure for reinstalling.
Connect
the
wires
to
P2
by
the following: Red
to
'3'
(L3),
Grey to
'4'
(IA),
Black
to
'E'
(R5)
and
White
to
'J'
(R8).
4.5.1 Write Protect Detector Adjustment
a.
Insert
SA
101 diskette in to drive. Write
protect
hole
must
be
open.
b. Set oscilloscope to AUTO sweep, 2V/div. and
monitor
TP25.
c.
Loosen screw
on
detector
assembly and adjust
until
maximum
amplitude
is
achieved. Tighten
screw.
4.6
Head Load Actuator
4.6.1 Head
L.oad
Actuator: Removal
and
Installation
a.
Remove side cover (Section 4.2).
b. Disconnect the wires
to
the
actuator
terminals
(solder joints).
c. Swing
out
the
cartridge
to
guide assembly
(Section 4.3).
8
d. Remove screw holding
the
actuator
to
the
cartridge guide.
CAUTION: Restrain the
head
load arm
to
pre-
vent its
impact
with
the head.
e.
Reverse
the
procedure for installation.
4.61.2
Head Load Actuator Adjustment
a.
Remove side cover.
b. Energize Head
Load
Coil.
c.
Place Head Load
Actuator
adjustment
tool,
PIN
50391,
on platen.
d. Adjust down
stop
so thatthe
top
of
Head Load
Bail
is
flush
with
top
of
tool within ±
.005"
at
track
76. Reference Figure
3.
e. Step carriage
to
track
38.
f.
De-energize Head Load Coil.
g.
Place
adjustment
tool
onto
R/W Head and place
load
button
in
cup
of
tool.
h. Adjust
up
stop
on
actuator
so
that
bail
just
touches Head
Load
Arm
or has
.005"
clearance
or lifts Load Arm
.005".
Reference Figure
2.
l.
Energize Head Load Coil
and
step carriage
between track
00
and 76. Insure
that
there
is
a
clearance
of
a
minimum
of
.010"
between Head
Load Bail
and
Head
Load
Arm.
j.
Replace side cover.
UP STOP
ADJUSTMENT
ISCREW
FLUSH
WITHIN
±.005
~~--\~b=T=~=O=--L~1
R/W
HEAD
..-----.'
"\
FIGURE
2
HEAD
LOAD
ACTUATOR
UPSTOP
ADJUSTMENT
ADJUSTMENT
==-~
-~~-
SCR
EW
~,-=E=~=:=·~~=~:I~~
D~i~{~:~05
BASE
CASTING
PLATEN---.
FIGURE
3
HEAD
LOAD
ACTUATOR
DOWN
STOP
ADJUSTMENT

4.6.3
Head Load
Actuator
Timing
a.
Insert Alignment Diskette (SA 120).
b. Step carriage to track 00.
c.
Sync oscilloscope on TP
11
(+ Head Load). Set
time base to 10MSEC/division.
d. Connect one probe to TPI and the other
to
TP2. Ground probes to the
PCB.
Set the
inputs to add and invert one
input
e.
Energize the Head Load solonoid and observe
the read signal on the oscilloscope. The signal
must be at 50%
of
full amplitude by 35Msec.
Reference Figure
4.
f.
If
this
is
not met, continue on with the
procedure.
g.
Check adjustments outlined in paragraph
4.6.2.
h.
If
item 'g'
is
ok, adjust down stop screw
(Figure
6)
clockwise until timing
is
met.
Note: Not
to
exceed
~
turn.
FIGURE
4
HEAD
LOAD
ACTUATOR
TIMING
4.7
Index/Sector
Photo
Transistor Assembly
4.7.1 Index/Sector
Photo
Transistor
J~ssembly:
Removal and Installation
a.
Disconnect P2 connector from PCB.
b.
Remove wires from Door Closed switch and
extract wires from P2 connector pin 9(L9)
Black, H(R7) Brown, 6(L6) Red and B(R2)
Orange.
c.
Remove cable clamp holding wires from
detector.
9
d.
Remove screw holding detector
to
the base
plate and remove assembly.
e.
To install reverse procedure.
4.7.2
Index/Sector
Photo
Transistor
Potentiometer
Adjustment
a.
Insert Alignment Diskette (SA120).
b.
Using oscilloscope monitor TP-I2
(-Index),
sync internal negative,
DC
coupled, set vertical
scale
to
2V/cm.
c.
Adjust the potentiometer
on
the Sector/Index
Phototransistor
to
obtain apulse
of
1.7 msec.
±
.5
msec. duration.
d.
Continue adjustment in Section 4.7.3.
4.7.3
Index/Sector
Adjustment
a.
Insert Alignment Diskette (SA 120).
b.
Step carriage to track 01.
c.
Sync oscilloscope, external negative, on TP 12
(-
Index). Set time base to 50
Ilsec/
division.
d.
Connect one probe
to
TP 1and the other
to
TP
2.
Ground probes to the
PCB.
Set the inputs
to
AC,
Add and invert one channel. Set vertical
deflection
to
500
MV
/division.
e.
Observe the timing between the start
of
the
sweep and the first data pulse. This should be
200 ±100
jJ.sec.
If
the timing
is
not
within
tolerence, continue on with the adjustment.
Reference Figure
5.
FIGURE
5
INDEX
TIMING

f.
Loosen
the
holding screw in
the
Index
Trans-
ducer
until
the transducer is
just
able
to
be
moved.
g.
Observing
the
timing, adjust
the
transducer
until
the
timing is
200
±
100
J1sec.
Insure
that
the transducer assembly
is
against
the
registra-
ltion surface
on
the
base casting.
h. Tighten
the
holding screw.
i.
Recheck
the
timing.
j.
Seek
to
track
76
and
reverify
that
the
timing
is
200
±1
00
J1sec.
4.8 Spindle Assembly
a. Remove side cover (Section
4.2).
b. Swing
out
cartridge guide (Section
4.3).
c.
Remove
the
nut
and washer
or
2spring washers.
holding
the
spindle pulley. On late level drives,
Spanner Wrench
50752
may
be used
to
hold
spindle.
CAUTION: The pre-loaded rear bearing
may
fly
out
when
spindle pulley
is
removed.
d. Withdraw spindle
hub
from
opposite
side
of
baseplate.
e. Reverse
the
procedure
for installation.
f.
Tighten
nut
to
20
in.flbs.
If
spring washers are
used, insure
they
are compressed.
Add
a
drop
of
LOCTITE®
#290
to
threads.
4.8.1 Clamp Hub Removal
a.
Remove
hub
clamp plate. Reference Figure 6.
b. Remove
damp
hub
and spring.
c.
To install, reverse
the
procedure. No
adjustment
necessary.
CARTRIDGE
GUIDE
ADJ.
TOOL
MOUNTING
SCREW
ADJUSTING
SCREW
FIGURE
6
CARTRIDGE
GUIDE
ADJUSTMENT
10
4.9.1 Cartridge Guide Removal
a.
Perform
steps 4.3
through
4.6.1.
b.
Remove C-clip
form
pivot shaft.
Reference Figure7.
c.
Remove pivot shaft.
d.
Tilt
the
cartridge guide slightly,
and
remove
it
from
the
upper
pivot.
e.
To
install
the
cartridge guide, reverse
the
procedure.
PIVOT
SHAFT
\
/REMOVE
C
CLIP
'----,-L.--:J-------::J
~~
~=c
FIGURE
7
CARTRIDGE
GUIDE
REMOVAL
4.9.2
Cartridge Guide Adjustment
a.
Insert the
shoulder
screw
(tool
PfN 50377-1)
through
the
adjustment
hole in
the
cartridge
guide and screw
completely
into
the
base cast-
ing
(hand
tight). Reference Figure
6.
b.
Move
the
handle
into
the
latched
position
and
hold it lightly against
the
latch.
c.
Tighten
two
screws holding
the
cartridge guide
to
the
latch plate.
d.
Remove the tool
and
check
to
determine
the
flange on
the
clamp
hub
clears the cartridge
guide
when
the
spindle is rotating.
If
the
clamp
hub
rubs on the cartridge guide,
repeat
the
adjustment
procedure.
e. Check index alignment
per
Section
4.7.3.
f.
Insert diskette, close and
open
door,
then
check
for
proper
operation.
4.10
Front Plate Assembly: Removal
a.
Remove side cover (Section 3.4.2).
b.
Swing
out
the cartridge guide assembly (Section
4.3).

c.
Remove 4screws holding
the
front
plate
assembly
to
the
base casting.
d. To install, reverse the
procedure.
e. Check
Index
adjustment
Section
4.7.3.
4.
'11
Head
Amplitude
Check
These
checks
are
only
valid
when
writing
and
reading
back
as described below.
If
this
amplitude
is
below
the
minimum
specified,
the
load
pad
should
be replaced
and
the
head should be cleaned
if necessary before re-writing
and
re-checking.
Insure the
diskette
used for this
check
is
not
"worn"
or
otherwise shows evidence
of
damage on
either
the
load
pad
or head side.
a.
Install
good
media.
b.
Select
the
drive
and
step to
TK
76.
c.
Sync
the oscilloscope
on
TP-12
(-Index)
con-
nect
one
probe
on
TP-2 and
one
on
TP-I,
on
the drive PCB.
Ground
the
probes
to
the
PCB
add
and
invert one
input.
Set
volts
per
division
to
50mv
and
time base
to
20
Msec.
per
division.
d. Write the entire
track
with
2F signal (all
one's).
e.
The
average
minimum
read back
amplitude,
peak
to
peak,
should
be
110
millivolts.
If
the
output
is
below
minimum
and anew load
pad
and
different
media
is
tried
and
the
output
is
still low, it will be necessary
to
install anew
head
and carriage assembly.
4.11.1 Stepper/Carriage Assembly; Removal
and
Installation
a. Remove cable
clamp
holding R/W
head
cable
on
PCB side
of
drive.
b. Remove side cover (Section 4.2).
c.
Extract
stepper
cable
contacts
from P2 connec-
tor. Black 10
(LI
0),
Red
2(L2), Brown 5(L5),
and
Orange 8(8).
Note: This
step
is
only necessary if
the
stepper
motor
is
to
be replaced.
d. Loosen
(2)
screws
and
swing
clamp
down
to
allow withdrawl
of
motor.
CAUTION: DO NOT LOOSEN
THREE
SCREWS COATED WITH
GL
YPTOL.
11
e. Remove the
grommet
on
the
cable
that
is
inserted
into
aslot
on
the
Track
00
Detector
bracket.
f.
Turn
stepper
shaft until the carriage runs
off
the
end
of
the
lead screw.
g.
To
install stepper/carriage assembly, reverse
procedurc.
Notc
steps
"h"
and
"i".
h.
If
installing a
new
carriage, set
the
pre-load
nut
in
the
#2
notch.
Reference Figure 8.
i.
When threading lead screw
into
carriage
assembly, press
the
pre-load
nut
slightly against
spring in
order
to
start
thread.
After
threading,
insure there
is
agap
between
pre-load
nut
and
rear
of
carriage.
NOTCH
#1
FIGURE
8
CARRIAGE
ASSEMBLY
4.11.2
Carriage Assembly
Readjustment
After
Replacement
a.
Loosen
Track
00
stop
collar
and
manually move
the carriage towards
the
stepper
by
rotating
the
lead screw until
the
carriage
load
arm
tab
is
near
the edge
of
the
load
bail.
Tighten
the
collar set
screw.
b.
Position
the
Track
00
flag
approximately
in
the
center
of
its slot and
tighten
the
screw.
Move the carriage towards the spindle
by
rotat-
ing
the
lead screw
un
til the flag
is
clear
of
the
detector.
c. Insert
the
SA
120
alignment diskette
and
load
the head. Set
the
scope
as
explained in
Section
4.11.3
steps c
and
d.
d.
Step
the
carriage towards
track
00
until
the
track
00
signal
is
detected
on
the interface
pin
42.

e.
Loosen the 2stepper
motor
mounting
screws
slightly
and
slowly
rotate
the stepper
motor
case until aread data signal
off
of
track
00
appears. Continue
rotation
until maximum
amplitude
is
obtained. This
is
only arough
adjustment.
CAUTION: DO NOT LOOSEN
THREE
SCREWS COATED WITH GLYPTOL.
f.
Step the carriage
to
TK
38 and proceed
with
ht~ad
radial adjustments. Refer to Section4.11.3.
g.
Adjust Track
00
stop
(Section 4.11.7).
h. Adjust Track
00
flag (Section 4.11.8).
i. Adjust index (Section 4.7.3).
j. Adjust Azimuth (Section
4.11.9
).
4.11.:3 Head Radial
Alignment
Note:: Head radial alignment should be checked
prior to adjusting index/sector,
Track
00
flag or carriage stop.
a.
Load alignment diskette
(SAI20).
Note: Alignment diskette should be
at
room
conditions for
at
least twenty minutes
before alignment.)
b. Step the carriage
to
track 38.
c. Sync the oscilloscope, external negative,
on
TP 12
(-
CE Index). Set the time base
to
20
Msec per division. This will display over one
revolution.
d.
Connect one probe
to
TP Iand the
other
to
TP
2.
Ground
the probes
on
the PCB.
Set
the
inputs
to
AC,
Add
and invert one channel. Set
the vertical deflection
to
100 MV/dev.
e.
The
two
lobes must be within 70% amplitude
of
each other.
If
the lobes do
not
fall within the
specification,
continue
on
with the procedure.
Reference Figure
9.
f.
Loosen the
two
mounting
screws which hold
the
motor
clamp
to
the mounting plate.
CAUTION: DO NOT LOOSEN
THREE
SCREWS COATED WITH GLYPTOL.
g.
Rotate
the stepper
motor
to
radially move the
head in or
out.
If
the left lobe
is
less
than
70%
of
the right,
turn
the stepper
motor
counter-
clockwise
as
viewed from the rear.
If
the right
lobe
is
less than 70%
of
the left lobe,
turn
the
stepper
motor
cl
ockwise
as
viewed from the
rear.
12
FIGURE
9
HEAD
RADIAL
ALIGNMENT
h.
When the lobes are
of
equal amplitude, tighten
the
motor
clamp
mounting
screws. Reference
Figure
9.
i.
Check the adjustment by stepping
off
track and
returning. Check in
both
directions
and
readjust
as
required.
j. Whenever the Head Radial Alignment has been
adjusted, the Track
00
flag adjustment (Section
4.11.8), Track
00
stop
(Section
4.11.7)
and R/W
head azimuth (Section 4.11. 9 )
must
be checked.
4.11.3
ReadlWrite
Head
Load
Button:
Removal
and
Installation
a.
Remove side cover
if
installed.
b. To remove the old
button,
hold the arm
out
away from head, squeeze the locking tabs
together with apair
of
needle nose pliers and
press forward.
c. To install load
button,
press
the
button
into
the arm, from the head side, and it will snap in
place. Reference Figure 10.
FIGURE
10

d. Adjust according
to
Section 4.11.4.
Note: The load arm should never be opened
over 90° from carriage assembly or while
at track
00
to
prevent possible damage to
the torsion spring.
4.11.4
Read/Write Head Load
Button
Adjustment
a.
Insert Alignment Diskette (SAl20).
b. Connect oscilloscope to TP 1and
2,
added
differentially
and
sync negative external on
TP 12
(-
INDEX).
c. Step carriage to track 75.
d.
Observing read signal on oscilloscope, rotate
the load
button
counter-clockwise in small
increments (10°) until maximum amplitude is
obtained.
4.11.5
Head
Penetration
Adjustment
Note: This adjustment
is
not
normally done in the
field. The only time that this adjustment
need be done
is
when the stepper mounting
plate has been loosened or removed.
a.
Place the penetration tool
(PIN
50380) on the
gauge block and insure
that
the gauge reads
.030 (3
on
the small hand) and zero the dial
for the large hand. This results in areading
of
.030".
EVEN
AMPLITUDE
(100%),
ON
TRACK
LEFT
80%
OF
RIGHT,
+1
MIL
OFF
TRACK
TOWARD
TK
0
LEFT
60%
OF
RIGHT,
+2
MI
L
OFF
TRACK
TOWARD
TK
0
LEFT
40%
OF
RIGHT
+3
MIL
OFF
TRACK
TOWARD
TK
0
RIGHT
80% OF
LEFT,
- 1
MIL
OFF
TRACK
TOWARD
76
RIGHT
60% OF
LEFT,
- 2
MIL
OFF
TRACK
TOWARD
76
RIGHT
40%
OF
LEFT,
- 3
MIL
OFF
TRACK
TOWARD
76
Figure
11
R/W Head Radial Alignment
13

b. Swing
open
the
cartridge
as
per
Section
4.3.
c.
Place
the
penetration
tool
on
the
base assembly
with the
short
leg
on
the
platen,
the
long
leg
on
the
carriage guide bar,
and
the
plastic
tip
in
the
center
of
the
R/W head.
d.
The
head
penetration
should
be
.030"
±
.003"
read
on
the
gauge.
c.
[f
the
head
does
not
meet
this
adjustment,
move the
stepper
plate
laterally
until
the gauge
reads
.030".
f.
Tighten
the
screws
and
recheck
the
adjustment.
g.
Return
cartridge guide
and
adjust
as
per
Section
4.9.2.
h. Adjust
Azimuth
(Section
4.11.
9).
4.11.6
Track
00
Detector:
Removal
and
Installation
a.
Remove side cover
(Section
4.2).
b. Swing cartridge guide
open
(Section
4.3).
c.
Manually
rotate
stepper
shaft
and
move carriage
all the way in.
d. Remove 2screws holding
bracket
to
base cast-
ing
and
remove
bracket
and
detector.
e.
Remove PCB
connector
and
remove PCB.
f.
Extract
cable
from
P2
connector;
Brown, A
(Rl);
Black, C
(R3);
Red, F
(R6);
and
Orange
K
(R9).
g.
Remove cable clamps and remove
Detector
assembly.
h.
To
install, reverse
the
procedure.
i.
Adjust according
to
Section
4.11.8.
4.11.7
Track
00
Stop
Adjustment
a.
Remove side cover
(Section
4.2).
b.
Step
carriage
to
track
00.
Verify
that
carriage
is
at
00
by
checking PI
pin
42
is
minus
(ground).
c.
Check
that
stop
is
.040"
±
.020"
be tween collar
and carriage.
Turn
DC
power
OFF,
and
manually
rotate
lead screw clockwise until
carriage stops. Check
that
stop
is
.020"
±
.010"
between
collar and carriage.
14
d.
If
clearances are
not
within
tolerance,
con
tinue
on
with
adjustment
procedure.
e.
Turn
DC
power
ON.
f.
Step
carriage
to
track
02.
g.
Loosen
Track
00
stop
collar.
h.
Grasp
end
of
lead
screw,
in
back
of
stepper
motor,
with
a
pair
of
pliers
and
manually
turn
lead screw clockwise
to
the
track
-01
position.
(Next
detent
position
on
stepper
motor.)
i.
Position
the
stop
collar axially along the
lead
screw so there is
.020"
±
.010"
between
collar
and
carriage.
Rotate
the collar
toward
inside
un
til
the
stop
on
the
collar
contacts
the carriage
stop
surface.
Tighten
screw.
j.
Turn
DC Power
OFF
and
back
ON. Carriage
should
move
to
track
00.
Verify
that
there
is
data
at
track
00.
k.
Step
carriage
between
track
00
and
76
and
check for
any
binding or interference
between
the carriage, lead screw,
stop
and
head
cable.
4.11.8
Track
00
Flag
Adjustment
a.
Remove side cover
(Section
4.2).
b.
Check
head
radial alignment
and
adj ust
if
necessary before making this
adjustment.
c.
Connect
oscilloscope
probe
to
TP
26.
Set
vertical
deflection
to
1v/division
and
sweep
to
continuous.
d.
Step
carriage
to
track
01.
TP
26
should
be high
(+5 volts).
e.
If
TP
26
is
not
high, loosen screw
holding
Track
00
nag
and
move flag towards
stepper
until
TP 26
just
goes high.
f.
Step
carriage
to
track 2. TP
26
should
go low.
Adjust flag
towards
spindle
if
not
low.
g.
Check
adjustment
by
stepping carriage
between
tracks
00
and
02,
observing
that
TP
26
is
low
at
track
02
and
high
at
tracks 0I
and
00.
h.
Replace side cover.

4.11.9 R/W
Head
Azimuth Alignment
This adjustment can only be made on SA800/801's
at
MLC
3or higher with anew style stepper plate
which has 50112-4 stamped
on
it. This adjustment
is
only necessary when the stepper
or
carriage
assembly has been replaced or
if
the stepper plate
has been loosened.
a.
If
stepper plate has been loosened or replaced
adjust head penetration, Section 4.11.5.
b. Align R/W head, 4.11.3.
c. Install C.E. alignment diskette
SA
120-1. Select
the drive and step to track 76.
d. Sync the scope external negative on TP 12, set
time base
to
.5
MSec per DIY.
e.
Connect one probe
to
TP 1and the other
to
'IP
2. Invert one channel and ground the probes
to TP 5&6. Set
the
inputs to AC, ADD and
50
MY
per division.
f.
Compare the wave form to Figure 13.
If
not
within the range shown the head Azimuth will
require adjustment.
If
required, proceed
to
next step.
g.
Slightly loosen the 2R.H. stepper plate mount-
ing
screws only. Reference Figure 12. Do
not
loosen the L.H. screw
as
this will effect the
head penetration adjustment.
FIGURE
13
h. Push the stepper down towards the A.C. drive
motor
until the 1st sector is larger than the 2nd
sector.
i.
Pry the R.H. side
of
the stepper plate
up
with a
medium screw driver until the 1st and
4th
sectors have equal to or less amplitude than the
middle 2sectors. Reference Figure 13.
15
I,
C:LI~I
MOTOR
CAPACITOR
STEPPER
PLATE
(P/N50112-41
1'f
'
00~111
R.H.STEPPERPLATE
M
MOUNTING
SCREWS
L.H.
MOUNTING
~0
SCREW
(DO
NOT
I
~
LOOSEN)
~
[]
~"""
&i!~'~:ATTH",mNT
AC
DRIVE
MOTOR~
TO
OBTAIN
THE
PROPER
ADJUSTMENT
DRIVE
REAR
VIEW
FIGURE
12
j. Re-tighten the 2R.H. screws.
If
either
of
the
outside 2sectors increase in amplitude greater
than the inside 2after re-tightening the screws,
perform the adjustment again.
k. Check and re-adjust the index timing and head
radial adjustment
if
required.
4.11.10 Stepper Plate Removal
and
Adjustment
a.
Remove PCB.
b. Remove head and carriage assembly from
stepper lead screw, section 4.11.1 .
c. Pull the stepper
motor
out
thru
the stepper
plate until the lead screw
is
completely clear
of
the plate.
d. Remove the 3stepper plate mounting screws.
e.
Reinstall the stepper plate.
NOTE:
If
the stepper plate
is
P/N 50112-4,
there must be anylon bushing in the L.H. hole
and all 3screws must have aflat washer and a
black spring washer.
f.
Reinstall head and carriage and stepper
motor
assemblies.
g.
Adjust penetration, Section 4.11.5.
If
the
stepper plate
is
P/N 50112-4, there will remain
agap between the
bottom
of
the stepper plate
and
the
machined surface on the casting.
All
other style stepper plates must remain flush
with machined surface.
h. Readjust carriage assembly, Section 4.] 1.2.
i.
Check and adjust Azimuth alignment, Section
4.11.10.

4.12
Activity Light Removal and Installation
(Standard)
a.
Remove P6
connector
from PCB.
c. Remove
front
plate (Section
4.10).
b. Remove two screws holding assembly
to
front
plate.
b. Remove cable clamp holding
the
cable and
remove cable from clamp.
c.
Remove two allen
head
screws holding assembly
to push
button.
c.
Remove
the
2screws holding the push
button.
d. Remove push
button
and activity light from
the front
as
an entire assembly.
d. Grasp
both
ends
of
push
bu
tton
and
bow
outwards to remove LED.
c. Reverse procedure to assemble.
e.
Install the light and push
button
assembly
by
reversing the removal procedure.
f.
No special
orientation
is
required when
installing P6
onto
the PCB. No adjustments
are required
to
the push
button
assembly.
f. Adjustment
of
the
door
lock should
not
be
necessary.
If
it has to be.
the
gap between the
armature tab
and
the latch should
be
.015
±.010. This
adjustment
can be made
by
loosening the
two
screws on
the
armature.
4.13
Door Lock
a.
Disconnect P6 connector.
4.14
Activity Light (with
Door
Lock Option)
b. Disconnect red wire near
IC
2G.
a.
Follow procedure for
door
lock
(4.13).
LED
,,---*""
(l3LK)
L.--
~tI_
SOLENOID
(2)
(BRN)
GROUND
(B
LK)
"*"---------1
+5
VOLTS
SOLENOID(1)
(RED)
*-------4~------~
(FlED)
INUSELED
(BRN)
DOCK
25058·-
II
~rJ$$@
t;J
RED
BRN
BLK
FIGURE
14
DOOR
LOCK
SCHEMATIC
16
Other manuals for SA800
2
This manual suits for next models
1
Table of contents
Other Shugart Storage manuals

Shugart
Shugart SA800 User manual

Shugart
Shugart Kennedy 9610 User manual

Shugart
Shugart SA900 User manual

Shugart
Shugart SA450 User manual

Shugart
Shugart SA 400 minifloppy User manual

Shugart
Shugart SA800 Installation and operation manual

Shugart
Shugart Kennedy 9600B User manual

Shugart
Shugart SA1000 User manual

Shugart
Shugart SA860 User manual

Shugart
Shugart Kennedy 9660 User manual