Shure ADX3 User manual

ADX3
Plug-On Transmitter
Print user guide for ADX3.
Version: 0.2 (2022-L)

Shure Incorporated
2/23
Table of Contents
ADX3 Plug-On Transmitter 3
Important Safety Information 3
IMPORTANT SAFETY INSTRUCTIONS 7
WARNING 8
ADX3 Axient Digital Plug-On Transmitter 8
Full Guide Online 8
Included Components 9
ADX3 Transmitter Overview 9
Transmitter Controls 10
Home Screen Display 11
Setup 12
Locking the Interface 12
Setting the AA Battery Type 13
Shure Rechargeable Battery 13
Shure SB900B Runtime 13
Checking Battery Info 13
Power Over USB 14
Menu Parameters 14
Tips for Editing Menu Parameters 14
Menu Map 15
IR Sync 15
Updating Firmware 16
Firmware Versioning 16
Updating the Transmitter 16
Specifications 16
Frequency Range and Transmitter Output Level 18
Certifications 21
LICENSING INFORMATION 22
Information to the user 22

Shure Incorporated
3/23
ADX3
Plug-On Transmitter
Important Safety Information
Explanation of Symbols -- Explication des symboles -- Erläuterungen zu Symbolen -- Explicación de los símbolos --
Spiegazione dei simboli -- Explicação dos Símbolos -- Объяснение обозначений -- Verklaring van symbolen -- シンボ
ルの説明 -- 기호 설명 -- 符号说明 -- 符號說明 --Penjelasan Simbol --ﺯﻮﻣﺮﻟﺍ ﺡﺮﺷ
Caution: risk of electric shock
Attention:risquedechocélectrique
Vorsicht: Stromschlagrisiko
Precaución: riesgo de descarga eléctrica
Attenzione: rischio di scosse elettriche
Aviso: risco de choque elétrico
Внимание:рискпораженияэлектрическимтоком
Waarschuwing: risico op elektrische schok
警告:感電のおそれ
주의: 전기 충격 위험
小心电击
注意:存在觸點風險
Awas: risiko sengatan listrik
ﻪﻴﺒﻨﺗ:ﺔﻴﺑﺮﻬﻜﻟﺍ ﺔﻣﺪﺼﻟﺍ ﺮﻄﺧ
Caution: risk of danger (See note.)
Attention:risquededanger(voirlaremarque)
Vorsicht: Gefährdungsrisiko (siehe Hinweis.)
Precaución: riesgo de peligro (ver nota)
Attenzione: rischio di pericolo (vedi nota).
Aviso: risco de perigo (Veja observação.)
Внимание:опасность(см.примечание.)

Shure Incorporated
4/23
Waarschuwing: risico op gevaar (zie opmerking)
警告:危険のおそれ(注意書き参照)
주의: 위험(주 참조)
小心危险(参见注释)。
注意:存在危險(參見注釋)。
Awas: risiko bahaya (Lihat catatan.)
ﻪﻴﺒﻨﺗ:ﺮﻄﺨﻟﺍ ﺮﻃﺎﺨﻣ)ﺔﻈﺣﻼﻤﻟﺍ ﺮﻈﻧﺍ(
Direct current
Courant direct
Gleichstrom
Corriente directa
Corrente continua
Corrente direta
Постоянныйток
Gelijkstroom
直流
직류
直流
直流電
Arus searah
ﺮﺷﺎﺒﻣ ﺭﺎﻴﺗ
Alternating current
Courant alternatif
Wechselstrom
Corriente alterna
Corrente alternata
Corrente alternada
Переменныйток
Wisselstroom

Shure Incorporated
5/23
交流
교류
交流
交流電
Arus bolak-balik
ﺏﻭﺎﻨﺘﻣ ﺭﺎﻴﺗ
On (Supply)
Marche (alimentation)
Ein (Versorgung)
Encendido (alimentación)
Alimentazione attiva
Ligado (Fonte)
Вкл.(питание)
Aan (voeding)
オン (供給)
켜짐(공급장치)
打开(供电)
開啟(電源)
Hidup (Catu)
ﻞﻴﻐﺸﺗ)ﺩﺍﺪﻣﺇ(
Equipment protected throughout by DOUBLE INSULATION or REINFORCED INSULATION
ÉquipementintégralementprotégéparuneDOUBLEISOLATIONouuneISOLATIONREN
FORCÉE
Geräte durchgängig durch DOPPELTE ISOLIERUNG oder VERSTÄRKTE ISOLIERUNG
geschützt
El equipo está protegido con AISLAMIENTO DOBLE o AISLAMIENTO REFORZADO
ApparecchiointeramenteprotettotramiteISOLAMENTODOPPIOoISOLAMENTORINFORZA
TO
Equipamento protegido por DUPLA ISOLAÇÃO ou ISOLAÇÃO REFORÇADA
ОборудованиезащищеносиспользованиемДВОЙНОЙИЗОЛЯЦИИилиУСИЛЕННОЙ
ИЗОЛЯЦИИ

Shure Incorporated
6/23
Apparatuur volledig beschermt door DUBBELE ISOLATIE of VERSTERKTE ISOLATIE
二重絶縁または強化絶縁により常に保護されている機器
이중 절연 또는 강화 절연으로 완전히 보호된 장비
设备始终有双绝缘或加强绝缘保护
透過雙絕緣或加強絕緣完全保護設備
Peralatan dilindungi seluruhnya dengan ISOLASI GANDA atau ISOLASI DIPERKUAT
ﻯﻮﻘﻣ ﻝﺰﻋ ﻭﺃ ﺝﻭﺩﺰﻣ ﻝﺰﻋ ﻝﻼﺧ ﻦﻣ ﻲﻤﺤﻣ ﺯﺎﻬﺠﻟﺍ
Stand-by
Veille
Standby
En espera
Standby
Em espera
Режиможидания
Stand-by
スタンバイ
대기
待机
待機
Siaga
ﺩﺍﺪﻌﺘﺳﻻﺍ ﻊﺿﻭ
Equipment should not be disposed of in the normal waste stream
Nepasmettrel’équipementaurebutaveclesdéchetsnormaux
Geräte sollten nicht im normalen Abfallstrom entsorgt werden
No se debe desechar el equipo en el canal normal de eliminación de desechos
L’apparecchionondeveesseresmaltitonelflussodeirifiutinormali
Este equipamento não deve ser descartado em lixo comum
Оборудованиенеподлежитутилизациивместесобычнымибытовымиотходами
Apparatuur mag niet worden afgevoerd via het normale afvalsysteem

Shure Incorporated
7/23
1.
2.
3.
4.
5.
6.
7.
8.
9.
10.
11.
12.
13.
14.
15.
16.
17.
18.
19.
機器は通常の廃棄物の流れにより廃棄されてはなりません。
장비를 일반 쓰레기 수거함에 폐기하지 말 것
本设备不能作一般废弃物处理
不應在普通廢水中處理設備
Peralatan tidak boleh dibuang dalam aliran limbah normal
ﺓﺮﻄﺨﻟﺍ ﺕﻼﻀﻔﻟﺍ ﻝﻭﺪﺟ ﻲﻓ ﺯﺎﻬﺠﻟﺍ ﻦﻣ ﺺﻠﺨﺘﻟﺍ ﻡﺪﻋ ﺐﺠﻳ
IMPORTANT SAFETY INSTRUCTIONS
READ these instructions.
KEEP these instructions.
HEED all warnings.
FOLLOW all instructions.
DO NOT use this apparatus near water.
CLEAN ONLY with dry cloth.
DO NOT block any ventilation openings. Allow sufficient distances for adequate ventilation and install in accordance
withthemanufacturer’sinstructions.
DONOTinstallnearanyheatsourcessuchasopenflames,radiators,heatregisters,stoves,orotherapparatus(in
cluding amplifiers) that produce heat. Do not place any open flame sources on the product.
DO NOT defeat the safety purpose of the polarized or grounding type plug. A polarized plug has two blades with one
wider than the other. A grounding type plug has two blades and a third grounding prong. The wider blade or the third
prongareprovidedforyoursafety.Iftheprovidedplugdoesnotfitintoyouroutlet,consultanelectricianforreplace
ment of the obsolete outlet.
PROTECT the power cord from being walked on or pinched, particularly at plugs, convenience receptacles, and the
point where they exit from the apparatus.
ONLY USE attachments/accessories specified by the manufacturer.
USE only with a cart, stand, tripod, bracket, or table specified by the manufacturer, or sold with the apparatus. When a
cart is used, use caution when moving the cart/apparatus combination to avoid injury from tip-over.
UNPLUG this apparatus during lightning storms or when unused for long periods of time.
REFER all servicing to qualified service personnel. Servicing is required when the apparatus has been damaged in any
way, such as power supply cord or plug is damaged, liquid has been spilled or objects have fallen into the apparatus,
the apparatus has been exposed to rain or moisture, does not operate normally, or has been dropped.
DO NOT expose the apparatus to dripping and splashing. DO NOT put objects filled with liquids, such as vases, on the
apparatus.
The MAINS plug or an appliance coupler shall remain readily operable.
The airborne noise of the Apparatus does not exceed 70dB (A).
ApparatuswithCLASSIconstructionshallbeconnectedtoaMAINSsocketoutletwithaprotectiveearthingconnec
tion.
To reduce the risk of fire or electric shock, do not expose this apparatus to rain or moisture.

Shure Incorporated
8/23
20.
21.
•
•
•
•
•
•
•
•
•
•
•
•
•
•
Do not attempt to modify this product. Doing so could result in personal injury and/or product failure.
Operate this product within its specified operating temperature range.
WARNING: Voltagesinthisequipmentarehazardoustolife.Nouserserviceablepartsinside.Referallservicingtoqualifiedservicepersonnel.Thesafetycer
tifications do not apply when the operating voltage is changed from the factory setting.
WARNING
Battery packs may explode or release toxic materials. Risk of fire or burns. Do not open, crush, modify, disassemble, heat
above 140°F (60°C), or incinerate.
Follow instructions from manufacturer
Only use Shure charger to recharge Shure rechargeable batteries
WARNING: Danger of explosion if battery incorrectly replaced. Replace only with same or equivalent type.
Never put batteries in mouth. If swallowed, contact your physician or local poison control center
Do not short circuit; may cause burns or catch fire
Do not charge or use battery packs other than Shure rechargeable batteries
Dispose of battery packs properly. Check with local vendor for proper disposal of used battery packs.
Batteries (battery pack or batteries installed) shall not be exposed to excessive heat such as sunshine, fire or the like
Do not immerse the battery in liquid such as water, beverages, or other fluids.
Do not attach or insert battery with polarity reversed.
Keep away from small children.
Do not use abnormal batteries.
Pack the battery securely for transport.
WARNING
If water or other foreign objects enter the inside of the device, fire or electric shock may result.
Do not attempt to modify this product. Doing so could result in personal injury and/or product failure.
CAUTION
Never disassemble or modify the device, as failures may result.
Do not subject to extreme force and do not pull on the cable or failures may result.
Keep the microphone dry and avoid exposure to extreme temperatures and humidity.
Note: Use only with the included power supply or a Shure-approved equivalent.
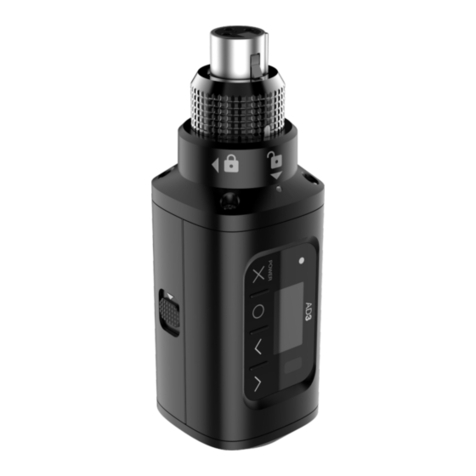
ADX3 Axient Digital Plug-On Transmitter
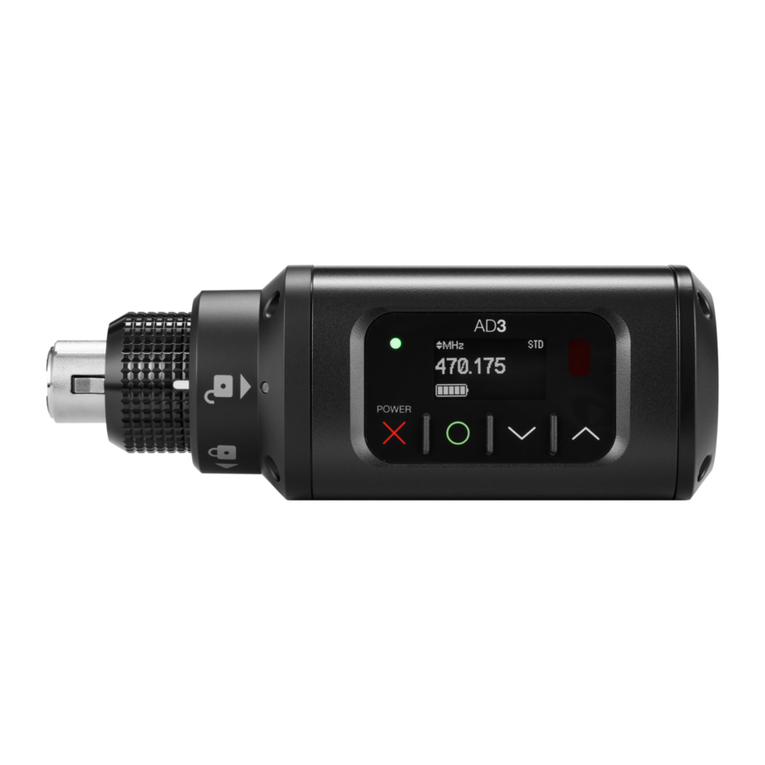
Shure ADX series transmitters deliver impeccable audio quality and RF performance and are equipped with ShowLink remote
control for real-time parameter adjustments and interference avoidance. The Shure ADX3 plug-on transmitter transforms any
microphone into an advanced, portable Axient Digital ADX Series wireless microphone with wide-tuning, High Density (HD)
mode, encryption, and advanced rechargeability. ADX3 features a custom, fast, and secure XLR connector and supports both
conventional AA and Shure SB900-series rechargeable batteries. The ADX3 is housed in a lightweight, rugged, metal chassis
and is designed to resist sweat, moisture, and debris.
®
Shure Incorporated
9/23
◦
◦
Full Guide Online
Visit www.shure.com for information, resources, and the full version of the product guide.
Included Components
AA batteries (2) 80B8201
USB-A to USB-C cable 95A39299
Zipper bag 95D2313
Pouch with belt clip 95A44910
ADX3 Transmitter Overview
①Display
View menu screens and settings.
②Infrared (IR) port
Align with the receiver IR port during an IR Sync for automated transmitter tuning and setup.
③Control buttons
Use to navigate through parameter menus and to change settings.
④Power switch
Hold the X button to power the unit on or off.
⑤Enter button
Press to enter menu screens and confirm menu changes.
⑥Power LED
Green = Unit is powered on
Red = Low battery, or battery error
⑦Audio LED
Red, yellow, and green LEDs indicate average and peak audio levels.
The LED will turn red when the limiter is engaged.
⑧USB-C port

Shure Incorporated
10/23
◦
◦
◦
Supplies power or charges Shure rechargeable battery. LED indicates charging status when connected to a power supply.
Red = Charging
Green = Full charge
Yellow = Not charging
⑨Battery compartment
Requires two AA batteries or Shure rechargeable battery.
⑩AA battery adapter
Use to secure AA batteries. Remove when using a Shure rechargeable battery.
⑪XLR connector
Connection point for wired microphones, cables, and boom poles, among other things.
⑫Locking ring
To release the XLR connector, turn the ring counterclockwise and push in.
⑬Pouch
Provides additional grip and protection for the transmitter.
⑭Belt clip
Holds transmitter and microphone securely for hands-free carrying.

Shure Incorporated
11/23
•
•
•
•
Transmitter Controls
Use the controls to navigate menus and update settings.
XHoldbuttontoturntransmitterpoweronandoff.Actsasa'back'buttontoreturntopreviousmenusorpa
rameters without confirming a value change.
OEnters menu screens and confirms parameter changes
∨∧ Use to scroll through menu screens and to change parameter values
Tip: Hold the ∧button while powering on to enter safe start mode.
Home Screen Display
The home screen shows transmitter information and status.
There are four pieces of information that you can choose to see on the home screen. Use the arrow buttons to select one of
the following choices:
Name
Frequency Setting
Group (G) and Channel (C)
Device ID
The following icons indicate transmitter settings:
Icon Setting
Battery runtime in hours and minutes or bar display
Key: Displayed when encryption is enabled
Lock: Displayed when controls are locked. Icon will flash if
access is attempted to a locked control (power or menu).
ShowLink signal strength displays 0 to 5 bars

Shure Incorporated
12/23
1.
2.
◦
◦
3.
4.
◦
◦
◦
5.
1.
◦
◦
Icon Setting
STD: Standard Transmission Mode
HD: High Density Transmission Mode
RF Mute Engaged: Displayed when RF output is muted
Setup
Slide the tab on the side of the transmitter to open the battery door.
Install the batteries.
AA batteries: Place batteries (note polarity markings) and AA adapter as shown below and close the door.
Shure rechargeable battery: Place battery as shown below (note polarity markings). Remove the AA adapter and
close the door to secure the battery.
Note: If using AA batteries, set the battery type to ensure the transmitter's battery status indicator is accurate.
Press and hold X to turn on the transmitter.
Select the appropriate input pad or boost to avoid overloading the audio input our add boost to low-output sources: Au
dio > Pad
12 dB: Use with high output sources, such as line levels and point-to-point applications.
Off (default): Use with typical microphones.
+12 dB: Use with low output sources.
Plug the transmitter into an XLR microphone or the output of an audio device.
Note: If you remove or replace the batteries without turning the transmitter off, the device will turn on again when the batteries are replaced.
Locking the Interface
Lock transmitter interface controls to prevent accidental or unauthorized changes to parameters. The lock icon appears on the
home screen when a lock is enabled.
From the Utilities menu, navigate to Locks and select one of the following lock options:
None: The controls are unlocked
Power: The power switch is locked

Shure Incorporated
13/23
◦
◦
2.
1.
2.
◦
◦
◦
3.
•
•
•
Menu: The menu parameters are locked
All: The power switch and menu parameters are locked
Press O to save.
Tip: To quickly unlock the transmitter menu, press O and select None.
Setting the AA Battery Type
To ensure accurate display of transmitter runtime, set the battery type to match the battery you have installed.
Note: If a Shure rechargeable battery is installed, selecting a battery type is not necessary and the battery type will display Shure.
Navigate to Utilities and select Battery.
Usethe▼▲buttonstoselecttheinstalledbatterytype:
Alkaline = Alkaline
NiMH = Nickel Metal Hydride
Lithium = Lithium Primary
Press O to save.
Shure Rechargeable Battery
ShureSB900serieslithiumionbatteriesofferarechargeableoptionforpoweringthetransmitters.Batterieschargeto50%ca
pacity in 1 hour and reach full charge within 3 hours.
Single chargers and multiple bay chargers are available to recharge the Shure batteries.
Caution: Only charge Shure rechargeable batteries with a Shure battery charger.
Shure SB900B Runtime
2 mW 10 mW 35 mW
8+ hours 8+ hours 5+ hours
Note: Phantom power, RF output and the impedance of the connecting device can impact battery life.
Checking Battery Info
When using a Shure rechargeable battery, the receiver and transmitter home screens display the number of hours and minutes
remaining.
Detailed information for the battery is displayed Battery menu of the transmitter: Utilities > Battery
Battery: The chemistry type of for the installed battery (Shure, Alkaline, Lithium, NiMH)
Battery Time to Full(onlyappearswhenShurerechargeablebatteryisbeingexternallycharged):Timeremaininguntilbat
tery is fully charged
Battery Life: Indicates remaining battery runtime

Shure Incorporated
14/23
•
•
•
•
•
•
•
•
•
•
•
•
Charge: Percentage of charge capacity
Health: Percentage of current battery health
Cycle Count: Total of the number of charging cycles for the installed battery
Temperature: Battery temperature reported in Celsius and Fahrenheit
Power Over USB
When operated with AA batteries, or without batteries, the ADX3 transmitter can be powered by connecting the USB-C port on
the bottom of the transmitter to a suitable power source.
When a Shure rechargeable battery is inserted, the USB connection can power the transmitter while simultaneously charging
the battery.
Menu Parameters
The Main menu organizes the available transmitter parameters into three categories:
Radio
Audio
Utilities
Tips for Editing Menu Parameters
To access the menu options from the home screen, press O.Usethearrowbuttonstoaccessadditionalmenusandpara
meters.
A menu parameter will blink when editing is enabled
To increase, decrease or change a parameter, use the arrow buttons
To save a menu change, press O
To exit a menu without saving a change, press X

Shure Incorporated
15/23
1.
2.
3.
4.
5.
Menu Map
IR Sync
Use IR Sync to form an audio channel between the transmitter and receiver.
Note: The receiver band must match the band of the transmitter.
Select a receiver channel.
Tune the channel to an available frequency using group scan or manually turn to an open frequency.
Power on the transmitter.
Press the SYNC button on the receiver.
Align the IR windows between the transmitter and the receiver so that the IR LED illuminates red. When complete,
Sync Success! appears. The transmitter and receiver are now tuned to the same frequency.

Shure Incorporated
16/23
1.
2.
3.
4.
Note: Anychangetotheencryptionstatusonthereceiver(enabling/disablingencryption)requiresasynctosendthesettingstothetransmitter.Newencryp
tionkeysforthetransmitterandreceiverchannelaregeneratedoneveryIRsync,sotorequestanewkeyforatransmitter,performanIRsyncwiththede
sired receiver channel.
Updating Firmware
Firmwareisembeddedsoftwareineachcomponentthatcontrolsfunctionality.Periodically,newversionsoffirmwarearedevel
opedtoincorporateadditionalfeaturesandenhancements.Totakeadvantageofdesignimprovements,youcanuploadandin
stall new versions of the firmware by using the Shure Update Utility. The Shure Update Utility is available for download from
http://www.shure.com/.
Firmware Versioning
When performing an update, first download firmware to the receiver, and then update transmitters to the same firmware version
to ensure consistent operation.
ThefirmwarenumberingforShuredevicesusesthefollowingformat:MAJOR.MINOR.PATCH.BUILD(e.g.,1.2.21.1).Atamini
mum, all devices on the network (including transmitters), must have the same MAJOR and MINOR firmware version numbers
(e.g., 1.2.x).
Updating the Transmitter
Download the firmware to the receiver.
Access the following menu from the receiver: Device Settings > Tx Firmware Update.
Align the IR ports between the transmitter and the receiver. IR ports must be aligned for the entire download, which can
take 50 seconds or longer.
Tip: The red alignment LED will turn on when the alignment is correct.
Press ENTERonthereceivertobeginthedownloadtothetransmitter.Thereceiverwilldisplaytheprogressoftheup
date as a percentage.
Specifications
Mic Offset Range
12to21dB(in1dBsteps)
Battery Type
ShureSB900seriesRechargeableLiIonorLR6AAbatteries1.5V
Battery Runtime
@ 10 mW
Shure SB900B >8hours
alkaline >7hours
Dimensions
126mmx44.5mmx44.5mm(5.0in.x1.8in.x1.8in.)HxWxD

Shure Incorporated
17/23
Weight
Without Battery 240g(8.0oz.),
with AA batteries 263g
with Shure rechargeable battery 280g
Housing
Cast Metal
Operating Temperature Range
-10°C (-14°F) to 50°C (122°F)
Note: Battery characteristics may limit this range.
Storage Temperature Range
-40°C (-40°F) to 74°C (165°F)
Note: Battery characteristics may limit this range.
Audio Input
Connector
3-pin female XLR
Configuration
balanced
Impedance
Pad-12 dB 26.64kΩ
0 dB 6.64kΩ
Boost12 dB 6.64kΩ
Maximum Input Level
1 kHz at 1% THD
Pad-12 dB 21dBV
0 dB 9dBV
Boost12 dB 3dBV
Preamplifier Equivalent Input Noise (EIN)
System Gain Setting ≥ +20
115dBV,Aweighted,typical
Phantom Power
+48V(7mAmaximum),+12V(15mAmaximum)

Shure Incorporated
18/23
High Pass Filter
Two-pole (12 dB per octave), cut off frequency selectable from 40 to 240 in 20 Hz increments
RF Output
Antenna Type
Dipole
Impedance
50Ω
Occupied Bandwidth
<200kHz
Channel-to-Channel Spacing
Standard Mode 350kHz
High Density Mode 125kHz
varies by region
Modulation Type
Shure Axient Digital Proprietary
Power
2mW,10mW,35mW
See Frequency Range and Output Power table, varies by region
Specific Absorption Rate (SAR)
< 0.12 W/kg
ShowLink
Network Type
IEEE 802.15.4
Antenna Type
Zigbee Dual Conformal
Frequency Range
2.40 to 2.4835 GHz (24 Channels)
RF Output Power
10 dBm (ERP)
varies by region

Shure Incorporated
19/23
Frequency Range and Transmitter Output Level
Band Frequency Range ( MHz) Tx RF Power ( mW)***
G53 470 to 510 2/10/35
G54 479 to 565 2/10/20
G55† 470 to 636 2/10/35
G56◇470 to 636 2/10/35
G57△470 to 616* 2/10/35
G62 510 to 530 2/10/35
G63 487 to 636 2/10/35
H54 520 to 636 2/10/35
K53† 606 to 698 2/10/35
K54△606 to 663** 2/10/35
K55 606 to 694 2/10/35
K56 606 to 714 2/10/35
K57 606 to 790 2/10/35
K58 622 to 698 2/10/35
L60 630.125 to 697.875 2/10/35
P55 694 to 703, 748 to 758, 803 to 806 2/10/35
R52 794 to 806 10
JB 806 to 810 2/10
X55 941 to 960 2/10/35
X56 960 to 1000 2/10/35
*With a gap between 608 to 614 MHz.
**With a gap between 608 to 614 MHz and a gap between 616 to 653 MHz.
***Power delivered to the antenna port.
†Operation mode varies according to region. In Brazil, High Density mode is used. The maximum power level for Peru is
10mW.
△Output power limited to 10 mW above 608 MHz.
◇Korea defines power as conducted (ERP) which is 1dB less then declared in table.
เครื่องโทรคมนาคมและอุปกรณ์นี้มีความสอดคล้องตามมาตรฐานหรือข้อกำหนดทางเทคนิคของ กสทช.

Shure Incorporated
20/23
K55 606-694 MHz
Country Code
Code de Pays
Codice di paese
Código de país
Länder-Kürzel
Frequency Range
Gamme de frequences
Gamme di frequenza
Gama de frequencias
Frequenzbereich
A, B, BG, CH, CY, CZ, D, DK, EST, F *
FIN, GB, GR, H, HR, I, IRL, IS, L, LT *
M, N, NL, P, PL, RO, S, SK, SLO, TR *
all other countries *
* This equipment may be capable of operating on some frequencies not authorized in your region. See Licensing Information.
G56 470-636 MHz
Country Code
Code de Pays
Codice di paese
Código de país
Länder-Kürzel
Frequency Range
Gamme de frequences
Gamme di frequenza
Gama de frequencias
Frequenzbereich
A, B, BG, CH, CY, CZ, D, DK, EST, F *
FIN, GB, GR, H, HR, I, IRL, IS, L, LT *
M, N, NL, P, PL, RO, S, SK, SLO, TR *
all other countries *
* This equipment may be capable of operating on some frequencies not authorized in your region. See Licensing Information.
Table of contents
Other Shure Transmitter manuals

Shure
Shure MX692 User manual

Shure
Shure AXIENT AXT100 User manual

Shure
Shure AD1 User manual

Shure
Shure ULXD6 User manual

Shure
Shure AXIENT AXT100 User manual

Shure
Shure UR3 User manual

Shure
Shure ADX1-G56 User manual

Shure
Shure AXIENT AXT100 User manual

Shure
Shure ULXD6 User manual

Shure
Shure AXIENT AXT100 User manual

Shure
Shure ADX1M User manual

Shure
Shure Axient Digital ADX1 User manual

Shure
Shure AXIENT DIGITAL ADX2FD User manual

Shure
Shure AXT200 User manual

Shure
Shure ADX1M User manual

Shure
Shure AD2 User manual

Shure
Shure UC2 User manual

Shure
Shure AD2 User manual

Shure
Shure AD3 User manual

Shure
Shure ADX2 User manual