manuals.online logo
Brands
  1. Home
  2. •
  3. Brands
  4. •
  5. Siamp
  6. •
  7. Plumbing Product
  8. •
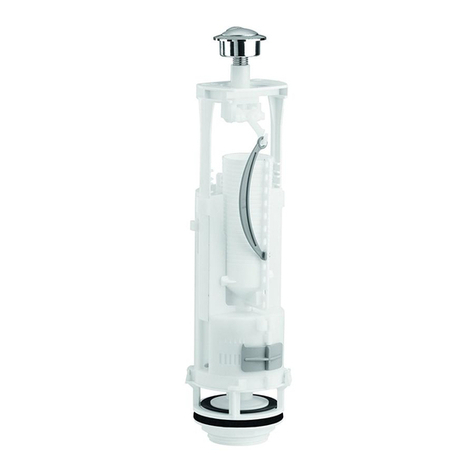
  9. Siamp OPTIMA 50 User manual

Siamp OPTIMA 50 User manual

OPTIMA 50
ASSEMBLY INSTRUCTIONS
Button
Short flush
Long flush
Escutcheon
(supplied but not
necessarely fitted)
Button nut
Dead water
sliding valve
Strainer
Strainer nut
Pan gasket
Strainer gasket
Valve gasket
Overflow
Réf. 5496 - Imprimerie PONS s.a.
a
b
c
e
f
g
h
i
j
l
GB
Short
flush cursor k
Cable d
I - PREPARING THE MECHANISM
II - INSTALLATION
➊ In the table below, choose the right level
for the overflow shortening
➋ Unscrew the strainer nut (g)
Measure the cistern
-H (from the top of the lid to the inside base of the cistern)
-D (diameter of the hole in the lid)
H
D
Position the mechanism in the cistern
and secure it in place with the nut (g)
Height H Overflow tube
of cistern shortening
Diameter D Diameter D
of hole in lid of hole
18 to 38 mm in lid Cut between
and 38 to
45 to 50 mm 44 mm
> 332 mm > 350 mm No cut
327 to 332 345 to 350 A and B
322 to 326 340 to 344 B and C
317 to 321 335 to 339 C and D
312 to 316 330 to 334 D and E
307 to 311 325 to 329 E and F
302 to 306 320 to 324 F and G
297 to 301 315 to 319 G and H
292 to 296 310 to 314 H and I
287 to 291 305 to 309 I and J
282 to 286 300 to 304 J and K
277 to 281 295 to 299 K and L
272 to 276 290 to 294 L and M
IV - SETTING WATER LEVELIII -
ASSEMBLING BOWL AND CISTERN
V - INSTALLATION OF BUTTON
VI - MAINTENANCE
Bottom of cistern
Wall of bowl
Conical seal
Hexagon nut
Washer
Wing nut
Washer
➊ Fix screws at the bottom
of the cistern (see order of
parts below)
➋ Position the latex foam
gasket on the nut (g)
➌ Position the cistern on
the bowl and secure it
with wing nuts
Changing the valve gasket
➊ After having opened
the cistern, turn the
mechanism 90° to
separate it from its
strainer
➋ Change the valve
gasket
➌ Reposition the
mechanism, locking it
into the strainer
➍ Close the cistern
again.
Valve gasket
Strainer
After having connected your ballcock to the water
supply, open the tap and set the level of the long
flush using the ballcock (see overleaf).
Note: The max. water level should be 20 mm lower
than the overflow tube (l).
To adjust the water level of the short flush, slide
the cursor along (k).
Note : The closer the cursor is to 18, the more
water will be flushed.
➊ Once the set-up has been completed, place button
(a) on lid and screw button nut (c), (if the hole in
the lid (D) is > 38 mm and < 45 mm, remove the
escutcheon (b))
➋ Clip cable case
➌ Place lid back on top of cistern
In some (rare) cases, the dead water level (amount
of water remaining after the long flush) must be
increased to ensure more efficient cleaning. To do
this, move the sliding valve (e) to the left (the more
it is open, the more the residual water increases).
Note: Increasing the dead water reduces the
volume of water flushed. If necessary, readjust the
max. water level using the ballcock.
M6x78 screw
20 mm
Overflow
Max.
water level
(k)
INSTALLING THE FLOAT VALVE
ROBECO 06 and STANDARD 15EL
COMPACT 95L
MAINTENANCE (95L & 99B)
4, quai Antoine 1er - BP 219 - MC 98007 MONACO Cedex
Tél. 00 377 93 15 53 75 - Fax : 00 377 92 05 71 04 - E-mail: contact@siamp.com
➊ Position valve
➋ Fasten with nut
➌ Connect to water supply
➍ Adjust water level with the adjustment screw
➊ Position valve
➋ Fasten with nut
➌ Connect to water supply
➍ Adjust water level with the adjustment screw
(15 EL) or by bending the rod (06)
Adjustment screw Adjustment screw
Inser t rod
as far as
possible Locking
nut
Locking
nut
Fiber gasket
Fiber gasket
Filter
Membrane
Membrane
N.B. Ensure tightness of
connection to cistern with fiber
gasket, without the use of any
corrosive joint compound N.B. Ensure tightness of connection to cistern with
fiber gasket, without the use of any corrosive joint
compound
COMPACT 99B and HANDY 93B
Adjustment screw
Locking nut
Fiber
gasket
Locking nut
Gasket/filter
N.B. Ensure tightness of
connection to cistern with filter
gasket.
WARNINGS:
1 - Do not overtight in any case.
2 - Do not use any sealing paste
and/or compound in any
case
3 - Do not use connector handling
the internal part of the inlet
valve.
SIAMP will be not responsible
in case these warnings are not
respected.
Adjustment screw

Other Siamp Plumbing Product manuals

Siamp Monaco User manual

Siamp

Siamp Monaco User manual

Siamp VERSO BCM 350 Quick guide

Siamp

Siamp VERSO BCM 350 Quick guide
Siamp Quieto OD User manual

Siamp

Siamp Quieto OD User manual

Siamp SCU 350 User manual

Siamp

Siamp SCU 350 User manual

Siamp INTRASLIM Maintenance and service guide
Siamp

Siamp INTRASLIM Maintenance and service guide

Siamp BCU 790 Quick guide

Siamp

Siamp BCU 790 Quick guide

Siamp SEGMENT User manual

Siamp

Siamp SEGMENT User manual

Siamp Monaco INTRA User manual

Siamp

Siamp Monaco INTRA User manual

Siamp Monaco Maintenance and service guide
Siamp

Siamp Monaco Maintenance and service guide

Siamp Monaco OPTIMA 49 User manual

Siamp

Siamp Monaco OPTIMA 49 User manual

Siamp SCC 80 Quick guide

Siamp

Siamp SCC 80 Quick guide

Siamp Optima 49 User manual

Siamp

Siamp Optima 49 User manual

Popular Plumbing Product manuals by other brands
Hans Grohe Metropol 74515 Series Instructions for use/assembly instructions
Hans Grohe

Hans Grohe Metropol 74515 Series Instructions for use/assembly instructions

Hans Grohe Exafill S 58113 Instructions for use/assembly instructions

Hans Grohe

Hans Grohe Exafill S 58113 Instructions for use/assembly instructions

Thetford 23709 Repair instruction

Thetford

Thetford 23709 Repair instruction

newform SENSITIVE 66709E instructions

newform

newform SENSITIVE 66709E instructions

Bradley S19-200B installation instructions
Bradley

Bradley S19-200B installation instructions

Toto RENESSE TL170SD owner's manual

Toto

Toto RENESSE TL170SD owner's manual

Kohler ECO 72685T-B7 installation instructions

Kohler

Kohler ECO 72685T-B7 installation instructions

Artweger TWINLINE 1 AIR TLA113 Assembly instructions

Artweger

Artweger TWINLINE 1 AIR TLA113 Assembly instructions

Hans Grohe Mistral 3 28524 Series Assembly instructions

Hans Grohe

Hans Grohe Mistral 3 28524 Series Assembly instructions

Inax ECOCARAT+ manual

Inax

Inax ECOCARAT+ manual

Sanela SLA 04 Instructions for use

Sanela

Sanela SLA 04 Instructions for use

VADO OMIKA user guide

VADO

VADO OMIKA user guide

Toto TTLA101 installation manual

Toto

Toto TTLA101 installation manual
Rheem Guardian Warm Water Owner's guide and installation instructions

Rheem

Rheem Guardian Warm Water Owner's guide and installation instructions

VOXORT PERLA BLACK V401137 Installation instruction
VOXORT

VOXORT PERLA BLACK V401137 Installation instruction

Spectrum Brands Pfister Capistrano LF-042-CS0 Quick installation guide
Spectrum Brands

Spectrum Brands Pfister Capistrano LF-042-CS0 Quick installation guide

Peerless Faucet P88200 quick start guide
Peerless Faucet

Peerless Faucet P88200 quick start guide

Mira everclear Installation and user guide

Mira

Mira everclear Installation and user guide

manuals.online logo
manuals.online logoBrands
  • About & Mission
  • Contact us
  • Privacy Policy
  • Terms and Conditions

Copyright 2025 Manuals.Online. All Rights Reserved.