manuals.online logo
Brands
  1. Home
  2. •
  3. Brands
  4. •
  5. Siemens
  6. •
  7. Controllers
  8. •
  9. Siemens GAMMA instabus UP 204 Service manual

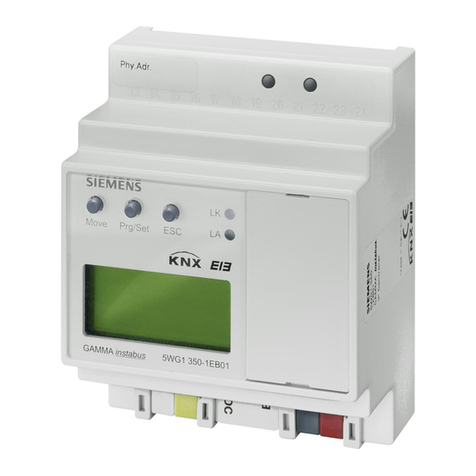
Siemens GAMMA instabus UP 204 Service manual

D
GB
L1V30068787 DS01 Seite 1von 4 page 1 of 4
GAMMA instabus
UP 204 Raum Controller Contouch
titanweiss 5WG1 204-2AB11
carbonmetallic 5WG1 204-2AB21
aluminiummetallic 5WG1 204-2AB31
pianoschwarz 5WG1 204-2AB51
UP 204 Room Controller Contouch
Titanium white 5WG1 204-2AB11
Carbon metallic 5WG1 204-2AB21
Aluminum metallic 5WG1 204-2AB31
Piano black 5WG1 204-2AB51
Bedien- und Montageanleitung
Operating and Mounting Instructions
Stand: Januar 2014
Issued: January 2014
Produkt- und Funktionsbeschreibung
Der Raum Controller Contouch, im Folgenden Contouch ge-
nannt, vereint die Funktionen eines grafischen Anzeigedisplays
mit bis zu 18 Raumbedienfunktionen, eines Einzelraumtempera-
turreglers mit Sollwertvorgabe und Betriebsarteneinstellung, ei-
nes Temperatursensors und eines Fan-Coil Unit Bediengerätes
in einem Busteilnehmer.
Der Contouch ist in den Farbvarianten titanweiss,
carbonmetallic, aluminiummetallic und pianoschwarz erhältlich.
Für den Raum Controller Contouch ist folgendes Zubehör erhält-
lich:
Contouch Flash-Kit 5WG1204-8AB01
Dieser Flash-Kit besteht aus einem Wechseldatenträger, einer
microSDHC-Karte, mit zwei Adaptern, einem micro SD Adapter
und einem USB microSD Leser.
Die Basis des Gerätes ist ein hochwertiges 320 x 240 Pixel Farb-
display 2,8“ mit Touchscreen und Drehrad. Dieses verfügt über
eine Dreh-/ Druckfunktion.
Bedient wird der Contouch über den Touchscreen und das
Drehrad. Die auf dem Display angezeigten Schaltflächen können
zum Schalten und Dimmen von Leuchten, zur Steuerung des
Sonnenschutzes oder zum Abrufen und Speichern von Szenen
verwendet werden. Die Funktionen und Zustände können mit
Texten und Symbolen grafisch auf dem Display in 4 verschiede-
nen Designs dargestellt werden. Text- und Alarmmeldungen
können ebenfalls zur Anzeige gebracht werden. Alarmmeldun-
gen werden über ein akustisches Signal und über die LED Anzei-
ge besonders hervorgehoben. Über den Touchscreen lässt sich
die Anzeige der Texte und Meldungen zwischen bis zu 6 Spra-
chen auswählen.
Der im Contouch integrierte Raumtemperaturregler ist speziell
für den Einsatz in Räumen ausgelegt, die geheizt und / oder ge-
kühlt werden und deren Raumtemperaturregelung abhängig
von bis zu vier Raum-Betriebsarten (Komfortbetrieb, Pre-
Komfortbetrieb, Energiesparbetrieb und Schutzbetrieb) erfolgt.
Über einen Parameter ist bei Bedarf einstellbar, dass der Regler
nicht alle vier Betriebsarten berücksichtigen soll sondern nur
drei (Komfortbetrieb, Energiesparbetrieb und Schutzbetrieb)
oder nur zwei (Komfortbetrieb und Schutzbetrieb). Der Raum-
temperaturregler ist als Zweipunktregler (Thermostat) oder als
stetiger Regler (P-, PI-Regler) einsetzbar.
Auf dem Display des Contouch werden die aktuellen Raum-
Betriebsarten, Automatik- oder Handbetrieb, die Innen- bzw.
Aussentemperatur, die Solltemperatur, ein geöffnetes Heiz-
oder Kühlventil, Taupunktbetrieb oder geöffnete Fenster über-
sichtlich und selbsterklärend dargestellt.
Über eine spezielle Anzeigeseite werden über den Touchscreen
die Einstellungen zur Raumtemperaturregelung durchgeführt.
Dort kann die Raum-Betriebsart direkt vor Ort gewählt werden.
Damit ist der Handbetrieb aktiv. Im Handbetrieb kann jede
Raum-Betriebsart dauerhaft aktiviert und nicht durch ein Bus-
Telegramm geändert werden.
Der Regler bietet die Möglichkeit, die Dauer der Betriebsart Kom-
fort zu verlängern. Dazu wird auf dieser speziellen Bedienseite
auf dem Touchscreen die Schalt-
fläche „Komfortbetrieb-Verlängerung“ betätigt und per
Drehrad die Dauer der Komfortverlängerung eingestellt.
Die Einstellung der Soll-Temperatur erfolgt auf der Anzeigeseite
zur Raumtemperaturregelung direkt in °C/°F bezogen auf die
Raumbetriebsart Komfortbetrieb oder als relativer Wert, Verschie-
bung vom Basissollwert in K. Über das Drehrad des Reglers kann
der vorgegebene Sollwert zu einem höheren oder niedrigerem
Wert verschoben werden, wobei der Bereich der Verschiebung
einstellbar ist.
Die Einstellung Automatik kann ebenfalls direkt am Contouch
selektiert werden. Dann erhält der Regler seine Betriebsart über
ein Telegramm vom Bus oder über das interne Zeitschaltpro-
gramm.
Bei Räumen, welche über eine Fan Coil Unit beheizt und /oder
gekühlt werden, kann der Contouch als Bediengerät für die
Lüftersteuerung eingesetzt werden.
Die aktuelle Lüfterstufe wird auf dem Display angezeigt.
Im Handbetrieb kann man die Drehzahlstufe des Lüfters über
das Drehrad am Contouch einstellen.
Mit der Drehzahlstufe „0“ wird der Lüfter ausgeschaltet und ein
ggf. geöffnetes Ventil wird geschlossen, d.h. der Raum wird
dann weder geheizt noch gekühlt. Wird daraufhin der Sollwert
für den Hitzeschutz überschritten bzw. der Sollwert für den
Frostschutz unterschritten, wird bei einem stetigen Regler der
Automatikbetrieb aktiv und bei einem Zweipunktregler der Lüf-
ter auf die höchste Lüfterstufe eingeschaltet. Der Regler heizt
bzw. kühlt bis zum Erreichen des Sollwertes der bisher einge-
stellten Betriebsart.
Mit der Auswahl „A“ wird über das Drehrad am Contouch die
Lüftersteuerung auf Automatikbetrieb gesetzt. Dann erfolgt die
Drehzahlvorgabe über die Regelung.
Mit der Bedienung des Contouch wird die Displaybeleuchtung
eingeschaltet. Nach einer bestimmten, zu parametrierenden,
Zeit schaltet sich die Beleuchtung aus. Das Gerät ist im Standby
Betrieb.
Product and Application Description
The Contouch room controller, hereinafter referred to as
Contouch, combines the functions of a graphic display with up
to 18 room operating functions, an individual room temperature
controller with setpoint indication and operating mode setting,
a temperature sensor and a fan-coil unit control panel in one
bus node.
The Contouch is available in the colour variations titanium
white, carbon metallic, aluminum metallic and piano black.
The following accessories are available for the Contouch room
controller:
Contouch Flash-Kit 5WG1204-8AB01
This flash kit consists of a removable data carrier, a micro SDHC
card with two adapters, a micro SD Adapter and a USB micro SD
reader.
The basis of the equipment is a high-quality 320 x240 pixel col-
our display 2.8" with touchscreen and rotary control. This is
equipped with a rotary/push-button function.
Contouch is operated by the touchscreen and the rotary control.
The buttons shown on the display can be used for switching and
dimming lights, for regulating sun protection or for the retrieval
and storage of scenes. The functions and conditions can be
shown graphically with texts and symbols on the display in 4 dif-
ferent designs. Text and alarm messages can also be displayed.
Alarm messages are specially highlighted by an acoustic signal
and the LED display. The touchscreen canbe used to select from
up to 6 languages for the display of texts and messages.
The room temperature controller integrated in Contouch is spe-
cially designed for use in rooms which are heated and / or
cooled where the manner of room temperature control depends
on up to four room operating modes (comfort mode, pre-
comfort mode, energy-saving mode, and protection mode). As
required, a parameter can be set so that the controller does not
consider all four operating modes, but rather only three (com-
fort mode, energy-saving mode and protection mode) or only
two (comfort mode and protection mode). The room tempera-
ture controller can be used as a two-point controller (thermo-
stat) or a continuous controller (P or PI-controller).
The current room operating modes, automatic ormanual opera-
tion, the interior or exterior temperature, the setpoint tempera-
ture, an open heating and cooling valve, melting point opera-
tion or open windows are clearly shown on the display in a self-
explanatory manner.
By means of a special display page, the room temperature con-
trol parameters can be set using the touchscreen. There the
room operating mode can be selected directly on site. The man-
ual mode is activated in this way. In manual mode, every room
operating mode can be permanently activated and not changed
by a bus telegram.
The controlleroffers the option of extending the duration of the
Comfort operating mode. For this purpose, the "Comfort mode
extension" button is pressed on this special touchscreen opera-
tor page and the length of the Comfort mode extension set by a
rotary control.
The setpoint temperature is set directly in °C/°F on the display
page for room temperature control based on the room operating
mode Comfort mode or as a relative value, shifting from the base
setpoint in K. The rotary control of the controllercan be used to
shift the specified setpoint to a higher or lower value, whereby
the range of the offset can be adjusted.
The automatic mode setting can also be selected directly on the
Contouch. The the controller receives its operating mode direct-
ly by telegram from the bus or via the internal time switchpro-
gram.
In rooms which are heated and / or cooled by a fan coil unit, the
Contouch can be used as a control panel for the ventilator con-
trol.
The current fan speed is shown on the display.
In manual operation, the speed level of the fan can be set by the
rotary control on the Contouch.
At speed level "0", the fan switches off and a possibly open valve
closes, i.e. the room is then neither heated nor cooled. If the
setpoint for heat protection is then exceeded or the setpoint for
frost protection fallen short of, automatic mode becomes active
inthe case of a continuous controller and the fanis switched to
the highest fan speed if a two-point controller is used. The con-
troller heats or cools until reaching the setpoint of the previous-
ly set operating mode.
With option "A", the Contouch rotary control is used to set the
fan control to automatic mode. Then the speed is specified by
the control system.
The display lighting switches on when Contouch is operated.
The lighting switches off after a certain time period, which must
be configured. The device is in standby mode.
D
GB
L1V30068787 DS01 Seite 2 von 4 page 2 of 4
A4
A5
A3
A7
A4
A6
Bild / figure 1
Bild / figure 2
Für die 18 Raumbedienfunktionen als auch für die Einstellung
der Raumbetriebsart des Reglers können Zeitprogramme mit
Wochenschaltplänen parametriert werden. Bis zu 16 Schalt-
punkte pro Zeitschaltprogramm sind dabei einstellbar. Die Zeit-
schaltprogramme zur Einstellung der Raumbetriebsart werden
im Automatik Modus aktiviert.
Der Contouch bietet eine Putzfunktion. Wurde diese über den
Touchscreen aktiviert, ist das Gerät für eine bestimmte, zu
parametrierende, Zeit für die Bedienung gesperrt. Das Gerät,
insbesondere der Touchscreen, kann gereinigt werden ohne da-
bei ungewollte Funktionen auszulösen.
Der interne Signalgeber des Contouch dient zur akustischen
Anzeige von Alarmmeldungen und kann als Rückmeldung für
eine Tastenbetätigung benutzt werden.
Mit Hilfe der ETS3 ab Version 3.0f kann das Applikationspro-
gramm ausgewählt, die spezifischen Parameter und Adressen
vergeben und in den Raum Controller Contouch UP 204 über-
tragen werden.
Weitere Informationen
http://www.siemens.de/gamma
Anschlussbeispiel
siehe Bild 1
Hinweis:
Der Contouch ist nur zusammen mit dem mitgelieferten
Busankoppler einsetzbar.
Technische Daten Busankoppler
Spannungsversorgung
Eingangsspannung
·Bus: DC 24V (DC 21...30 V), 10 mA
·Zusatzspannung: DC 24 V (DC 12…30 V), 50 mA, aus exter-
ner Sicherheitskleinspannung
·Empfohlene Spannungsversorgung: unverdrosselte Span-
nung aus EIB Spannungsversorgung N125/21
Ausgangsspannung und –strom an den Contouch
·DC 3,3 V, > 150 mA
Anschlüsse
·Buslinie: Busklemme (schwarz/rot), schraubenlos
0.6 ... 0,8 mm Ø eindrähtig
·Spannungsversorgung: Busklemme (gelb-weiss), schrauben-
los 0,6...0,8 mm Ø eindrähtig
·6-polige Buchse (AST): zum Anschluß des Contouch
Mechanische Daten
·Gehäuse: Kunststoff
·Abmessungen:
-Teilungsmaß: 72 x 72 mm
-Einbautiefe: 21 mm
·Gewicht: 58 g (mit Hängebügel)
Elektrische Sicherheit
·Schutzart (nach EN 60529): IP 20
Umweltbedingungen
·Umgebungstemperatur im Betrieb: - 5 ... + 45 °C
·Lagertemperatur: - 25 ... + 70 °C
·rel. Feuchte (nicht kondensierend): 5 % bis 93 %
Lage- und Funktion der Anzeige- und Bedienelemente des
Busankopplers
siehe Bild 2
A1 rote LED zur Anzeige Normalmodus (LED Aus) oder
Adressiermodus (LED Ein); sie erlischt automatisch
nach Übernahme der physikalischen Adresse
A2 Taste zum Umschalten zwischen Normalmodus und
Adressiermodus zur Übernahme der physikalischen
Adresse
A3 Typenschild zum Eintrag der physikalischen Adresse
A4 Löcher für die Zentrierungsdorne zur Befestigung des
Contouchs auf dem Busankoppler
A5 6-polige Anwenderschnittstelle (AST) zum Anschluß
des Contouch
A6 Langlöscher für die Befestigung des Busankopplers an
der Installationsdose
A7 Gewinde für die Befestigungsschraube (für die zusätz-
liche Befestigung des Contouch, z.B. Diebstahlschutz)
Technische Daten Raum Controller Contouch
Spannungsversorgung
Eingangsspannung über 6-polige Stiftleiste vom Busankoppler
·DC 3,3 V
Temperaturmessung
·Messbereich: 0 ... + 40 °C
·Auflösung: 0,1 K
·Genauigkeit in Bezug zur Fühlertemperatur:
±1,5 K bei Referenzbedingungen
±2,0 K bei Umgebungsbedingungen und im Messbereich
Time programs with weekly switching plans can be configured
for the 18 room operating functions and for setting the room
operating mode of the controller. Up to 16 switching points can
be set for each time switch program. The time switch programs
for setting the room operating mode are activated in automatic
mode.
Contouch offers a cleaning function. If this has been activated
by the touchscreen, then the device is blocked for servicing for a
specific time period, which must be configured. The device, in
particular the touchscreen, can be cleaned without triggering
unwanted functions.
The internal Contouch signal generator provides the acoustic
display of alarm messages and can be used as a response
when a button is activated.
You use the ETS3 (Version 3 and higher) to select the applica-
tion program, to allocate specific parameters and addresses and
to transfer these into the Contouch UP 204 room controller.
Additional information
http://www.siemens.com/gamma
Example of operation
see figure 1
Note:
Contouch can only be used together with the supplied bus
coupler.
Technical Data bus coupler
Power supply
Input voltage
·Bus: DC 24V (DC 21...30 V), 10 mA
·Booster voltage: DC 24 V (DC 12…30 V), 50 mA, from exter-
nal SELV power supply
·Recommended power supplies: DC 24V (before choke) from
EIB power supply N125/21
Output voltage and current onContouch
·DC 3.3 V, > 150 mA
Connections
·Bus line: Bus terminal (black/red) , screwless
0.6... 0.8 mm Ø solid
·Power supply: Bus terminal (yellow-white), screwless
0.6...0.8 mm Ø, solid
·6-pole socket (AST) for connecting the Contouch
Mechanical specifications
·Casing: plastic
·Dimensions:
-Hole pitch: 72 x 72 mm
-mounting depth: 21 mm
·Weight: 58 g (with hanger)
Electrical Safety
·Degree of protection (according to EN 60529): IP 20
Environmental conditions
·Ambient operating temperature: - 5 ... + 45 °C
·Storage temperature: - 25 ... + 70 °C
·Relative humidity (not condensing): 5 % bis 93 %
Location / Function of the Display and Operating Elements of
the bus coupling unit
see figure 2
A1 Red LED for indicating normal mode (LED Off) or ad-
dressing mode (LED On); it goes out automatically after
transferring the physical address
A2 Key for switching between normal mode and addressing
mode for transferring the physical address
A3 Nameplate for entering the physical address
A4 Holes for the centring spikes for fastening the Contouch
to the bus coupler
A5 6-pin user interface (AST) for connecting the Contouch
A6 Slots for fastening the bus coupler to the installation
mounting box
A7 Threads for the fixing screw (for the additional fastening
of the Contouch, e.g. theft protection)
Technical Data for the Contouch room controller
Power supply
Input voltage from the bus coupler via 6-pin plug connector
·3.3 V DC
Temperature measurement
·Measuring range: 0 ... + 40°C
·Resolution: 0.1 K
·Accuracy in relation to the sensor temperature:
±1,5 K under reference conditions
±2.0 K under environmental condition and in the measuring
range
Busankoppler
Raum Controller
Contouch
6
AST
A1
A2
D
GB
L1V30068787 DS01 Seite 3 von 4 page 3 of 4
B1
Bild / figure 3
Bild / figure 4
Bild / figure 5
Bild / figure 6
Anschlüsse
·6-polige Stiftleiste zum Aufstecken und Verbinden mit dem
Busankoppler
Mechanische Daten
·Gehäuse: Kunststoff
·Abmessungen:
-(L x B x T): 116 x 86 x 14 mm (ohne Dreh-/Drückknopf
und ohne Führung der Stiftleiste),
-(L x B x T): 116 x 86 x24 mm (mit Dreh-/Drückknopf und
ohne Führung der Stiftleiste),
-(L xB xT): 116 x 86 x 30 mm (mit Dreh-/Drückknopf und
mit Führung der Stiftleiste),
·Gewicht: 88 g
·Montage: Der Contouch wird auf den Busankoppler aufge-
steckt und mit einer Kreuzschlitzschraube M 2,5 x6 (DIN
7985 Linsenschraube) mit dessen Tragrahmen verschraubt
(Diebstahlschutz)
Elektrische Sicherheit
·Schutzart (nach EN 60529): IP 20
Umweltbedingungen
·Umgebungstemperatur im Betrieb: - 5 ... + 45 °C
·Keine direkte Sonneneinstrahlung
·Lagertemperatur: - 25 ... + 70 °C
·rel. Feuchte (nicht kondensierend): 5 % bis 93 %
Lage- und Funktion der Anzeige- und Bedienelemente
Contouch
siehe Bild 3, Vorderseite Contouch
B1 Touch Display
B2 RGBLED
B3 Drehrad mit Druckfunktion
siehe Bild 4, Rückseite Contouch
C1 Dorne zur Zentrierung des Contouch auf dem
Busankoppler
C2 6-polige Stiftleiste als Anwenderschnittstelle zum
Busankoppler
C3 Schraube zur Befestigung des Contouch am Trag-
rahmen des Busankopplers
C4 Einschub für die microSD-Karte (SD-Karte mit Kontakten
zur Vorderseite einführen, siehe Bild 3)
C5 Temperaturfühler
Installationshinweise
·Das Gerät kann für feste Installation in trockenen Innenräu-
men, zum Einbau in UP-Dosen verwendet werden.
VWARNUNG
·Das Gerät darf nur von einer zugelassenen Elektrofachkraft
installiert und in Betrieb genommen werden.
·Das Gerät darf nicht zusammen mit 230V Geräten und/oder
230V Leitungen in derselben Dose eingesetzt werden.
·Die geltenden Sicherheits- und Unfallverhütungsvorschriften
sind zu beachten.
·Das Gerät darf nicht geöffnet werden.
·Bei der Planung und Errichtung von elektrischen Anlagen sind
die einschlägigen Richtlinien, Vorschriften und Bestimmun-
gen des jeweiligen Landes zu beachten
Montage, Verdrahtung und Inbetriebnahme
Der Anschluß an die Buslinie (D1) und an die Zusatzspannung
(D2) erfolgt über schraubenlose Steckklemmen.
Busklemme und Versorgungsklemme abziehen
Die Busklemme (D1) und die Versorgungsklemme (D2) befinden
sich auf der Rückseite des Busankopplers (Bild 5).
Die Busklemme bzw. die Versorgungsklemme (Klemmen-
Block) (E1) bestehen aus zwei Teilen (E1.1, E1.2) mit je vier
Klemmkontakten. Es ist darauf zu achten, dass die beiden
Prüfbuchsen (E1.3) weder mit dem Busleiter (versehentlicher
Steckversuch) noch mit dem Schraubendreher (beim Versuch
die Klemme zu entfernen) beschädigt werden.
Den Schraubendreher vorsichtig in den Drahteinfüh-
rungsschlitz des roten/schwarzen bzw. gelben/weißen Teils
der Klemme einführen und die Klemme aus dem
Busankoppler herausziehen (Bild 6).
Hinweis
Klemmen nicht von unten heraushebeln! Kurzschlußgefahr
Busklemme und Versorgungsklemme aufstecken
Die Klemmen in die Führungsnuten des Busankopplers stecken
und die Klemmen bis zum Anschlag nach unten drücken.
Connections
·6-pin plug connector for attaching and connecting with the
buscoupler
Mechanical specifications
·Casing plastic
·Dimensions:
-(L xW xD): 116 x 86 x 14 mm (without rotary/push-
button and without plug connector guidance ),
-(L xW xD): 116 x86 x 24 mm (with rotary/push-button
and without plug connector guidance ),
-(L xW xD): 116 x86 x 30 mm (with rotary/push-button
and without plug connector guidance ),
·Weight: 88 g
·Mounting: The Contouch is attached to the bus coupler and
screwed to its support frame with a Phillips screw M 2.5 x 6
(DIN 7985 raised –head screw) (theft protection)
Electrical Safety
·Degree of protection (according to EN 60529): IP 20
Environmental specifications
·Ambient temperature in operation: - 5 ... + 45 °C
·No direction sunlight
·Storage temperature: - 25 ... + 70 °C
·Relative humidity (non-condensing): 5% to 93%
Location- and function of the Display and Operating ele-
ments of the Contouch
see figure 3, Front view of the Contouch
B1 Touch display
B2 RGBLED
B3 Rotary control with push-button function
see figure 4, Rear view of the Contouch
C1 Spikes for centring the Contouch on the
Bus coupler
C2 6-pin plug connector as user interface to the
Bus coupler
C3 Screw for fastening the Contouch to the support
frame of the bus coupler
C4 Insert for the micro SD card (inserting SD card withcon-
tacts to the front, see figure 3)
C5 Temperature sensor
Installation notes
·The system is used for fixed installation in dry internal areas
for the installation of flush-mounting boxes.
VWARNING
·The system may only be installed and commissioned by a li-
censed electrician.
·The device may not be inserted together in the same socket
with 230V equipment and/or 230V cables.
·The relevant safety and accident prevention rules are to be
obeyed.
·The system must not be opened.
·When planning and installing electrical systems, the relevant
national directives, rules and regulations of the country in
question are to be obeyed.
Assembly, wiring and commissioning
The connection to the bus line (D1) and to the booster voltage
(D2) is achieved using screwless plug-in terminals.
Remove bus terminal and supply terminal
The bus terminal (D1) and the supply terminal (D2) are located
on the rear side of the bus coupler (Figure 5).
The bus terminal and supply terminal (terminal block) (E1)
consist of two parts (E1.1, E1.2), each with four terminal con-
tacts. You must take care that bothtest sockets (E1.3) are not
damaged, either with the bus lead (accidental attempt to plug
in) or withthe screwdriver (when trying to remove the termi-
nal)..
Insert the screwdriver carefully into the wire insertion slot of
the red/black or yellow/white part of the terminal and remove
the terminal from the bus coupler (Figure 6).
Note
Do not lever the terminals outwards from below! Risk of short-
circuit
Attach bus terminal and supply terminal
Plug the terminals into the guide grooves of the bus coupler and
push the terminals downwards to the end stop.
C5
C1
C1
C2
C3
B2
B3
C4
D1
D2
E 1.3
E1.1 E 1.2
E1
D
GB
L1V30068787 DS01 Seite 4von 4 page 4 of 4
E 1 E
1
.
4
5
m
m
E 1
E
1
.4
F1
F2
F3
Bild / figure 7
Bild / figure 8
Bild / figure 8
Bild / figure 9
Bild / figure 10
Bild / figure 11
Technical Support
'+49 (911) 895-7222
7+49 (911) 895-7223
*support.automation@siemens.com
www.siemens.de/automation/support-request
Anschließen der Bus- und Versorgungsleitungen
Die Klemmen (E1) sind für eindrähtige Leiter mit 0,6 ... 0,8 mm
Øgeeignet.
Enden des Leiters (E1.4) entisolieren und in Klemme (E1) ste-
cken (rot = +, schwarz = -) bzw. (gelb = +, weiß = -) (Bild 7).
Wird die Buslinie verpolt angeschlossen, so wird der
Busankoppler durch eine Schutzeinrichtung abgeschaltet
(Verpolschutz). Dies gilt ebenfalls für die benötigte Zusatzspan-
nung.
Abklemmen der Bus- und Versorgungsleitungen
Die Klemmen (E1) abziehen und den Leiter (E1.4),
bei gleichzeitigem Hin- und Herdrehen, herausziehen
(Bild 7).
Montage
Der Busankoppler wird in Installationsdosen 60 mm Ø mittels
Schraubbefestigung eingebaut (siehe Bild 8).
F1 Installationsdose (60 mm Ø nach DIN 49073)
F2 Busankoppler
F3 Befestigungsschrauben des Busankopplers
Hinweis:
Der Busankoppler ist so zu montieren, dass sich die Anwender-
schnittstelle (AST) unten befindet (siehe Bild 1 bzw. 7). Da-
durch ist sichergestellt, dass der auf die AST aufzusteckende
Contouch, in der für die Bedienung richtigen Lage montiert
wird. Für eine dauerhaft sichere Kontaktgabe an der AST wird
dringend empfohlen, den Contouch mit der Befestigungs-
schraube zu fixieren (im Auslieferungszustand unverschraubt).
Inbetriebnahme
- Den Busankoppler (F2) an der UP-Dose (F1) befestigen und
an die Busleitung bzw. an die Zusatzspannung anschließen
- Inbetriebnahme-Taste (A2) drücken: Inbetriebnahme-LED
(A1) leuchtet auf
- Physikalische Adresse und das parametrierte Applikations-
programm mit Hilfe der ETS laden
- Contouch mittels den beiden Zentrierungsdornen (C1) und
der 6-poligen Siftleiste (C2) auf den Busankoppler aufste-
cken und mit der Befestigungsschraube (G2) auf dessen
Tragrahmen (G1) verschrauben (Diebstahlschutz)
- Dreh-/Drückknopf (G3) auf den Contouch aufstecken
Der Contouch verfügt neben der Anwenderschnittstelle über
einen Wechseldatenträger (microSDHC-Karte). Auf dieser
Flashkarte befinden sich die verschiedenen Dateien (Firmware
und definierte Konfigurationseinstellungen) für die Inbetrieb-
nahme des Contouch, welche vom ETS PlugIn abgelegt bzw.
generiert wurden. Somit ist für jede Inbetriebnahme der Wech-
seldatenträgermit dem Inbetriebnahme-PC zu verbinden. Der
Contouch Flash-Kit, welcher als Zubehör zum Raum Controller
Contouch erhältich ist, bietet neben der microSDHC-Karte die
beiden Adapter (micro SD Adapter bzw. USB microSD Leser).
Mit den beiden Adaptern kann der Wechseldatenträger im SD-
Kartenslot bzw. im USB Port des Inbetriebnahme-PC aufge-
nommen werden.
Demontage
- Dreh-/Drückknopf (G3) abziehen
- Befestigungsschraube (G2) herausschrauben
- Contouch vom Busankoppler abziehen
- Busankoppler aus der UP-Dose ausbauen
Montageort (siehe Bild 10)
Bei der Montage des Raum Controller Contouch sind folgende
Hinweise zu beachten:
Reglermontage an der Innenwand des zu klimatisierenden Rau-
mes, gegenüber der Heizquelle:
·Auf ca. 1,5 m Höhe in der Aufenthaltszone und mindestens
50 cm von der nächsten Wand entfernt.
·nicht an Aussenwänden
·nicht in Nischen oder hinter Vorhängen
·nicht über oder nahe bei Wärmequellen oder Regalen
·nicht an Wänden, hinter denen sich Wärmequellen wie z.B.
ein Kamin befindet
·nicht im Strahlungsbereich von Wärmequellen und Leucht-
körpern wie z.B. Spotlampen
·nicht in Bereichen mit direkter Sonneneinstrahlung
·Es ist auf einen vibrationsarmen Einbauort zu achten
Die Zugluft von Fenstern und Türen ist zu vermeiden!
Das geräteseitige Ende des Installationsrohres ist abzudichten,
damit kein Luftzug im Rohr entsteht, der die Messung negativ
beeinflusst, siehe Bild 11.
Allgemeine Hinweise
·Die Bedienungsanleitung ist dem Kunden auszuhändigen.
·Das defekte Gerät mit Busankoppler ist mit einem Rücklie-
ferschein der zuständigen Vertriebsniederlassung zurückzu-
senden.
·Bei zusätzlichen Fragen zum Produkt wenden Sie sich bitte an
unseren Technical Support.
Connecting the bus and supply terminals
The terminals (E1) are suitable for solid leads with a diameter of
0.6 ... 0.8 mm.
Remove insulation on the ends of the leads (E1.4) and plug
them into the terminal (E1) (red = +, black = -) or (yellow = +,
white = -) (Fig. 7).
If the bus line is connected with reverse polarity, then the bus
coupler is switched off by a protective device (reverse polarity
protection). This also applies for the required booster voltage.
Disconnection of the bus and supply lines
Remove the terminal (E1) and pull out its lead (E1.4) by turning
it alternately backwards and forwards (Figure 7).
Mounting
A screw connection is used to install the bus coupler in Ø 60 mm
mounting boxes (see Fig. 8).
F1 Mounting box (60 mm Ø in accordance with DIN 49073)
F2 Bus coupler
F3 Bus coupler fixing screws
Note:
The bus coupler must be mounted in such a way that the user
interface (AST) is located at the bottom (see Fig. 1 or 7). Please
ensure thereby that the Contouch to be attached to the AST is
mounted in the correct position for operation. For a perma-
nently secure contact connection to the AST, it is urgently rec-
ommended to lock the Contouch into place with the fixing
screw (not screwed together in the delivery state).
Starting up
- Fasten the bus coupler (F2) to the flash-mounting box (F1)
and connect it to the bus line and the booster voltage.
- Press the start-up button (A2): Start-up LED (A1) illuminates
- Use the ETS to load the physical address and the configured
application program
- Use the two centring spikes (C1) and the 6-pin plug connect-
or (C2) to attach Contouch to the bus coupler and screw this
onto the support frame (G1) with the fixing screw (G2)
(Theft protection)
- Attach rotary/push-button (G3) to the Contouch
Along with the user interface, Contouch is equipped with a re-
movable data carrier (micro SDHS card). This flash card contains
various files (Firmware and defined configuration settings) for
the start-up of Contouch, which have been stored or generated
by ETS plug-in. Thus, the removable data carrier is to be con-
nected with the commissioning PC for every start-up. The
Contouch flash kit, which is available as an accessory for the
Contouch room controller, offers both adapters (micro SD
Adapter and USB microSD reader) along with the micro SDHC
card. The two adapters can be used to install the removable data
carrier into the SD card slot or in the USB port of the commis-
sioning PC.
Dismounting
- Remove rotary/push-button (G3)
- Unscrew the fixing screw (G2).
- Remove Contouch from the bus coupler
- Remove the bus coupler from the flush-mounting box
Mounting site (see Fig. 10)
Observe the following notes when mounting the Contouch
room controller:
Controller mounting on the interior wall of the room to be air-
conditioned, opposite the heating source:
·at aheight of around 1.5 m inthe occupied zone and at least
50 cm away from the nearest wall.
·not on exterior walls
·not in niches or behind curtains
·not above or near heat sources or shelves
·not on walls, behind which heat sources such as a fireplace
are located
·not in the radiation range of heat sources and lights such as
spot lamps
·not in areas with direct sunlight
·care must be taken to ensure a low-vibration installation site
Drafts from windows and doors must be avoided!
The device-side end of the installation tube must be sealed so
that no drafts form in the tube which negatively affect the
measurements, see Fig. 11.
General Notes
·The operating instructions must be handed over to the client.
·The faulty device with bus coupler shall be returned with a
Return Good Note for Service provided by the appropriate
Siemens sales office.
·If you have further questions concerning the product please
contact our technical support.
G1
G3
G2

This manual suits for next models

4

Other Siemens Controllers manuals

Siemens RAJA+ 3TE7131-1HC14-1A Operating instructions

Siemens

Siemens RAJA+ 3TE7131-1HC14-1A Operating instructions

Siemens Synco700 RMK770 Operator's manual

Siemens

Siemens Synco700 RMK770 Operator's manual

Siemens simovert masterdrives User manual

Siemens

Siemens simovert masterdrives User manual

Siemens SIMATIC S5 Series User manual

Siemens

Siemens SIMATIC S5 Series User manual

Siemens SINAMICS PM240-2 Assembly instructions

Siemens

Siemens SINAMICS PM240-2 Assembly instructions

Siemens Powermite 599 Series Owner's manual

Siemens

Siemens Powermite 599 Series Owner's manual

Siemens S7-1200 TELECONTROL User manual

Siemens

Siemens S7-1200 TELECONTROL User manual

Siemens SIRIUS 3RW5 series User manual

Siemens

Siemens SIRIUS 3RW5 series User manual

Siemens RBC User manual

Siemens

Siemens RBC User manual

Siemens rle127 User manual

Siemens

Siemens rle127 User manual

Siemens SSA911.01ZB User manual

Siemens

Siemens SSA911.01ZB User manual

Siemens SQU83 User manual

Siemens

Siemens SQU83 User manual

Siemens SIPART PS2 6DR5 series User manual

Siemens

Siemens SIPART PS2 6DR5 series User manual

Siemens OpenAir GLB141.1P Owner's manual

Siemens

Siemens OpenAir GLB141.1P Owner's manual

Siemens N350E Service manual

Siemens

Siemens N350E Service manual

Siemens Simatic S7-1500/ET 200MP User guide

Siemens

Siemens Simatic S7-1500/ET 200MP User guide

Siemens AEROGYR RWI65.02 User manual

Siemens

Siemens AEROGYR RWI65.02 User manual

Siemens RC 195 User manual

Siemens

Siemens RC 195 User manual

Siemens SIPART DR19 User manual

Siemens

Siemens SIPART DR19 User manual

Siemens Acvatix SAS Series Operator's manual

Siemens

Siemens Acvatix SAS Series Operator's manual

Siemens ATC5300 User manual

Siemens

Siemens ATC5300 User manual

Siemens SAS61.33U Owner's manual

Siemens

Siemens SAS61.33U Owner's manual

Siemens SIMATIC S5 Series User manual

Siemens

Siemens SIMATIC S5 Series User manual

Siemens Climatix HMI-TM Operator's manual

Siemens

Siemens Climatix HMI-TM Operator's manual

Popular Controllers manuals by other brands

Woodward EPG 524 Installation and troubleshooting guide

Woodward

Woodward EPG 524 Installation and troubleshooting guide

ComAp InteliDrive Lite reference guide

ComAp

ComAp InteliDrive Lite reference guide

eCOUNT aFLAT Series manual

eCOUNT

eCOUNT aFLAT Series manual

MSA PremAire System manual

MSA

MSA PremAire System manual

Digital Video Lab DejaVu user manual

Digital Video Lab

Digital Video Lab DejaVu user manual

Cannon DVR-1000 instruction & operation manual

Cannon

Cannon DVR-1000 instruction & operation manual

Allen-Bradley PanelView 800 installation instructions

Allen-Bradley

Allen-Bradley PanelView 800 installation instructions

Satel ABAX 2 ACU-280 manual

Satel

Satel ABAX 2 ACU-280 manual

GE Multilin F650 user guide

GE

GE Multilin F650 user guide

rotork CK Series Use and installation  manual

rotork

rotork CK Series Use and installation manual

RUTEC TSC manual

RUTEC

RUTEC TSC manual

Endress+Hauser Liquiline Control CDC90 operating instructions

Endress+Hauser

Endress+Hauser Liquiline Control CDC90 operating instructions

LINK-MI LM-TV04P user manual

LINK-MI

LINK-MI LM-TV04P user manual

StarLogixs PressMate Service manual

StarLogixs

StarLogixs PressMate Service manual

Weiss Instruments Dixell XR03CX operating manual

Weiss Instruments

Weiss Instruments Dixell XR03CX operating manual

ReWater Systems COMPLETE CONTROL 9 user guide

ReWater Systems

ReWater Systems COMPLETE CONTROL 9 user guide

TLV SC-F70 operating instructions

TLV

TLV SC-F70 operating instructions

Contour PRO v2 quick start guide

Contour

Contour PRO v2 quick start guide

manuals.online logo
manuals.online logoBrands
  • About & Mission
  • Contact us
  • Privacy Policy
  • Terms and Conditions

Copyright 2025 Manuals.Online. All Rights Reserved.