manuals.online logo
Brands
  1. Home
  2. •
  3. Brands
  4. •
  5. Sierra Wireless
  6. •
  7. Gateway
  8. •
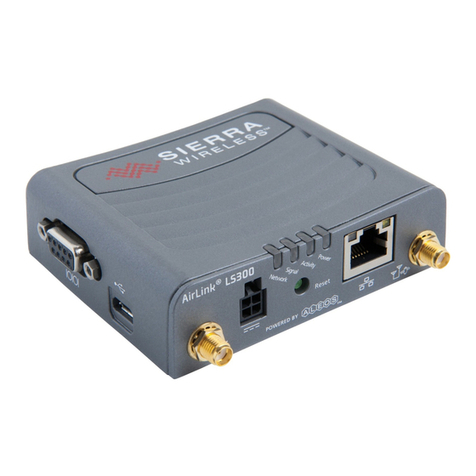
  9. Sierra Wireless LS300 User manual

Sierra Wireless LS300 User manual

      
   
      
         
Due to the nature of wireless communications, transmission and reception of data
can never be guaranteed. Data may be delayed, corrupted (i.e., have errors) or be
totally lost. Although significant delays or losses of data are rare when wireless
devices such as the Sierra Wireless AirLink LS300 are used in a normal manner
with a well-constructed network, the Sierra Wireless LS300 should not be used in
situations where failure to transmit or receive data could result in damage of any
kind to the user or any other party, including but not limited to personal injury,
death, or loss of property. Sierra Wireless accepts no responsibility for damages
of any kind resulting from delays or errors in data transmitted or received using
the Sierra Wireless AirLink LS300, or for failure of the Sierra Wireless AirLink
LS300 to transmit or receive such data.
Do not operate the Sierra Wireless AirLink LS300 in areas where blasting is in
progress, where explosive atmospheres may be present, near medical
equipment, near life support equipment, or any equipment which may be
susceptible to any form of radio interference. In such areas, the Sierra Wireless
LS300 MUST BE POWERED OFF. The Sierra Wireless AirLink LS300 can
transmit signals that could interfere with this equipment.
Do not operate the Sierra Wireless AirLink LS300 in any aircraft, whether the
aircraft is on the ground or in flight. In aircraft, the Sierra Wireless AirLink LS300
MUST BE POWERED OFF. When operating, the Sierra Wireless AirLink LS300
can transmit signals that could interfere with various onboard systems.
               !   " #       $  % !   & '    %    # $   ! ( $     $     '   &   !   $ 
)
  % *  *  $  *     !  #  + , $        -      ! ! .   /  0 /  1 2 2   " 3  % !  *    $  !     +
The driver or operator of any vehicle should not operate the Sierra Wireless
AirLink LS300 while in control of a vehicle. Doing so will detract from the driver or
operator's control and operation of that vehicle. In some states and provinces,
operating such communications devices while in control of a vehicle is an offence.
In accordance with ANSI/ISA 12.12.1-2011, Section 16 and CSA C22.2 No 213,
Section 5.5, the following instructions and warnings apply:
This apparatus is suitable for use in Class I, Division 2, Groups A, B, C and D.
Warning:
4 5 6
/ 7  8 7  9 . : . ; < =  > ?  , 8 , > , 8 7  7 @ A 7 B
6
7 
4
 ,  B . C 8 B
6
. 8 ;
 > 8 , . ? 8 / 8 , C @ 7 ; A / .   8 D < 8 E 8  8 7  F +
Warning:
. E
4
; , 8  
4
B
4
 , = ; 8  G >
4
< H
4 5 6
/ 7  8 7  I / .  > ?  , 8 , > , 8 7  <
4
A 7 B
6
7  .  , 
6 4
> , ;
4
<;
4
A
4
B . ,
4
; 8
4
/ 8  . A A
4 6
, . ? /
4 6
7 > ; /
4

4
B
6
/ . A
4
I
B
4
 ,  <
4
A / .  
4
8 D < 8 E  8 7  F +
Warning:
4 5 6
/ 7  8 7  9 . : . ; < = < 7  7 , < 8  A 7  
4
A , - 9 8 /
4
A 8 ; A > 8 , 8  / 8 E
4
>/
4
  , 9
4
. ;
4
. 8  J  7 -  , 7 ?
4
 7  I 9 . : . ; < 7 >  +
K L  M L N O M P  Q Q R S   T U L V 
W W   X Y Z [
Warning:
. E
4
; , 8  
4
B
4
 , = ; 8  G >
4
< H
4 5 6
/ 7  8 7  I 
4 6
.  <
4
? ; .  A 9
4
; , .  ,
G >
4
/
4
A8;A>8,
4
 ,  7 > ;  ,
4
  8 7  D . B 7 8 
4
 G > H 8 / 
4
 H. \ 8  
4
< H > 
4
B
6
/ . A
4
B
4
 ,  7  < .  \
4
;
4
>
5
+
Warning:
< 7  7 , > 
4
, 9
4
>  ? A 7  
4
A , 7 ; 8  . 9 . : . ; < 7 >  . ;
4
. +
The information in this manual is subject to change without notice and does not
represent a commitment on the part of Sierra Wireless. SIERRA WIRELESS AND
ITS AFFILIATES SPECIFICALLY DISCLAIM LIABILITY FOR ANY AND ALL
DIRECT, INDIRECT, SPECIAL, GENERAL, INCIDENTAL, CONSEQUENTIAL,
PUNITIVE OR EXEMPLARY DAMAGES INCLUDING, BUT NOT LIMITED TO,
LOSS OF PROFITS OR REVENUE OR ANTICIPATED PROFITS OR REVENUE
ARISING OUT OF THE USE OR INABILITY TO USE ANY SIERRA WIRELESS
PRODUCT, EVEN IF SIERRA WIRELESS AND/OR ITS AFFILIATES HAS BEEN
ADVISED OF THE POSSIBILITY OF SUCH DAMAGES OR THEY ARE
FORESEEABLE OR FOR CLAIMS BY ANY THIRD PARTY.
Notwithstanding the foregoing, in no event shall Sierra Wireless and/or its
affiliates aggregate liability arising under or in connection with the Sierra Wireless
product, regardless of the number of events, occurrences, or claims giving rise to
liability, be in excess of the price paid by the purchaser for the Sierra Wireless
product.
This product may contain technology developed by or for Sierra Wireless Inc.
This product includes technology licensed from QUALCOMM®.
This product is manufactured or sold by Sierra Wireless Inc. or its affiliates under
one or more patents licensed from InterDigital Group and MMP Portfolio
Licensing.
© 2013 Sierra Wireless. All rights reserved.
Sierra Wireless™, Watcher™ AirPrime™, AirLink™, AirVantage™ and the Sierra
Wireless logo are trademarks of Sierra Wireless.
Windows®is a registered trademark of Microsoft Corporation.
Macintosh®and Mac OS X®are registered trademarks of Apple Inc., registered in
the U.S. and other countries.
QUALCOMM®is a registered trademark of QUALCOMM Incorporated. Used
under license.
Other trademarks are the property of their respective owners.
      
         [
* If you have purchased your product from an AirLink Distributor or Reseller,
please contact them for first line technical support.
Consult our website for up-to-date product descriptions, documentation,
application notes, firmware upgrades, troubleshooting tips, and press releases:
www.sierrawireless.com
] ^ _ ` ^ a b c d e f g h i j k i l m n h k o n p n i o j j h q i j o k o n n r s t u
] ^ _ ` ^ a b c v w w x _ y z n { | | t j } p n i o j j h q i j o k o n n r s t u
] ^ _ ` ^ a b ~  ] ~ f w d ^ _ g z j o | h i j n p n i o j j h q i j o k o n n r s t u
] ^ _ ` ^ a b  a e ^ a f c v w w x _ y
 a x  e f   f  d g f
q q q r n i o j j h q i j o k o n n r s t u   { | | t j }   { | | t j }  o l } o j
] ^ _ ` ^ a b c x  y  d _ f
 x  a e x d  g
www.sierrawireless.com/en/Support/
Downloads.aspx
x _ w x _ d y f  f  c ^ y f q q q r n i o j j h q i j o k o n n r s t u
c d e f g
 f d   v d _ y f _ g   
x a f                
 x v _ g        y x      

d  ^  ^   ^ ¡ f
¢  ¡ d ^ e  £ ¤ ¥ ¦ £ § £ ¨ ¦ © © ¤ ª ¨ © ¦ ¥ ¦ £ £ « ¬  ®

x g y  c ^ f _ _ d  ^ _ f e f g g
      ^ _ f e f g g  d ¯
~ ^ 

¡ x a  ° ± 
d a d  d ²  ²  ] 
³ ´ µ ¶ · ¶ ¸ ¹ º » ¼ ´ ½ ¾ ¿ ¿ » À Á ¸ Â Ã Ä » ¹ Å ´ ·
Æ Ç Æ º ´ Ã ´ ¿ È ´ À É Æ Ê É Ë ^ _ g y  _ d  y
Æ Ç Ê Ì » ¹ ¾ » À Á É Æ Ê Í c f  x a   _ d  y
Ê Ç Æ Î ´ È À ¾ » À Á É Æ Ê Í Ë ^ _ g y ~ f e f d g f
K L  M L N O M P  Q Q R S   T U L V 
ÏW   X Y Z [
       Ð   Ñ
Ò Ó Ô Õ Ö × Ø Ù Ô Ú Ö Ó Û Û Û Û Û Û Û Û Û Û Û Û Û Û Û Û Û Û Û Û Û Û Û Û Û Û Û Û Û Û Û Û Û Û Û Û Û Û Û Û Û Û Û Û Û Û Û Û Û Û Û Ü
Ý Þ ß Ù Õ Ú à Ô Ú Ö Ó Û Û Û Û Û Û Û Û Û Û Û Û Û Û Û Û Û Û Û Û Û Û Û Û Û Û Û Û Û Û Û Û Û Û Û Û Û Û Û Û Û Û Û Û Û Û Û Û Û Û á â
ã Õ Ö Ó Ô ä å Ó Þ æ Û Û Û Û Û Û Û Û Û Û Û Û Û Û Û Û Û Û Û Û Û Û Û Û Û Û Û Û Û Û Û Û Û Û Û Û Û Û Û Û Û Û Û Û Û Û Û á â
ç Þ è Ô é Ú × Þ ä å Ó Þ æ Û Û Û Û Û Û Û Û Û Û Û Û Û Û Û Û Û Û Û Û Û Û Û Û Û Û Û Û Û Û Û Û Û Û Û Û Û Û Û Û Û Û Û Û Û á á
ê Þ å Õ ä å Ó Þ æ Û Û Û Û Û Û Û Û Û Û Û Û Û Û Û Û Û Û Û Û Û Û Û Û Û Û Û Û Û Û Û Û Û Û Û Û Û Û Û Û Û Û Û Û Û Û Û Û á ë
ì ç í î é é Ö è Ô ï å Õ Þ Û Û Û Û Û Û Û Û Û Û Û Û Û Û Û Û Û Û Û Û Û Û Û Û Û Û Û Û Û Û Û Û Û Û Û Û Û Û Û Û Û Û Û Û Û á ë
ì ð í ñ å Ó å ò Þ Õ Û Û Û Û Û Û Û Û Û Û Û Û Û Û Û Û Û Û Û Û Û Û Û Û Û Û Û Û Û Û Û Û Û Û Û Û Û Û Û Û Û Û Û Û Û Û á ó
ì ð í ô Ú Þ ï Û Û Û Û Û Û Û Û Û Û Û Û Û Û Û Û Û Û Û Û Û Û Û Û Û Û Û Û Û Û Û Û Û Û Û Û Û Û Û Û Û Û Û Û Û Û Û Û Û á ó
ì Ú Õ õ å Ó Ô å ò Þ ö å Ó å ò Þ ñ Þ Ó Ô é Þ Õ ô Ú Ù Þ Û Û Û Û Û Û Û Û Û Û Û Û Û Û Û Û Û Û Û Û Û Û Û Û Û Û Û Û Û Û á ÷
ä Ö ï Þ Õ ð Ö Ó Ó Þ Ù Ô Ö Õ Ý Þ ß Ù Õ Ú à Ô Ú Ö Ó Û Û Û Û Û Û Û Û Û Û Û Û Û Û Û Û Û Û Û Û Û Û Û Û Û Û Û Û Û Û Û Û Û Û Û Û á ø
ö Ö Ø Ó Ô Ú Ó ò ç Ö Ù å Ô Ú Ö Ó Ò Ó è Ö Õ ñ å Ô Ú Ö Ó Û Û Û Û Û Û Û Û Û Û Û Û Û Û Û Û Û Û Û Û Û Û Û Û Û Û Û Û Û Û Û Û Û Û Û á Ü
ù Ö Ö æ ß å Ó × ö å Ô Þ Õ Ú å æ ß ê Þ ú Ø Ú Õ Þ × Û Û Û Û Û Û Û Û Û Û Û Û Û Û Û Û Û Û Û Û Û Û Û Û Û Û Û Û Û Û Û Û Û Û Û á Ü
Ò Ó ß Ô å æ æ Ú Ó ò Ô û Þ é Ò ö ð å Õ × Û Û Û Û Û Û Û Û Û Û Û Û Û Û Û Û Û Û Û Û Û Û Û Û Û Û Û Û Û Û Û Û Û Û Û Û Û Û Û Û Û ë â
ð Ö Ó Ó Þ Ù Ô Ú Ó ò Ô û Þ ç é ó â â Û Û Û Û Û Û Û Û Û Û Û Û Û Û Û Û Û Û Û Û Û Û Û Û Û Û Û Û Û Û Û Û Û Û Û Û Û Û Û Û Û ë á
Ò Ó ß Ô å æ æ Ú Ó ò Ô û Þ ü ä é ì Ó Ô Þ Ó Ó å Û Û Û Û Û Û Û Û Û Û Û Û Û Û Û Û Û Û Û Û Û Û Û Û Û Û Û Û Û Û Û Û Û Û Û Û Û ë á
ö Ö Ø Ó Ô Ú Ó ò Ô û Þ ç é ó â â Ú Ó å õ Þ û Ú Ù æ Þ Û Û Û Û Û Û Û Û Û Û Û Û Û Û Û Û Û Û Û Û Û Û Û Û Û Û Û Û Û Û Û Û Û ë ë
é Ô å Õ Ô Ú Ó ò Ô û Þ ç é ó â â Û Û Û Û Û Û Û Û Û Û Û Û Û Û Û Û Û Û Û Û Û Û Û Û Û Û Û Û Û Û Û Û Û Û Û Û Û Û Û Û Û Û Û Û ë ó
ç í Ý î à Þ Õ å Ô Ú Ö Ó Û Û Û Û Û Û Û Û Û Û Û Û Û Û Û Û Û Û Û Û Û Û Û Û Û Û Û Û Û Û Û Û Û Û Û Û Û Û Û Û Û Û Û Û Û Û Û ë ÷
ð Ö Ó Ó Þ Ù Ô Ú Ö Ó ä Ö Õ Ô ß Û Û Û Û Û Û Û Û Û Û Û Û Û Û Û Û Û Û Û Û Û Û Û Û Û Û Û Û Û Û Û Û Û Û Û Û Û Û Û Û Û Û Û Û Û ë ý
ð Ö Ó è Ú ò Ø Õ Ú Ó ò ï Ú Ô û ì ð í ñ å Ó å ò Þ Õ Û Û Û Û Û Û Û Û Û Û Û Û Û Û Û Û Û Û Û Û Û Û Û Û Û Û Û Û Û Û Û Û Û Û Û ë ý
ð Ö Ó è Ú ò Ø Õ Ú Ó ò ï Ú Ô û ì Ú Õ õ å Ó Ô å ò Þ ö å Ó å ò Þ ñ Þ Ó Ô é Þ Õ ô Ú Ù Þ Û Û Û Û Û Û Û Û Û Û Û Û Û Û Û Û Û Û Û ë þ
ð Ö Ó è Ú ò Ø Õ Ú Ó ò ï Ú Ô û ì ù ð Ö ñ ñ å Ó × ß Û Û Û Û Û Û Û Û Û Û Û Û Û Û Û Û Û Û Û Û Û Û Û Û Û Û Û Û Û Û Û Û Û Û ë þ
K L  M L N O M P  Q Q R S   T U L V 
Y W   X Y Z [
ã Þ × Þ Õ å æ ð Ö ñ ñ Ø Ó Ú Ù å Ô Ú Ö Ó ß ð Ö ñ ñ Ú ß ß Ú Ö Ó ÿ Ö Ô Ú Ù Þ

ã ð ð

Ó Ú Ô Þ × é Ô å Ô Þ ß

Û Û Û Û ó ø
ÿ Ö Ô Ú Ù Þ è Ö Õ ð å Ó å × Ú å Ó

ß Þ Õ ß Û Û Û Û Û Û Û Û Û Û Û Û Û Û Û Û Û Û Û Û Û Û Û Û Û Û Û Û Û Û Û Û Û Û Û ó ø
ê ã í

à Ö ß Ø Õ Þ Û Û Û Û Û Û Û Û Û Û Û Û Û Û Û Û Û Û Û Û Û Û Û Û Û Û Û Û Û Û Û Û Û Û Û Û Û Û Û Û Û Û Û Û Û Û ó

í

ÛÛÛÛÛÛÛÛÛÛÛÛÛÛÛÛÛÛÛÛÛÛÛÛÛÛÛÛÛÛÛÛÛÛÛÛÛÛÛÛÛÛÛÛÛÛÛÛÛÛÛÛÛÛó

       Ð   Z
This chapter describes the Sierra Wireless AirLink LS300 and its
various connectors. It also introduces the ALEOS™ software and the
AirVantage Management System (AVMS) which controls, configures
and monitors the AirLink LS300.
The AirLink LS300 is a compact, intelligent and fully-featured
communications platform that provides real-time wireless capabilities
for fixed and mobile applications such as:
•Remote asset monitoring
•Smart meters
•AVL applications
•Public Safety vehicle deployments
•Point of sale terminals
•Digital signs
The AirLink LS300 has multiple communication ports including serial,
Ethernet, and USB ports. The power connector has one digital I/O pin
for remote monitoring and control and one ignition sense pin to turn
the device on and off and trigger the low power mode.
The AirLink LS300 is a 3G cellular device that supports a variety of
radio bands options, both on HSPA+ or CDMA EV-DO cellular
technology.
The AirLink LS300, when coupled with the rich embedded
intelligence provided by the embedded ALEOS software, is the
perfect choice for a broad set of machine to machine solutions.
K L  M L N O M P  Q Q R S   T U L V 
 Q W   X Y Z [
The front panel has the following connectors and controls:
                   
• Antenna Connector–This is the radio’s receive and transmit port. The device
works with most cellular antennas with an SMA connector.
The antenna should not exceed the maximum gain specified in Antenna Con-
siderations on page 33. In more complex installations (such as those requiring
long lengths of cable and/or multiple connections), you must follow the maxi-
mum dBi gain guidelines specified by the radio communications regulations of
the Federal Communications Commission (FCC) or Industry Canada or

our
country’s regulatory body (if used outside the US)
• LEDs–These show the device’s operating status. Each LED can be red,
green, yellow or off. The LEDs are described in detail in LED Operation on
page 24. They are:
· Network–When green the device is connected to a cellular network with an
IP address assigned and a channel acquired.
· Signal–When green it is receiving a cellular signal.
· Activity–When green, the radio link is active.
· Power–When green, the device is connected to power.
• Ethernet Connector–This RJ-45 connector connects a standard Ethernet
cable to the device. This is used to connect a PC to the device for configu-
ration and diagnostic purposes or attaching Ethernet equipment to the device.
• GPS/Diversity Antenna Connector–This connects an optional GPS
antenna to the device. It works with most antennas that have an SMA
connector. It also can be used as an auxiliary receive port for wireless
communications.
     , $  ! #     !   '  

   " D   *   !      !    +
• Reset–Pressing this button resets the device.
     9   * 
)
 $  3 %    *  ( &  

2 !  '  * !   !   !  $  * 

 '      ! *  &  %   !    
)
! +
Antenna Connector
Ethernet Connector
Power Connector
LEDs
GPS/Diversity
Antenna Connector

N



V U 

L

N
   
 K L  M L N O M P  Q Q
       Ð    
• Power Connector–This connects power to the device and provides
additional inputs/outputs for the control and monitoring of external devices as
well as triggering the low power mode. More information on its operation and
how to use it is given in Power Connector Description on page 15.
There are two types of optional power cables available from Sierra Wireless:
·Cables with an AC adapter that are usually used for indoor, fixed applica-
tions where the device runs off line power.
·DC cables that are usually used in vehicles or other installations where the
device runs off battery power.
The device automatically starts when it senses power as described in Starting
the LS300 on page 23.
The left side panel has the following connectors:
                      
• Serial Port–This 9-pin connector provides standard RS-232 communication
with a standard straight-though serial cable. It is used to communicate with
industrial machines like motors, computers or controllers or for connection to
a computer to configure the device with AT commands. It also supports
features like TCP PAD and UDP PAD.
• USB Port–This port is a Micro-B connector. You can connect a Windows PC
to this port to monitor and configure the device.
When connected to a PC, it becomes either a:
·Virtual serial port
·Virtual Ethernet port
     ? " *  &  %      ! 

   %  
4
 $     #    +
Windows drivers for this port are available at the Sierra Wireless’s download
web site www.sierrawireless.com/en/Support/Downloads.aspx.
Serial Port
USB Port
K L  M L N O M P  Q Q R S   T U L V 
 X W   X Y Z [
The rear panel has the following connector:
         !        
• SIM Card Port–This panel allows access to the SIM card connector for card
installation and removal, if your mobile network operator requires a SIM card.
Also see Installing the SIM Card on page 20.
     @   *       *  &             &  $  &    %   !  . /
4
7  D !    $  . /
4
7  A  & 
)
% I
     > !   \ %  *  +
ALEOS, the embedded core technology of the AirLink product line provides:
•Simplified installation, operation and maintenance of any wireless solution.
•An always-on, always-aware, intelligent two-way connection for mission-
critical applications.
ALEOS enables:
•Persistent Network Connectivity
•Over-The-Air (OTA) Upgrades
•Wireless Optimized TCP/IP
•Real-Time Notification
•Real-Time GPS Reporting
•GPS Store and Forward
•Packet Level Diagnostics
•Device Management & Control
The AirLink Control Environment (ACE) and ACEWare are Sierra Wireless’ device
management and monitoring tool suites for AirLink devices. The ACEware suite
includes:
• ACEmanager– a software application embedded in the device
• ACEview– a Windows-based application for PCs
• AirVantage Management Service (AVMS)– a cloud computing device
management service provided by Sierra Wireless
Contact your dealer or Sierra Wireless representative for more information.
SIM Card Port

N



V U 

L

N
   
 K L  M L N O M P  Q Q
       Ð    
Download the applications and user guides from the Sierra Wireless AirLink
Solutions web site at www.sierrawireless.com/support.
ACEmanager:
•Simplifies deployment
•Provides extensive monitoring, control and management capabilities
•Configures your device to meet your needs
•Monitors and controls your AirLink device remotely and in real-time
•Is accessible through a web browser connected to the device
See Starting the LS300 on page 23 for instructions on how to access
ACEmanager.
        "  # $ % &       '  &     
ACEview is a Windows-based monitoring application for the PC with an easy to
read interface.
        (  # $ % )   *  +    
     . A
4

  (  
,
%    !  $  B  '   !  &  + 
4
, @     (   0

+ F + 2  * B  '   !  &  -  *  ( !
5 6
       + 7 3     $  B  '   !  &  + 
4
, @     (   0 &    B  '   !  &     $   # 
- -
( ( ( +   '   !  &  + '   +
K L  M L N O M P  Q Q R S   T U L V 
 W W   X Y Z [
AirLink devices can be managed with the AirVantage Management Service
(AVMS) available from Sierra Wireless. AVMS is a cloud-based application,
accessed from your web browser, that provides remote monitoring and
configuration for any number of your AirLink ALEOS devices.
AVMS features include:
•Device management with no software or hardware to buy and no ongoing
maintenance required.
•Advanced monitoring dashboards and alert notifications ensuring you always
know the status of your AirLink devices.
•Detailed configuration of all ALEOS parameters, including templates
providing batch updates of pre-set configurations across multiple devices.
•Over-the-air (OTA) firmware upgrades for all of your AirLink devices with a
single operation.
To use AVMS, either call your AirLink reseller or visit:
www.sierrawireless.com/en/productsandservices/AirLink/
Device_Management.aspx
       Ð    [
This chapter shows you how to connect, install and start the Sierra
Wireless AirLink LS300. It also describes the front panel LEDs.
The LS300’s power connector is a four pin connector that has:
•Two pins connecting DC voltage to the device
•Two pins providing additional monitoring and control functions
This section has information to help you plan your device’s
connection and configuration.
The connector’s pin diagram is shown below. It also shows the colors
of the wires used on the DC power cable you can order from Sierra
Wireless.
            . .   *   $     +       /      &
0 1 2 3 4 5 1
6 7 8 9 : 3 4 5 1
; < = > ?
@ A B C D E F E G E H A G I G
J
E K A B L M N O P Q R S T P G U
V W X Y
Z [ [
V W X \
] ^ _ ` a b
V W X c
d e a f g f _ a
h i a j i
V W X k
lfef g m n d o p _ ^
qa m n _ e d a r ` g
s t u v v
w x y z { | x } } z ~  x {
           
           
5 1 1  3 4 5 1                
  ¡
 ¢  £ ¤ ¥ 

£  
¡ ¦  §
 

3 ¨ 4 © 1 3 4 5 1
ª p « ¬  [ _ n _ ^ j m ^ i ® _ n _ ^ j _ ¯
°
f ^ i j _ a l [ ® _ a a i ® g _ ^ ® m ± n i
  ²

  
¡  ³ ´
     
µ ¶ · ¸ ¹ º · » ¼ ½ ¾ ¿ ¿ À Á
Â
½ Ã Ã Ä
Â
¼ Ä Å ¼ ½ ¼ Æ Ä À Ç Ã À ¼ À ½ Ã È
É Ê Ë
K L  M L N O M P  Q Q R S   T U L V 
ÏW XYZ[
• Pin 1 – VCC; Connect to +12VDC (nominal) (red wire on DC cable).
• Pin 2 – Ground; Connect to ground (black wire on DC cable).
This pin is the ignition sense pin (white wire on DC cable). The voltage level
present on this pin turns the device on and off.
     8 & "  % *    '   '   $  ! #     $  
)
    D "  %
Ì Í Î Ï
'   '       $  #  !   


        & "  %  #  (   ! % # #  "   3      " + , $  * 

 '     0 ! &   
,
%    &   *

   
)
   $  ! # 
 ! #     &  $  #  (   % # ! 
,
%  ' 
Ð Ñ
= F
Ò
E < A
Ó
+ 8 &   *   ! H  !     D  $  * 

 '  (       % 
 + 8 & "  %    % ! 
)
       -      ! ! . A '  3   D  $  '   '     !  !  *   $  '  3   +
There are several typical connection options for this pin:
Option 1 – If you want the device turned on and off when the engine is
turned on and off:
·Connect pin 3 to the ignition.
·In ALEOS, disable the Low Power Mode. (Default setting is disabled.)
Option 2 – If you power the device from the engine’s battery and you do not
want the device to drain it when the engine is turned off:
·Connect pin 3 to the ignition.
·In ALEOS, enable the Low Power Mode and set a time delay.
When the ignition is turned off, the device operates at full power for the pro-
grammed time delay. When it expires, the device switches to Low Power Mode
(consumes 35mA or less). The device resumes normal operation when the
ignition is turned on.
Option 3 – If you want the device to switch into low power mode when the
engine battery voltage drops below a certain value:
·Connect pin 3 to pin 1.
·In ALEOS, configure the Low Power Mode with a voltage level threshold.
The device operates normally until the battery voltage drops below the thresh-
old value, triggering the Low Power Mode. The device resumes normal opera-
tion when the battery voltage rises above the threshold value.
Option 4 – If you use a separate battery other than the engine’s for device
power, (such as in an ambulance or other application that has a stand-alone
battery power system) but it isn't connected to an ignition or an on/off
switch, and you do not want the battery drained:
·Connect pin 3 to pin 1.
·In ALEOS, configure the Low Power Mode with a voltage level threshold.
The device operates normally until the battery voltage drops below the thresh-
old value, triggering the Low Power Mode. The device resumes normal opera-
tion when the battery voltage rises above the threshold value.
Option 5 – If you have an installation where the device uses line power such
as in a store or a remote site where power saving isn’t needed:
·Use the Sierra Wireless AC adapter or connect pin 3 to pin 1.

N S


Ô Ô


L

N  N V P

 

U
Õ
       Ð    Ñ
·In ALEOS, disable the Low Power Mode. (Default setting is disabled.)
The device is on for as long as the power is on.
     @   *      !  $  (   % !  . /
4
7  D !    $  . /
4
7  A  & 
)
%      > !   \ %  *  +
This pin is a digital input/output or an analog voltage input (green wire on DC
cable).
Pin 4:
•Monitors inputs and outputs
•Drives a relay
It has a maximum rating of 30V and 150mA sink current. The pin is user
programmed. Configuration instructions along with other information on how to
use it are given in the ALEOS Configuration User Guide.
One way to use pin 4 is with events reporting. In ALEOS you:
1. Create an Event. This triggers the device to act when it sees a specific input.
For example, you can tell the device to do something when the pin (called
digital input 1 in ALEOS) sees a digital 1. This could be when a door is
opened, activating a switch attached to it.
2. Specify an Action. These are instructions the device performs when it sees
an event. For example, an email could be sent to security, saying the door is
open, giving the time, location and other information.
There are several typical uses for Pin 4:
•As a digital input it monitors a switch, using its opening or closing to record
events or monitoring external voltages up to 30VDC. For example, you could
use it to measure the voltage on a 24VDC light bulb and have the device
react when it turns on
Ö
When the switch, or input voltage is:
· Open (or at 3.3VDC to 30VDC) – It is read as a digital input=1.
· Closed (or lower than 3.3VDC) – it is read as a digital input=0.
          /       ×  Ø   Ù Ø       
Ú Û Ü Ý
Þ Û ß Û à á â ã ä å æ ç è é
Ü ê
ë
è
Ü à á ì à
í î ï ð ñ ò ó ô õ ð ö
÷ î î ï î ô ð ø ù ø ú û ü õ î ý ù ø ú
þ ò õ ÿ ð î ô ð ø ù ø ú û ü õ î ý ù ø ú

ú ø ù

ù î ø î ø û î
 

î
 
ò ï

ô î ï

î

ø

ó ô
 
û í

õ õ ü î ø

ò ù ø ð ï
      
            
   
      
          
  !  "
# $ # % & '
( ) *
+ , - . / , 0 1
2 3 1 1 4 5
K L  M L N O M P  Q Q R S   T U L V 
 Y W   X Y Z [
•As a digital output, it can trigger an alarm, siren, door lock or opens a valve
or a switch. Pin 4 is an open collector transistor output normally at 3.3VDC.
When triggered, it is pulled to ground. The initial state of the digital output
when the device is rebooted is configurable in ALEOS.
         /       Ù   Ø   Ù Ø       
•As an analog voltage input, it detects inputs of 0–30VDC across this pin to
ground. When used with a converter to transform values into voltages, it
monitors measurements like temperatures, pressures or the volume of liquid
in a container. ALEOS can transform these voltages into meaningful values.
In ALEOS, events reporting tells the device to perform an action when a
specified voltage is detected.
        "  #     
6
      ×  Ø   Ù Ø       
7 8 9 :
; 8 < 8 = > ? @ A = B A =
C D E F
; G
G @ H
I G
I @
G J
C
G J K
L M N O P Q R S T O S R U V W P X Y W N
Z [ \ ] ^ _ ` a b _ ] c d e ] f g ^ a f h i c j k ] _ i a f
l
i b b g d m d f g a f _ n d ] ^ _ j ] b e o e _ d p g d e i c f q
7 8 9 : 8 r 9 s t u > ? ? v
> = w x w
F y
A = 8 r B A ? ? z {
{ s | 9 = s }
F
| ~ z 9 >  = 8  > = z {
w x w
F
; G

D 
       
     
               

  
    ¡ ¢  £ ¡  ¤
¥ ¦  § ¨    ©   
ª « ¬ «  ®  ¯ ° ± ² ³ ¯ ´ ² µ
¶ · ¸ · ¹ ¸ º » ¼ ½ ¾ ½ ¸
¿ º À ¸ Á Â · Ã Ä ¿
ª « ¬ «  Å Æ  
¶ · ¸ · ¹ ¸ º » ¼ ½ ¾ ½ ¸
¿ º À ¸ Á Â · Ã Ç È ¿
É « ¬ Ê Ë « ± « ² ² ° ± « Ì Í
« ¯ Î Ê  Ï Î Ð Ì Ê Ì Ñ Ï Ò « Ì
² Î Ì Ó Ê ± Î  ¯ ° ± ² « ¯ ´ ² µ
Ô Õ Ö ± « « Ì ° Ì × Ê Ì Ø Ù
Ú  Û
Ü ¡ §  ¢ Ý  §  ¡ ¢  Þ  ß à 

N S


Ô Ô


L

N  N V P

 

U
Õ
       Ð    Z
Warning:
, $  ! * 

 '   !      *  * &   % !  '   !     $  $ %   3  * " + .    ! ! $  %  *
3       ! 
Ò
 ' $  !
Ð
F 2 ' 
Ó
 (  " &     $   #       +
Mount the device where:
•There is easy access to the cables
•Cables are not bent, constricted, close to high amperages or exposed to
extreme temperatures
•The front panel LEDs are easily visible
•There is adequate airflow
•It is kept free from direct exposure to the elements, such as sun, rain, dust,
etc
•If needed, a SIM card for your device as provided by your mobile network
operator
•#0 Phillips screwdriver if you have to install the SIM card
•Laptop computer with Ethernet cable
•Wireless antenna
•If used, a GPS antenna or a second wireless antenna
•Power cable, either the DC cable or AC cable ordered from Sierra Wireless or
your own custom-made cable
•If used, a straight-through 9-pin connection cable for the RS-232 port
•If ordered from Sierra Wireless, the optional mounting bracket kit
á
» ¾ ¼ ¶ ¸ ¹
â
, $  * 

 '  $  !  $   *   * '  !  &   % !    * % !       * 
ã
     

      ! +
8 & "  %     !     
)
    $  !   " #  !  & 

      ! D % !  '  3   ! *  ! 
)
 *  * ! #  '  &   * &  
% !    $  !   " #  !  & 

        

  * '  3   &    %   +
K L  M L N O M P  Q Q R S   T U L V 
XQ W XYZ[
If your mobile network operator requires it, insert a SIM card into the device
before installation or connecting any external equipment or power to the device.
To install the SIM card:
1. Remove the SIM port cover.
When viewed from the top, the notched corner of the SIM card faces towards
the center of the device as shown in Figure 2-5.
        (   ×
ä
$    × 
å
        
2. Gently slide the card into the slot in the connector until it stops.
3. Replace the SIM port cover.
     8 & "  % !  
æ
   8 B   > 
ã
#  '   *  8 B     % !
ç
 . A
4
  
)
  H !    (   0     
!  '     &  $      % !
è
9      3 ! D  $  '   *   " 3    ! ! 
)
   !      *  '     '   " +
       
é
  ×
ä
$   
ä

å å
  
ä

å å
     # $ % &      
NOTE: Direction of notched corner of SIM card for proper alignment

Other manuals for LS300

6

Other Sierra Wireless Gateway manuals

Sierra Wireless AirLink XR80 User manual

Sierra Wireless

Sierra Wireless AirLink XR80 User manual

Sierra Wireless AirLink GX400 Installation manual

Sierra Wireless

Sierra Wireless AirLink GX400 Installation manual

Sierra Wireless AirLink RV50 Series Installation manual

Sierra Wireless

Sierra Wireless AirLink RV50 Series Installation manual

Sierra Wireless airlink es440 User manual

Sierra Wireless

Sierra Wireless airlink es440 User manual

Sierra Wireless oMG 2000 User manual

Sierra Wireless

Sierra Wireless oMG 2000 User manual

Sierra Wireless oMG series Quick guide

Sierra Wireless

Sierra Wireless oMG series Quick guide

Sierra Wireless FX30S User manual

Sierra Wireless

Sierra Wireless FX30S User manual

Sierra Wireless airlink es440 User manual

Sierra Wireless

Sierra Wireless airlink es440 User manual

Sierra Wireless oMG 500 User manual

Sierra Wireless

Sierra Wireless oMG 500 User manual

Sierra Wireless LS300 Installation manual

Sierra Wireless

Sierra Wireless LS300 Installation manual

Sierra Wireless LS300 User manual

Sierra Wireless

Sierra Wireless LS300 User manual

Sierra Wireless LS300 User manual

Sierra Wireless

Sierra Wireless LS300 User manual

Sierra Wireless AirLink ES450 Installation manual

Sierra Wireless

Sierra Wireless AirLink ES450 Installation manual

Sierra Wireless Airlink  GX450 Installation manual

Sierra Wireless

Sierra Wireless Airlink GX450 Installation manual

Sierra Wireless LS300 User manual

Sierra Wireless

Sierra Wireless LS300 User manual

Sierra Wireless airlink es440 Installation manual

Sierra Wireless

Sierra Wireless airlink es440 Installation manual

Sierra Wireless AirLink Raven XE User manual

Sierra Wireless

Sierra Wireless AirLink Raven XE User manual

Sierra Wireless FX30S User manual

Sierra Wireless

Sierra Wireless FX30S User manual

Sierra Wireless oMG 2000 User manual

Sierra Wireless

Sierra Wireless oMG 2000 User manual
Sierra Wireless LS300 User manual

Sierra Wireless

Sierra Wireless LS300 User manual

Sierra Wireless Raven EDGE User manual
Sierra Wireless

Sierra Wireless Raven EDGE User manual

Sierra Wireless AirLink FXT Series User manual

Sierra Wireless

Sierra Wireless AirLink FXT Series User manual

Sierra Wireless PinPoint XT User manual
Sierra Wireless

Sierra Wireless PinPoint XT User manual

Sierra Wireless AirLink PinPoint X User manual

Sierra Wireless

Sierra Wireless AirLink PinPoint X User manual

Popular Gateway manuals by other brands

Comm-Tec CTG-KNX/IP quick start guide

Comm-Tec

Comm-Tec CTG-KNX/IP quick start guide

ADTRAN Type 400 Basic configuration guide

ADTRAN

ADTRAN Type 400 Basic configuration guide

Robustel R3000 LG user guide

Robustel

Robustel R3000 LG user guide

HDL KNX-DALI manual

HDL

HDL KNX-DALI manual

3Com OfficeConnect 3C100XF Cli user's guide

3Com

3Com OfficeConnect 3C100XF Cli user's guide

RTA 460PSUSB-N70U Product user guide

RTA

RTA 460PSUSB-N70U Product user guide

WRC 1782-JDO user manual

WRC

WRC 1782-JDO user manual

Arris Touchstone TG852 user guide

Arris

Arris Touchstone TG852 user guide

RTA 460BSA-NNA4 Product user guide

RTA

RTA 460BSA-NNA4 Product user guide

Juniper SRX340 Hardware guide

Juniper

Juniper SRX340 Hardware guide

HP ProCurve NAC 800 user guide

HP

HP ProCurve NAC 800 user guide

Shaw BlueCurve Instruction guide

Shaw

Shaw BlueCurve Instruction guide

APARIAN A-HRIO quick start guide

APARIAN

APARIAN A-HRIO quick start guide

HP hn200w owner's manual

HP

HP hn200w owner's manual

Lehigh E-Flex EFNTWK user manual

Lehigh

Lehigh E-Flex EFNTWK user manual

X-Trax VATA2024 Product user manual

X-Trax

X-Trax VATA2024 Product user manual

AddPac AP-GS1001 Setup guide

AddPac

AddPac AP-GS1001 Setup guide

MicroNet SP5018B user manual

MicroNet

MicroNet SP5018B user manual

manuals.online logo
manuals.online logoBrands
  • About & Mission
  • Contact us
  • Privacy Policy
  • Terms and Conditions

Copyright 2025 Manuals.Online. All Rights Reserved.