1. OPENING THE SOLAR PORTABLE CHARGER
Place on a flat, dry surface. Grasp a corner of the Solar Portable
Charger and gently pull the corner until the hook and loop tape
is completely separated. Unfold the Solar Portable Charger until
all four solar panels and the storage pouch are completely
exposed and facing upwards.
2. ATTACHING THE SOLAR PORTABLE CHARGER
There are 4 x carabiners supplied with the Solar Portable
Charger. Unlock the gate on one of the carabiners and pass the
nose of the carabiner through the eyelet of the Solar Portable
Charger and the eyelet/strap on the object you are attaching it
to. Release the gate so that the carabiner is securely closed.
Repeat for the remaining carabiners and eyelets.
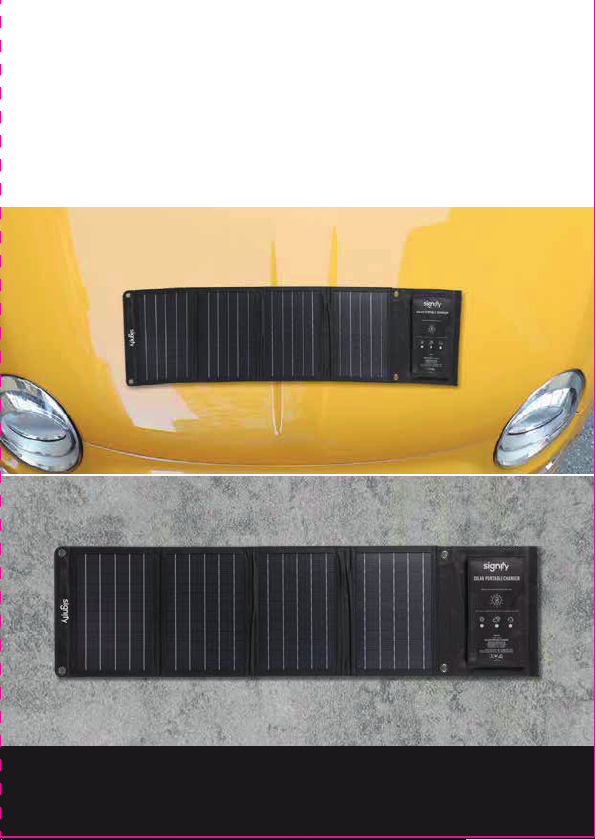
3. SETTING UP SOLAR PORTABLE CHARGER WHEN NOT
ATTACHING IT TO AN OBJECT
If you want best charging, are not facing space constraints, and
are not on the go, then simply lay the Solar Portable Charger on
the ground or drape it over the bonnet or windscreen of your
stationary vehicle.
PLEASE PRINT DOUBLE SIDED AND FOLD INTO LEAFLETDO NOT PRINT DIELINE
SOLAR PORTABLE
CHARGER
charge directly from the sun
GETTING STARTED
For a complete guide please read the instruction manual provided NOTE: Always check that the Solar Portable Charger is securely
attached to the object.
WARNING: The devices being charged using the Solar Portable Charger, may not
be suitable for long term sunlight exposure. Excessive heat may cause damage.
Always refer to the guidelines provided by the manufacturer of the device being
charged to avoid any hazard or possible product failure.
105 x 148mm
DO NOT PRINT DIELINE PLEASE PRINT DOUBLE SIDED AND FOLD INTO LEAFLET
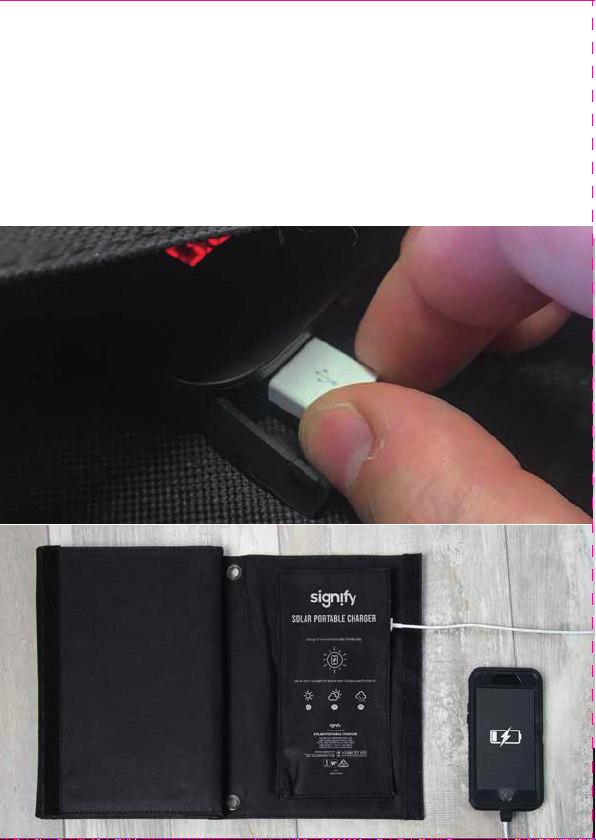
4. CHARGING DEVICES USING YOUR SOLAR PORTABLE CHARGER
Undo the hook and loop tape on the storage pouch so that you can
access the junction box inside. Remove the USB dust cover/s from
the USB port/s. Insert the USB end of your USB charging cable (not
supplied) into the USB port on the junction box. Connect the
charging end of your USB charging cable (not supplied) to your
device. The charging process has now commenced.
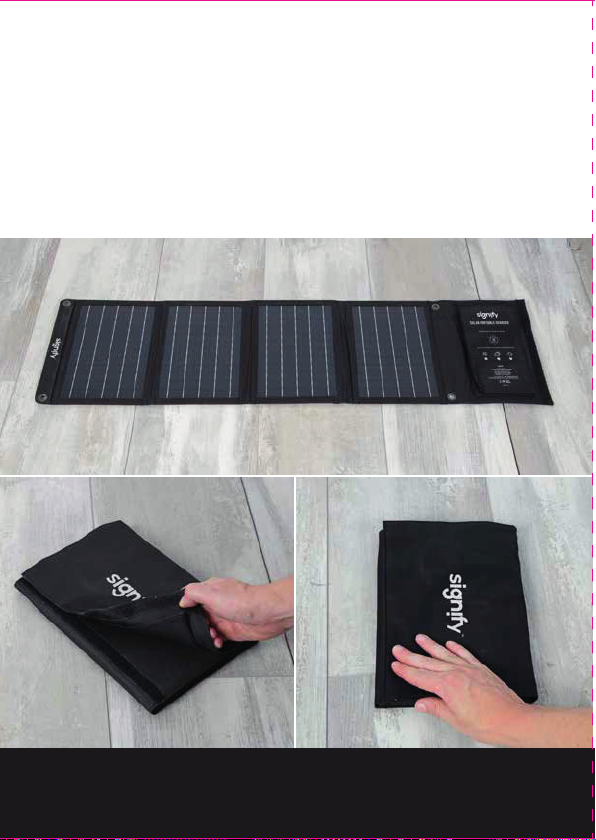
5. CLOSING THE SOLAR PORTABLE CHARGER
Place on a flat, dry surface so that the solar panels and the
storage pouch are facing upwards. Holding the edge of the
Solar Portable Charger which is furthest away from the storage
pouch, fold the Solar Portable Charger one solar panel at a time,
until the hook and loop tape is aligned. Gently tap the fabric
above the hook and loop tape until the Solar Portable Charger
is securely closed.
SOLAR PORTABLE
CHARGER
charge directly from the sun
MODEL: EA2265 PRODUCT CODE: 710183 07/2022
AFTER SALES SUPPORT
1300 777 137
v1.4
3. SETTING UP SOLAR PORTABLE CHARGER WHEN NOT
ATTACHING IT TO AN OBJECT (CONT.)
For optimum charging results, position the Solar Portable
Charger so that it is always directly facing the sun. We
recommend the panels face NORTH at an angle of between 20°
and 40° from the ground. Refer to the instructions on page 15 of
the instruction manual for more detailed information.
S
E
N
W
N
S
E
W
Panel
facing
NORTH
Panel
facing
SOUTH
Path of the
sun always
NORTH
Path of the
sun always
SOUTH
Southern Hemisphere
(e.g., Australia)
Northern Hemisphere
(e.g., United Kingdom)
Solar Portable
Charger
Solar Portable
Charger
SUN SUN
NOTE: Always check that all USB charging cables (not supplied) have been
disconnected (removed) from the USB ports, and all the carabiners have been
unhooked from the eyelets and placed in the storage pouch.
105 x 148mm