Sinexcel Izar User manual
Izar AC Charger
User Manual

Contents
— —
1
User Manual
About the document
1.Liability statement and disclaimer
1.1 Liability statement
1.2 Disclaimer
2.Safety Instructions
2.1 Symbol Conventions
2.2 Instructions for equipment use
2.3 Instructions for safe operation
3.Product overview
3.1 Brief introduction
3.2 Nameplate
3.3 Product use
3.4 Product naming overview
3.5 Product image
3.6 Product specifications
4.Sinexcel AC APP
4.1 Download APP
4.2 Registration/login
4.3 Binding
4.4 Unbind
4.5 Setting charging start time
4.6 Authorization management
4.7 Configuration setting
4.8 Firmware upgrade
5.Charging instructions
5.1 Charging steps
5.2 Indicator status
5.3 Cable management
5.4 Installation mode for disabled
6.Fault diagnosis and resolution
7.Network security
7.1 Warning
7.2 Product network security disclaimer
8.Warranty
8.1 Warranty period
8.2 Warranty conditions
2
3
3
3
5
5
6
6
8
8
8
9
9
10
11
13
13
13
13
14
14
15
15
16
17
17
21
23
24
25
27
27
27
28
28
28
For Apple users, please search for Sinexcel AC in the Apple App Store to download and install it. For Android
users, please search for Sinexcel AC in the Google App Store to download and install it.

About the document
1.This manual is specifically for the Izar AC charger series products, providing comprehensive guidance
for users of new energy vehicles users to use and maintain this charging equipment.
2.This manual will provide detailed product information and operating instructions for users. Users
should read the contents of the manual carefully before use this product and ensure that you understand
all the instructions. Please store this manual in a safe place for easy installation, operation, and mainte-
nance personnel to obtain and use.
3.Without written authorization, it is forbidden to disclose, excerpt and copy part or all of the contents of
this manual (including materials and publications).
4.The contents of this manual will be adjusted, revised and updated according to product upgrades. Users
refer to the actual product purchased.
— —
2

1. Liability statement and disclaimer
1.1 Liability statement
Requirements of users and field operators:
·Please operate charging stations with adequate safeguards in place and ensure that safeguards are prop-
erly installed and regularly maintained.
·Please prepare an emergency plan that instructs people on what to do in an emergency.
·Please prepare the installation site of the charging pile, according to the requirements described in this
manual.
·Please ensure that the charger has enough space for installation and maintenance.
·It is necessary to be fully aware that changes and changes without permission may affect the user's op-
eration authorization and may also affect the quality assurance.
1.2 Disclaimer
The product equipment needs to be used normally within a certain range of conditions. We will not be
responsible for any accident or damage caused by one of the following conditions:
·Products and components which are not marked by our company;
·Product or component which has exceeded our warranty period;
·Faults and damages caused by not using in accordance with the instructions or using in an environ-
ment not in accordance with the instructions (for example, the temperature is too high, too low, too
humid or dry, the altitude is too high, the voltage or current is unstable, etc.);
·Failure or damage caused by disassembly, repair, modification of products without the consent of our
company, which is not installed, repaired, changed or disassembled by our after-sales service personnel;
·Normal use of old, wear and tear, breakage and immersion, etc.
·Failure or damage caused by accident or human causes (operation error, scratch, handling, knock,
access to inappropriate voltage, etc.), transportation damage;
·Failure or damage caused by force majeure such as natural disasters (such as earthquake, lightning
strike, fire, abnormal voltage, etc.);
— —
3

— —
4
1.Without the permission of our company, users are strictly prohibited from modi-
fying the parameters by themselves. Other unpredictable faults caused by the user
modifying the parameters without authorization will be solved by the user himself.
2.It is forbidden to use any other adaptors to charge an electric vehicle that does
not comply with the standards of this product! If the user does not comply with the
warnings in this manual, the user will be responsible for any risks from the use of
the adaptor!
3.It is forbidden to extend the cable of the connector without permission! If the
user does not comply with the warnings in this manual and extends the cable of
the connector, any risks will be borne by the user!
2. Safety Instructions
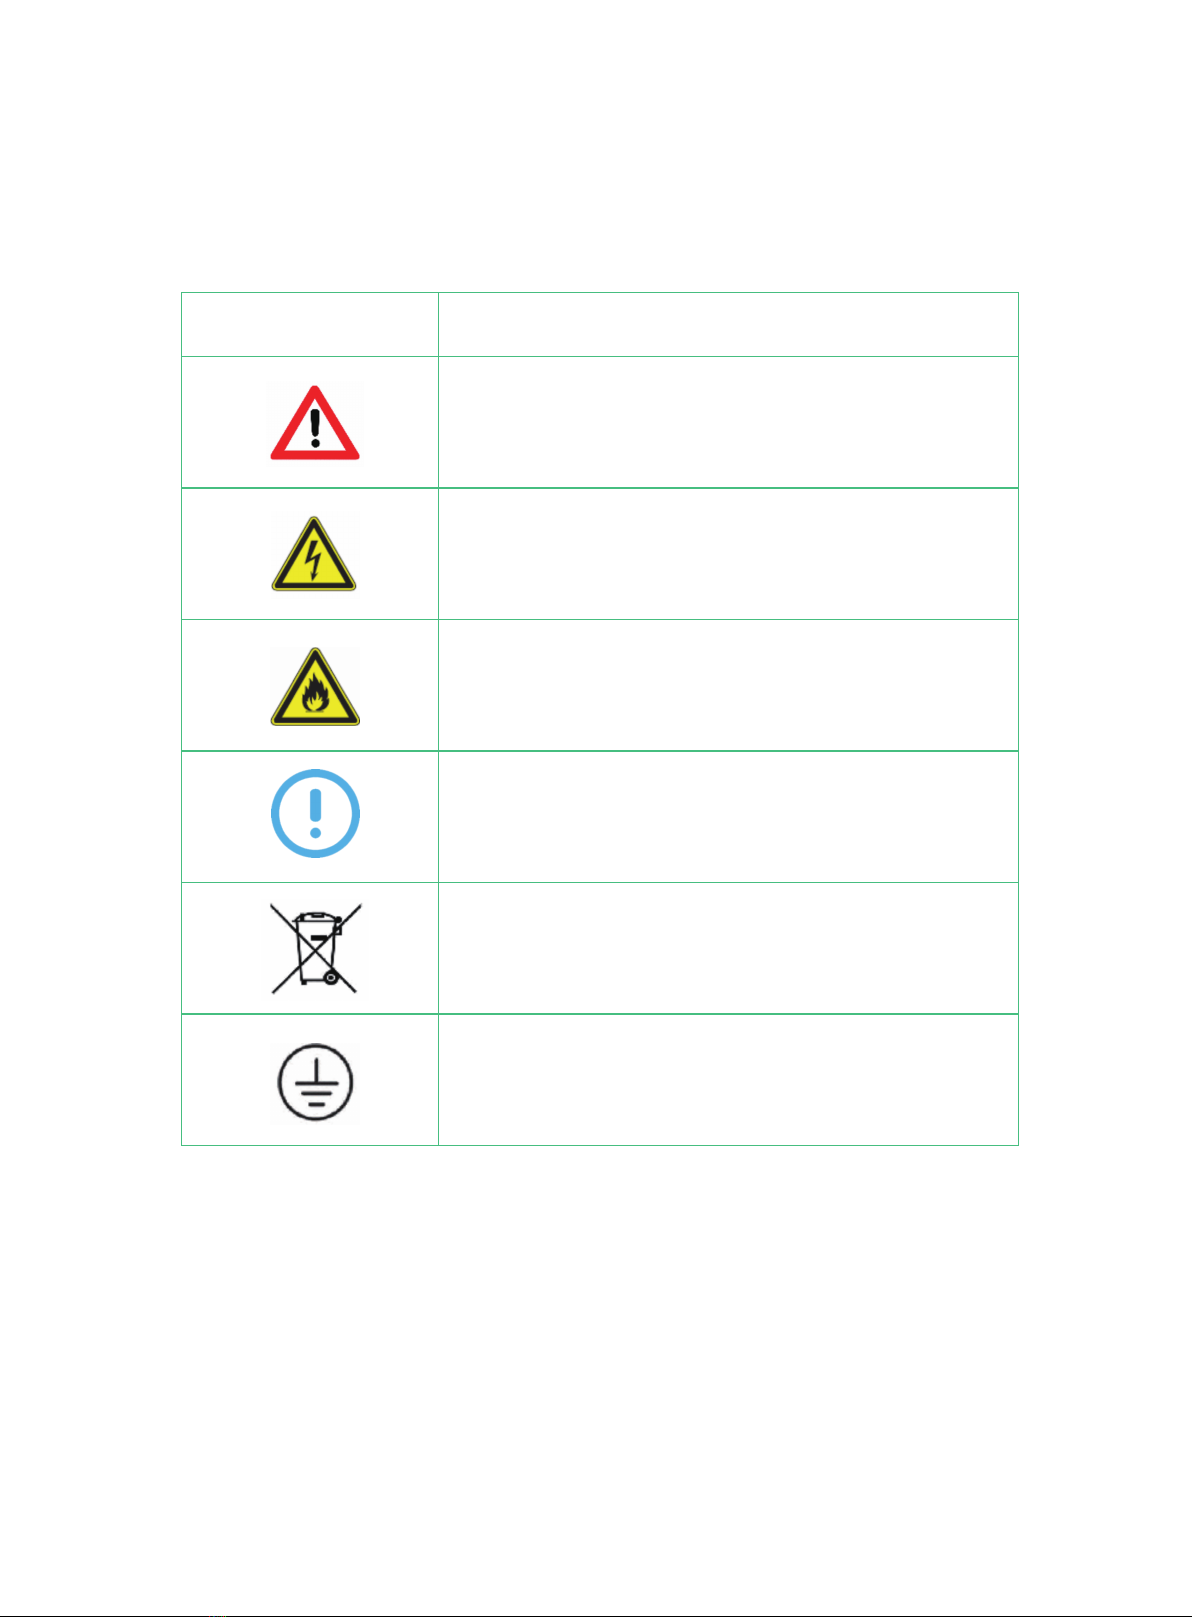
2.1 Symbol Conventions
Identification Description
Warning
Indicates a potentially hazardous situation which, if not
avoided, could result in death or serious injury.
Danger
Caution electricity
Caution of fire
Note
A note gives more details to make easily use.
It means that the machine cannot be discarded after use
and should be delivered to a dedicated recycling place,
otherwise it may cause environmental pollution.
Grounding identification
This indicates that the product must be grounded during
installation. If it is not properly grounded, it may cause
death or serious injury
— —
5

2.2 Instructions for equipment use
·This product is an all-in-one machine that can charge electric vehicles in indoor and outdoor areas.
·Please use and save the product information and accessories provided with the equipment from the fac-
tory.
·If the user has any problems or failures during use, please consult the equipment provider directly.
During the warranty period, if you find a third party or non-professionals for maintenance without autho-
rization, the user will be responsible for any safety consequences.
·The installation environment of charging equipment should be far away from fire and other dangerous
sources.
2.3 Instructions for safe operation
Please read the product manual carefully before use, and strictly follow the steps in the product manual.
·Without the permission of the manufacturer, users are strictly prohibited from disassembling and other
improper operations on this product, and the adverse consequences caused by improper operations shall
be borne by the users themselves.
·It is strictly forbidden to touch the charging plug or the charging socket of the electric vehicle, keep the
charging plug in a dry state, and do not touch the charging plug with wet hands.
·It is strictly forbidden to continue to use the charging device when the charging head is damaged or the
insulation skin is damaged.
·Make sure that no foreign objects remain in the charging plug and the charging socket on the vehicle
side.
·Properly lock doors after installation or maintenance operations.
— —
6

Do not use the charger in the following situations and contact the manufacturer immediately:
·Outer shell damage
Electric vehicle charging cable or charging gun damage
·Lightning strikes the charger
·Accident or fire near the charger
·Water has entered the charger
— —
7
Warning: If an emergency occurs during the use of this product, please press the
emergency stop button immediately, it is strictly forbidden to use the emergency
stop button in non-emergency situations! After pressing it, do not reset the emergen-
cy stop switch by yourself, you should immediately notify the professional to reset
the emergency stop switch operation, if you do not comply with the requirements of
this manual to reset the emergency stop switch by yourself, any risks will be borne
by the user!
3.Product overview
3.1 Brief introduction
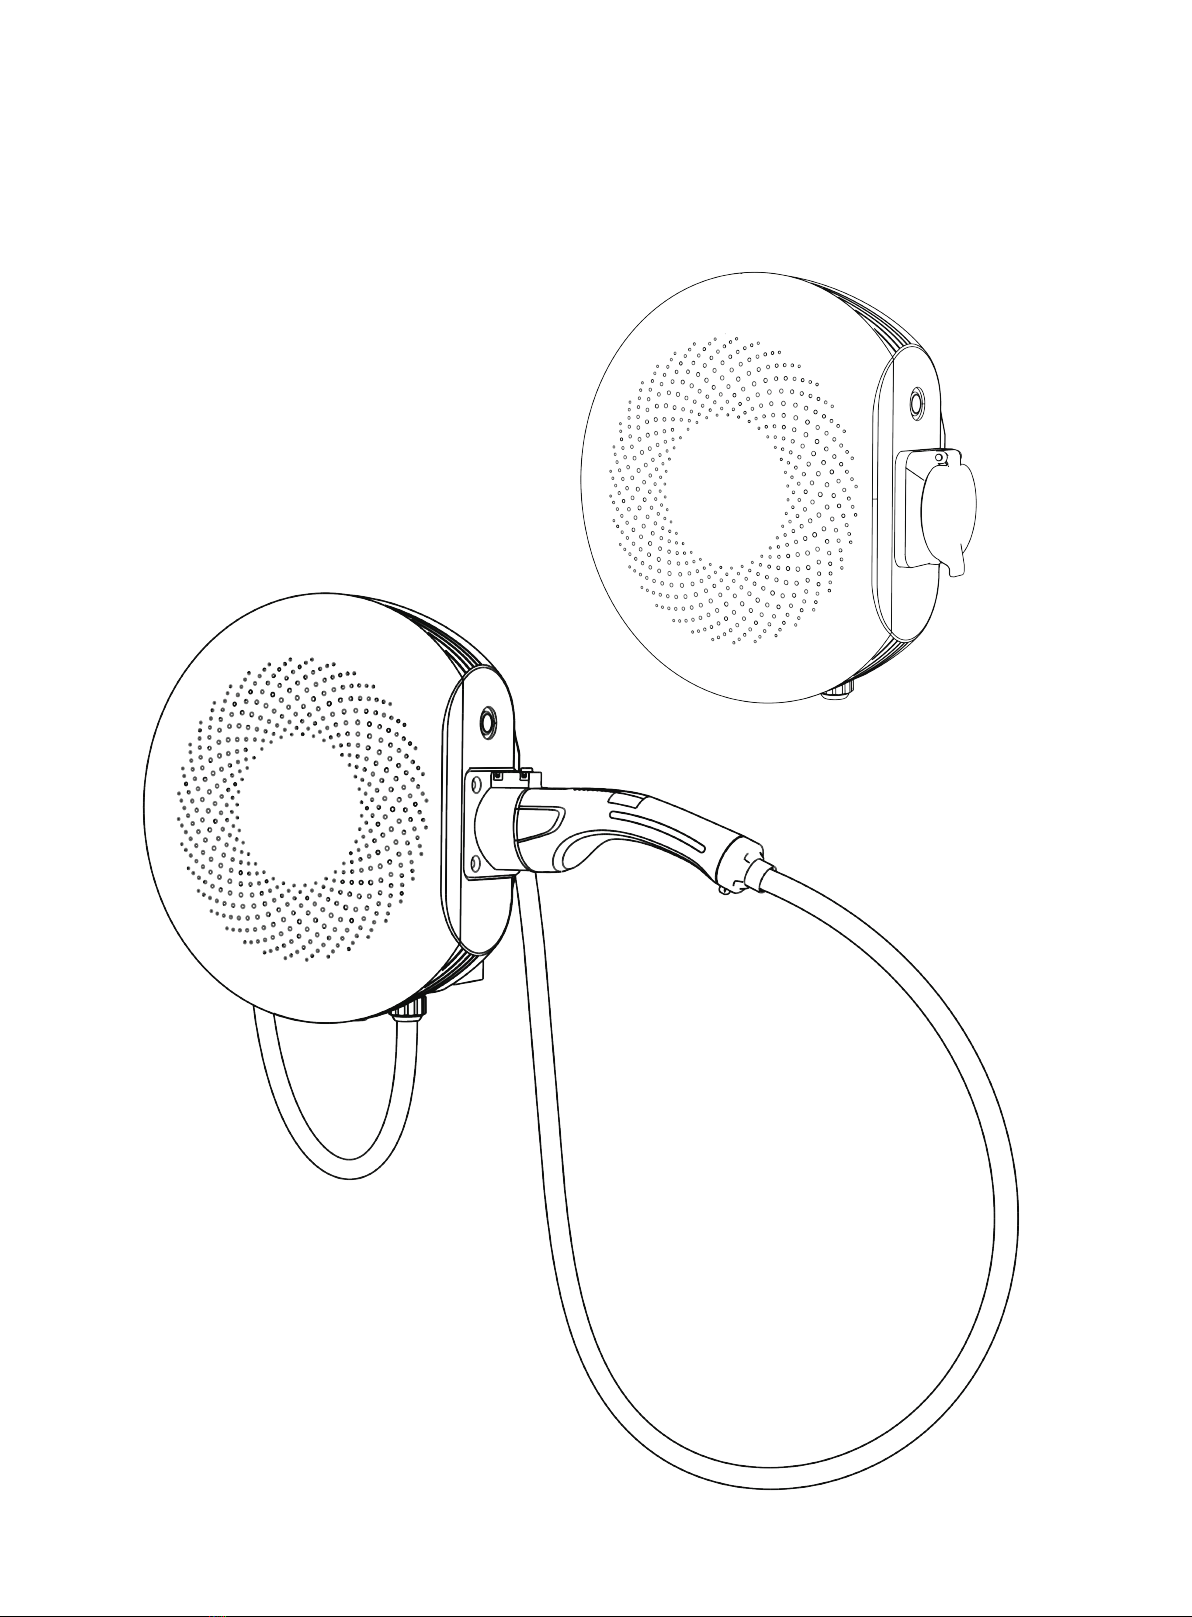
Izar is an AC charger for electric vehicles. It is mainly composed of a charger body and an optional ped-
estal, including Socket and Cable version. The IP grade of the Socket version is IP55, and the IP grade of
the Cable version is IP65. Izar has multiple security protectionsto ensure the smooth operation of the
equipment.
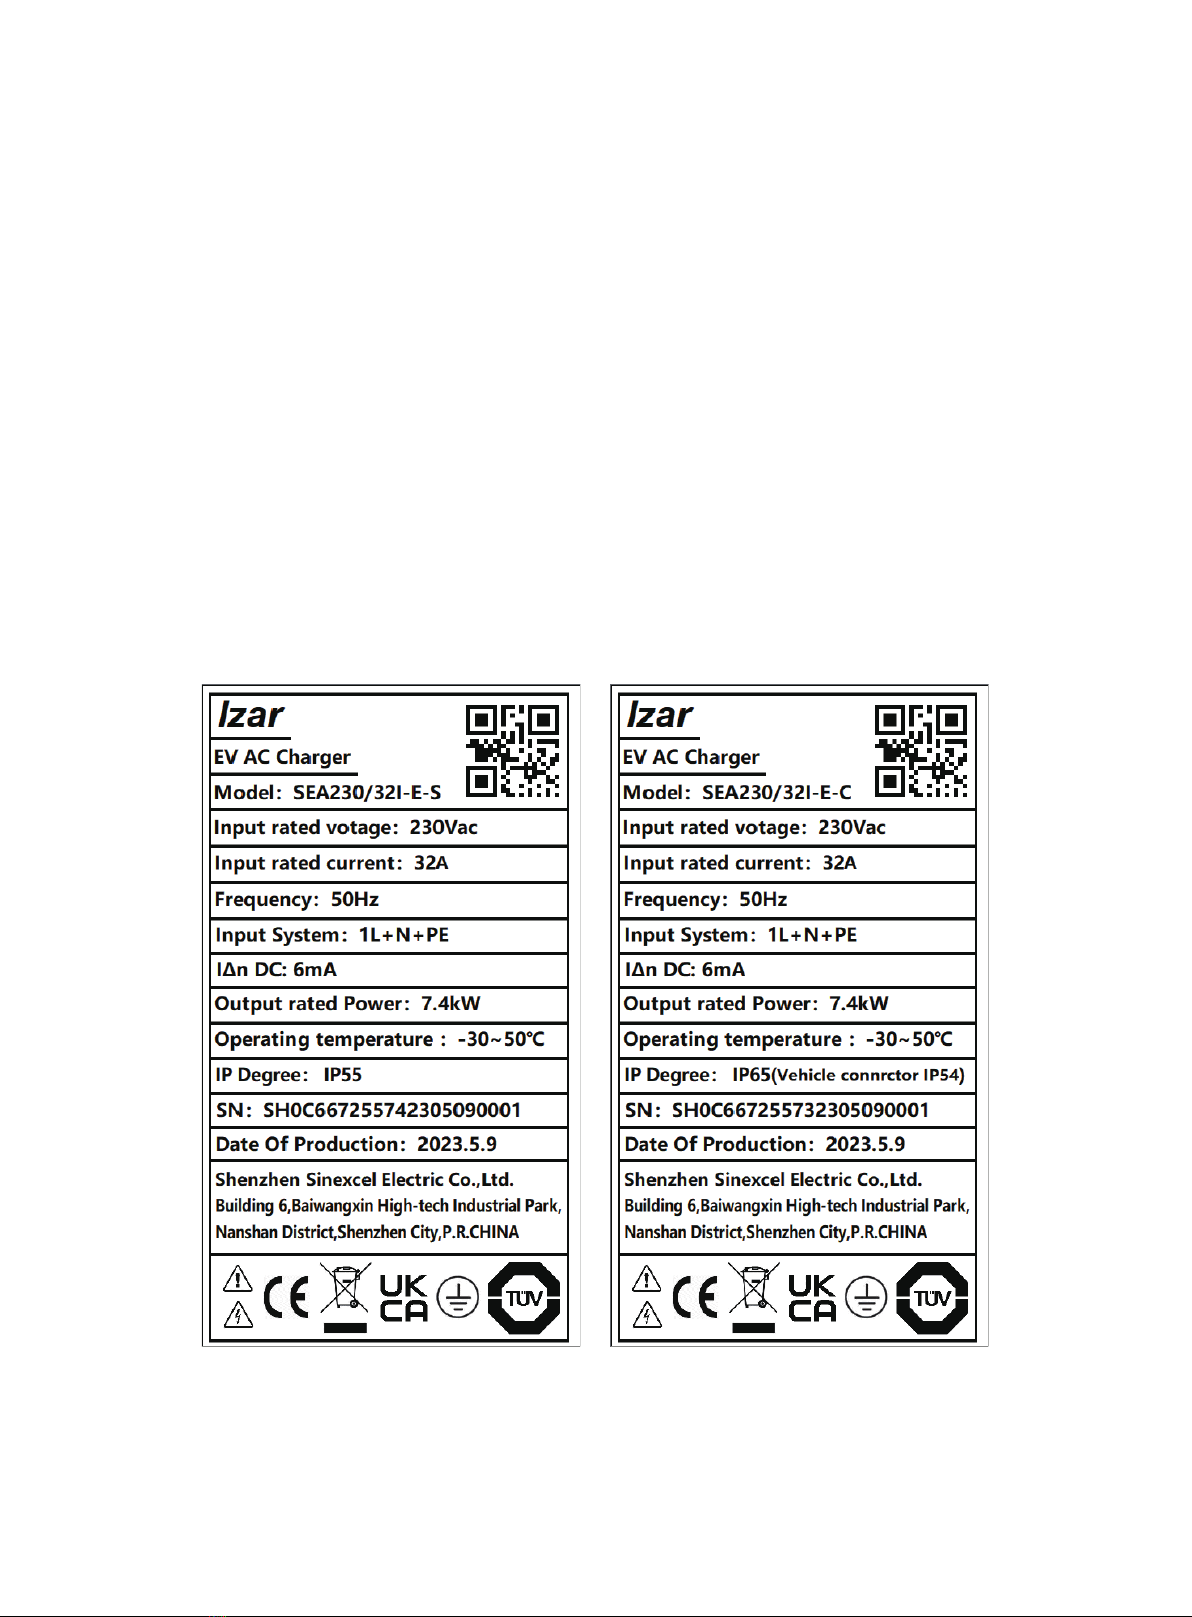
3.2 Nameplate
— —
8

— —
9
3.3 Product use
Izar is used for AC charging of electric vehicles and is suitable for use in indoor or outdoor environments.
Izar should only be used with accessories supplied by the manufacturer or in compliance with local stan-
dard specifications.
3.4 Product naming overview

— —
10
3.5 Product image
1.Emergency stop button 2. ocket 3.Card swiping area
4.LED 5.Connector holder 6.Charging connector
Tips: The emergency stop button is not a power-off restart button. It is forbidden to
press it in non-emergency situations. The charger will stop charging immediately
after pressing it. If the emergency stop button is pressed by mistake, please press it
again to reset it.
No Name Functions
1
2
3
4
5
6
Emergency stop button
Socket
Card swiping area
LED
Connector holder
Charging connector
Emergency press to stop charging immediately
Connect connector wire
RFID card identification area(optional)
Display charging and standby status
Fix charging connector
Connect to the car
4
3
5
6
1
2
S
Note:Izar Socket and Izar Cable have the same shell size.
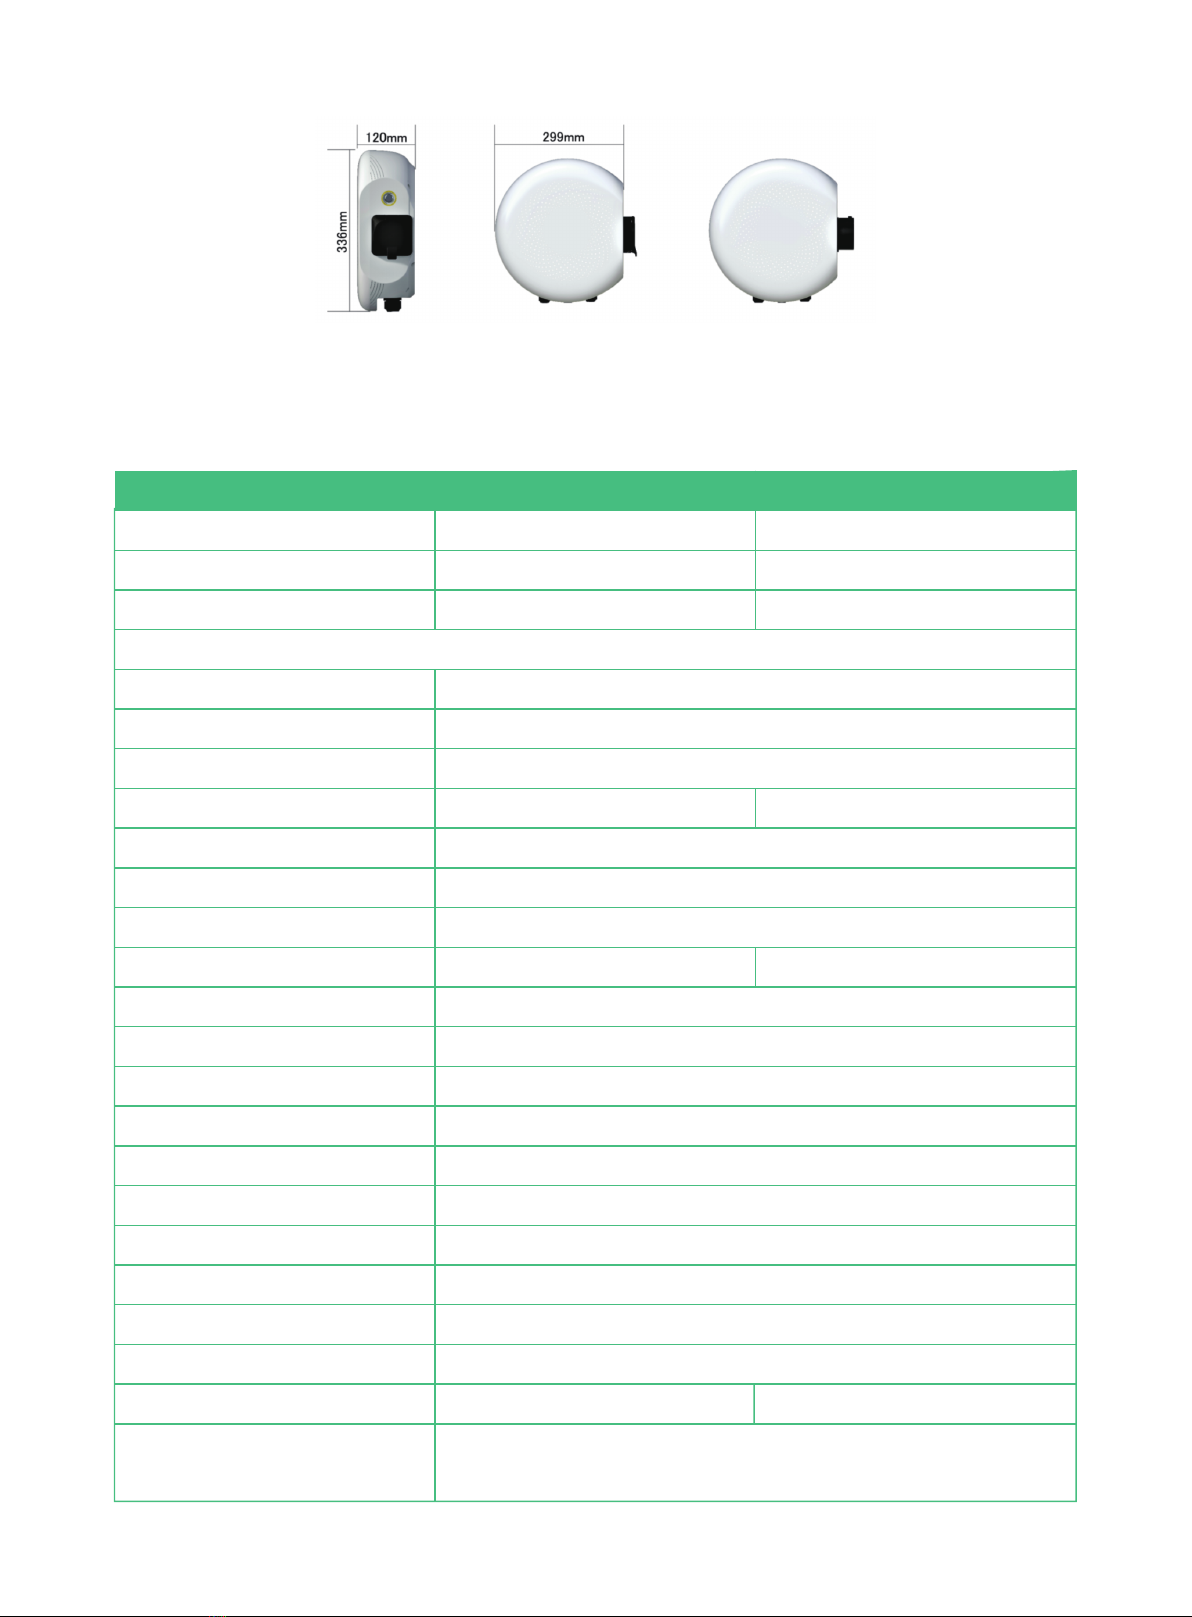
3.6 Product specifications
Type
Product name
Rated power
Input/output current
Input/output voltage
Demensions
Weight
Frequency
Standby power consumption
Connectortype
Charging cable
Charging method
Emergency stop function
RCD
Charging status
Meter
Communication method
Working temprature
Relative Humidity
Operation Altitude
Installation
Protection rating
Protection
Basic Specifications
SEA 230/32I-E-C
Izar Cable
7.4kW
SEA 230/32I-E-S
Izar Socket
7.4kW
32A
Single phase 230V(±10%)
L336*W299*D120mm
2.7KG 3.8KG
50/60Hz
≤5W
IEC Type 2
Length:: 3m (5m,7m for optional)
Plug and Charge, RFID, APP
Yes
DC 6mA + Type A(optional)
LED
Onboard Metering Capabilities(Class B)
Bluetooth, WiFi, 4G (optional)
-30℃—+50℃
5%—95%
<2000m
Floor-mounted/Wall-mounted
IP55/IK10
overcurrent protection, overvoltage/undervoltage protection, lightning
protection, short circuit protection, ground fault protection, etc.
European standard AC charger(residential )Izar
— —
11
IP65/IK10
/

— —
12
Recoverable failure
EMC
Support power system
Certification
Color
Noise
emergency stop, input overvoltage and undervoltage, grounding, connector
lock abnormality, overfrequency and underfrequency fault, restart charging
after recovery, onboard metering abnormality, CT abnormality (optional)
Class B(Residential environment)
TN-CS,TN-C,TN-S,TT
CE,TUV mark,TR25,RCM,UKCA
Snow white
≤15dB
— —
13
4.Sinexcel AC APP
4.1 Download APP
For Apple users, please search for Sinexcel AC in the Apple App Store to download and install it. For An-
droid users, please search for Sinexcel AC in the Google App Store to download and install it.
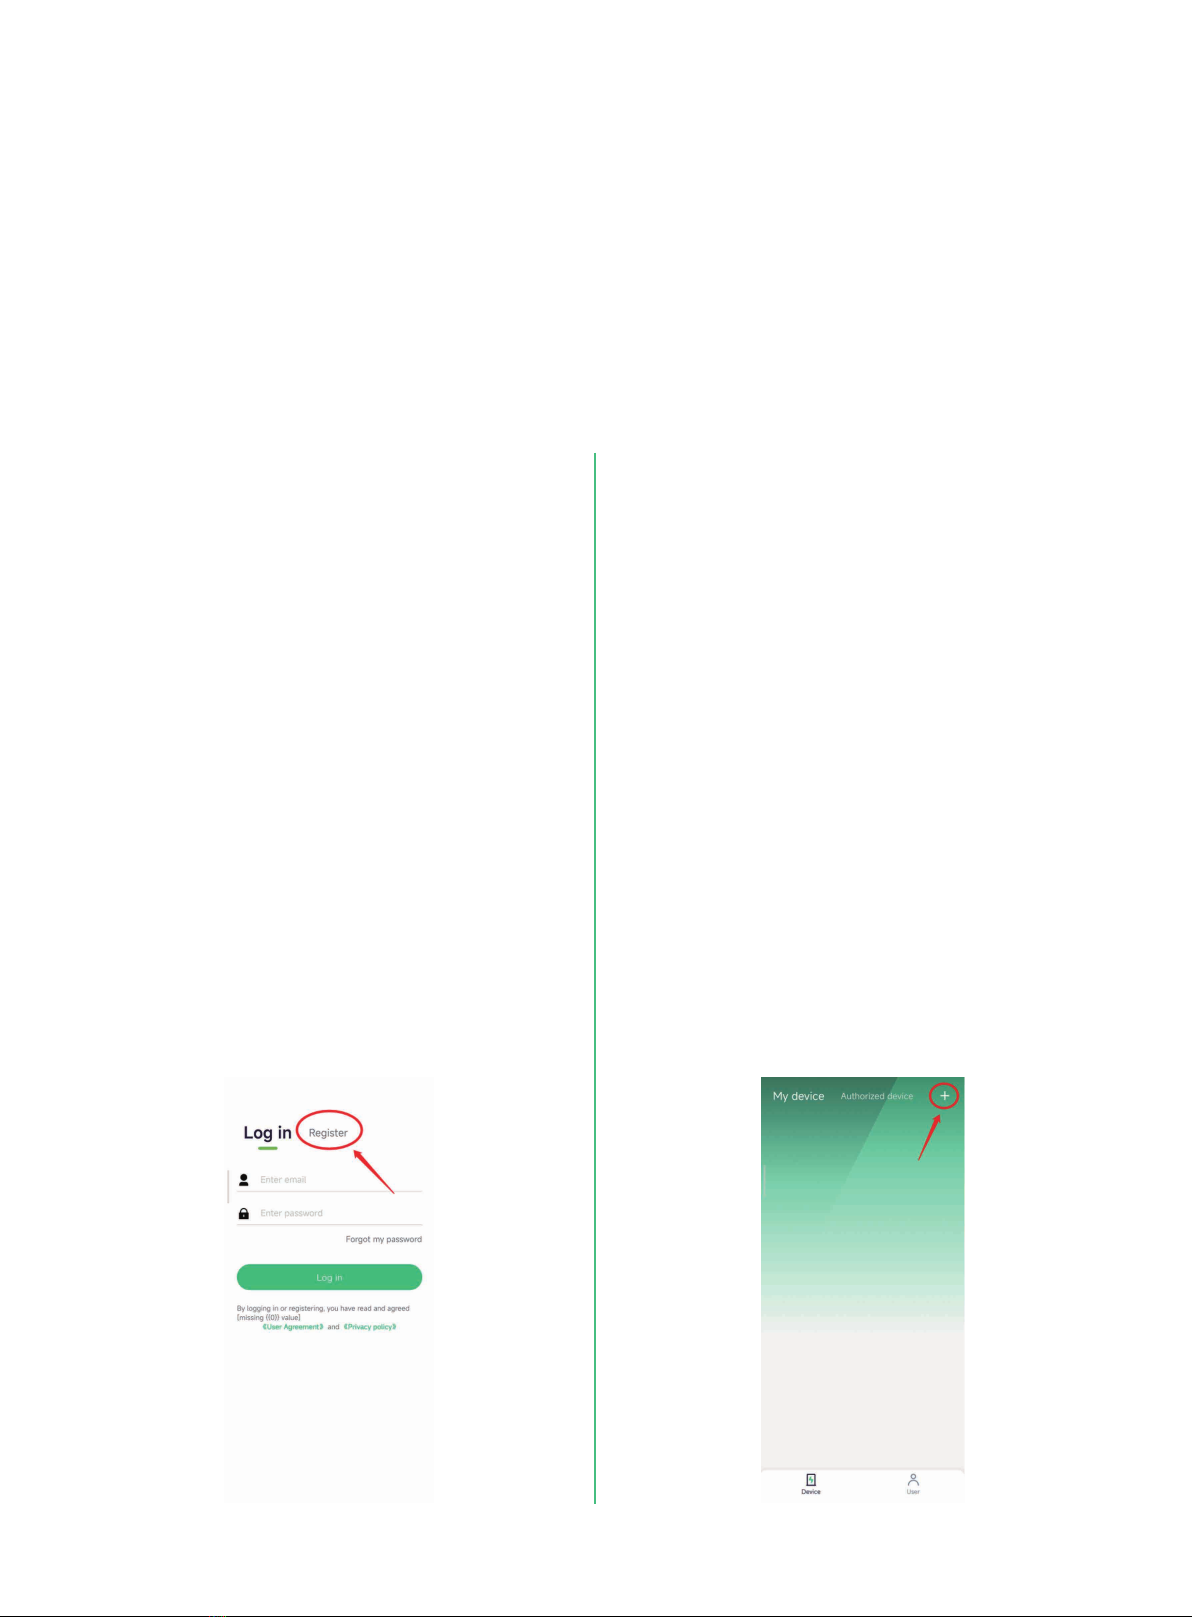
4.3 Binding
As shown in the picture, enter the App interface,
click "+" in the upper right corner to enter the
binding page. Enter a custom name, click on the
charger model to select Izar; the charger number
is bound by scanning the code,the charger
number is automatically obtained by scanning the
specified QR code. Click “Bind now” .During
the process, the location permission needs to be
enabled. A Charger can be only bind to one ac-
count, and one account can be bound to multiple
chargers.
4.2 Registration/login
You need to complete the registration for the first
time log in to the Sinexcel App, before enter the
APP interface.
— —
14
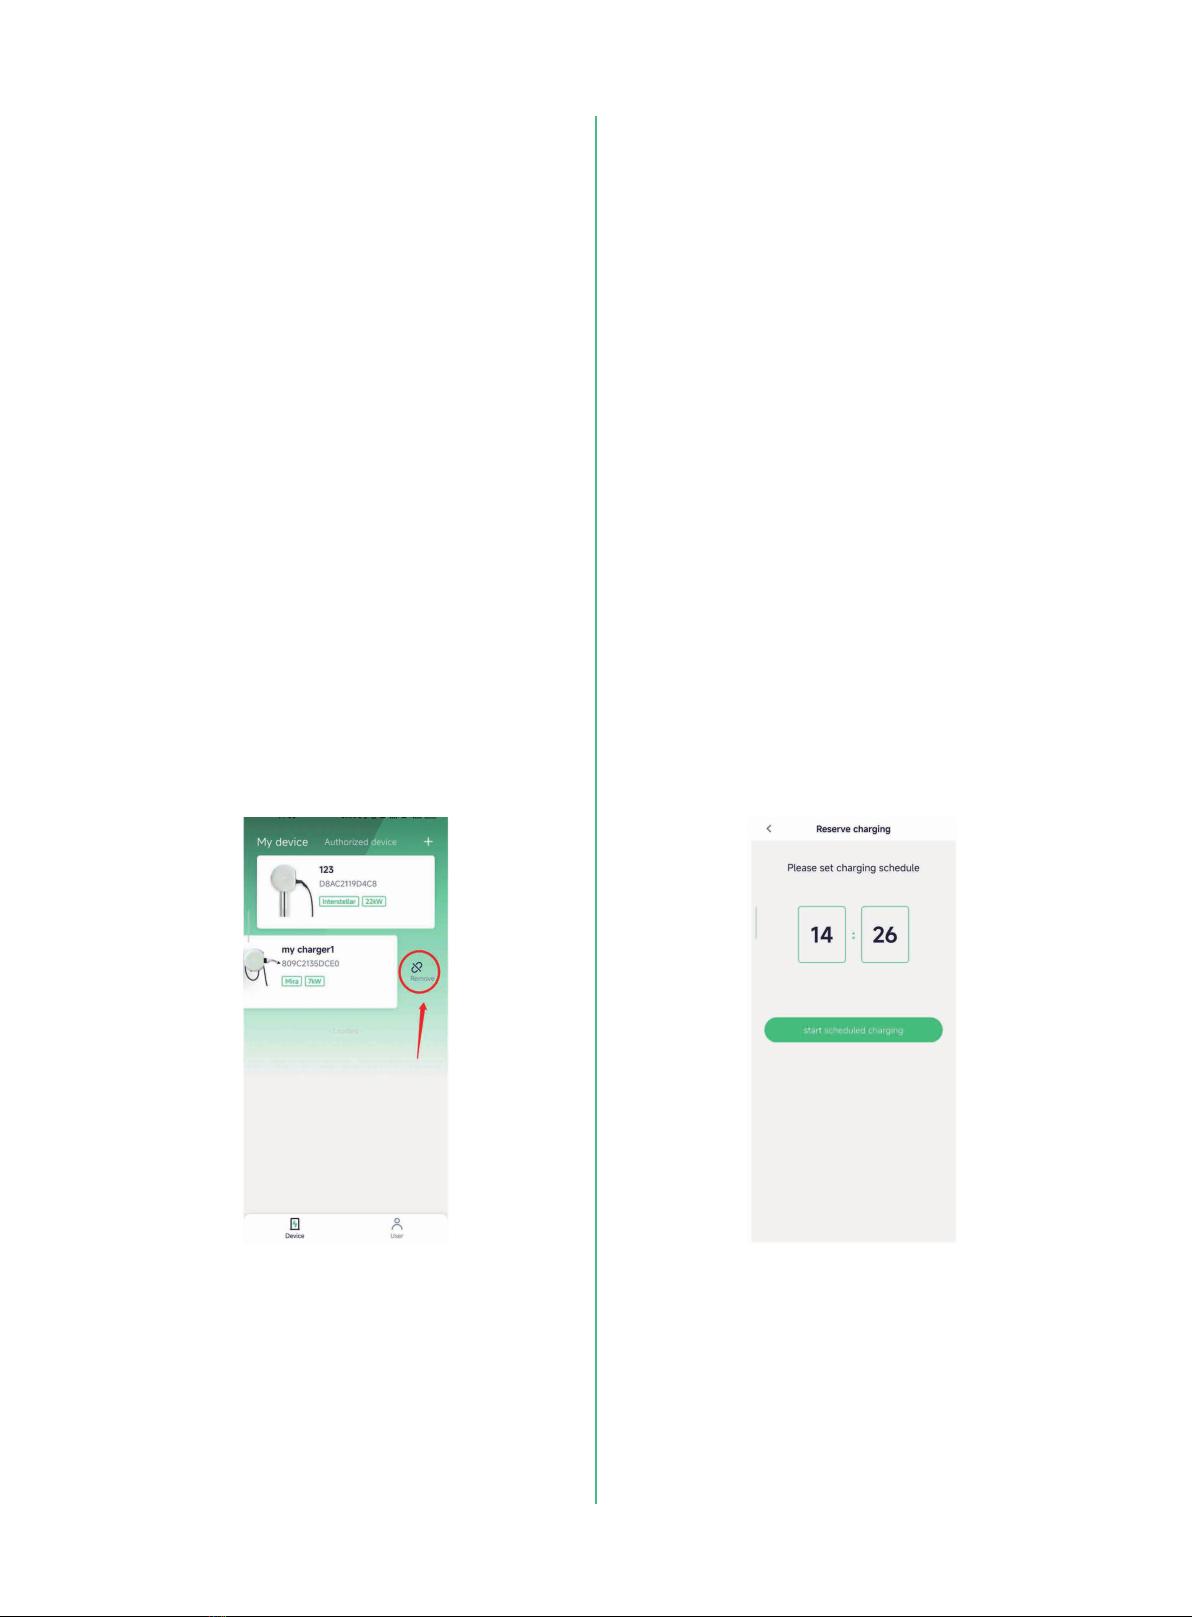
4.4 Unbind 4.5 Setting charging start time
On the "Device Details" page, click "Scheduled
Charging", and click the "Start Scheduled
Charging" button to start the scheduled charging
function. When the time reaches the set time
point and the gun is inserted, the pile will auto-
matically start charging. Click the "Cancel
Scheduled Charging" button to cancel the sched-
uled start charging function.
— —
15
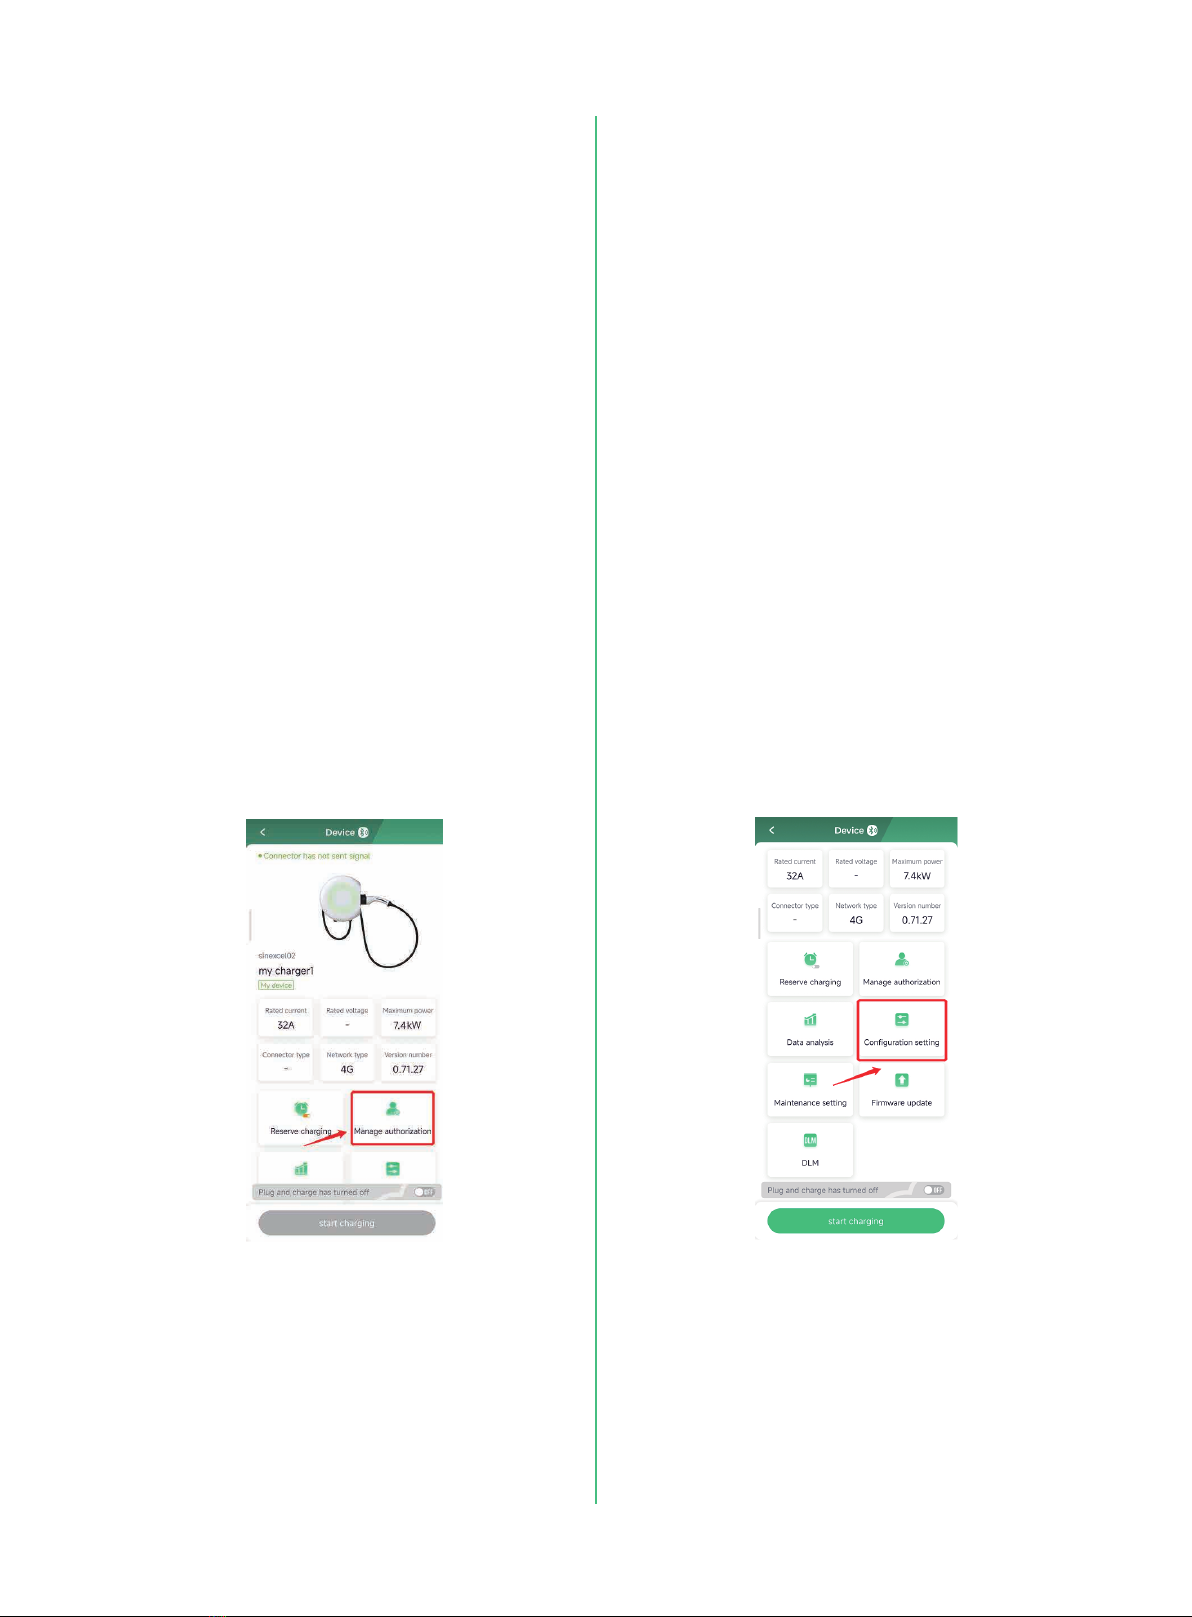
4.6 Authorization management
Click "Authorization Management" in the
"Device Details" interface, click "Add Authoriza-
tion" in the upper right corner, enter the email ac-
count of the authorized user (already registered),
and click "Save and Apply" to complete the au-
thorization. the authorized user can only use start
and stop Charging, regular charging,
plug-and-charge, and some functions of data anal-
ysis, but not other functions.
4.7 Configuration setting
Click "configuration Settings" in the "Device De-
tails" interface, and you can view or set the fol-
lowing parameters in this interface. (Note: Users
must not modify parameters without authorization
to avoid unnecessary trouble).
— —
16
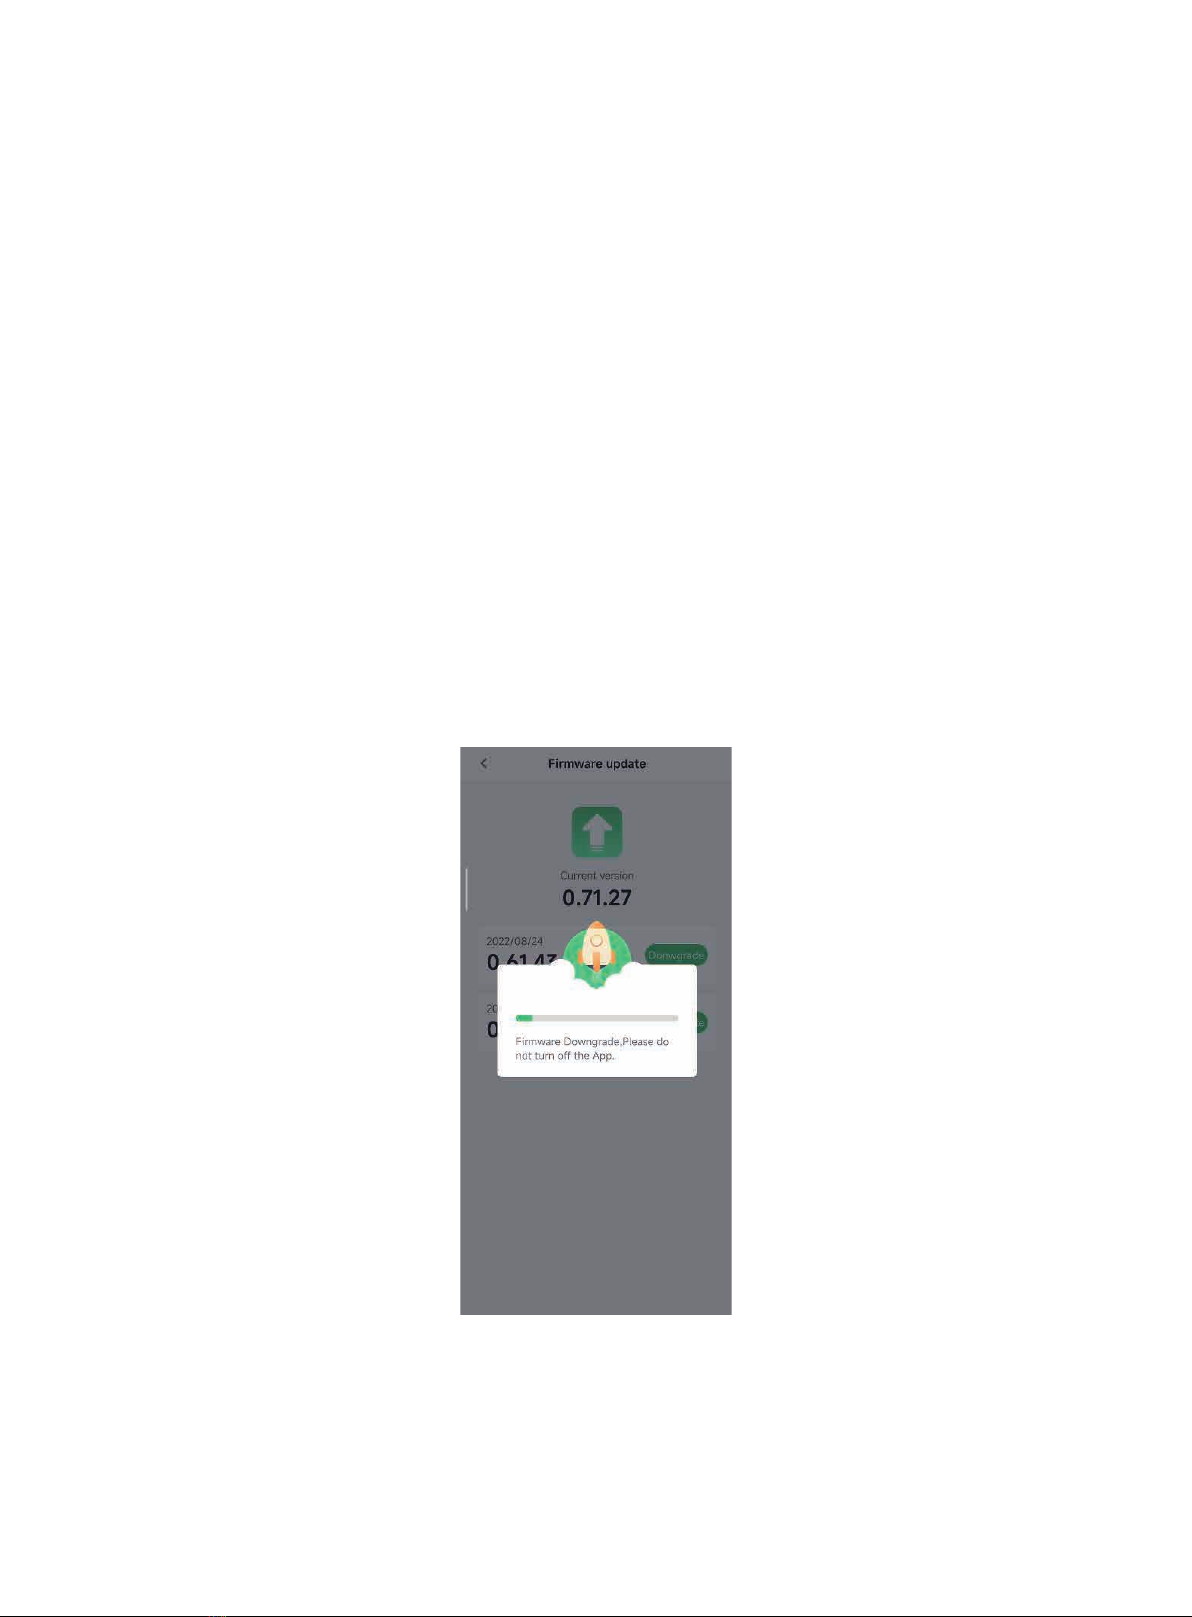
4.8 Firmware upgrade
Click "Firmware Upgrade" in the "Device Details" interface to enter the "Firmware Upgrade" interface.
Select the version, upgrade or downgrade to the corresponding version of the software, and click Up-
grade or Downgrade, according to the needs.
When the software is being upgraded, please wait patiently for the upgrade progress bar to complete,
which is expected to take 2-3 minutes.
After the upgrade is complete, the pile will automatically restart.
After restart, the APP needs to reconnect to the charger. Please check the device version under the
"Device Details" interface to confirm whether the upgrade is successful.
— —
17
5. Charging instructions
5.1 Charging steps
5.1.1 Charge with APP
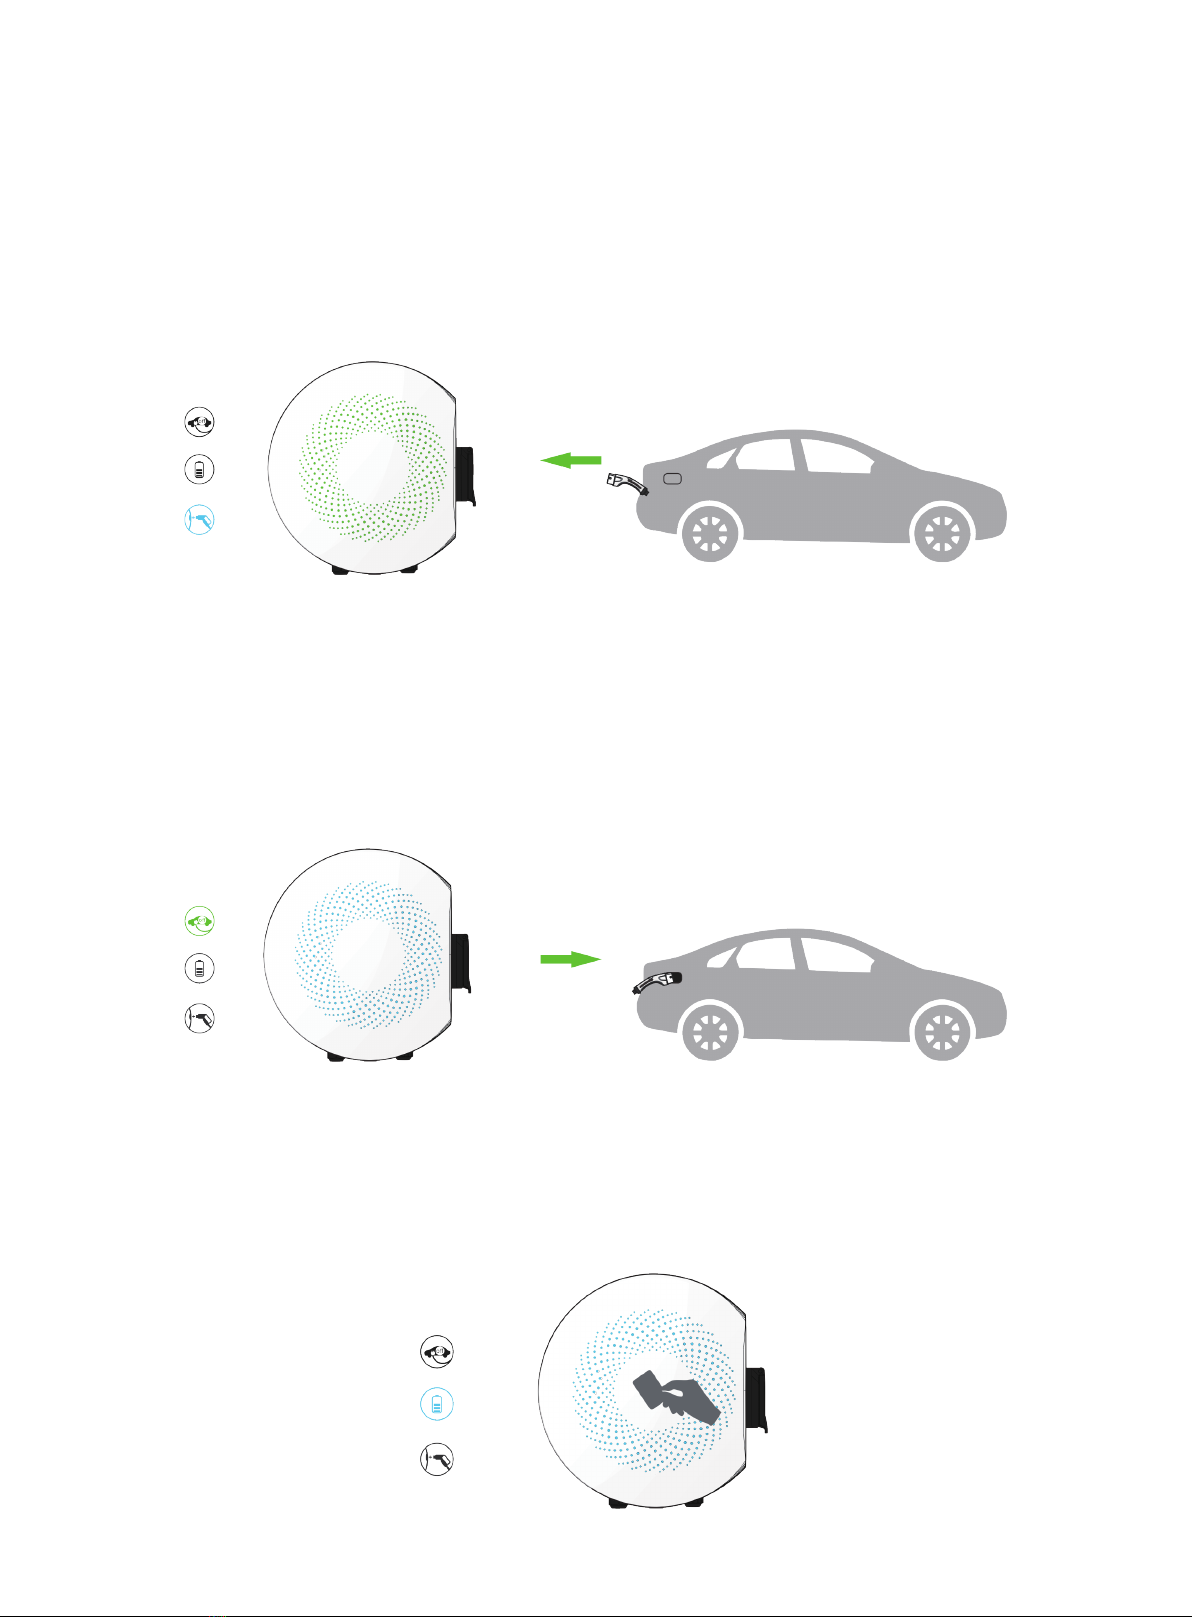
Step 1: Insert the connector
Insert the connector into the socket of the electric vehicle, and the indicator light changes from green to blue.
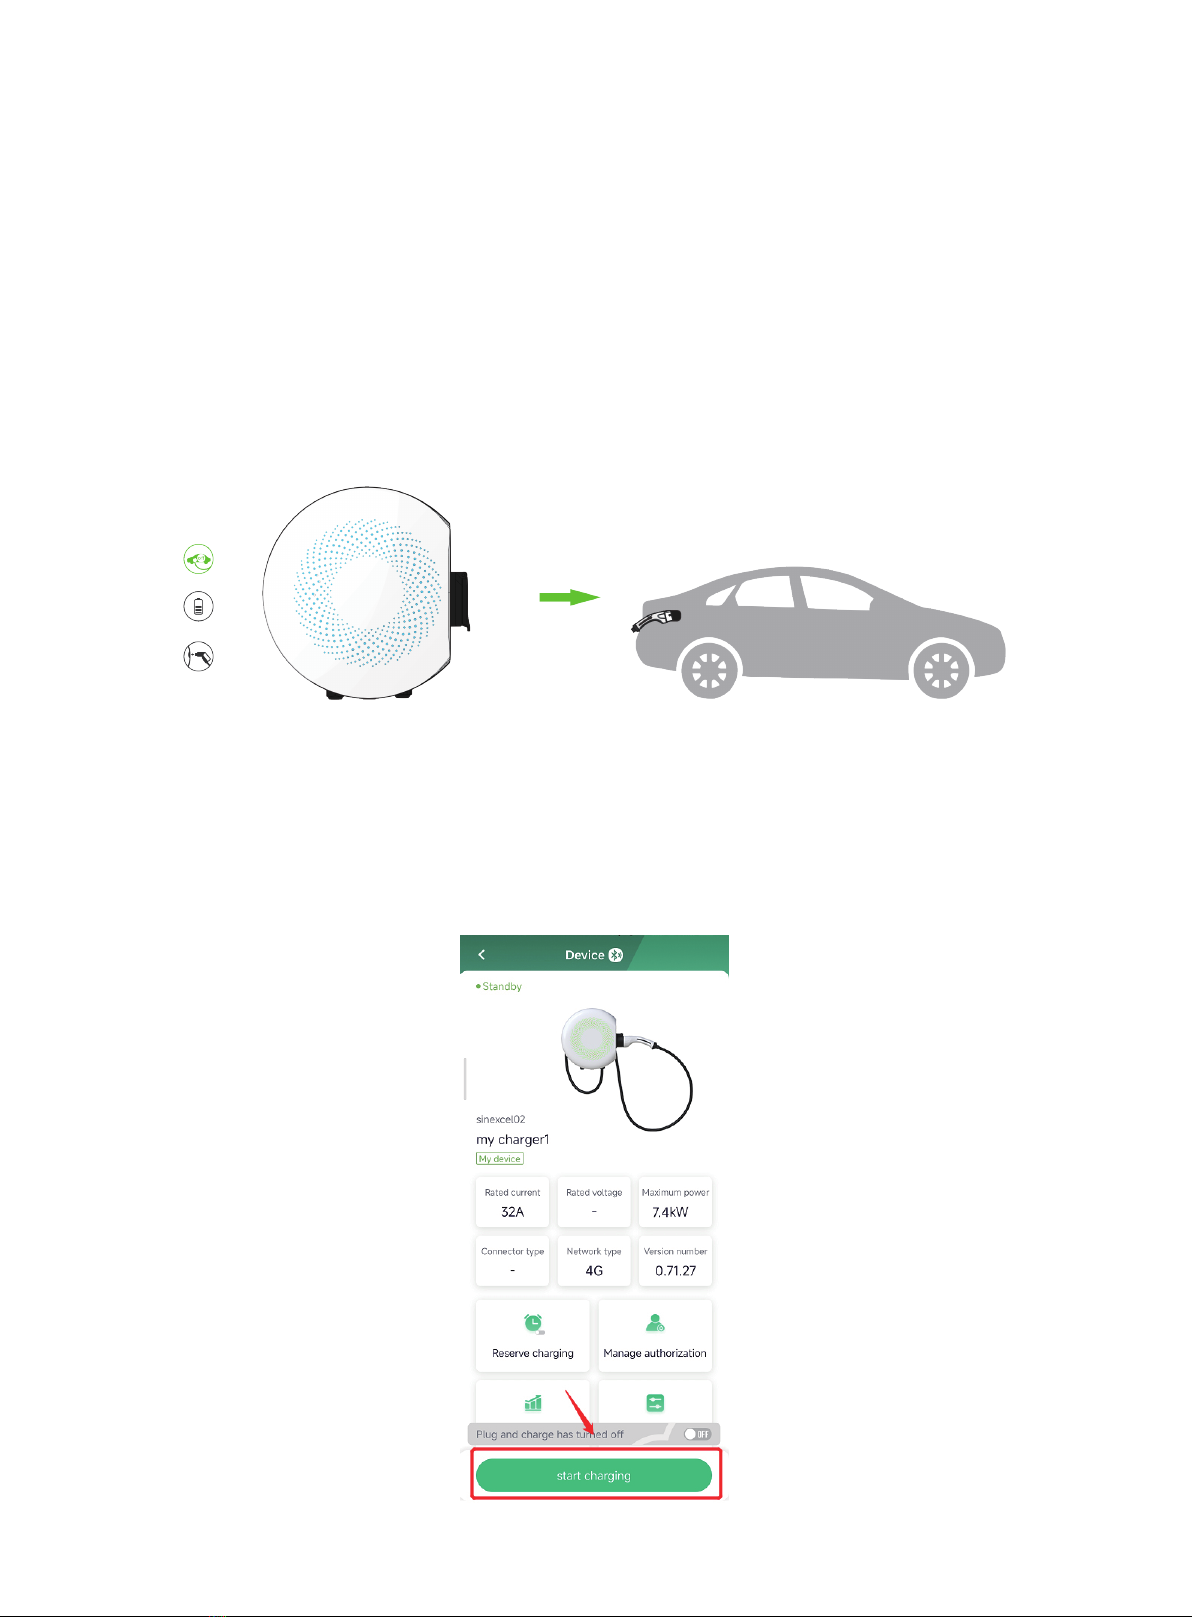
Step 2: Start charging
After opening the APP and connecting the charger, click "Start charging" in the device details interface,
and the indicator turns blue, then the charging will be successfully started. (To use the APP for the first
time, you need to register an account. Please refer to 4.3 Binding).
— —
18
Step 3: Stop charging
When the battery is fully charged or click "Stop charging" on the device details interface of the APP, the
indicator light will turn blue and stay on, and the battery will stop charging. Pull out the connector and
return it to the socket of the charger. The indicator light turns green and is always on, and it enters the
standby state.
5.1.2 Charge with RFID card
Step 1: Insert the connector
Insert the connector into the socket of the electric vehicle, and the indicator light changes from green to blue.
Step 2: Start charging
Place the RFID card in the card reading area. After the RFID card is successfully identified, the indicator turns
to blue breathing light, and then the charging is successfully started.

— —
19
Step 3: Stop charging
When the charge is fully charged or the card is swiped in the card reading area, the indicator light turns
blue and stays on, and the charging is stopped. Pull out the connector and return it to the socket of the
charger. The indicator light turns green, and it enters the standby state.
5.1.3 Plug and charge
Step 1: Set the mode
After opening the APP and connecting the charger, click the "off" button of plug and charge in the device
details interface to start the plug and charge mode.
Table of contents
Other Sinexcel Batteries Charger manuals


