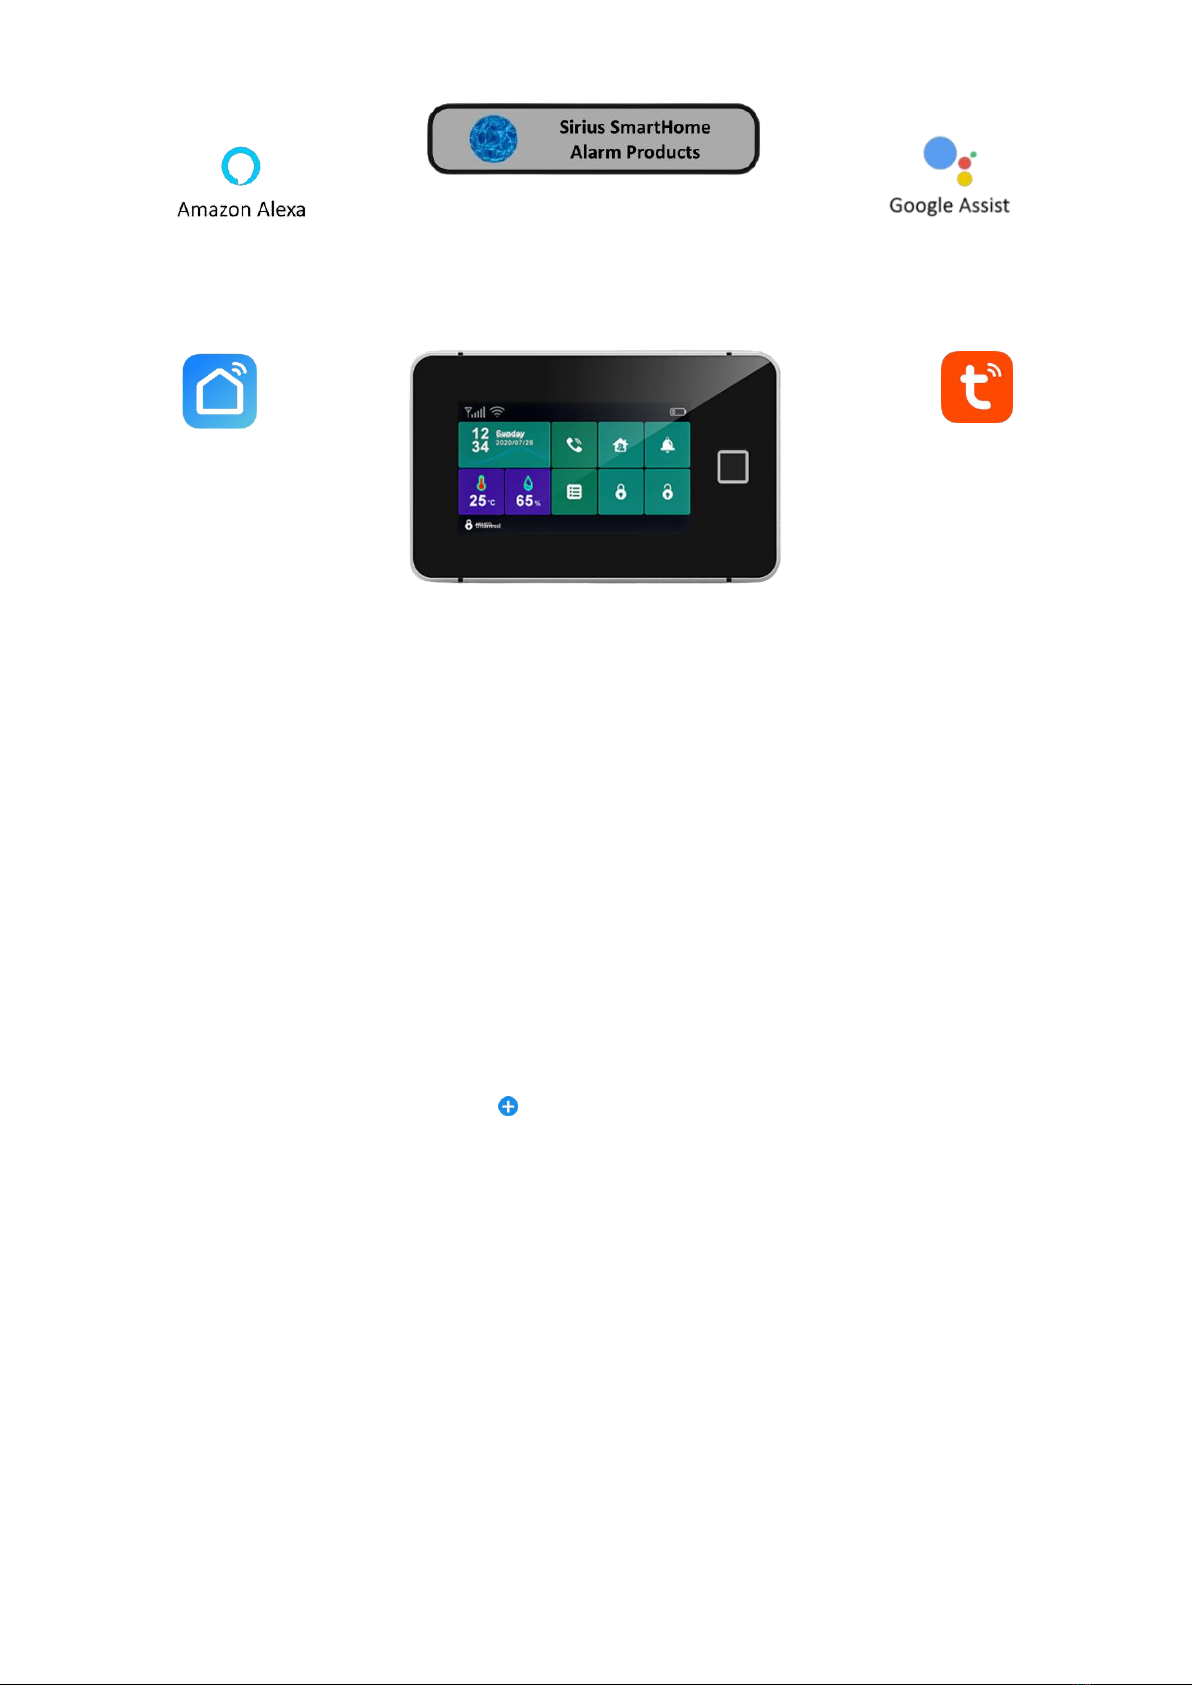
Sirius Satellite Radio Smart Alarm AW-200 User manual

AW-200 Smart Alarm
Quick Guide
When you purchase a Sirius AW200 Smart Alarm Base Station every device will be pre programmed
for you, Motion detectors, Remotes, Sirens.
In the smart alarm kit box the Devices are labeled as Motion Detector 1 and Motion Detector 2, and
the Remotes are Remote 1 and Remote 2 on the App. The detector number will be written on the
base of the device. The Sirens will also be programmed
Download the Smart life or Tuya App.
Upon installation of the APP on your phone, the App will guide you through the registering process.
Find a location for the base station (usually within the routes WiFi range the base station also
requires a power point connection)
Make sure you know the Routers User Name and Password for your Router as they will be needed
in the installation process.
Base Station App Connection Setup
1 Open the Smart Life or Tuya App.
2 Tap Add the new device icon and then add device.
3 Scroll to the Sensor icon and Tap.
4 Tap Alarm WiFi.
5 On the App enter your Routers User Name and Password then Tap next.
6 On your Base Station push the Menu icon and then Tap WiFi and then Tap Smart link.
7 On the App Tap Confirm the indicator is blinking rapidly.
8 Wait for the configuration to finish then tap Done.
Once you are connected to your router you can now install the devices.
By default the Entry and Exit delays are set to 30 seconds and the user code is 1234.

Best way to install your devices
1 Place the Base Station in central location that is reasonably close to the router for best
WiFi range.
2 You will need to test the WiFi range off the devices to the router.
3 Take the first device to the area that you want to install, then use a remote control and
arm the system and then trigger the device, if the alarm sounds then that device is within
range, disarm the system. and now the device can be installed.
4 Then name the device in the App.
5 Repeat this for the other devices.
Motion Detector
After mounting the Motion Detector don’t forget to take the detector out of walk test mode. After
installation the device should be be in Normal mode. See diagram 1.
The detector number will be written on the base of the device.
Diagram 1
App Instructions
Open up your AW200 App home page. Go to the Accessories page.
Type of Devices for the Sirius AW200.
Detector Remote Wired detector RFID Fingerprint
Edit a device
Tap on a Detector to edit.
Zone Name You can now change the Zone name.
Repeat for each devices.
Zone Mode How the zone Works.
Go to zone Mode and scroll to the Mode want for this device.
Normal, 24 Hours, Delay, Home, 24hr Hour Silent, Home with Delay and, Off.
Repeat for each devices.
Type of zone
Go to zone Mode and scroll to the Mode want. Motion detector, remote etc.
Repeat for each devices.
Delete a Detector
Scroll from right to left then tap the red rubbish bin icon to delete the Detector

Settings
On this page you can set the Entry, Exit, Alarm Siren Duration, Factory Reset and Turn off Push
Notifications etc.
Exit delay 1 - 300 Seconds
Timer Refer to main manual
Alarm sound On by Default
Alarm duration 1 - Minutes
Sensor low battery alarm On by Default
Alarm notification On by Default
Entry delay 1 - 300 Minutes
Countdown with tick tone On by Default
CPG - 64 Base Station only
Alarm call number
Alarm SMS number
Alarm call
Alarm SMS
Unanswered phone redial times
Factory reset Return base station back to factory settings
Hub language 12 languages
Virtual password
How to Add Finger Prints For Arming & Disarming
Tap the Menu icon on the Base Station then the Finger Print icon, Tap +now set which user number
Finger Print you are setting up (0 to 8) then push the Tick icon, now you will have to present the
Finger you wish to use to the finger print scanner. You will have present your finger a total off four
times then Tap the Tick icon to save.
To delete a Finger Print Tap on the rubbish bin icon off the Finger Print to be deleted. To delete all
Finger Prints, Tap on the X and the Tap the Tick icon.
It is recommended to keep a record of which number is assigned Finger Prints
Advance Settings
Smart alarm touch Name your Base Station
Device information Device settings
Tap to run and automation Refer to main manual
Offline notification Off by Default
Share device Share your Device to another phone
Create group Refer to main manual
FAQ Feedback Advanced help manual
Add to home screen Add device to main screen
Check device network Network diagnostics
Device update A red dot indicates update available
Remove device Deletes your device from your phone
Pairing New Device
Tap the +icon.
Activate the Device your installing
Push confirm.
Repeat for each devices.

View Event Log
From the App Home page Tap the me icon, now Tap Message Center.Tap on the the event message
you want to view.
Deleting Event Logs
After viewing the event logs you can delete a selected event or all the events.
Tap now you can select one event by Tapping the circle beside the event and Tapping. You can
select all then Tap .
Sharing Your Device to another phone
From the Home page open up the device you want to share. Tap on the Settings icon. Scroll down
to share device and open that page and Tap on Add Sharing
now Tap on more. Tap on the Gmail icon and your email page will open, now enter the email
address of the person that is sharing that device and send.
The person that is sharing the device need the open the link and follow the on screen prompts to
setup the Smart Life or Tuya App onto the phone.
Log on by using the senders login password. The person will now be able to receive notification.
Wireless Sirens
Connecting to the Base Station
Pressing and hold the SET button until the siren sounds 1 x then release the set button, the strobe
lights flash to indicating that the siren is in sniffer mode. Then press the SOS Icon on the Base
Station, The siren will sounds, this indicates that the pairing with the Base Station is successful.
Now disarm the Base Station.
The Siren will automatically exit the sniffer mode if no any operation is made for more than 20s.
Disconnect Wireless Sirens from the Base Station
Pressing and hold the SET button until the siren sounds 3 x then release the Set button,
Hard wired Zones Lead Setup
Tap the Menu Button and the the Parts button.
The Tap the EOL Zones button.
Now select the Type of zone it is going to
(Door Contact, Motion Detector
Smoke Detector)
Now select what type of zone it is going to be.
( Delay, Instant,24 Hr)
Now confirm the zone number you are using.
Then Tap the Tick Button to save.

CP - G64 SMS Text Messaging
To set up a SMS Text Message number open up your Base Station App and Tap the Settings icon this
will display the settings page. Turn on Alarm SMS (Green) then Tap on the Alarm SMS number. Tap
the Add phone number icon, now you can type in the phone number you want to Text to the Tap
Save. Repeat for extra numbers.
SMS Text Messaging
To set up a SMS Text Message number open up your Base Station App and Tap the
Settings icon this will display the settings page. Turn on Alarm SMS (Green) then
Tap on the Alarm SMS number. Tap the Add phone number icon, now you can type
in the phone number you want to Text to the Tap Save. Repeat for extra numbers.
Sim Card Installation
For more advanced programming please refer to the main installation manual.
Optional Extras
Internal Siren External Siren Smoke Detectors Remotes
Motion Detector Indoor Camera
For more advanced programming please refer to the main installation manual.
Table of contents