manuals.online logo
Brands
  1. Home
  2. •
  3. Brands
  4. •
  5. Sirius XM RAdio
  6. •
  7. Radio
  8. •
  9. Sirius XM RAdio Stratus 6 User manual

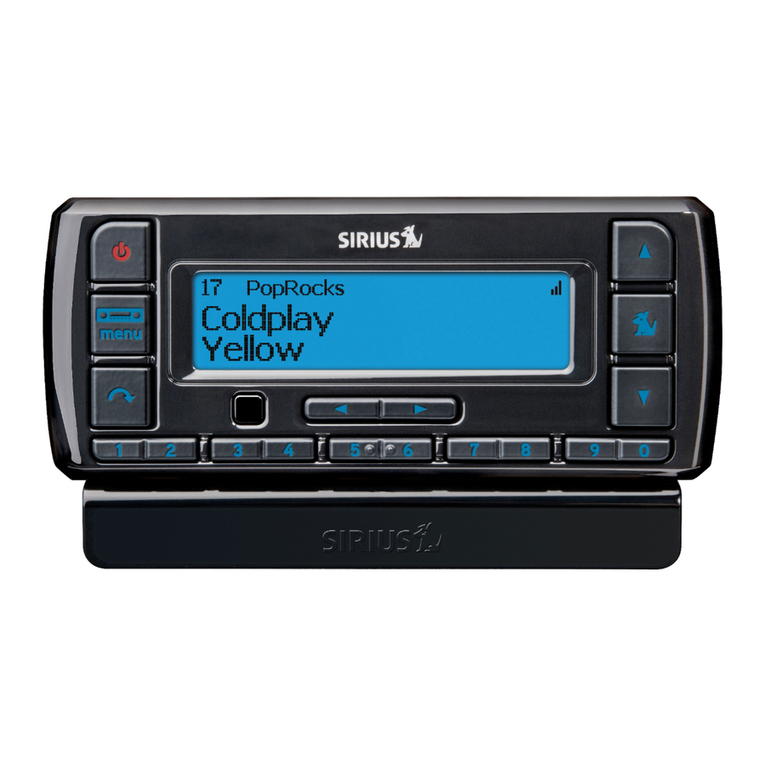
Sirius XM RAdio Stratus 6 User manual

Step 1:
Connect the Home Dock Connect the Home Dock (continued) Step 2: Install the Indoor/Outdoor Antenna
A Connect the Indoor/Outdoor Home Antenna.
Once you have selected a location, connect the
antenna to the ANT connector at the rear of the
Home Dock. (After completing a few additional
steps, we will work on the location of the antenna.)
B. Connect the Home Power Adapter
Connect the Home Power Adapter to the DC5V
connector at the rear of the Home Dock, and plug it
into a wall outlet.
C. Connect the Home Dock to a Home Stereo
System or Powered Speakers
The Home Dock can be connected to your home
stereo system, or to a pair of powered speakers. If
you are connecting to a home stereo system, see
the following section. If you are connecting to a
pair of powered speakers, refer to the next panel.
To Connect the Home Dock to Your Home Stereo
System:
The Home Dock can be connected to your home stereo system through the AUX IN or LINE IN
connection of your home stereo system, using the provided Stereo Audio Cable.
1. Take the provided Stereo Audio Cable and connect the single 3.5 mm (1/8”) connector to the AUDIO
OUT connector at the rear of the Home Dock.
2. Connect the white left and
red right Stereo Audio Cable
connectors to any available
input other than PHONO on
your home stereo system. (If
your stereo’s inputs are marked
red and black, simply connect
the white plug to the black
input.)
3. Turn the home stereo system
On, and make sure you select
the correct input on your stereo
system for the AUX In or LINE
In connection.
When installing the Home Dock in your home, choose a location in close proximity to your home stereo
system or powered speakers, and also where the cable from the Indoor/Outdoor Antenna can reach the
Home Dock. The location should be easily accessible and provide good visibility of the display, but should
not be located where it will be in direct sunlight, which will affect the visibility of the display screen.
You will also need to decide whether you will be connecting your Home Dock to your home stereo
system using the provided Stereo Audio Cable, or directly to powered speakers.
To Connect the Home Dock to Your Powered Speakers:
The Home Dock can be connected directly to a
pair of powered speakers.
1. Connect the 3.5 mm (1/8”) connector from
the powered speakers to the AUDIO OUT
connector at the rear of the Home Dock.
2. Plug the powered speakers into an AC outlet.
3. Turn On the powered speakers.
D. Dock Your Radio
Place the radio into the Home Dock, aligning the connector on the
Stratus 6 with the connector on the Home Dock, and gently press the
Radio down until it is fully seated in the Home Dock. Press the power
button on the radio to turn it on.
To begin, try experimenting with the Home Antenna to get a feel for the reception in your location. Move
the antenna around the room or from room to room. Aim it from different windows. In major metropolitan
areas, you might find that you get great reception in several locations without worrying too much about
aim and placement.
Refer to your radio’s User Guide for instructions, and access the
Signal or Signal Indicator screen of your radio to see a visual
indication of signal strength. If you’re receiving a good Satellite
and Terrestrial signal strength, you’re done. If not, try some of the
suggestions which follow.
Other Indoor/Outdoor Antenna Installation Suggestions
If you find you are getting a signal, but it’s
inconsistent, try moving the Indoor/Outdoor
Antenna closer to a window, ideally one that is
facing due south.
Not sure which way is south? Think about where the
sun rises (in the east) and sets (in the west). Then
stand so that east is to your left and you’ll be facing
south. Is there a window in the direction you’re facing?
Move the antenna closer to the window.
TIP! Still not sure which way is south or where to
place your Home Antenna? Look up your location
on an online mapping Web site that offers satellite
views of street addresses where you can easily
see which way is south, and what window may
offer an unobstructed view of the sky.
Another easy method is to start at any window, then work from window to window in a simple pattern to
find the window gives the best signal strength. Note that the antenna must also have an unobstructed
view. No trees or buildings blocking its aim. If the antenna is aimed through a window, be aware that blinds,
screens, or any other non-glass elements such as thermal insulation can sometimes cause reception issues.
If this is the case, you may want to use another window or place the antenna outside of the window.
The Indoor/Outdoor Antenna’s reception can also be tweaked by opening or closing the antenna clamshell,
and turning the antenna. While
observing the signal strength, make
small adjustments to the angle of
tilt of the clamshell until the highest
possible signal strength is achieved.
If you have not wall-mounted the
antenna, turn the antenna slightly to
the right or left and observe if the
signal strength increases. For each
tweak, allow a few seconds in each
position to determine if the signal
strength increases.
If you are unable to get a good satellite signal, consult the User Guide for outdoor antenna installation
options. The User Guide is available at www.siriusxm.ca/userguide.
SOUTH
Step 3: Activate
Stratus 6 works on the Sirius network and requires a Sirius subscription. Before you can start listening,
please do the following:
1. Make sure your Stratus 6 is properly installed and receiving the Sirius signal so that you can hear the
audio on channel 1.
2. Make a note of your Sirius ID (SID). You can find it on channel 0, on a label on the bottom of the gift
box, and on the label on the back of your Stratus 6.
3. Activate your service:
•Online:Gotosiriusxm.ca/activate
OR
•Byphone:Call1-877-438-9677
When your service is activated, your Stratus 6 will receive all channels to which you have subscribed. At
this time, if you press or , you can scroll and tune other channels. Activation usually takes 10 to 15
minutes, but may take up to an hour. We recommend that your radio remain on until activated.
AUDIOANT PWR
AUDIOANT PWR
menu
AUDIOANT PWR
AUDIOANT PWR
Quick Start Guide
Stratus 6
Radio & Home Kit
www.siriusxm.ca
Sirius XM Canada Inc.
135LibertySt.-4thfloor
Toronto,Ontario,M6K1A7
1-877-438-9677
©2014SIRIUSXMRadioInc.“SiriusXM”,theSiriusXM
logo, channel names and logos are trademarks of
Sirius XM Radio Inc. and are used under license.
Getting Started SV6 (0000000000000)
00.ABCD1.001(141007a)
What’s in the Box? Stratus 6 Front Panel
Self installation instructions and tips are provided for your convenience. It is your
responsibility to determine if you have the knowledge, skills and physical ability required
to properly perform an installation. SiriusXM shall have no liability for damage or injury
resulting from the installation or use of any SiriusXM or third party products. It is your
responsibility to ensure that all products are installed in adherence with local laws and
regulations. SiriusXM warranties do not cover the installation, removal or reinstallation of
any product.
a. Stratus 6 radio
b. Home Dock
c. Home Power Adapter
d. Stereo Audio Cable
e. Indoor/Outdoor Home Antenna
f. Remote Control
a
b
d
f
e
c
The following section describes the Stratus 6’s buttons and controls.
1. Power Button: Turns the Stratus 6’s power ON and OFF.
2. FM Presets/Menu Button: Selects between different preset frequencies used by the built-in wireless
FM transmitter. Press and hold to access Menu OptiOns to make setup and feature changes.
3. Jump Button: Jumps to a pre-selected channel.
4. Preset/Direct Tune Buttons (0 – 9): Sets and selects preset channels. Also lets you directly tune
channels by entering the channel number.
5. Category < > Buttons: Navigates through the Category List screen which displays channel categories.
6. LCD Display: Displays information about the Stratus 6’s operation and about the program that is
playing.
7. Channel Up/Down Buttons: Navigates through channels and display screens.
8. Select Button: Selects items highlighted on the display screen. When at the Default display screen, a
press-and-release will display a prompt to enter a channel number.
1
2
37
7
8
4
5 6
067 Real Jazz
Canadian Compliance
This Class B digital apparatus complies with Canadian ICES-003.
IC STATEMENT
Operation is subject to the following two conditions: (1) this device may not cause interference, and (2)
this device must accept any interference, including interference that may cause undesired operation
of the device. For product available in the Canada market, only channel 1~11 can be operated. Selection
of other channels is not possible. This device and its antenna(s) must not be co-located or operation in
conjunction with any other antenna or transmitter. To reduce potential radio interference to other users,
the antenna type and its gain should be so chosen that the equivalent isotropically radiated power (e.i.r.p)
is not more than that permitted for successful communication. IC Radiation Exposure Statement: This
equipment complies with IC RSS-102 radiation exposure limits set forth for an uncontrolled environment.
This equipment should be installed and operated with minimum distance 20cm between the radiator &
your body.
8
5
2
7
4
1
9
6
3
mute
t-mix
alerts
t-scn
fm
menu
0
twx
bank
direct
v2.0
PULL

Other manuals for Stratus 6

4

Other Sirius XM RAdio Radio manuals

Sirius XM RAdio ONYX EZR User manual
Sirius XM RAdio

Sirius XM RAdio ONYX EZR User manual

Sirius XM RAdio Onyx User manual

Sirius XM RAdio

Sirius XM RAdio Onyx User manual

Sirius XM RAdio MIRGE User manual

Sirius XM RAdio

Sirius XM RAdio MIRGE User manual

Sirius XM RAdio Snap! User manual

Sirius XM RAdio

Sirius XM RAdio Snap! User manual

Sirius XM RAdio Stratus 6 User manual

Sirius XM RAdio

Sirius XM RAdio Stratus 6 User manual

Sirius XM RAdio Onyx EZ User manual

Sirius XM RAdio

Sirius XM RAdio Onyx EZ User manual

Sirius XM RAdio Onyx Operating and maintenance instructions

Sirius XM RAdio

Sirius XM RAdio Onyx Operating and maintenance instructions

Sirius XM RAdio SXBR3 Operation manual

Sirius XM RAdio

Sirius XM RAdio SXBR3 Operation manual

Sirius XM RAdio TTR1 User manual

Sirius XM RAdio

Sirius XM RAdio TTR1 User manual

Sirius XM RAdio Starmate 8 User manual

Sirius XM RAdio

Sirius XM RAdio Starmate 8 User manual

Sirius XM RAdio Music For Business User manual

Sirius XM RAdio

Sirius XM RAdio Music For Business User manual

Sirius XM RAdio Onyx Plus User manual

Sirius XM RAdio

Sirius XM RAdio Onyx Plus User manual

Sirius XM RAdio Roady BT Specification sheet

Sirius XM RAdio

Sirius XM RAdio Roady BT Specification sheet

Sirius XM RAdio Type III User manual

Sirius XM RAdio

Sirius XM RAdio Type III User manual

Sirius XM RAdio EDGE User manual

Sirius XM RAdio

Sirius XM RAdio EDGE User manual

Sirius XM RAdio BREO/BREW User manual

Sirius XM RAdio

Sirius XM RAdio BREO/BREW User manual

Sirius XM RAdio SiriusXM Music User manual

Sirius XM RAdio

Sirius XM RAdio SiriusXM Music User manual

Sirius XM RAdio TTR1 User manual

Sirius XM RAdio

Sirius XM RAdio TTR1 User manual

Sirius XM RAdio ILX Guide

Sirius XM RAdio

Sirius XM RAdio ILX Guide

Sirius XM RAdio Onyx Plus User manual

Sirius XM RAdio

Sirius XM RAdio Onyx Plus User manual

Sirius XM RAdio ONYX EZR User manual

Sirius XM RAdio

Sirius XM RAdio ONYX EZR User manual

Sirius XM RAdio Lynx Home Dock User manual

Sirius XM RAdio

Sirius XM RAdio Lynx Home Dock User manual

Sirius XM RAdio DH3 User manual

Sirius XM RAdio

Sirius XM RAdio DH3 User manual

Sirius XM RAdio SiriusXM Music User manual

Sirius XM RAdio

Sirius XM RAdio SiriusXM Music User manual

Popular Radio manuals by other brands

SOUNDMASTER UR2170v2 manual

SOUNDMASTER

SOUNDMASTER UR2170v2 manual

Motorola Spectra T83 instruction manual

Motorola

Motorola Spectra T83 instruction manual

Albrecht DR 690 CD instruction manual

Albrecht

Albrecht DR 690 CD instruction manual

SOUNDMASTER UR-2008 manual

SOUNDMASTER

SOUNDMASTER UR-2008 manual

Yaesu FTM-400DE quick guide

Yaesu

Yaesu FTM-400DE quick guide

Freetalker R5 operating instructions

Freetalker

Freetalker R5 operating instructions

Trevi DAB 795 R user guide

Trevi

Trevi DAB 795 R user guide

Baofeng BF-5C User instructions

Baofeng

Baofeng BF-5C User instructions

auna multimedia 10027920 instruction manual

auna multimedia

auna multimedia 10027920 instruction manual

Roadstar CLR-2950DAB+ instruction manual

Roadstar

Roadstar CLR-2950DAB+ instruction manual

Sangean EUPHONIC 450 user manual

Sangean

Sangean EUPHONIC 450 user manual

Retekess TR108 user manual

Retekess

Retekess TR108 user manual

Makita DMR114 instruction manual

Makita

Makita DMR114 instruction manual

Scansonic R110 owner's manual

Scansonic

Scansonic R110 owner's manual

Kenwood TKR-750 Programming reference

Kenwood

Kenwood TKR-750 Programming reference

SHYAM Networks RM-1C-18M-19-24 quick start guide

SHYAM Networks

SHYAM Networks RM-1C-18M-19-24 quick start guide

KREAFUNK aTUNE Operation manual

KREAFUNK

KREAFUNK aTUNE Operation manual

Team Electronic TS-9M Operating	 instruction

Team Electronic

Team Electronic TS-9M Operating instruction

manuals.online logo
manuals.online logoBrands
  • About & Mission
  • Contact us
  • Privacy Policy
  • Terms and Conditions

Copyright 2025 Manuals.Online. All Rights Reserved.