4.3 Montaje de los Agitadores
- Verificar si el controlador de velocidades está en la
posición Apagado/0 (cero) y, si el enchufe de la badora está
desenchufado del toma de corriente.
- Destrabar la manija que se encuentra en la lateral de la
base de la máquina.
- Inclinar la parte superior de la máquina hacia atrás.
- Alimentar la olla con los ingredientes que serán procesados
y encajarla a la base del soporte de la máquina, girando en el
sendo horario hasta trabarla.
- Elegir el aditamento que será usado y conectarlo al
disposivo para el encaje de los badores, acoplando
el perno del disposivo con la abertura del bador. Es
necesario empujar y girar el bador en el sendo ante
horario a fin de trabarlo.
- Bajar la parte superior de la badora y, trabarla con
la manija de trabar que está en la lateral de la base de la
badora. Antes de prender la máquina, verificar si la manija
trabó de hecho la parte superior. Hacer un test si de hecho
se trabó, intentando levantar la parte superior.
- Conectar el enchufe en un toma de corriente que debe
estar de acuerdo con el voltaje de la máquina.
- Prender la maquina presionando el botón PRENDER/
DESLIGAR y luego después, seleccionar la velocidad deseada
hasta que el proceso esté concluido.
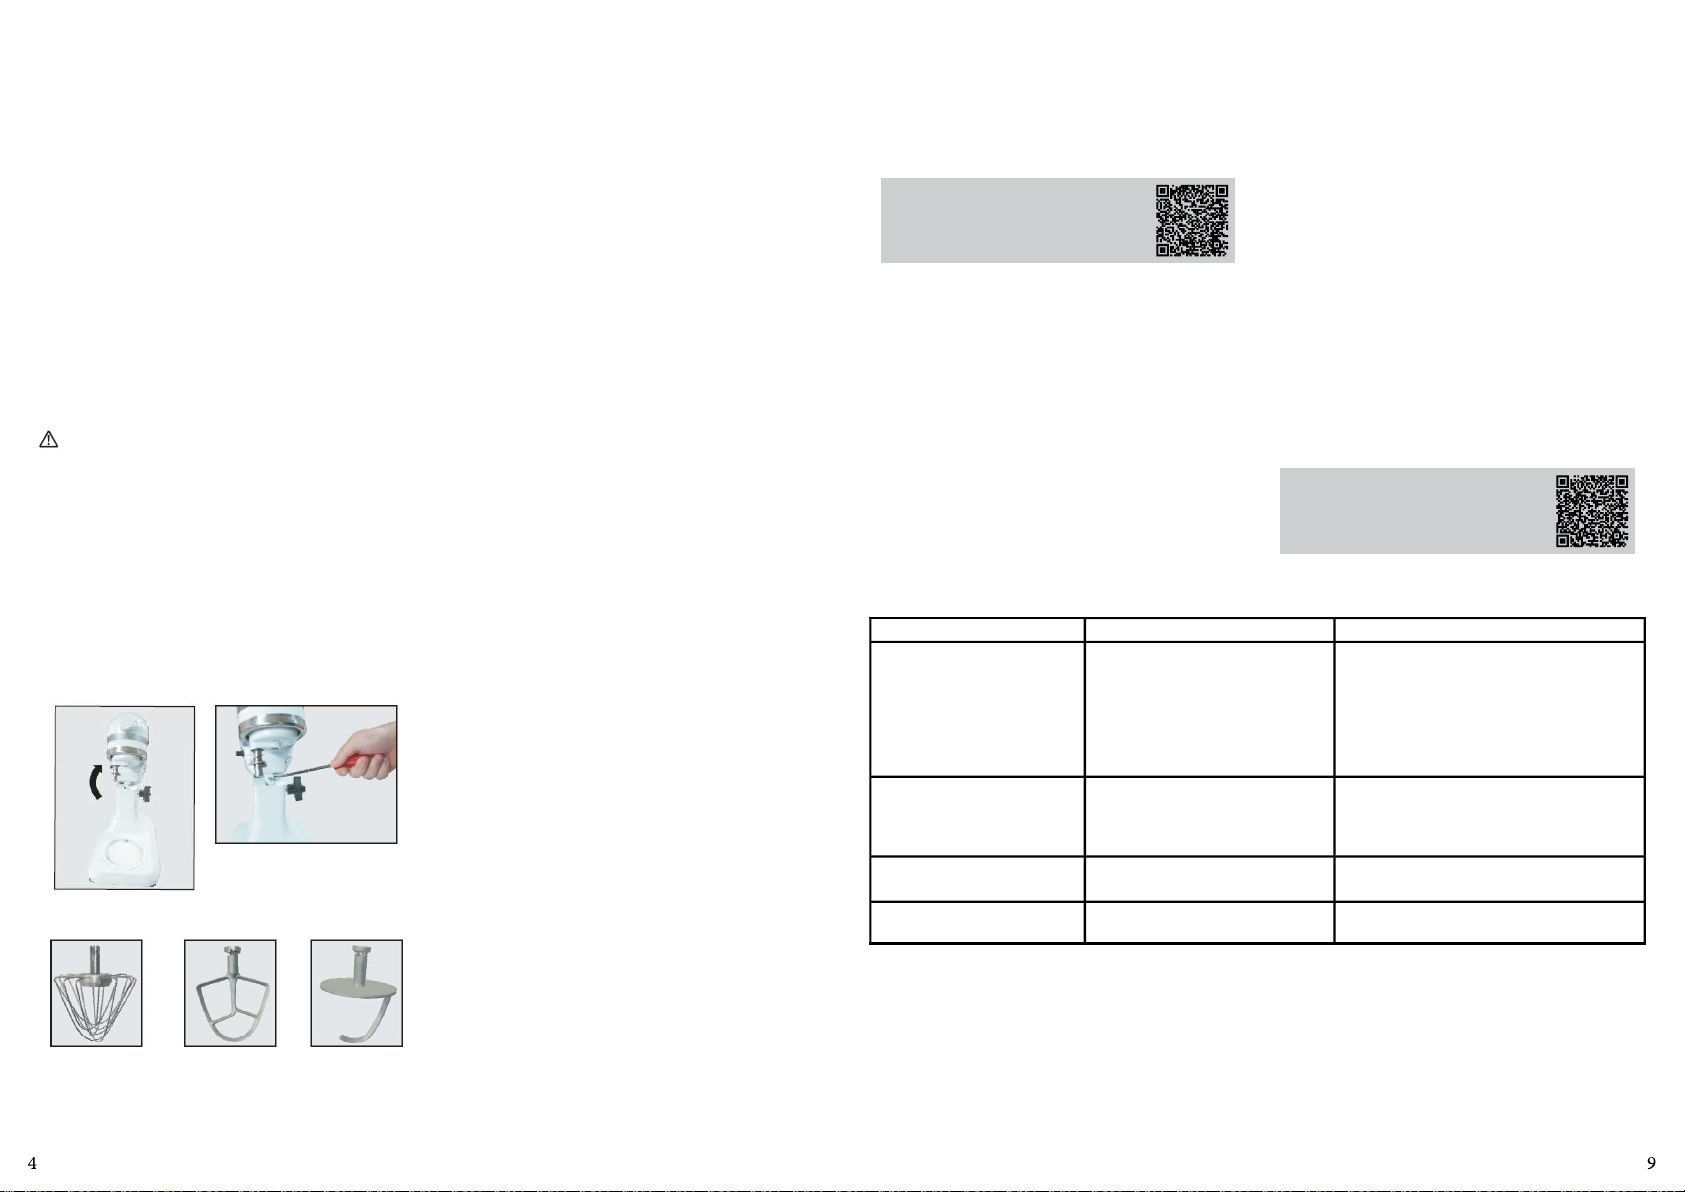
4.4 Ajuste de la altura de los badores
La badora Planetaria BPS-06 viene ajustada de fabrica,
pero, si por algunos movo el bador tocar el fondo de la
olla, Usted puede ajustarlo, como por ejemplo mostramos
a seguir.
- Verificar si la palanca de controle de velocidad está en
0(cero) y, si el enchufe de la maquina está desenchufado de
la toma de corriente.
- Destrabar la manija TRABAR/DESTRABAR (Fig.01 No.06).
- Inclinar la parte superior de la máquina hacia atrás.
- Con un destornillador, girar el tornillo que se ubica en la
parte superior del suporte despacio en el sendo ante
horario, para levantar el aditamento, o en el sendo horario
para bajarlo, y así regular el tornillo hasta ubicar el punto
ideal que es cuando los aditamentos tocan el fondo de la
olla.
4.5 Preparación de los Alimentos
Su badora planetaria mezcla de forma más homogénea y
más rápida de que cualquier otra badora eléctrica. Así que
el empo de la mezcla de la mayoría de las recetas debe
ser ajustado, para evitar que la masa pase del punto. Por
ejemplo, para tortas y bollos, el empo de la mezcla puede
ser diferente del indicado para otras badoras.
Tres modelos de aditamentos acompañan su equipo. Cada
uno de ellos ene aplicación para una finalidad específica.
1 - Aditamento para masas livianas (pala): el bador plano
(pala) para masas livianas como muestra la Fig.-08 sirve
para bar masas livianas como: tortas, bollos, galletas,
merengues, panes rápidos, bollos de carne, puré de papas,
torllas entre otras de estos seguimientos.
2 - Aditamento para masa pesada (gancho): el bador para
masas pesadas como muestra la Fig.-09 sirve para bar
masas pesadas como masas con levadura: panes, pizza,
pastas entre otras masas similares.
Observación: cuando ulizar el bador para masas pesadas,
ulizar solamente la velocidad 1 para evitar dañar su equipo.
3- Aditamento globo: el globo, como muestra la Fig.-07,
sirve para bar claras para masas que exigen incorporación
de aire como, huevos, clara de huevo bada, merengues,
caramelos, etc.
4.5.1 Sugesones para preparo
Velocidad 1 - usar esta velocidad para agitar y mezclar
lentamente los ingredientes. Es el inicio de todos los
procedimientos de mezclas. Esta velocidad debe ser usada
cuando desear añadir harina y otros ingredientes secos a
la masa que está procesando, o líquidos a los ingredientes
secos o aún mezclar masas pesadas.
Velocidad 2 - Usar esta velocidad para mezclar masas
pesadas, iniciar el procesamiento de puré de papas, puré de
legumbres, mezclar mantequilla o grasa a la harina, mezclar
masas finas, dar fusión a la masa de buñelos y mezclar
masas para panes y rosquillas. Sirve también para bar
masas medianas (medio pesadas), como galletas, tortas,
así como para adicionar azúcar y mantequilla a la masa y
adicionar azúcar a la clara en nieve.
Velocidad 3 - para bar en velocidad de mediana y rápida.
Usar esta velocidad para finalizar la mezcla de bollos, tortas
y otras masas.
Velocidad 4 - para mezclar pequeñas candades de crema o
clara en nieve y claras de huevo. También se uliza para bar
nata montada, nata montada y glaseado.
4.6 Para sacar la olla
- Retornar a la Velocidad 1.
- Colocar la llave selectora de velocidad en la posición
0(cero) y desenchufar la maquina de la toma de corriente.
- Aflojar la manija TRABAR/DESTRABAR (Fig.01 No.06) de la
badora.
- Inclinar la parte superior de la badora hacia atrás y apretar
suavemente la manija TRABAR/DESTRABAR (Fig.01 No.06).
- Sacar el bador sujetándolo por el asta, empujándolo y
girándolo en el sendo horario al mismo empo. Luego,
rarlo hacia abajo.
Figura 05 Figura 06
Figura 07 Figura 08 Figura 09
PROBLEMS CAUSES SOLUTIONS
- The equipment does not
switch on.
- Lack of Power;
- Problem with the internal or
external electric circuits.
- Check if there is electric power.
- Call Technical Assistance.
- Machine switch on but stop
during operaon
- Belts not fastened enough.
- ON/OFF Switch with bad contact.
- Call Technical Assistance;
- Call Technical Assistance.
- Smoke or burn smell. - Problem with the internal or
external electric circuits. - Call Technical Assistance.
- Unusual noises. - Defecve bearing. - Call Technical Assistance.
7. PROBLEM SOLUTIONS
- When the saw is not going to be used for a long period.
- Before to start operaon aer a long period it has not been
used.
All removable parts must be removed and washed. Wash
them with running water and neutral soap.
Use a clean cloth or a so brush to remove residues.
Wash, sanize, rinse and dry all the components.
6. MAINTENANCE
Maintenance must be considered a set of procedures
with the purpose to keep the equipment best operang
condions, therefore increasing the equipment life and
safety.
Cleaning – check item 5 CLEANING
Wiring - Check all wires regarding deteriorate condions as
well as all electric contacts (terminals) regarding ghtening
and corrosion .
Contacts – ON/OFF switch, emergency buon, reset buon,
electronic circuits, etc., check the equipment in order to
assure that all components are correctly working and the
equipment operaon is normal .
Installaon – make sure the installaon followed item 3
instrucons.
1 – Each month check:
- Check the electrical installaon
- Measure the voltage at the socket
- Measure the working current and match it with the
nominal current
- Check the ghtening of all electric terminals to avoid bad
contacts
- Check electric motor sha clearance
- Check the wiring for overeang, insulaon failures and
mechanical damages.
2 Each three month checks
- Check electrical components such as ON/OFF switch,
emergency buon , reset buon, electronic electric circuits ,
overeang, insulaon failings, or mechanical damages
- Check bearings clearances
- Check retainers, O’rings, V’rings and other seals.
Use Your QR Code Reader to access more
informaon regarding the cares needed
when handling stainless Steel.
Use Your QR Code Reader to access
more informaon regarding safety and
maintenance.