Slime 40045 User manual

PART# 40045 | 12.18.14
CARS • TRUCKS • BIKES • INFLATABLES
120V GARAGE INFLATOR
ATTENTION! READ ALL INSTRUCTIONS CAREFULLY
FAILURE TO FOLLOW WARNING INSTRUCTIONS CAN RESULT IN FIRE,
PERSONAL INJURY OR PROPERTY DAMAGE.
Mounting Bracket
(mounting screws included)
Coiled Hose and Gauge
Holder
Inflator Clips into
Bracket for Easy
and Quick Access
Storage Kit holds Tread
Depth Gauge, Valve Caps and
Accessory Adapters
Cord Winds around
Bracket for Easy
Storage
!

DIAL GAUGE
• Mounted on Inflator
• 0-150 PSI range
• 0-10.3 BAR range
AIR HOSE
ON/OFF
BUTTON
IDEAL USES
TIRE INFLATION TIME
CFM
AIR HOSE LENGTH
COIL HOSE LENGTH
POWER CORD LENGTH
POWER SOURCE
GAUGE
Tires, Bikes, Inflatables, Sports Balls
4 min*
1.5 (42 LPM)
29.5” (0.75m)
14.75’ (4.5M)
67” (1.7m)
120 volt wall outlet
Mounted dial gauge
TECH SPECS
* (0-35 PSI, Standard Tire: P195/65 R15)
EASY GRAB
HANDLE
INFLATOR
• Powerful Direct Drive Motor
EXTENSION COIL
AIR HOSE
POWER SOURCE
• Plugs into a 120V
power outlet
ACCESSORY KIT
Valve Caps Air Accessories
Tread Depth Gauge
Storage Kit
Pencil Gauge

CAUTION: HOT • REMOVE FROM WALL MOUNT BEFORE USE. DO NOT HOLD IN HAND
WHILE OPERATING • PLACE INFLATOR ON A HARD, CLEAN SURFACE.
1. DO NOT use inflator continuously for more than 10 minutes. Allow unit to cool
approximately 25 minutes between uses. Do not leave inflator unattended.
2. ALWAYS ensure air hose connector is secured on the valve stem for proper inflation.
3. ALWAYS use a pressure gauge to check tire pressure. DO NOT overinflate.
4. Keep inflator out of reach of children.
5. For use with 120 volt outlets only.
SAFETY INSTRUCTIONS
1. For household use only. For indoor use only.
2. The safety instructions provided in this manual are not intended to cover all possible
conditions that may occur during product operation. Always use common sense and
pay attention to all WARNING and CAUTION statements in this manual.
3. Risk of injury – do not direct the air stream towards the body.
4. This inflator is designed to inflate car tires, bike tires, ATV tires, sports equipment, air
mattresses, beach toys and other inflatables. Do not use for any purpose other than
inflating. If you do so, bodily harm or personal injury can occur.
5. Do not over-inflate the item you are inflating. Follow the manufacturer’s instructions
for your item. Save these instructions for future use.
6. Keep the inflator away from flammable areas at all times. Do not operate power tools
in explosive atmospheres, such as in the presence of flammable liquids, gasses or dust.
7. To protect against fire, electric shock and injury to persons, do not immerse the cord,
plugs or the product in water or other liquids. Do not operate the inflator in wet or
damp areas. Keep the inflator away from liquids at all times. Do not expose to rain.
Store indoors when not in use.
8. Do not leave the inflator unattended while in operation. Turn the power off after using
the inflator.
9. Unplug from the outlet when not in use and before cleaning.
10. Keep bystanders, children and visitors away while operating a power tool. Distractions
can cause you to lose control. Close supervision is necessary when any appliance is used
by or near children. This inflator is not a toy.
11. Operate the inflator only with the accessories and/or attachments that are included.
The use of accessory attachments not recommended by the appliance manufacturer
may result in fire, electric shock or personal injury. Risk of bursting – use only
recommended air-handling parts acceptable for pressures not less than 110 PSI.
12. Do not operate any appliance with a damaged cord or plug or after the appliance
malfunctions or has been damaged in any manner. Do not attempt to repair or replace
the electrical cord or plug on this product.
13. If available, it is recommended that safety glasses be used when operating the inflator.

GROUNDING INSTRUCTIONS
This product must be grounded. In the event of an electrical short circuit, the grounding
reduces the risk of electric shock by providing an escape wire for the electric current.
This product is equipped with a cord having a grounding
wire with an appropriate grounding plug. The plug must
be plugged into an outlet that is properly installed and
grounded in accordance with all local codes and ordinances.
Do not modify the plug provided. If it does not fit the outlet, have
the proper outlet installed by a qualified electrician.
This product is for use on a nominal 120-V circuit and has a
grounding plug similar to the plug illustrated.
Only connect the product to an outlet having the same configuration as the plug. Do not use
an adapter with this product.
If an extension cord must be used, use only a 3-wire extension cord that has a 3-blade
grounding plug and a 3-slot receptacle that accepts the plug on the product. Do not use a 3
to 2 adapter. Make sure your extension cord is not damaged. When using an extension cord,
be sure to use one heavy enough to carry the current your product draws. For lengths less
than 50 feet, 18AWG extension cords are recommended. An undersized cord results in a loss
of power and overheating.
Check with a qualified electrician or serviceman when the grounding instructions are not
completely understood or when in doubt as to whether the product is properly grounded.
1
HOW TO INFLATE
1. Screw air hose connector onto valve stem.
2. Plug power cord into a 120 volt wall power outlet.
3. Press on switch to turn on inflator. Inflate tire or inflatable to manufacturer's
recommended air pressure. Correct tire pressure for motor vehicles can be found in
vehicle owner's manual or on driver's side door jamb. Check owner's manual for correct
pressure for other types of tires or inflatables.
4. When proper pressure is reached, press off switch to turn off inflator. Unplug power
cord and remove air hose connector.
2 3
Grounded Outlet
Grounding
Plug
Grounded
Outlet Box

TROUBLESHOOTING
Inflator does not turn on:
1. Make sure plug is fully inserted into the wall outlet.
2. Make sure the outlet is live by using a known functional electronic device.
3. Check the power cord for damaged prongs, frays or breaks.
Inflator runs but does not inflate:
1. Be sure the air hose connector is tightly screwed onto the valve stem.
2. Check tire for leaks.
3. Check air hose for breaks and leaks at fittings.
4. Check tire valve for leaks.
5. Check valve core for damage.
Inflator runs slowly:
1. The inflator may have overheated from excessive use. Shut it off and allow it to cool for
25 minutes.
NOTE: If tire is totally deflated, it is possible that the tire could
separate from the rim allowing air to leak out when trying to
inflate. In the event this occurs, it may be necessary to jack up
the tire prior to inflation.
TREAD DEPTH GAUGE INSTRUCTIONS
1. For each measurement, fully extend tread depth probe by
pushing on the top of the gauge.
2. Place probe in the center, inner and outer grooves of the tire.
Checking multiple grooves allows you to check for uneven
wear.
3. Press on the black platform until the underside is rested on
the top of the tire tread.
4. Take the measurement by reading the first visible number
above the metal gauge barrel.
5. Repeat for next tire.
NOTE: Readings in the yellow and red zones indicate low tire tread levels.
CLEANING AND USER MAINTENANCE
1. This product has no user serviceable parts.
2. To clean the inflator, unplug the unit from the electrical outlet and wipe with a clean,
dry cloth to remove debris.
3. Store indoors.

Warranty: For the period of one year from date of purchase, manufacturer guarantees that this Product will meet
the specifications when used as directed. Manufacturer's sole liability and Customer’s sole remedy under any
warranty claim is limited to refund of purchase price or new product upon return of unit and proof of purchase.
QUESTIONS OR COMMENTS: Call 888-45-SLIME or visit www.slime.com
Accessories Marketing, Inc, a division of Illinois Tool Works, Inc. 125 Venture Drive, Suite 210, San Luis Obispo, CA
93401 USA.
Slime® is a trademark of Illinois Tool Works, Inc., registered in the U.S. and other countries.
BRACKET MOUNTING INSTRUCTIONS
The inflator can hang on the wall for storage by using the mounting bracket and two
screws that are supplied in the kit.
1 2 3
4 5 6
7 8 9
Use a stud finder to locate a stud
on the wall.
Mark the spot with a pencil. Locate the pencil mark through
the hole of the mounting bracket
and place your screw at that point.
Using a power screwdriver, drive
the screw into wall.
Ensure top of mounting bracket is
level and repeat for second screw.
Place inflator onto the mounting
bracket and lock into place.*
Wrap the cord around the
handles on the right side.
Storage is available for your accessories kit, pencil gauge and coil hose.
* Wall mount is for storage only. Remove inflator from wall mount and place on a hard clean surface before
operating.

AUTOMÓVILES • CAMIONES • BICICLETAS • ARTÍCULOS INFLABLES
INFLADOR DE GARAJE DE 120 V
¡ATENCIÓN! LEA ATENTAMENTE TODAS LAS INSTRUCCIONES
NO SEGUIR ESTAS INSTRUCCIONES DE ADVERTENCIA PUEDE PROVOCAR INCENDIOS,
LESIONES PERSONALES O DAÑOS A LA PROPIEDAD.
Soporte de montaje
(se incluyen los pernos de montaje)
Manguera extensible y
sujetador del indicador
Pasadores del inflador
dentro del soporte para
un rápido y fácil acceso
Kit de almacenamiento para el
indicador de profundidad de banda
de rodamiento, tapas de válvula y
adaptadores para accesorios
Cable que se enrolla
alrededor del soporte para
almacenarlo fácilmente
!

INDICADOR DE CUADRANTE
• Montado en el inflador
• Rango de 0 a 10,3 BAR
• Rango de 0 a 150 PSI
MANGUERA
DE AIRE
COMPRIMIDO
BOTÓN DE
ENCENDIDO/
APAGADO
IDEAL PARA USAR EN
TIEMPO DE INFLADO DE
NEUMÁTICO
FLUJO
LONGITUD DE LA MANGUERA
DE AIRE COMPRIMIDO
LONGITUD DE LA MANGUERA
EXTENSIBLE
LONGITUD DEL CABLE DE
ALIMENTACIÓN
FUENTE DE ALIMENTACIÓN
INDICADOR
Neumáticos, bicicletas, artículos inflables,
pelotas deportivas
4 min.*
42 LPM (1,5 pies
3
/min.)
0,75 m (29,5")
4,5 m (14,75')
1,7 m (67")
Toma de corriente de pared de 120 voltios
Indicador de cuadrante montado
ESPECIFICACIONES
TÉCNICAS
* (0 a 35 PSI, neumático estándar: P195/65 R15)
MANILLA DE
FÁCIL AGARRE
INFLADOR
• Poderoso motor de transmisión directa
MANGUERA
DE AIRE
COMPRIMIDO
EXTENSIBLE
FUENTE DE
ALIMENTACIÓN
• Se enchufa a una toma
de corriente de 120 V
KIT DE ACCESORIOS
Tapas de
válvula Accesorios de aire
Indicador de profundidad
de banda de rodamiento
Kit de almacenamiento
Indicador de lápiz

PRECAUCIÓN: CALIENTE • RETIRE DEL MONTAJE DE LA PARED ANTES DE USARLO. NO
LO SOSTENGA MIENTRAS FUNCIONA • COLOQUE EL INFLADOR SOBRE UNA SUPERFICIE
DURA Y LIMPIA.
1. NO use el inflador continuamente por más de 10 minutos. Deje que la unidad se enfríe
aproximadamente por 25 minutos entre usos. No descuide el inflador.
2. SIEMPRE asegúrese de que el conector de la manguera de aire comprimido esté fijo
en el vástago de la válvula para obtener un inflado correcto.
3. SIEMPRE use un manómetro para revisar la presión del neumático. NO infle en exceso.
4. Mantenga el inflador fuera del alcance de los niños.
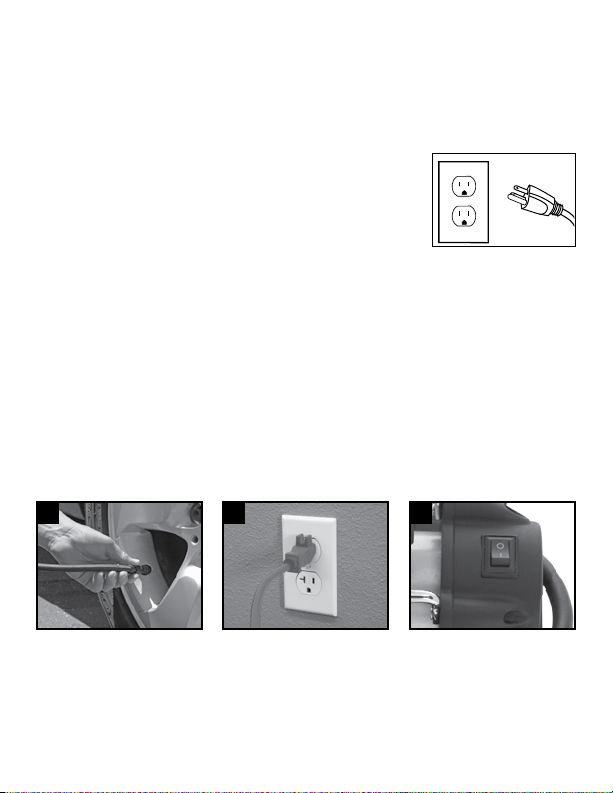
5. Solo para uso con tomas de corriente de 120 voltios.
INSTRUCCIONES DE SEGURIDAD
1. Solamente para uso doméstico. Solamente para uso en interiores.
2. Las instrucciones de seguridad proporcionadas en este manual no tienen como finalidad
cubrir todas las condiciones posibles que puedan ocurrir durante el funcionamiento del
producto. Siempre use el sentido común y preste atención a todas las ADVERTENCIAS y
PRECAUCIONES en este manual.
3. Riesgo de lesiones: No dirija la corriente de aire directamente hacia el cuerpo.
4. Este inflador está diseñado para inflar neumáticos de automóviles, neumáticos de
bicicletas, neumáticos de vehículos todo terreno, artículos deportivos, colchones
inflables, juguetes de playa y otros artículos inflables. No lo use para otro propósito que
no sea inflar. Si lo hace, pueden ocurrir daños o lesiones corporales.
5. No infle en exceso el artículo. Siga las instrucciones del fabricante respecto a su artículo.
Conserve estas instrucciones para futuras consultas.
6. Mantenga el inflador alejado de las áreas inflamables en todo momento. No opere
herramientas motorizadas en atmósferas explosivas, como en presencia de líquidos,
gases o polvo inflamables.
7. Para proteger a las personas contra incendios, descargas eléctricas o lesiones, no
sumerja el cable, los enchufes o el producto en agua u otros líquidos. No opere el
inflador en áreas húmedas o mojadas. Mantenga el inflador alejado de los líquidos en
todo momento. No lo exponga a la lluvia. Almacénelo en interiores cuando no lo use.
8. No descuide el inflador mientras está funcionando. Desconecte la energía después de
usar el inflador.
9. Desenchúfelo de la toma de corriente cuando no lo use y antes de limpiarlo.
10. Mantenga alejados a los transeúntes, los niños y las visitas mientras opera una
herramienta motorizada. Las distracciones pueden ocasionar que pierda el control. Es
necesario supervisar de cerca cuando se usa cualquier artefacto cerca de los niños. Este
inflador no es un juguete.
11. Haga funcionar el inflador solo con los complementos y accesorios que se incluyen. Es
posible que el uso de complementos o accesorios no recomendados por el fabricante
del artefacto provoquen un incendio, descargas eléctricas o lesiones personales. Riesgo
de explosión: Use solo piezas de manipulación neumática que sean adecuadas para
presiones no menores que 110 PSI.
12. No haga funcionar un artefacto con el cable o el enchufe dañados o después de que el
artefacto haya tenido un mal funcionamiento o se haya dañado de alguna manera. No
intente reparar ni remplazar ni el cable eléctrico ni el enchufe de este producto.
13. Si tiene, se recomienda usar gafas de seguridad cuando haga funcionar el inflador.

INSTRUCCIONES PARA CONECTAR A TIERRA
Este producto se debe conectar a tierra. En caso de corto circuito, la conexión a tierra reduce
el riesgo de electrocución porque brinda un alambre de escape para la corriente eléctrica.
Este producto cuenta con un cable que tiene un alambre de conexión a tierra con el enchufe
de conexión a tierra adecuado. El enchufe se debe enchufar en un tomacorriente que esté
adecuadamente instalado y tenga conexión a tierra de acuerdo con todos los códigos y
ordenanzas locales.
No debe modificar el enchufe suministrado. Si no encaja en el
tomacorriente, haga que un electricista calificado le instale uno
adecuado.
Este producto se debe usar en un circuito nominal de 120 voltios
y cuenta con un
enchufe de conexión a tierra similar al que aparece en la imagen.
Conecte el producto solamente a un tomacorriente de la misma configuración del enchufe.
No use adaptadores con este producto.
Si es necesario utilizar un cable de extensión, use solamente un cable de extensión de 3
alambres con un enchufe de conexión a tierra con tres clavijas y un receptor de 3 orificios
en el que se pueda enchufar el producto. No use un adaptador de 3 a 2. Asegúrese de que
su cable de extensión no esté dañado. Cuando use un cable de extensión, asegúrese de que
sea uno de suficiente peso para que pueda llevar la corriente que el producto necesita. Para
distancias inferiores a 50 pies (15,25 m), se recomiendan cables de extensión de 18AWG. Un
cable demasiado pequeño da lugar a la pérdida de electricidad y al recalentamiento.
Consulte con un electricista calificado o un especialista en servicio cuando no comprenda
bien las instrucciones de conexión a tierra o cuando tenga dudas con respecto a si el
producto ha quedado adecuadamente conectado a tierra.
1
CÓMO INFLAR
1. Atornille el conector de la manguera de aire comprimido en el vástago de la válvula.
2. Enchufe el cable de alimentación en una toma de corriente de pared de 120 voltios.
3. Oprima el interruptor para encender el inflador. Infle el neumático u otro producto inflable a la
presión de aire recomendada por el fabricante. La presión adecuada para los neumáticos de vehículos
automotores se puede encontrar en el manual del propietario o en el marco de la puerta del conductor.
Consulte el manual del propietario para obtener la presión adecuada para otros tipos de neumáticos o
artículos inflables.
4. Cuando alcance la presión adecuada, pulse el interruptor para apagar el inflador. Desconecte el cable
eléctrico y retire el conector de la manguera de aire.
2 3
Toma de corriente
conectada a tierra
Enchufe conectado
a tierra
Caja de toma de
corriente conectada
a tierra

LIMPIEZA Y MANTENIMIENTO POR PARTE DEL USUARIO
1. Este producto no contiene piezas que se puedan reparar.
2. Para limpiar el inflador, desconecte la unidad del tomacorriente y límpielo con un paño
limpio y seco para retirar la suciedad.
3. Almacénelo en interiores.
SOLUCIÓN DE PROBLEMAS
El inflador no enciende:
1. Asegúrese de que el enchufe esté totalmente inserto en la toma de corriente de la
pared.
2. Asegúrese de que el enchufe tenga corriente por medio de un dispositivo electrónico
funcional conocido.
3. Revise el cable de alimentación en busca de terminales dañados, desgastes o roturas.
El inflador funciona, pero no infla:
1. Asegúrese de que el conector de la manguera de aire comprimido está atornillado
firmemente en el vástago de la válvula.
2. Revise si hay fugas en los neumáticos.
3. Revise la manguera de aire en busca de roturas o fugas en los accesorios.
4. Revise si hay fugas en la válvula del neumático.
5. Revise el núcleo de la válvula en busca de daños.
El inflador funciona lentamente:
1. Es posible que el inflador esté sobrecalentado por uso excesivo. Apáguelo y deje que se
enfríe por 25 minutos.
NOTA: Si el neumático está totalmente desinflado, es posible que se separe del rin
permitiendo que el aire se filtre cuando lo trate de inflar. En caso de que esto ocurra, es
necesario levantar el neumático con el gato antes de inflarlo.
INSTRUCCIONES DEL INDICADOR DE
PROFUNDIDAD DE BANDA DE RODAMIENTO
1. En cada medición, presione la parte superior del indicador para extender
completamente el sensor de profundidad de la banda de rodamiento.
2. Coloque el sensor en las ranuras centrales, interiores y exteriores del
neumático. La revisión de varias ranuras le permite verificar el desgaste
desigual.
3. Presione la plataforma negra hasta que la parte inferior de esta descanse
sobre la parte superior de la banda de rodamiento del neumático.
4. Lea el primer número visible sobre el cilindro de metal del indicador para
obtener la medición.
5. Repita para el siguiente neumático.
NOTA: Las lecturas en las zonas amarilla y roja indican niveles bajos de profundidad de
banda de rodamiento.

Garantía: Por el periodo de un año desde la fecha de compra, el fabricante garantiza que este producto cumplirá
las especificaciones si se usa de acuerdo con las instrucciones. La única responsabilidad del fabricante y la única
reparación para el cliente, en caso de cualquier reclamación por garantía, es la devolución del precio de compra o
la entrega de un producto nuevo contra entrega de la unidad y el comprobante de compra.
PREGUNTAS O COMENTARIOS: Llame al 888-45-SLIME o visite www.slime.com
Accessories Marketing, Inc, una división de Illinois Tool Works, Inc. 125 Venture Drive, Suite 210, San Luis Obispo, CA
93401 EE. UU.
Slime® es una marca comercial de Illinois Tool Works, Inc., registrada en EE. UU. y otros países.
INSTRUCCIONES DE MONTAJE DEL SOPORTE
El inflador se puede almacenar colgado en la pared con el soporte de montaje y los dos
tornillos que se suministran en el kit.
1 2 3
4 5 6
7 8 9
Utilice un buscador de postes de
tabique en la pared.
Marque el lugar con un lápiz. Haga una marca con el lápiz a
través del orificio del soporte de
montaje y coloque su tornillo en ese
punto. Atorníllelo a la pared con un
atornillador eléctrico.
Asegúrese de que la parte de arriba
del soporte de montaje está nivelada
y repita para el segundo tornillo
.
Coloque el inflador sobre el
soporte de montaje y bloquéelo
en su lugar.*
Enrolle el cable en las manillas del
lado derecho.
Se dispone de lugar para almacenar su kit de accesorios, el indicador de lápiz y la manguera extensible.
* El montaje de pared es solo para almacenamiento. Antes de hacerlo funcionar, retire el inflador del montaje de
pared y colóquelo sobre una superficie dura y limpia.
Other manuals for 40045
1
Table of contents
Other Slime Power Tools manuals
Popular Power Tools manuals by other brands

Stomer Professional
Stomer Professional SHG-2000 user manual

Craftsman
Craftsman 572.6112 owner's manual

Trak Machine Tools
Trak Machine Tools ProtoTRAK SMX K2 Safety, Installation, Maintenance, Service and Parts List

Hitachi
Hitachi H 65SD Handling instructions

Hilti
Hilti TE 60 operating instructions

Jet
Jet JDP-387A operating instructions

Lukas
Lukas e3 operating instructions

Bosch
Bosch GST 185-LI Professional Original instructions

Rothenberger
Rothenberger ROMAX 3000 Instructions for use

Stanley
Stanley FATMAX V20 LITHIUM ION SFMCE600 Original instructions

Bosch
Bosch FWA 43 Series Maintenance instructions

stayer
stayer MULTITOOL PRO 300 operating instructions