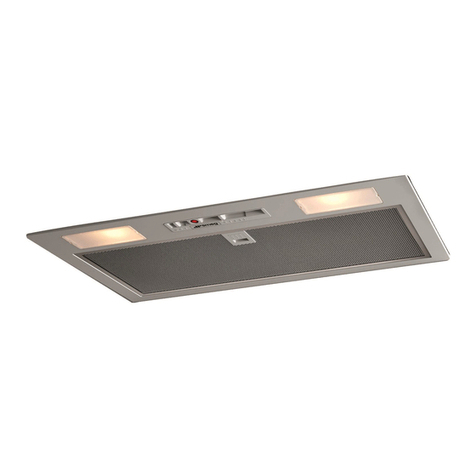
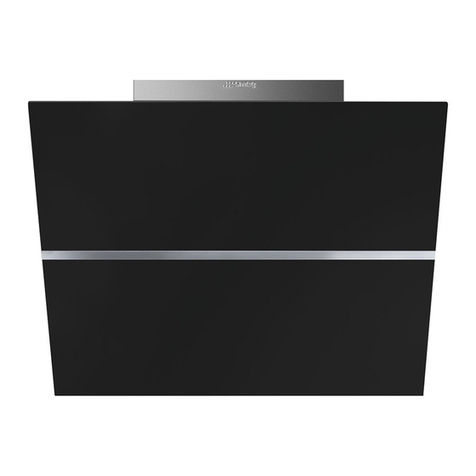
Smeg SPUM60X Operator's manual

User Instruction Manual
SPUM60X
SPUM90X

CONTENTS
1) WARNING
2) INSTALLATION INSTRUCTIONS
3) OPERATION
4) LIGHT REPLACEMENT
5) CHARCOAL FILTER INSTALLATION
6) MAINTENANCE
7) ATTENTION
8) TROUBLESHOOTING
1

1. WARNING
Young children should be supervised to ensure that they do not play with
the appliance.
The appliance is not intended for use by persons (including children) with
reduced physical, sensory or mental capabilities, or lack of experience and
knowledge, unless they have been given supervised or instruction
concerning use of the appliance by a responsible person for their safely.
Your cooker hood is for domestic use only, not suitable for barbecue, fast -
food shops, and other commercial use.
Any installation work must be carried out by a qualified electrician or
competent person.
The cooker hood and its filter mesh should be cleaned regularly in order to
keep in good working order.
Before cleaning, always ensure that you have switched your cooker hood
off.
Do not flambé under the range hood.
Clean the cooker hood according to the instruction manual, and keep the
cooker hood away from the danger of flames.
If there is any fault with your cooker hood, please call the customer service
number in the Warranty Card.
Please keep the room adequately ventilated when your cooker hood and
gas hob are working.
Do not exhaust the gas from cooker hood through the same heated flue
which is for the gas from gas hob and other kitchen appliances.
Before installation and usage, read all the instructions and make sure that
the voltage (V) and the frequency (Hz) indicated on your cooker hood are
exactly the same as the voltage (V) and the frequency (Hz) in your home.
To ensure that you get the best Warranty experience for your cooker hood,
please provide copies of the Warranty Card and purchase receipt, when
booking warranty work with the Customer Service department.
2

2. INSTALLATION
Preparation
1. The cooker hood should be placed at a distance of 65-75cm (26-30inch)
from the cooking surface for the best effect.
2. Drill a hole in the cupboard, 570*265(mm) for model SPUM60X and
865*265(mm) for model SPUM90X. Make sure the distance between the
edge of the hole and the edge of the cupboard edge is at least 35mm.
3. Take off the filter and the two lamps. Remove the two screws on the panel.
And then take off the panel.
Installation
Method 1
1. Use four ST4*8mm screws to fix the mounting bracket onto the hood. Then
put two ST4*30mm screws into the wall. Hang the hood onto the wall.
2. Use ST4*14mm screws to tighten the hood to the cabinet. SPUM60X needs
ten screws. SPUM90X needs twelve screws.
3

Method 2
1. Use four ST4*8mm screws to fix the mounting bracket onto the hood. Then
put two ST4*30mm screws into the wall. Hang the hood onto the wall.
2. Use eight ST4*14mm screws to fix the hood onto the cabinet from the
sides.
Method 3
1. Use four ST4*8mm screws to fix the mounting bracket onto the hood. Then
put two ST4*30mm screws into the wall. Hang the hood onto the wall.
2. Use four M4*35mm screws, eight washers and four nuts to fix the hood
onto the cabinet from the top.
And then connect the ducting pipes to the outlet. Install the lamps and filter
back to the hood.
4

3. OPERATION:
1)Push the low button, indicated by a fan with 3 blades, and the motor will run
at a low speed. An indicator light will also illuminate. Push it again and the
motor will stop.
2)Push the medium button, indicated by a fan with 4 blades and the motor will
run at a medium speed. An indicator light will also illuminate. Push it again and
the motor will stop.
3) Push the high button, indicated by a fan with 5 blades and the motor will
run at a high speed. An indicator light will also illuminate. Push it again and the
motor will stop.
4) Push the light button; the indicating light on, and the two lighting lamps will
come on. Push it again and the lamps will turn off.
4. LIGHT REPLACEMENT
To change the light, press the lamp cup, take out the bulb counter-clockwise.
And then Insert a new lamp.
5. CHARCOAL FILTER INSTALLATION
To remove or install the charcoal filter, twist the charcoal filter in the direction
shown below:
5

6. MAINTENANCE
1. The rangehood and its filter mesh should be cleaned regularly in order to
keep in good working order. Because the grease filters are made of metal,
do not clean the filters with detergents that will corrode metal products.
Clean the filters as below:
Method one:
Put the filter in water (40℃-50℃), pour in some grease-loosening
detergent, soak it for about 2-3 minutes and then clean it with a soft
brush. Do not brush too hard, as it may damage the filter.
Method two:
You can also put the filter into the dishwasher with detergent for cleaning.
Set the temperature at around 60℃.
2. To protect the main body from corrosion over a long period of time, the
rangehood should be cleaned with hot water plus soap or non corrosive
detergent once a week. Do not use grinding detergent, or it will damage the
body.
3. Keep the motor and other spare parts free from water, as this will cause
damage to the appliance.
4. Disassembly and assembly the filter:
7. ATTENTION
·Rangehood uses 220-240V 50Hz power;
·Disconnect the power when you clean the rangehood;
·Do not detach the filter surround
·If the power cord or plug is damaged, contact service centre
6

SPUM60X
Dimensional Drawing
SPUM90X
Dimensional Drawing

8. TROUBLESHOOTING
Fault
Cause
Solution
Light on, but motor
does not work
The leaf blocked
Get rid of the blocking
The capacitor damaged
Replace capacitor
The motor jammed bearing
damaged
Replace motor
The internal with of motor off or a
bad smell from the motor
Replace motor
Light does not work,
motor does not work
Beside the above mentioned, check the following:
Light damaged
Replace lights
Power cord looses
Connect the wires as per
the electric diagram
Oil leakage
One way valve and the air
ventilation entrance are not
tightly sealed
Take down the one way
valve and seal with glue
Leakage from the connection of
U-shaped section and cover
Take U-shaped section
down and seal with soap or
paint
Shake of the body
The leaf damaged and causes
shaking
Replace the leaf
The motor is not tightly hanged
Lock the motor tightly
The body is not tightly hanged
Fixed the body tightly
Insufficient suction
The distance between the body
and the gas top too long
Readjust the distance
Too much ventilation from open
doors or windows
Choose a new place and
resemble the machine
The machine inclines
The fixing screw not tight
enough
Tighten the hanging screw
and make it horizontal
The hanging screw not tight
enough
Tighten the hanging screw
and make it horizontal

Congratulations on your new appliance purchase!
To help care for your investment, be sure to register your
appliance online. Registration will help you if you need to
arrange service in the future, and serves as a record of your
purchase – including critical information like model number
and serial number – that you can refer to at any time.
Simply visit the below website, or ask your retailer for help:
www.applico.co.nz/register
WARRANTY:
Unless otherwise stated in paragraph 7, these products
are covered by a warranty for a period of 24 months from
the date of purchase, subject to the following conditions*.
The warranty covers rectification free of charge of any fault
arising from defective materials or components, or faulty
workmanship or assembly.
* The conditions above mentioned are:
1. That the purchaser carefully follows all instructions
packed with the product;
2. That the purchaser and/or installer carefully follows
the installation instructions provided and complies
with electrical wiring regulations, gas and/or
plumbing codes;
3. That the purchaser carefully follows instructions
provided in the owner’s handbook relating to the
proper use and care of the product and does not
use the product for any purpose other than the
domestic use for which it has been designed;
4. Commercial use of the product for professional or
industrial purposes will void this warranty.;
5. That the product was purchased and installed in
New Zealand;
6. That this warranty does not extend to:
a) optional glass lids for hobs apart from claims which
relate to mechanical or physical damage thereof at
the date of purchase;
b) ‘consumable’ parts such as light bulbs or filters;
c) damage to ceramic glass caused by liquid or
solid spill-overs, lack of maintenance, or impact;
d) damage to surface coatings caused by cleaning
or maintenance using products not recommended
by the owner’s handbook;
e) defects caused by normal wear and tear,
accident, negligence, alteration, misuse or
incorrect installations;
f) a product dismantled, repaired or serviced by any
serviceman other than an authorised service agent;
g) a product not in possession of the original
purchaser;
h) damage caused by power outages or surges
i) damage caused by pests (eg. rats, cockroaches etc.)
7. The following products, unless stated otherwise, have
warranty periods as follows:
- Microwave ovens: 12 month replacement warranty
(with 24 months on the microwave magnetron)
- Kettles, toasters, and other small appliances (not
stated below): 12 month replacement warranty
- Waste disposers: 12 month parts and labour warranty
- Blenders: 24 month parts and labour warranty
- Stand mixers: 5 year parts and labour warranty
To facilitate your repair or replacement, please phone
0800 763 448.
8. The provision of service under this warranty is
limited by a 25km boundary from the retailer where
the product was purchased exept for microwaves.
Such travelling outsideof these limits will incur
commercial cost to be paid by you, regulated by the
number of kilometres travelled beyond the 25km limit
(50km return trip).Microwaves are to be delivered to the
nearest authorised serviceagent by the customer.
9. All warranty repairs must be agreed to by Applico and
undertaken by an Applico appointed authorised service
agent. Please refer to your user manual for any further
conditions that may apply to your specific model.
Nothing herein contained shall be construed in any way
as excluding or limiting your rights under the Consumer
Guarantees Acts 1993.
For Service please visit smeg.co.nz/customerservice or
contact the dealer/retailer from whom you purchased the
product from or call the 0800 number listed below. If you are
unable to establish the date of purchase, or the fault is not
covered by this warranty, or if the product is found to
be in working order, you will be required to bear all service
call charges.
Registration of this warranty constitutes acceptance of the
terms and conditions of this warranty.
Should you require any assistance, please call Customer
Services on 0800 763 448.
Distributed by Applico Ltd.
www.smeg.co.nz
November 2015
WARRANTY REGISTRATION CARD
PRODUCT: ................................................................................
RETAILER:.................................................................................
DATE OF PURCHASE: ..............................................................
INVOICE NO:.............................................................................
MODEL NO: ..............................................................................
SERIAL NO:...............................................................................
REGISTRATION WEBSITE DETAILS FOR
www.applico.co.nz/register
WEBSITE USERNAME: ............................................................
WEBSITE PASSWORD: ............................................................
After registering your appliance online, we recommend you fill out the below information for your reference and
keep this warranty card in a safe place.
THIS WARRANTY IS VALID IN NEW ZEALAND ONLY.
This manual suits for next models
1
Table of contents
Other Smeg Ventilation Hood manuals

Smeg
Smeg KDIAM90AX User manual

Smeg
Smeg KSMD910X Technical manual

Smeg
Smeg SA950CXA User manual

Smeg
Smeg KI1207X Technical manual

Smeg
Smeg KSET650X Technical manual

Smeg
Smeg SA550-2X90 User manual

Smeg
Smeg SB900ELITE User manual

Smeg
Smeg KAT900XHE Technical manual

Smeg
Smeg SA550X90 User manual

Smeg
Smeg kseg55xe User manual
Popular Ventilation Hood manuals by other brands

Faber
Faber FABULA BK A90 RB instruction manual

LIVINOX
LIVINOX LCH-ROSE-90BL user manual

Electrolux
Electrolux RH30WC55GS Guide d’installation, utilisation et d’entretien

Halton
Halton KVF Capture Jet Operation

KOBE
KOBE IN2630SQB-700-1 Installation instructions and operation manual

IKEA
IKEA FINSMAKARE manual