manuals.online logo
Brands
  1. Home
  2. •
  3. Brands
  4. •
  5. socomec
  6. •
  7. Switch
  8. •
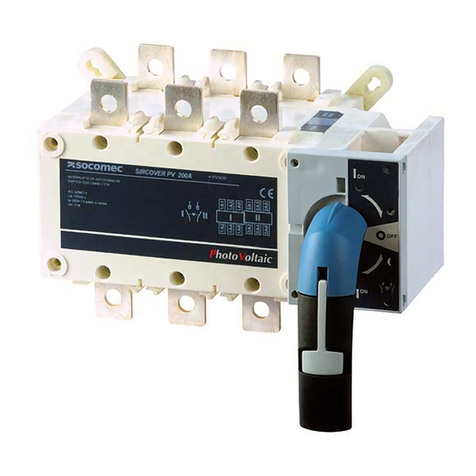
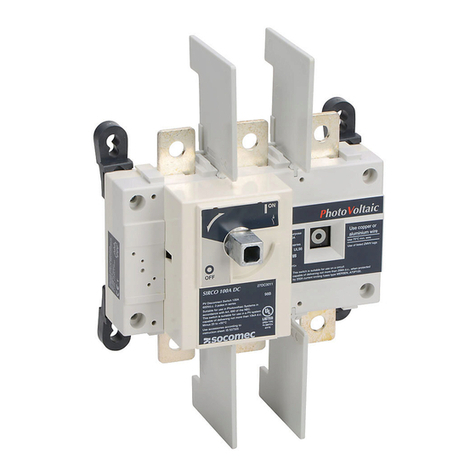
  9. socomec SIRCO PV Series User manual

socomec SIRCO PV Series User manual

RECTO-VERSO / S blanc offset 80g/m² / I noire pantonne black C / F 630x297 / P 2 PLIS ROULES - 1 PLI CROISE
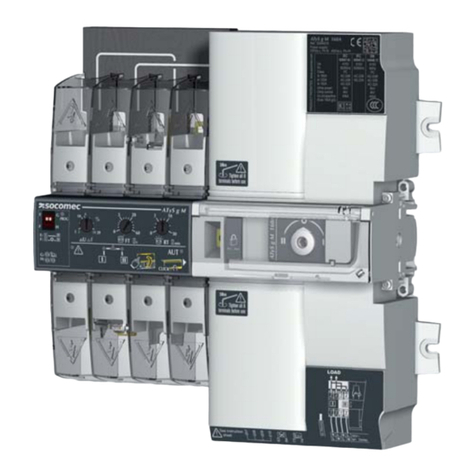
SIRCO PV 500V/P - 100A to 400A LOAD BREAK SWITCH
IS 542122-E
DANGER / DANGER / PELIGRO
!
HAZARDOUS VOLTAGE
.This equipment must be installed and serviced only by
qualified electrical personnel.
.Turn off all power supplying this equipment before working
on or inside equipment.
.Always use a properly rated voltage sensing device to
confirm power is off.
.Replace all devices, doors, and covers before turning on
power to this equipment.
. Maintain electrical clearances between cable and live parts.
PRESENCE OF MAGNET
. Keep a minimum distance (>4in / 10cm) from medical
equipments, inclusive pacemakers and other medical implants.
Failure to follow these instructions will result in
death or serious injury.
TENSION DANGEREUSE
.L’installation et l’entretien de cet appareil ne doivent être
effectués que par du personnel qualifié.
.Coupez l’alimentation de cet appareil avant d’y travailler.
.Utilisez toujours un dispositif de détection de tension à
valeur nominale approprié pour confirmer que toute
alimentation est coupée.
.Replacez tous les dispositifs, les portes et les couvercles
avant de mettre cet appareil sous tension.
.Maintenez les distances d’isolement électrique entre le
câble et les pièces sous tension.
PRESENCE D’AIMANT
. Maintenir une distance minimale (> 4in / 10cm) avec tous
les équipements médicaux, incluant les pacemakers et
autres implants actifs.
Si ces précautions ne sont pas respectées, cela
entraînera la mort ou des blessures graves.
VOLTAJE PELIGROSO
.Este equipo debe ser instalado y operado únicamente por
personal cualificado.
.Desconectar cualquier suministro eléctrico al equipo antes
de trabajar con el mismo.
.Utilizar siempre un multímetro correctamente calibrado para
confirmar que el equipo no está alimentado.
.Vuelva a colocar todos los dispositivos, puertas y cubiertas
antes de volver a dar tensión al equipo
.Mantenga las distancias eléctricas adecuadas entre el cable
y las partes activas
PRESENCIA DE MAGNETISMO
.Deje una distancia mínima (> 4in / 10cm) con equipos
médicos, incluso marcapasos y otros implantes médicos.
No seguir estas instrucciones puede provocar
daños graves e incluso la muerte.
Keep the instruction sheet, it is necessary for the mounting of the accessories.
Ne jetez pas cette notice : elle sera nécessaire pour le montage des accessoires.
No tirar ésta noticia, porque es necesaria para el montaje de los accesorios.
Switch and accessories
L’interrupteur et ses accessoires
El interruptor y sus accessorios
OOFF
-
26995052
11221111*
11231111*
140010ZZ
39542020 / 39544020
39542025 / 39544025
39542040 / 39543040 / 39544040
39542041 / 39543041 / 39544041
27988021
27988041
27984041
142X2111 / 142X2311
142X6111 / 142YZ911
100A to 250A & IEC 315A 275A to 400A & IEC 500A
127PV1016 227PV2009 / 26PV2010*
327PV2016 / 26PV2016*
427PV2019 / 26PV2025*
527PV2024 / 26PV2031*
627PV1026 727PV2027
827PV2032
927PV2039
10 27PV3026
11 27PV3032
12 27PV3039
13 27PV4026
14 27PV4032
15 27PV4039
(ZZ = 20, 25, 32, 40)
(X = DEFG, Y = D or E, Z = 2 or 6)
27983021
27983041
27984041
*not UL approved
27091020
27090027
27090040
27090045
27091041
27090046
27090038
27090039
27990021 / 27990022
27990121 / 27990122
26990031*/ 26990032*
IS 542122-E 2/5
A B C H H1 max. J J1 J2 J3 K K1 Y
in mm in mm in mm in mm in mm in mm in mm in mm in mm in mm in mm in mm
17.08 180 6.30 160 3.74 95 5.21 132,5 4.21 107 6.30 160 2.16 55 / / / / 5.31 135 1.89 48 1.51 38.5
2
3
4
57.08 180 6.30 160 3.74 95 5.21 132,5 4.21 107 6.30 160 2.16 55 / / 3.94 100 5.31 135 1.89 48 1.51 38.5
69.05 230 10.23 260 4.92 128 8 203 6.53 166 8.26 210 2.95 75 / / / / 7.67 195 2.65 67,5 2.08 53
7
8
99.05 230 10.23 260 4.92 128 8 203 6.53 166 8.26 210 2.95 75 / / 5.12 130 7.67 195 2.65 67,5 2.08 53
10
11
12 9.05 230 10.23 260 4.98 126.5 8 203 6.53 166 8.26 210 2.95 75 2.56 65 / / 7.67 195 2.65 67,5 2.02 51.5
13
14
15 11.41 290 10.63 270 5.31 135
Dual dimensions in/mm
Double dimensions in/mm
Doble dimensiones in/mm
C
Y
H
H
H1
0.29
7,5
Ø 0.35
Ø 9
Ø 0.27
Ø 7
K1 Y
X
J
J1
BK
A
J2
J3
0.98
25
0.53
13,3
1.18
30
Ø 0.43
Ø 11
Mounting orientation
Sens de montage
Sentido de montaje
27PV1016
27PV2009 / 26PV2010
27PV2016 / 26PV2016
27PV2019 / 26PV2025
27PV2024 / 26PV2031
27PV1026
27PV2027
27PV2032
27PV2039
27PV3026
27PV3032
27PV3039
27PV4026
27PV4032
27PV4039
1
2
3
4
5
6
7
8
9
10
11
12
13
14
15
A B C J J1 K K1 K2
in mm in mm in mm in mm in mm in mm in mm in mm
1
2
3
4
598B & CSA 16 406 24 610 6 152 6.30 160 2.16 55 5.35 136 1.89 48 12 305
6
7
8
9
10
11
12 98B & CSA 24 610 36 914 8 203 8.26 210 2.95 75 7.67 195 2.70 68,5 18 457
13
14
15 10.63 270 5.31 135
Minimum enclosure dimensions
Dimensions minimum des coffrets
Dimensiones minimas de las cajas
A
CJ
J1
K1
K B
K2
L(see IS 537744)
0.76 ±.079 in
19,5 ±2 mm
!
1.77
45
0.79
20
1.96
50
Ø 0.51
Ø 13
1 5
to
6 15
to
IS 542122-E3/5
27090040 / 27090045 / 27090046
Mounting of jumpers
Montage des barres de pontage
Montaje de las pletinas de union
STEP 1
OOFF
-
STEP 2
1
2
Mounting of terminal covers
Montage des capots
Montaje de los Cubrebornes
Ref. TOP
Ref. AMONT
Referencia SUPERIOR
Ref. BOTTOM
Ref. AVAL
Referencia INFERIOR
127PV1016
227PV2009 / 26PV2010
327PV2016 / 26PV2016
427PV2019 / 26PV2025
527PV2024 / 26PV2031
27983021 27988021
627PV1026 / 727PV2027 / 827PV2032
927PV2039 / 10 27PV3026 / 11 27PV3032
12 27PV3039
27983041 27988041
13 27PV4026 / 14 27PV4032 / 15 27PV4039 27984041 27984041
13.3 lb-in
1,5 Nm
Pozidriv n°2
OOFF
-
USED FOR
UTILISE POUR
UTILIZADO PARA
Jumpers
Barres de pontage
Pletina de union
2 4 5
27091020
7 8 9
27091041
STEP 3
USED FOR
UTILISE POUR
UTILIZADO PARA
Jumpers
Barres de pontage
Pletina de union
Torque
Couple
Par de apriete
lb-in Nm
230 26 17
398 45 19
Size
2 4 5
7 8 9
15
27090045
Ie ≤325A
10 11 12 13 14 15
27090027
Ie ≤350A
12 15
27090040
10 11 12 13 14 15
27090027
12 15
Torque
Couple
Par de apriete
lb-in Nm
398 45
Size 19
OOFF
-
Only for: 5, Ie > 250A (IEC)
9, Ie ≥400A
The jumper reference (27091020 or 27091041)
has to be ordered twice
This configuration is also allowed
in IEC up to 500A
12 15
27090046
10 11 12 13 14 15
27090038
a
10 11 12
13 14 15
27090039
bcd
Limited to configuration : Limited to configurations :
IS 542122-E 4/5
Connection with cables and bars (IEC application)
Raccordement câble et barre (application CEI)
Conexión con cables y pletinas (aplicación IEC)
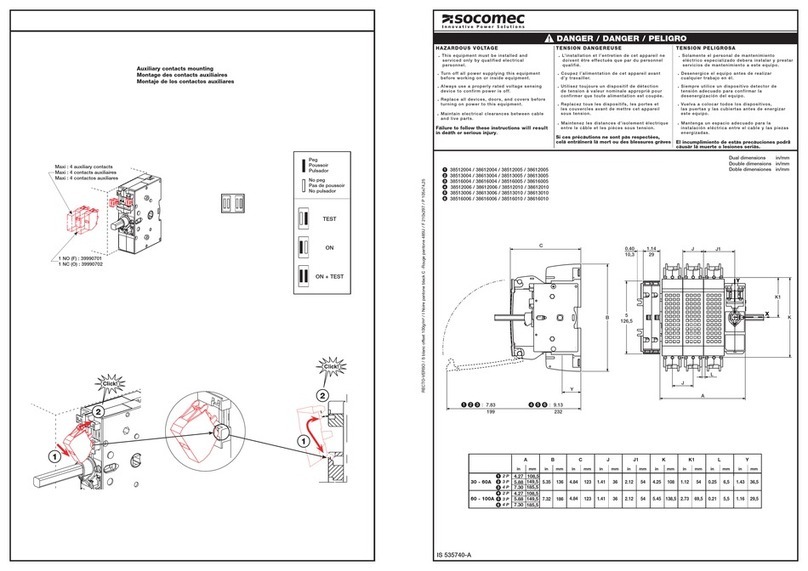
Mounting of auxiliary contacts
Montage des contacts auxiliaires
Montaje de los contactos auxiliares
1
4 2
A B
27990021 27990022
125 - 250 V a.c. 60 Hz
General Use 10,1A
1/2 HP
I min. 100 mA
27990121 27990122 125 V a.c. 60 Hz
General Use 1A
26990031 26990032 not UL approved
*
Line terminals of the two auxiliary contacts must be
of the same polarity.
Les raccordements amont doivent être de la même
polarité.
Conexiones de entrada de los contactos auxiliares
deben ser de la misma polarited.
*
4.4 lb-in
0,5 Nm
Pozidriv n°1
B
A
OOFF
-
Connection with LUGS (UL application)
Raccordement avec bornes à cage (application UL)
Conexión con bornes (aplicación UL)
OOFF
-
USED FOR
UTILISE POUR
UTILIZADO PARA
Lugs
Bornes à cage
Bornes
39542040 / 39543040 / 39544040
39542041 / 39543041 / 39544041
27PV1026 / 27PV2027 / 27PV2032 / 27PV2039
27PV3026 / 27PV3032 / 27PV3039 / 27PV4026
27PV4032 / 27PV4039
27PV1016 / 27PV2009 / 27PV2016 / 27PV2019 / 27PV2024
39542020 / 39544020
39542025 / 39544025
Ref. lugs
Ref. bornes à
cage
Ref. bornes
Designation
Désignation
Designación
Quantity per reference.
Quantité par ref.
Cantidad por referencía
Size / Section
Sección
( AWG )
Openings per lug.
Nombre de points
de connexion.
Numero de puntos
de conexión.
Torque
Couple
Par de apriete
Size
min. max. lb-in Nm
39542020
39544020
CMC LA300-R
2
4# 6 300 Kcmil 1160 18 13
39542025
39544025
CMC DLA-125
2
4# 14 2/0 247 5.4 10
39542040
39543040
39544040
CMC LA630-R 2
3
4
# 4
1/0
600 Kcmil
250 Kcmil
1
2310 35 17
39542041
39543041
39544041
PANDUIT LAM2A 350 2
3
4
# 6 350 Kcmil 2398 45 19
Ie
Nominal Cu cable section
Section nominale câbles rigides Cu
Sección máx. de cables de cobre rígidos
Maximum Cu busbar width
Largeur max. barre Cu
Largo máx. (barra cobre)
Min./Max. tightening torque
Couple de serrage min./max.
Par de apriete mini./maxi.
100 A 35 mm² 1.26 in / 32 mm 177 lb-in / 20 Nm 230 lb-in / 26 Nm
125 A 50 mm² 1.26 in / 32 mm 177 lb-in / 20 Nm 230 lb-in / 26 Nm
160 A 70 mm² 1.26 in / 32 mm 177 lb-in / 20 Nm 230 lb-in / 26 Nm
200 A 95 mm² 1.26 in / 32 mm 177 lb-in / 20 Nm 230 lb-in / 26 Nm
250 A 120 mm² 1.26 in / 32 mm 177 lb-in / 20 Nm 230 lb-in / 26 Nm
250 A (1)120 mm² 1.57 in / 40 mm 354 lb-in / 40 Nm 398 lb-in / 45 Nm
315 A (2) 185 mm² 1,26 in / 32 mm 177 lb-in / 20Nm 230lb-in / 26Nm
320 A 185 mm² 1.57 in / 40 mm 354 lb-in / 40 Nm 398 lb-in / 45 Nm
400 A 240 mm² 1.57 in / 40 mm 354 lb-in / 40 Nm 398 lb-in / 45 Nm
500 A 2 x 150 mm² 1.57 in / 40 mm 354 lb-in / 40 Nm 398 lb-in / 45 Nm
(1)27PV1026 / 27PV2027 /
27PV3026 / 27PV4026
(2)26PV2031
Note : Cu or Al cables or
bars are allowed
IS 542122-E5/5
+
(-)
+
(-)
+
(-)
+
(-)
+
(-)
-
(+)
+
(-)
+
(-)
-
(+)
+
(-)
-
(+)
+
(-)
-
(+)
+
(-)
+
(-)
1 2
1 2
1 2
+
(-)
-
(+)
+
(-)
-
(+)
+
(-)
-
(+)
+
(-)
-
(+)
+
(-)
+
(-)
+
(-)
+
(-)
12
+
(-)
+
(-)
+
(-)
1 2 3
+
(-)
+
(-)
+
(-)
+
(-)
+
(-)
+
(-)
+
(-)
+
(-)
+
(-)
+
(-)
+
(-)
+
(-)
+
(-)
+
(-)
1 2 3 4
+
(-)
-
(+)
+
(-)
-
(+)
+
(-)
-
(+)
+
(-)
+
(-)
600Vdc : 98B, CSA C22.2 Nr. 4, IEC 60947-3 (grounded) [one pole per circuit]
1000Vdc : 98B, IEC 60947-3 - 600Vdc : CSA C22.2 Nr. 4 [2 poles in series per circuit]
1500Vdc : IEC 60947-3 - 1500Vdc : 98B - 600Vdc : CSA C22.2 Nr. 4 [3poles in series min. per circuit]
Grounded Ungrounded
Grounded Ungrounded
1 or multiple circuits
single circuit
2 circuits
27PV1016
27PV2009
26PV2010
27PV2016
26PV2016
27PV2019
26PV2025
27PV2024
26PV2031
27PV1026
27PV2027
27PV2032
27PV2039
27PV3026
27PV3032
27PV3039
27PV4026
27PV4032
27PV4039
Non contractual document - Document non contractuel - Documento no contractual
For ungrounded systems, see NEC 690.35
(NEC2008, NEC2011, NFPA70).
Grounded systems : in some installation standards, this
conguration might not be allowed .
COMPULSORY
!
POLE CONNECTION IN SERIES
OBLIGATOIRE
!
CONFIGURATION RACCORDEMENT
OBLIGATORIO
!
CONEXIÓN DE LOS POLOS EN SERIES
Para mayor claridad, sólo se describe un tipo de conexión.
Todos los polos son independientes y sin polarización así que
la conexión de los polos en serie se puede realizar entre polos
que están contiguos o no, en el mismo lado o en el lado
opuesto del producto. El número mínimo de polos a conectar
en serie debe corresponder a las siguientes indicaciones para
las características técnicas mencionadas. El radio de curvatura
de los cables y las distancias entre las partas activas y pasivas
respetar las normas de instalación NEC. Por ello, la dimensiones
mínimas de la envolvente deberíanser aumentadas. Para la
conexión serie entre los polos / pletinas de puenteado no
suministras por Socomec debenser verificados los efectos
térmicos.
Para productos con multi-circuitos, las cifras , , y
representan la conexión de cada circuito.
2 o varios circuitos separados se pueden conectar juntos en
el lado del inversor.
1 2 3 4
Grounded Ungrounded
Grounded Ungrounded
For comprehension reason, only one type of connection is
shown. As all poles are independent and non polarized, the
pole connections in series can be done between adjacent or
non-adjacent poles and on the same or opposite side of the
product. The minimum number of pole to be connected in
series must be as shown below for the given technical
characteristics. Wire bending space as well as spacings have
to be according to NEC or relevant installation standard. For
this, the enclosure dimension might have to be increased.
For bridging bar and serial connections not supplied by
Socomec, thermal effect have to be checked.
For multi-circuit products, the signs represent
wiring for each circuit.
2 or more separated circuits can also be connected together
on the inverter side.
1 2 3 4
Pour une meilleure compréhension, seul un type de raccorde-
ment est décrit. Tous les pôles sont indépendants et non
polarisés, le raccordement des pôles en série peut être réalisé
entre pôles adjacents ou non, sur le même coté ou le coté
opposé du produit. Le nombre minimum de pôles à raccorder
en série doit correspondre aux indications ci-dessous pour
les caractéristiques techniques mentionnées. Le rayon de
courbure des câbles ainsi que les distances entre
conducteurs/parois doivent être selon le NEC ou la norme
d’installation. Pour cela, la dimension minimum du coffret
pourrait être augmentée. Pour les connections série entre
pôles/barres de pontages non fournies par Socomec, les
impactes thermiques doivent être vérifiés.
Pour les produits multi-circuits, les chiffres
indiquent le raccordement de chaque circuit.
2 circuits ou plus peuvent aussi être connectés ensemble du
coté de l’onduleur.
1234
-
(+)
+
(-)
+
(-)
-
(+)
+
(-)
+
(-)
-
(+)
-
(+)
+
(-)
+
(-)
-
(+)
-
(+)
-
(+)
+
(-)
+
(-)
-
(+)
+
(-)
+
(-)
-
(+)
-
(+)
+
(-)
+
(-)
-
(+)
-
(+)
b
cd
a
a aa
a
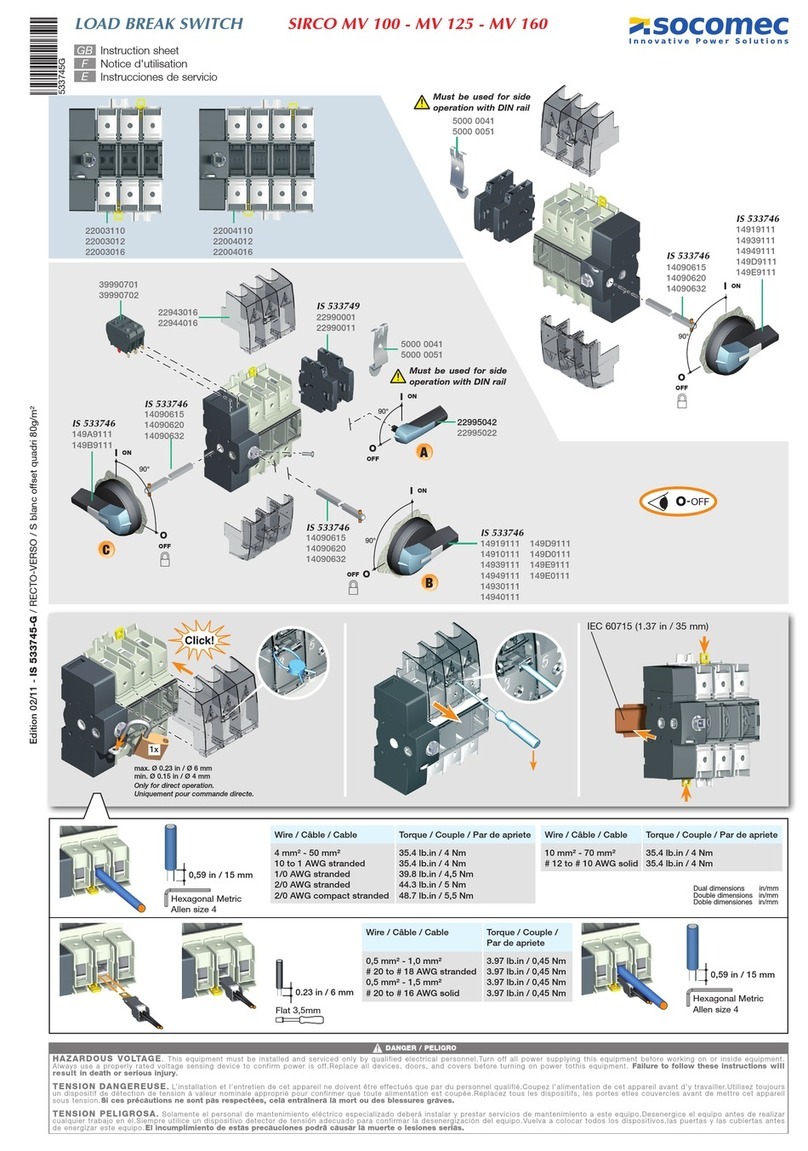
This manual suits for next models

19

Other socomec Switch manuals

socomec ATyS g M User manual

socomec

socomec ATyS g M User manual

socomec ATyS t User manual

socomec

socomec ATyS t User manual

socomec SIRCO M 16 User manual

socomec

socomec SIRCO M 16 User manual

socomec ATyS 3S User manual

socomec

socomec ATyS 3S User manual

socomec STATYS XS 16A User manual

socomec

socomec STATYS XS 16A User manual

socomec ATyS t M User manual

socomec

socomec ATyS t M User manual

socomec ATyS d M User manual

socomec

socomec ATyS d M User manual

socomec 400A User manual

socomec

socomec 400A User manual

socomec ATyS t M User manual

socomec

socomec ATyS t M User manual

socomec ATyS d Guide

socomec

socomec ATyS d Guide

socomec SIRCO 100A User manual

socomec

socomec SIRCO 100A User manual

socomec ATyS t User manual

socomec

socomec ATyS t User manual

socomec ATyS p User manual

socomec

socomec ATyS p User manual

socomec INOSYS LBS Series User manual

socomec

socomec INOSYS LBS Series User manual

socomec SIRCO MOT AT User manual

socomec

socomec SIRCO MOT AT User manual

socomec 27003040 User manual

socomec

socomec 27003040 User manual

socomec Sirco MV 100 User manual

socomec

socomec Sirco MV 100 User manual

socomec SIRCOVER PV 200A User manual

socomec

socomec SIRCOVER PV 200A User manual

socomec ATyS g M User manual

socomec

socomec ATyS g M User manual

socomec Sirco MV 100 User manual

socomec

socomec Sirco MV 100 User manual

socomec COMO CS 25A User manual

socomec

socomec COMO CS 25A User manual

socomec ATyS t User manual

socomec

socomec ATyS t User manual

socomec ATyS Series User manual

socomec

socomec ATyS Series User manual

socomec ATyS 100A User manual

socomec

socomec ATyS 100A User manual

Popular Switch manuals by other brands

D-Link DGS-3312SR product manual

D-Link

D-Link DGS-3312SR product manual

Hawking CS112U user manual

Hawking

Hawking CS112U user manual

GEYA G2R-63 manual

GEYA

GEYA G2R-63 manual

LEGRAND Adorne installation instructions

LEGRAND

LEGRAND Adorne installation instructions

3Com 3CRBSG2093 - Baseline Plus Switch 2920 datasheet

3Com

3Com 3CRBSG2093 - Baseline Plus Switch 2920 datasheet

Generac Power Systems GTS "W" owner's manual

Generac Power Systems

Generac Power Systems GTS "W" owner's manual

Enterasys Matrix 7G4270-09 Configuration guide

Enterasys

Enterasys Matrix 7G4270-09 Configuration guide

Panasonic AJ9 (J9) installation instructions

Panasonic

Panasonic AJ9 (J9) installation instructions

Brocade Communications Systems VDX 8770-4 quick start guide

Brocade Communications Systems

Brocade Communications Systems VDX 8770-4 quick start guide

Perreaux TS2 datasheet

Perreaux

Perreaux TS2 datasheet

Matrix Switch Corporation MSC-2HD1632L product manual

Matrix Switch Corporation

Matrix Switch Corporation MSC-2HD1632L product manual

Renkforce RF-3984134 operating instructions

Renkforce

Renkforce RF-3984134 operating instructions

Hamplus AS-603AL Operation manual

Hamplus

Hamplus AS-603AL Operation manual

Renesas IDT 89HPES8T5 user manual

Renesas

Renesas IDT 89HPES8T5 user manual

Siemens SIMATIC NET SCALANCE XC-200 operating instructions

Siemens

Siemens SIMATIC NET SCALANCE XC-200 operating instructions

Aotec ZW096 user manual

Aotec

Aotec ZW096 user manual

Cisco 6509 - Catalyst Chassis Switch installation guide

Cisco

Cisco 6509 - Catalyst Chassis Switch installation guide

Terra SRM564 manual

Terra

Terra SRM564 manual

manuals.online logo
manuals.online logoBrands
  • About & Mission
  • Contact us
  • Privacy Policy
  • Terms and Conditions

Copyright 2025 Manuals.Online. All Rights Reserved.