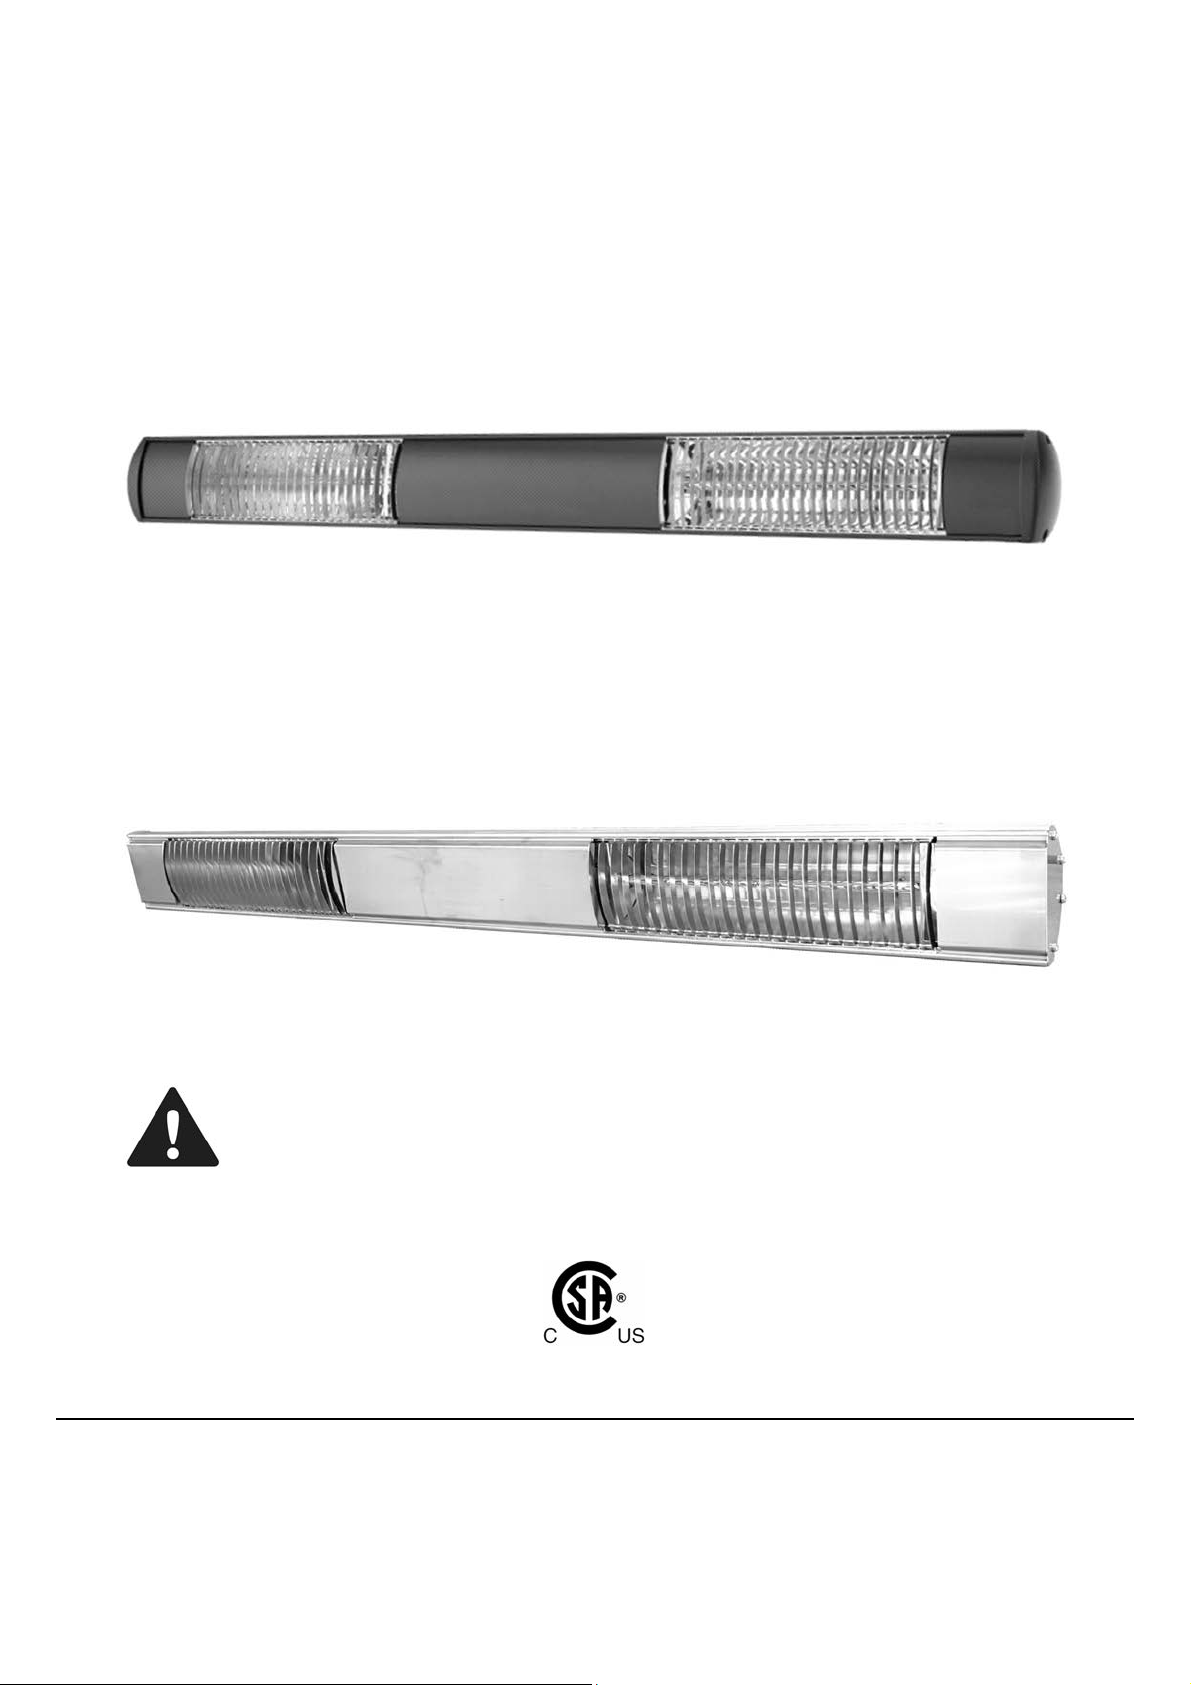
Solaira Cosy XL Double User manual


This manual suits for next models
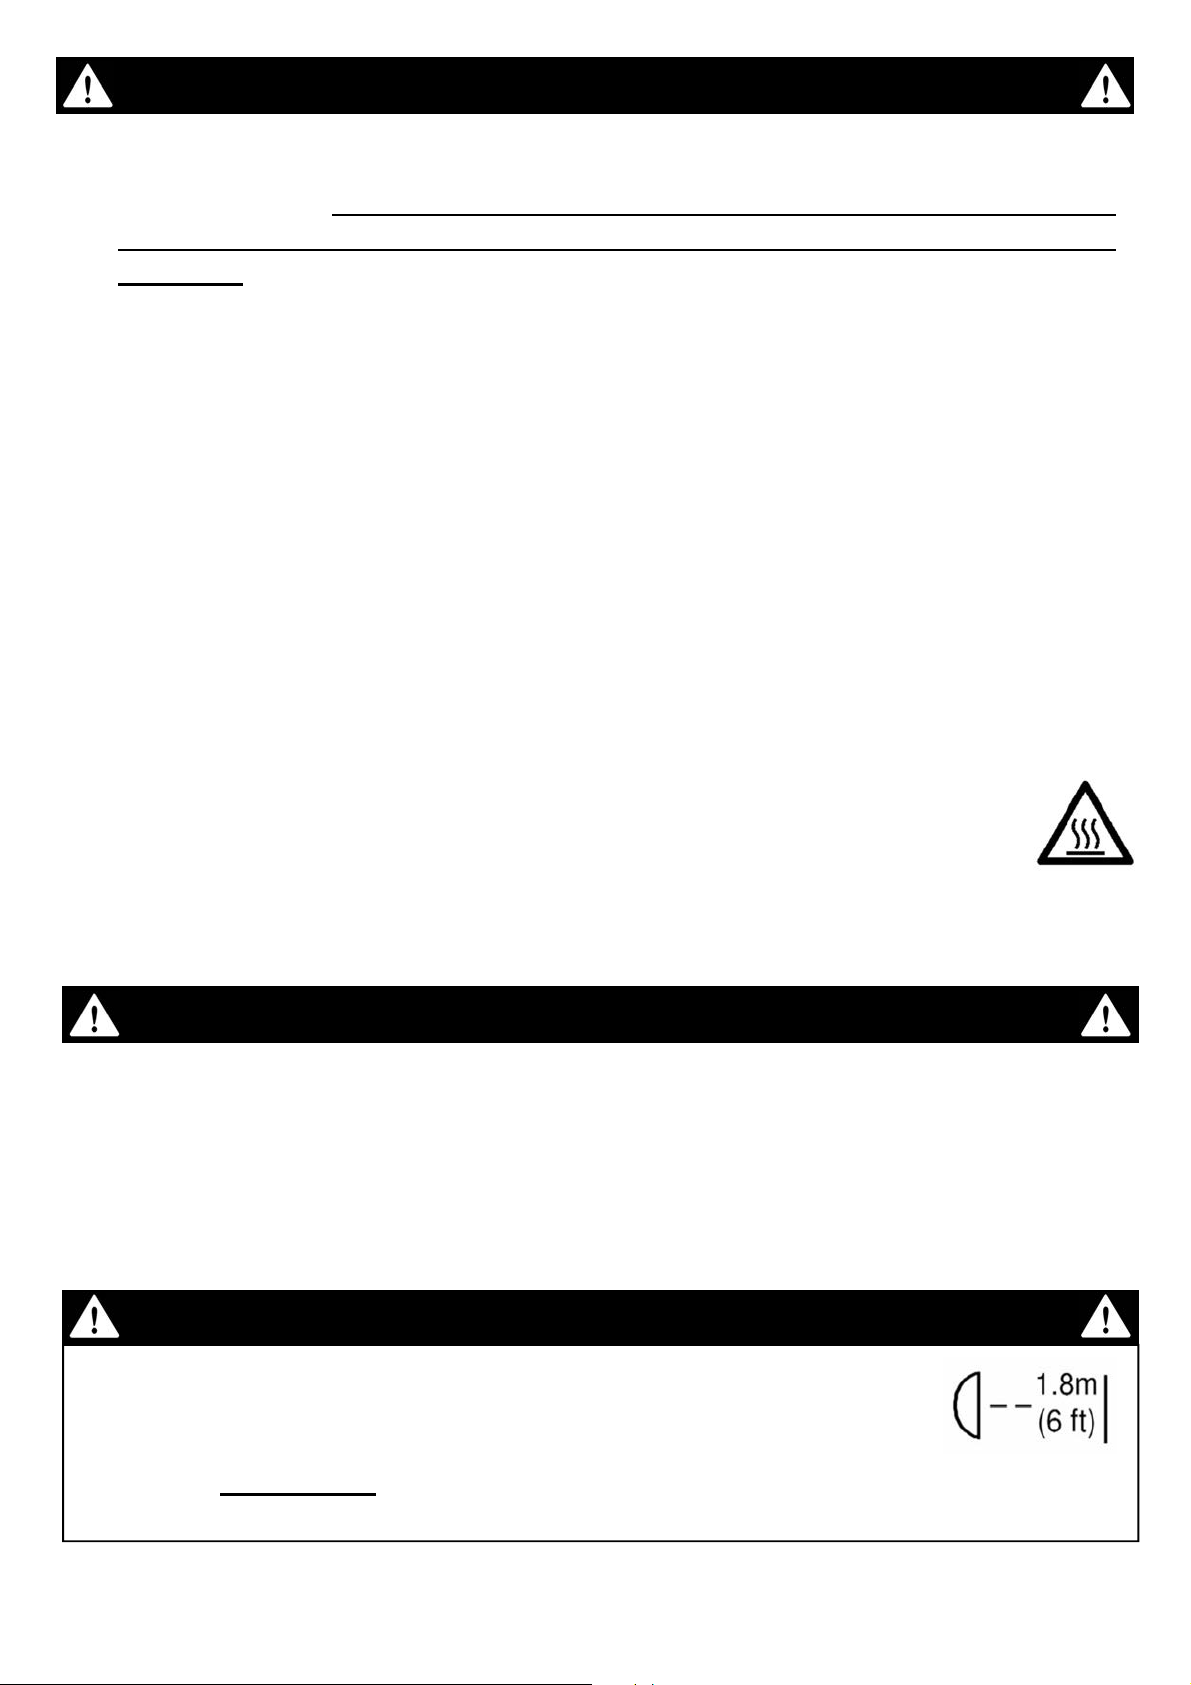
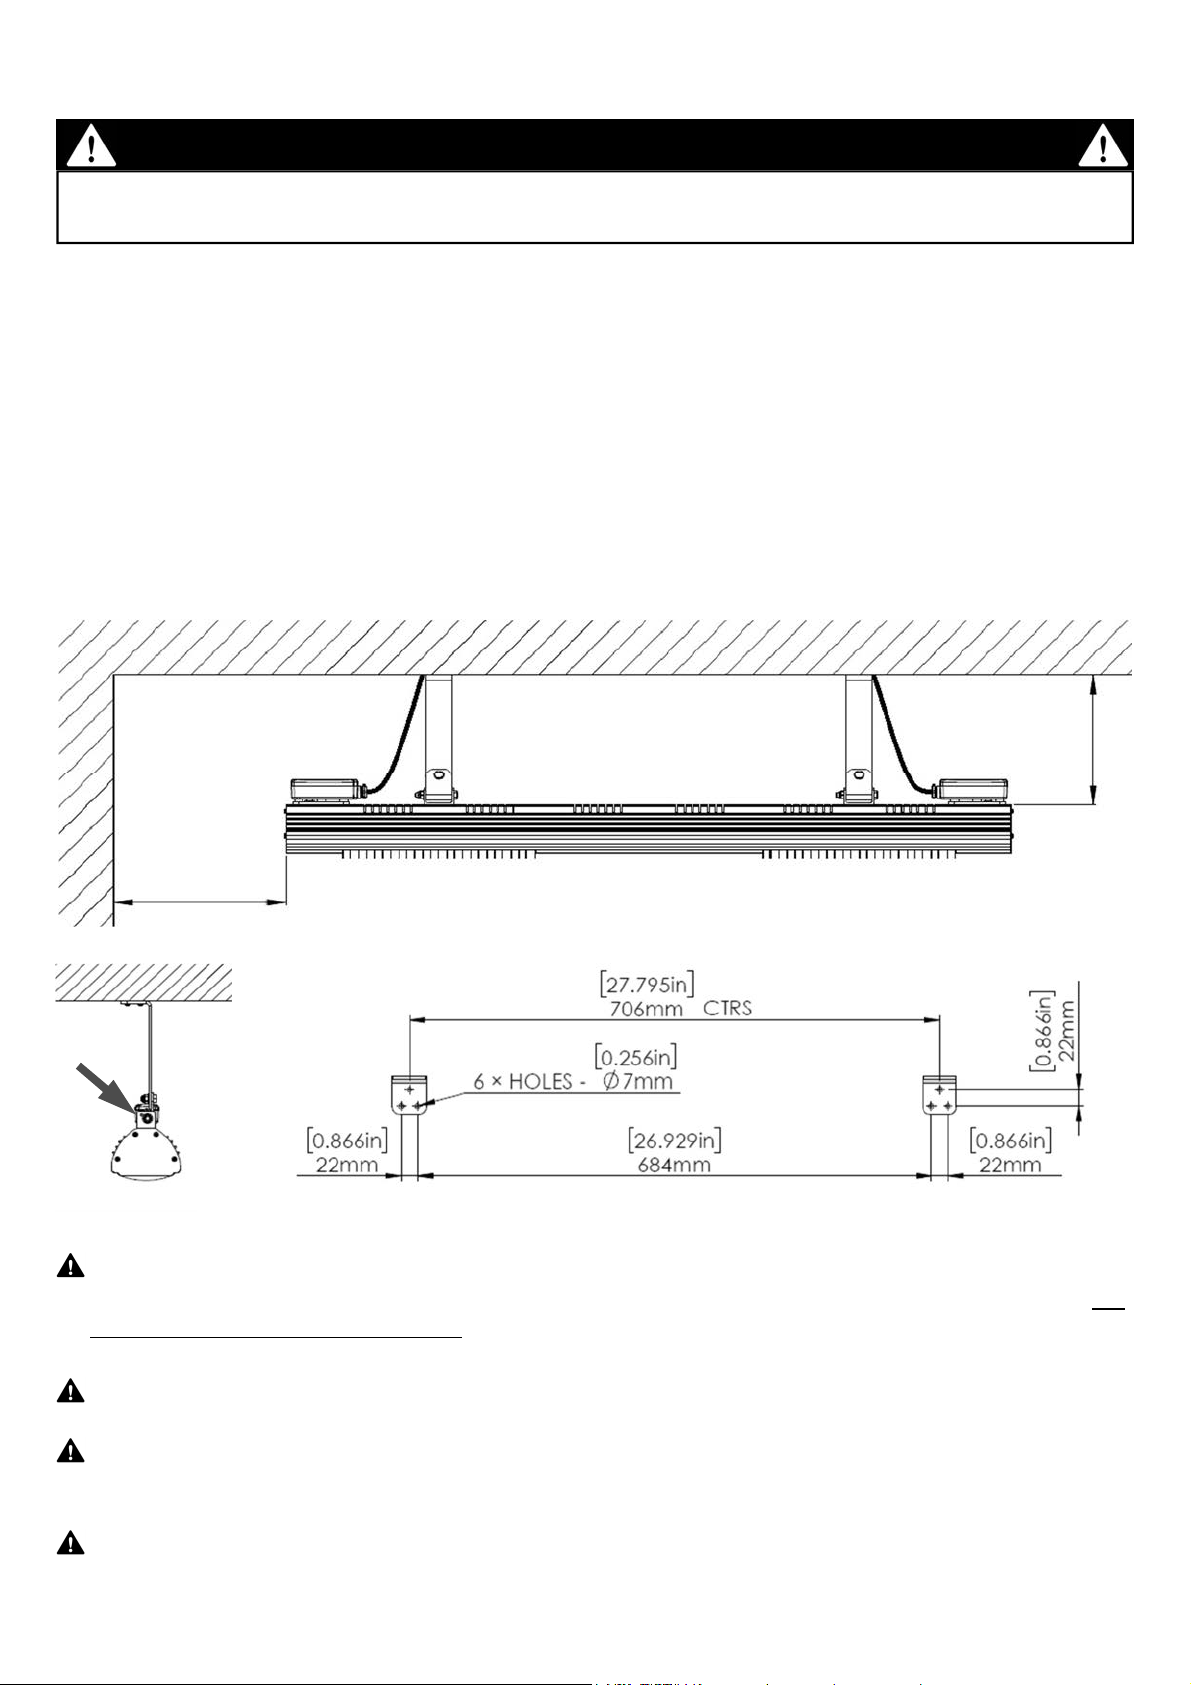
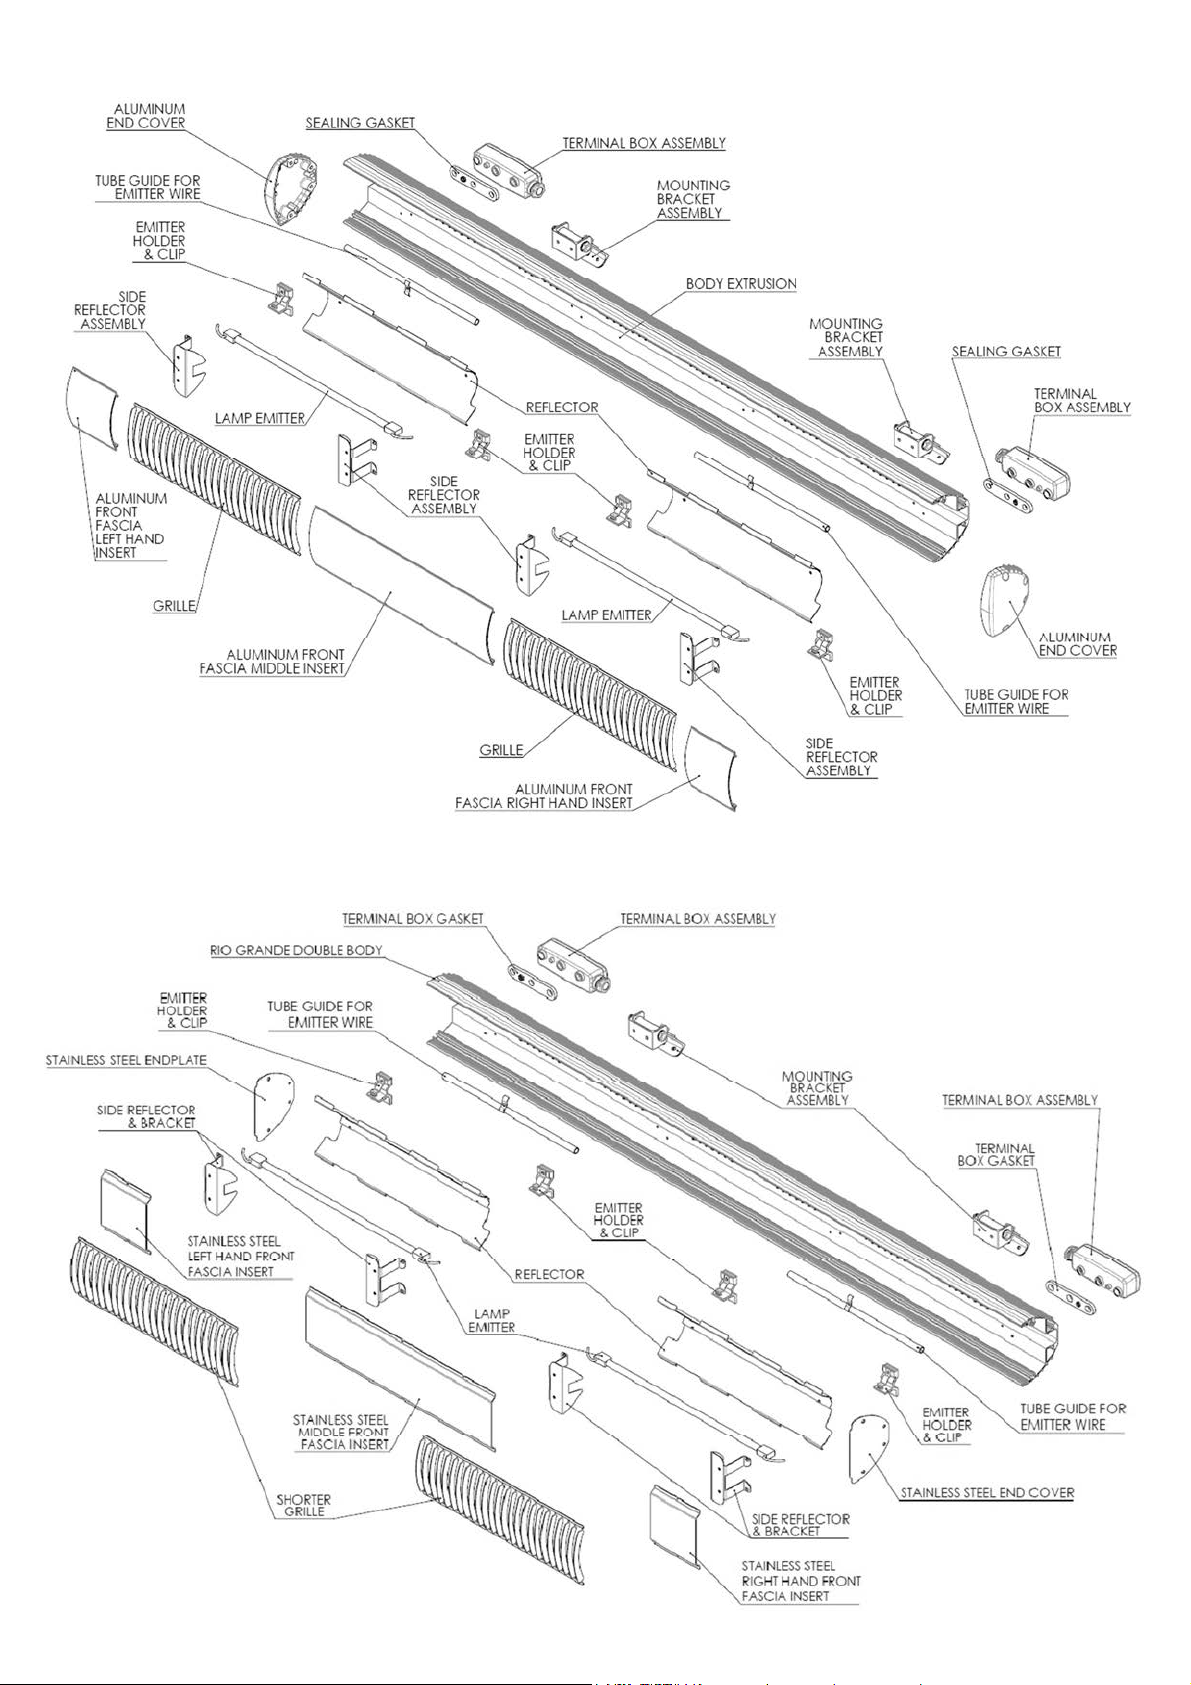
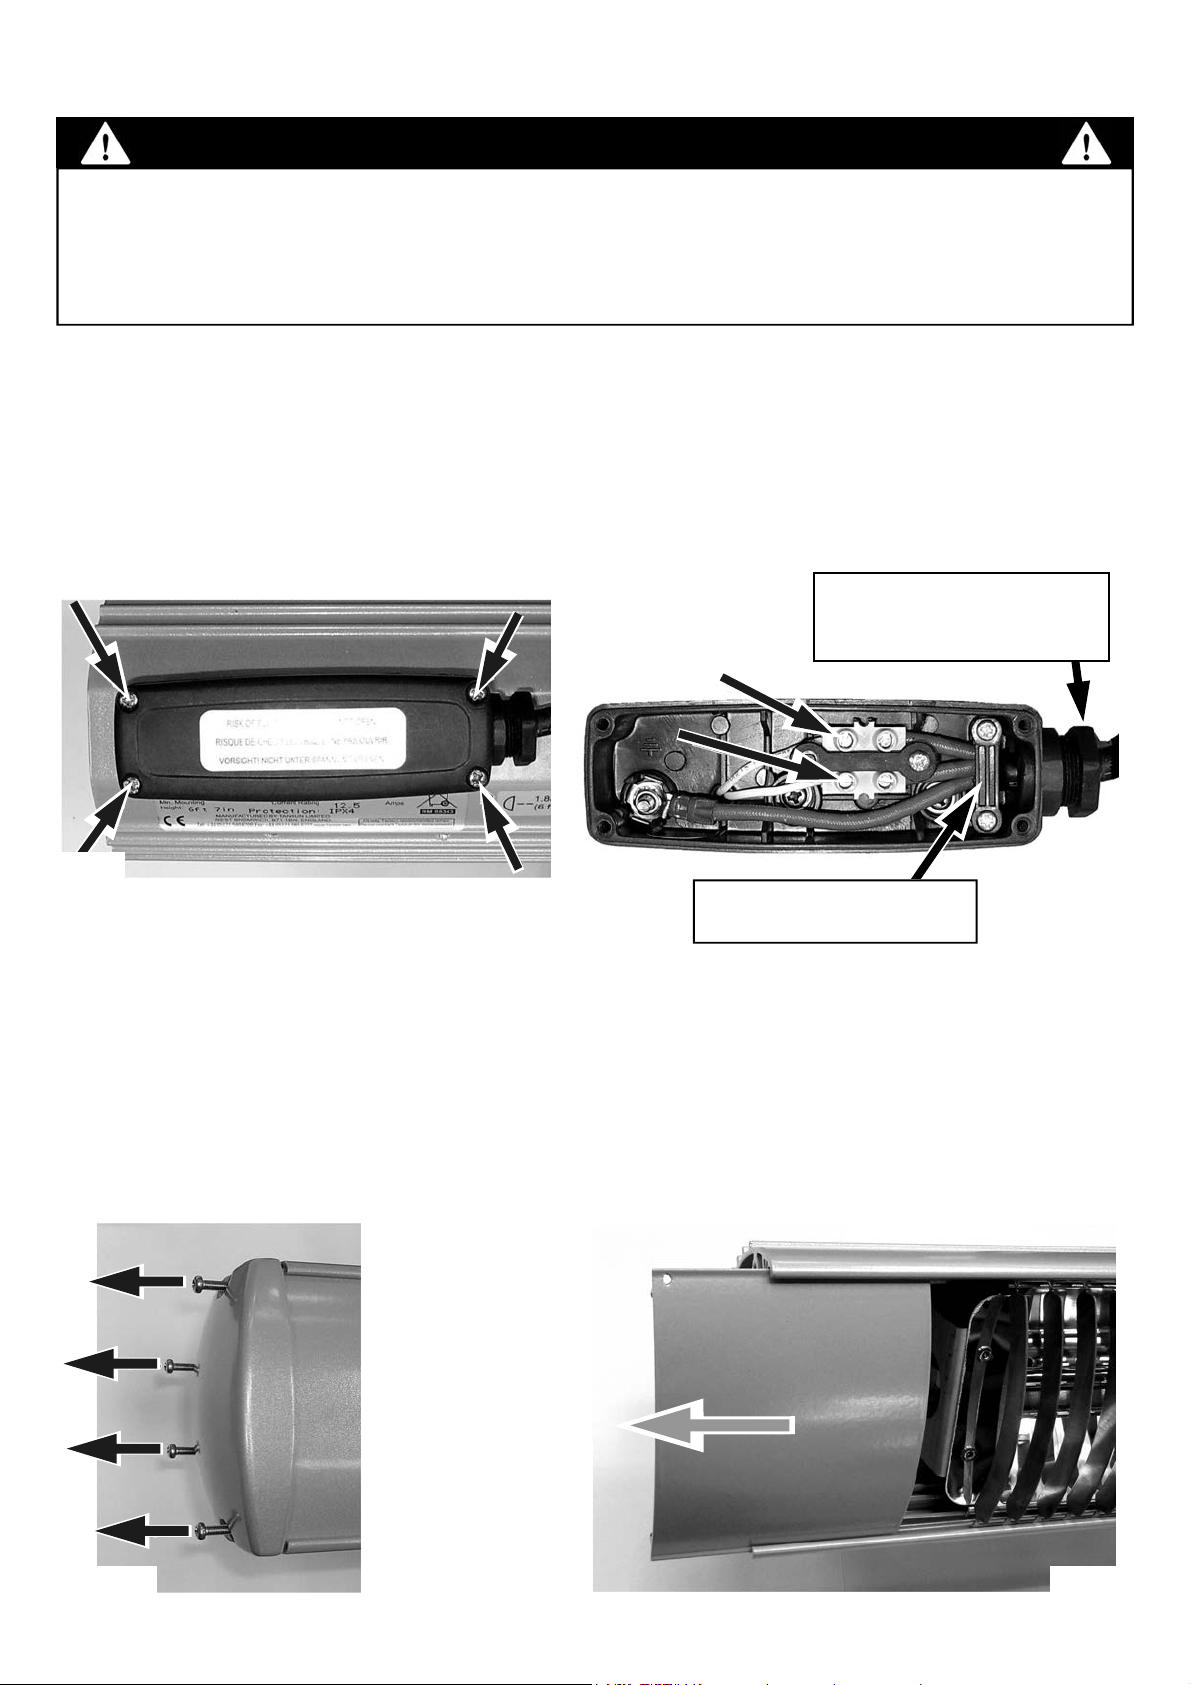
4
Other Solaira Heater manuals

Solaira
Solaira SCOMH01500 Use and care manual

Solaira
Solaira Alpha H2SALPHAH2-20240 User manual

Solaira
Solaira Cosy XL User manual

Solaira
Solaira SALPHAH3-30240 User manual

Solaira
Solaira Cosy SCOSYAW15120 User manual

Solaira
Solaira Malibu MAL 45240 User manual

Solaira
Solaira ICR Series User manual

Solaira
Solaira SCOSYXLAW15120 User manual

Solaira
Solaira Alpha H3 User manual

Solaira
Solaira SALPHA15120 User manual


Popular Heater manuals by other brands


AKO
AKO BY 801 S Installation and operating instructions

BN Thermic
BN Thermic HN3-15 Instructions for use

Honeywell
Honeywell HZ-8000 - Whole Room Energy Smart Heater instructions

Dimplex
Dimplex EUL-B Series installation instructions

Toyotomi
Toyotomi DR-37 Operation and maintenance instructions

Spartan
Spartan JOH-2000R instruction manual