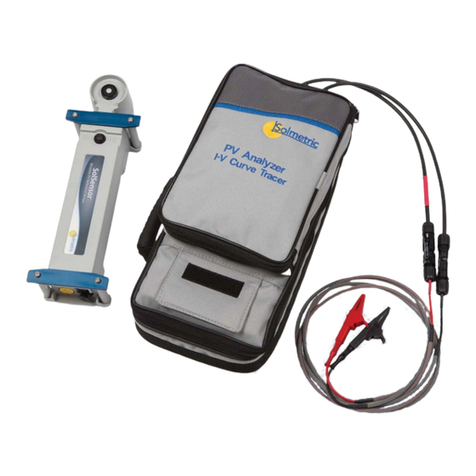
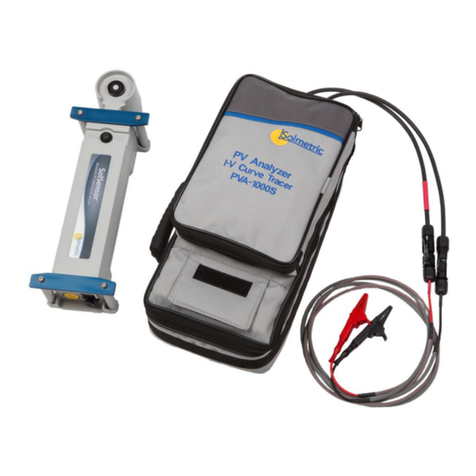
Solmetric PVA-1000S User manual

Solmetric PVA-1000S
PV Analyzer and SolSensor™
User’s Guide

ii
© Copyright Solmetric Corporation, 2010
All Rights Reserved. Reproduction, adaptation, or
translation without prior written permission is prohibited,
except as allowed under copyright laws.
Part No. 600-90001
Version 3.0
September 2013
Printed in USA
Solmetric Corporation
www.solmetric.com
Tel: (877) 263-5026
Fax: (707) 823-4620
End User Software License and Hardware
Agreement
CAREFULLY READ THE FOLLOWING AGREEMENT.
BY OPENING THE PACKAGE OR CLICKING ON "I
AGREE", YOU ARE CONSENTING TO BE BOUND BY
AND ARE BECOMING A PARTY TO THIS
AGREEMENT. IF YOU DO NOT AGREE TO ALL OF
THE TERMS OF THIS AGREEMENT, CLICK "I DO
NOT AGREE", DELETE ANY DOWNLOADED
INSTALLATION FILES, AND, IF APPLICABLE,
RETURN THIS PRODUCT TO THE PLACE OF
PURCHASE FOR A FULL REFUND.
Software License Grant
The package or downloaded installation file contains:
1. PV analyzer TM PC software (“PC Software”),
2. PV analyzer I-V Unit software ("Embedded
Software"), and
3. Related explanatory written materials
("Documentation").
"PC Software" and “Embedded Software” includes any
upgrades, modified versions, updates, additions, and copies
of the software. "You" means the person or company who
is being licensed to use the Software or Documentation.
"We", "us", and “Solmetric” mean Solmetric ® Corporation.
We hereby grant you a nonexclusive license to use one
copy of the PC Software on any single computer, provided
the PC Software is in use on only one computer at any
time. The PC Software is "in use" on a computer when it is
loaded into temporary memory (RAM) or installed into the
permanent memory of a computer—for example, a hard
disk, CD-ROM or other storage device. If the PC Software
is permanently installed on the hard disk or other storage
device of a computer (other than a network server) and one
person uses that computer more than 80% of the time, then
that person may also use the PC Software on a portable or
home computer.
We hereby grant you a nonexclusive license to use one
copy of the Embedded Software when it is running within
the relevant Solmetric hardware.
Software Title
Solmetric remains the owner of all right, title and interest in
the PC Software, Embedded Software, and Documentation.
Archival or Backup Copies of PC Software
You may either:
make one copy of the PC Software solely for
backup or archival purposes, or
transfer the PC Software to a single hard disk,
provided you keep the original solely for backup
or archival purposes.
Things You May Not Do With the Software or
Documentation
The PC Software, Embedded Software, and Documentation
are protected by United States copyright laws and
international treaties. You must treat the PC Software,
Embedded Software, and Documentation like any other
copyrighted material--for example a book. You may not:
copy the Documentation,
copy the Embedded Software
copy the PC Software except to make archival or
backup copies as provided above,
modify or adapt the PC Software or Embedded
Software or merge it into another program,
reverse engineer, disassemble, decompile or
make any attempt to discover the source code of
the PC Software or Embedded Software,
place the PC Software or Embedded Software
onto a server so that it is accessible via a public
network such as the Internet, or
sublicense, rent, lease, or lend any portion of the
PC Software, Embedded Software, or
Documentation.

iii
Transfers of PC Software or Embedded Software
You may transfer all your rights to use the PC Software and
Documentation to another person or legal entity provided
you transfer this Agreement, the PC Software, and
Documentation, including all copies, updates and prior
versions to such person or entity and that you retain no
copies, including copies stored on computer.
You may transfer all your rights to use the Embedded
Software and Documentation to another person or legal
entity provided you transfer this Agreement, the hardware
associated with the Embedded Software, and the Embedded
Software and Documentation, including all copies, updates
and prior versions to such person or entity and that you
retain no copies, including copies stored on computer.
Limited Hardware and Software Warranty
This Solmetric PC Software and Embedded Software and
the Solmetric PV analyzer hardware (“Hardware”) are
warranted against defects in materials and workmanship for
a period of one year. During the warranty period, Solmetric
will, at its option, either repair or replace products which
prove to be defective. The warranty period begins on the
date of shipment.
For warranty service or repair, this product must be
returned to Solmetric. For products returned to Solmetric
for warranty service, the Buyer shall pay for shipping
charges to send the product to Solmetric, and Solmetric
shall pay for shipping charges to return the product to the
Buyer. However, the Buyer shall pay all shipping charges,
duties, and taxes for products returned to Solmetric from
another country.
The foregoing warranty shall not apply to defects resulting
from improper or inadequate maintenance by the Buyer,
unauthorized modification or misuse, or operation outside
of the environmental specifications for the product.
Unauthorized modification includes disassembly of the
Hardware or removal of any part of the Hardware
(including opening the PV analyzer I-V Unit). The design,
construction, and measurement of any system or building
by the Buyer is the sole responsibility of the Buyer.
Solmetric does not warrant the Buyer’s system, products, or
malfunction of the Buyer’s system or products. In addition
Solmetric does not warrant any damage that occurs as a
result of the Buyer’s system, product, or the Buyer’s use of
Solmetric products.
To the extent permitted by applicable law, THE
FOREGOING LIMITED WARRANTY IS IN LIEU OF
ALL OTHER WARRANTIES OR CONDITIONS,
EXPRESS OR IMPLIED, AND WE DISCLAIM ANY
AND ALL IMPLIED WARRANTIES OR CONDITIONS,
INCLUDING ANY IMPLIED WARRANTY OF TITLE,
NONINFRINGEMENT, MERCHANTABILITY OR
FITNESS FOR A PARTICULAR PURPOSE, regardless of
whether we know or had reason to know of your particular
needs. No employee, agent, dealer, or distributor of ours is
authorized to modify this limited warranty, nor to make any
additional warranties.
SOME STATES DO NOT ALLOW THE EXCLUSION
OF IMPLIED WARRANTIES, SO THE ABOVE
EXCLUSION MAY NOT APPLY TO YOU. THIS
WARRANTY GIVES YOU SPECIFIC LEGAL RIGHTS,
AND YOU MAY ALSO HAVE OTHER RIGHTS
WHICH VARY FROM STATE TO STATE.
Limited Remedy
Our entire liability and your exclusive remedy shall be the
replacement or repair of any Solmetric Hardware or
Solmetric PC Software or Embedded Software not meeting
our Limited Hardware and Software Warranty which is
returned to us or to an authorized Dealer or Distributor with
a copy of your receipt.
IN NO EVENT WILL WE BE LIABLE TO YOU FOR
ANY DAMAGES, INCLUDING ANY LOST PROFITS,
LOST SAVINGS, INJURY, DEATH, OR OTHER
INCIDENTAL OR CONSEQUENTIAL DAMAGES
ARISING FROM THE USE OF OR THE INABILITY TO
USE THE PC SOFTWARE, EMBEDDED SOFTWARE,
HARDWARE, OR DOCUMENTATION (EVEN IF
SOLMETRIC OR AN AUTHORIZED DEALER OR
DISTRIBUTOR HAS BEEN ADVISED OF THE
POSSIBILITY OF THESE DAMAGES), OR FOR ANY
CLAIM BY ANY OTHER PARTY.
SOME STATES DO NOT ALLOW THE LIMITATION
OR EXCLUSION OF LIABILITY FOR INCIDENTAL
OR CONSEQUENTIAL DAMAGES, SO THE ABOVE
LIMITATION MAY NOT APPLY TO YOU.
Term and Termination
This agreement takes effect upon your use of the PC
Software, Embedded Software, or Hardware and remains
effective until terminated. You may terminate it at any time
by destroying all copies of the PC Software, Embedded
Software, and Documentation in your possession and
returning the Hardware to Solmetric or to an authorized
distributor. It will also automatically terminate if you fail to
comply with any term or condition of this license
agreement. You agree on termination of this license to
either return to us or destroy all copies of the PC Software,
Embedded Software, and Documentation in your
possession and to return the Hardware to us or to an
authorized distributor.

iv
Confidentiality
The PC Software and Embedded Software contain trade
secrets and proprietary know-how that belong to us and it is
being made available to you in strict confidence. ANY USE
OR DISCLOSURE OF THE PC SOFTWARE,
EMBEDDED SOFTWARE, OR OF THEIR
ALGORITHMS, PROTOCOLS OR INTERFACES,
OTHER THAN IN STRICT ACCORDANCE WITH THIS
LICENSE AGREEMENT, MAY BE ACTIONABLE AS
A VIOLATION OF OUR TRADE SECRET RIGHTS.
Trademarks
SOLMETRIC, PV ANALYZER, PV DESIGNER,
SOLMETRIC IPV, and SOLMETRIC ISV are trademarks
owned by Solmetric Corporation. SOLMETRIC and
SUNEYE are registered trademarks in the U.S. Patent and
Trademark Office.
General Provisions
1. This written agreement is the exclusive agreement
between you and us concerning the PC Software,
Embedded Software, Hardware, and Documentation
and supersedes any and all prior oral or written
agreements, negotiations, or other dealings between us
concerning the PC Software, Embedded Software,
Hardware, or Documentation.
2. This license agreement may be modified only in
writing and written documentation must be signed by
Buyer and Solmetric.
3. In the event of litigation between Buyer and Solmetric
concerning the PC Software, Embedded Software,
Hardware, or Documentation, the prevailing party in
the litigation will be entitled to recover attorney fees
and expenses from the other party.
4. This license agreement is governed by the laws of the
State of California.
5. Buyer agrees that the PC Software, Embedded
Software, or Hardware will not be shipped, transferred
or exported into any country or used in any manner
prohibited by the United States Export Administration
Act or any other export laws, restrictions, or
regulations.

v
Contents
1GETTING STARTED ........................................................................................................................................ 1-1
OVERVIEW ............................................................................................................................................................. 1-1
COMPUTER MINIMUM SYSTEM REQUIREMENTS .................................................................................................... 1-2
EQUIPMENT............................................................................................................................................................ 1-2
PVA-1000S Equipment .................................................................................................................................... 1-2
SolSensor Equipment........................................................................................................................................ 1-3
SPECIFICATIONS ..................................................................................................................................................... 1-4
PVA-1000S Specifications ............................................................................................................................... 1-4
SolSensor Specifications................................................................................................................................... 1-5
SAFETY AND REGULATORY.................................................................................................................................... 1-7
PVA-1000S Safety and Regulatory .................................................................................................................. 1-7
Warnings, Cautions, and Notes .................................................................................................................... 1-7
Declaration of Conformity............................................................................................................................ 1-7
Cleaning........................................................................................................................................................ 1-7
Instrument Markings .................................................................................................................................... 1-8
SolSensor Safety and Regulatory...................................................................................................................... 1-8
Warnings, Cautions, and Notes .................................................................................................................... 1-8
Declaration of Conformity ........................................................................................................................... 1-8
Cleaning........................................................................................................................................................ 1-8
Instrument Markings .................................................................................................................................... 1-9
PRECAUTIONS ...................................................................................................................................................... 1-10
PVA-1000S Precautions ................................................................................................................................. 1-10
Using PV Connector Saver Jumpers........................................................................................................... 1-10
PV/Electrical Safety Precautions ................................................................................................................ 1-10
Battery Precautions..................................................................................................................................... 1-11
Measuring High-Efficiency PV Modules ................................................................................................... 1-12
SolSensor Precautions..................................................................................................................................... 1-12
Covering the Irradiance Sensor .................................................................................................................. 1-12
Cleaning the Irradiance Sensor................................................................................................................... 1-12
Battery Precautions..................................................................................................................................... 1-12
INSTALLATION PROCEDURE ................................................................................................................................. 1-13
PVA-1000S Installation Procedure................................................................................................................. 1-13
Hardware Installation ................................................................................................................................. 1-13
Software Installation................................................................................................................................... 1-13
Special XP Operating System Instructions................................................................................................. 1-17
Updating the PV Equipment Databases...................................................................................................... 1-17
SolSensor Installation Procedure .................................................................................................................... 1-17
Drivers for SolSensor ................................................................................................................................. 1-17
CHARGING THE BATTERY .................................................................................................................................... 1-18
Changing the Battery on the PVA-1000S ....................................................................................................... 1-18
Changing the SolSensor Battery ..................................................................................................................... 1-18
YOUR WIRELESS NETWORK................................................................................................................................. 1-19
2SETTING UP AND USING THE PVA-1000S AND SOLSENSOR ............................................................... 2-1
SYSTEM CONTROLS AND SETTINGS........................................................................................................................ 2-1
PVA-1000S Operational States......................................................................................................................... 2-1

vi
SETTING UP THE PVA-1000S ................................................................................................................................ 2-3
SETTING UP SOLSENSOR........................................................................................................................................ 2-3
MOUNTING SOLSENSOR TO A PV MODULE FRAME................................................................................................. 2-4
OPTIMIZING WIRELESS TRANSMISSION RANGE ....................................................................................................... 2-8
MOUNTING SOLSENSOR ON A TRIPOD .................................................................................................................... 2-9
CONNECTING TO THE SOLAR PV EQUIPMENT ...................................................................................................... 2-11
POWERING-UP THE I-V UNIT ............................................................................................................................... 2-13
I-V MEASUREMENTS............................................................................................................................................ 2-13
SWEEP DISABLED................................................................................................................................................. 2-14
OVER-TEMPERATURE PROTECTION ..................................................................................................................... 2-14
Thermal Shutdown.......................................................................................................................................... 2-14
Operating Under High-Temperature Conditions............................................................................................. 2-15
OVER-VOLTAGE PROTECTION ............................................................................................................................. 2-15
OVER-CURRENT PROTECTION.............................................................................................................................. 2-16
REVERSE POLARITY PROTECTION ........................................................................................................................ 2-16
3SOFTWARE OVERVIEW ................................................................................................................................ 3-1
USING PROJECTS.................................................................................................................................................... 3-1
USING THE SYSTEM TREE ...................................................................................................................................... 3-2
MAIN SCREEN OVERVIEW...................................................................................................................................... 3-2
MENU BAR............................................................................................................................................................. 3-3
File Menu.......................................................................................................................................................... 3-3
Browse Project ............................................................................................................................................. 3-3
Recent Projects ............................................................................................................................................. 3-3
Export Trace for Active Measurement ......................................................................................................... 3-3
Export Traces for Entire System .................................................................................................................. 3-3
Export Meg Test Data .................................................................................................................................. 3-3
New Project .................................................................................................................................................. 3-4
Selecting your PV Module ....................................................................................................................... 3-6
Creating the System Tree ......................................................................................................................... 3-8
Properties Menu .............................................................................................................................................. 3-12
Site Info… .................................................................................................................................................. 3-13
Array Navigator…...................................................................................................................................... 3-13
Utility Menu.................................................................................................................................................... 3-14
Help Menu ...................................................................................................................................................... 3-16
USING THE TAB SCREENS..................................................................................................................................... 3-17
Traces Tab....................................................................................................................................................... 3-17
Table Tab ........................................................................................................................................................ 3-21
History Tab ..................................................................................................................................................... 3-22
Meg Test Tab .................................................................................................................................................. 3-23
DESCRIPTION OF THE EXPORTED I-V DATA FILE ................................................................................................. 3-24
BASIS OF PV PERFORMANCE PREDICTIONS.......................................................................................................... 3-29
SolSensor Irradiance Calibration .................................................................................................................... 3-29
Irradiance Measurement.................................................................................................................................. 3-29
PVA Prediction of Electrical Output .............................................................................................................. 3-30
Translation of Measured Values to STC......................................................................................................... 3-30
Measurement of Isc .......................................................................................................................................... 3-30

vii
4MAKING MEASUREMENTS........................................................................................................................... 4-1
INTRODUCTION ...................................................................................................................................................... 4-1
CREATING A NEW PROJECT.................................................................................................................................... 4-1
Start the PVA-1000S Software ......................................................................................................................... 4-2
Select New Project............................................................................................................................................ 4-2
Enter the Site Information................................................................................................................................. 4-3
Select PV Module ............................................................................................................................................. 4-5
Create the System Tree ..................................................................................................................................... 4-6
Add a New Inverter........................................................................................................................................... 4-7
Add a New Combiner ....................................................................................................................................... 4-8
Add a New String ............................................................................................................................................. 4-8
Edit Wire Properties.......................................................................................................................................... 4-9
Create a Custom PV Model .............................................................................................................................. 4-9
CREATING A NEW PROJECT THAT IS SIMILAR TO AN EXISTING PROJECT ............................................................. 4-10
MAKING MEASUREMENTS ................................................................................................................................... 4-10
USING THE HISTORY TAB..................................................................................................................................... 4-12
SAVING A SCREEN IMAGE .................................................................................................................................... 4-12
EXPORTING MEASUREMENT DATA ...................................................................................................................... 4-12
5TROUBLESHOOTING PVA-1000S OPERATION ........................................................................................ 5-1
TROUBLESHOOTING USING STATUS MESSAGES ..................................................................................................... 5-1
TROUBLESHOOTING BY SYMPTOM ......................................................................................................................... 5-4
6MEASURING IRRADIANCE, TEMPERATURE, AND TILT ..................................................................... 6-1
INTRODUCTION ...................................................................................................................................................... 6-1
MEASURING IRRADIANCE WITH SOLSENSOR ......................................................................................................... 6-3
SolSensor irradiance sensor .............................................................................................................................. 6-3
Preliminary Irradiance ...................................................................................................................................... 6-3
SolSensor Precautions....................................................................................................................................... 6-3
Covering the Irradiance Sensor .................................................................................................................... 6-3
Cleaning the Irradiance Sensor..................................................................................................................... 6-3
Orienting and mounting the irradiance sensor .................................................................................................. 6-4
Albedo effects ................................................................................................................................................... 6-4
Diffuse light ...................................................................................................................................................... 6-4
DETERMINING IRRADIANCE FROM THE MEASURED I-V CURVE ............................................................................. 6-5
Entering Irradiance Manually ........................................................................................................................... 6-5
MEASURING PV MODULE BACKSIDE TEMPERATURE WITH A THERMOCOUPLE ..................................................... 6-6
Selecting a thermocouple wire gauge ............................................................................................................... 6-7
Selecting a thermocouple tip............................................................................................................................. 6-7
Selecting a tape for thermocouple attachment .................................................................................................. 6-7
Attaching the thermocouple to the module backside ........................................................................................ 6-8
Choosing a location to mount the thermocouple on the module or array.......................................................... 6-8
MEASURING PV MODULE TEMPERATURE WITH AN INFRARED THERMOMETER....................................................... 6-9
DETERMINING CELL TEMPERATURE FROM THE MEASURED I-V CURVE .............................................................. 6-10
USING SMARTTEMP TO MEASURE CELL TEMPERATURE...................................................................................... 6-11

viii
7INTERPRETING MEASURED I-V CURVES ................................................................................................ 7-1
INTRODUCTION ...................................................................................................................................................... 7-1
INPUTS TO THE PV MODEL..................................................................................................................................... 7-1
I-V CURVE TERMINOLOGY .................................................................................................................................... 7-2
Performance Factor........................................................................................................................................... 7-2
Fill Factor.......................................................................................................................................................... 7-2
THE SHAPE OF A NORMAL I-V CURVE ................................................................................................................... 7-3
INTERPRETING I-V CURVES ................................................................................................................................... 7-4
1. NOTCHES OR STEPS ............................................................................................................................................ 7-6
Array Is Partially Shaded, or non-uniform soiling or debris is present............................................................. 7-8
PV Cells Are Damaged ..................................................................................................................................... 7-8
Cell String Conductor Is Short Circuited .......................................................................................................... 7-8
2. LOW CURRENT ................................................................................................................................................... 7-9
Uniform soiling................................................................................................................................................. 7-9
Strip shade ........................................................................................................................................................ 7-9
Dirt dam ............................................................................................................................................................ 7-9
Module Degradation ....................................................................................................................................... 7-10
Incorrect PV Module Is Selected for the PV Model ....................................................................................... 7-10
Number of PV Strings in Parallel Is Not Entered Correctly in the Model ...................................................... 7-10
Irradiance Changed Between Irradiance and I-V Measurements.................................................................... 7-10
Irradiance Sensor Is Not Oriented in the Plane of Array ................................................................................ 7-10
Albedo Effects (reflection) Contribute Additional Irradiance ........................................................................ 7-10
Irradiance Is Too Low, or the Sun Is Too Close to the Horizon ..................................................................... 7-11
Manual Irradiance Sensor Is Not Accurate ..................................................................................................... 7-11
3. LOW VOLTAGE ................................................................................................................................................. 7-12
PV Cell Temperature Is Hotter than the Measured Temperature.................................................................... 7-12
One or More Cells or Modules Are Completely Shaded ................................................................................ 7-12
One or More Bypass Diodes Are Conducting or Shorted ............................................................................... 7-13
4. ROUNDER KNEE................................................................................................................................................ 7-14
5. STEEPER SLOPE IN HORIZONTAL LEG ................................................................................................................ 7-15
Shunt Paths Exist In PV Cells or Modules...................................................................................................... 7-15
Module Isc Mismatch....................................................................................................................................... 7-16
Tapered shade or dirt dam............................................................................................................................... 7-16
6. LESS STEEP SLOPE IN VERTICAL LEG................................................................................................................. 7-17
PV Wiring Has Excess Resistance or Is Insufficiently Sized ......................................................................... 7-17
Electrical Interconnections in the Array Are Resistive ................................................................................... 7-18
Series Resistance of PV Modules Has Increased ............................................................................................ 7-18
8TRANSLATION OF I-V DATA TO STANDARD TEST CONDITIONS..................................................... 8-1
PARAMETER DEFINITIONS ...................................................................................................................................... 8-1
DEFINITION OF THE TRANSLATION PROCESS........................................................................................................... 8-2
Figures
FIGURE 1. WELCOME SCREEN................................................................................................................................... 1-13
FIGURE 2. PREREQUISITES DIALOG ........................................................................................................................... 1-14
FIGURE 3. INSTALLATION DEFAULT LOCATION DIALOG ............................................................................................ 1-14

ix
FIGURE 4. INSERT WIRELESS USB ADAPTER DIALOG ................................................................................................ 1-15
FIGURE 5. INSERT WIRELESS USB ADAPTER............................................................................................................. 1-15
FIGURE 6. INSTALLATION COMPLETE DIALOG........................................................................................................... 1-15
FIGURE 7. LAUNCHING THE PVA-1000S SOFTWARE ................................................................................................ 1-16
FIGURE 8. SPLASH SCREEN ....................................................................................................................................... 1-16
FIGURE 9. PVA-1000S SOFTWARE USER INTERFACE ................................................................................................ 1-16
FIGURE 10. DIRECTORY STRUCTURE OF PVA-1000S SOFTWARE ............................................................................. 1-17
FIGURE 11. BATTERY CHARGER CONNECTOR ON THE PVA-1000S........................................................................... 1-18
FIGURE 12. CHARGER CONNECTED........................................................................................................................... 1-19
FIGURE 13. NETWORK ICON ..................................................................................................................................... 1-20
FIGURE 14. NETWORK DIAGRAMS ............................................................................................................................ 1-20
FIGURE 15. LED-ILLUMINATED BUTTON SWITCH ....................................................................................................... 2-1
FIGURE 16. SOLSENSOR MOUNTED ALONG THE UPPER FRAME EDGE OF A PV MODULE .............................................. 2-3
FIGURE 17. SOLSENSOR'S TOOL LANYARD SECURED TO A RACKING MEMBER. ........................................................... 2-4
FIGURE 18. SOLSENSOR CORRECTLY SEATED ALONG THE UPPER HORIZONTAL LEG OF THE MODULE FRAME. ............ 2-5
FIGURE 19. TIP OF FRAME CLAMP PROPERLY SEATED ON INSIDE SURFACE OF MODULE FRAME .................................. 2-6
FIGURE 20. THERMOCOUPLE PLUGGED INTO THE TC1 CONNECTOR. .......................................................................... 2-6
FIGURE 21. LOCATING THE THERMOCOUPLE TIP ON A SINGLE FREE-STANDING MODULE............................................ 2-7
FIGURE 22. PUSHBUTTON WITH LED LIT.LED BLINKS UNTIL WIRELESS NETWORK IS ESTABLISHED,AFTER WHICH IT
REMAINS ON. ............................................................................................................................................ 2-8
FIGURE 23. TRIPOD MOUNTING SETUP ...................................................................................................................... 2-10
FIGURE 24. EXAMPLE OF PVA-1000S TEST LEADS CLIPPED TO THE BUSS BARS OF A PV COMBINER BOX ................ 2-12
FIGURE 25. POWERING-UP THE I-V UNIT.................................................................................................................. 2-13
FIGURE 26. PVA-1000S MAIN SCREEN ....................................................................................................................... 3-2
FIGURE 27. FILE MENU............................................................................................................................................... 3-3
FIGURE 28. THE SITE INFO SCREEN OF THE NEW PROJECT WIZARD ........................................................................... 3-4
FIGURE 29. ROOF MEASUREMENT TOOL .................................................................................................................... 3-4
FIGURE 30. ROOF MEASUREMENT TOOL IMAGE OF PV SITE ...................................................................................... 3-5
FIGURE 31. FINDING THE AZIMUTH VALUE USING THE ROOF MEASUREMENT TOOL................................................. 3-5
FIGURE 32. THE ARRAY NAVIGATOR SCREEN OF THE NEW PROJECT WIZARD........................................................... 3-6
FIGURE 33. CHANGE MODULE SCREEN....................................................................................................................... 3-6
FIGURE 34. ARRAY NAVIGATOR SCREEN WITH EXAMPLE SYSTEM TREE................................................................... 3-8
FIGURE 35. PROPERTIES MENU................................................................................................................................. 3-12
FIGURE 36. SITE INFORMATION SCREEN................................................................................................................... 3-13
FIGURE 37. ARRAY NAVIGATOR SCREEN ................................................................................................................. 3-13
FIGURE 38. UTILITY MENU....................................................................................................................................... 3-14
FIGURE 39. HELP MENU ........................................................................................................................................... 3-16
FIGURE 40. TRACES TAB........................................................................................................................................... 3-17
FIGURE 41. TABLE TAB............................................................................................................................................. 3-21
FIGURE 42. HISTORY TAB ......................................................................................................................................... 3-23
FIGURE 43. MEG TEST TAB....................................................................................................................................... 3-23
FIGURE 44. HEADER INFORMATION SECTION OF THE EXPORTED CSV FILE ................................................................ 3-25
FIGURE 45. THE MEASUREMENT VS.MODEL SECTION OF THE EXPORTED CSV FILE.................................................. 3-26
FIGURE 46. THE SOLSENSOR MEASUREMENTS SECTION OF THE EXPORTED CSV FILE............................................... 3-26
FIGURE 47. MODEL DETAILS SECTION OF THE EXPORTED CSV FILE .......................................................................... 3-27
FIGURE 48. THE VOLTAGE,CURRENT,AND POWER DATA FROM THE I-V MEASUREMENT ......................................... 3-28
FIGURE 49. TRACES SCREEN ....................................................................................................................................... 4-2
FIGURE 50. SITE INFORMATION SCREEN OF THE NEW PROJECT WIZARD.................................................................... 4-3
FIGURE 51. ROOF MEASUREMENT TOOL SCREEN ....................................................................................................... 4-3

x
FIGURE 52. MEASURING YOUR ROOF ORIENTATION.................................................................................................... 4-4
FIGURE 53. SECOND SCREEN OF THE NEW PROJECT WIZARD,UNPOPULATED .............................................................. 4-5
FIGURE 54. CHANGE MODULE SCREEN....................................................................................................................... 4-5
FIGURE 55. THE SECOND SCREEN OF THE NEW PROJECT WIZARD,PRIOR TO CREATING YOUR SYSTEM TREE ............. 4-6
FIGURE 56. AUTOFILL TREE SCREEN........................................................................................................................... 4-6
FIGURE 57. POPULATED ARRAY NAVIGATOR SCREEN................................................................................................ 4-7
FIGURE 58.ADD INVERTER SCREEN............................................................................................................................ 4-7
FIGURE 59. NEW COMBINER SCREEN .......................................................................................................................... 4-8
FIGURE 60. ADD STRING SCREEN................................................................................................................................ 4-9
FIGURE 61. DIRECTORY STRUCTURE OF PVA-1000S SOFTWARE ............................................................................. 4-10
FIGURE 62. STATUS INDICATOR.................................................................................................................................. 5-1
FIGURE 63. DEFINITION OF THE FILL FACTOR. ........................................................................................................... 7-3
FIGURE 64. ANORMAL I-V CURVE FOR THE PARALLEL COMBINATION OF TWO STRINGS OF EIGHT 175-WATT MODULES,
SHOWING CONFORMANCE WITH FIVE POINTS PREDICTED BY THE PV MODEL............................................ 7-4
FIGURE 65. DEVIATIONS IN THE SHAPE OF THE I-V CURVE FALL INTO ONE (OR A COMBINATION)OF THESE SIX
CATEGORIES ............................................................................................................................................. 7-5
FIGURE 66. THE EFFECT OF PARTIAL SHADING ON A STRING I-V CURVE..................................................................... 7-6
FIGURE 67. THE SHADING IMPACT OF PLACING A BUSINESS CARD ON A SINGLE CELL IN A STRING OF FIFTEEN 180-WATT
MODULES.................................................................................................................................................. 7-7
FIGURE 68. THE EFFECT OF INTENTIONALLY SHADING ENTIRE MODULES IN DIFFERENT COMBINATIONS,IN TWO
PARALLEL-CONNECTED STRINGS .............................................................................................................. 7-7
FIGURE 69. MEASUREMENT WITH LESS STEEP THAN PREDICTED SLOPE IN THE VERTICAL LEG OF THE I-V CURVE.... 7-12
FIGURE 70. I-V CURVE MEASUREMENT SHOWING ROUNDER KNEE THAN PREDICTED BY THE PV MODEL. ................ 7-14
FIGURE 71. AN I-V CURVE SHOWING STEEPER SLOPE IN THE HORIZONTAL LEG OF THE I-V CURVE.......................... 7-15
FIGURE 72. MEASUREMENT WITH LESS STEEP SLOPE IN THE VERTICAL LEG OF THE I-V CURVE. .............................. 7-17
Tables
TABLE 1. PVA-1000S ELECTRICAL SPECIFICATIONS .................................................................................................. 1-4
TABLE 2. SOLSENSOR IRRADIANCE SPECIFICATIONS .................................................................................................. 1-5
TABLE 3. DIRECT AND INDIRECT WIRELESS LINKS BETWEEN PC, PVA, AND SOLSENSOR ........................................ 1-21
TABLE 4. PVA-1000S STATES.................................................................................................................................... 2-2
TABLE 5. CHANGE MODULE SCREEN DESCRIPTION ................................................................................................... 3-7
TABLE 6. ARRAY NAVIGATOR SCREEN DESCRIPTION .................................................................................................. 3-9
TABLE 7. UTILITY MENU DESCRIPTION ..................................................................................................................... 3-14
TABLE 8. HELP MENU DESCRIPTION.......................................................................................................................... 3-16
TABLE 9. TRACES TAB DESCRIPTION ........................................................................................................................ 3-18
TABLE 10. TABLE TAB DESCRIPTION ........................................................................................................................ 3-22
TABLE 11. MEG TEST TAB DESCRIPTION................................................................................................................... 3-24
TABLE 12. DESCRIPTION OF THE HEADER INFORMATION SECTION OF THE EXPORTED CSV FILE ............................... 3-25
TABLE 13. DESCRIPTION OF THE SOLSENSOR MEASUREMENTS SECTION OF THE EXPORTED CSV FILE...................... 3-26
TABLE 14. DESCRIPTION OF THE MODEL DETAILS SECTION OF THE EXPORTED CSV FILE ......................................... 3-27
TABLE 15. SENSOR CHOICES ...................................................................................................................................... 6-2

1 Getting Started
1-1
1Getting Started
Overview
The PVA-1000S PV analyzer is a portable test instrument designed for commissioning
and troubleshooting PV arrays.It measures the current-voltage (I-V) curves of PV
modules and strings and immediately compares the results to the predictions of the built-
in PV models. Measurement results are easily saved for future reference and analysis.
The PVA-1000S is controlled wirelessly by your portable PC via a wireless USB adapter.
Wireless interfaces allow you to move around in the immediate work area, and eliminate
the trip hazards associated with hard-wired interconnections.
Irradiance and module backside temperature are measured by SolSensor, a wireless PV
reference sensor streams irradiance and temperature data to your PC. The I-V
Measurement and SolSensor share the same wireless USB adapter.
This User Guide covers both the PVA-1000 and SolSensor.
NOTE: Version 3.0 PVA software is not compatible with the Solmetric Wireless Sensor Kit, the
predecessor of SolSensor.
Version 3.0 PVA software cannot open projects that were created with version 2.x
software.
The current-voltage (I-V) curve of a PV module, string, or array provides a detailed
description of its energy conversion ability. The curve ranges from the short circuit
current (Isc) at zero volts, to the open circuit voltage (Voc) at zero current. At the ‘knee’ of
a normal I-V curve are the maximum power current and voltage (Imp, Vmp), the point at
which the array generates maximum electrical power. All of these important voltages and
currents are captured when the I-V curve is measured. The detailed shape of the curve
between these points gives additional information about the health of the PV module,
string, or array under test.
The value of a measured I-V curve is greatly increased when it can be compared with a
predicted I-V curve derived from an accurate PV model. Models take into account the
specifications of the PV modules, the number of modules in series and strings in parallel,
and the losses in system wiring. Other data used by the models include the irradiance in
the plane of the array, the module temperature, and array orientation.
The PC software that controls the PV analyzer contains a powerful Array Navigator tool
for saving and managing your measurement data. The New Project Wizard guides you in
setting up the PV model and customizing the Array Navigator to your project.

1 Getting Started
1-2
The PC software can also save insulation resistance data collected by an insulation
resistance tester. This data is stored and managed in the same database as the PVA-1000S
I-V measurement results.
Computer Minimum System Requirements
Test and Supported Operating System: Windows 8®,Windows 7®(32 and 64 bit
versions), Windows Vista®(32 bit versions only), Windows XP®SP3
Two USB Ports (or one USB port if wireless sensors will not be used). A
portable USB hub may be used if only one port is available.
Display Resolution: 1024 X 600 (minimum)
Processor Speed: >1 GHz, 1.5 GHz recommended. A Windows Experience
Index (Processor component) of 2.3 or greater is recommended. This value is
available on your PC's Control Panel under "Performance Information and
Tools".
RAM: > 1 GB minimum, 2 GB recommended
Available Disc Space: 100 Mbytes or more
Systems that do not meet these requirements may not operate correctly.
Equipment
PVA-1000S Equipment
I-V Measurement Unit
Soft Case
Wireless USB Adapter
PVA-1000S Software Application
AC Wall Plug Charger
MC-4 to MC-4 Connector-Saver Cable (2)

1 Getting Started
1-3
MC-4 to MC-3 Adapter Cable (1 set)
User’s Guide (on Installation DVD and accessible via the PVA software)
PVA/SolSensor Quick Start Guide
SolSensor Equipment
SolSensor unit
K-type thermocouple temperature sensors (2)
Wireless USB Adapter
AC Wall Plug Charger
Soft Case
Module Frame Clamp
Adhesive discs for thermocouple attachment (50)
SolSensor tool lanyard
Irradiance sensor cleaning supplies (micro-fiber cloth and distilled water spray)
Shoulder bag

1 Getting Started
1-4
Specifications
PVA-1000S Specifications
Safety Rating: Measuring Category CATIII 600V.
Table 1. PVA-1000S electrical specifications
Parameter
Specification
Voltage range
0 –1000 V
Current range 1
0 –20 A
Voltage accuracy (0 to 55C)
±0.5% ±0.25 V
Current accuracy (0 to 55C)
±0.5% ±0.04 A
Voltage resolution
25 mV
Current resolution
2 mA
Measurement duration
4s (typical) 2
I-V sweep duration 3
0.05 - 2s. Typically 0.2s for PV strings.
Minimum recommended repetition rate:
15s
Number of I-V trace points
100 or 500 (user controlled)
Wireless range
30 ft (direct to PC, open line of sight)
Operating temperature range
-10 to +65C
Storage temperature range
-20 to +65C
Operating humidity
<90% RH, non-condensing. Avoid exposing a
cold instrument to warm and humid air as
condensation will result. Store the instrument in
the same conditions in which it will be used.
Battery charging time
6 hr
Battery run time
12 hours of continuous operation; more than
1000 measurement sweeps
Protective features
Over-voltage, over-current, over-temperature,
reverse polarity

1 Getting Started
1-5
Parameter
Specification
PV connector
MC-4
Weight
12 lb (including soft case, test leads & charger)
Height
15 in (not including primary PV leads)
Width
8 in (not including handle)
Depth
5 in (not including gear pouch)
1 Conventional PV modules and strings may be measured in parallel, up to the current
limit specified here. High-efficiency modules should NOT be measured in parallel.
2 Time between pressing "Measure Now" and display of measurement result.
3 Automatically selected. Measurement sweep time depends upon the characteristics of
the test device (PV module, string, or array) electrical characteristics.
SolSensor Specifications
Table 2. SolSensor irradiance specifications
Parameter
Specification
Irradiance
Sensor type
Silicon photodiode with corrections for
temperature, spectral, and angular effects
Measurement range
0 –1,500 W/m2
Accuracy
Typically ±2% when used to predict the
performance of well characterized poly- and
monocrystalline PV modules in mid-day direct sun
conditions. Contact Solmetric Application
Engineering for more information on accurate
irradiance measurements.
Resolution
1 W/m2
Measurement interval
0.1 s (Measurement bandwidth approximately
10 Hz)
Temperature
Sensor type
Type K thermocouple. Two inputs.
Measurement range
0 –100C
Accuracy
Typically less than 2C including inherent

1 Getting Started
1-6
Parameter
Specification
thermocouple limitations
Resolution
0.1C
Measurement interval
1 s
Tilt
Sensor type
Electronic
Measurement range
0 –90 deg from horizontal
Accuracy (0 –45 deg tilt)
±1 deg (typical)
General
Measurement synchronization with I-V
curve
Typically less than 1s
Wireless range
100m line of sight
Auto-power off time
15 min (after…..)
Operating temperature range
-10 to 65C
Storage temperature range
-20 to 65C
Operating humidity
<90% RH, non-condensing. Avoid exposing a cold
instrument to warm and humid air as condensation
will result. Store the instrument in the same
conditions in which it will be used.
Battery charging time
6 hr
Battery run time
Greater than 16 hours typical use
Weight
2 lb (not including soft case and accessories)
Height
14 in
Width
4.5 in
Depth
3 in
Ingress protection
IP65

1 Getting Started
1-7
Safety and Regulatory
PVA-1000S Safety and Regulatory
Warnings, Cautions, and Notes
Before operating the PVA-1000S, familiarize yourself with the following notations.
WARNING A Warning calls attention to a procedure, which, if not performed correctly, could
result in personal injury or loss of life. Do not proceed beyond a warning note until
the indicated conditions are fully understood and met.
CAUTION A Caution calls attention to a procedure that, if not performed correctly, could result in
damage to, or destruction of, the instrument. Do not proceed beyond a caution note until
the indicated conditions are fully understood and met.
NOTE A Note provides important or special information.
Declaration of Conformity
A declaration of conformity is available upon request.
Cleaning
To remove dirt or dust from the external case and/or hard enclosure of the PVA-1000S,
use a dry or slightly dampened cloth only.
WARNING To prevent electrical shock, disconnect the PVA-1000S from the PV system and/or
battery charger before cleaning. Use only a dry cloth or cloth slightly dampened
with water to clean the external case and hard enclosure parts. Do not attempt to
clean internally.

1 Getting Started
1-8
Instrument Markings
The PVA-1000S has the following markings on the front and/or rear panel. Familiarize
yourself with these markings before operating the PVA-1000S.
The instruction manual symbol. The product is marked with this
symbol when it is necessary for you to refer to instructions in the
manual.
This symbol indicates separate collection for electrical and electronic
equipment, mandated under EU law as of August 13, 2005. All
electrical and electronic equipment are required to be separated from
normal waste for disposal. (Reference WEEE Directive, 2002/96/EC.)
The IEC HV symbol indicates the presence of hazardous voltages.
Danger exists of electrical shock that can cause severe injury or death.
SolSensor Safety and Regulatory
Warnings, Cautions, and Notes
Before operating SolSensor, familiarize yourself with the following notations.
WARNING A Warning calls attention to a procedure, which, if not performed correctly, could
result in personal injury or loss of life. Do not proceed beyond a warning note until
the indicated conditions are fully understood and met.
CAUTION A Caution calls attention to a procedure that, if not performed correctly, could result in
damage to, or destruction of, the instrument. Do not proceed beyond a caution note until
the indicated conditions are fully understood and met.
NOTE A Note provides important or special information.
Declaration of Conformity
A declaration of conformity is available upon request.
Cleaning
To remove dirt or dust from the SolSensor enclosure, use a dry or slightly dampened
cloth only.
The irradiance sensor (white disc) is cleaned using a more carefully controlled process, to
avoid damaging the irradiance sensor. See the SolSensor Precautions/Cleaning section for
details.

1 Getting Started
1-9
WARNING To prevent electrical shock, disconnect SolSensor from the battery charger before
cleaning. Use only a dry cloth or cloth slightly dampened with water to clean the
external enclosure parts. Do not attempt to clean internally.
WARNING The irradiance sensor (white disc) is a precision instrument and is easily damaged if
cleaned improperly. See the SolSensor Precautions/Cleaning section for the proper
cleaning process.
Instrument Markings
The SolSensor has the following markings on the front and/or rear panel. Familiarize
yourself with these markings before operating the SolSensor.
The instruction manual symbol. The product is marked with this
symbol when it is necessary for you to refer to instructions in the
manual.
This symbol indicates separate collection for electrical and electronic
equipment, mandated under EU law as of August 13, 2005. All
electrical and electronic equipment are required to be separated from
normal waste for disposal. (Reference WEEE Directive, 2002/96/EC.)
This symbol indicates compliance with Federal Communication
Commission (FCC) regulations for commercial electronic devices.

1 Getting Started
1-10
Precautions
PVA-1000S Precautions
Using PV Connector Saver Jumpers
PV connectors, regardless of manufacturer, are not designed for large numbers of
connection/disconnection cycles. For this reason, the PVA-1000S is shipped with
connector-saver jumpers attached to its own PV connectors. The connector-saver jumpers
are intended to take wear and tear, greatly extending the life of the PVA-1000S's own PV
connectors. Leave the connector-saver jumpers in place at all times. Make all of your PV
circuit connections/disconnections to the connector-saver jumpers, not to the PVA-
1000S's own connectors.
CAUTION When the lifetime of the connector-save jumpers has been reached (typically 100
connection/disconnection cycles), remove them, cut them in half to prevent further use,
and recycle them. Replace them with fresh connector-saver jumpers, which can be
ordered from Solmetric.
Using the connector-saver jumpers as described here will extend the life of the PVA-
1000S's own PV connectors by 100 times.
PV/Electrical Safety Precautions
Installed PV systems are not consistent in design or construction. Therefore the guidance
provided in this section is general in nature, and it is critical that you apply techniques
and precautions appropriate to the circumstances, following best PV/electrical safety
precautions.
WARNING The information below is important but not necessarily complete; the operator must
assess the potential dangers of each PV system, and take appropriate precautions.
FAILURE TO TAKE APPROPRIATE SAFETY PRECAUTIONS COULD LEAD
TO PERSONAL INJURY OR LOSS OF LIFE.
Never work alone.
Do not use the PVA-1000S in wet environments.
Do not operate or subject the PVA-1000S to temperatures beyond the published
operating and storage temperature specifications.
Wear electrical safety gloves.
Wear eye protection.
Wear fall protection where required.
Other manuals for PVA-1000S
1
Table of contents
Other Solmetric Measuring Instrument manuals

Solmetric
Solmetric PVA-1500V2 Reference guide

Solmetric
Solmetric PVA-1500T User manual

Solmetric
Solmetric PVA-600 User manual

Solmetric
Solmetric PVA-1500V2 User manual

Solmetric
Solmetric PVA-600 User manual

Solmetric
Solmetric PVA-1500S User manual

Solmetric
Solmetric PV ANALYZER PVA-1500 Series User manual

Solmetric
Solmetric SunEye 210 User manual