solva SC User manual
SOLVA MODEL SC
USER MANUAL
USER MANUAL
|
SC
MODEL

“
“
”
”
Dear SOLVA owner
Congratulations, you are taking part of the electric revolution and
from Solva Technologies we welcome you. The Twenty-First Century
will be remembered as the biggest electrification process of urban
mobility and this is only possible because of people like you,
convinced of changing to a clean and sustainable riding.
The purpose of this manual is to help you understand your Solva
and make the journey easier. I recommend you to read the
instructions to make the most of your motorbike in a safety way.
Yousif Al Abd
CEO & Co-Founder
Mohamed Al Abd
COO & Co-Founder

Introduction —————————
Safety driving ————————
Scooter identification ————
First start ———————————
Display ————————————
Battery Indicator ———————
Controllers —————————
Acceleration & Braking ————
Battery ———————————
Technical specifications ———
4
6
8
10
12
14
16
18
20
22

4
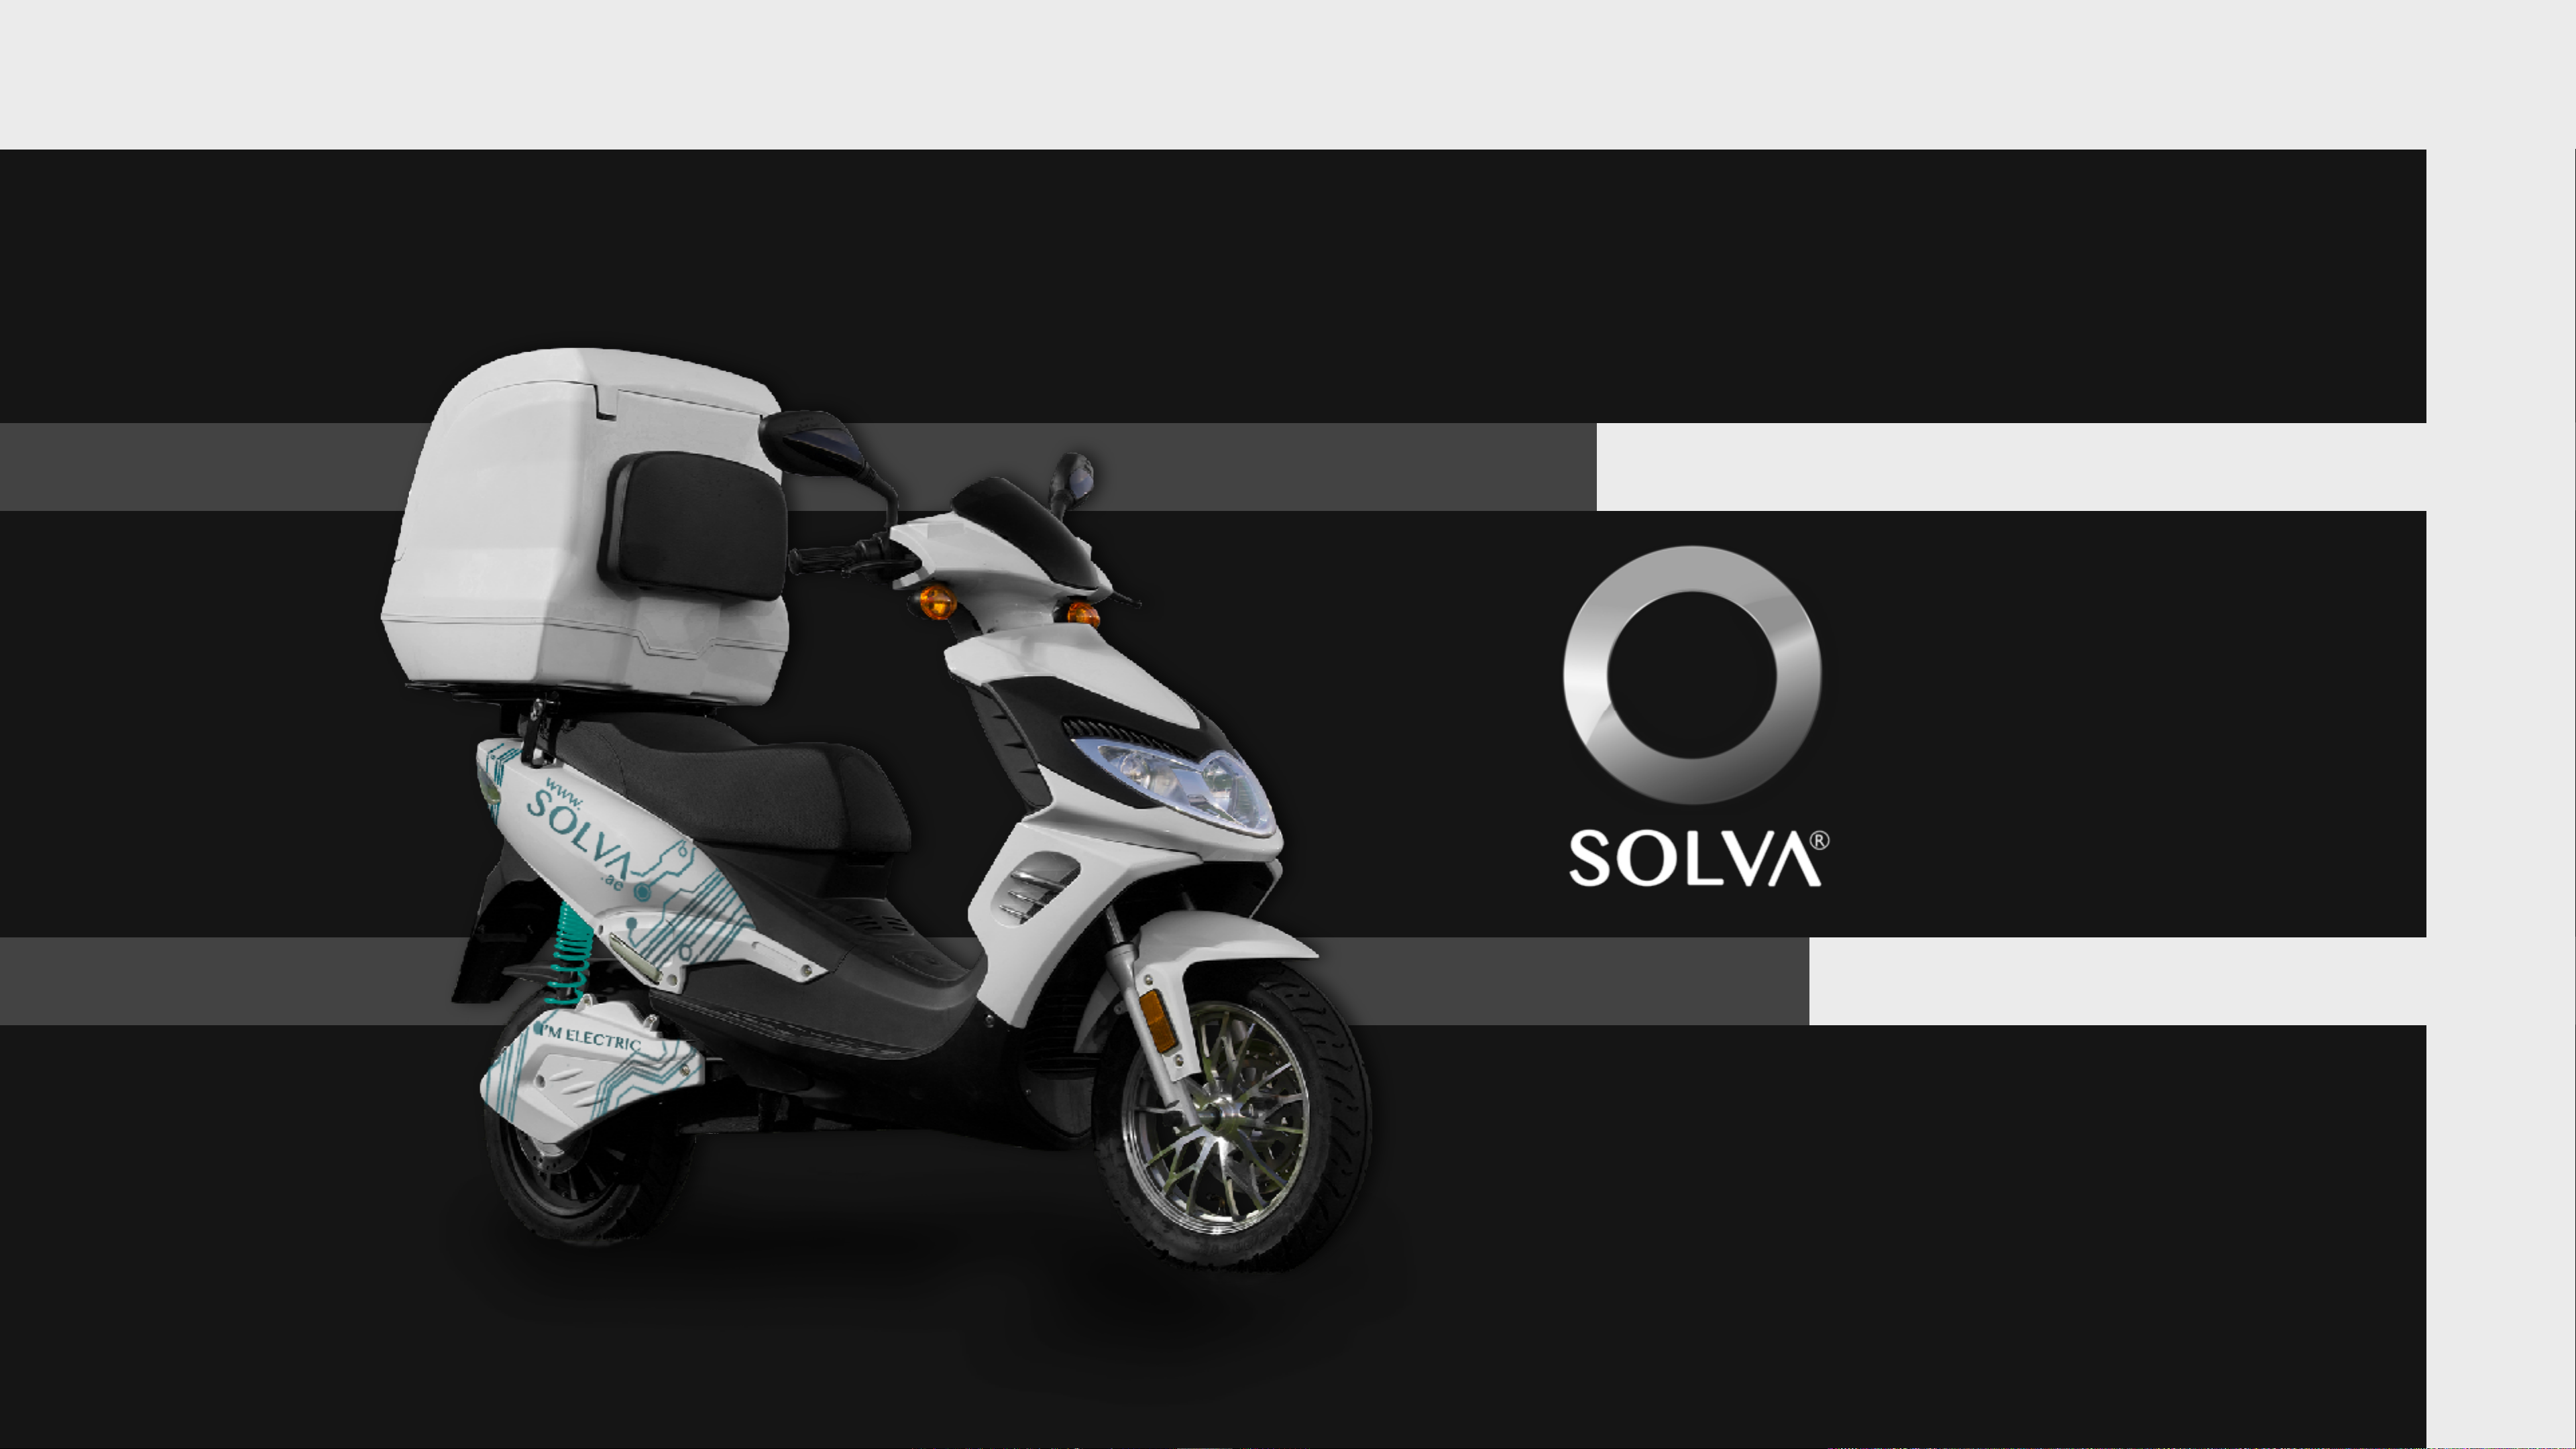
Your Solva is a electric scooter that will
turn your daily life easier.!
It doesn’t require any special license
With Solva you never worry again about
traffic jams, gas stations or parking

WE THINK IT IS ADDICTIVE

6
SAFETY IS OUR
MAIN CONCERN
General instructions before riding:
1. Tire pressures: Check the tires for correct inflation and for any signs
of physical damage.
2. Brake check: Squeeze the brake lever (front and rear) as hard as you
can, push the scooter forward and check the braking resistance.
3. Safety Circuit Breaker: It is a safety switch placed under the seat. It
might be turned off when delivery and technical service, and it must
be turned on before riding.
4. Battery Check: Make sure your scooter is sufficiently charged for
your ride and always check the battery indicator while you are riding.
Be sure that battery does not get too low too often. Sometimes the
voltage meter on left side of dashboard would be more accurate than
bars battery indicator, this is normal because of lithium battery
properties. Always charge the battery before using and after every
use. More frequently charging is better for battery life.
5. Ready to ride: Make sure the side stand is removed and the kill-
switch is in “GO” position before riding. If some of that sensors are
not ready the scooter will not respond to the accelerator.
6. Steering: Check the handlebar for any damage. Squeeze the front
brake and push the handlebar up and down to check for any unusual
noise. Move the handlebar in all directions to check for any loose
parts or obstructions. Any problems should be corrected before use.

8. Suspension: Check the correct working of the fork and the
rear suspension before riding.
9. Parking: Your bike should not be left in strong, direct
sunlight or heavy rain for extended periods of time as it will
prematurely age and damage paintwork and the general
finish of the scooters appearance and some of the electric
components may overheat.
10. Riding: Never ride your bike overloaded. Prolonged use
with excessive weight could cause serious damage to the
electronic and mechanical parts and void your warranty. It
is recommended that all new scooter riders enroll in
motorbike riding training.
11. Road rules: As with any vehicle, a scooter rider must
always comply with the local road traffic rules and
regulations. Before taking your scooter out on a public
road, make sure you are familiar with traffic rules and
regulations and any special requirements for motorcycles &
scooters.
12. Never drink and ride: Alcohol slows reflexes and greatly
limits your ability to operate a scooter. Even a very small
amount of alcohol will reduce your ability to operate a
scooter safely.

8
YOUR SCOOTER
IDENTIFICATION NUMBER

VEHICLE VIN
1
FRAME VIN
2

10
LEARN ABOUT
YOUR FIRST RIDE
2
1
3
STEPS TO
STARTYOUR
RIDE
2
1
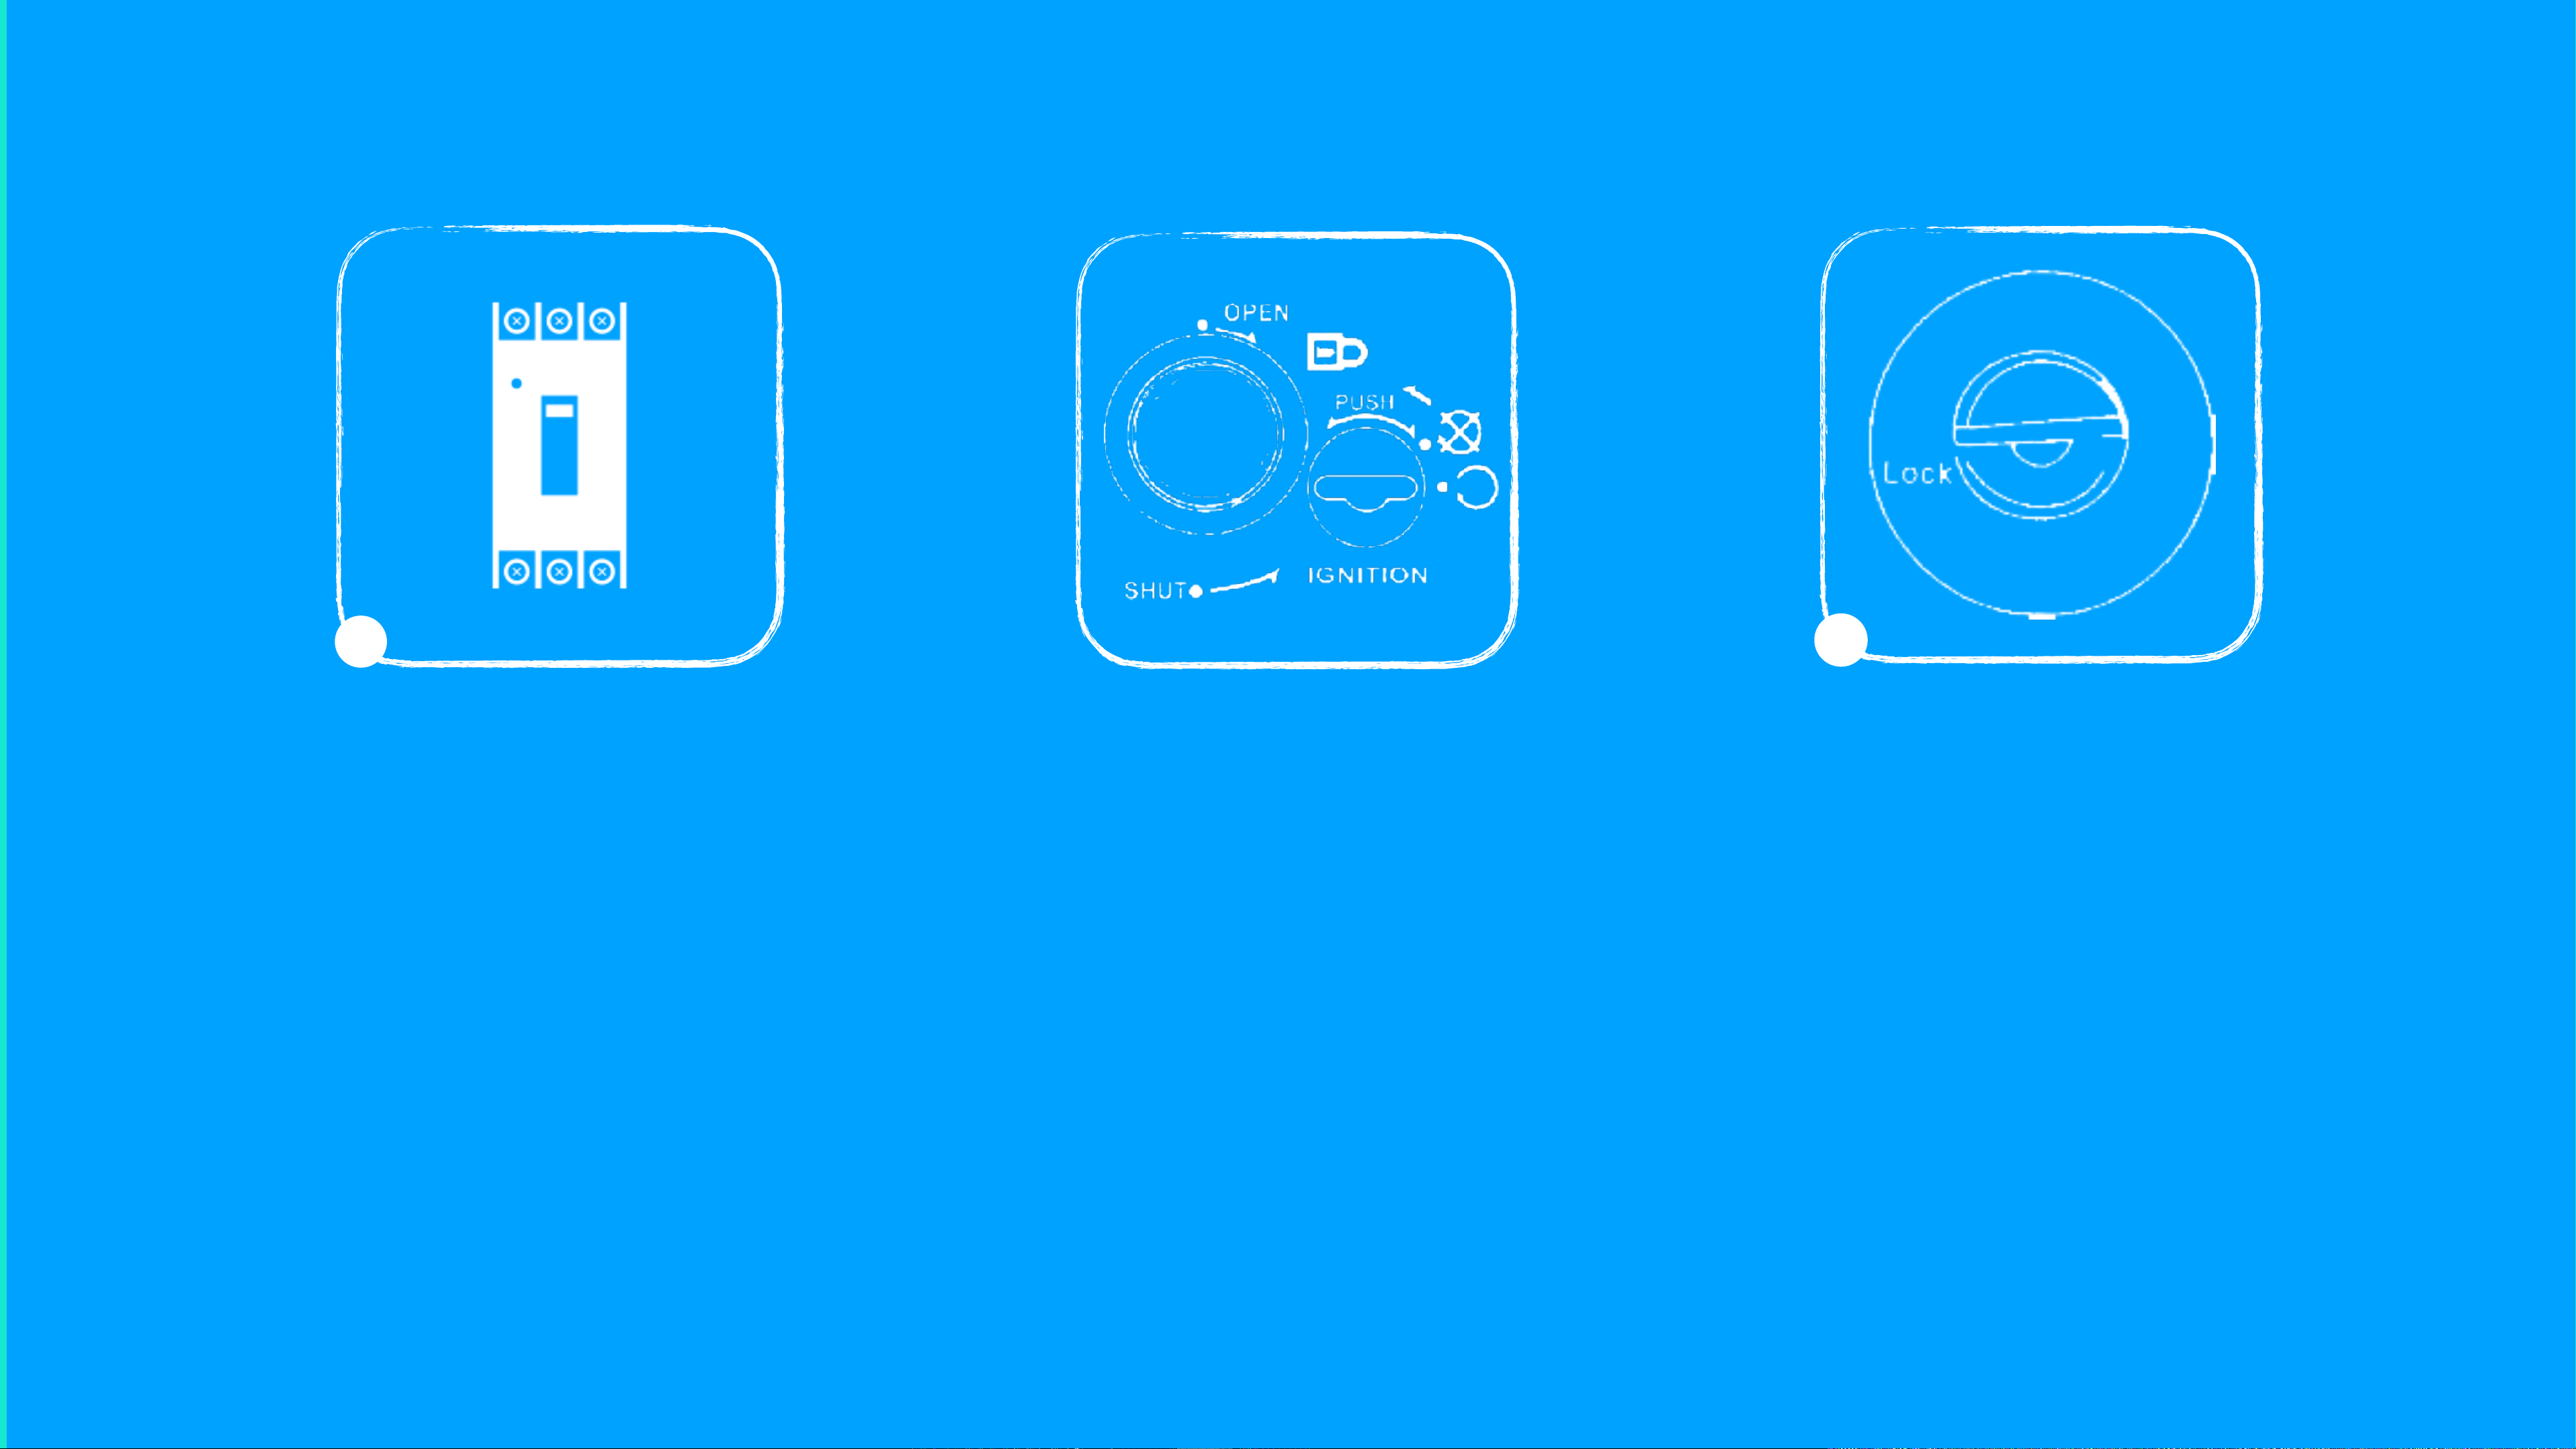
SAFETY CIRCUIT BREAKER
The scooter includes a safety
circuit breaker under the seat
that disconnects all the electric
system of the bike in case it
detects an extreme over-
current or overheat and it must
be manually rearmed.
It also allows a manual
disconnection.
KEY LOCKS
OFF Scooter is turned OFF. The key can be extracted in that position.
ON Turn the key right. Scooter is turned ON. The key can not be
extracted in that position.
LOCK Press and turn the key left. Scooter is turned OFF and handlebar
is locked. To avoid theft, turn the handlebar to the left and turn the key
to the LOCK position.
Located under the seat Scooter lock Seat lock

12
LEARN ABOUT
YOUR DISPLAY
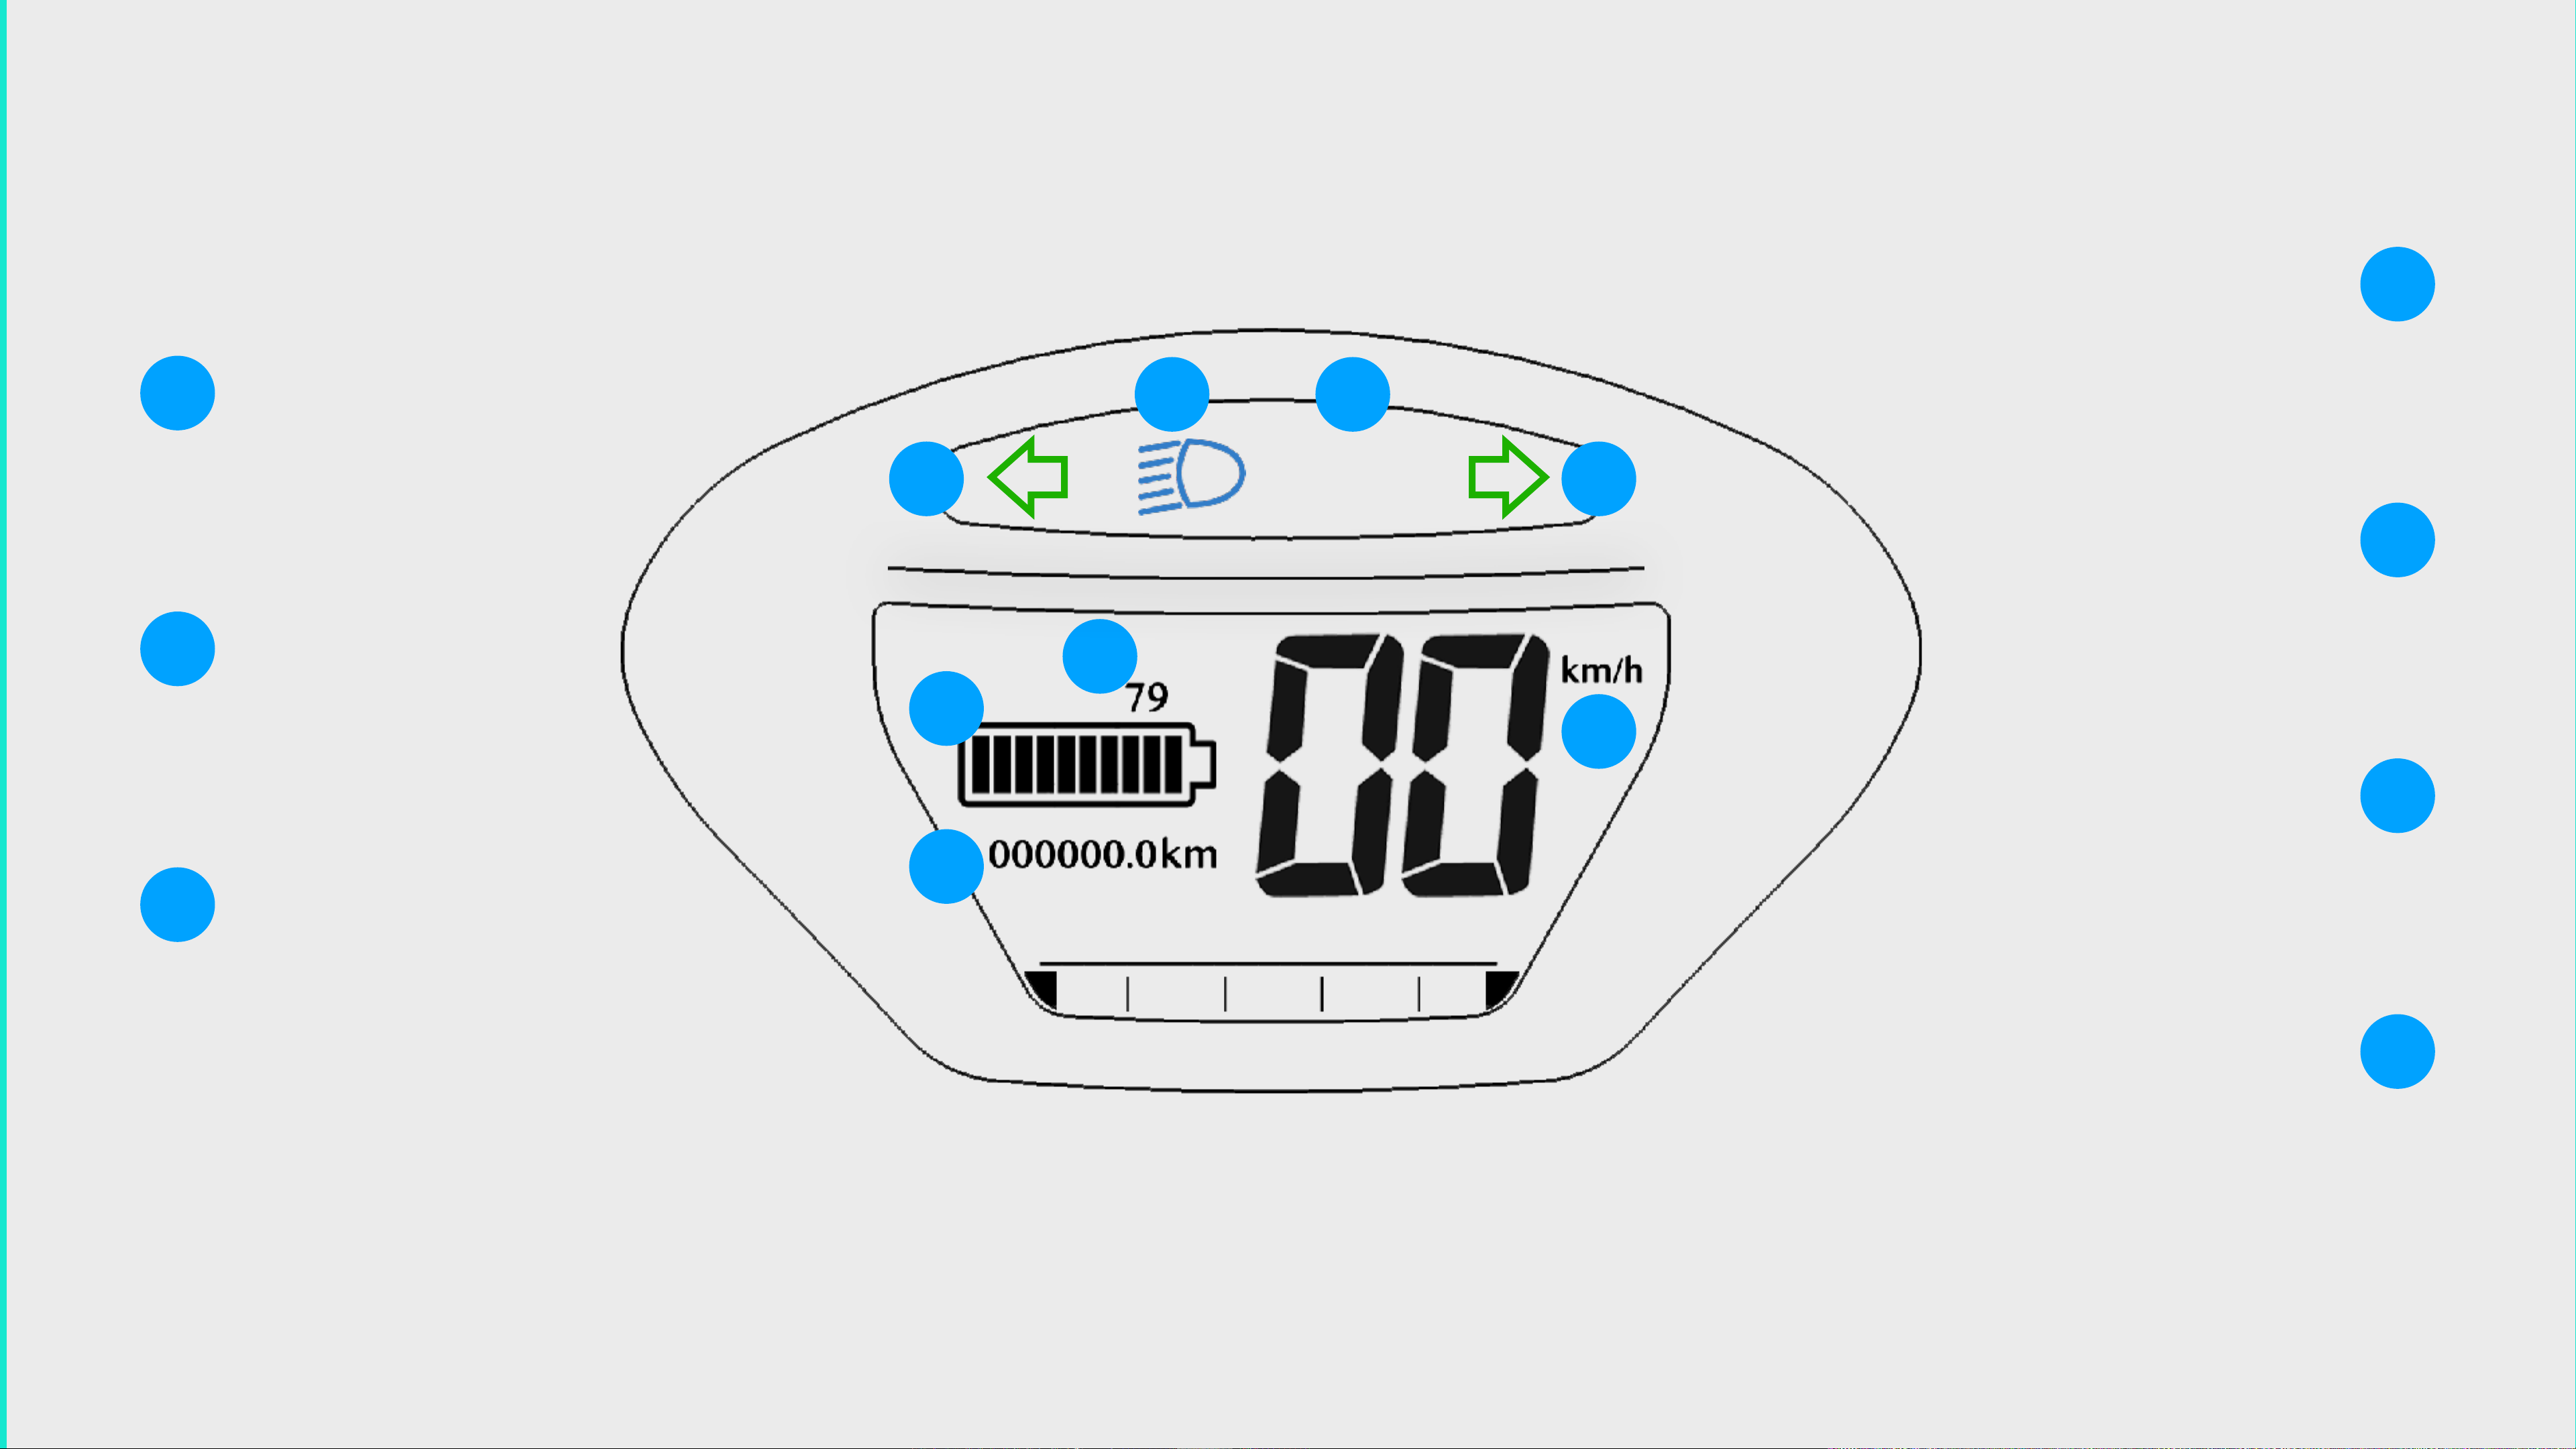
READY
1
2
1
3
6
5
4
V
7
1
2
3
4
5
6
7
TURNING INDICATORS
Right and left turning LED
indicators
HIGH BEAM
Led high beam
indicator
READY
indicates that the hv
system is connected
While 0 km/h
SPEED
Indicates speed digitally
Measured in km/h
(EU homologation)
ODOMETER (ODO)
Measures ridden
kilometers from bike
manufacturing
BATTERY LEVEL
Battery estimated
remaining capacity
VOLTAGE
Measures battery
voltage
Note : In running order, Voltage (7) indicates remaining battery better than Battery Level (6).
See Battery Indicator chapter to reach a deep understanding about it.
THE DISPLAY REFLECTS THE BASIC RIDING PARAMETERS

UNDERSTAND YOUR
10 BARS BATTERY INDICATOR
V
14

LOW BATTERY:
Under 72V the controller will limit the output current to
the motor, therefore the top speed will be reduced to
save energy. If that happens, make sure the scooter
has enough battery to reach an available plug.
NOTE:
Some times voltage meter is more accurate than bars indicator.
Accelerating and reg. braking rises and lowers voltage.
Battery estimated state of charge (SoC) is more accurate after
a few minutes with bike keyed OFF.
BARS INDICATOR
VOLTAGE
DESCRIPTION
10/10
More than 78V
Full battery
5/10
between 74V - 72V
Half battery
Less than 2/10
Less than 72V
Low battery

16
LEARN ABOUT
YOUR CONTROLLERS

1
2
3
5
6
TURNING INDICATORS
Right and left turning LED
indicators
HIGH BEAM
Led high beam
indicator
READY
indicates that the hv
system is connected
While 0 km/h
ODOMETER (ODO)
Measures ridden
kilometers from bike
manufacturing
BATTERY LEVEL
Battery estimated
remaining capacity
2
1
3
1
2
LEFT
RIGHT

18
READ ABOUT
ACCELERATION & BRAKING

Acceleration tips
Deceleration tips
&
Turn the key ON and put the kill-switch on
the ON position. Remove the side stand
and then your bike will be ready to ride!
To avoid loosing control you must twist
the throttle slowly while speed increases
gradually. !
Don’t twist the throttle until you are
ready to ride. !
After braking, make sure you release the
throttle, release the brake levers, and
then twist the throttle again. !
The electric brushless motor emits a
magnetic slight noise when accelerating.
It’s the silent revolution that’s coming.
To stop the bike, release the throttle
and push the front and rear brakes
simultaneously.
Both brakes activates the reg. braking
in addition to the mechanical disc
brake. !
For your safety, the scooter has a
button on the brake lever.
Release the throttle during braking,
and twist it smoothly after releasing the
brake lever to accelerate again.
When you push front or rear brakes the
motor controller disables the traction.
Table of contents


