Solwise 3GWIFIMRW User manual

1Version 1.0
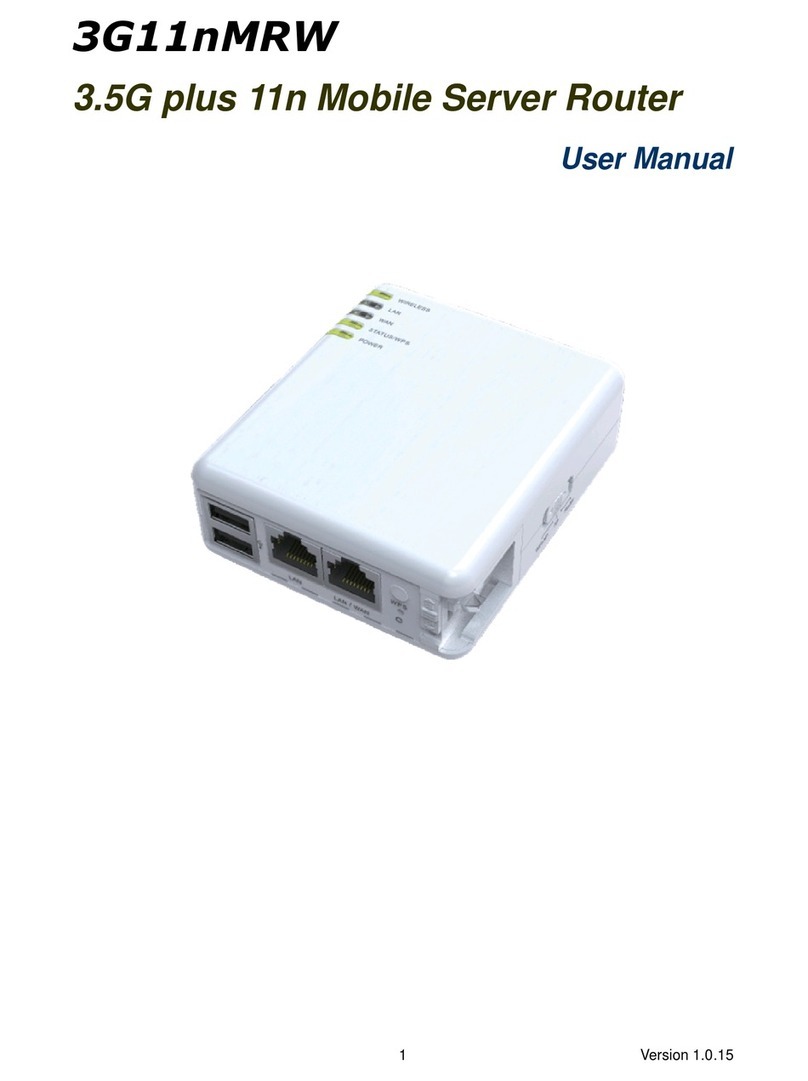
3GWIFIMRW
3.5G plus WLAN Wall Server Router
Quick Setup Guide

2Version 1.0
Declaration of Conformity
Marking by the above symbol indicates compliance with the Essential Requirements of the
R&TTE Directive of the European Union (1999/5/EC). This equipment meets the following
conformance standards:
EN300 328, EN301 489-17, EN60950
Countries of Operation and Conditions of Use in the European Community
This device is intends to be operated in all countries of the European Community.
Requirement is for indoors vs. outdoors operation, license requirements and allowed
channels of operation apply in some countries as described in this document.
Note: The user must use the configuration utility provided with this product to check
the current channel of operation and confirm that the devices operating in conformance
with the spectrum usage rules for the European Community countries as described
below.
If operation is occurring outside of the allowable channels as indicated in this guide, then the
user must cease operating the product and consult with the local technical support staff
responsible for the wireless network.
This device may be operated indoors or outdoors in all countries of the European
Community using the 2.4GHz band: Channels 1 –13, except where noted below:
·In Italy the end-user must apply for a license from the national spectrum authority to
operate this device outdoors.
·In France outdoor operation is only permitted using the 2.4 –2.454 GHz band:
Channels 1 –7.
3Version 1.0
Contents
Chapter 1. About Mobile Server Router
1.1 Hardware Overview
1.2 LED Indicators Status Description
Chapter 2. Easy Setup
2.1 What is Easy Setup
2.2 Install Easy Setup
Chapter 3. Administrator Complete Setup
3.1 Wireless Router Mode Setup
3.2 Wireless Access Point Mode Setup
3.3 Wireless Client Mode Setup
Chapter 4. Server Login
4.1 Server Login Setup
4.2 Administrator Login
4.3 User Login
Chapter 5. Administrator Optional Setup
5.1 Quick Setup
5.2 Advanced Setup
Important Information
Default IP : 192.168.1.1 (Router Mode)
192.168.1.254 (AP Mode)
10.64.64.64 (Client Mode)
Default Username & Password : admin
Default Channel : 6
Web Browser Requirement : Internet Explorer 5.5, 6.0 or higher version,
Netscape Navigator 7.x

4Version 1.0
Chapter 1 About Mobile Server Router
1.1 Hardware Overview
Power Plug
100V ~ 240V Input
Operation Mode
Switch
Router,AP, and Client. 3 operation modes
Reset Button
Press “Reset” button over 7 seconds. When status indicator turns
from flashing to solid, the process is completed. All settings are
back to default.
Ethernet Port
2 RJ-45 Ethernet 10/100 Ports
USB2.0 Ports
2 USB Ports
Power on the unit. When Power, Status & Wireless indicator lights become
solid, the server router is ready to use.
1.2 LED Indicator Status Description
Status
LED Indicator
Solid
Flashing
WIRELESS
Operation OK
Transmitting Data
LAN
Ethernet OK
Transmitting Data
WAN
Internet OK
Transmitting Data
STATUS
Operation OK
Reset/Firmware updates in progress
POWER
Operation OK
Firmware upgrade failed

5Version 1.0
Chapter 2. Easy Setup
2.1 What is Easy Setup
Easy Setup is a quick and easy install genie which offers you a super easy way to set up
the internet connection and USB devices.
2.2 Install Easy Setup
Step 1. After inserting the Install CD, please click Install Utility on the auto-run menu to
start the installation.
Step 2. While the illustration below is shown, click on Finish to complete Easy Setup
installation.
After completing the installation, Easy Setup icon will be generated on
desktop automatically.

6Version 1.0
Chapter 3. Administrator Complete Setup
3.1 Wireless Router Mode Setup
Build up WAN and wireless LAN with 3.5G plus WLAN Mobile Server Router
Step 1. Please switch to Router mode and plug in power.

7Version 1.0
Step 2. Please click on Easy Setup icon on your desktop to start the utility.
When the following window pops up, please select your Ethernet
adapter for the internet connection.
If the operation mode is not switched properly, the warning message will pop up. Please
power off the unit and check the switch.
Step 3. Please select Administrator Complete Setup to start the configuration.
Please enter the default password admin, and click Yes.

8Version 1.0
Step 4. To change password, please enter your new password and click Next. Or just
click on Next to continue.
Step 5.Please select your Internet connection type and be reminded that you
cannot connect Internet via wired and wireless at the same time. Then click
Next when finished. If you’re not sure, please contact your Internet Service
Provider (ISP). (Diagram below is for reference only.)
Type1 Dynamic IP Setup
Click DHCP as your Internet connection type. If you’re not sure, please contact your
Internet Service Provider (ISP).
Here provides Backup of Connection function to indicate that when DHCP is
disconnected and detected, the system automatically provides HSDPA/UMTS connection
as backup. The default interval between the two connection detection is 3 minutes, and
the range is from 1 to 3 minutes. If 3.5G signal is not available, it starts to search
downward for 3/2.75/2.5G signals until none existed. Also, information like user name,
password and SIM PIN etc. are required here. Please refer to User Manual for more

9Version 1.0
details.
And click Next to continue.
Type 2 Static IP Setup
Click Static IP and insert the required information as diagram shown below. If you’re not
sure, please contact your Internet Service Provider (ISP).
Here provides Backup of Connection function to indicate that when Static IP is
disconnected and detected, the system automatically provides HSDPA/UMTS connection
as backup. The default interval between the two connection detection is 3 minutes, and
the range is from 1 to 3 minutes. If 3.5G signal is not available, it starts to search
downward for 3/2.75/2.5G signals until none existed. Also, information like user name,
password and SIM PIN etc. are required here. Please refer to User Manual for more
details.
And click Next to continue.

10 Version 1.0
Type 3 PPPoE Setup
Click PPPoE, and then enter your user name and password. If you’re not sure, please
contact your Internet Service Provider (ISP).
Here provides Backup of Connection function to indicate that when PPPoE is
disconnected and detected, the system automatically provides HSDPA/UMTS connection
as backup. The default interval between the two connection detection is 3 minutes, and
the range is from 1 to 3 minutes. If 3.5G signal is not available, it starts to search
downward for 3/2.75/2.5G signals until none existed. Also, information like user name,
password and SIM PIN etc. are required here. Please refer to User Manual for more
details.
Click Next to continue.

11 Version 1.0
Type 4 PPTP Setup
Click PPTP and fill in the required information. If you’re not sure, please contact your
Internet Service Provider (ISP).
Here provides Backup of Connection function to indicate that when PPTP is
disconnected and detected, the system automatically provides HSDPA/UMTS connection
as backup. The default interval between the two connection detection is 3 minutes, and
the range is from 1 to 3 minutes. If 3.5G signal is not available, it starts to search
downward for 3/2.75/2.5G signals until none existed. Also, information like user name,
password and SIM PIN etc. are required here. Please refer to User Manual for more
details.
And click Next to continue.

12 Version 1.0
Type 5 HSDPA/UMTS Setup
Click HSDPA/UMTS and fill in the required information. If you’re not sure, please
contact your Internet Service Provider (ISP). At this moment, Backup of Connection is
not available. When 3.5G signal cannot be reached, the system starts to search
downward for 3/2.75/2.5G signals until none existed. Please refer to User Manual on
CD for more details, and click Next to continue.

13 Version 1.0
Step 6. Name your wireless network, please follow the instruction and click on Next to
continue. (The default Wireless_Mobile_Router is recommended.)
Step 7. Please select to encrypt your wireless network or not. If you wish not to encrypt,
click Next to continue.

14 Version 1.0
To encrypt, please follow the instructions below for each option.
Option 1 WEP
As the illustration shown below, select your encryption and key type from the drop-down
list. Then enter the key and click Next when finished. Or you can click Help for given
examples. For details, please refer to the User Manual.

15 Version 1.0
Option 2 WPA
Please refer to the following graphic in explain. Or you can click Help for given examples.
After completing the required information, click Next to continue. Please read User
Manual if you need more details.
Step 8. The system automatically detects the connected USB devices and lists them as
the diagram shown below, including document server, webcam server and printer
server etc. The table indicates their operation status and other information.
Please click on Next to continue or Rescan to find any new devices.

16 Version 1.0
Step 9. The found USB devices are also shown as below. Please refer to Chapter 5
Administrator Optional Setup for further step. Just click Next to continue.
Step 10. If a USB flash/drive is connected, the window pops up to enquire as follows. Click
Yes or No by demand.
<!> Disk format will erase all data within.
Step 11. Please select to enable the server you need, and click on Next to continue.

17 Version 1.0
Step 12.Select to enable or disable your webcam server.
Step 13. Create user names, passwords, and authorize their access rights for each server
at the same time, then click Add. Please click Next to finish when all accounts
are completed.

18 Version 1.0
Step 14. When the following screenshot appears, click Finish to end the quick setup.

19 Version 1.0
3.2 Wireless Access Point Mode Setup
While WAN is connected, expand the network coverage with the unit. 3.5G plus WLAN
Mobile Server Router in AP mode doesn’t support WAN and DDNS.
Step 1. Please switch to AP mode and plug in power.

20 Version 1.0
Step 2. Please click on Easy Setup icon on your desktop to start the utility.
When the following window pops up, please select your Ethernet
adapter for the internet connection.
If the operation mode is not switched properly, the warning message will pop up. Please
power off the unit and check the switch.
Step 3. Please select Administrator Complete Setup to start the configuration.
Please enter the default password admin, and click Yes.
Table of contents
Other Solwise Wireless Router manuals

Solwise
Solwise 53R-EXT User manual

Solwise
Solwise 3G-431R User manual

Solwise
Solwise 3G11nMRW User manual

Solwise
Solwise M18P1 Series User manual

Solwise
Solwise 605EW User manual

Solwise
Solwise NET-PL-200AV11NRT User manual

Solwise
Solwise PLV-500AV-PEWN User manual

Solwise
Solwise 3G-431R User manual

Solwise
Solwise UltraSkyM18P1 User manual

Solwise
Solwise A10W User manual