manuals.online logo
Brands
  1. Home
  2. •
  3. Brands
  4. •
  5. SOMFY
  6. •
  7. Home Automation
  8. •
  9. SOMFY 4120 User manual

SOMFY 4120 User manual

www.somfy.com
EN
USER GUIDE
LIGHTING ON/OFF TOUCH PANEL
1-GANG/2-GANG
4120
1- Important Information
Read this guide carefully before installing and using Lighting On/
Off Touch Panel. Any incorrect use will invalidate the warranty and
Somfy’s liability.
Caution
• This product is designed for indoor use only.
• Always turn off the Miniature Circuit Breaker (MCB) before
installing / uninstalling / mounting / conducting maintenance
work on the product or connected light bulbs.
• Keep the product dry at all times.
• To prevent fire or electrical shock: Do not expose the product to
excessive heat from heating equipment or direct sunlight.
• Do not place the product near naked flames, such as lighted
candles.
• Do not submerge the product in water.
• Do not expose the product to dripping or splashing liquids.
• To clean the product, switch it off and wipe it with a soft cloth
moistened with water. Do not use cleansing agents which
contain alcohol, spirits, ammonia or abrasives, as they may
damage the product.
• Do not disassemble the product.
• All installation must be performed by a qualified or licensed
electrician.
• Read the “Load Type Table” carefully before connecting the
lighting load to the product.
• Do not install the product where the voltage is below 220V~ or
above 240V~.
• Do not reverse the “Neutral” and “Live” wiring connections.
• Do not operate the product in a place where the temperature is
below 0°C or above 50°C.
• Do not use the product if there are any signs of damage.
• After installation, the wires connected to the terminals must not
be bent or under physical tension.
• Only use the maintenance products recommended by Somfy.
• Do not allow children to touch the product during installation.
Configuration panel
• Restart (power cut) – No impact on any network information.
• PROG – Press and hold for 10secs.
Clears all network information and automatically enters zigbee pairing mode.
• Notification tone setting (high tone, low tone, off)
You will hear a beep sound only when the panel received a remote command from
the app or from another panel (multiple control points).
• Touch button backlight setting (full, half, off).
2-Package content
1. Lighting on/off touch panel 1-gang/2gang x1
2. Screws x 2
3. Protective film x 1
4. User guide x 1 (English)
3-Product description
Lighting on/off touch panel provides on /off switch control for loads
up to 1000W. It is designed to operate with or without a neutral wire.
The panel is compatible with Somfy Gateway and the TaHoma App,
but can also be used as a standalone product. The panel can be used
as a relay switch or a remote control, which can be linked to another
relay channel to control the same light source.
Before installation, read the following tips carefully:
1. Avoid using a metallic wall box as it will block the radio signals
and shorten the wireless range.
2. For optimal results, use a wall box with a depth of 50mm.
3. The wireless range may be affected by certain materials or
objects, such as mirrors, metal, or high power electronic devices.
2
3
1
Touch button backlight LED [Blue]
Half ON Light OFF
Full ON Light ON
Blinks slowly Linking mode as a remote control
Blinks fast Linking mode as a load switch
1
Zigbee network status LED [Blue]
#This LED does not always light up in order to save energy.
Press “PROG” once to show the status for 1 minute.
Flashes twice every second Pairing mode
(searching for network)
Flashes twice in 1sec.,
then switches off for 5 sec.
Not connected to a zigbee
network / no linking control
Solid blue Connected to a zigbee
network / with linking control
2
Product status LED [Red and Green]
#This LED does not always light up in order to save energy.
Press “PROG” once to show the status for 1 minute.
Solid green The device is working normally
Green and red LED
flashes alternately The “PROG” button is pressed
Red LED flashes 3 times
rapidly after holding
“PROG” for 10 sec.
The “PROG” button should be
released to reset the device
and restart pairing
Flashing Red
#Keeps flashing
until error is fixed
Protection mode –
over-current, over-temperature,
or over-voltage was detected
Solid orange
Firmware updating –
do not power off the device
from the MCB
3
Load type table
Load type Overall maximum load (W)
Load 1+Load 2
Incandescent 1000W
Fluorescent 750W
Halogen 650W
LED 550W
CFL 550W
4- Installation and Configuration
Caution: All installation work must be performed by a qualified or
licensed electrician
Step 1 - Before Installation,
turn off the Miniature
Circuit Breaker (MCB).
Step 2 - Connect the wires
5- Operating the product
You can control the corresponding channels from the wired touch
panel, or other linked control points. You can also remotely control the
product from Somfy gateway and app.
Status memory in the event of a power cut.
After a power cut, the panel will return to the same status as before
the power cut.
6- Technical Specification
7 - Troubleshooting
#Connect a single live power stabilizer (9026652) across the light load
to prevent it from flickering when a single-live wire connection is used.
Step 3 - Install the lighting on/off touch panel on the wall
Step 4 - Ensure there is no short circuit or incorrect wiring.
Turn on the Miniature Circuit Breaker (MCB).
Touch Link #During linking process. The two panels should be placed
close to one another (within 30cm).
• Press and hold button B (remote control) for 7 seconds, and then
release it when you hear two short beep sounds. The panel will enter
linking mode as a remote control and the back light blue LED will
flash twice every second (linking mode will time out after 45s). You
will hear a low beep sound when the channel has been linked. The
flashing blue LED will return to normal.
• Press and hold button C (load switch). You will hear two short beep
sounds at 7 seconds. Keep holding the button until you hear a long
beep sound after 12 seconds, then release the button. The panel will
now enter linking mode as an actuator, blue LED will flash twice every
second (linking mode will time out after 45 seconds). You will hear a
low beep sound when the channel has been linked. The flashing blue
LED return to normal.
Power Supply 220V AC - 240V AC 50Hz/60Hz
Maximum Load 1000W (Resistive Load)
Radio Protocol Frequency Zigbee 3.0, 2.4GHz
Maximum RF Power <10dBm
RF distance
80 meters open-field distance
20 meters through 2 reinforced
concrete walls
* RF distance would be affected by specific
material, such as mirror, metal, or high-power
electronic products
Operating Temperature 0 - 50⁰C
Relative Humidity 5% - 95%
Protection Rating Index IP 20
Dimensions 86 mm x 86 mm x 36 mm
Weight ~ 155g
Protection Over-load > 1100W
Over voltage > 280V
Over-temperature >90°C
Problem Possible Causes Solutions
Pairing failed
Wrong gateway Check if the gateway is
online (LED solid green)
Timeout (3min.),
or still connected
to previous zigbee
network
Redo pairing procedures
The
touch-sensitive
switch cannot
be operated
after reinstalling
the glass panel
The touch calibration
process takes 20
seconds to complete
After reinstalling the glass
panel, wait 20 seconds
before operating the switch
The touch
button cannot
switch ON and
the product
status RED LED
flashing
The product entered
protection mode
and was forced to
switch off due to an
overload, overvoltage
or over-temperature
Press or wait 10
minutes. The product will
exit protection mode if the
overload, overvoltage or
over-temperature is no
longer detected after 10
minutes
After pressing
the “PROG”
button, the LED
indicators do
not show the
product status
The main processor
was interrupted by
very strong noise
Press once to reboot the
device (you will hear a beep
sound)
Mains power is
disconnected Consult licensed and
qualified electrician
The light flashes
or turns off
automatically
Incorrect wiring Check the wiring and ensure
that the wires are connected
according to the instructions
Interference from
other products in
the system
Ensure there is no conflict
in interoperation setting
A non-compliant
Load is connected
to a single live wire
1. Turn off the MCB
2. Replace the load/ install
a power stabilizer
Step 5 - Reset and pair with gateway:
• Remove the glass panel, then press and hold the PROG button for 10
seconds until the red LED starts flashing. The LED will flash 3 times
in red and you will hear a beep sound indicating the panel has been
reset to the factory defaults. The panel will then enter pairing mode
immediately. The flashing blue LED will turn to constant blue when
the panel has joined a zigbee network.
• Use the app to configure the zigbee network of your gateway:
- On the home page, select , and then select Configuration.
- Click on Add Device. The app will prompt you to select the device type.
- Choose zigbee, and then follow the instructions in the mobile app to
complete the configuration.
Unpair from gateway/reset to factory defaults: Remove the glass
panel, then press and hold the PROG button for 10 seconds until the red
LED starts flashing. The LED will flash 3 times in red and you will hear
a beep sound indicating the panel has been reset to the factory defaults.
The panel will then enter paring mode and search for zigbee network
for 3 minutes. If it unable to join a zigbee network within 3 minutes, the
flashing blue LED will turn off, and the red LED will flash 5 times. The
panel will then be unpaired.
Step 6 - Reinstall the glass panel and wait 20 seconds for the touch
calibration to complete, before operating the switch.
Step 7 -Configure multiple control points.
If you use Somfy gateway
and app in your system, pair the
panels first with your gateway,
then use touch link to configure
multiple control points
(e.g. use button B to wirelessly
control the light bulb
connected to switch C).
Option D - As an on/off
remote control
(single live)
Neutral
power
stabilizer
no light bulb used
L
S1
Live
Option A - As a load switch
(live -neutral) Load 1 Neutral
Neutral
1
2
Load 2
L
S1
N
S2
Live
Option B - As an on/off
remote control
(live-neutral)
Neutral
L
S1
N
S2
Live
Live
Load 1 Neutral
Neutral
power
stabilizer
1
2
power
stabilizer
Load 2
L
S1
S2
Option C - As a load switch
(single live)
A B C
<30cm
Other SOMFY Home Automation manuals

SOMFY Sunea io User manual

SOMFY

SOMFY Sunea io User manual

SOMFY ST28WF Installation manual

SOMFY

SOMFY ST28WF Installation manual

SOMFY LV25 User manual

SOMFY

SOMFY LV25 User manual

SOMFY HOME MOTION Zwave On-Off Plug User manual

SOMFY

SOMFY HOME MOTION Zwave On-Off Plug User manual

SOMFY Universal Setting Cable Kit User manual

SOMFY

SOMFY Universal Setting Cable Kit User manual

SOMFY sonesse 30 rts User manual

SOMFY

SOMFY sonesse 30 rts User manual

SOMFY animeo IB+ 4 Zone Touch Building Controller User manual

SOMFY

SOMFY animeo IB+ 4 Zone Touch Building Controller User manual

SOMFY Irismo Plus User manual

SOMFY

SOMFY Irismo Plus User manual

SOMFY TaHoma Operating instructions

SOMFY

SOMFY TaHoma Operating instructions

SOMFY IXENGO S User manual

SOMFY

SOMFY IXENGO S User manual

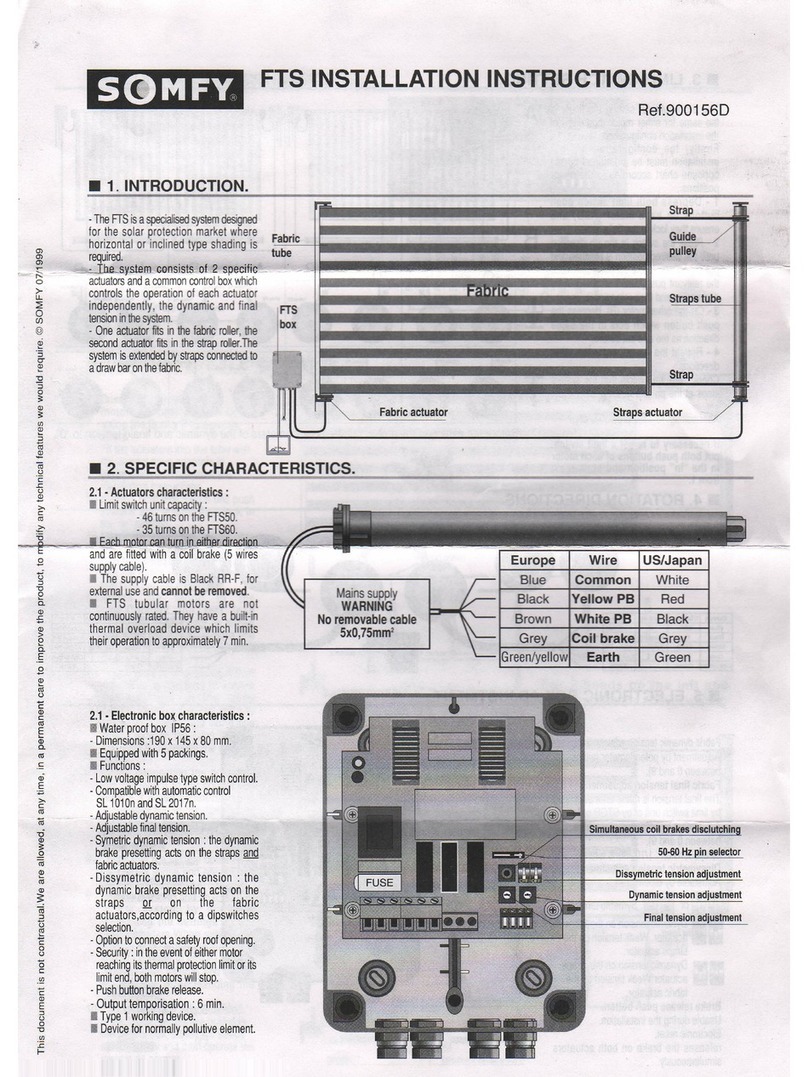
SOMFY FTS User manual

SOMFY

SOMFY FTS User manual

SOMFY TaHoma Operating manual

SOMFY

SOMFY TaHoma Operating manual

SOMFY MC PRO Series User manual

SOMFY

SOMFY MC PRO Series User manual

SOMFY Roll Up 28 WF RTS User manual

SOMFY

SOMFY Roll Up 28 WF RTS User manual

SOMFY Sonesse 50 RTS User manual

SOMFY

SOMFY Sonesse 50 RTS User manual

SOMFY Smoove Origin RS100 io User manual

SOMFY

SOMFY Smoove Origin RS100 io User manual

SOMFY Tilt Only 50 WF RTS Operating instructions

SOMFY

SOMFY Tilt Only 50 WF RTS Operating instructions

SOMFY TAHOMA RTS Quick setup guide

SOMFY

SOMFY TAHOMA RTS Quick setup guide

SOMFY Sonesse 40 PA User manual

SOMFY

SOMFY Sonesse 40 PA User manual

SOMFY Home Motion Glystro User manual

SOMFY

SOMFY Home Motion Glystro User manual

SOMFY TaHoma Operation manual

SOMFY

SOMFY TaHoma Operation manual

SOMFY sonesse 30 rts User manual

SOMFY

SOMFY sonesse 30 rts User manual

SOMFY TaHoma User manual

SOMFY

SOMFY TaHoma User manual

SOMFY TaHoma User manual

SOMFY

SOMFY TaHoma User manual

Popular Home Automation manuals by other brands

Eaton Holec Capitole 40 user manual

Eaton

Eaton Holec Capitole 40 user manual

Melink ML1SSO20-FR1S instruction manual

Melink

Melink ML1SSO20-FR1S instruction manual

AVM FRITZ!DECT 200 Installation and operation

AVM

AVM FRITZ!DECT 200 Installation and operation

Plugwise Stick installation manual

Plugwise

Plugwise Stick installation manual

GE Cync CPLGOD2BLG1 installation guide

GE

GE Cync CPLGOD2BLG1 installation guide

Smartwares SH5-TSW-B instructions

Smartwares

Smartwares SH5-TSW-B instructions

Comelit Minitouch Installer manual

Comelit

Comelit Minitouch Installer manual

Freedompro Easykon for MyHome Quick manual

Freedompro

Freedompro Easykon for MyHome Quick manual

LEGRAND Mosaic 802 57 manual

LEGRAND

LEGRAND Mosaic 802 57 manual

Deimic One Master installation guide

Deimic

Deimic One Master installation guide

Evolveo Heat M30 Users manual & quick start guide

Evolveo

Evolveo Heat M30 Users manual & quick start guide

Matricom Arc user manual
Matricom

Matricom Arc user manual

QNect QN-WP06 Quick setup manual

QNect

QNect QN-WP06 Quick setup manual

Heatit Controls HEATIT Z-HAN B quick guide

Heatit Controls

Heatit Controls HEATIT Z-HAN B quick guide

Yeelight YL00461 user manual

Yeelight

Yeelight YL00461 user manual

eZLO Secure manual

eZLO

eZLO Secure manual

Lutron Electronics Maestro IR MIR-600 installation manual

Lutron Electronics

Lutron Electronics Maestro IR MIR-600 installation manual

Eaton xComfort CDAP-01/13 Assembly instructions

Eaton

Eaton xComfort CDAP-01/13 Assembly instructions

manuals.online logo
manuals.online logoBrands
  • About & Mission
  • Contact us
  • Privacy Policy
  • Terms and Conditions

Copyright 2025 Manuals.Online. All Rights Reserved.