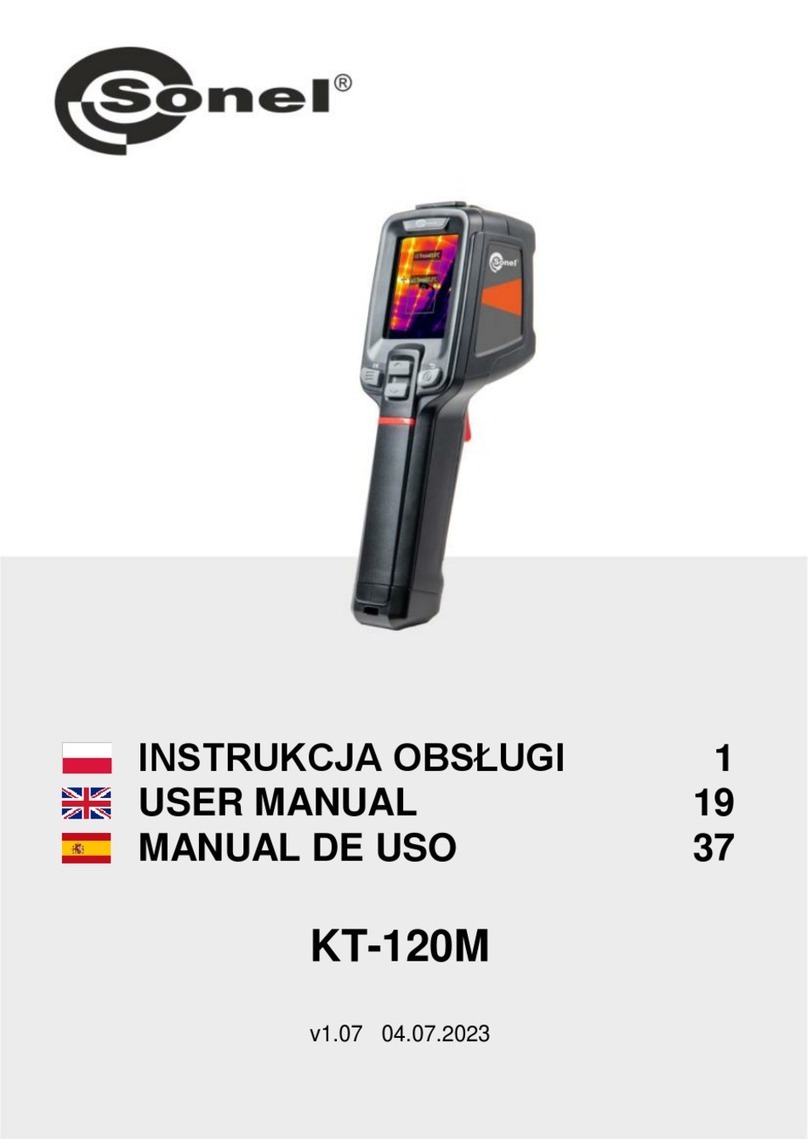
Sonel KT-165 User manual

USER MANUAL
THERMAL IMAGERS
KT-165 ● KT-250 ● KT-320


USER MANUAL
THERMAL IMAGERS
KT-165 ● KT-250 ● KT-320
SONEL S.A.
Wokulskiego 11
58-100 Świdnica, Poland
Version 1.01 27.09.2018

KT-165 ● KT-250 ● KT-320 –USER MANUAL
2
Thank you for purchasing our thermal camera. KT camera is a modern, easy and safe measuring de-
vice. Please acquaint yourself with the present manual in order to avoid measuring errors and prevent
possible problems related to operation of the camera.
All products of Sonel S.A. are manufactured in accordance with Quality Management System which
is approved to ISO9001:2008 for the design, manufacturing, and servicing.
Due the continuous development of our products, we reserve the right to introduce changes and im-
provements in the thermal imaging camera and in the software described in this manual without prior
notice. Illustrations presented in this manual may slightly differ from the real product.
Copyrights
© Sonel S.A. 2018. All rights reserved.

KT-165 ● KT-250 ● KT-320 –USER MANUAL
3
CONTENTS
1Safety ................................................................................................................5
2Functional description ....................................................................................6
2.1 Components of the camera...................................................................................... 6
2.2 Function buttons and screen menu..........................................................................7
2.2.1 Layout of buttons ..............................................................................................................7
2.2.2 Screen..............................................................................................................................8
2.2.3 Location of information on the screen ...............................................................................8
3Camera control and adjustment.....................................................................9
3.1 Turning the camera or screen ON/OFF ...................................................................9
3.2 Enlarging the image - Digital Zoom........................................................................10
3.3 Temperature range ................................................................................................10
3.4 Capturing and recording images............................................................................ 12
3.5 Menu, settings, functions .......................................................................................13
3.5.1 Full screen......................................................................................................................14
3.5.2 Temperature analysis......................................................................................................15
a. Point ............................................................................................................................16
b. Area Max.....................................................................................................................16
c. Area Min......................................................................................................................17
d. Upper isotherm ............................................................................................................17
e. Lower isotherm............................................................................................................18
3.5.3 Emissivity........................................................................................................................19
3.5.4 Palette ............................................................................................................................20
3.5.5 Temperature settings (settings of parameters for temperature measurement).................22
a. Advanced.....................................................................................................................23
b. Unit..............................................................................................................................24
c. Temperature alarm.......................................................................................................24
3.5.6 System settings ..............................................................................................................26
a. Automatic shutdown.....................................................................................................27
b. Time/Date....................................................................................................................27
c. Language.....................................................................................................................29
d. Brightness....................................................................................................................30
e. Storage........................................................................................................................30
f. Update.........................................................................................................................31
g. WiFi Hotspot................................................................................................................31
h. USB Video...................................................................................................................32
i. Reset Factory ..............................................................................................................33
j. Help.............................................................................................................................34
k. Version Code...............................................................................................................34
3.6 Files - viewing, deleting.......................................................................................... 35
3.7 SD memory card .................................................................................................... 38
3.8 Power supply, battery charging..............................................................................39
3.8.1 Removal /installation of the battery .................................................................................39
3.8.2 Using the AC adapter......................................................................................................40
3.8.3 Power supply from the battery pack................................................................................40
3.8.4 Charging the battery pack...............................................................................................40
3.8.5 General rules for using Li-Ion rechargeable batteries......................................................41
3.9 Installing the camera driver....................................................................................42
3.9.1 Hardware requirements...................................................................................................42
3.9.2 Installation.......................................................................................................................42
3.10 Reading data from the external memory / SD card................................................ 43

KT-165 ● KT-250 ● KT-320 –USER MANUAL
4
3.11 Preview of the infrared image via USB...................................................................44
3.12 Data Analysis .........................................................................................................44
4Cleaning and maintenance........................................................................... 45
5Storing............................................................................................................ 45
6Dismantling and disposal............................................................................. 45
7Specifications................................................................................................ 46
8Equipment...................................................................................................... 47
9Manufacturer.................................................................................................. 47
10 Laboratory services ...................................................................................... 48
11 Examplary Emissivity Coefficient Values ................................................... 49

KT-165 ● KT-250 ● KT-320 –USER MANUAL
5
1 Safety
Before you proceed to operate the camera, acquaint yourself thoroughly with the present manual and
observe the safety regulations and specifications defined by the producer.
Any application that differs from those specified in this manual may result in damage to the de-
vice and constitute a source of danger for the user.
The camera must not be used in rooms where special conditions are present e.g. fire and explo-
sion risk.
It is forbidden to use damaged or malfunctioning camera.
When the camera is not used for a long time, remove the batteries.
Do not use the camera with half-closed or opened battery cover and do not use any other adapter
than the one supplied with the camera.
Repairs may be performed only by an authorised service point.
KT-165 / KT-250 / KT-320 thermal camera is designed to measure and record the images in the infra-
red. It is designed to provide the user with maximum performance and safety during the work. How-
ever, the following guidelines and recommendations must be observed at all times (in addition to all
binding precautions applicable at individual work stands and work areas):
Keep the camera steady when performing the measurements.
Do not use the camera in temperatures exceeding its working and storage temperature ranges.
Do not direct the camera toward very high intensity radiation sources such as the sun, la-
sers or welding arcs etc.
Do not expose the camera to dust and moisture. When operating the device near water, ensure
that it is adequately guarded against splashes.
When the camera is not in use or is to be transported, ensure that the unit and its accessories
are stored in the protective carry case.
Do not re-switch on the camera until 15 seconds later after switching it off.
Do not throw, knock or shake intensely the camera and its components in order to avoid the
damage.
Do not attempt to open the camera body, as this action will void the warranty.
Use only the SD memory card supplied with the camera.
During operation, if the camera is to be moved from hot/cold place to cold/hot place, e.g. from in-
side/outside to outside/inside of a room, switch off the camera and leave it in the new workplace
for 20 minutes. Only after that time, turn it on and start normal operation with an accurate tem-
perature measurement. Sudden and rapid changes in ambient temperature may cause fault tem-
perature measurement and even damage camera’s IR detector.
Calibration of the detector - during operation, the camera performs auto-calibration from time to
time, which takes approx. 2 seconds and which is signalled by "Calibration" message at the bot-
tom of the screen.
Due to continuous development of the instrument's software, the actual appearance
of the display may slightly differ from the display presented in this manual.
To maintain required parameters of rechargeable batteries, unused rechargeable
batteries should be charged every 3 months. When the camera is not used for a
long time, remove the batteries and store them separately.

KT-165 ● KT-250 ● KT-320 –USER MANUAL
6
CAUTION!
KT-165 / KT-250 / KT-320 thermal camera has no parts that could be repaired by
the user. Never attempt to disassemble or modify the camera. Opening the device
will void the warranty.
Use only standard and additional accessories, listed in section 8. Using other ac-
cessories does not ensure proper operation of the camera and may cause its dam-
age.
2 Functional description
2.1 Components of the camera
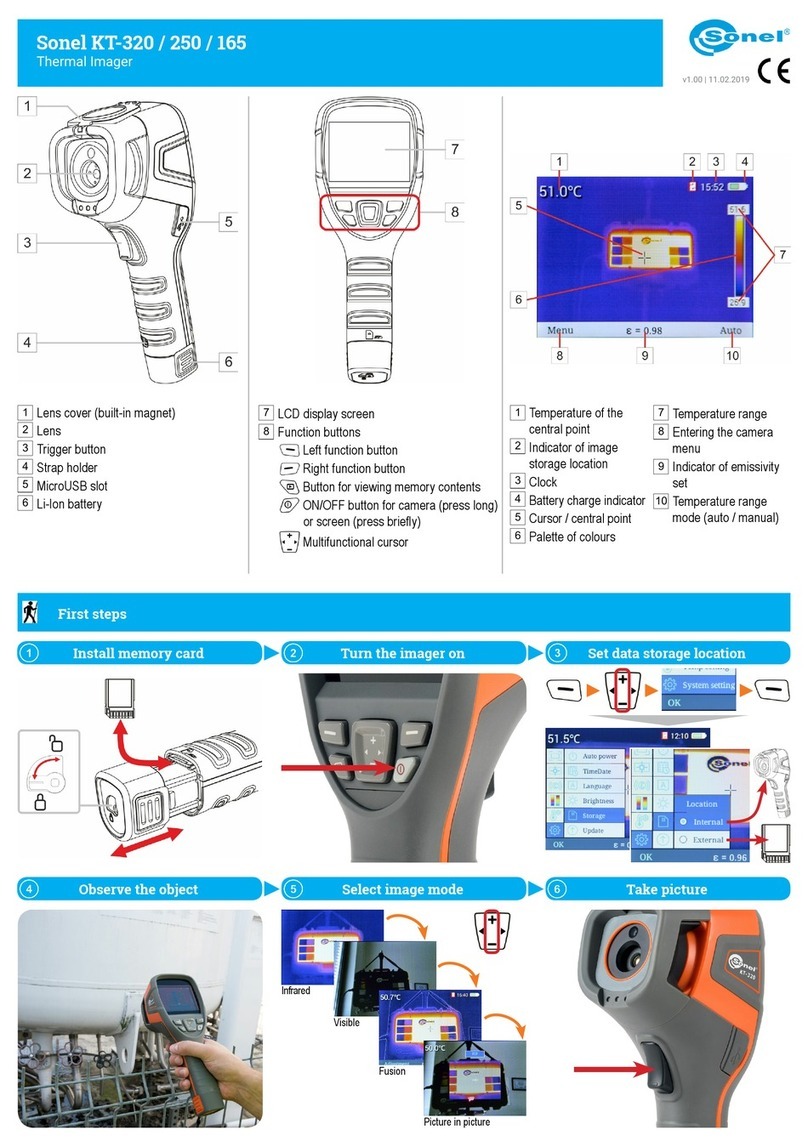
Lens cover (built-in magnet)
Lens
Trigger button
Strap holder
MicroUSB slot
Li-Ion battery (after removing it the SD card slot is accessible)
LCD display screen
Function buttons

KT-165 ● KT-250 ● KT-320 –USER MANUAL
7
2.2 Function buttons and screen menu
2.2.1 Layout of buttons
Camera functions are available after pressing
the buttons located below LCD screen,
the trigger button .
The function buttons are arranged as shown in the figure below.
Left function button
Right function button
Button for viewing SD card contents
ON/OFF button for camera or screen
Multifunctional cursor where:
Enlarging the image / increasing selected values / cursor up
Reducing the image / decreasing selected values / cursor down
Cursor left
Cursor right
During operation of the camera, using buttons or it is possible to change the display mode.

KT-165 ● KT-250 ● KT-320 –USER MANUAL
8
2.2.2 Screen
During operation of the camera, the infrared image is displayed in real time on the screen . In the
upper left corner, the temperature of the object in the central point of the screen is displayed for
the whole time.
At the bottom of the screen, a menu is displayed, where each option may be activated by using one
out of two buttons.
In the above example, button corresponds to Menu command. The button corresponds to
Auto command.
2.2.3 Location of information on the screen
Temperature of the central
point.
Cursor / central point
Indicator of emissivity set
Indicator of image storage
location
Palette of colours
Temperature range mode
(auto / manual)
Clock
Temperature range
Battery charge indicator
Entering the camera menu

KT-165 ● KT-250 ● KT-320 –USER MANUAL
9
3 Camera control and adjustment
3.1 Turning the camera or screen ON/OFF
Before turning on the camera ON, open the lens cover.
In order to switch the camera on, press and hold button for more than 3 sec. The camera will
display the welcome logo and commence the start-up, including the self-check. After completing the
self-check, the camera is ready to work and enters the mode of real-time display of infrared image.
To switch OFF the camera:
press and hold button. Hold the button until the screen goes blank;
press and hold button for approx. 2 sec. The screen will show the following message: Pow-
er off Your camera will shut down. To turn off the camera, use buttons to highlight OK and
confirm the selection using button . Select Cancel to exit the menu.

KT-165 ● KT-250 ● KT-320 –USER MANUAL
10
Shortly press button to turn OFF only the screen. It is recommended to turn OFF the screen
temporarily for short breaks in the measurements, in order to save energy. For longer breaks, we
recommend to completely turn off the camera.
The camera cannot be turned OFF in full screen mode.
In order to eliminate possible errors in temperature readouts after turning off the
camera, wait for 15 seconds before turning it on again.
3.2 Enlarging the image - Digital Zoom
To operate the zoom function, use the cursor . When the screen shows no menu (full-screen
mode, sec. 3.5.1), pressing button will activate the zoom in mode –the screen image will be
enlarged twice. In this mode:
the magnification of 1-, 2- and 4-fold is available and
access to other functions is unavailable.
The zoom magnification is indicated by symbol or in the upper, central part of the
screen. Zoom function is operated by buttons Press button to exit the zoom mode.
3.3 Temperature range
The camera offers manual or automatic selection of the temperature range.
The bottom bar on the right side shows the information on the current mode of temperature range se-
lection (Auto or Manual). Press button to select:
Auto (automatic selection of the displayed temperature range) –during the measurement, maxi-
mum and minimum temperatures will be automatically adjusted for the temperature range bar,
depending on the detected temperature distribution in the observed area,
Manual (manual selection of the displayed temperature range) –entering the manual mode of
selecting the temperature range.

KT-165 ● KT-250 ● KT-320 –USER MANUAL
11
If the manual mode is selected,
this information is shown at the
bottom bar.
Press or buttons to in-
crease or decrease both limits of
the temperature range shown on
the thermal image.
Pressing button on the cursor
will extend the temperature range
–lowering the bottom limit and in-
creasing the upper limit.
Pressing button will reduce the
temperature range –increasing
the lower limit and lowering the
upper limit.
Accept the manually selected
temperature range by pressing
button (OK) or by a few sec-
onds of inactivity (next to limit val-
ues, padlock symbols will be dis-
played)

KT-165 ● KT-250 ● KT-320 –USER MANUAL
12
3.4 Capturing and recording images
The camera displays the image in
a continuous manner.
To capture an image, press the
trigger button . This will tem-
porarily freeze the displayed
image and a message on record-
ing the image will be displayed on
the screen.
After recording the image, the
camera will automatically return
to the real-time display of infrared
image.

KT-165 ● KT-250 ● KT-320 –USER MANUAL
13
3.5 Menu, settings, functions
When the screen is not showing
any menu, press button or
to display the bottom bar.
After selecting Menu ( but-
ton) the main menu of the camera
will be shown. It allows you to set
the parameters of the camera.
The desired parameter may be selected, with cursors up / down (button or ). After highlight-
ing desired parameter, you can accept it by pressing button (OK) or using the cursor . To exit,
press button (Exit) or cursor .

KT-165 ● KT-250 ● KT-320 –USER MANUAL
14
3.5.1 Full screen
The screen shows the main menu
of the camera.
To enter the full screen mode, se-
lect Full Screen option and ac-
cept it (OK).
Exit the mode by pressing
button or .

KT-165 ● KT-250 ● KT-320 –USER MANUAL
15
3.5.2 Temperature analysis
The screen shows the main menu
of the camera.
Select Temp Analyze option to
open a sub-menu with analysis
functions.
You can select one of several op-
tions.

KT-165 ● KT-250 ● KT-320 –USER MANUAL
16
a. Point
Select Point, to activate the operation in standard mode, with the cursor in the middle of the screen.
b. Area Max
Select Area Max to activate the temperature monitoring mode with indication of the point with the
maximum temperature within the selected area.
The screen will show the area selected for monitoring the maximum temperature. The cursor chang-
es location, indicating the point of the highest temperature measured within the area. Indication of the
cursor temperature is repeated next to the cursor.
If the alarm function is activated for maximum temperature, then after exceeding the alarm threshold
the maximum temperature indicator (shown next to the cursor) will change colours (background of
temperature value will change from white to red).

KT-165 ● KT-250 ● KT-320 –USER MANUAL
17
c. Area Min
Select Area Min to activate the temperature monitoring mode with indication of the point with the min-
imum temperature within the selected area.
The screen will show the area selected for monitoring the minimum temperature. The cursor changes
location, indicating the point of the lowest temperature measured within the area. Indication of the
cursor temperature is repeated next to the cursor.
If the alarm function is activated for minimum temperature, then after exceeding the alarm threshold
the maximum temperature indicator (shown next to the cursor) will change colours (background of
temperature value will change from white to blue).
d. Upper isotherm
Select Above to activate isothermal analysis mode. Areas with a temperature above the set threshold
are displayed in red.
Selected threshold value is shown next to the indicator of the colour palette . It may be
increased or decreased by clicking buttons or .
Exit the function by pressing button (OK) or (Exit).

KT-165 ● KT-250 ● KT-320 –USER MANUAL
18
e. Lower isotherm
Select Below to activate isothermal analysis mode. Areas with a temperature below the set threshold
are displayed in blue.
Selected threshold value is shown next to the indicator of the colour palette . It may be
increased or decreased by clicking buttons or .
Exit the function by pressing button (OK) or (Exit).
This manual suits for next models
2
Table of contents
Other Sonel Laboratory Equipment manuals
Popular Laboratory Equipment manuals by other brands

CORNING
CORNING Axygen MotoPet instruction manual

Agilent Technologies
Agilent Technologies 6460 Guide

Agilent Technologies
Agilent Technologies 8860 Maintaining

cytiva
cytiva AKTA readyflux operating instructions

Optika Italy
Optika Italy OPTIGEM Series instruction manual

Primus
Primus PSS500 Quick reference instructions