Sonelco PCP1290 User manual

DESCRIPTION
Control with direct power supply at 230V. 2 stereo channels : FM radio with RDS and
auxiliary channel JACK 3.5. Alarm clock, calendar, auto-off, and remote control.
CONNECTION
OPERATION
Before connecting the device, make sure that the power supply unit of the system is
switched off. Insert the control into the frame and make the connection according to the
following instructions:
When power is supplied to the control, the time, date and following items are displayed:
TERMINALS:
L - 230 Vac Line.
N - 230 Vac neutral
4FA040101 DIGITAL CONTROL WITH FM TUNER & AUX INPUT PCP1290
Infrareds activated – Infrareds deactivated, icon not visible
Mono / Stereo (Only in tuner function)
CONTROL OFF:
In this initial state, the volume Up (5) / Down (8) / Exit (6) / Accept (7) buttons have no
function, only the on button (4).
CONTROL ON:
With the volume Up (5) / Down (8) buttons we change stations.
With the volume Up (6) and Accept (7) buttons, we turn the volume up and down.
ENTER MAIN MENU:
With the control switched on, press the Menu button (4) for two or three seconds to enter
the menu; scroll down the menu with Up (5) and Down (8) buttons until you reach the
option you wish to modify. Press Accept (7) and then Exit button (6) to exit the menu.
MAIN MENU:
AUDIO
RADIO
CHANNEL
EQUALIZE
TIMER OFF (TIMER)
DATE/TIME
ALARM
CONFIGURE
LANGUAGE
AUDIO
BASS - With buttons 6 and 7, we adjust the bass level, with button 8 we exit and
validate the adjustment. To exit the menu we will press button 6 to return to
on mode. If we do not touch the buttons, after 30 seconds we will return to
on position.
TREBLE - With buttons 6 and 7, we adjust the treble level, with button 8 we exit
and validate the adjustment. To exit the menu we will press button6 to return to on
mode. If we do not touch the buttons, after 30 seconds we will return to on position.
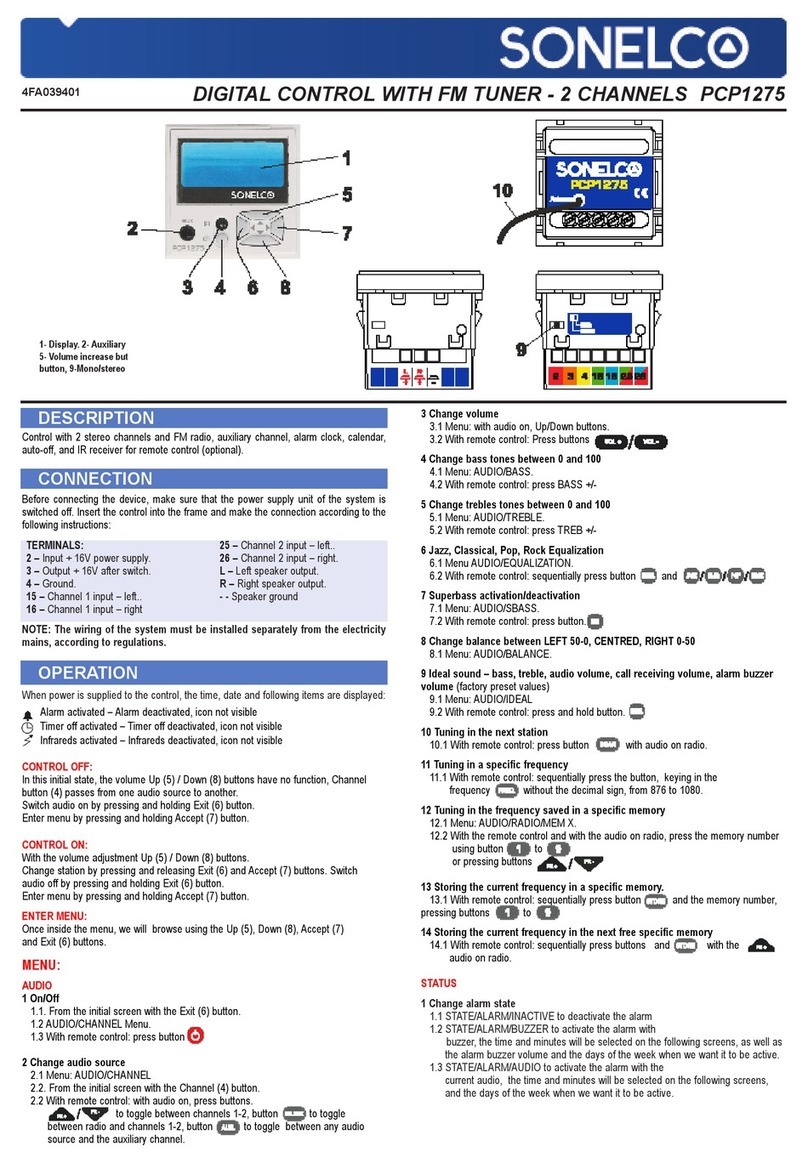
1- Display. 2- Auxiliary channel input. 3- Infrared receiver, 4- ON/OFF/MENU
5- Volume increase button, 6- Exit button, 7- Accept button, 8- Volume down button
SUPERBASS -With buttons 5 and 8 we select ACTIVATE or DEACTIVATE the
SUPERBASS function. With button 7, we validate the option and with button
6 we exit the menu. With the function activated on the display the Sb icon will
appear. If we do not touch the buttons, after 30 seconds we will return to on
position.
IDEAL -When we select the IDEAL function, it is automatically activated and the
Id icon appears on the display. To exit the menu we will press button 6 until we
return to on mode. If we do not touch the buttons, after 30 seconds we will return to
on position.
RADIO
MONO/STEREO - With buttons 5 and 8 we select the MONO or STEREO option
With button 7, we validate the option and with button 6 we exit the menu until we
return to on mode. The following information will appear on the display:
Mono , Stereo .
If we do not touch the buttons, after 30 seconds we will return to on position.
SENSITIVITY - After entering the menu, we can choose 4 search sensitivity
levels: MAXIMUM – HIGH – LOW - MINIMUM. With buttons 5 and 8 we will choose
the search sensitivity level, with button 7 we validate the option and with
button 6 we exit the menu until we return to the on mode. If we do not touch the
buttons, after 30 seconds we will return to on position.
AUTOSEARCH - When we select the AUTOSEARCH function, the tuner
automatically searches for all available stations and stores them in the memories.
With button 6 we exit the menu until we return to on mode. If we do not touch the
buttons, after 30 seconds we will return to on position.
SEARCH - In the search menu, we have two options, DIRECT and MEMORIES.
The direct option searches for the stations on the dial and the memories option
searches for the stations we have stored. With buttons 5 and 8, we will choose the
search mode and with button 7, we validate the option and with button 6 we exit the
menu until we return to on mode. If we do not touch the buttons, after 30 seconds
we will return to on position.
MEMORISE - In this option, we memorise the stations manually; to do this, we will
have to tune in the station we want to store, then enter the MEMORISE menu; with
buttons 5 and 8 we will choose the memory (M01 empty , M01 occupied )
where we want to store the station and if we keep button 7 pressed for a few
seconds, it will be stored. To exit the menu, press button 6 until you return to on
mode.
DELETE - After entering the delete menu we have two options; delete all the
memories (ALL) or just one memory (ONLY ONE). With buttons 5 and 8 we select
the option we want. If we select ALL, when we press button 7 all the memories will
automatically be deleted. If we choose ONLY ONE, when we press button 7, we
will enter a menu where we will be able to select the memory we wish to delete by
pressing buttons 5 and 8; we accept with button 7 and the memory will be deleted.
We will repeat the process until all the memories we wish have been deleted. To
exit the menu, press button 6 until you return to on mode.
RDS - With buttons 5 and 8 we will select the RDS ACTIVATE or DEACTIVATE
option. When the RDS is activated, the name of the selected station will appear on
the display. With button 7, we validate the option and with button 6 we exit the menu
until we return to on mode. If we do not touch the buttons, after 30 seconds we will
return to on position.
Ant - Antenna.
L + – Left speaker output.
R + – Right speaker output.
- - Speaker ground

CHANNEL - In this menu, we have the option of selecting between RADIO and
AUX. With buttons 5 and 8, we will select the channel we wish to listen to
and with button 7 we will validate the option. To exit the menu we will press
button 6 to return to on mode. If we do not touch the buttons, after 30 seconds
we will return to on position.
EQUALIZE - In this menu, we have a choice of several pre-established
equalizations: POP, JAZZ, ROCK and CLASSICAL. With buttons 5 and 8, we
will select the type of equalization and with button 7 we will validate the option.
To exit the menu we will press button 6 until we return to on mode. If we do not
touch the buttons, after 30 seconds we will return to on position.
TIMER - With the timer function (SLEEP), the control goes off after the time we have
selected has elapsed. In the menu, we will find 6 pre-established timings, which
are: 10, 20, 30, 40, 50 and 60 minutes. With buttons 5 and 8, we will select
the time and with button 7 we will validate the option. Icon will appear on the
display. To exit the menu we will press button 6 until we return to on mode. If we
do not touch the buttons, after 30 seconds we will return to on position.
DATA / TIME
DATA - With buttons 6 and 7 we will scroll down the digits corresponding to the
day, month and year. With button 5, we will change the number of the day, month
and year. To exit we will press button 8 and we return to the DATE/TIME menu.
To exit the menu we will press button 6 until we return to on mode. If we do not
touch the buttons, after 30 seconds we will return to on position.
TIME - With buttons 6 and 7 we will scroll the digits corresponding to the hour
and minutes. With button 5, we will change the number of the hours and of the
minutes. To exit we will press button 8 and we return to the DATE/TIME menu. To
exit the menu we will press button 6 until we return to on mode. If we do not
touch the buttons, after 30 seconds we will return to on position.
12 FORMAT - With buttons 5 and 8, we will select the option and with button 7
we will validate it. The icons AM or PM will appear on the display: To exit the
menu we will press button 6 until we return to on mode. If we do not touch the
buttons, after 30 seconds we will return to on position.
24 FORMAT - With buttons 5 and 8, we will select the option and with button 7
we will validate it. To exit the menu we will press button 6 until we return to on
mode. If we do not touch the buttons, after 30 seconds we will return to on
position.
ALARM
TIME - With buttons 6 and 7 we will scroll down the digits corresponding to the
hour and minute. With button 5, we will change the number of the hours and of
the minutes. To exit we will press button 8 and we return to the ALARM menu.
To exit the menu we will press button 6 until we return to on mode. If we do not
touch the buttons, after 30 seconds we will return to on position.
ACTIVATE - With buttons 5 and 8, we will go to ACTIVATE and by pressing
button 7 we validate the option and automatically return to the ALARM menu.
Icon will appear on the display. To exit the menu we will press button 6 until we
return to on mode. If we do not touch the buttons, after 30 seconds we will return
to on position.
DEACTIVATE - With buttons 5 and 8, we will go to DEACTIVATE and by
pressing button 7 we validate the option and automatically return to the ALARM
menu. To exit the menu we will press button 6 until we return to on mode. If we
do not touch the buttons, after 30 seconds we will return to the on position.
ALARM AUDIO - In this option, we choose the type of sound we want to activate for
the alarm. There are two options: RADIO AND BUZZER. With buttons 5 and 8, we
will select one of the two options and with button 7 we will validate it. To exit the
menu we will press button 6 to return to on mode. If we do not touch the buttons,
after 30 seconds we will return to on position.
BUZZER - When we enter this option, we will adjust the buzzer volume with
buttons 6 and 7. Press and hold to return to the ALARM menu. To exit the menu
we will press button 6 until we return to on mode. If we do not touch the buttons,
after 30 seconds we will return to on position.
CONFIGURE
INFRARED - With buttons 5 and 8 we can select between ACTIVATE and
DEACTIVATE the function. With this, we will get the control to be able to work
with remote control P4804. To exit the menu we will press button 6 until we return
to on mode. If we do not touch the buttons, after 30 seconds we will return to on
position.
BACKLIGHT - In this menu, we can modify the display lighting. There are two
options, the control off (AUDIO OFF) option and the control on (AUDIO ON)
option. With buttons 5 and 8, we will select one of the two options, with button 7
we will validate the option and we enter the adjustment menu; with buttons 6 and
7 we adjust the degree of luminosity that we want. With button 8 we validate and
exit at the same time, returning to the BACKLIGHT menu. To exit the menu we will
press button 6 until we return to on mode.
If we do not touch the buttons, after 30 seconds we will return to on position.
LANGUAGE - In the LANGUAGE option, we have a choice of the following
languages: SPANISH, FRENCH, ENGLISH, PORTUGUESE and DUTCH. With
buttons 5 and 8, we will select the language and with button 7 we will validate it.
To exit the menu we will press button 6 until we return to on mode. If we do not
touch the buttons, after 30 seconds we will return to on position.
INSTALLATION EXAMPLE
These characteristics are provided for information purposes only. The manufacturer reserves the right to make modifications without prior notice in order to improve the product PCP1290 / 22-01-14
TECHNICAL CHARACTERITICS
Power supply voltage: 230V
Maximum consumption: 540 mA; consumption on standby 50 mA.
Rated output power: 1+1W RMS; Output impedance: 8 Ohm
Maximum output power: 1.5+1.5W RMS;
Distortion < 1%
Frequency response: 90Hz-18KHz (-3dB)
Signal/Noise ratio: >55 dB
Auxiliary input sensitivity: 60 mV
Crosstalk: 38 dB
REMOTE CONTROL P4804 FUNCTIONS
We can carry out the same functions with remote control P4804.
The operation is described in the control data sheet.
THE SPEAKERS TO CONNECT MUST BE 8 Ohms

Instructions for installation of bluetooth
Safety during installation
The installation must be performed by a person properly qualified in electrical engineering. Before commencing
the installation, always disconnect mains voltage.
During installation of the bluetooth, the following conditions must be observed:
•The bluetooth mounting box must be placed flush with the plaster.
•In case of problems with a “sunk” mounting box, the VK1 or VK2
spacer (distance) rings must be used in order to prevent deformation of the
fittings when the screws are tightened.
•The switch is fastened in the mounting box though a sheet-metal
frame by means of two screws of 3 mm diameter (Fig.1,2).
•Position the frame correctly, see Fig. 2, lugs marked with arrows
•To install multiple fitting assemblies, it is necessary to use multiple
boxes with the spacing of centres of 71 mm.
•It is recommended to place the bluetooth in the mounting boxes at
the approximate depth of 40 mm.
•Plastic base segment, pos. 3, snap on the sheet metal frame
•In the bluetooth switch, pos. 4, strip insulation and connect the
wires according to the wiring diagram. Then insert the bluetooth unit in the
base segment, pos. 3, together with the sheet metal frame, pos. 2, until the
bluetooth is locked with the lugs positioned on the sides.
•Put the frame, pos. 5 (wood, metal, plastic, etc.) on the base segment, pos. 3
•Finally, fit the visible component - intermediate frame, pos. 6
Disassembly of bluetooth
•Use a flat screwdriver and slide the intermediate frame out carefully
•Then remove the frame
•Finally, remove the complete bluetooth device using the screwdriver.
The product contains no hazardous substances; after expiration of its service life, it must be handled in
conformity with the waste act in force or pertinent related regulations.
Other Sonelco Controllers manuals
Popular Controllers manuals by other brands
Smartgen
Smartgen HMC9000 user manual
Gate
Gate NanoHARD user guide

Comet
Comet H5421 Quick start manual

HomeSeer Technologies
HomeSeer Technologies HomeTroller Series II Getting started guide

WEIGL
WEIGL WEMC-KEY232 instruction manual

Manson Engineering Industrial
Manson Engineering Industrial PVC-7830 user manual


