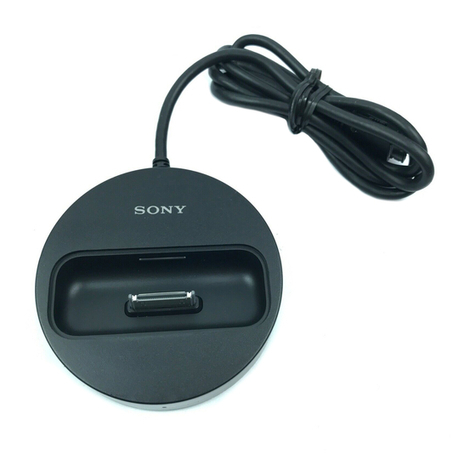
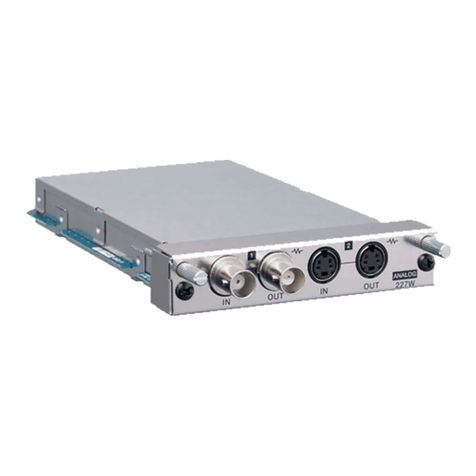
Sony TDM-iP50 - Digital Media Port Cradle User manual

©2008 Sony Corporation
US
FR
ES
3-877-710-22(1)
DIGITAL
MEDIA
PORT
Adapter
Operating Instructions
_
______
_
Mode d’emploi ______________
_
Manual de instrucciones
_
______
_
TDM-iP50

2US
Do not install the appliance in a
confined space, such as a bookcase or
built-in cabinet.
The nameplate is located on the bottom
exterior.
Install this system so that the power
cord can be unplugged from the wall
socket immediately in the event of
trouble.
The unit is not disconnected from the
AC power source (mains) as long as the
connected AV system is connected to
the wall outlet.
Notice for the customers in the
U.S.A.
WARNING
This equipment has been tested and
found to comply with the limits for a
Class B digital device, pursuant to Part
15 of the FCC Rules. These limits are
designed to provide reasonable
protection against harmful interference
in a residential installation. This
equipment generates, uses, and can
radiate radio frequency energy and, if
not installed and used in accordance
with the instructions, may cause
harmful interference to radio
communications. However, there is no
guarantee that interference will not
occur in a particular installation. If this
equipment does cause harmful
interference to radio or television
reception, which can be determined by
turning the equipment off and on, the
user is encouraged to try to correct the
interference by one or more of the
following measures:
– Reorient or relocate the receiving
antenna.
– Increase the separation between the
equipment and receiver.
– Connect the equipment into an outlet
on a circuit different from that to
which the receiver is connected.
– Consult the dealer or an experienced
radio/TV technician for help.
CAUTION
You are cautioned that any changes or
modifications not expressly approved in
this manual could void your authority to
operate this equipment.
Notice for the customers in
Canada
This class B digital apparatus complies
with Canadian ICES-003.
On copyrights
• iPod is a trademark of Apple Inc.,
registered in the U.S. and other
countries.
• iPhone is a trademark of Apple Inc.
• All other trademarks and registered
trademarks are of their respective
holders. In this manual, ™ and ®
marks are not specified.
WARNING

3US
US
Notes
• This unit is designed for iPod only. You can not connect any other portable audio
players.
• In these Operating Instructions, “iPod” is used as a general reference for the iPod
functions on the iPod and iPhone, unless otherwise specified by the text or illustrations.
• Sony cannot accept responsibility in the event that data recorded to iPod is lost or
damaged when using an iPod connected to this unit.
• For details on supplied iPod Dock Adapters, refer to the instructions supplied with
the Dock Adapters. When you use other iPod models, a compatible Dock Adapter
from Apple Inc. will need to be purchased separately.
• This product has been designed specifically to work with iPhone and iPod and has
been certified to meet Apple performance standards.
Compatible iPod models
The compatible iPod models are as follows. Update your iPod to use the
latest software before you use it.
iPod touch iPod nano 3rd
generation (video)
iPod classic iPhone
iPod nano
2nd generation
(aluminum)
iPod
5th generation
(video)
iPod nano
1st generation
iPod
4th generation
(color display)
iPod
4th generation
iPod mini

4US
Overview...............................5
Getting Started
1: Checking supplied items ...6
2: List of parts locations........6
3: Installing the TDM-iP50 ...7
Operating the Unit
Selecting the operating
mode.................................10
Using iPod Display mode....10
Using the On Screen Display
mode.................................12
Additional Information
Troubleshooting ..................16
Precautions ..........................18
Specifications ......................19
Table of Contents

5US
You can enjoy iPod audio, video and photo contents by connecting this
unit to an AV system with DIGITAL MEDIA PORT interface (Sony DAV
series, etc.).
• You can operate your iPod by its control buttons, the control buttons of
the AV system and the remote supplied with the AV system (page 10).
• While browsing information on the iPod screen or on your TV screen in
On Screen Display mode, you can operate your iPod (pages 10, 12).
• You can also use this unit as a battery charger (page 9).
Note
DIGITAL MEDIA PORT is occasionally abbreviated as DMPORT.
Overview
iPod and TDM-iP50 AV system

6US
Unit (1)
Operating Instructions (1)
iPod Dock Adapters (1 set)
For details on supplied iPod Dock Adapters, refer to the instructions supplied with
the Dock Adapters.
1DIGITAL MEDIA PORT cable (page 7)
2iPod connector (page 8)
3OPR MODE button (page 10)
4LED status indicator (page 10)
iPod Display mode (page 10): Lights up in amber.
On Screen Display mode (page 12): Lights up in green.
5VIDEO OUT jack (page 7)
Getting Started
1: Checking supplied items
2: List of parts locations

7US
Connect and position the TDM-iP50 as illustrated below.
If your AV system cannot output video signals when the system is
in DMPORT function
Connect the composite video cable (not supplied) to the VIDEO OUT jack
of this unit.
Refer to the user’s guide of your AV system for further information.
Notes
• This unit turns on/off automatically whenever the connected AV system (DAV
series, etc.) turns on/off.
• When connecting a video cable to a TV that has a SCART (EURO AV) jack, use a
commercially available conversion connector.
• When connecting the composite video cable to the VIDEO OUT jack of the unit,
no image is output from the DIGITAL MEDIA PORT cable of the unit.
3: Installing the TDM-iP50
DMPORT
Video cable
(not supplied) DIGITAL MEDIA
PORT cable
TV AV system
(Sony DAV series, STR series, etc.)
TDM-iP50
DMPORT
DIGITAL MEDIA PORT cable
TV
TDM-iP50
Composite video cable (not supplied)
DIGITAL MEDIA
PORT cable
AV system
(Sony HT series, etc.)
TV
TDM-iP50
continued

8US
To connect/disconnect
the unit
Connecting
1Connect the DIGITAL MEDIA
PORT cable of this unit to the
DIGITAL MEDIA PORT jack of
an AV system (DAV series,
etc.). Make sure the AV system
is turned off before connecting.
2Turn on the AV system with a
DIGITAL MEDIA PORT jack
connected to this unit, and
select the DIGITAL MEDIA
PORT function.
Disconnecting
Before disconnecting, turn off the
AV system.
To put the iPod into the
unit
1Choose the iPod Dock Adapter
that fits your iPod. For details
on supplied iPod Dock
Adapters, refer to the
instructions supplied with the
Dock Adapters.
2Insert the Dock Adapter into
the unit.
3Place the iPod into the unit.
DMPORT
To DMPORT jack
Connect the cable
so that both f
marks are aligned.
To remove the DIGITAL MEDIA PORT
cable from the DMPORT jack, press
both side buttons and pull it out.

9US
Notes
• When placing or removing the iPod,
handle the iPod in the same angle as
that of the iPod connector on this unit
and do not twist or sway the iPod to
prevent connector damage.
• Do not carry the unit with an iPod set
on the connector. Doing so may cause
a malfunction.
• When placing or removing the iPod,
brace the unit with one hand and take
care not to press the controls of the
iPod by mistake.
To use the unit as a
battery charger
You can use the unit as a battery
charger. While the POWER
indicator is lit, the battery can be
charged. The charging status
appears in the iPod display. For
details, see the user’s guide of your
iPod.
To remove the iPod Dock
Adapter
To remove the iPod Dock Adapter, pull
it up with your fingernail or a flat object
using the slot inside the adapter.

10US
You can operate your iPod by the
AV system with DIGITAL
MEDIA PORT interface (Sony
DAV series, etc.).
Switch the operating mode
by pressing OPR MODE on
the unit.
xiPod Display mode
You can operate the unit by the
connected iPod’s buttons, the
connected AV system’s buttons or
its remote.
xOn Screen Display mode
You can operate the unit by the
connected AV system’s buttons or
its remote while displaying the
iPod information menu screen on
the TV.
Note
The mode cannot be switched, except
for the DIGITAL MEDIA PORT
function.
Press OPR MODE on the unit
to switch the mode to iPod
Display mode.
While the unit is in iPod Display
mode, the unit’s LED indicator
lights up in amber.
Notes
• To use an iPod, refer to the user’s
guide of your iPod.
• Before disconnecting the iPod, pause
playback.
Basic Operations
Operating the Unit
Selecting the
operating mode
Using iPod Display
mode
Press To
NStart play.
X/xPause play.
X/xSelect a menu or track
for playback.
c//
ENTER
Execute the selected
menu or play the
selected track.
./>Press and release to
skip to the next
(previous) song/video
or chapter of
audiobook/podcast.
Hold down to fast-
forward (fast-rewind).
m/MFast-forward (fast-
rewind) play.
C/MENU/
DISPLAY/
RETURN
Works much like the
Menu button on the
iPod.

11US
Notes
• Point the remote at the AV system.
• Depending on the connected AV
system, the operation or buttons may
differ. Refer to the AV system’s
operating instructions.
• Depending on the connected iPod,
operations may differ.
• Before enjoying video, adjust the
video settings on the iPod to the
appropriate settings according to your
situation.
• It may take time to start playback
depending on the contents.
• The volume (except for the iPhone
ring volume) cannot be adjusted using
the volume control on the iPod when
it is connected to the AV system.
• Hold down ./>to fast-forward
(fast-rewind) while playing video if
m/Mdoes not function.
• When the iPhone is connected to the
AV system and you receive a call
during playback, playback will pause
and you can take an incoming call.
• The iPhone rings as the ring volume
set on the iPhone even when it is
connected to the AV system. Adjust
the ring volume to the appropriate
setting on the iPhone.
OPR MODE/
MODE
Switch the operating
modes.
VOLUME
+/–
Adjust the volume
level.
Press To

12US
Press OPR MODE on the unit to switch the mode to On Screen
Display mode.
While the unit is in this mode, the unit’s LED indicator lights up in green.
1Selected menu title
2Current settings ( , Repeat, Shuffle)
3[Main Menu] list ([Music], [Videos], [Settings])
4Selected menu
Using the On Screen Display mode
Main Menu
Music
Videos
Settings
>
>
>
DIGITAL
MEDIA
P O R T
2
3
4
1

13US
To enjoy music and video while browsing information
on the on screen display
Example: Music playlists
1Select [Music] from [Main Menu], then press ENTER.
The [Music] menu display appears.
2Select [Playlists] from [Music] menu, then press ENTER.
The [Playlists] menu display appears.
3Select the desired playlist, then press ENTER.
Tracks in the selected playlist appear.
4Select the desired track, then press ENTER.
The selected track starts playback.
1Current playing track
2Artist name
3Album name
4Elapsed time
5Currently playing track number/total number of tracks
6Playback status (Play, Pause, Fast-forward, Fast-rewind)
Notes
• In this mode, you cannot use the iPod’s control buttons.
• When the TDM-iP50 cannot display a character, it is displayed as “*”.
• Depending on the connected iPod, switching to iPod Display mode (page 10) will
be necessary in order to display video/photo images.
• Before disconnecting the iPod, pause playback.
• While “Loading…” is displayed on the TV, do not disconnect the iPod.
• It may take time to start playback depending on the contents.
• Before enjoying video, adjust the video settings on the iPod to the appropriate
settings according to your situation.
My Favorites
Jack and Paul
Somebody
Colors
To Marble
Woman in Red
Joy
Colors
Jennifer G
My Best Album
1/ 16 1: 30
2
3
4
5
6
1
continued

14US
Basic operations
Settings menu
In the Settings menu, you can
select this unit’s settings: [Screen
Saver], [Color Theme], [Shuffle],
[Repeat], [Audiobooks]. The
setting switches by pressing
ENTER, , or crepeatedly.
The default settings are
underlined.
Note
[Screen Saver] and [Color Theme] can
be selected by pressing ENTER, and
their settings can be changed even when
the iPod is not placed into the unit.
xScreen Saver
The screen saver image appears on
the TV after about 15 minutes of
inactivity. Press any button to
cancel the screen saver.
The display does not switch to the
screen saver image while playing
video.
xColor Theme
Selects the on screen display color
on the connected TV.
xShuffle
Plays the songs/albums in random
order.
The setting is determined by the
iPod settings.
Press To
NStart play.
X/xPause play.
c//
ENTER
Select the menu/go to
the next menu display/
start playback.
C/MENU/
DISPLAY/
RETURN
Go to previous menu
display.
X/xMove cursor.
./>Press and release to
skip to the next
(previous) song or
chapter of audiobook/
podcast.
Hold down to fast-
forward (fast-rewind).
m/MFast-forward (fast-
rewind) play.
OPR MODE/
MODE
Switch the operating
modes.
VOLUME
+/–
Adjust the volume
level.
[ON] Turns on the screen saver.
[OFF] Turns off the screen saver.
[Auto] The color is selected
automatically according to
your iPod.
[White] The color is white.
[Black] The color is black.
[Green] The color is green.
[Red] The color is red.
[Blue] The color is blue.
[OFF] Does not play in random
order.
[Songs] Plays songs in random
order.
[Albums] Plays albums in random
order.

15US
Note
When video contents are played, the
[Shuffle] setting turns [OFF]
automatically.
xRepeat
Plays songs repeatedly.
The setting is determined by the
iPod settings.
xAudiobooks
Changes the Audiobook playback
speed.
The setting is determined by the
iPod settings.
[OFF] Does not play repeatedly.
[Repeat
to One]
Repeat one song.
[Repeat
to All]
Repeat all songs.
[Slower] Plays Audiobook slowly.
[Normal] Plays Audiobook at normal
speed.
[Faster] Plays Audiobook rapidly.

16US
Should you encounter a problem
with your unit, find your problem
in the troubleshooting checklist
below and take the indicated
corrective action. If the problem
persists, contact your Sony dealer.
Note that if service personnel
changes some parts during repair,
these parts may be retained.
When bringing the system in for
repairs, be sure to bring in the
entire system.
This product is a system product,
and the entire system is needed to
determine the location requiring
repair.
The LED indicator flashes.
• Remove the iPod, and turn the
AV system off, then on again.
If the LED indicator still flashes,
consult your nearest Sony dealer.
The remote does not function.
• Update your iPod to use the
latest software before you use it.
• Remove any obstacles.
• Point the remote at the AV
system (DAV series, etc.)’s
sensor.
• The distance between the
remote and the AV system is too
far.
• Replace the battery.
• Make sure the iPod* is securely
connected.
• Select the DMPORT function
on the AV system.
• Turn on and off the AV system.
Video/photo image from the
iPod does not appear on the TV
screen.
• Set the operating mode to iPod
Display mode to display photo
images (page 10).
• Make the connection according
to your AV system (page 7).
• When browsing the on screen
display through the DIGITAL
MEDIA PORT cable:
Disconnect the video cable from
the VIDEO OUT jack.
• When browsing the on screen
display through the VIDEO
OUT jack:
Switch the TV input to the video
input connected to this unit.
• Check that the TV output setting
on the iPod is on (Refer to the
user’s guide of your iPod).
• Check that the iPod* is
compatible with video output
(Refer to the user’s guide of
your iPod).
Video/photo image from the
iPod does not appear on the
iPod display.
• Adjust the video/photo image
output settings to the
appropriate settings.
Additional Information
Troubleshooting

17US
On screen display does not
appear on the TV screen.
• Check that the operating mode
is set to On Screen Display
mode (page 12).
• Make the connection according
to your AV system (page 7).
• When browsing the on screen
display through the DIGITAL
MEDIA PORT cable:
Disconnect the video cable from
the VIDEO OUT jack.
• When browsing the on screen
display through the VIDEO
OUT jack:
Switch the TV input to the video
input connected to this unit.
There is no sound.
• Update your iPod to use the
latest software before you use it.
• Check the connections.
• Make sure the unit is securely
connected.
• Make sure the iPod* is securely
connected.
• Make sure the iPod* is playing
music.
• It may take time to start
playback depending on the
contents.
There is severe hum or noise.
• Move the unit away from the
source of noise.
The sound is distorted.
• Reduce the volume of the
connected AV system.
• Set the “EQ” setting of the iPod
to “Off” or “Flat”.
Ring volume of the iPhone
does not change.
• Adjust the ring volume on the
iPhone.
*See “Compatible iPod models”
(page 3).

18US
On safety
Should any solid object or liquid
fall into the system, unplug the
system and have it checked by
qualified personnel before
operating it any further.
On placement
• Do not place the unit in an
inclined position.
• Do not place the unit in
locations where it is;
– Extremely hot or cold
– Dusty or dirty
– Very humid
– Subject to vibrations
– Subject to direct sunlight.
• Use caution when placing the
unit on surfaces that have been
specially treated (with wax, oil,
polish, etc.) as staining or
discoloration of the surface may
result.
On heat buildup
• Although the unit heats up
during operation, this is not a
malfunction.
• Place the unit in a location with
adequate ventilation to prevent
heat buildup in the unit.
If you have any questions or
problems concerning your unit,
please consult your nearest Sony
dealer.
Cleaning the unit
Clean the unit with a soft cloth
slightly moistened with mild
detergent solution. Do not use any
type of abrasive pad, scouring
powder or solvent such as thinner,
benzine or alcohol.
Precautions

19US
Output
Video: 1 Vp-p 75 ohm
(Composite Video
out)
General
Power requirements:
DC IN: 5 V,
0.7 A (via
DIGITALMEDIA
PORT)
Dimensions: Approx. φ95 ×
23(h) mm
(φ33/4×
29/32(h) inch)
Mass: Approx. 225 g
(7.3 oz)
(includes cable)
Cable length: Approx. 1.5 m
(5 ft)
Design and specifications are subject
to change without notice.
Specifications

2FR
N’installez pas l’appareil dans un
endroit exigu tel qu’une bibliothèque ou
un meuble encastré.
La plaque signalétique se trouve sur la
face inférieure de l’appareil.
Installez cette chaîne afin de pouvoir
débrancher immédiatement le cordon
d’alimentation de la prise secteur en cas
de problème.
La chaîne n’est pas isolée du secteur
tant que le système AV connecté reste
branché à la prise murale.
Pour les utilisateurs aux États-
Unis
AVERTISSEMENT
Cet appareil a été contrôlé et satisfait
aux limites imposées pour les unités
numériques de classe B, conformément
à la Partie 15 de la réglementation de la
FCC. Ces restrictions sont conçues pour
fournir une protection raisonnable
contre les interférences nuisibles dans
les lieux résidentiels. Cet appareil
génère, utilise et peut émettre de
l’énergie radioélectrique et, s’il n’est
pas installé ou utilisé selon les
directives, peut causer des interférences
nuisibles aux communications radio.
Cependant, il n’existe aucune garantie
que des interférences ne se produiront
pas dans une installation particulière. Si
ce matériel est source d’interférences
nuisibles pour la réception radio ou
télévisée, ce qui peut être déterminé en
mettant l’appareil hors tension, puis
sous tension, il est recommandé de
tenter d’éliminer ces interférences en
appliquant l’une ou plusieurs des
mesures suivantes :
– Réorienter ou déplacer l’antenne
réceptrice ;
– Éloigner l’appareil du récepteur ;
– Brancher l’appareil à une prise de
courant sur un circuit distinct de celui
sur lequel le récepteur est branché ;
– Consulter le concessionnaire ou un
technicien radio/TV compétent pour
obtenir de l’aide.
ATTENTION
L’utilisateur est avisé que toute
modification non expressément
approuvée dans ce manuel pourrait
entraîner l’annulation des droits
d’utilisation de cet appareil.
AVERTISSEMENT POUR LES
UTILISATEURS AU CANADA
Cet appareil numérique de la classe B
est conforme à la norme NMB-003 du
Canada.
A propos des droits d’auteur
• iPod est une marque de Apple Inc.,
déposée aux Etats-Unis et dans
d’autres pays.
• iPhone est une marque de Apple Inc.
• Toutes les autres marques et marques
déposées appartiennent à leurs
détenteurs respectifs. Dans ce
manuel, les sigles ™ et ® ne sont pas
spécifiés.
AVERTISSEMENT
Other manuals for TDM-iP50 - Digital Media Port Cradle
2
Table of contents
Languages:
Other Sony Adapter manuals

Sony
Sony AC-L100 Instruction Manual

Sony
Sony PCGA-BA1/A Instruction sheet

Sony
Sony BDKP-N1001 User manual

Sony
Sony PSone SCPH-170 U User manual

Sony
Sony PRSA-CC1 User manual

Sony
Sony DCP-77 User manual

Sony
Sony AC-DN2A User manual

Sony
Sony XA-CC1 User manual

Sony
Sony AC-E60HG Quick guide

Sony
Sony AC-S5220E User manual