Sony DXF-20W User manual

Printed in Japan
3-991-782-03(1)
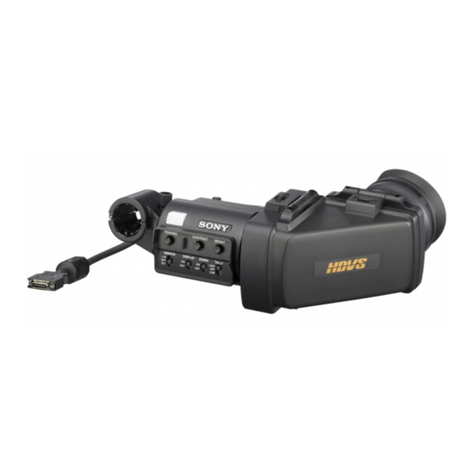
Electronic Viewfinder
© 2006 Sony Corporation
DXF-20W
取扱説明書2 ページ JP
Operating Instructions Page 13 GB
Mode d’emploi Page 22 FR
Bedienungsanleitung Seite 32 DE
Istruzioni per l’uso Pagina 42 IT
Manual de instrucciones Página 52 ES
CS
お買い上げいただきありがとうございます。
電気製品は、安全のための注意事項を守らないと、
火災や人身事故になることがあり、危険です。
この取扱説明書には、事故を防ぐための重要な注意事項と製品の取
り扱いかたを示してあります。この取扱説明書をよくお読みのうえ、
製品を安全にお使いください。お読みになったあとは、いつでも見
られるところに必ず保管してください。

2
安全のために
ソニー製品は安全に充分配慮して設計されています。し
かし、電気製品は、まちがった使いかたをすると、火災
や感電などにより死亡や大けがなど人身事故につながる
ことがあり、危険です。
事故を防ぐために次のことを必ずお守りください。
安全のための注意事項を守る
4 ページの注意事項をよくお読みください。製品全般の
注意事項が記されています。
定期点検をする
長期間、安全にお使いいただくために、定期点検をする
ことをおすすめします。点検の内容や費用については、
ソニーのサービス担当者または営業担当者にご相談くだ
さい。
故障したら使わない
すぐに、ソニーのサービス担当者または営業担当者にご
連絡ください。
万一、異常が起きたら
m
a電源を切る。
b電源コードや接続ケーブルを抜く。
cソニーのサービス担当者または営業担当者に連絡する。
m
すぐにカムコーダーの電源を切り、消火する。
•煙が出たら
•異常な音、においがしたら
•内部に水、異物が入ったら
•製品を落としたり、キャビネットを破損したときは
炎が出たら
警告表示の意味
取扱説明書および製品で
は、次のような表示をし
ています。表示の内容を
よく理解してから本文を
お読みください。
この表示の注意事項を守
らないと、火災や感電な
どにより死亡や大けがな
ど人身事故につながるこ
とがあります。
この表示の注意事項を守ら
ないと、感電やその他の事
故によりけがをしたり周辺
の物品に損害を与えたりす
ることがあります。
注意を促す記号
行為を禁止する記号
日本語

3
JP
目次
警告・注意 .....................................................................4
概要 .....................................................................................5
各部の名称と働き................................................................6
カムコーダーに取り付ける .................................................8
ビューファインダーシューを付け替える ........................ 8
ビューファインダーを取り付ける................................... 9
取り外すときは................................................................ 9
アイピース部の取り扱い ...................................................10
アイピース部を取り外すには ........................................ 10
画面や内部をクリーニングするには ............................. 10
防曇フィルター.............................................................. 11
仕様 ...................................................................................12

4
分解しない、改造しない
分解したり、改造したりすると、感電の原因となります。
ビューファインダー内部の調整や点検を行う必要がある場合は、
必ずソニーのサービス担当者にご依頼ください。
内部に水や異物を入れない
水や異物が入ると火災の原因となります。
万一、水や異物が入ったときは、すぐにカムコーダーの電源を切
り、接続コードを抜いて、ソニーのサービス担当者または営業担
当者にご相談ください。
油煙、湯気、湿気、ほこりの多い場所では設置・使用し
ない
上記のような場所で設置・使用すると、火災や感電の原因となり
ます。
ビューファインダーの接眼レンズを太陽に向けて放置し
ない
太陽光が接眼レンズを通してビューファインダー内部に焦点を結
び、火災の原因となることがあります。
警告・ 注意

概要 5
概要
エレクトロニックビューファインダー
DXF-20W は、2 インチワイドスクリー
ンのビューファインダーです。ソニー
PDW-F330/F350、DSR-450WS シリーズ
カムコーダーに取り付けて使用します。
DXF-20W には以下のような特長があり
ます。
16:9 ワイドスクリーン
2 インチ 16:9 ブラウン管の採用により、
16:9 表示でも映像が縮小されず見やすく
なっています。また、カムコーダー側の
設定により、画面を 4:3 に切り替えるこ
とができます。
高性能ブラウン管
•クイックスタートタイプ(電源を入れ
るのとほとんど同時に画像が現れま
す。)
•高解像度
•低フレア
マーカー表示
カムコーダー側で、センターマーカーや
セーフティーゾーンマーカーなどのマー
カー表示が ON に設定されている場合、
本機のスイッチで、マーカー表示を ON/
OFF できます。
着脱可能なアイピース部
アイピース部を取り外して使うと、目を
離しても画面の中央がぼやけません。ま
た、画面やミラーにほこりが付着したと
きは、アイピース部を取り外してクリー
ニングすることができます。
低ひずみレンズ
アイピース部には、2 枚構成の低ひずみ
レンズを採用しているため、ひずみの少
ない映像を見ることができます。
その他
•大口径で、目を離しても画面が見やす
くなっています。
•別売りの防曇フィルターを取り付ける
と、呼気や水蒸気によるくもりを防ぐ
ことができます。

各部の名称と働き
6
各部の名称と働き
a視度調整リング
画面の映像が最もはっきり見えるよう
に、このリングを回して視度を調整しま
す。
bカメラパーソンタリーランプ
REC/TALLY ランプ(q;)と同様に点
灯、点滅します。
このランプを使用する場合は、スライド
式のふたを開けてください。
cストッパー
本機をカムコーダーに取付けて左右にス
ライドさせるとき、本機がカムコーダー
から外れるのを防ぎます。
dPEAKING(ピーキング)つまみ
時計方向に回すと、画面の映像の輪郭が
強調され、レンズのフォーカス合わせが
容易になります。カムコーダーの出力信
号には影響しません。
eCONTRAST(コントラスト)つ
まみ
画面のコントラスト(濃淡)を調整しま
す。カムコーダーの出力信号には影響し
ません。
fDISPLAY(ディスプレイ)スイッ
チ
ビューファインダーに文字情報やセーフ
ティーゾーンなどのマーカーを表示した
いときに、ON にします。
接続するカムコーダーによっては、あら
かじめカムコーダー側でこれらの文字情
SHUTTER GAIN UP
BATTREC
TALLY
1
2
3
4
5
8
9
0
qa
qs
qd
qg
qf
qh
qj
6
7
アイカップ
ご注意

各部の名称と働き 7
報やマーカーを表示する設定にしておく
必要があります。
gTALLY(タリー)スイッチ
タリーランプを使用するとき、HIGH
(高輝度)または LOW(低輝度)に設定
します。REC/TALLY ランプ(q;)、カ
メラパーソンタリーランプ(2)には影
響しません。
hTALLY(タリー)ランプ(グリー
ン)
グリーンの LED ランプです。点灯、点
滅の仕様は接続するカムコーダーによっ
て異なります。
iBATT(バッテリー)ランプ(赤)
カムコーダーのバッテリーの消耗を知ら
せます。
jREC/TALLY(記録 / タリー)ラン
プ(赤)
赤色の LED ランプです。点灯、点滅の
仕様は接続するカムコーダーによって異
なります。
kGAINUP(ゲイン)ランプ(オレ
ンジ)
ゲインが 3dB 以上のとき点灯します。
lSHUTTER(シャッター)ランプ
(赤)
カムコーダーの SHUTTER スイッチを
ON にすると点灯します。
mロックリング
画面を直接見たいとき、このリングを反
時計方向に回し、ロックリングと本機筒
部のそれぞれの合いマーク(オレンジ
色)を合わせてから、アイピースを抜き
取ります。
nタリーランプ
TALLY スイッチ(7)が HIGH(高輝
度)または LOW(低輝度)のとき、
REC/TALLY ランプ(q;)と同様に動
作します。
o筒部
使用状況に応じて回転させることができ
ます。
このとき、地磁気の影響で画面の位置が
ずれることがあります。
pBRIGHT(明るさ)つまみ
画面の明るさを調整します。カムコー
ダーの出力信号には影響しません。
qビューファインダーコネクター
カムコーダーの VF 端子と接続します。
ご注意

カムコーダーに取り付ける
8
カムコーダーに取
り付ける
ビューファインダーを取り付けたあと、
接眼レンズを太陽に向けて放置しないで
ください。太陽光が接眼レンズを通して
ビューファインダー内部に焦点を結び、
火災の原因となることがあります。
ビューファインダー
シューを付け替える
カムコーダーに DXF-20W 以外のビュー
ファインダーが取り付けられている場合
は、あらかじめ取り外しておきます。
(ここでは PDW-F330 のイラストで説明
していますが、DSR-450WS の場合も同
様です。)
本機は、PDW-F350 には標準であらかじ
め取り付けられているため、この作業は
不要です。
1
付属の六角レンチを使用してボルト
とスプリングワッシャーを外し、
ビューファインダーシューを VF
シューコテイダイから分離する。
2
付属のビューファインダーシューを
取り付ける。
ビューファインダーシューの裏の穴
を、VF シューコテイダイ上の2本
のピンにはめ合わせる。このとき、
ビューファインダーシューの表の△
マークが上に向くようにする。
3
手順 1で外したスプリングワッ
シャーとボルトで、ビューファイン
ダーシューを VF シューコテイダイ
に固定する。
ご注意
ご注意
ビューファイン
ダーシュー
VF シューコテイ
ダイ
fマーク
ピンにはめ合わせる
穴(ビューファイン
ダーシューの裏)
ピン

カムコーダーに取り付ける 9
ビューファインダーを取
り付ける
1
1カムコーダーの左右位置固定リン
グをゆるめる。
2本機裏側の溝をビューファイン
ダーシューにはめる。
2
1本機を矢印の方向にスライドさせ
て取り付け位置を決める。
2カムコーダーの左右位置固定リン
グを締める。
3ビューファインダーコネクターを
カムコーダーの VF 端子に差し込
み、ケーブルクランプでケーブルを
固定する。
•必ずカムコーダーの電源をOFFにして
から、ビューファインダーコネクター
をカムコーダーの VF 端子に差し込ん
でください。電源が ON の状態でコネ
クターを差し込むと、本機が正常に動
作しないことがあります。
•ビューファインダーコネクターをカム
コーダーの VF 端子の奥まで確実に差
し込んでください。コネクターが確実
に接続されていないと、画像が乱れた
り、タリーランプが正常に点灯しない
ことがあります。
取り外すときは
取り付け操作の手順を逆に実行します。
本機をカムコーダーから抜き取るとき
は、ストッパーを引き上げてください。
2
1
溝
ストッパー
ビュー
ファイン
ダー
シュー
左右位置
固定リン
グ
ご注意
1
3
2
ビュー
ファインダー
コネクター
VF 端子
ケーブル
クランプ

アイピース部の取り扱い
10
アイピース部の取
り扱い
アイピース部を取り外す
には
ビューファインダーから目を離して撮影
するような場合は、アイピース部を外す
と、画面全体が見やすくなります。
1
ロックリングを反時計方向いっぱい
に回して、ロックリングの合いマー
クと本機筒部の合いマーク(いずれ
もオレンジ色の線)を合わせる。
2
アイピース部を抜き取る。
再び取り付けるには
1
ロックリングの合いマークと、本機
筒部の合いマークを合わせる。
2
アイピース部先端の合いマーク
(「アイピース部を取り外すには」の
手順 2を参照)をロックリングの合
いマークに合わせて、アイピース部
を本機筒部に差し込む。
3
ロックリングを時計方向いっぱいに
回し、ロックリングの「LOCK」表
示の上の矢印を、本機筒部の合い
マークに合わせる。
画面や内部をクリーニン
グするには
本機の画面や内部をクリーニングすると
きは、本機をカムコーダーから取り外
し、内部の部品を傷つけないように十分
注意して行ってください。
◆ 本機をカムコーダーから取り外す方法につい
ては、「カムコーダーに取り付ける」(8 ペー
ジ)の手順を参考にしてください。
準備
ロックリング
ロックリングの合いマーク
筒部の合いマーク
アイピース部先端の合いマーク
筒部
アイカップ
ホルダー
プロテクト
フィルター
パッキング
アイカップ
アイピース部

アイピース部の取り扱い 11
1
本機の筒部から、アイピース部を取
り外す。
◆ 取り外しかたについては、「アイピース
部を取り外すには」(10 ページ)をご覧
ください。
2
アイカップホルダーからアイカップ
を外す。
3
アイカップホルダーから、プロテク
トフィルターをパッキングごと外
す。
4
パッキングからプロテクトフィル
ターを外す。
画面とミラーの表面のお手入れ
市販のブロアーを使ってほこりを取り除
いてください。
レンズやプロテクトフィルター
のお手入れ
市販のレンズクリーナーを使ってクリー
ニングを行なってください。
シンナーなどの溶剤は、いっさい使わな
いでください。
防曇フィルター
撮影場所の温度条件によっては、呼気や
水蒸気によってプロテクトフィルターが
くもり、画面が見にくくなることがあり
ます。
プロテクトフィルターの代わりに、別売
りの防曇フィルターを使用すると、くも
りの発生を防ぐことができます。
防曇フィルターを取り付けるに
は
プロテクトフィルターをパッキングから
外し、代わりに防曇フィルターをパッキ
ングにはめ込みます。
◆ プロテクトフィルターをパッキングから外す
には、「準備」(10 ページ)の手順を参考にし
てください。
防曇フィルターをクリーニングする際
は、防曇効果を損なわないように、柔ら
かい布でからぶきしてください。
ご注意
ご注意

仕様
12
仕様
一般
信号形式 EIA 標準/CCIR 標準
走査 2:1 インターレース
525
2:1 インターレース
625
電源 DC12V
消費電力 3W
動作温度 −5〜+40℃
保存温度 − 20 〜+ 60 ℃
最大外形寸法 239 × 76 × 215mm
(幅/高さ/奥行
き)
質量 620g
性能
ブラウン管 白黒、2 型
水平解像度 600TV 本(画面中心
部)
付属品
取扱説明書 (1)
六角レンチ (1)
VF(ビューファインダー)シュー
ASSY(A-8278-412-H)(1)
保証書 (1)
別売り品
防曇フィルター
(サービスパーツ番号:1-547-341-11)
老視用レンズ(視度− 2.8D 〜+ 2.0D)
(サービスパーツ番号:
A-8262-537-A)
低倍率レンズ(視度− 3.6D 〜− 0.8D)
(サービスパーツ番号:
A-8262-538-A)
パッド付きアイカップ
・ パッド部(サービスパーツ番号:
X-3678-187-1)
・ アタッチメント部(サービスパー
ツ番号:3-682-494-02)
関連製品
プロフェッショナルディスクカムコー
ダー PDW-F330/F3501)
デジタルカムコーダー DSR-450WS
1) 本機は、PDW-F350 には標準で付属していま
す。
仕様および外観は、改良のため予告なく
変更することがありますが、ご了承くだ
さい。
お使いになる前に、必ず動作確認を
行ってください。故障その他に伴う営
業上の機会損失等は保証期間中および
保証期間経過後にかかわらず、補償は
いたしかねますのでご了承ください。

13
GB
To reduce the risk of fire or electric
shock, do not expose this apparatus
to rain or moisture.
To avoid electrical shock, do not
open the cabinet. Refer servicing to
qualified personnel only.
For the customers in the U.S.A.
This equipment has been tested and found
to comply with the limits for a Class B
digital device, pursuant to Part 15 of the
FCC Rules. These limits are designed to
provide reasonable protection against
harmful interference in a residential
installation. This equipment generates,
uses, and can radiate radio frequency
energy and, if not installed and used in
accordance with the instructions, may cause
harmful interference to radio
communications. However, there is no
guarantee that interference will not occur in
a particular installation. If this equipment
does cause harmful interference to radio or
television reception, which can be
determined by turning the equipment off
and on, the user is encouraged to try to
correct the interference by one or more of
the following measures:
– Reorient or relocate the receiving
antenna.
– Increase the separation between the
equipment and receiver.
– Connect the equipment into an outlet on
a circuit different from that to which the
receiver is connected.
– Consult the dealer or an experienced
radio/TV technician for help.
You are cautioned that any changes or
modifications not expressly approved in
this manual could void your authority to
operate this equipment.
For the customers in Europe
This product with the CE marking complies
with the EMC Directive issued by the
Commission of the European Community.
Compliance with this directive implies
conformity to the following European
standards:
• EN55103-1 :Electromagnetic
Interference (Emission)
• EN55103-2 : Electromagnetic
Susceptibility (Immunity)
This product is intended for use in the
following Electromagnetic
Environment(s): E1 (residential), E2
(commercial and light industrial), E3
(urban outdoors), E4 (controlled EMC
environment, ex. TV studio).
For the customers in Europe
The manufacturer of this product is Sony
Corporation, 1-7-1 Konan, Minato-ku,
Tokyo, Japan.
The Authorized Representative for EMC
and product safety is Sony Deutschland
GmbH, Hedelfinger Strasse 61, 70327
Stuttgart, Germany. For any service or
guarantee matters please refer to the
addresses given in separate service or
guarantee documents.
WARNING
English

14 Table of Contents
Table of Contents
Outline ...................................................................................15
Location and Function of Parts........................................... 16
Attaching the Viewfinder to a Camcorder .........................17
Replacing the Viewfinder Shoe ......................................17
Attaching the Viewfinder ...............................................18
Detaching the Viewfinder ...............................................19
Handling the Eyepiece ..........................................................19
Detaching the Eyepiece ..................................................19
Cleaning the Screen or Interior .......................................20
Fog-Proof Filter ..............................................................20
Specifications .........................................................................21

15
Outline
Outline
The DXF-20W is a wide-aspect 2-inch
screen (aspect ratio 16:9) viewfinder. It can
be attached to a Sony PDW-F330/F350 or
DSR-450WS/450WSP-series camcorder.
The DXF-20W has the features described
below.
16:9 Wide Screen
The 2-inch 16:9 CRT provides a clear, full-
size 16:9 aspect ratio image. You can
switch to a 4:3 aspect ratio image with a
setting on the camcorder.
High-Performance CRT
• Quick-start type (The image appears as
soon as the camcorder is turned on.)
• Enhanced resolution
• Reduced flare
Marker Indication
When the camcorder is set so that markers
such as a center marker or safety zone
marker are indicated on the viewfinder
screen, marker indication on/off switching
can be controlled on the viewfinder.
Removable Eyepiece
Detaching the eyepiece gives you a clear
view of the center of the screen even with
your eye away from the viewfinder. You
can clean dust from the screen or the mirror
by detaching the eyepiece.
Low Distortion Lens
The eyepiece includes a two-element low-
distortion lens, enabling you to view a low-
distortion image.
Others
• Due to its large diameter, you can see the
screen well at a longer distance.
• Fitting a fog-proof filter (not supplied)
over the viewfinder lens prevents breath
or vapor condensation on the lens.

16 Location and Function of Parts
Location and Function of Parts
aEyepiece focusing ring
Turn this ring to adjust viewfinder image
into sharp focus.
bCamera person tally light
This lights or flashes in the same way as the
REC/TALLY indicators (q;).
To use this light, open the sliding lid.
cStopper
When the viewfinder is attached to the
camcorder and slid sideways, this prevents
the viewfinder from becoming detached
from the camcorder.
dPEAKING control
Turn this clockwise to emphasize outlines
on the screen, to make lens focusing easier.
This has no effect on the signal output from
the camcorder.
eCONTRAST control
Adjusts the screen contrast. This has no
effect on the signal output from the
camcorder.
fDISPLAY switch
Set this to ON to display text and markers
such as safety zone on the viewfinder
screen.
Depending on the camcorder connected, it
is first necessary to set the text or markers to
be shown with a camcorder setting.
gTALLY switch
When the tally light is used, set to HIGH
(high intensity) or LOW (low intensity).
This does not affect the REC/TALLY
indicators (q;) or camera person tally light
(2).
hTALLY indicator (green)
The way in which this green LED indicator
lights or flashes depends on the
specification of the connected camcorder.
SHUTTER GAIN UP
BATTREC
TALLY
1
2
3
4
5
8
9
0
qa
qs
qd
qg
qf
qh
qj
6
7
Eyecup
Note

17
Attaching the Viewfinder to a Camcorder
iBATT indicator (red)
Indicates that the camcorder battery is
exhausted.
jREC/TALLY indicators (red)
The way in which this red LED indicator
lights or flashes depends on the
specification of the connected camcorder.
kGAIN UP indicator (orange)
Lights when the gain is 3 dB or more.
lSHUTTER indicator (red)
Lights when the camcorder SHUTTER
switch is in the ON position.
mLock ring
To directly view the screen, turn this ring
counterclockwise, to align the orange
marks on the lock ring and the barrel of the
viewfinder, and remove the eyepiece.
nTally light
When the TALLY switch (7) is in the
HIGH (high intensity) or LOW (low
intensity) position, this operates in the same
way as the REC/TALLY indicators (q;).
oBarrel
You can rotate this for convenience.
The position of the image may change, as a
result of the earth's magnetic field.
pBRIGHT control
Adjusts the screen brightness. This has no
effect on the signal output from the
camcorder.
qViewfinder connector
Connect to the VF connector of the
camcorder.
Attaching the
Viewfinder to a
Camcorder
When the viewfinder is attached, do not
leave the camera (or the camcorder) with
the eyepiece facing the sun. Direct sunlight
can enter through the eyepiece, be focused
in the viewfinder and cause fire.
Replacing the Viewfinder
Shoe
When the camcorder has been used with a
viewfinder other than the DXF-20W, it is
first necessary to replace the shoe.
(The following illustrations show the PDW-
F330, but the same applies to the DSR-
450WS/450WSP.)
If you are using the PDW-F350 camcorder,
this operation is not required. The
camcorder was shipped from the factory
with the DXF-20W attached to it.
1With the supplied hexagonal wrench,
remove the bolts and spring washers,
and detach the viewfinder shoe from
theVF shoe fixing bracket.
Note
Note
Note

18 Attaching the Viewfinder to a Camcorder
2Attach the supplied viewfinder shoe.
Align the holes in the backside of the
viewfinder shoe with the two pins on
the VF shoe fixing bracket. At this
point, the triangular mark on the
viewfinder shoe should be facing
upward.
3With the spring washers and bolts
removed in step 1, fasten the
viewfinder shoe to the VF shoe fixing
bracket.
Attaching the Viewfinder
11Loosen the left-right positioning
ring of the camcorder.
2Engage the slide rail on the
viewfinder backside with the
viewfinder shoe.
21Slide the viewfinder in the
direction shown by the arrow to the
required mounting position.
2Tighten the left-right positioning
ring of the camcorder.
3Plug the viewfinder connector into
the VF connector of the camcorder,
and clip the cable into the cable clamp .
Viewfinder shoe
VF shoe fixing
bracket
Holes to align with
the pins (backside
of the viewfinder
shoe)
Triangular mark
Pins 2
1
View finder
shoe
Slide rail
Stopper
Left-light
positioning
ring

19
Handling the Eyepiece
• Be sure to power off the camorder before
plugging the viewfinder connector into
the VF connector on the camorder. If the
connector is plugged in while the power
is on, the viewfinder may not operate
correctly.
• Make sure that the viewfinder connector
is pushed fully into the VF connector on
the camorder. If the connector is not
firmly connected, the image may break
up, or the tally light may not operate
properly.
Detaching the Viewfinder
To detach the viewfinder from the
camcorder, conduct the attachment
procedure in reverse. When removing the
viewfinder from the camcorder, pull up the
stopper.
Handling the
Eyepiece
Detaching the Eyepiece
Detaching the eyepiece gives you a clear
view of the screen even with your eye away
from the viewfinder.
1Turn the eyepiece lock ring fully
counterclockwise to line up the orange
match mark on the lock ring with the
orange match mark on the viewfinder
barrel.
2Detach the eyepiece.
Notes
1
3
2
VF connector
Viewfinder
connector
Cable clamp
Lock ring
Lock ring match mark
Match mark on the viewfinder barrel
Match mark on end of eyepiece

20 Handling the Eyepiece
Refitting the Eyepiece
1Align the match mark on the eyepiece
lock ring with that on the viewfinder
barrel.
2Align the match mark on the end of the
eyepiece (see Step 2in “Detaching the
Eyepiece”) with that of the eyepiece
lock ring, then insert the eyepiece into
the viewfinder barrel.
3Turn the eyepiece lock ring clockwise
until its “LOCK” indication arrow
points to the match mark on the
viewfinder barrel.
Cleaning the Screen or
Interior
When cleaning the screen or the interior of
the viewfinder, detach the viewfinder from
the camcorder, then clean it taking care not
to damage the components.
To detach the viewfinder from the camcorder, see
“Attaching the Viewfinder to a Camcorder” on page
17 and conduct the attachment procedure in reverse.
Preparation for Cleaning
1Detach the eyepiece from the
viewfinder barrel.
For the detaching procedure, see “Detaching
the Eyepiece” on page 19.
2Remove the eyecup from the eyecup
holder.
3Remove the protecting filter, together
with the packing ring, from the eyecup
holder.
4Detach the protecting filter from the
packing ring.
To clean the screen or the mirror
Use a commercially available dust blower.
To clean the lens or the protecting
filter
Use a commercially available lens cleaner.
Do not use organic solvents such as
thinners.
Fog-Proof Filter
Depending on the temperature and
humidity, the protecting filter may mist,
especially if you breathe near it. You can
replace the protecting filter with an optional
fog-proof filter to prevent the fogging.
Attaching the fog-proof filter
Detach the protecting filter from the
packing ring, and replace it with the fog-
proof filter.
To remove the packing from the protecting filter, see
the procedure “Preparation for Cleaning” (page
20).
When cleaning the fog-proof filter, wipe the
filter very gently with a soft cloth to avoid
impairing the anti-fogging effect.
Viewfinder
barrel
Eyecup
holder
Protecting
filter
Packing ring
Eyecup
Eyepiece
Note
Note
Other manuals for DXF-20W
1
Table of contents
Languages:
Other Sony Camera Accessories manuals