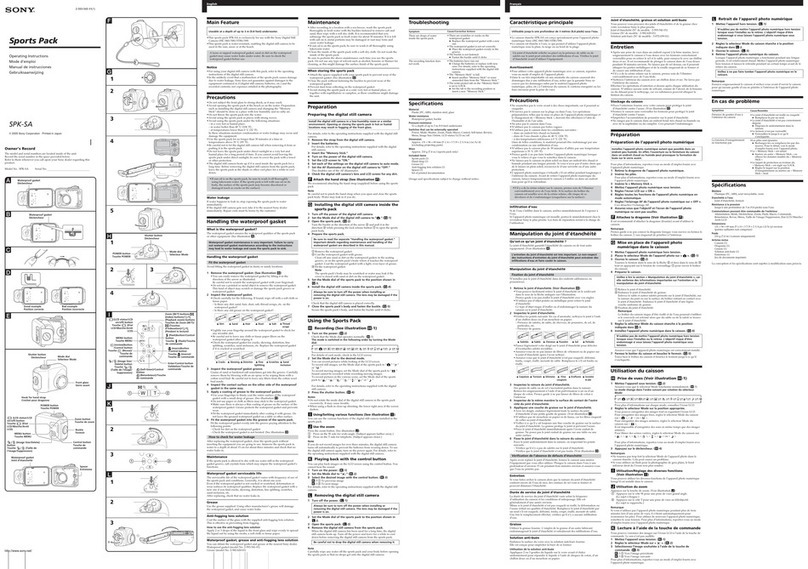
Sony SPK-HCE Operating instructions

スポーツパック準備ガイド
Sports Pack Preparation Guide
Guide de préparation du caisson sport
4-134-920-01(1)
SPK-HCE
1
4
1
2
5
D F
© 2009 Sony Corporation Printed in Japan
準備
ご注意
以下で説明されるビデオカメラはすべての国/地域で取り扱いしているわけではあ
りません。
ビデオカメラの準備
ビデオカメラの取扱説明書もあわせてご覧ください。
1
付属品をはずす。
MCプロテクター、NDフィルター、コンバージョンレンズ、特殊フィルター、レン
ズキャップ、レンズフード、ショルダーストラップなどを取りはずしてください。
手動レンズシャッターが付いているビデオカメラをご使用のときは、レンズ
シャッターを開けてください。
2
バッテリーを取り付ける。
充分に充電してあるバッテリーを取り付けてください。
3
メディアを入れる。
お使いのビデオカメラに対応したメディアを入れます。
詳しくはビデオカメラの取扱説明書をご覧ください。
ご注意
誤消去防止つまみ、スイッチを解除し、記録できるようにしてください。
テープ、メモリースティック デュオ、ディスク、ハードディスクおよび内蔵メモ
リーの残量を確認しておいてください。
ディスクがファイナライズされていないことを確認しておいてください。
4
反射防止リングをビデオカメラのフィルター取り付けねじに取り付け
る。
反射防止リングは、外光がスポーツパック内で反射してレンズに入るのを防ぎま
す。
反射防止リングを使わないビデオカメラは、なるべく日光に背を向けないように
してお使いください。
反射防止リング種類 ビデオカメラ
反射防止リング(M30×φ43)
HDR-UX20/UX19/UX10/UX9,
DCR-DVD910/DVD708/DVD608/DVD510/
DVD308/DVD306/DVD109/DVD108/
DVD106,
DCR-HC62/HC54/HC53/HC52/HC51/
HC48/HC47/HC45/HC38/HC37
反射防止リング(M30×φ47)
HDR-CX120/CX106/CX105/CX100,
DCR-SR87/SR77/SR67/SR57/SR48/SR47/
SR38/SR37
反射防止リング(M30×φ50)
DCR-DVD850/DVD810/DVD710/DVD650/
DVD610/DVD450/DVD410/DVD310/
DVD150/DVD115/DVD110
反射防止リング(M30×φ58) DCR-SR85/SR75/SR65/SR55/SR46/SR45/
SR36/SR35
反射防止リング(M30×φ62)
HDR-XR200V/XR200/XR106/XR105/XR101/
XR100,
HDR-SR10,
DCR-SR220/SR210
反射防止リング(M37×φ55)
HDR-XR520V/XR520/XR500V/XR500,
HDR-SR12/SR11/SR8/SR7/SR5,
HDR-CX12/CX11/CX7/CX6,
HDR-HC9/HC7/HC5
反射防止リングなし DCR-SX60/SX50/SX41/SX40/SX31/SX30
5
液晶画面を外側に向けて本体に閉じる。
6
フォーカス、明るさなどの調節が手動になっているときは、自動に戻す。
台座の準備
1
下の表から、お手持ちのビデオカメラに合う台座、番号を選ぶ。
台座 番号 ビデオカメラ
D
1
HDR-HC9/HC7/HC5、
DCR-DVD708/DVD608/DVD308/DVD306/
DVD109/DVD108/DVD106
2DCR-HC62/HC54/HC53/HC52/HC51/HC48/
HC47/HC45/HC38/HC37
F1 HDR-CX12/CX11/CX7/CX6
2HDR-SR8/SR7/SR5
G 1
HDR-UX20/UX19/UX10/UX9,
DCR-DVD910/DVD850/DVD810/DVD710/
DVD650/DVD610/DVD510/DVD450/DVD410/
DVD310/DVD150/DVD115/DVD110
H 1
HDR-XR520V/XR520/XR500V/XR500/XR200V/
XR200/XR106/XR105/XR101/XR100,
HDR-SR12/SR11/SR10,
DCR-SR220/SR210
I 1 DCR-SR85/SR75/SR65/SR55/SR46/SR45/SR36/
SR35
J 1 HDR-CX120/CX106/CX105/CX100,
DCR-SX60/SX50/SX41/SX40/SX31/SX30
K 1 DCR-SR87/SR77/SR67/SR57/SR48/SR47/SR38/
SR37
2
選択した番号に合わせて、三脚ネジプレートをパチンと音がするまで押
し込み取り付ける。
製品出荷時は、三脚ネジプレートは台座Hに取り付けてあります。
スポーツパックの準備
1
グリップベルトを調節する。
START/STOPボタン、テレボタン、ワイドボタン、PHOTOボタンを操作できるよ
うに位置を決め、グリップベルトを調整してください。
2
ショルダーベルトを取り付ける。
ビデオカメラを取り付ける
電源スイッチがあるビデオカメラでは、電源スイッチを「OFF」にし、スポーツパック
の電源も切っておいてください。液晶画面の開閉で電源を「ON/OFF」するビデオカ
メラでは、ビデオカメラの電源を「OFF」にする必要はありません。
ご注意
ビデオカメラ取り付け後は、スポーツパックのPOWERボタンを押してビデオカメラ
の電源も「ON/OFF」できます。
1
スポーツパックを開ける。
ロック解除ボタンを矢印の方向にずらしたまま、オープンスライダー を
ずらしてバックルを開ける。
リア部を開く。
2
フロントガラスにくもり止めリキッドを塗る。
スポーツパック前部のフロントガラスの内側に、付属のくもり止めリキッドを2
〜3滴たらして塗布します。さらにくもり止め効果を高めたい場合は、付属の乾
燥剤をあわせてご使用ください。詳しくは、取扱説明書の「乾燥剤について」をご
覧ください。
3
Oリング、溝および本体との接触面の砂やゴミなどをきれいに取り除き、
Oリングに薄く均一にグリスを塗る。
砂やゴミが付着したままふたを閉めると、傷が付いて浸水の原因になります。
Oリングの取り扱いかたについて、詳しくは、取扱説明書の「Oリングの取り扱い
かた」をご覧ください。
4
台座に取り付ける。
ビデオカメラ底面の三脚用ネジ穴に台座のネジ位置をあわせる。
以下の機種をご使用の場合、端子カバーを開けて音声/リモートプラグをA/V
端子、A/V OUT端子またはA/Vリモート端子へ奥までしっかり差し込む:
HDR-UX20/UX19/UX10/UX9、DCR-DVD910/DVD510、DCR-SR87/
SR77/SR67/SR57/SR48/SR47/SR38/SR37、DCR-SX60/SX50/SX41/SX40/
SX31/SX30
DCR-SR87/SR77/SR67/SR57/SR48/SR47/SR38/SR37では端子カバーを充
分開きながら音声/リモートプラグを差し込んでください(イラスト-5-I
)。端子カバーが充分開いていないとプラグの根元に干渉して、プラグの
接続不良などの原因になります。
付属のショルダーベルトの金具を使って台座のネジをしめ、台座へ取り付け
る。
5
プラグを接続し、スポーツパックに取り付ける。
お手持ちのビデオカメラに合わせて、音声/リモートプラグをA/V端子、
A/V OUT端子またはA/Vリモート端子へ奥までしっかり差し込みます。(手順4
のビデオカメラ以外)
スポーツパックへの取り付けは、台座をスポーツパックのフロント部内のガイド
に合わせ、台座の後部を押して、カチッとロックされるまで差し込みます。
ご注意
スポーツパックを立てた状態で台座を差し込まないでください。
台座やフロント部を傷める原因になります。
ケーブルがレンズ、液晶、ビューファインダー、ズームレバーおよびフォトボタ
ンにかからないようにしてください。
液晶画面の開閉で電源を「ON/OFF」するビデオカメラでは、静止画撮影モード
や画像再生モードのときに音声/リモートプラグを接続すると動画撮影モード
へ切り換わります。
HDR-XR520V/XR520/XR500V/XR500をお使いの場合(イラスト-5-A)
端子カバーを開け、プラグを取り付ける(図のように、プラグから出たケーブル
がビデオカメラの後ろ側へ円を描くようにする)
ケーブルがスポーツパック内側の部品に引っかからないよう注意しながらス
ポーツパックに取り付ける
スポーツパックに取り付けた後、ケーブルをビデオカメラのグリップベルト側
に軽く押し込んで整理する
HDR-XR200V/XR200/XR106/XR105/XR101/XR100をお使いの場合(イラスト
-5-B)
端子カバーを開け、プラグを取り付ける
図のように、プラグから出たケーブルがビデオカメラの後ろ側へ円を描くよう
にする
ケーブルがスポーツパック内側の部品に引っかからないよう注意しながらス
ポーツパックに取り付ける
スポーツパックに取り付けた後、ケーブルをビデオカメラのグリップベルト側
に軽く押し込んで整理する
HDR-SR12/SR11/SR10、
DCR-SR220/SR210をお使いの場合(イラスト-5-C)
端子カバーを開け、プラグを取り付ける(図のように、プラグから出たケーブル
がビデオカメラの後ろ側へ円を描くようにする)
スポーツパックに取り付けた後、ケーブルをビデオカメラのグリップベルト側
に軽く押し込んで整理する
HDR-SR8/SR7/SR5をお使いの場合(イラスト-5-D)
端子カバーを開ける
プラグを取り付ける
スポーツパックに取り付けた後、ケーブルをビデオカメラのグリップベルト側
に整理する
HDR-CX120/CX106/CX105/CX100をお使いの場合(イラスト-5-E)
端子カバーを開け、プラグを取り付ける
スポーツパックに取り付けた後、ケーブルが台座の手前などに引っかからない
ように注意しながらビデオカメラのグリップベルト側に整理する
G H
A
C
日本語
HDR-CX12/CX11/CX7/CX6をお使いの場合(イラスト-5-F)
端子カバーを開ける
プラグを取り付ける
ケーブルを台座の上に乗せて、スポーツパックに取り付ける
スポーツパックに取り付けた後、ケーブルを台座から外へ落ちないように置
き、ビデオカメラのグリップベルト側に整理する
HDR-UX20/UX19/UX10/UX9、
DCR-DVD910/DVD510をお使いの場合(イラ
スト-5-G)
(手順-4で下記の操作を済ませている場合はから行います。)
プラグを取り付ける
台座を取り付ける
スポーツパックに取り付けた後、ケーブルを整理する(スポーツパックのケー
ブル保持部にかける)
HDR-HC9/HC7/HC5をお使いの場合(イラスト-5-H)
端子カバーを開ける
プラグを取り付ける
スポーツパックに取り付けた後、ケーブルをビデオカメラのグリップベルト側
に整理する
DCR-SR87/SR77/SR67/SR57/SR48/SR47/SR38/SR37をお使いの場合(イラス
ト-5-I)
(手順-4で下記の操作を済ませている場合はから行います。)
プラグの根元へつかえないように端子カバーを充分開きながら、プラグを取り
付ける
台座を取り付ける
ケーブルがビデオカメラの上側に来るようにしてスポーツパックに取り付け
る
ケーブルが液晶表示にかからないように注意して台座のツメにケーブルを固
定する
ビデオカメラのバッテリーが大きく、ケーブルがバッテリーの後ろに回らな
いときは、ケーブルをバッテリーの上側に通してからツメで固定する。
DCR-SR85/SR75/SR65/SR55/SR46/SR45/SR36/SR35をお使いの場合(イラス
ト-5-J)
端子カバーを開け、プラグを取り付ける(図のように、プラグから出たケーブル
がビデオカメラの後ろ側へ円を描くようにする)
スポーツパックに取り付けた後、ケーブルをビデオカメラのグリップベルト側
に軽く押し込んで整理する
DCR-SX60/SX50/SX41/SX40/SX31/SX30をお使いの場合(イラスト-5-K)
(手順-4で下記の操作を済ませている場合はから行います。)
グリップベルトを持ち上げて端子カバーを開け、プラグを取り付ける
台座を取り付ける
ケーブルをビデオカメラの上側にたわませながらスポーツパックに取り付け
る
スポーツパックに取り付けた後、ケーブルを整理する(スポーツパックのケー
ブル保持部にかける)
DCR-DVD850/DVD810/DVD710/DVD650/DVD610/DVD450/DVD410/
DVD310/DVD150/DVD115/DVD110をお使いの場合(イラスト-5-L)
端子カバーを開ける
プラグを取り付ける
ケーブルを反射防止リングのグリップベルト側のみぞへ図のようにはさむ
ケーブルを図のようにして、台座をスポーツパックに取り付ける
取り付ける際は次のことに注意する:
ケーブルが折れ曲がっていないか
ケーブルが反射防止リングのみぞからはずれていないか
スポーツパックに取り付けた後、ケーブルがビデオカメラのレンズにかかって
いないかを確認する
DCR-DVD708/DVD608/DVD308/DVD306/DVD109/DVD108/DVD106をお
使いの場合(イラスト-5-M)
端子カバーを開ける
プラグを取り付ける
スポーツパックに取り付けた後、ケーブルを整理する(イラスト参照)
DCR-HC62/HC54/HC53/HC52/HC51/HC48/HC47/HC45/HC38/HC37をお使
いの場合(イラスト-5-N)
端子カバーを開ける
プラグを取り付ける
スポーツパックに取り付けた後、ケーブルを整理する(スポーツパックのケー
ブル保持部にかける)
6
リア部を閉じる
リア部をしっかり押さえ、バックルがカチッとロックされるまで締めます。
ご注意
ケーブルを挟み込まないようにご注意ください。
ビデオカメラをスポーツパックに収納したとき、レンズの中心がスポーツパッ
クのフロントガラス部中心に対してずれているものもありますが、撮影などに
問題ありません。
English
Preparing
Notes
e video camera models described below may not be available in all countries/regions.
Preparing the Video Camera
For details, please refer to the operating instructions supplied with your video camera.
1Remove lter, conversion lens, lens cap, lens hood or the shoulder
strap from the video camera.
When using a video camera with a manual lens shutter, open the lens shutter.
2Install the battery pack.
Attach a fully recharged battery.
3Insert the media.
Insert a media compatible with your video camera.
For details, refer to the operating instructions supplied with your video camera.
Notes
Unlock the safety tab on the “Memory Stick Duo” media and the cassette tape, and make
them possible to record images.
Be sure that the tape, “Memory Stick Duo” media, disc and hard disk and internal memory
have enough space to record images.
Be sure that the disc is not nalized.
4Attach the reex prevention ring to the lter attachment screw of the
video camera.
e reex prevention ring prevents external light from being reected inside the sports
pack and entering the lens.
When using a video camera without a reex prevention ring, turn your back away from
the sunlight as much as possible.
Reex prevention ring Video camera
Reex prevention ring
(M30 × ø 43)
HDR-UX20/UX19/UX10/UX9,
DCR-DVD910/DVD708/DVD608/DVD510/DVD308/
DVD306/DVD109/DVD108/DVD106,
DCR-HC62/HC54/HC53/HC52/HC51/HC48/HC47/
HC45/HC38/HC37
Reex prevention ring
(M30 × ø 47)
HDR-CX120/CX106/CX105/CX100,
DCR-SR87/SR77/SR67/SR57/SR48/SR47/SR38/SR37
Reex prevention ring
(M30 × ø 50)
DCR-DVD850/DVD810/DVD710/DVD650/DVD610/
DVD450/DVD410/DVD310/DVD150/DVD115/DVD110
Reex prevention ring
(M30 × ø 58)
DCR-SR85/SR75/SR65/SR55/SR46/SR45/SR36/SR35
Reex prevention ring
(M30 × ø 62)
HDR-XR200V/XR200/XR106/XR105/XR101/XR100,
HDR-SR10,
DCR-SR220/SR210
Reex prevention ring
(M37 × ø 55)
HDR-XR520V/XR520/XR500V/XR500,
HDR-SR12/SR11/SR8/SR7/SR5,
HDR-CX12/CX11/CX7/CX6,
HDR-HC9/HC7/HC5
Unable to attach the
supplied reex prevention
ring
DCR-SX60/SX50/SX41/SX40/SX31/SX30
5Turn the LCD panel over and move back to the video camera with the
LCD screen facing out.
6Set the functions, such as focusing and lightning, to AUTO.
Selecting the Camera Mounting Shoe
1Choose the mounting shoe and the number according to the table
below.
Mounting shoe Number Video camera
D
1
HDR-HC9/HC7/HC5,
DCR-DVD708/DVD608/DVD308/DVD306/
DVD109/DVD108/DVD106
2DCR-HC62/HC54/HC53/HC52/HC51/HC48/HC47/
HC45/HC38/HC37
F1 HDR-CX12/CX11/CX7/CX6
2 HDR-SR8/SR7/SR5
G 1
HDR-UX20/UX19/UX10/UX9,
DCR-DVD910/DVD850/DVD810/DVD710/DVD650/
DVD610/DVD510/DVD450/DVD410/DVD310/
DVD150/DVD115/DVD110
H 1
HDR-XR520V/XR520/XR500V/XR500/XR200V/
XR200/XR106/XR105/XR101/XR100,
HDR-SR12/SR11/SR10,
DCR-SR220/SR210
I 1 DCR-SR85/SR75/SR65/SR55/SR46/SR45/SR36/SR35
J 1 HDR-CX120/CX106/CX105/CX100,
DCR-SX60/SX50/SX41/SX40/SX31/SX30
K 1 DCR-SR87/SR77/SR67/SR57/SR48/SR47/SR38/SR37
2Align the tripod screw plate with the chosen number on the
mounting shoe and press the tripod screw plate until it clicks into
place.
e tripod screw plate is attached to the mounting shoe H when the unit is shipped
from the factory.
Preparing the Sports Pack
1Adjust the grip strap.
Holding the sports pack so that the tips of your nger can easily touch the START/
STOP button, Telephoto button, Wide button and PHOTO button, adjust its length.
2Attach the shoulder strap.
Installing the Video Camera
When using a video camera with a POWER switch, turn the POWER switch o and also
leave the power of the sports pack turned o. When using a video camera with an internal
power switch linked to the switching action of the LCD screen, you do not need to turn
o the video camera.
Notes
Aer installing the video camera into the sports pack, you can set the power of the video
camera to “ON” or “OFF” by pressing the POWER button of the sports pack.
1Release the buckles.
Keep sliding the unlock button in the direction of the arrow, slide the open
slider and release the buckle.
Open the rear body.
B
I J K
H
G
ボディ
Body
Corps
N
M
J
L
F
D
E
I
K
2Coat the front glass with anti-fogging lens solution.
Apply 2 to 3 drops of the anti-fogging lens solution provided onto the inside surface of
the front glass of the sports pack. To increase the anti-fogging eect, use the desiccant
supplied. For details, refer to “Desiccant” in the supplied operating instructions.
3Remove foreign materials such as dust, sand or hair from the O-ring,
the groove and any surface it touches. Then, put the grease evenly on
the O-ring.
If the body is closed with such materials present, these areas may be damaged and
water may leak in.
For details on handling the O-ring, refer to the “Handling the O-ring” in the operating
instructions.
4Attach the camera mounting shoe.
Align the screw position of the mounting shoe with the tripod screw on the bottom
of the video camera.
When using the models below, open the jack cover and rmly insert the Audio/
Remote plug into the A/V jack, A/V OUT jack or A/V remote jack:
HDR-UX20/UX19/UX10/UX9, DCR-DVD910/DVD510, DCR-SR87/SR77/SR67/
SR57/SR48/SR47/SR38/SR37, DCR-SX60/SX50/SX41/SX40/SX31/SX30
When using the DCR-SR87/SR77/SR67/SR57/SR48/SR47/SR38/SR37, insert the
Audio/Remote plug with sucient opening of the jack cover. (See illustration
-5-I ) As insucient opening of the jack cover, the jack cover jams the
Audio/Remote plug, and causes poor connection.
Attach the camera mounting shoe to the video camera using the metal parts of
shoulder strap as shown in the illustration.
5Connect the plug and install the video camera.
Depending on your video camera, rmly insert the Audio/Remote plug into the A/V
jack, A/V OUT jack or A/V remote jack. (except video camera models in step 4)
When installing the video camera into the sports pack, align the camera mounting
shoe with the guide inside the front body of the sports pack, and then push the rear of
the camera mounting shoe until it clicks into place.
Notes
Be sure to keep the sports pack horizontal when installing the camera mounting
shoe. Installing the camera mounting shoe in a vertical motion may damage the
camera mounting shoe and the front body.
Be sure not to cover the lens, LCD screen, view nder, zoom lever or photo button
with the cable.
When using a video camera with an internal power switch linked to the switching
action of the LCD screen, connecting the Audio/Remote plug will switch the Still
image recording mode/Video playing mode to the Movie recording mode of the
video camera.
When using HDR-XR520V/XR520/XR500V/XR500 (See illustration -5-A)
Open the jack cover and connect the plug. (Place the cable connected to the sports
pack with the plug to the rear in a circular motion as illustrated.)
Install the video camera into the sports pack, taking care not to catch the cable on
the parts inside the sports pack.
Aer installing the video camera into the sports pack, arrange the cable on the grip
belt side of the video camera.
When using HDR-XR200V/XR200/XR106/XR105/XR101/XR100 (See illustration
-5-B)
Open the jack cover and connect the plug.
Place the cable connected to the sports pack with the plug to the rear in a circular
motion as illustrated.
Install the video camera into the sports pack, taking care not to catch the cable on
the parts inside the sports pack.
Aer installing the video camera into the sports pack, arrange the cable on the grip
belt side of the video camera.
When using HDR-SR12/SR11/SR10, DCR-SR220/SR210 (See illustration -5-C)
Open the jack cover and connect the plug. (Place the cable connected to the sports
pack with the plug to the rear in a circular motion as illustrated.)
Aer installing the video camera into the sports pack, arrange the cable on the grip
belt side of the video camera by pushing it lightly.
When using HDR-SR8/SR7/SR5 (See illustration -5-D)
Open the jack cover.
Connect the plug.
Aer installing the video camera into the sports pack, arrange the cable on the grip
belt side of the video camera.
When using HDR-CX120/CX106/CX105/CX100 (See illustration -5-E)
Open the jack cover and connect the plug.
Aer installing the video camera into the sports pack, arrange the cable on the
grip belt side of the video camera, taking care not to catch the cable on the camera
mounting shoe or other parts.
When using HDR-CX12/CX11/CX7/CX6 (See illustration -5-F)
Open the jack cover.
Connect the plug.
Put the cable on the camera mounting shoe and install the video camera into the
sports pack.
Aer installing the video camera into the sports pack, arrange the cable so that it
will not fall out of the camera mounting shoe. Set the cable on the grip belt side of
the video camera.
When using HDR-UX20/UX19/UX10/UX9 or DCR-DVD910/DVD510 (See
illustration -5-G)
(If you completed the following and in step -4, start from .)
Connect the plug.
Attach the camera mounting shoe to the video camera.
Aer installing the video camera into the sports pack, adjust the cable. (Hook the
cable at the cable holder.)
When using HDR-HC9/HC7/HC5 (See illustration -5-H)
Open the jack cover.
Connect the plug.
Aer installing the video camera into the sports pack, arrange the cable on the grip
belt side of the video camera.
When using DCR-SR87/SR77/SR67/SR57/SR48/SR47/SR38/SR37 (See
illustration -5-I)
(If you completed the following and in step -4, start from .)
Attach the plug by adequately opening the jack cover so that it does not become
attached to the base of the plug.
Attach the camera mounting shoe to the video camera.
Install the video camera into the sports pack, keeping the cable on the top side of
the video camera.
Secure the cable in the clip of the camera mounting shoe, taking care not to catch
the cable on the LCD screen.
If the video camera battery is large and the cable cannot be passed around the
backside of it, fasten the cable with clips aer passing the battery around the top
side of it.
When using DCR-SR85/SR75/SR65/SR55/SR46/SR45/SR36/SR35 (See
illustration -5-J)
Open the jack cover and connect the plug. (Place the cable connected to the sports
pack with the plug to the rear in a circular motion as illustrated.)
Aer installing the video camera into the sports pack, arrange the cable on the grip
belt side of the video camera by pushing it lightly.
When using DCR-SX60/SX50/SX41/SX40/SX31/SX30 (See illustration -5-K)
(If you completed the following and in step -4, start from .)
Li the grip belt and open the jack cover to connect the plug.
Attach the camera mounting shoe to the video camera.
Install the video camera into the sports pack, keeping the cable bending on the top
side of the video camera.
Aer installing the video camera into the sports pack, adjust the cable. (Hook the
cable at the cable holder.)
When using DCR-DVD850/DVD810/DVD710/DVD650/DVD610/DVD450/
DVD410/DVD310/DVD150/DVD115/DVD110 (See illustration -5-L)
Open the jack cover.
Connect the plug.
Clip the cable with the groove of the reex prevention ring on the grip belt side as
illustrated.
Place the cable as illustrated and attach the camera mounting shoe to the sports
pack.
Notes on attachment:
Do not bend the cable.
Be sure that the cable has not come o the groove of the reex prevention ring.
Aer installing the video camera into the sports pack, be sure that the cable is not
interfering with the lens of the video camera.
When using DCR-DVD708/DVD608/DVD308/DVD306/DVD109/DVD108/
DVD106 (See illustration -5-M)
Open the jack cover.
Connect the plug.
Aer installing the video camera into the sports pack, adjust the cable.
(See illustration)
When using the DCR-HC62/HC54/HC53/HC52/HC51/HC48/HC47/HC45/HC38/
HC37 (See illustration -5-N)
Open the jack cover.
Connect the plug.
Aer installing the video camera into the sports pack, adjust the cable. (Hook the
cable at the cable holder.)
6Close the rear body.
Press the rear body shut, and fasten the buckles until they click in place.
Notes
Be careful not to pinch the cables when closing the rear body.
Although the center of the lens of some video camera models may be out of line
with the center of the front glass of the sports pack when installed, this will not
cause any problems when recording.
Français
Préparation
Remarques
Les modèles de caméscopes mentionnés ci-dessous ne sont pas forcément disponibles
dans tous les pays ou toutes les régions.
Préparation du caméscope
Pour le détail, reportez-vous au mode d’emploi fourni avec votre caméscope.
1Retirez le ltre, le convertisseur, le capuchon d’objectif, le pare-soleil
ou la bandoulière du caméscope.
Si le caméscope que vous utilisez est pourvu d’un obturateur central manuel, ouvrez cet
obturateur.
2Installez la batterie.
Installez une batterie complètement rechargée.
3Introduisez le support.
Introduisez un support compatible avec votre caméscope.
Pour plus d’informations, reportez-vous au mode d’emploi fourni avec le caméscope.
Remarques
Désactivez le taquet de sécurité du « Memory Stick Duo » et de la cassette pour
permettre l’enregistrement.
Assurez-vous que l’espace sur la cassette, le « Memory Stick Duo », le disque et le disque
dur ainsi que dans la mémoire interne est susant pour l’enregistrement.
Assurez-vous que le disque n’a pas été nalisé.
4Fixez la bague antireet sur le letage de l’objectif du caméscope.
La bague antireet empêche la lumière extérieure de se rééchir dans le caisson sport et
de pénétrer dans l’objectif.
Si vous utilisez un caméscope avec une bague antireet, ne lmez pas si possible avec le
soleil derrière vous.
(Suite á la page arrière)
台座
Camera mounting shoe
Sabot de montage de caméra
ガイド
Guide
Guide
戶外包準備工作指南
➎㣖㌊㠓#ⷪ⌮#ცⱞᧆ
㍞Ἶᱦ#Ẳ⮞㟯#❲
ცⱞᧆ
⇢㆞
ឹኈᐡԋ၇྄ቻ
Ᏻ
єᡞ
ឹኈᐡԋ၇྄ቻ
Ᏻ
єᡞ
ឹኈᐡԋ၇྄ቻ
Ᏻ
єᡞ
㍞Ἶᱦ#Ẳ⮞㟯#❲
ცⱞᧆ
⇢㆞
㍞Ἶᱦ#Ẳ⮞㟯#❲
ცⱞᧆ
⇢㆞

Français
(Suite de la page avant)
Bague antireet Caméscope
Bague antireet
(M30 × ø 43)
HDR-UX20/UX19/UX10/UX9,
DCR-DVD910/DVD708/DVD608/DVD510/DVD308/
DVD306/DVD109/DVD108/DVD106,
DCR-HC62/HC54/HC53/HC52/HC51/HC48/HC47/
HC45/HC38/HC37
Bague antireet
(M30 × ø 47)
HDR-CX120/CX106/CX105/CX100,
DCR-SR87/SR77/SR67/SR57/SR48/SR47/SR38/SR37
Bague antireet
(M30 × ø 50)
DCR-DVD850/DVD810/DVD710/DVD650/DVD610/
DVD450/DVD410/DVD310/DVD150/DVD115/DVD110
Bague antireet
(M30 × ø 58)
DCR-SR85/SR75/SR65/SR55/SR46/SR45/SR36/SR35
Bague antireet
(M30 × ø 62)
HDR-XR200V/XR200/XR106/XR105/XR101/XR100,
HDR-SR10,
DCR-SR220/SR210
Bague antireet
(M37 × ø 55)
HDR-XR520V/XR520/XR500V/XR500,
HDR-SR12/SR11/SR8/SR7/SR5,
HDR-CX12/CX11/CX7/CX6,
HDR-HC9/HC7/HC5
Impossible de xer la bague
antireet fournie
DCR-SX60/SX50/SX41/SX40/SX31/SX30
5Retournez le panneau de l’écran LCD et rabattez-le contre le
caméscope avec l’écran LCD tourné vers l’extérieur.
6Réglez la mise au point, l’éclairage, etc. sur AUTO.
Sélection du sabot de montage de caméra
1Choisissez le sabot de montage et le numéro d’orice en vous
reportant au tableau suivant.
Sabot de montage Numéro Caméscope
D
1
HDR-HC9/HC7/HC5,
DCR-DVD708/DVD608/DVD308/DVD306/
DVD109/DVD108/DVD106
2DCR-HC62/HC54/HC53/HC52/HC51/HC48/HC47/
HC45/HC38/HC37
F1 HDR-CX12/CX11/CX7/CX6
2 HDR-SR8/SR7/SR5
G 1
HDR-UX20/UX19/UX10/UX9,
DCR-DVD910/DVD850/DVD810/DVD710/DVD650/
DVD610/DVD510/DVD450/DVD410/DVD310/
DVD150/DVD115/DVD110
H 1
HDR-XR520V/XR520/XR500V/XR500/XR200V/
XR200/XR106/XR105/XR101/XR100,
HDR-SR12/SR11/SR10,
DCR-SR220/SR210
I 1 DCR-SR85/SR75/SR65/SR55/SR46/SR45/SR36/SR35
J 1 HDR-CX120/CX106/CX105/CX100,
DCR-SX60/SX50/SX41/SX40/SX31/SX30
K 1 DCR-SR87/SR77/SR67/SR57/SR48/SR47/SR38/SR37
2Emboîtez la plaquette à vis dans l’orice choisi sur le sabot de
montage, puis appuyez dessus de sorte qu’elle s’encliquette.
La plaquette à vis a été xée sur le sabot de montage H en usine.
Préparation du caisson sport
1Réglez la sangle.
Tout en tenant le caisson sport de manière à atteindre facilement les boutons START/
STOP, Téléobjectif, Grand angle et PHOTO du bout des doigts, réglez la longueur de la
sangle.
2Fixez la bandoulière.
Installation du caméscope
Lorsque vous utilisez un caméscope pourvu d’un interrupteur POWER, mettez l’
interrupteur POWER sur arrêt et laissez le caisson sport hors tension. Si vous utilisez
un caméscope pourvu d’un interrrupteur d’alimentation interne relié à la fonction de
commutation de l’écran LCD, vous n’avez pas besoin de mettre le caméscope hors tension.
Remarques
Après avoir installé le caméscope dans le caisson sport, vous pouvez régler l’alimentation
du caméscope sur « ON » ou « OFF » en appuyant sur le bouton POWER du caisson
sport.
1Relâchez les fermoirs.
Tout en poussant le bouton de déverrouillage dans le sens de la èche, tirez sur
le curseur et relâchez la fermoir.
Ouvrez la partie arrière.
2Appliquez une solution antibuée pour objectif sur la vitre avant.
Appliquez 2 ou 3 gouttes de la solution antibuée pour objectif fournie sur la face interne
de la vitre avant du caisson sport. An d’augmenter l’eet antibuée, utilisez le dessiccatif
fourni. Pour plus de détails, reportez-vous à « Dessiccatif » dans mode d’emploi fourni.
3Enlevez les matières étrangères, poussière, sable ou cheveux, du joint
torique, de la rainure et de toutes les surfaces en contact avec le joint
torique. Ensuite, graissez uniformément le joint torique.
Si vous fermez le caisson sport sans nettoyer ces parties, celles-ci risquent d’être
endommagées et de laisser l’eau pénétrer à l’intérieur.
Pour le détail sur l’entretien du joint torique, reportez-vous à « Entretien du joint
torique » dans le mode d’emploi.
4Fixez le sabot de montage de caméra.
Alignez la vis du sabot de montage sur le letage de pied photo sous le caméscope.
Si vous utilisez les modèles suivants, ouvrez le cache-prise et insérez à fond la
che Audio/Télécommande dans la prise A/V, A/V OUT ou dans la prise de
télécommande A/V :
HDR-UX20/UX19/UX10/UX9, DCR-DVD910/DVD510, DCR-SR87/SR77/SR67/
SR57/SR48/SR47/SR38/SR37, DCR-SX60/SX50/SX41/SX40/SX31/SX30
Lorsque vous utilisez les DCR-SR87/SR77/SR67/SR57/SR48/SR47/SR38/SR37,
ouvrez susamment le cache-prise pour pouvoir insérer la che Audio/
Télécommande. (Voir l’illustration -5-I) Si vous n’ouvrez pas susamment
le cache-prise, celui-ci bloquera la che Audio/Télécommande et la connexion
sera mauvaise.
Fixez le sabot de montage de caméra au caméscope en utilisant les pièces
métalliques de la bandoulière comme indiqué sur l’illustration.
5Raccordez la che et installez le caméscope.
Insérez fermement la che Audio/Télécommande dans la prise A/V, A/V OUT ou la
prise de télécommande A/V selon le caméscope utilisé. (sauf modèles de caméscopes
mentionnés au point 4)
Lorsque vous installez le caméscope dans le caisson sport, alignez le sabot de montage
de caméra sur le guide dans la partie avant du caisson sport, puis poussez l’arrière du
sabot de montage de caméra jusqu’à ce que le sabot s’encliquette.
Remarques
Veillez à tenir le caisson sport à l’horizontale lorsque vous installez le sabot de
montage de caméra. Si vous installez le sabot de montage de caméra en inclinant le
caméscope, vous risquez d’endommager le sabot ainsi que la partie avant du caisson
sport.
Attention de ne pas masquer l’objectif, l’écran LCD, le viseur, le levier de zoom ou le
bouton photo avec le câble.
Lorsque vous utilisez un caméscope avec interrupteur d’alimentation relié à la
fonction de commutation de l’écran LCD, le branchement de la che Audio/
Télécommande fera basculer le mode d’enregistrement de photos/mode de lecture
vidéo dans le mode d’enregistrement de lm du caméscope.
Lorsque les HDR-XR520V/XR520/XR500V/XR500 sont utilisés (Voir l’illustration
-5-A)
Ouvrez le cache-prise et branchez la che. (Faites revenir le câble raccordé au
caisson sport par la che vers l’arrière en formant une boucle, comme indiqué dans
l’illustration.)
Installez le caméscope dans le caisson sport, en prenant soin de ne pas coincer le
câble dans les pièces à l’intérieur du caisson sport.
Après avoir installé le caméscope dans le caisson sport, rangez le câble du côté de la
sangle du caméscope.
Lorsque les HDR-XR200V/XR200/XR106/XR105/XR101/XR100 sont utilisés (Voir
l’illustration -5-B)
Ouvrez le cache-prise et branchez la che.
Faites revenir le câble raccordé au caisson sport par la che vers l’arrière en formant
une boucle, comme indiqué dans l’illustration.)
Installez le caméscope dans le caisson sport, en prenant soin de ne pas coincer le
câble dans les pièces à l’intérieur du caisson sport.
Après avoir installé le caméscope dans le caisson sport, rangez le câble du côté de la
sangle du caméscope.
Lorsque les HDR-SR12/SR11/SR10, DCR-SR220/SR210 sont utilisés (Voir l’
illustration -5-C)
Ouvrez le cache-prise et branchez la che. (Faites revenir le câble raccordé au
caisson sport par la che vers l’arrière en formant une fermoir, comme indiqué
dans l’illustration.)
Après avoir installé le caméscope dans le caisson sport, rangez le câble du côté de la
sangle du caméscope en le poussant doucement.
Lorsque les HDR-SR8/SR7/SR5 sont utilisés (Voir l’illustration -5-D)
Ouvrez le cache-prise.
Branchez la prise.
Après avoir installé le caméscope dans le caisson sport, rangez le câble du côté de la
sangle du caméscope.
Lorsque les HDR-CX120/CX106/CX105/CX100 sont utilisés (Voir l’illustration
-5-E)
Ouvrez le cache-prise et branchez la che.
Après avoir installé le caméscope dans le caisson sport, rangez le câble du côté de
la sangle du caméscope en prenant soin de ne pas coincer le câble sur le sabot de
montage de caméra ou d’autres pièces.
Lorsque les HDR-CX12/CX11/CX7/CX6 sont utilisés (Voir l’illustration -5-F)
Ouvrez le cache-prise.
Branchez la prise.
Placez le câble sur le sabot de montage de caméra et installez le caméscope dans le
caisson sport.
Après avoir installé le caméscope dans le caisson sport, disposez le câble de sorte
qu’il ne tombe pas du sabot de montage de caméra. Rangez ensuite le câble du côté
de la sangle du caméscope.
Lorsque les HDR-UX20/UX19/UX10/UX9 ou DCR-DVD910/DVD510 sont utilisés
(Voir l’illustration -5-G)
(Si les points et suivants ont déjà été eectués à l’étape -4, continuez
par .)
Branchez la prise.
Fixez le sabot de montage de caméra au caméscope.
Après avoir installé le caméscope dans le caisson sport, ajustez le câble. (Accrochez
le câble au support de câble.)
Lorsque les HDR-HC9/HC7/HC5 sont utilisés (Voir l’illustration -5-H)
Ouvrez le cache-prise.
Branchez la prise.
Après avoir installé le caméscope dans le caisson sport, rangez le câble du côté de la
sangle du caméscope.
Lorsque les DCR-SR87/SR77/SR67/SR57/SR48/SR47/SR38/SR37 sont utilisés
(Voir l’illustration -5-I)
(Si les points et suivants ont déjà été eectués à l’étape -4, continuez
par .)
Fixez la che en ouvrant susamment le cache-prise pour qu’il ne se coince pas à la
base de la che.
Fixez le sabot de montage de caméra au caméscope.
Installez le caméscope dans le caisson sport en laissant le câble sur le caméscope.
Accrochez le câble à l’aide de l’attache du sabot de montage de caméra, en prenant
soin de ne pas le coincer sur l’écran LCD.
Si la batterie du caméscope est trop grosse et si vous ne pouvez pas faire passer le
câble à l’arrière de la batterie, xez-le avec des attaches après avoir fait passer la
batterie par dessus.
Lorsque les DCR-SR85/SR75/SR65/SR55/SR46/SR45/SR36/SR35 sont utilisés
(Voir l’illustration -5-J)
Ouvrez le cache-prise et branchez la che. (Faites revenir le câble raccordé au
caisson sport par la che vers l’arrière en formant une fermoir, comme indiqué
dans l’illustration.)
Après avoir installé le caméscope dans le caisson sport, rangez le câble du côté de la
sangle du caméscope en le poussant doucement.
Lorsque les DCR-SX60/SX50/SX41/SX40/SX31/SX30 sont utilisés (Voir l’
illustration -5-K)
(Si les points et suivants ont déjà été eectués à l’étape -4, continuez
par .)
Levez la sangle et ouvrez le cache-borne pour brancher la prise.
Fixez le sabot de montage de caméra au caméscope.
Installez le caméscope dans le caisson sport en lmaintenant le câble courbé sur le
caméscope.
Après avoir installé le caméscope dans le caisson sport, ajustez le câble. (Accrochez
le câble au support de câble.)
Lorsque les DCR-DVD850/DVD810/DVD710/DVD650/DVD610/DVD450/
DVD410/DVD310/DVD150/DVD115/DVD110 sont utilisés (Voir l’illustration
-5-L)
Ouvrez le cache-prise.
Branchez la prise.
Insérez le câble dans la rainure de la bague antireet du côté de la sangle, comme
indiqué sur l’illustration.
Disposez le câble de la façon illustrée et xez le sabot de montage de caméra au
caisson sport.
Remarques sur le câble :
Ne tordez pas le câble.
Veillez à ce que le câble ne ressorte pas de la rainure de la bague antireet.
Après avoir installé le caméscope dans le caisson sport, veillez à ce que le câble ne
gêne pas l’objectif du caméscope.
Lorsque les DCR-DVD708/DVD608/DVD308/DVD306/DVD109/DVD108/
DVD106 sont utilisés (Voir l’illustration -5-M)
Ouvrez le cache-prise.
Branchez la prise.
Après avoir installé le caméscope dans le caisson sport, ajustez le câble.
(Voir l’illustration)
Lorsque les DCR-HC62/HC54/HC53/HC52/HC51/HC48/HC47/HC45/HC38/
HC37 sont utilisés (Voir l’illustration -5-N)
Ouvrez le cache-prise.
Branchez la prise.
Après avoir installé le caméscope dans le caisson sport, ajustez le câble. (Accrochez
le câble au support de câble.)
6Ouvrez la partie arrière.
Appuyez sur la partie arrière du caisson pour le refermer et serrez les fermoirs jusqu’à
ce qu’ils s’encliquettent.
Remarques
Veillez à ne pas coincer les câbles lorsque vous fermez la partie arrière.
Bien que l’objectif de certains caméscopes puisse être décentré par rapport à la vitre
avant du caisson, l’enregistrement s’eectue normalement.
中文(繁)
準備工作
註︰
並非所有國家/地區均有下述攝影機型號銷售。
準備攝影機
有關詳情,請參閱攝影機附帶的使用說明書。
1 從攝影機上拆下濾鏡、轉換鏡頭、鏡頭蓋、鏡頭遮光罩或肩帶。
當使用帶有手動鏡頭快門的攝影機時,請打開鏡頭快門。
2 安裝電池組。
請安裝完全充滿電的電池。
3 插入介質。
請插入與攝影機相容的介質。
有關詳情,請參閱攝影機附帶的使用說明書。
註︰
解開“Memory Stick Duo”和磁帶上的安全小翼,使其能夠錄製影像。
請確保磁帶、“Memory Stick Duo”、光盤、硬盤和內部記憶體有足夠的空間來錄
製影像。
請確認該光盤沒有被終結。
4 把防反射環安裝到攝影機的濾鏡固定螺絲上。
防反射環可以防止外部光線在戶外包內被反射並進入鏡頭。
使用沒有防反射環的攝影機時,應盡可能背對陽光。
防反射環 攝影機
防反射環
(M30×φ43)
HDR-UX20/UX19/UX10/UX9,
DCR-DVD910/DVD708/DVD608/DVD510/
DVD308/DVD306/DVD109/DVD108/DVD106,
DCR-HC62/HC54/HC53/HC52/HC51/HC48/HC47/
HC45/HC38/HC37
防反射環 (M30×φ47)
HDR-CX120/CX106/CX105/CX100,
DCR-SR87/SR77/SR67/SR57/SR48/SR47/SR38/
SR37
防反射環 (M30×φ50)
DCR-DVD850/DVD810/DVD710/DVD650/
DVD610/DVD450/DVD410/DVD310/DVD150/
DVD115/DVD110
防反射環 (M30×φ58) DCR-SR85/SR75/SR65/SR55/SR46/SR45/SR36/
SR35
防反射環 (M30×φ62)
HDR-XR200V/XR200/XR106/XR105/XR101/
XR100,
HDR-SR10,
DCR-SR220/SR210
防反射環 (M37×φ55)
HDR-XR520V/XR520/XR500V/XR500,
HDR-SR12/SR11/SR8/SR7/SR5,
HDR-CX12/CX11/CX7/CX6,
HDR-HC9/HC7/HC5
無法安裝隨附的防反射環 DCR-SX60/SX50/SX41/SX40/SX31/SX30
5 請反轉液晶顯示器面板使其背向攝影機,而使液晶顯示屏面朝外。
6 把調焦和閃光等功能設定於 AUTO(自動)。
Ȏ選擇攝影機安裝極履
1 根據下表來選擇極履和號碼。
安裝極履 號碼 攝影機
D
1
HDR-HC9/HC7/HC5,
DCR-DVD708/ D V D608/ D V D308/ DVD306/
DVD109/DVD108/DVD106
2DCR-HC62/HC54/HC53/HC52/HC51/HC48/
HC47/HC45/HC38/HC37
F1 HDR-CX12/CX11/CX7/CX6
2 HDR-SR8/SR7/SR5
G 1
HDR-UX20/UX19/UX10/UX9,
DCR-DVD910/ D V D850/ D V D810/ DVD710/
DVD650/DVD610/DVD510/DVD450/DVD410/
DVD310/DVD150/DVD115/DVD110
H 1
HDR-XR520V/XR520/XR500V/XR500/
XR200V/XR200/XR106/XR105/XR101/XR100,
HDR-SR12/SR11/SR10,
DCR-SR220/SR210
I 1 DCR-SR85/SR75/SR65/SR55/SR46/SR45/
SR36/SR35
J 1 HDR-CX120/CX106/CX105/CX100,
DCR-SX60/SX50/SX41/SX40/SX31/SX30
K 1 DCR-SR87/SR77/SR67/SR57/SR48/SR47/
SR38/SR37
2 把三角架螺旋盤和安裝極履上所選的號碼對齊,按壓三角架螺旋盤,
直至聽到“哢嗒”就位聲。
出廠時,三角架螺旋盤已安裝到安裝極履 H 上。
ȏ 準備戶外包
1 調整腕帶。
握住戶外包, 以便指尖能觸到 START/STOP 按鈕、Telephoto(遠攝)按
鈕、Wide(廣角)按鈕和 PHOTO 按鈕,調節其長度。
2 裝上肩帶。
Ȑ 安裝攝影機
使用帶有 POWER(電源)開關的攝影機時,請關閉 POWER(電源)開關,並
使戶外包電源處於關閉狀態。使用有內部電源關閉與液晶顯示屏關閉行動相連接
的攝影機時,無需關閉攝影機電源。
註︰
把攝影機裝進戶外包後,按戶外包的 POWER 按鈕便可將攝影機的電源設為
“ON”或“OFF”。
1 解開扣環。
ʓ 滑動解鎖按鈕 ɞ,按照箭頭方向滑動打開的滑塊 ɟ,解開扣環。
ʔ 打開後包體。
2 用鏡頭防霧液塗抹前玻璃窗。
在戶外包前玻璃窗內表面滴上 2 到 3 滴附帶的鏡頭防霧液。使用附帶的乾燥劑
可提高防霧效果。有關詳情,請參閱附帶的使用說明書中“乾燥劑”部分。
3 清除外來雜物,像防水密封墊上面、槽溝和任何結合面上粘附的塵
埃、沙粒或毛髮。然後,在防水密封墊上均勻塗上一層潤滑脂。
如果讓機身夾有雜物關上,便可能損壞該處併發生漏水。
有關使用防水密封墊的詳情,請參閱使用說明書的“防水密封墊使用須知”。
4 安裝攝影機的安裝極履。
ʓ 把安裝極履的螺絲位置和攝影機底部的三角架螺絲對齊。
ʔ 當使用以下型號時,請打開插孔蓋,並把音頻/遙控器插頭牢牢地插入 A/V
插孔、A/V OUT 插孔或 A/V 遙控器插孔:
HDR-UX20/UX19/UX10/UX9、DCR-DVD910/DVD510、DCR-SR87/
SR77/SR67/SR57/SR48/SR47/SR38/SR37、DCR-SX60/SX50/SX41/
SX40/SX31/SX30
當使用 DCR-SR87/SR77/SR67/SR57/SR48/SR47/SR38/SR37 型號時,
請確保插孔蓋充分打開再插入音頻 / 遙控器插頭(參見圖 Ȑ-5-Iʓ)。若插
孔蓋打開不充分,就會將音頻 / 遙控器插頭卡住,從而導致連接不良。
ʕ 如圖所示,用肩帶上的金屬部件將攝影機安裝極履安裝到攝影機上。
5 將插頭連接到攝影機的各個插孔上。
根據您的攝影機,把音頻/遙控器插頭牢固地插入 A/V 插孔、A/V OUT 插孔或
A/V 遙控器插孔。(步驟 4ʔ 中的攝影機型號除外)
當把攝影機裝進戶外包時,請把攝影機的安裝極履和戶外包的前包體內側對
齊,然後推攝影機安裝極履的後部,直到聽到“哢嗒”就位聲。
註︰
安裝攝影機的安裝極履時,請確保戶外包保持水平狀態。如果垂直狀態下安
裝攝影機的安裝極履,可能會損壞攝影機的安裝極履和前包體。
確保導線不要遮蓋鏡頭、液晶顯示屏、取景器、變焦杆或 PHOTO 按鈕。
使用有內部電源關閉與液晶顯示屏關閉行動相連接的攝影機時,連接音頻/遙
控器插頭會將靜態影像錄製模式/視頻播放模式切換為攝影機的動態影像錄製
模式。
當使用 HDR-XR520V/XR520/XR500V/XR500 型號時(如圖Ȑ-5-A所示)
ʓ 打開插孔蓋並連接插頭。(放置連接到戶外包的導線,使插頭環繞到後面,
如圖所示。)
ʔ 將攝影機裝入戶外包,小心不要讓導線碰到戶外包內部的部件。
ʕ 把攝影機裝進戶外包後,調整攝影機腕帶側的導線。
當使用 HDR-XR200V/XR200/XR106/XR105/XR101/XR100 型號時(如圖
Ȑ-5-B所示)
ʓ 打開插孔蓋並連接插頭。
ʔ 放置連接到戶外包的導線,使插頭環繞到後面,如圖所示。
ʕ 將攝影機裝入戶外包,小心不要讓導線碰到戶外包內部的部件。
ʖ 把攝影機裝進戶外包後,調整攝影機腕帶側的導線。
當使用 HDR-SR12/SR11/SR10、DCR-SR220/SR210 型號時(如圖Ȑ-5-C所示)
ʓ 打開插孔蓋並連接插頭。(放置連接到戶外包的導線,使插頭環繞到後面,
如圖所示。)
ʔ 把攝影機裝進戶外包後,輕輕推動攝影機腕帶側的導線將其排列好。
當使用 HDR-SR8/SR7/SR5 型號時(如圖Ȑ-5-D所示)
ʓ 打開插孔蓋。
ʔ 連接插頭。
ʕ 把攝影機裝進戶外包後,調整攝影機腕帶側的導線。
當使用 HDR-CX120/CX106/CX105/CX100 型號時(如圖Ȑ-5-E所示)
ʓ 打開插孔蓋並連接插頭。
ʔ 把攝影機裝進戶外包後,調整攝影機腕帶側的導線,小心不要碰到攝影機安
裝極履或其他部件上的導線。
當使用 HDR-CX12/CX11/CX7/CX6 型號時(如圖Ȑ-5-F所示)
ʓ 打開插孔蓋。
ʔ 連接插頭。
ʕ 把導線置於攝影機安裝極履上,然後把攝影機裝進戶外包。
ʖ 把攝影機裝進戶外包後,調整導線,使其不會從攝影機安裝極履跌落。把導
線固定到攝影機的腕帶上。
當使用 HDR-UX20/UX19/UX10/UX9 或 DCR-DVD910/DVD510 型號時(如
圖Ȑ-5-G 所示)
(如果以下 ʓ 和 ʔ 已經在步驟Ȑ-4 中完成,則從 ʕ 開始執行。)
ʓ 連接插頭。
ʔ 把攝影機安裝極履安裝到攝影機上。
ʕ 把攝影機裝進戶外包後,調整導線。(把導線固定到線夾上。)
當使用 HDR-HC9/HC7/HC5 型號時(如圖 Ȑ-5-H所示)
ʓ 打開插孔蓋。
ʔ 連接插頭。
ʕ 把攝影機裝進戶外包後,調整攝影機腕帶側的導線。
當使用 DCR-SR87/SR77/SR67/SR57/SR48/SR47/SR38/SR37 型號時(如
圖Ȑ-5-I所示)
(如果以下 ʓ 和 ʔ 已經在步驟Ȑ-4 中完成,則從 ʕ 開始執行。)
ʓ 在保持插孔蓋完全打開的情況下再連接插頭,以確保它不會貼附於插頭的根
部。
ʔ 把攝影機安裝極履安裝到攝影機上。
ʕ 使導線位於攝影機的頂端,把攝影機裝進戶外包。
ʖ 將導線固定在攝影機安裝極履的夾子上,小心不要碰到液晶顯示屏上的導線。
如果攝影機電池較長,導線無法沿兩端繞到其後面,可使導線沿上部跨過
電池,然後用夾子將導線固定好。
當使用 DCR-SR85/SR75/SR65/SR55/SR46/SR45/SR36/SR35 型號時(如
圖Ȑ-5-J所示)
ʓ 打開插孔蓋並連接插頭。(放置連接到戶外包的導線,使插頭環繞到後面,
如圖所示。)
ʔ 把攝影機裝進戶外包後,輕輕推動攝影機腕帶側的導線將其排列好。
當使用 DCR-SX60/SX50/SX41/SX40/SX31/SX30 型號時(如圖Ȑ-5-K所示)
(如果以下 ʓ 和 ʔ 已經在步驟Ȑ-4 中完成,則從 ʕ 開始執行。)
ʓ 提起腕帶並打開插孔蓋,然後連接插頭。
ʔ 把攝影機安裝極履安裝到攝影機上。
ʕ 使導線挽於攝影機的頂端,把攝影機裝進戶外包。
ʖ 把攝影機裝進戶外包後,調整導線。(把導線固定到線夾上。)
當使用 DCR-DVD850/DVD810/DVD710/DVD650/DVD610/DVD450/
DVD410/DVD310/DVD150/DVD115/DVD110 型號時(如圖Ȑ-5-L所示)
ʓ 打開插孔蓋。
ʔ 連接插頭。
ʕ 用腕帶側防反射環的凹槽夾住導線,如圖所示。
ˎ
ˎ
ˎ
ˎ
ˎ
ʖ 按照圖示放置導線,然後把攝影機安裝極履安裝到戶外包上。
安裝時請注意︰
不要彎曲導線。
確認導線未從防反射環的凹槽中脫落。
ʗ 把攝影機裝進戶外包後,確認導線不會妨礙攝影機的鏡頭。
當使用 DCR-DVD708/DVD608/DVD308/DVD306/DVD109/DVD108/
DVD106 時(如圖Ȑ-5-M所示)
ʓ 打開插孔蓋。
ʔ 連接插頭。
ʕ 把攝影機裝進戶外包後,調整導線。
(如圖所示)
當使用 DCR-HC62/HC54/HC53/HC52/HC51/HC48/HC47/HC45/HC38/
HC37 時(如圖Ȑ-5-N所示)
ʓ 打開插孔蓋。
ʔ 連接插頭。
ʕ 把攝影機裝進戶外包後,調整導線。(把導線固定到線夾上。)
6 關上後包體。
關緊後包體,並扣緊扣環直至聽到“哢嗒”就位聲。
註︰
關後包體時,小心不要夾住導線。
某些型號的攝像機的鏡頭中心在安裝時可能會相對戶外包的前玻璃窗的中心
發生位移。但這在攝像時不會產生任何問題。
ˎ
ˎ
ˎ
ˎ
㩆⪞
ⷪ⌮㩂ጚ
ⷦⱂ⳺
ᵛ㇃ぇ# ᬏ㬷ᬯ# ⢻ ᾋ゛# 㣫Ⓥ ⇳# ┟ㆷ# ㇳ⟷# ᬏ⇳2㐷つぇ⮓ᴋ# ⵓ㶇ẏ㐷# ⿁ㆻ# ⲏ#
ㇿᴿᵛ1
⌮᧾⬎#㍞Ἶᱦ#ⷪ⌮㩂ጚ
㈇⮯㿓#ᬫㄠㆷ#⬣ㄠ#㎈#⢻ᾋ゛#㣫Ⓥ⇳ぇ#⟷Ⰴẓ#⬣ㄠ⮛⓼⮓⏳#㚯㋧㿏っ#㍳ⵤⵓ゛1
1# ⌮᧾⬎# ㍞Ἶᱦ⪺☆# 㨮㘚/# ㏒Ⅾⳮ# ᳶ/# ᳶ# ㎋/# ᳶ# 㮮ᧆ# # ⪞ፒ#
ᔲⰮ#≮ẖ㩓ឲ៎1
ⲏṐ#⊃㏿#⯋㮧⏳# ⬣ㄠ㿫⮓#⢻ᾋ゛#㣫Ⓥ⇳⏳#⬣ㄠ㿏ᴋ#᜴ㄧぇᴋ#⊃㏿#⯋㮧⏳#に〫#
㍳ⵤⵓ゛1
2# ℚ㘚ẖ㠓Ⱞ#ⲏㄓ㩓ឲ៎1
⑃㠠㉻㿓#⚧㮧␣㶠ㆻ#㈜㚠㿏っ#㍳ⵤⵓ゛1
3# ᧾⪞Ṧ#ᘍ➟ឲ៎1
⬣ㄠ#㎈#⢻ᾋ゛#㣫Ⓥ⇳ぇ#ᵷ㇈㿏ᴋ#♯ᾋ〫⏳#ᮚ〫#㍳ⵤⵓ゛1
㈇⮯㿓#ᬫㄠㆷ#⬣ㄠ#㎈#⢻ᾋ゛#㣫Ⓥ⇳ぇ#⟷Ⰴẓ#⬣ㄠ⮛⓼⮓⏳#㚯㋧㿏っ#㍳ⵤⵓ゛1
ⷦⱂ⳺
啂Phpru|#Vwlfn#Gxr啃#♯ᾋ〫シ#⢻ᾋ゛#㯃㽻㇏#⽧ᢧ㐷#㭤#㈗ㆻ#㿫㊓㿫⮓#
♯㐷⏳#ᢧ⋔㿗#ⲏ#ㇿᴋ#⬸㭓⋓#㿫#ᰊᴿᵛ1
㯃㽻/#啂Phpru|#Vwlfn#Gxr啃#♯ᾋ〫/#ᾋⴛ㫣#⚆#㿏ὓ#ᾋⴛ㫣シ#ᬫ㈜#Ⓥ┟␣ぇ#
♯㐷⏳#ᢧ⋔㿗#ⲏ#ㇿᴋ#㠠⟻㿓#ㄠ≀#ㇿᴋ㐷#䃌㿏っ#㍳ⵤⵓ゛1
ᾋⴛ㫣ᙷ#㶃ᮇ⇳㏿#ẏ㐷#⿁⿏㇃ㆻ#䃌㿏っ#㍳ⵤⵓ゛1
4# ℂ▖#ℓ⺪#ẫⰮ#⌮᧾⬎#㍞Ἶᱦⱂ#㨮㘚#ⲏㄓ#ᖂ▖⪺#ⲏㄓ㩓ឲ៎1
⚏⬣# ⚠㐷# ㆷ# ワ⟷㇏# ⣒# ⴛ㹣㢗㶠# ᬫ⟷⋓# ⚏⬣ẏ〫# ⊃㏿⋓# Ὓ〫゛ᴋ# ㆻ#
⚠㐷㿠ᴿᵛ1
⚏⬣#⚠㐷#〽#⢻ᾋ゛#㣫Ⓥ⇳⏳#⬣ㄠ㿏ᴋ#᜴ㄧぇᴋ#ᙷᴜ㿓㿓#㭓〈ㆻ#Ὠ㐻#⬸㭓⋓#
㞣へ㿫#㍳ⵤⵓ゛1
⚏⬣#⚠㐷# ⢻ᾋ゛#㣫Ⓥ⇳
⚏⬣#⚠㐷#
+P63#啑#堬#76,
HDR-UX20/UX19/UX10/UX9,
DCR-DVD910/DVD708/DVD608/DVD510/DVD308/
DVD306/DVD109/DVD108/DVD106,
DCR-HC62/HC54/HC53/HC52/HC51/HC48/HC47/
HC45/HC38/HC37
⚏⬣#⚠㐷#
+P63#啑#堬#7:,
HDR-CX120/CX106/CX105/CX100,
DCR-SR87/SR77/SR67/SR57/SR48/SR47/SR38/SR37
⚏⬣#⚠㐷#
+P63#啑#堬#83,
DCR-DVD850/DVD810/DVD710/DVD650/DVD610/
DVD450/DVD410/DVD310/DVD150/DVD115/DVD110
⚏⬣#⚠㐷#
+P63#啑#堬#8;,
DCR-SR85/SR75/SR65/SR55/SR46/SR45/SR36/SR35
⚏⬣#⚠㐷#
+P63#啑#堬#95,
HDR-XR200V/XR200/XR106/XR105/XR101/XR100,
HDR-SR10,
DCR-SR220/SR210
⚏⬣#⚠㐷#
+P6:#啑#堬#88,
HDR-XR520V/XR520/XR500V/XR500,
HDR-SR12/SR11/SR8/SR7/SR5,
HDR-CX12/CX11/CX7/CX6,
HDR-HC9/HC7/HC5
Ṑ ➀ ẓ# ⚏ ⬣# ⚠ 㐷 # ㆻ#
⟷㚠㿗#ⲏ#〽ᴿᵛ
DCR-SX60/SX50/SX41/SX40/SX31/SX30
5#OFG# 㠒ᗺⰮ#ℂᵆ#ᢶᴎ☆# OFG#㬾ⱞ#ፏ⾧Ⱞ# 㪏㩂ᵇ#⌮᧾⬎#
㍞Ἶᱦ#⾧⪺#ᤂᢶᴎ#ᙽ➟ឲ៎1
6# ㇲ⳺ⱞᖂ#ⵚὯ#ⱂ#ጚតⰮ#DXWRᵆ#☎⳿㩓ឲ៎1
Ȏ#㍞Ἶᱦ#Ẳ⮞㟯#❲#☊㗇㩂ጚ
1# ៎ⰶ#㥆⪺☆#Ẳ⮞㟯#❲⬪#ⅲ㬢Ṧ#☊㗇㩓ឲ៎1
ㄫ㵼#⳿ ⛿䂯 ⢻ᾋ゛#㣫Ⓥ⇳
D
1
HDR-HC9/HC7/HC5,
DCR-DVD708/DVD608/DVD308/DVD306/
DVD109/DVD108/DVD106
2DCR-HC62/HC54/HC53/HC52/HC51/HC48/HC47/
HC45/HC38/HC37
F1 HDR-CX12/CX11/CX7/CX6
2 HDR-SR8/SR7/SR5
G 1
HDR-UX20/UX19/UX10/UX9,
DCR-DVD910/DVD850/DVD810/DVD710/DVD650/
DVD610/DVD510/DVD450/DVD410/DVD310/
DVD150/DVD115/DVD110
H 1
HDR-XR520V/XR520/XR500V/XR500/XR200V/
XR200/XR106/XR105/XR101/XR100,
HDR-SR12/SR11/SR10,
DCR-SR220/SR210
I 1 DCR-SR85/SR75/SR65/SR55/SR46/SR45/SR36/SR35
J 1 HDR-CX120/CX106/CX105/CX100,
DCR-SX60/SX50/SX41/SX40/SX31/SX30
K 1 DCR-SR87/SR77/SR67/SR57/SR48/SR47/SR38/SR37
2# ▦ძ# ᖂ▖# 㧶ᳲⱞ㞢Ṧ# Ẳ⮞㟯# ❲ⱂ# ☊㗇㩆# ⅲ㬢⪺# Ỉ㉾ᇊ/# ⪞ც#
♶ẖც#ᖊ#ᨶጶ⺪#▦ძ#ᖂ▖#㧶ᳲⱞ㞢Ṧ#ᛮṯឲ៎1
ᝬ㈜#㠓㿏#ⵓ#⬳ᙸᵷ#ᬏ⬣#㾃≿㴯ᴋ#ㄫ㵼#⳿#Kぇ#㈜㚠ẏ〫#ㇿᴿᵛ1
ȏ#➎㣖㌊㠓#ⷪ⌮㩂ጚ
1# ዢầ#➎㞢ᲓⰮ#ⵚⳲ㩓ឲ៎1
VWDUW2VWRS#⛻㴳/#Whohskrwr#⛻㴳/#Zlgh#⛻㴳/#SKRWR#⛻㴳ㆻ#Ⰷᙷ⇴ㆳ⋓#
㋧㈈㿏ᢧ#ḻ⋔#ⴛ㹣㢗㶠ㆻ#㈘/#ᡯ#ⴛ㴯∠㇏#⏳#㋧㉿㿏っ#㍳ⵤⵓ゛1
2# ⪞ፒ#ᔲⰮ#ⲏㄓ㩓ឲ៎1
Ȑ#⌮᧾⬎#㍞Ἶᱦ#ⲏㄓ㩂ጚ
SRZHU#ⴛㅻ㣏ᙷ#ㇿᴋ#⢻ᾋ゛#㣫Ⓥ⇳⏳#⬣ㄠ㿏ᴋ#᜴ㄧぇᴋ#SRZHU#ⴛㅻ㣏⏳#/#
ⴛ㹣㢗㶠㇏#㉻ㅇḻ##⬸㭓⋓#㆗㐷㿫#㍳ⵤⵓ゛1#OFG#䃋⓫㇏#㉻ㅇᮚᢧ#㋧㈈ぇ#でẓ#
ᬫ⟷#㉻ㅇ#ⴛㅻ㣏ᙷ#ㇿᴋ#⢻ᾋ゛#㣫Ⓥ⇳⏳#⬣ㄠ㿗#ῃぇᴋ#⢻ᾋ゛#㣫Ⓥ⇳㇏#㉻ㅇㆻ##
㾻ㄋᙷ#〽ᴿᵛ1
ⷦⱂ⳺
ⴛ㹣㢗㶠ぇ#⢻ᾋ゛#㣫Ⓥ⇳⏳#㈜㚠㿓#䄻ᴋ#ⴛ㹣㢗㶠㇏#SRZHU#⛻㴳ㆻ#ᱻ⏫#⢻ᾋ゛#
㣫Ⓥ⇳㇏#㉻ㅇㆻ#啂RQ啃#₇ᴋ#啂RII啃⋓#⮛㊌㿗#ⲏ#ㇿᴿᵛ1
1# Ⅾ㕞Ⱞ#㥳ឲ៎1
ʓ㈗#㿫㊓#⛻㴳#ɞㆻ#䃋⬫㻓#⚠䀜ㆳ⋓#♳#㚻#゛㽿#ⴣ⇳#ɟ⏳#♷〫⮓#⛻㫫ㆻ#
㼀ᴿᵛ1
ʔἮ⓫#❯㜫⏳#ぴᴿᵛ1
2# ⩈#Ⰺẖ⪺#➟ጚ#ℓ⺪#ᳶ#⮓⩋Ⱞ#ṯឲ៎1
⟷Ⰴẓ#ᢧ#⚠㐷#⊃㏿#ㄠ#5/#6#⚠ㄯㆻ#ⴛ㹣㢗㶠㇏#⿕#㆗␣#⾿㔴ぇ#⚋⏼ᴿᵛ1#ᢧ#
⚠㐷# 䄟ᝳ⏳# ᰉㇳ# ⲏ# ㇿḻ⋔# ⟷Ⰴẓ# ᛫㋧㊓⏳# ⬣ㄠ㿏っ# ㍳ⵤⵓ゛1# ㈇⮯㿓# ᬫㄠㆷ#
⟷Ⰴẓ#⮛⓼⮓㇏#%᛫㋧㊓%⏳#㚯㋧㿏っ#㍳ⵤⵓ゛1
3# Rẫⱞᖂ#㬲##ዢ#℀ⱂ#⳻ㇳ⪺☆#ἦ⺪ᖂ#ᾒᲂ/#ἢẖ㍞ᱧ#ⱂ#ⱞ…⺲Ⱞ#
ⴆᅚ㩓ឲ៎1#ዢẖᇊ#Rẫ⪺#ዢẖ➎Ṧ#ᇊṞᅶ#㢞#ṯឲ៎1
△㐿 ㆻ# ㊓ᛧ㿏㐷# ⿁# ❯㜫⏳# ᵢㆳ ⓫# ᡯ# ⟷⟻# Ⰷ⬸ ẏ# △# ⭇# び ⊛ᙷ#
ㇿᴿᵛ1
R㇏# ㈇ ⮯ 㿓# 㡟 ᢀぇ# 㿫⮓ ᴋ# ⬣ ㄠ ⮛⓼ ⮓ ㇏# 啂R ㇏# 㡟 ᢀ啃ㆻ# 㚯 ㋧ 㿏っ#
㍳ⵤⵓ゛1
4# ㍞Ἶᱦ#Ẳ⮞㟯#❲Ṧ#ⲏㄓ㩓ឲ៎1
ʓ⢻ᾋ゛#㣫Ⓥ⇳#⚈⓫㇏#⬳ᙸᵷ#㈜㚠#ᬏ⬣ぇ#ㄫ㵼#⳿㇏#ᬏ⬣#ㅻ㣏⏳#㠋ⵤⵓ゛1
ʔ⾻∏シ#ᚐㆷ#┟ㆻ#⬣ㄠ㿏ᴋ#᜴ㄧぇᴋ#ᵟ㈇#㥛⛻⏳#に#゛ᾋ゛2␣┟㴯#㾃≣ᡯ
⏳#D2Y#ᵟ㈇/#D2Y#RXW#ᵟ㈇#₇ᴋ#D2Y#␣┟㴯#ᵟ㈇ぇ#ᵟᵟ䇿#⬴ㇼ㿫#㍳ⵤⵓ
゛=
KGU0X[532X[4<2X[432X[</#GFU0GYG<432GYG843/# GFU0VU;:2
VU::2VU9:2VU8:2VU7;2VU7:2VU6;2VU6:/#GFU0V[932V[832V[742
V[732V[642V[63
GFU0VU;:2VU::2VU9:2VU8:2VU7;2VU7:2VU6;2VU6:ㆻ# ⬣ㄠ㿏ᴋ#
᜴ㄧ/# ᵟ㈇# 㥛⛻⏳# 㠠⟻䇿# に〫⮓# ゛ᾋ゛2␣┟㴯# 㾃≣ᡯ⏳# ⬴ㇼ㿫# ㍳ⵤⵓ゛1#
+ᡯ#Ȑ080L#ʓ# 㚯㋧,# ᵟ㈇# 㥛⛻ᙷ# 㠠⟻䇿# に␣㐷# ⿁ㆳ⓫/# ᵟ㈇# 㥛⛻ᙷ#
゛ᾋ゛2␣┟㴯#㾃≣ᡯぇ#ᛯ⊛⮓#㊈Ⰴ#㌂㐷#⿁ᜃ#Ạᴿᵛ1
ʕᡯᝳ#ᚐ#〫ᣟ#㇏#Ⰴ#⟷⟻ㆻ#⬣ㄠ㿫⮓#㣫Ⓥ⇳#ㄫ㵼#⳿⏳#⢻ᾋ゛#㣫Ⓥ⇳
ぇ#㈜㚠㿠ᴿᵛ1
5㧶᳖ዢṦ#⫚ᆚ㩂ᇊ#⌮᧾⬎#㍞ἾᱦṦ#ⲏㄓ㩓ឲ៎1
⢻ᾋ゛#㣫Ⓥ⇳ぇ#㠋〫#゛ᾋ゛2␣┟㴯#㾃≣ᡯ⏳#D2Y#ᵟ㈇/#D2Y#RXW#ᵟ㈇#₇ᴋ#
D2Y# ␣┟㴯# ᵟ㈇ぇ# ᵟᵟ䇿# ⬴ㇼ㿏ⵤⵓ゛1# # +ᵟ# 7ʔ㇏# ⢻ᾋ゛# 㣫Ⓥ⇳# ┟ㆷ#
㊓ワ,
ⴛ㹣㢗㶠ぇ#⢻ᾋ゛#㣫Ⓥ⇳⏳# ㈜㚠㿗#ῃぇᴋ#㣫Ⓥ⇳#ㄫ㵼#⳿⏳#ⴛ㹣㢗㶠#⿕#⟷⟻#
⾿㔴㇏# ᙷὓぇ# 㠏# ᵛ㇃/# ㊌ẏᴋ# Ⰳ␣ᙷ# ᬗ# ῃᣃ㐷# 㣫Ⓥ⇳# ㄫ㵼# ⳿㇏# Ἦ#
⟷⟻ㆻ#ᲃ≣#ᮚᴿᵛ1
ⷦⱂ⳺
㣫Ⓥ⇳# ㄫ㵼# ⳿⏳# ㈜㚠㿗# ῃぇᴋ# ⴛ㹣㢗㶠ㆻ# ⲏ㹀ㆳ⋓# ㆗㐷㿫# ㍳ⵤⵓ゛1#
㣫Ⓥ⇳# ㄫ㵼# ⳿⏳# ⮯⋓# ⚠䀜ㆳ⋓# ㈜㚠㿏⓫# 㣫Ⓥ⇳# ㄫ㵼# ⳿シ# ⿕㔴# ❯㜫ᙷ#
Ⰷ⬸ẗ#び⊛ᙷ#ㇿᴿᵛ1
⊃㏿/# OFG# 䃋⓫/# ⡧㶃㮧/# ㎃# ≿⛻/# ⬣㐻# ⛻㴳ぇ# 㥷⢋# ᛯ␣㐷# ⿁ḻ⋔#
㍳㇏㿏ⵤⵓ゛1
OFG#䃋⓫㇏#㉻ㅇᮚᢧ#㋧㈈ぇ#でẓ#ᬫ⟷#㉻ㅇ#ⴛㅻ㣏ᙷ#ㇿᴋ#⢻ᾋ゛#㣫Ⓥ⇳⏳#
⬣ㄠ㿗#ῃぇᴋ#゛ᾋ゛2␣┟㴯#㾃≣ᡯ⏳#㊈Ⰴ㿏⓫#㊌㐷#♯㐷#㞣へ#┟ὓ2⢻ᾋ゛#
㈣⭔#┟ὓ⏳#⢻ᾋ゛#㣫Ⓥ⇳㇏#Ṑへ⬸#㞣へ#┟ὓ⋓#✷䃏㿠ᴿᵛ1
KGU0[U853Y2[U8532[U833Y2[U833Ⱞ#▖⮓㩂#ᆧ⮚+ዢẦ#Ȑ080D#ㄢⵚ,
ʓᵟ㈇#㥛⛻⏳#に#㾃≣ᡯ⏳#でᜧ㿠ᴿᵛ1#+ᡯᝳ#ᚐ#㾃≣ᡯぇ⮓#ⴛ㹣㢗㶠ぇ#で
ᜧ㿓#㥷⢋#ㅇㆻ#ᡯ␣ⓧ#⢻ᾋ゛#㣫Ⓥ⇳#Ἓ㔴ㆳ⋓#ṃ⾻゛ḻ⋔#㿠ᴿᵛ1)
ʔ#ⴛ㹣㢗㶠#ᬫ⟷#⟷㻿ぇ#㥷⢋#ᛯ␣㐷#⿁ḻ⋔#㍳㇏㿫⮓#⢻ᾋ゛#㣫Ⓥ⇳⏳#ⴛ㹣
㢗㶠ぇ#⮛㣏㿠ᴿᵛ1
ʕ#⢻ᾋ゛#㣫Ⓥ⇳⏳#ⴛ㹣㢗㶠ぇ#⮛㣏㿓#䄻ぇ#㥷⢋ㆷ#⢻ᾋ゛#㣫Ⓥ⇳#ᡯ#✟㴯#㔴
ㆳ⋓#㿫#ᰊᴿᵛ1
KGU0[U533Y2[U5332[U4392[U4382[U4342[U433Ⱞ#▖⮓㩂# ᆧ⮚+ዢẦ##
Ȑ080E#ㄢⵚ,
ʓᵟ㈇#㥛⛻⏳#に#㾃≣ᡯ⏳#でᜧ㿠ᴿᵛ1
ʔ#ᡯᝳ#ᚐ#㾃≣ᡯぇ⮓#ⴛ㹣㢗㶠ぇ#でᜧ㿓#㥷⢋#ㅇㆻ#ᡯ␣ⓧ#⢻ᾋ゛#㣫Ⓥ
⇳#Ἓ㔴ㆳ⋓#ṃ⾻゛ḻ⋔#㿠ᴿᵛ1
ʕ#ⴛ㹣㢗㶠#ᬫ⟷#⟷㻿ぇ#㥷⢋#ᛯ␣㐷#⿁ḻ⋔#㍳㇏㿫⮓#⢻ᾋ゛#㣫Ⓥ⇳⏳#ⴛ㹣
㢗㶠ぇ#⮛㣏㿠ᴿᵛ1
ʖ#⢻ᾋ゛#㣫Ⓥ⇳⏳#ⴛ㹣㢗㶠ぇ#⮛㣏㿓#䄻ぇ#㥷⢋ㆷ#⢻ᾋ゛#㣫Ⓥ⇳#ᡯ#✟㴯#㔴
ㆳ⋓#㿫#ᰊᴿᵛ1
KGU0VU452VU442VU43/#GFU0VU5532VU543Ⱞ# ▖⮓㩂#ᆧ⮚+ዢẦ#Ȑ
080F#ㄢⵚ,
ʓᵟ㈇#㥛⛻⏳#に#㾃≣ᡯ⏳#でᜧ㿠ᴿᵛ1#+ᡯᝳ#ᚐ#㾃≣ᡯぇ⮓#ⴛ㹣㢗㶠ぇ#で
ᜧ㿓#㥷⢋#ㅇㆻ#ᡯ␣ⓧ#⢻ᾋ゛#㣫Ⓥ⇳#Ἓ㔴ㆳ⋓#ṃ⾻゛ḻ⋔#㿠ᴿᵛ1,
ʔ#⢻ᾋ゛#㣫Ⓥ⇳⏳#ⴛ㹣㢗㶠ぇ#⮛㣏㿓#䄻ぇ#㥷⢋ㆷ#ᙷ❄ᜃ#ᲃ≣⮓#⢻ᾋ゛#㣫Ⓥ
⇳#ᡯ#✟㴯#㔴ㆳ⋓#㿫#ᰊᴿᵛ1
KGU0VU;2VU:2VU8Ṧ#▖⮓㩂#ᆧ⮚+ዢẦ#Ȑ080G#ㄢⵚ,
ʓᵟ㈇#㥛⛻⏳#ぴᴿᵛ1
ʔ#㾃≣ᡯ⏳#でᜧ㿠ᴿᵛ1
ʕ#⢻ᾋ゛#㣫Ⓥ⇳⏳#ⴛ㹣㢗㶠ぇ#⮛㣏㿓#䄻ぇ#㥷⢋ㆷ#⢻ᾋ゛#㣫Ⓥ⇳#ᡯ#✟㴯#㔴
ㆳ⋓#㿫#ᰊᴿᵛ1
KGU0F[4532F[4392F[4382F[433Ⱞ#▖⮓㩂#ᆧ⮚+ዢẦ#Ȑ080H#ㄢⵚ,
ʓᵟ㈇#㥛⛻⏳#に#㾃≣ᡯ⏳#でᜧ㿠ᴿᵛ1
ʔ#⢻ᾋ゛#㣫Ⓥ⇳⏳#ⴛ㹣㢗㶠ぇ#⮛㣏㿓#䄻ぇ/#⢻ᾋ゛#㣫Ⓥ⇳㇏#ᡯ#✟㴯㢘ぇ#ㇿᴋ#
㥷⢋ㆻ#㠋〫⮓#㣫Ⓥ⇳#ㄫ㵼#⳿#₇ᴋ#ᢧ㬷#⟷㻿ぇ#㥷⢋#ᛯ␣㐷#⿁ḻ⋔#
㍳㇏㿫#㍳ⵤⵓ゛1
KGU0F[452F[442F[:2F[9Ṧ#▖⮓㩂#ᆧ⮚+ዢẦ#Ȑ080I#ㄢⵚ,
ʓᵟ㈇#㥛⛻⏳#ぴᴿᵛ1
ʔ#㾃≣ᡯ⏳#でᜧ㿠ᴿᵛ1
ʕ#㥷⢋ㆻ#㣫Ⓥ⇳#ㄫ㵼#⳿#ㅻぇ#ィ⊛ᰊ#⢻ᾋ゛#㣫Ⓥ⇳⏳#ⴛ㹣㢗㶠ぇ#㈜㚠㿠
ᴿᵛ1
ʖ#⢻ᾋ゛#㣫Ⓥ⇳⏳#ⴛ㹣㢗㶠ぇ#㈜㚠㿓#䄻ぇ#㥷⢋ㆻ#㣫Ⓥ⇳#ㄫ㵼#⳿ぇ⮓#⣗㐷
㐷#⿁ḻ⋔#㊌␣㿫#ᰊᴿᵛ1#㥷⢋ㆻ#⢻ᾋ゛#㣫Ⓥ⇳#ᡯ#✟㴯#㔴ㆳ⋓#⮛㣏㿠ᴿ
ᵛ1
ˎ
ˎ
ˎ
ˎ
KGU0X[532X[4<2X[432X[<##GFU0GYG<432GYG843Ⱞ#▖⮓㩂#ᆧ⮚
+ዢẦ#Ȑ080J#ㄢⵚ,
+✆☆#Ȑ07⪺☆#៎ⰶⱂ#ʓᇦ#ʔṦ#Ẳ㇎Ⱞ#ᨶ⪺#ʕⰦᵆ#⺮㩳㩂⟗⟆⬎1,
ʓ㾃≣ᡯ⏳#でᜧ㿠ᴿᵛ.
ʔ#㣫Ⓥ⇳#ㄫ㵼#⳿⏳#⢻ᾋ゛#㣫Ⓥ⇳ぇ#㈜㚠㿠ᴿᵛ1
ʕ#⢻ᾋ゛#㣫Ⓥ⇳⏳#ⴛ㹣㢗㶠ぇ#⮛㣏㿓#䄻#㥷⢋ㆻ#㋧㉿㿠ᴿᵛ1#+㥷⢋ㆷ#㥷⢋#
䂷ぇ#ᛯ〫#ᰊᴿᵛ1,
KGU0KF<2KF:2KF8Ṧ#▖⮓㩂#ᆧ⮚+ዢẦ#Ȑ080K#ㄢⵚ,
ʓᵟ㈇#㥛⛻⏳#ぴᴿᵛ1
ʔ#㾃≣ᡯ⏳#でᜧ㿠ᴿᵛ1
ʕ#⢻ᾋ゛#㣫Ⓥ⇳⏳#ⴛ㹣㢗㶠ぇ#⮛㣏㿓#䄻ぇ#㥷⢋ㆷ#⢻ᾋ゛#㣫Ⓥ⇳#ᡯ#✟㴯#㔴
ㆳ⋓#㿫#ᰊᴿᵛ1
GFU0VU;:2VU::2VU9:2VU8:2VU7;2VU7:2VU6;2VU6:Ⱞ#▖⮓㩂# ᆧ⮚
+ዢẦ#Ȑ080L#ㄢⵚ,
+✆☆#Ȑ07⪺☆#៎ⰶⱂ#ʓᇦ#ʔṦ#Ẳ㇎Ⱞ#ᨶ⪺#ʕⰦᵆ#⺮㩳㩂⟗⟆⬎1,
ʓ㾃≣ᡯ#⾻∢㔴ぇ#⟷㚠ẏ㐷#⿁ḻ⋔#㈤#㥛⛻⏳#㉸㉿㿏ᜃ#に〫⮓#㾃≣ᡯ⏳#⟷㚠㿠
ᴿᵛ1
ʔ#㣫Ⓥ⇳#ㄫ㵼#⳿⏳#⢻ᾋ゛#㣫Ⓥ⇳ぇ#㈜㚠㿠ᴿᵛ1
ʕ#⢻ᾋ゛#㣫Ⓥ⇳㇏#⬸⟷ぇ#㥷⢋ㆻ#㆗㐷ⵓ㬛⓫⮓#ⴛ㹣㢗㶠ぇ#⢻ᾋ゛#㣫Ⓥ⇳⏳#⮛
㣏㿠ᴿᵛ1
ʖ#OFG#䃋⓫ぇ#㥷⢋#ᛯ␣㐷#⿁ᜃ#㍳㇏㿫⮓#㣫Ⓥ⇳#ㄫ㵼#⳿㇏#㫫ぇ#㥷⢋
ㆻ#㊌㿠ᴿᵛ1
⢻ᾋ゛# 㣫Ⓥ⇳# ⚧㮧␣ᙷ# 㥛⮓# 㥷⢋# ⚧㮧␣# Ἦ㔴ㆻ# 㰬ᝳ㿗# ⲏ# 〽ᴋ#
᜴ㄧぇᴋ# ⬸⟷# ㍳ㅻ⋓# ⚧㮧␣⏳# 㰬ᝳⵓ㬟#䄻ぇ# 㫫ㆳ⋓#㥷⢋ㆻ# ㋧っ#
㍳ⵤⵓ゛1
GFU0VU;82VU:82VU982VU882VU792VU782VU692VU68Ṧ#▖⮓㩂# ᆧ⮚
+ዢẦ#Ȑ080M#ㄢⵚ,
ʓᵟ㈇#㥛⛻⏳#に#㾃≣ᡯ⏳#でᜧ㿠ᴿᵛ1#+ᡯᝳ#ᚐ#㾃≣ᡯぇ⮓#ⴛ㹣㢗㶠ぇ#で
ᜧ㿓#㥷⢋#ㅇㆻ#ᡯ␣ⓧ#⢻ᾋ゛#㣫Ⓥ⇳#Ἓ㔴ㆳ⋓#ṃ⾻゛ḻ⋔#㿠ᴿᵛ1,
ʔ#⢻ᾋ゛#㣫Ⓥ⇳⏳#ⴛ㹣㢗㶠ぇ#⮛㣏㿓#䄻ぇ#㥷⢋ㆷ#ᙷ❄ᜃ#ᲃ≣⮓#⢻ᾋ゛#㣫Ⓥ
⇳#ᡯ#✟㴯#㔴ㆳ⋓#㿫#ᰊᴿᵛ1
GFU0V[932V[832V[742V[732V[642V[63Ⱞ#▖⮓㩂# ᆧ⮚+ዢẦ# Ȑ080N#
ㄢⵚ,
+✆☆#Ȑ07⪺☆#៎ⰶⱂ#ʓᇦ#ʔṦ#Ẳ㇎Ⱞ#ᨶ⪺#ʕⰦᵆ#⺮㩳㩂⟗⟆⬎1,
ʓᡯ#✟㴯⏳#Ὓ〫ィ⊛⮓#㈤#㥛⛻⏳#に#㾃≣ᡯ⏳#でᜧ㿠ᴿᵛ1
ʔ#㣫Ⓥ⇳#ㄫ㵼#⳿⏳#⢻ᾋ゛#㣫Ⓥ⇳ぇ#㈜㚠㿠ᴿᵛ1
ʕ#㥷⢋ㆷ#⢻ᾋ゛#㣫Ⓥ⇳㇏#⬸⟷#㔴ㆳ⋓#៣⟷#⬸㭓⋓#⢻ᾋ゛#㣫Ⓥ⇳⏳#ⴛ㹣㢗
㶠ぇ#⮛㣏㿠ᴿᵛ1
ʖ#⢻ᾋ゛#㣫Ⓥ⇳⏳#ⴛ㹣㢗㶠ぇ#⮛㣏㿓#䄻#㥷⢋ㆻ#㋧㉿㿠ᴿᵛ1#+㥷⢋ㆷ#㥷⢋#
䂷ぇ#ᛯ〫#ᰊᴿᵛ1,
GFU0GYG;832GYG;432GYG:432GYG9832GYG9432GYG7832GYG7432
GYG6432GYG4832GYG4482GYG443Ⱞ#▖⮓㩂#ᆧ⮚+ዢẦ#Ȑ080O#ㄢⵚ,
ʓᵟ㈇#㥛⛻⏳#ぴᴿᵛ1
ʔ#㾃≣ᡯ⏳#でᜧ㿠ᴿᵛ1
ʕ#ᡯᝳ#ᚐ#㥷⢋ㆻ#ᡯ#✟㴯#㔴㇏#⚏⬣#⚠㐷##䂿ぇ#ㄸᴿᵛ1
ʖ#ᡯᝳ#ᚐ#㥷⢋ㆻ#ᰊ#㣫Ⓥ⇳#ㄫ㵼#⳿⏳#ⴛ㹣㢗㶠ぇ#㈜㚠㿠ᴿᵛ1
ⲏㄓ㩊#ᨶⱂ#ⷦⱂ=
㥷⢋ㆻ#៣⟷␣㐷#ⵤⵓ゛1
㥷⢋#⚏⬣#⚠㐷##䂿ぇ⮓#⣗㐷㐷#⿁ḻ⋔#㿏ⵤⵓ゛1
ʗ#⢻ᾋ゛#㣫Ⓥ⇳⏳#ⴛ㹣㢗㶠ぇ#⮛㣏㿓#䄻#㥷⢋#⢻ᾋ゛#㣫Ⓥ⇳㇏#⊃㏿ぇ#ᛯ␣
㐷#⿁⿏ᴋ㐷#䃌㿠ᴿᵛ1
GFU0GYG:3;2GYG93;2GYG63;2GYG6392GYG43<2GYG43;2GYG439Ⱞ#▖
⮓㩂#ᆧ⮚+ዢẦ#Ȑ080P#ㄢⵚ,
ʓᵟ㈇#㥛⛻⏳#ぴᴿᵛ1
ʔ#㾃≣ᡯ⏳#でᜧ㿠ᴿᵛ1
ʕ#⢻ᾋ゛#㣫Ⓥ⇳⏳#ⴛ㹣㢗㶠ぇ#⮛㣏㿓#䄻#㥷⢋ㆻ#㋧㉿㿠ᴿᵛ1
+ᡯ#㚯㋧,
GFU0KF952KF872KF862KF852KF842KF7;2KF7:2KF782KF6;2KF6:Ⱞ#
▖⮓㩂#ᆧ⮚+ዢẦ#Ȑ080Q#ㄢⵚ,
ʓᵟ㈇#㥛⛻⏳#ぴᴿᵛ1
ʔ#㾃≣ᡯ⏳#でᜧ㿠ᴿᵛ1
ʕ#⢻ᾋ゛#㣫Ⓥ⇳⏳#ⴛ㹣㢗㶠ぇ#⮛㣏㿓#䄻#㥷⢋ㆻ#㋧㉿㿠ᴿᵛ1#+㥷⢋ㆷ#㥷⢋#
䂷ぇ#ᛯ〫#ᰊᴿᵛ1,
6ᦡ#⇢㆞Ṧ#៕➟ឲ៎1
Ἦ⓫#❯㜫⏳#ᲃ≣⮓#ᵢ#㈗ᢧᴋ#Ⰳ␣ᙷ#ᬗ#ῃᣃ㐷#⛻㫫ㆻ#㈗ᢀᴿᵛ1
ⷦⱂ⳺
Ἦ⓫#❯㜫⏳#ᵢㆻ#ῃぇᴋ#㥷⢋#㐷#⿁ḻ⋔#㍳㇏㿏ⵤⵓ゛1
⢻ᾋ ゛# 㣫Ⓥ⇳㇏# ㇳ ⟷# ᢧ㋼ㆷ# ⴛ 㹣㢗㶠 ぇ# ⲏᬠ㿗# ῃ# ⊃ ㏿㇏# ㎈ⵣ#
ⴛ㹣㢗㶠㇏# ⿕# ㆗␣# ㎈ⵣᝳ# ㇳ㣏㿏㐷# ⿁ᴋ# ᜴ㄧᙷ# ㇿ㐷⑃# 㞣へぇᴋ# ▯㊓#
〽ᴿᵛ1
ˎ
ˎ
ˎ
ˎ
ˎ
中文(繁)
準備工作
註︰
並非所有國家/地區均有下述攝影機型號銷售。
準備攝影機
有關詳情,請參閱攝影機附帶的使用說明書。
1 從攝影機上拆下濾鏡、轉換鏡頭、鏡頭蓋、鏡頭遮光罩或肩帶。
當使用帶有手動鏡頭快門的攝影機時,請打開鏡頭快門。
2 安裝電池組。
請安裝完全充滿電的電池。
3 插入介質。
請插入與攝影機相容的介質。
有關詳情,請參閱攝影機附帶的使用說明書。
註︰
解開“Memory Stick Duo”和磁帶上的安全小翼,使其能夠錄製影像。
請確保磁帶、“Memory Stick Duo”、光盤、硬盤和內部記憶體有足夠的空間來錄
製影像。
請確認該光盤沒有被終結。
4 把防反射環安裝到攝影機的濾鏡固定螺絲上。
防反射環可以防止外部光線在戶外包內被反射並進入鏡頭。
使用沒有防反射環的攝影機時,應盡可能背對陽光。
防反射環 攝影機
防反射環
(M30×φ43)
HDR-UX20/UX19/UX10/UX9,
DCR-DVD910/DVD708/DVD608/DVD510/
DVD308/DVD306/DVD109/DVD108/DVD106,
DCR-HC62/HC54/HC53/HC52/HC51/HC48/HC47/
HC45/HC38/HC37
防反射環 (M30×φ47)
HDR-CX120/CX106/CX105/CX100,
DCR-SR87/SR77/SR67/SR57/SR48/SR47/SR38/
SR37
防反射環 (M30×φ50)
DCR-DVD850/DVD810/DVD710/DVD650/
DVD610/DVD450/DVD410/DVD310/DVD150/
DVD115/DVD110
防反射環 (M30×φ58) DCR-SR85/SR75/SR65/SR55/SR46/SR45/SR36/
SR35
防反射環 (M30×φ62)
HDR-XR200V/XR200/XR106/XR105/XR101/
XR100,
HDR-SR10,
DCR-SR220/SR210
防反射環 (M37×φ55)
HDR-XR520V/XR520/XR500V/XR500,
HDR-SR12/SR11/SR8/SR7/SR5,
HDR-CX12/CX11/CX7/CX6,
HDR-HC9/HC7/HC5
無法安裝隨附的防反射環 DCR-SX60/SX50/SX41/SX40/SX31/SX30
5 請反轉液晶顯示器面板使其背向攝影機,而使液晶顯示屏面朝外。
6 把調焦和閃光等功能設定於 AUTO(自動)。
Ȏ選擇攝影機安裝極履
1 根據下表來選擇極履和號碼。
安裝極履 號碼 攝影機
D
1
HDR-HC9/HC7/HC5,
DCR-DVD708/ D V D608/ D V D308/ DVD306/
DVD109/DVD108/DVD106
2DCR-HC62/HC54/HC53/HC52/HC51/HC48/
HC47/HC45/HC38/HC37
F1 HDR-CX12/CX11/CX7/CX6
2 HDR-SR8/SR7/SR5
G 1
HDR-UX20/UX19/UX10/UX9,
DCR-DVD910/ D V D850/ D V D810/ DVD710/
DVD650/DVD610/DVD510/DVD450/DVD410/
DVD310/DVD150/DVD115/DVD110
H 1
HDR-XR520V/XR520/XR500V/XR500/
XR200V/XR200/XR106/XR105/XR101/XR100,
HDR-SR12/SR11/SR10,
DCR-SR220/SR210
I 1 DCR-SR85/SR75/SR65/SR55/SR46/SR45/
SR36/SR35
J 1 HDR-CX120/CX106/CX105/CX100,
DCR-SX60/SX50/SX41/SX40/SX31/SX30
K 1 DCR-SR87/SR77/SR67/SR57/SR48/SR47/
SR38/SR37
2 把三角架螺旋盤和安裝極履上所選的號碼對齊,按壓三角架螺旋盤,
直至聽到“哢嗒”就位聲。
出廠時,三角架螺旋盤已安裝到安裝極履 H 上。
ȏ 準備戶外包
1 調整腕帶。
握住戶外包, 以便指尖能觸到 START/STOP 按鈕、Telephoto(遠攝)按
鈕、Wide(廣角)按鈕和 PHOTO 按鈕,調節其長度。
2 裝上肩帶。
Ȑ 安裝攝影機
使用帶有 POWER(電源)開關的攝影機時,請關閉 POWER(電源)開關,並
使戶外包電源處於關閉狀態。使用有內部電源關閉與液晶顯示屏關閉行動相連接
的攝影機時,無需關閉攝影機電源。
註︰
把攝影機裝進戶外包後,按戶外包的 POWER 按鈕便可將攝影機的電源設為
“ON”或“OFF”。
1 解開扣環。
ʓ 滑動解鎖按鈕 ɞ,按照箭頭方向滑動打開的滑塊 ɟ,解開扣環。
ʔ 打開後包體。
2 用鏡頭防霧液塗抹前玻璃窗。
在戶外包前玻璃窗內表面滴上 2 到 3 滴附帶的鏡頭防霧液。使用附帶的乾燥劑
可提高防霧效果。有關詳情,請參閱附帶的使用說明書中“乾燥劑”部分。
3 清除外來雜物,像防水密封墊上面、槽溝和任何結合面上粘附的塵
埃、沙粒或毛髮。然後,在防水密封墊上均勻塗上一層潤滑脂。
如果讓機身夾有雜物關上,便可能損壞該處併發生漏水。
有關使用防水密封墊的詳情,請參閱使用說明書的“防水密封墊使用須知”。
4 安裝攝影機的安裝極履。
ʓ 把安裝極履的螺絲位置和攝影機底部的三角架螺絲對齊。
ʔ 當使用以下型號時,請打開插孔蓋,並把音頻/遙控器插頭牢牢地插入 A/V
插孔、A/V OUT 插孔或 A/V 遙控器插孔:
HDR-UX20/UX19/UX10/UX9、DCR-DVD910/DVD510、DCR-SR87/
SR77/SR67/SR57/SR48/SR47/SR38/SR37、DCR-SX60/SX50/SX41/
SX40/SX31/SX30
當使用 DCR-SR87/SR77/SR67/SR57/SR48/SR47/SR38/SR37 型號時,
請確保插孔蓋充分打開再插入音頻 / 遙控器插頭(參見圖 Ȑ-5-Iʓ)。若插
孔蓋打開不充分,就會將音頻 / 遙控器插頭卡住,從而導致連接不良。
ʕ 如圖所示,用肩帶上的金屬部件將攝影機安裝極履安裝到攝影機上。
5 將插頭連接到攝影機的各個插孔上。
根據您的攝影機,把音頻/遙控器插頭牢固地插入 A/V 插孔、A/V OUT 插孔或
A/V 遙控器插孔。(步驟 4ʔ 中的攝影機型號除外)
當把攝影機裝進戶外包時,請把攝影機的安裝極履和戶外包的前包體內側對
齊,然後推攝影機安裝極履的後部,直到聽到“哢嗒”就位聲。
註︰
安裝攝影機的安裝極履時,請確保戶外包保持水平狀態。如果垂直狀態下安
裝攝影機的安裝極履,可能會損壞攝影機的安裝極履和前包體。
確保導線不要遮蓋鏡頭、液晶顯示屏、取景器、變焦杆或 PHOTO 按鈕。
使用有內部電源關閉與液晶顯示屏關閉行動相連接的攝影機時,連接音頻/遙
控器插頭會將靜態影像錄製模式/視頻播放模式切換為攝影機的動態影像錄製
模式。
當使用 HDR-XR520V/XR520/XR500V/XR500 型號時(如圖Ȑ-5-A所示)
ʓ 打開插孔蓋並連接插頭。(放置連接到戶外包的導線,使插頭環繞到後面,
如圖所示。)
ʔ 將攝影機裝入戶外包,小心不要讓導線碰到戶外包內部的部件。
ʕ 把攝影機裝進戶外包後,調整攝影機腕帶側的導線。
當使用 HDR-XR200V/XR200/XR106/XR105/XR101/XR100 型號時(如圖
Ȑ-5-B所示)
ʓ 打開插孔蓋並連接插頭。
ʔ 放置連接到戶外包的導線,使插頭環繞到後面,如圖所示。
ʕ 將攝影機裝入戶外包,小心不要讓導線碰到戶外包內部的部件。
ʖ 把攝影機裝進戶外包後,調整攝影機腕帶側的導線。
當使用 HDR-SR12/SR11/SR10、DCR-SR220/SR210 型號時(如圖Ȑ-5-C所示)
ʓ 打開插孔蓋並連接插頭。(放置連接到戶外包的導線,使插頭環繞到後面,
如圖所示。)
ʔ 把攝影機裝進戶外包後,輕輕推動攝影機腕帶側的導線將其排列好。
當使用 HDR-SR8/SR7/SR5 型號時(如圖Ȑ-5-D所示)
ʓ 打開插孔蓋。
ʔ 連接插頭。
ʕ 把攝影機裝進戶外包後,調整攝影機腕帶側的導線。
當使用 HDR-CX120/CX106/CX105/CX100 型號時(如圖Ȑ-5-E所示)
ʓ 打開插孔蓋並連接插頭。
ʔ 把攝影機裝進戶外包後,調整攝影機腕帶側的導線,小心不要碰到攝影機安
裝極履或其他部件上的導線。
當使用 HDR-CX12/CX11/CX7/CX6 型號時(如圖Ȑ-5-F所示)
ʓ 打開插孔蓋。
ʔ 連接插頭。
ʕ 把導線置於攝影機安裝極履上,然後把攝影機裝進戶外包。
ʖ 把攝影機裝進戶外包後,調整導線,使其不會從攝影機安裝極履跌落。把導
線固定到攝影機的腕帶上。
當使用 HDR-UX20/UX19/UX10/UX9 或 DCR-DVD910/DVD510 型號時(如
圖Ȑ-5-G 所示)
(如果以下 ʓ 和 ʔ 已經在步驟Ȑ-4 中完成,則從 ʕ 開始執行。)
ʓ 連接插頭。
ʔ 把攝影機安裝極履安裝到攝影機上。
ʕ 把攝影機裝進戶外包後,調整導線。(把導線固定到線夾上。)
當使用 HDR-HC9/HC7/HC5 型號時(如圖 Ȑ-5-H所示)
ʓ 打開插孔蓋。
ʔ 連接插頭。
ʕ 把攝影機裝進戶外包後,調整攝影機腕帶側的導線。
當使用 DCR-SR87/SR77/SR67/SR57/SR48/SR47/SR38/SR37 型號時(如
圖Ȑ-5-I所示)
(如果以下 ʓ 和 ʔ 已經在步驟Ȑ-4 中完成,則從 ʕ 開始執行。)
ʓ 在保持插孔蓋完全打開的情況下再連接插頭,以確保它不會貼附於插頭的根
部。
ʔ 把攝影機安裝極履安裝到攝影機上。
ʕ 使導線位於攝影機的頂端,把攝影機裝進戶外包。
ʖ 將導線固定在攝影機安裝極履的夾子上,小心不要碰到液晶顯示屏上的導線。
如果攝影機電池較長,導線無法沿兩端繞到其後面,可使導線沿上部跨過
電池,然後用夾子將導線固定好。
當使用 DCR-SR85/SR75/SR65/SR55/SR46/SR45/SR36/SR35 型號時(如
圖Ȑ-5-J所示)
ʓ 打開插孔蓋並連接插頭。(放置連接到戶外包的導線,使插頭環繞到後面,
如圖所示。)
ʔ 把攝影機裝進戶外包後,輕輕推動攝影機腕帶側的導線將其排列好。
當使用 DCR-SX60/SX50/SX41/SX40/SX31/SX30 型號時(如圖Ȑ-5-K所示)
(如果以下 ʓ 和 ʔ 已經在步驟Ȑ-4 中完成,則從 ʕ 開始執行。)
ʓ 提起腕帶並打開插孔蓋,然後連接插頭。
ʔ 把攝影機安裝極履安裝到攝影機上。
ʕ 使導線挽於攝影機的頂端,把攝影機裝進戶外包。
ʖ 把攝影機裝進戶外包後,調整導線。(把導線固定到線夾上。)
當使用 DCR-DVD850/DVD810/DVD710/DVD650/DVD610/DVD450/
DVD410/DVD310/DVD150/DVD115/DVD110 型號時(如圖Ȑ-5-L所示)
ʓ 打開插孔蓋。
ʔ 連接插頭。
ʕ 用腕帶側防反射環的凹槽夾住導線,如圖所示。
ˎ
ˎ
ˎ
ˎ
ˎ
ʖ 按照圖示放置導線,然後把攝影機安裝極履安裝到戶外包上。
安裝時請注意︰
不要彎曲導線。
確認導線未從防反射環的凹槽中脫落。
ʗ 把攝影機裝進戶外包後,確認導線不會妨礙攝影機的鏡頭。
當使用 DCR-DVD708/DVD608/DVD308/DVD306/DVD109/DVD108/
DVD106 時(如圖Ȑ-5-M所示)
ʓ 打開插孔蓋。
ʔ 連接插頭。
ʕ 把攝影機裝進戶外包後,調整導線。
(如圖所示)
當使用 DCR-HC62/HC54/HC53/HC52/HC51/HC48/HC47/HC45/HC38/
HC37 時(如圖Ȑ-5-N所示)
ʓ 打開插孔蓋。
ʔ 連接插頭。
ʕ 把攝影機裝進戶外包後,調整導線。(把導線固定到線夾上。)
6 關上後包體。
關緊後包體,並扣緊扣環直至聽到“哢嗒”就位聲。
註︰
關後包體時,小心不要夾住導線。
某些型號的攝像機的鏡頭中心在安裝時可能會相對戶外包的前玻璃窗的中心
發生位移。但這在攝像時不會產生任何問題。
ˎ
ˎ
ˎ
ˎ
Table of contents
Languages:
Other Sony Camera Accessories manuals

Sony
Sony FCB-H10 User manual

Sony
Sony VF-DCPL1 User manual

Sony
Sony RM-L1AM User manual

Sony
Sony VAD-S70 User manual

Sony
Sony CBK-WA100/IFU User manual

Sony
Sony MPK-WB User manual

Sony
Sony Alpha SH-L1AM User manual

Sony
Sony CCU-790 User manual

Sony
Sony Cyber-shot Station CSS-PC1 User manual

Sony
Sony MPK-THJ O-ring User manual