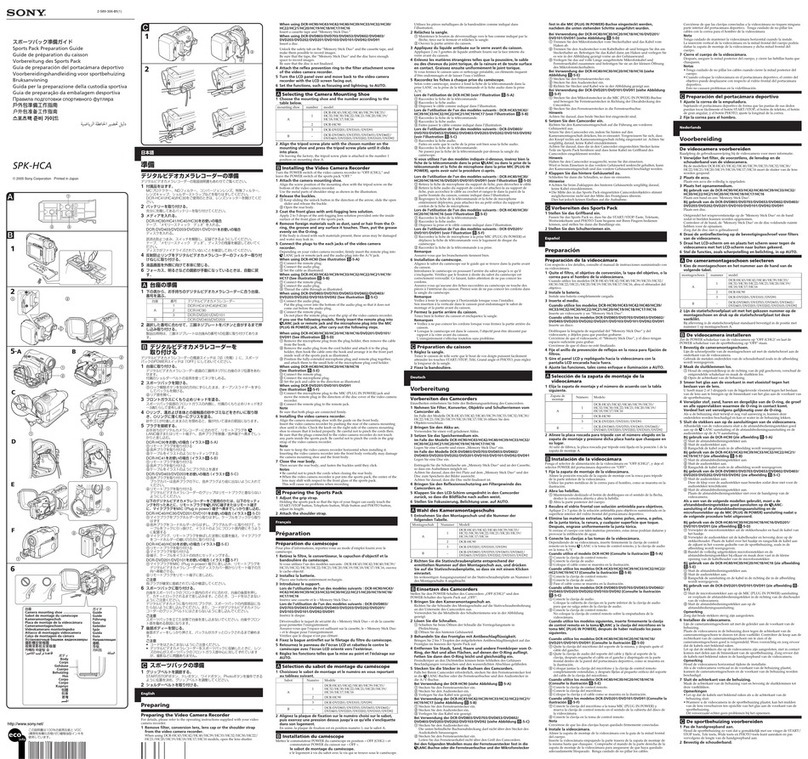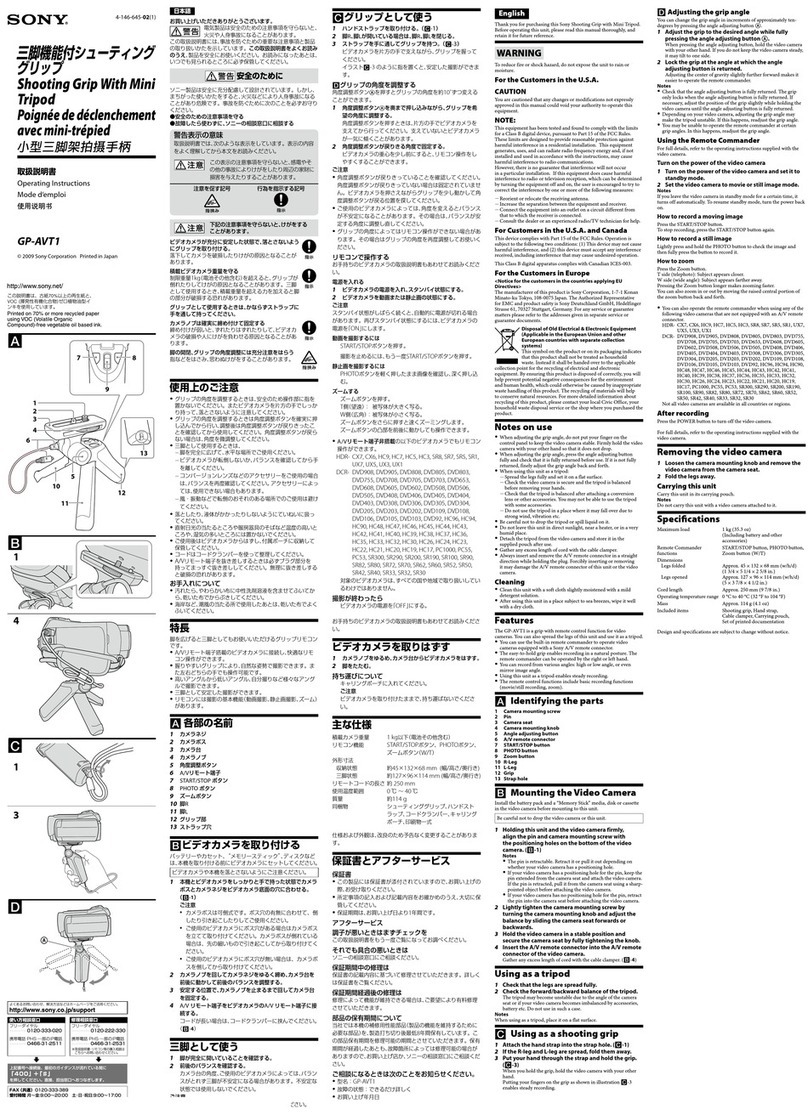
Shooting
vertical
images
Ifimagesarestillbcingsholforashorttimeafterthegmarkapprars,the
power
of
that ballery
will
run out, but the unil
will
automatically switch
to
the
other
battery pack.
Of
the two battery packs,use the
One
that has less power fi!st
When
doing so, the
mark
of
the ballery pack in use is bright
and
the mark 0
ftheother
ballerypackisdarkTheremainingbaut'ryleve1ofthebatterypackinuseisdisplayed
as apercentage (%).
The mark
oflhe
battery pack in u
....
changes
as
shown below.
When
Ihe power
of
balleryinuserunsout,theunitautomaticallyswitchestotheolherbatterypack.
The operalions
ofthe
unit's dials
and
buttons are same
as
those for
theca
meramain
body.
When
using this unit in vertical orientation, set the grip control
ON/
OFF switch to
"ON:
•The grip control ON/OFF switch switches the dial
and
bullon functions
ON
and
OFf
•Regardless
of
the position
of
the grip control
ON/OFF
switch, the cameraoperating
button always operates.
•
SwilCh
the power
ON
and OFF with the POWER switch
of
the camera.
lhe
grip
conlrol
ON/OFF
swilch
Can
not switch the power
ON
and
OFF.
Remaining
battery
power
indicator
When
inserting the two battery packs, Ihe following indicator will be displayed
On
the
lCD
screen
of
the camera.
Il!iID
.k
11ll±'·'
lAma
01
::
IIiIiEl
~F1NEIC11100
1@1J]100jiJ1~1"1~
Ihigh Ilow
Remaining
batterycapadty
[!J
Inserting
the
battery
packs
BatterypackNP·FMSOOH(lor2required)
•NP-FMSSH. NP-fMSO, Np·FM30 are not available with this unit.
• & sure to
chargelhe
ballery packs with the specified batlery
adaptor
before usc.
1When replacing
the
battery
packs
with
this
unit
attached
to
the
camera,
set
the
POWER
switch
of
the
camera
to
OFF.
2Press ®
on
the
battery
chamber
door
to
slide
it in
the
direction
of
the
arrow
to
open
the
battery
chamber
door.
3Press
the
battery
stopper
(blue)
down
with
your
finger
in
the
direction
of
the
arrow
as
illustrated.
·When
releasing the lock
of
the battery pack stopper, be careful to pop up Ihe
battery pack tray
4Remove
the
battery
pack
tray.
SAttach
the
battery
packs
to
the
battery
tray
according
to
the
display
on
the
battery
tray.
•
When
allachinga
batlery pack, altach it
to
either side.
·Donottouchtheterminalofthebatlerypacklray@
.
•Allach the battery pack Np·FMSOOH only
10
the battery pack Iray.
Do
nOI
attach
the
otherballery
packs.
-Do
notdisasscmhle the baUery pack tray
-When
inserting two batterypacks,Slart
byusinglheone
that has less power
Whenthebauerycapacityoftheusedballerypackrunsout,lheunitwil!
automatically switch
10
the
other
ballery pack.
6Insert
the
battery
pack
tray
into
the
original
position
by
pressing
it until it clicks.
·Makc
sure that the battery pack stopper locks the ballery pack lray
•If you force the bauery tray at an angle into the unit when
nobatteryp
ackis
installed,you
Can
insert it partway,bUI that
will
damage the unit.
Inscrt the battery tray in
thehoriwntal
position
lolhe
unit
and
in right direction.
(Seeillustrationr!J·6·@.)
7Close
the
battery
chamber
door
of
this
unit
and
slide
it in
the
direction
of
the
arrow
until
it
clicks.
What
is
the
"lnfoLiTHIUM" 1
CAUTION
For
the
Customers
in
the
U.S.A.
Do not expose the batteries
to
excessive heal such
as
sunshine,firt'ort
he like.
Lh
1hissymboliSintendedtoalerttheusertOlhepn:scnceOfimportant
opt'ratingandmainlenance~servicing)instrUCtiOnsintheliterature
•ac(Ompanymg the appliance
ICAUTION I
Replace the battery with thespecilied type only. Olherwise, fire
or
injury may result.
Do not disassemble. Electric shock may
occur
if
ahigh voltage circuit inside the
product
is
touched
Immediate1y remove the batteries
and
discontinue use
if
..
•
theproducl
is
dropped
or
subje.::ted to an impaet in which the interior
is
exposed.
•the product t'mits astrange smell,heat,
or
smoke.
Keep balteries
or
Ihings that could be swallowed away from young children, Contact a
doctor immediate1y
ifan
object
is
swallowed
To redllce
fire
Or
shock hazard, do not
exposcthe
llnit to rain
or
moisture.
Beforeoperatingtheproduct,plea~readthismanualthoroughlyandretain
it for
future reference
l"apeoverlithiumbatterycontactstoavoidshort-circuitwhendisposingofbatteries,
and follow local regulations for battery dispo:;aL
IWARNING I
You are cautioned that any changes
or
modifications not expresslyapproved in this
manual could void your authority to opt'rate this equipment
NOTE
This equipment has been tested and found
10
comply with the limits for aClass B
digital device, pursoant to Part
150fthe
FCC Rules. These limit. are
designed
to
provide reasonableproteetion againsl harmful interferen
ceina
residentialinstallalion.Thisequipmentgenerates,uses,andcanradialeradio
frequencyenergyand.ifnot
installed and used in accordance with Ihe
instructions, may cause harmful interference
to
radio communications
However, there
is
no guarantee Ihat inlerferencewill not occur in aparticular
installation,
If
this <.'quipment does cause harmful interference to rad
ioor
television reception, which can be determined by turning the equipmen
toff
andon,lheuserisencouragedtotrytocorrecttheinterferencebyoneormoreoflhe
following measures:
-Reorienl or relocate the receiving antenna
-Increase the separation between the equipment
and
receiver.
-Connect the equipment into an outlet
on
acircuil different from that to which the
receiver
is
connected
-
Consultthedea1eroranexperiencedradiorrVtechnicianforhc1p
For
the
Customers
in
Europe
:a
DI.posal of
Old
Electrical &
Elec.tronicEq.UiP.m,.nt
lA.PPllClb.
I,
in
theEuropean
Union
and other European countries with
separatecollection systemsl
ThIs symbol
on
the
producloron
lIS
packagmg mdlCatesthal thIs
producishallnotbetreatedashouscholdwaste.lnsteadltshall
_ :
~:~~:a~:~
t~:~I:;~fcl~~~;~0:~7~~ne:~~:nf::~~e:;~~~;g
is disposed
of
correctly, you
will
hc1p
prevent potenlial ncgative
consequences for the environment
and
human
hcalth,whichcollid
olherwiscbecauscdbyinappropriatewastehandlingoflhisproduCi
TherecydingofmaletialswillhdptoconservenaturalrtSOurces.For
moredetailedinformationaboutrecydingofthisproduCl,please
contact your local Civic Office, your household waste disposal service
or
the shop where you purchascd the product.
<Notice for
the
customers
in
the
countriesapplying
EU
Directives>
The manufacturer
of
this produCi
is
Sony Corporation, 1-7-1
KonanMinato-ku
Tokyo. 108-0075 Japan. The
Authoriud
Representalive for EMC and product safety is
Sony Deutschland GmbH. Hedelfinger Strasse 61, 70327 Stullgart, Germany. For any
serviceorguaranteemattersp1caserefertotheaddressesgiveninscparateservice
or
guarantee documents.
Notes
relating
to
the
lens
The camera does not work even after Ihe -Check that the unil al1achment screw
unitisauachedtothecamera,thebatlery
is
securely tightened
pack(s)areinsertedintotheunilandthe
•Check that the battery pack(s) are
camera POWER switch
is
set to ON. charged.
-Reattach
theballery
pack lray to the
unit
•
When
using this unit attached to the camera wilh the 70·200mm F2.8G
or
300mm
F2.8G lens attached to the Iripod-mounling collar. rotate
tripod-mounting
collar to
the position thaI allows the
grip
10
l>e
used.
•
When
using this unit attached
to
the camera with 70·200mm F2.8G lens attached
to Ihe
tripod-mounting
collar. the following lens switches
may
not
operat
eatthe
vertical shooting.
&forevertical
shooting, set them
at
the
horironta
Iposition.
-Focus-modeswitch
-DMF-mode switch
-Focus-rangelimiter
•
When
using attipod. use one screws that are
S.5
mOl
or
shorter. This unit cannot
be firmly faslened un atripod using long
SCrews.
Attempting
to
do
so will damage
this unit
Specifications
Ballery pack
NP_FMSOOH
DC7.2V
Recordingpcrformance
With
two NP-FMSOOH battery packs
Approx. LSOOframes
(When
Camera main hody DSLR-A200 is aUached)
•The measuring
method
conforms to CIPA standard
•
Dept'ndingon
the condition
of
use, recording performance
maybe
lower less
than what was listed.
•
For
details, refer
to
Ihe opt'rating instructions supplied with DSLR-A200
Dimensions Approx. 132.5 mm x
115.1
mm
x82.2
mm
(wlh/d)
(5
1/4in.x4S/8in.x3
1/4 in.)
Approx.
280g
(9.90z)
(induding
the battery tray, excluding the battery packs)
Operating tempt'rature O·C
to
40·C
(32QFto 104·F)
Included ilems Vertical
grip(l),
Battery tray
(I),
Terminal
oover(I),
Setofprinteddocumentation
Design
and
specificalions are subject
to
change with
out
notice
a.
and
"InfollTHIUM"
are trademarks
of
Sony Corporation.
•Reattach the batlery pack tray
10
Ihe
unit.
•
SCi
the camera POWER switch to
OFF. remOve
theballerypack{s),and
reattach the unit
10
the camera.
-Reattach the battery pack tray
10
the
unit
•ScI the camera POWER switch to
OFF. remove the
batterypack(s),and
reattach the
unitlo
the camera.
Remedy
Shutter
button
or
olher
oprrating
buttons
do
not work
"for
"InfoliTHlUM"
bal1eryonly"
is
displayed even though genuine Sony
batterypack(s) are being used.
Symptom
Troubleshooting
This unit is aVertical Grip for DSLR·A200. Do
not
attach
it
to
other
devices.
This unit
does
not
have
dust-proof, splash-proof
or
water-
proofspecifications.
Only
one
or
two
"lnfoLlTHIUM"
battery
pack(s) NP-FM500H
can
be
used.
NP-FM55H,
NP-FMSO,
NP-FM30
cannot
be
used.
Notes
on
Use
Othercautions
-This unit
is
designed
forusefromO·Ct040·C
(32 of
to
104°F).
- A rapid
and
dramatic rise
in
temperature causes condensation to form. Therefore,
scal the unit
in
aplastic bag
and
remove as much
of
the air inside
oft
he bag as
you can before allempting to bring this unit inside after being in the cold for
any
extended pcriod
of
lime. Once the temperature
in
Ihe bag has had achange
to
rise
gradually
to
the temperature
in
the room, you can safely remove it from the bag.
These procedures
will
prevent the unit from changing tempt'raturesrapidly
.and
therefore prevent condensation from forming
-
When
dirty, this unil may be
deaned
with a
dean,
dry c1olh,
Do
nOI
allow Ihis unit
10
come in contact with
akohol
or
other
chemicals.
•This unil has an electrically-connected signal oontact point with the camera.
If
you load the banery pack(s) while this unit
is
not attached to the came
ra,thellnit
could malfunction or be damaged
byashortingofthecontact
point.
When
attaching this llnit
to
the camera. detaching this unit from the camera
or
sioringthis
llnil separately, be sure
10
remove the battery pack(s} from this unit.
-Remove the battery packs when storing this unit for an extended period
of
time
Leaving the battery packs inscrted in Ihe unit may cause the battery chamber t
obe
damaged because liquid
Can
1cak
from abattery.
If
that should occur. take the unit
immedialcly
10
Ihe nearest Sony dealer for repair.
-BesuretollscagenuineSonybaut'rypackwithlhisunit.
•This unit does not have aballery charger function
Places
to
avoid for unit
use
and
storage
Regardless
of
whether this unit
is
in
use
or
in storage, do not
1cave
it where it can be
exposed
10
•ExtremelyhighlCmpcratures
Do
not leave this unit where it might be exposed to direct sunlight; Avoid places
like vehicle dashboards
or
near heat sourceS. The inside
ofa
vehide
can become
extremely hot
if
the vehicle windows are closed in the summer
or
if
the vehicle
is
under direcl sunlight. The unit
Can
become deformed
or
experience malfunCiionsif
leftinsideavehide.
-Excessivevibrations
-
Strongdcclromagnetismorrays
-Excessivesandordllst
1Eleclricalconlacls
2
Guidebar
3Allachmentscrew
4
Recording:AEL(AElock)butlon
Playback:
E!t
(Enlarge) button
SGrip control ON/OFF switch
6
Recording,~(Exposure)button
PlaybacklQ(Reducelbuttonlc=cl
(Indexlbutton
7Ballerycoverstorage
8Strap hook
9Shutter button
10
Front control dial
11
Tripodreceptade
121lalterypackstopper
13 Rallerypacktray
The "InfoLlTHIUM"
is
alithium ion battery pack which can exchange data with
compatible electronic equipment about
it.
battery consumplion. Sony recommends
Ihal you usc the "InfoLlTHIUM" battery pack with electronic equipment having the
m
InIoUTfflUtl
mark.
m
Attaching
this
unit
to
the
camera
1
Set
the
POWER
switch
of
the
camera
to
~OFF.H
•
Iflhebattery
pack{s)
isin
thisunil,removethe
bauery pack(s) fromthis unit.
2Remove
the
battery
pack
from
the
camera.
3Remove
the
terminal
cover
of
this
unit's
electrical
contacts
.
•After use, put the terminal cover hack
on
to
protect the electrical contacts
4Detach
the
battery
cover
from
the
camera.
SFit
th.
battery
cover
Into
the
battery
cover
storage.
When
litting the ballery cover into the battery coyer storage, check the direc
tionor
theballerycover.(Serillustrationl!J.5.@.)
6Align
the
following
part
to
attach
this
unit
to
the
camera.
[This unit] Guide
bar"-
[Camera) Batlery chamber
IThis unil] Attachment
screw"-
[Camera]
Ttipod
receptacle
7
Rotate
the
attachment
screw
to
lock it.
•Periodically confirm that the altachment screw
is
not loose while in use.
