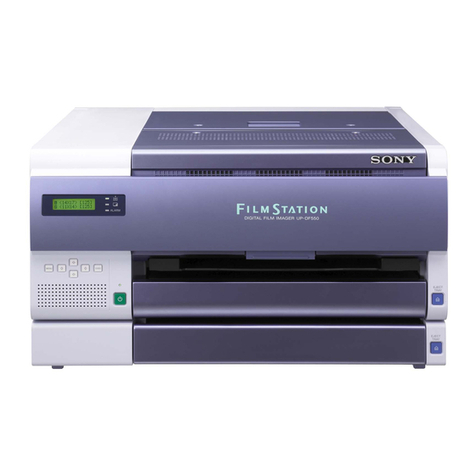
Sony FilmStation UP-DF750 User manual

4-114-600-15(1)
Digital Film Imager
Instructions for Use Page 2
Setup Manual Page 58
This manual is comprised of the Instructions for Use and the Setup Manual.
The Instructions for Use gives the information on how to use the printer for the
routine work.
The Setup Manual gives the system administrator the information needed to setup
the printer and connect it to the network.
UP-DF750
© 2008 Sony Corporation

2
Owner’s Record
The model and serial numbers are located at the rear.
Record these numbers in the space provided below.
Refer to these numbers whenever you call upon your Sony
dealer regarding this product.
Model No. ____________________
Serial No. ____________________
To reduce the risk of fire or electric shock, do not
expose this apparatus to rain or moisture.
To avoid electrical shock, do not open the
cabinet. Refer servicing to qualified personnel
only.
No modification of this equipment is allowed.
THIS APPARATUS MUST BE EARTHED.
To disconnect the main power, unplug the power
plug.
When installing the unit, incorporate a readily
accessible disconnect device in the fixed wiring,
or connect the power plug to an easily accessible
socket-outlet near the unit.
Do not position the ME equipment where it is
difficult to unplug the power plug.
If a fault should occur during operation of the
unit, operate the disconnect device to switch the
power supply off, or unplug the power plug.
For the customers in the U.S.A.
This equipment has been tested and found to comply with
the limits for a Class A digital device, pursuant to Part 15
of the FCC Rules. These limits are designed to provide
reasonable protection again harmful interference when the
equipment is operated in a commercial environment. This
equipment generates, uses, and can radiate radio frequency
energy and, if not installed and used in accordance with the
instruction manual, may cause harmful interference to
radio communications. Operation of this equipment in a
residential area is likely to cause harmful interference in
which case the user will be required to correct the
interference at his own expense.
You are cautioned that any changes or modifications not
expressly approved in this manual could void your
authority to operate this equipment.
All interface cables used to connect peripherals must be
shielded in order to comply with the limits for a digital
device pursuant to Subpart B of Part 15 of FCC Rules.
For the customers in Canada
This unit has been certified according to Standard CAN/
CSA-C22.2 No.60601-1.
For the customers in the U.S.A and Canada
Model UP-DF750 is Non-Patient Equipment.
This unit can not be used in the vicinity of patients.
* Patient Vicinity
When you use this product connected to 240 V single
phase, be sure to connect this product to a center tapped
circuit.
Important safeguards/notices for use in the
medical environments
1. All the equipments connected to this unit shall be
certified according to Standard IEC60601-1,
IEC60950-1, IEC60065 or other IEC/ISO Standards
applicable to the equipments.
2. Furthermore all configurations shall comply with the
system standard IEC60601-1-1. Everybody who
connects additional equipment to the signal input part
or signal output part configures a medical system, and
WARNING
Symbols on the products
This symbol indicates the equipotential
terminal which brings the various parts of a
system to the same potential.
This symbol is intended to alert the user to
the presence of important operating and
maintenance (servicing) instructions in the
literature accompanying the appliance.
This symbol indicates parts that may be hot.
Take caution when touching parts marked
with this symbol.
This symbol indicates the manufacturer, and
appears next to the manufacturer’s name and
address.
Refer to the operating instructions
Follow the directions in the operating
instructions for parts of the unit on which
this mark appears.
R1.83m
(6 feet)

3
is therefore, responsible that the system complies with
the requirements of the system standard IEC60601-1-1.
If in doubt, consult the qualified service personnel.
This unit can not be used in the patient environment.
* Patient Environment.
3. Do not touch the patient simultaneously while you are
contacting with this equipment.
4. For this particular equipment, all accessory equipment
connected as noted above, must be connected to mains
via an additional isolation transformer conforming with
the construction requirements of IEC60601-1 and
providing at least Basic Insulation.
5. The leakage current could increase when connected to
other equipment.
6. This equipment generates, uses, and can radiate radio
frequency energy. If it is not installed and used in
accordance with the instruction manual, it may cause
interference to other equipment. If this unit causes
interference (which can be determined by unplugging
the power cord from the unit), try these measures:
Relocate the unit with respect to the susceptible
equipment. Plug this unit and the susceptible
equipment into different branch circuit.
Consult your dealer. (According to standard IEC60601-1-
2 and CISPR11, Class B, Group 1)
R1.5m

4
Important EMC notices for use in the medical environments
• The UP-DF750 needs special precautions regarding EMC
and needs to be installed and put into service according to
the EMC information provided in this instructions for use.
• The portable and mobile RF communications equipment
such as cellular phones can affect the UP-DF750.
Warning
The use of accessories and cables other than those specified,
with the exception of replacement parts sold by Sony
Corporation, may result in increased emissions or decreased
immunity of the UP-DF750.
Warning
If the UP-DF750 should be used adjacent to or stacked with
other equipment, it should be observed to verify normal
operation in the configuration in which it will be used.
Guidance and manufacturer’s declaration-electromagnetic emissions
The UP-DF750 is intended for use in the electromagnetic environment specified below.
The customer or the user of the UP-DF750 should assure that it is used in such an environment.
Emission test Compliance Electromagnetic environment-guidance
RF emissions
CISPR 11 Group 1
The UP-DF750 uses RF energy only for its internal
function. Therefore, its RF emissions are very low and are
not likely to cause any interference in nearby electronic
equipment.
RF emissions
CISPR 11
Class B
The UP-DF750 is suitable for use in all establishments,
including domestic establishments and those directly
connected to the public low-voltage power supply network
that supplies buildings used for domestic purposes.
Harmonic emissions
IEC 61000-3-2
Class A
Voltage fluctuations/
flicker emissions
IEC 61000-3-3
Complies

5
Guidance and manufacturer’s declaration - electromagnetic immunity
The UP-DF750 is intended for use in the electromagnetic environment specified below. The customer or the user of the UP-
DF750 should assure that it is used in such as environment.
Immunity test IEC 60601 test
level Compliance level Electromagnetic environment-guidance
Electrostatic
discharge (ESD)
IEC 61000-4-2
±6 kV contact
±8 kV air
±6 kV contact
±8 kV air
Floors should be wood, concrete or ceramic tile. If floors are
covered with synthetic material, the relative humidity should
be at least 30%.
Electrical fast
transient/burst
IEC 61000-4-4
±2 kV for power
supply lines
±1 kV for input/
output lines
±2 kV for power
supply lines
±1 kV for input/
output lines
Mains power quality should be that of a typical commercial or
hospital environment.
Surge
IEC 61000-4-5
±1 kV differential
mode
±2 kV common
mode
±1 kV differential
mode
±2 kV common
mode
Mains power quality should be that of a typical commercial or
hospital environment.
Voltage dips, short
interruptions and
voltage variations
on power supply
input lines
IEC 61000-4-11
< 5% UT
(> 95% dip in UT)
for 0.5 cycle
40% UT
(60% dip in UT)
for 5 cycles
70% UT
(30% dip in UT)
for 25 cycles
< 5% UT
(> 95% dip in UT)
for 5 sec
< 5% UT
(> 95% dip in UT)
for 0.5 cycle
40% UT
(60% dip in UT)
for 5 cycles
70% UT
(30% dip in UT)
for 25 cycles
< 5% UT
(> 95% dip in UT)
for 5 sec
Mains power quality should be that of a typical commercial or
hospital environment. If the user of the UP-DF750 requires
continued operation during power mains interruptions, it is
recommended that the UP-DF750 be powered from an
uninterruptible power supply or a battery.
Power frequency
(50/60 Hz)
magnetic field
IEC 61000-4-8
3 A/m 3 A/m Power frequency magnetic fields should be at least
characteristic of a typical location in a typical commercial or
hospital environment.
NOTE: UTis the a.c. mains voltage prior to application of the test level.

6
Guidance and manufacturer’s declaration - electromagnetic immunity
The UP-DF750 is intended for use in the electromagnetic environment specified below. The customer or the user of the UP-
DF750 should assure that it is used in such as environment.
Immunity test IEC 60601 test
level Compliance level Electromagnetic environment-guidance
Conducted RF
IEC 61000-4-6
Radiated RF
IEC 61000-4-3
3 Vrms
150 kHz to 80 MHz
3 V/m
80 MHz to 2.5 GHz
3 Vrms
3 V/m
Portable and mobile RF communications equipment should
be used no closer to any part of the UP-DF750, including
cables, than the recommended separation distance
calculated from the equation appliance to the frequency of
the transmitter.
Recommended separation distance
d= 1.2 √P
d= 1.2 √P80 MHz to 800 MHz
d= 2.3 √P800 MHz to 2.5 GHz
Where Pis the maximum output power rating of the
transmitter in watts (W) according to the transmitter
manufacturer and dis the recommended separation distance
in meters (m).
Field strengths from fixed RF transmitters, as determined by
an electromagnetic site survey, ashould be less than the
compliance level in each frequency range. b
Interference may occur in the vicinity of equipment marked
with following symbol:
NOTE 1: At 80 MHz and 800 MHz, the higher frequency range applies.
NOTE 2: These guidelines may not apply in all situations. Electromagnetic propagation is affected by absorption and
reflection from structures, objects and people.
a Field strengths from fixed transmitters, such as base stations for radio (cellular/cordless) telephones and land mobile
radios, amateur radio, AM and FM radio broadcast and TV broadcast cannot be predicted theoretically with accuracy. To
assess the electromagnetic environment due to fixed RF transmitters, an electromagnetic site survey should be
considered. If the measured field strength in the location in which the UP-DF750 is used exceeds the applicable RF
compliance level above, the UP-DF750 should be observed to verify normal operation. If abnormal performance is
observed, additional measures may be necessary, such as reorienting or relocating the UP-DF750.
b Over the frequency range 150 kHz to 80 MHz, field strengths should be less than 3 V/m.

7
Caution
When you dispose of the unit or accessories, you must
obey the laws in the relative area or country and the
regulations in the relative hospital.
When the unit is moved, place the unit in a horizontal
position and lift it by holding corners of the bottom plate
with 4 people.
Do not move the unit in a vertical position.
WARNING on power connection
Use a proper power cord for your local power supply.
1. Use the approved Power Cord (3-core mains lead) /
Appliance Connector / Plug with earthing-contacts that
conforms to the safety regulations of each country if
applicable.
2. Use the Power Cord (3-core mains lead) / Appliance
Connector / Plug conforming to the proper ratings
(Voltage, Ampere).
If you have questions on the use of the above Power Cord
/ Appliance Connector / Plug, please consult a qualified
service personnel.
WARNING on power connection for
medical use
Please use the following power supply cord.
With connectors (plug or female) and cord types other than
those indicated in this table, use the power supply cord that
is approved for use in your area.
*Note: Grounding reliability can only be achieved when the equipment is
connected to an equivalent receptacle marked ‘Hospital Only’ or ‘Hospi-
tal Grade’.
For the customers in Europe
Hereby, Sony Corporation, declares that this UP-DF750/
Digital Film Imager is in compliance with the essential
requirements and other relevant provisions of Directive
1999/5/EC.
For details, please access the following URL :
http://www.compliance.sony.de/
Recommended separation distances between portable and mobile RF communications equipment and the
UP-DF750
The UP-DF750 is intended for use in an electromagnetic environment in which radiated RF disturbances are controlled. The
customer or the user of the UP-DF750 can help prevent electromagnetic interference by maintaining a minimum distance
between portable and mobile RF communications equipment (Transmitters) and the UP-DF750 as recommended below,
according to the maximum output power of the communications equipment.
Rated maximum output power of transmitter
W
Separation distance according to frequency of transmitter
m
150 kHz to 80 MHz
d= 1.2 √P
80 MHz to 800 MHz
d= 1.2 √P
800 MHz to 2.5 GHz
d= 2.3 √P
0.01 0.12 0.12 0.23
0.1 0.38 0.38 0.73
1 1.2 1.2 2.3
10 3.8 3.8 7.3
100 12 12 23
For transmitters rated a maximum output power not listed above, the recommended separation distance din meters (m) can
be estimated using the equation applicable to the frequency of the transmitter, where Pis the maximum output power rating
of the transmitter in watts (W) according to the transmitter manufacturer.
NOTE 1: At 80 MHz and 800 MHz, the separation distance for the higher frequency range applies.
NOTE 2: These guidelines may not apply in all situations. Electromagnetic propagation is affected by absorption and
reflection from structures, objects and people.
United States and Canada
Plug Type HOSPITAL GRADE*
Cord type Min.Type SJT
Min.18 AWG
Minimum Rating for Plug
and Appliance Couplers
10A/125V
Safety approval UL Listed and CSA

8
For the customers in Taiwan only

Instructions for Use
Table of Contents
Introduction
System Overview ..................................................10
System Configuration Example ..........................10
Location and Function of Parts and Controls ...11
Preparation
Supplied Accessories ............................................14
Removing the Packing Materials ......................14
Assembly ..........................................................15
Output tray size .................................................15
Placing the Unit ................................................16
Connections ..........................................................17
Turning the Unit On or Off ...............................17
Operation
Loading Film Sheets ............................................19
Recommended Film Sheets ..............................19
Loading Film Sheets .........................................19
Printing .................................................................24
Adjustment
Adjustment and Setting Using a Menu ..............27
Menu Configuration ..........................................28
Menu Operation ...................................................29
Confirming Information ....................................29
Adjusting the Print Quality ...............................29
Calibrating the Printing Density .......................32
Selecting a Gamma Curve ................................34
Making Network and LCD Panel Settings .......35
Test Print ...........................................................38
Other Settings .......................................................39
Miscellaneous
Precautions ...........................................................40
Safety ................................................................40
Installation ........................................................40
Transporting the Unit ........................................40
Cleaning the Cabinet .........................................40
Maintenance ......................................................40
Specifications ........................................................43
Messages ................................................................45
Error Messages .................................................45
Other messages .................................................46
Troubleshooting ....................................................47
If Damage is Suspected ....................................47
If the Film Sheets Jams .....................................47
Mammography Quality Control Guide .............51
Introduction .......................................................51
Procedure for Printing Quality Control
Pattern .............................................................51
Configuration of Quality Control Pattern .........52
Evaluation Procedure ........................................52
Quality Control Chart .......................................55
Index ......................................................................57

10 System Overview / System Configuration Example
Introduction
Introduction
System Overview
The UP-DF750 digital film imager is a thermal printer
designed to reproduce image data in DICOM format sent
via a network.
The UP-DF750 has the following functions:
• Equipped with DICOM (Digital Imaging and
Communications in Medicine) features
The DICOM portion of the unit receives image data in
DICOM format sent from the modality via the network,
processes it at the size of the blue thermal film selected
either by enlarging or reducing image size.
• High quality and high print resolution
The unit allows you to print out in high-resolution black
and white (16,384 levels processing) and in high-
resolution print mode (604 dpi).
• Suitable for diagnosis using image data captured by
diagnosis equipment
You can select the type of blue thermal film from among
the following standard film sizes used for modality: 14 ×
17 (about 353 × 430 mm), 11 × 14 (about 279 ×
355 mm), 10 × 12 (about 253 × 304 mm), 8 × 10 (about
202 × 253 mm). Also, the unit provides sufficient high
picture quality for image diagnosis.
• Space saving
You can place the unit either horizontally or vertically.
This allows you to design your system configuration
freely in accordance with the location.
Note
Casters (sold separately) are necessary for vertical
placement.
System Configuration
Example
The system allows you to make printouts of the data in
DICOM format, sent from image diagnosis equipment
such as CTs, MRIs, CR, DR, mammography and so on.
The following shows a system configuration example.
Personal computer for
managing the system
DICOM LAN network
DICOM server
UP-DF750
Digital or CR
mammography
equipment
Modality
Image diagnosis
equipment and so on
Modality
Image diagnosis
equipment and so on
Modality
Image diagnosis
equipment and so on

11
Location and Function of Parts and Controls
Introduction
Location and Function of
Parts and Controls
For details, refer to the pages given in parentheses.
ALiquid Crystal Display (LCD) (12)
Displays information about the status of the unit
(standby, errors, etc.) and shows menus.
During menu operation, the display shows the
respective menu. When an error has occurred, the
display shows the error message.
BALARM indicator (45)
Lights in orange when film sheets have been used up
in both film trays, film sheet jams occur, or other
problems occur.
CFront cover (49)
Open when you clean the thermal head and filters, and
when you replace the cleaning roller with a new one.
Also open this when you remove a jammed film
sheets.
DTOP cover (49)
Open when removing a jammed film sheet.
EVentilation holes
There is a built-in fan to prevent the thermal head
from overheating.
FEJECT TRAY button
Push this button to pull film tray 1 out. This button is
activated when the power is on and all covers are
closed.
GEJECT TRAY button
Push this button to pull film tray 2 out. This button is
activated when the power is on and all covers are
closed.
HFilm output slot 1
Printed film sheets (film sizes 8 ×10 (about 202 ×
253 mm), 10 ×12 (about 253 × 304 mm), 11 × 14
(about 279 × 355 mm)) are ejected here.
IOutput tray (15)
Printed film sheets (film sizes 8 × 10 (about 202 ×
253 mm), 10 × 12 (about 253 × 304 mm), 11 × 14
(about 279 × 355 mm)) are ejected onto this tray,
which also serves to prevent sheets from dropping.
The tray size must match the film size. If a change is
necessary, please contact your Sony dealer to have the
procedure performed.
JFront cover lock lever
Used to open the front cover.
KFilm output slot 2
Printed film sheets (film sizes 14 × 17 (about 353 ×
430 mm), 11 × 14 (about 279 × 355 mm)) are ejected
here. In the factory default condition, only film size
14 × 17 (about 353 × 430 mm) is supported. To eject
film size 11 × 14 (about 279 × 355 mm) film sheets,
the output tray size must be changed. If a change is
necessary, please contact your Sony dealer to have the
procedure performed.
Front panel
Rear panel

12 Location and Function of Parts and Controls
Introduction
LFilm tray 1 (19)
In the factory default condition, this is set for film size
14 × 17 (about 353 × 430 mm). To use films of other
sizes, contact your Sony dealer to have the tray size
changed. Printed film sheets are ejected onto this tray.
MFilm tray 2 (19)
In the factory default condition, this is set for film size
8 × 10 (about 202 × 253 mm). To use films of other
sizes, contact your Sony dealer to have the tray size
changed.
N1ON/STANDBY switch/indicator (17)
Press this switch to set the unit power to on. When the
power is on, the indicator lights in green. When you
press this switch again, the first indicator flashes and
then goes out, and the unit is powered down.
Pressing this switch while the indicator is blinking
turns the power back on.
Note
If the ?/amain POWER switch on the rear panel is
not set to on, the power is not on even though the
1ON/STANDBY switch on the front panel is
pressed.
OEXEC button (29)
Use this button in menu operations.
PG, g, F, f(Cursor control) buttons (29)
Press these buttons to increase or decrease the setting
values. Also press these buttons to select menu items.
QMENU button (29)
Press this button to display menus on the printer
window display. Also press this button to return to the
normal window.
RRear cover 1 (49)
Open this cover when removing jammed film sheets
loaded in film tray 1.
SRear cover 2 (49)
Open this cover when removing jammed film sheets
loaded in film tray 2.
TNetwork connector (RJ-45 modular jack) (17)
Used to connect to a LAN.
CAUTION
For safety, do not connect the connector to peripheral
device wiring that might have excessive voltage.
Follow the instructions for this port.
UCable stopper
Secures the network cable to prevent it from being
disconnected.
V-AC IN connector (17)
Use the proper power cord for your local power
supply (not supplied). Refer to “WARNING on power
connection” on page 7 and “WARNING on power
connection for medical use” on page 7.
W?/amain POWER switch (17, 18)
Switches the main power of the unit on or off.
XEquipotential ground terminal connector
Used to connect to a ground (equipotential) plug to
bring the various parts of the system to the same
potential.
Refer to “Important safeguards/notices for use in the
medical environments” on page 2.
LCD panel indication
The LCD panel of the unit displays various standby and
error information as well as menu screens.
Standard screen (during standby)
AStatus
Shows the current status of the printer.
BJob information
Shows information about jobs sent to the printer,
sorted by film size.
CFilm tray 1 information
Shows the size of film and remaining number of
sheets loaded in the upper film tray 1.
DFilm tray 2 information
Shows the size of film and remaining number of
sheets loaded in the lower film tray 2.

13
Location and Function of Parts and Controls
Introduction
Standard screen (when error has occurred)
AError countermeasure illustration
Shows an illustration indicating the appropriate step
to take for correcting the error that has occurred.
BError message
For details, see “Error Messages” (page 45).
CFilm tray 1 information
Shows the status of the upper film tray 1.
DFilm tray 2 information
Shows the status of the lower film tray 2.
Menu screen (Menu item list)
AMenu item number
The left digit indicates the number of the menu item
selected with the cursor (B). The right digit indicates
the total number of menu items, including those that
are currently not shown on the menu screen.
BMenu item
Shows a list of menu items and the cursor (B) for
selecting an item.
COperation guidance
Shows possible actions for the current menu screen.
Menu screen (Settings screen)
AMenu item name
Shows the name of the currently displayed item. The
“>” before the item name indicates the current menu
level.
BSetting value
A list of possible values for the currently displayed
setting item is shown. The cursor (B) for selecting a
value is also shown.
The previously set value is marked by a “z” symbol.

14 Supplied Accessories
Preparation
Preparation
Supplied Accessories
The unit is packed together with the following accessories.
Check that nothing is missing from your package.
Notes
• Retain the original carton and packing materials in case
you have to transport the unit in the future.
• The output tray stopper and film tray size adapter kit will
be required when the tray size is to be changed later.
Store these items carefully.
Removing the Packing Materials
Before using the unit for the first time, be sure to remove
the packing materials from inside the unit and film trays.
1
Open the top cover and inner cover (page 50), and
remove the packing materials from inside the unit.
2
Pull out film tray 1, and remove the tray cover.
3
Remove the packing material, and place the cover
back onto the tray.
4
Repeat steps 2 and 3 for film tray 2.
5
Place film trays 1 and 2 back into the unit.
Notes
• Failure to remove the packing materials from the unit
will result in film jams.
• If you turn on the unit without removing the packing
materials from inside the film trays, a “Check Tray”
error will occur.
Output tray (1)
Cleaning kit (1)
Output tray stopper (1)
Film tray size adapter kit (1)
CD-ROM (Instructions for Use disk) (1)
Before Using this Imager (1)
Service Contact List (1)

15
Supplied Accessories
Preparation
Assembly
Insert the supplied output tray into the unit.
Holding both sides of the output tray with both hands,
insert it all the way into the unit.
Notes
• The size of the supplied output tray must be adjusted to
match the film tray size. Please contact your Sony dealer
to have the size adjustment performed.
• Be sure to insert the output tray all the way into the unit.
If you do not, the error message “Set Output Tray”
appears when you start printing and the printer will not
continue the printing operation.
Output tray size
The combinations for film size and corresponding output
tray size are as listed below.
Large Size
This is the factory default setting.
Note
If you use film size 11 × 14 (about 279 × 355 mm) while
the output tray stopper is mounted, a film jam will occur.
When the output tray is inserted completely,
the surface of the unit and that of the output
tray should be flat.
Be sure to fully insert the projecting parts of the output tray
into the corresponding holes of the unit. Film size combinations Output tray stopper
8 × 10 8 × 10
Required
8 × 10 10 × 12
8 × 10 14 × 17
10 × 12 10 × 12
10 × 12 14 × 17
11 × 14 11 × 14
Not required11 × 14 14 × 17
14 × 17 14 × 17
Output tray stopper
⎫
⎪
⎬
⎪
⎭
⎫
⎪
⎪
⎪
⎬
⎪
⎪
⎪
⎭

16 Supplied Accessories
Preparation
Small Size
Please contact your Sony dealer to have the size changed
to this setting.
Placing the Unit
You can place the unit horizontally or vertically.
Casters (sold separately) are necessary for vertical
placement. Contact your nearest Sony dealer before using
casters.
To maintain performance, adequate space is needed for
ventilation. Also, to remove jammed film, space of about 7
cm (2 7/8 inches) towards the back and about 26 cm
(10 1/4 inches) over the top of the unit are required.
When placing the unit vertically
You can place the unit vertically by attaching casters (sold
separately). This is convenient for placing the unit under a
desk, and for pulling it out easily.
Caution
• If you move the unit with the casters for placing the unit
vertically (sold separately) attached, the unit may topple
and cause injury. Do not use the casters for any purpose
other than pulling the unit forward for maintenance.
• If you place the unit without providing adequate space
around it, heat may build up inside the unit and result in
fire or damage. Be sure to provide at least 8 cm (3 1/4
inches) of space around the unit.
Notes
• Be sure to use casters and stopper sheet (sold separately)
when placing the unit vertically. Otherwise, the unit may
topple and cause injury.
• When pulling the unit in and out while the unit is
equipped with the casters, be careful not to damage the
power cord, LAN cable, and so on.
Film size combinations Output tray stopper
8 × 10 11 × 14 Required
10 × 12 11 × 14
Output tray stopper
21 cm
(8 3/8 inches)
7 cm
(2 7/8 inches)
26 cm
(10 1/4 inches)
Secure the front caster using the stopper sheet (sold separately).
Be sure to place the roller of the caster in the groove of the stopper
sheet.
Secure the unit using the front
caster (sold separately).
Stopper sheet
(sold separately)
Stopper sheet
(sold
separately)
⎫
⎬
⎭

17
Connections
Preparation
Connections
Connect the unit to a LAN.
Notes
• Turn off the power of each device before attempting to
make any connections.
• Connect the AC power cord last.
• Before connecting to the LAN, be sure to set up the
required IP address and sub-net mask.
For detailed information, consult the system
administrator.
Notes on the LAN cable
• Be sure to use a LAN cable of less than 30 m (98 feet
5 1/4 inches) in length, and rated more than category 5e.
• It is recommended that you use a shielded cable.
Turning the Unit On or Off
Turn the printer power on after you connect the AC power
cord.
Turning the main power of the unit on
Set the ?/amain POWER switch to the on (=) side.
Note
The unit is not turned on even if the ?/amain POWER
switch of the unit is turned on.
Turning the unit on
Use the 1ON/STANDBY switch located on the front of
the unit to turn the unit on during daily use.
1
Press the 1ON/STANDBY switch to set the unit to
on.
The 1ON/STANDBY indicator lights up in green,
and the “Film Station” logo is shown on the LCD
panel. Then the following screen appears.
After a few minutes, the following message should
appear.
LAN cable
to the LAN
Power cord
to-AC IN
to the network connector
?/amain
POWER switch
1

18 Connections
Preparation
When you use the unit for the first time
The above message should appear when you use the
unit for the first time, because the film sheets are not
loaded in the film trays of the unit.
For detailed information on how to load the film sheet,
see “Loading Film Sheets” on page 19.
When you already use the unit
When the above message appears, the unit is ready to
print.
Note
If the ?/amain POWER switch located on the rear
panel is not set to on, the power is not on even though
the 1ON/STANDBY switch located on the front
panel is set to on.
Turning the unit off
Use the 1ON/STANDBY switch located on the front of
the unit to turn the unit off during daily use.
1
Press the 1ON/STANDBY switch to turn the unit off.
The 1ON/STANDBY indicator blinks and goes off.
The message “Please Wait” appears on the LCD, and
then the message disappears.
The printer is turned off.
When you do not intend to use the printer for a
long time
Turn the printer off as follows.
1
Press the 1ON/STANDBY switch.
The 1ON/STANDBY indicator blinks and goes off.
The message “Please Wait” appears on the LCD, and
then the message disappears.
The printer is turned off.
2
Set the ?/amain POWER switch located on the rear
of the unit to the off (a) side.

19
Loading Film Sheets
Operation
Operation
Loading Film Sheets
Recommended Film Sheets
The following packs of blue thermal film sheets are made
especially for the UP-DF750.
Blue Thermal Film UPT-517BL
Contains blue thermal transparent film sheets.
125 sheets of size 14 × 17 film (about 353 × 430 mm)
Blue Thermal Film UPT-514BL
Contains blue thermal transparent film sheets.
125 sheets of size 11 × 14 film (about 279 × 355 mm)
Blue Thermal Film UPT-512BL
Contains blue thermal transparent film sheets.
125 sheets of size 10 × 12 film (about 253 × 304 mm)
Blue Thermal Film UPT-510BL
Contains blue thermal transparent film sheets.
125 sheets of size 8 × 10 film (about 202 × 253 mm)
Blue Thermal Film UPT-M712BL
Contains 125 sheets of size 10 × 12 transparent blue
thermal film (about 253 × 304 mm) suitable for
mammography.
Blue Thermal Film UPT-M710BL
Contains 125 sheets of size 8 × 10 transparent blue thermal
film (about 202 × 253 mm) suitable for mammography.
Note
Be sure to use film sheets made expressly for the UP-
DF750. If you use other film sheets, the quality of the
printout cannot be guaranteed. Use of another type of film
sheets may also cause malfunction of the unit.
Loading Film Sheets
About the film tray
The printer is equipped with two film trays.
Film tray 1
In the factory default condition, this is set for film size 14 ×
17 (about 353 × 430 mm). This is also used for the output
tray.
Film tray 2
In the factory default condition, this is set for film size 8 ×
10 (about 202 × 253 mm).
To use films of other sizes, contact your Sony dealer to
have the tray size changed.
Confirming the remaining amount of film
The LCD allows you to confirm the size and remaining
amount of film sheets.
Film tray 1
Film tray 2
Remaining amount of film sheets in film tray 1
Remaining amount of film sheets in film tray 2

20 Loading Film Sheets
Operation
When film sheets are loaded in both trays:
The LCD displays the size and remaining amounts of film
sheets loaded in both trays.
When the film sheets loaded in either film tray 1
or film tray 2 have been used up:
On the row corresponding to the tray where film sheets
have been used up, the message “Set Film” is displayed.
When the film sheets loaded in both trays have
been used up:
The message “Set Film” is displayed on both rows.
The ALARM indicator lights in orange.
Loading film sheets
Proceed as follows to load film sheets.
We will explain how to load film sheets using film tray 1
as an example. Load film sheets in the lower tray in the
same way as you do for the upper tray.
Notes
• Hold the film using the damp-proof bag. Do not touch
the film directly. Dust, finger prints, or sweat are likely
to cause unsatisfactory printing.
• Hold both sides of the film tray and tray cover tightly
when handling the film tray.
1
Push the EJECT TRAY button for film tray 1 on the
front panel.
Film tray 1 is partially ejected.
Notes
• You can load film sheets without pulling out the
film tray completely out. However, if you want to
pull out it completely, hold both sides of the film
tray and film tray cover firmly.
• The film tray can not be ejected when the covers are
open.
• Even when film sheets have run out in the middle of
continuous printing, you can load new film sheets in
the vacant film tray. (See page 26.)
Push the EJECT TRAY
button for film tray 1.
Other manuals for FilmStation UP-DF750
4
Table of contents
Other Sony Laboratory Equipment manuals
Popular Laboratory Equipment manuals by other brands

Kendro
Kendro SORVALL RC-6 operating instructions

Four E's Scientific
Four E's Scientific KING KONG MI0102001D operating instructions

Endress+Hauser
Endress+Hauser Levelflex M FMP41C Safety instructions

Terragene
Terragene IC10/20FRT Quick user guide

ibidi
ibidi Glass Bottom Dish instructions

Faraday
Faraday DOS-100 quick start guide

VistaLab
VistaLab ali-Q 2 Safety instructions

THORLABS
THORLABS PMT1000 Series user guide

Struers
Struers LaboForce-Mi instruction manual

Labconco
Labconco CentriVap-105 Cold Trap Quick start installation guide

Digisol
Digisol DG-PE1148D Quick installation guide

Thermo Scientific
Thermo Scientific 1300 Series user manual