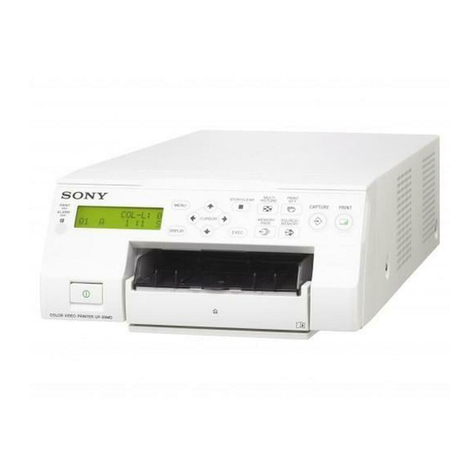
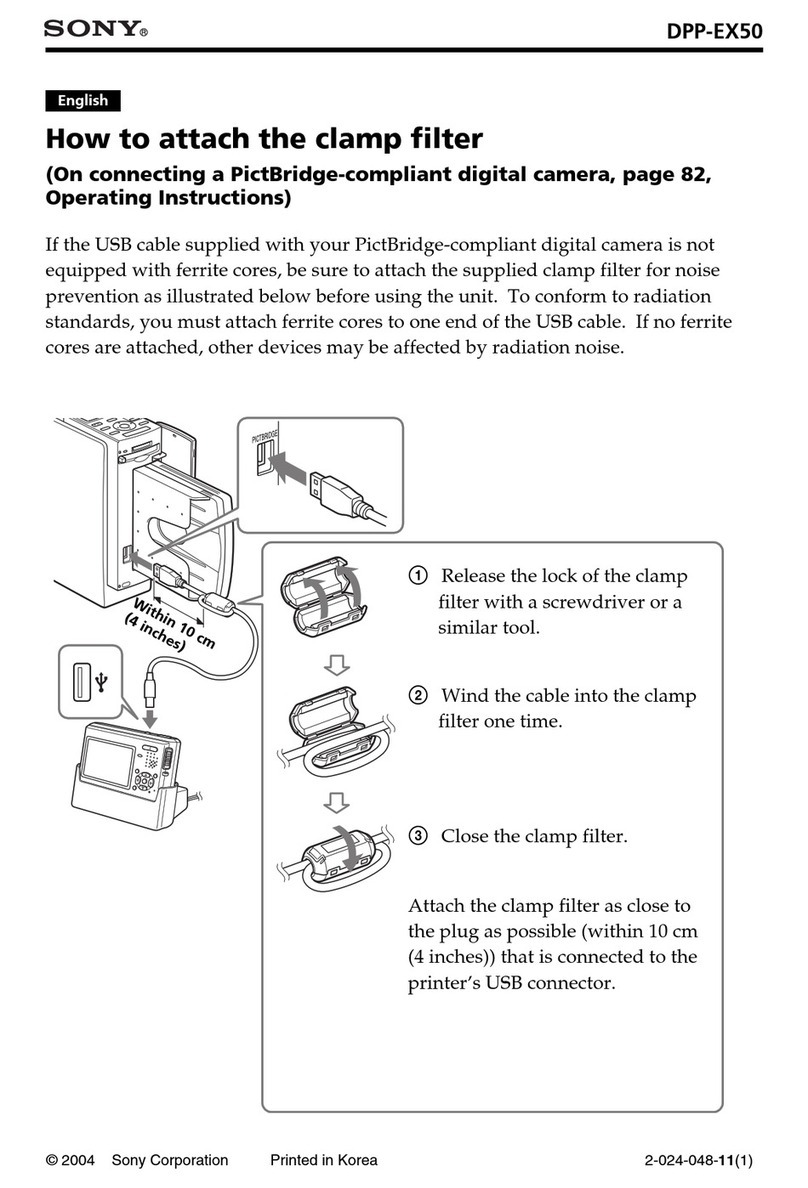
Sony UP-897MD User manual

SONTY.
VIDEO
GRAPHIC
PRINTER
UP-897MD
SERVICE
MANUAL
1st
Edition

ASE
COVIaAy
Wild,
D-EARA
TCT.
—_
BERN,
TCOVIaY
WVICMMANEREPRT,
BR,
EHREST
CREPKEK,
ASBMWIZDEMS
TEMBOET.
FERRI
SED,
U-PARL
—lLD
VES
eRHBOATHH<S
FEW.
A\
WARNING
This
manual
is
intended
for
qualified
service
personnel
only.
To
reduce
the
risk
of
electric
shock,
fire
or
injury,
do
not
perform
any
servicing
other
than
that
contained
in
the
operating
instructions
unless
you
are
qualified
to
do
so.
Refer
all
servicing
to
qualified
service
personnel.
A\
WARNUNG
Die
Anleitung
ist
nur
fur
qualifiziertes
Fachpersonal
bestimmt.
Alle
Wartungsarbeiten
dirfen
nur
von
qualifiziertem
Fachpersonal
ausgefiihrt
werden.
Um
die
Gefahr
eines
elektrischen
Schlages,
Feuergefahr
und
Verletzungen
zu
vermeiden,
sind
bei
Wartungsarbeiten
strikt
die
Angaben
in
der
Anleitung
zu
befolgen.
Andere
als
die
angegeben
Wartungsarbeiten
dirfen
nur
von
Personen
ausgefuhrt
werden,
die
eine
spezielle
Befahigung
dazu
besitzen.
,
4\
AVERTISSEMENT
Ce
manual
est
destiné
uniquement
aux
personnes
compétentes
en
charge
de
|’entretien.
Afin
de
réduire
les
risques
de
décharge
électrique,
d’incendie
ou
de
blessure
n’effectuer
que
les
réparations
indiquées
dans
le
mode
d’emploi
a
moins
d’étre
qualifié
pour
en
effectuer
d’autres.
Pour
toute
réparation
faire
appel
4
une
personne
compétente
uniquement.
UP-897MD

Table
of
Contents
Manual
Structure
Purpose
of
this
manual
..........ccccsssscseccssssecessssssetseseeststesesseacseessaees
3
Related
manuals
1.
Service
Overview
1-1.
Board
Location
......ci.sescsssesscscsesessecsseesscscesseverssecceanses
1-1
1-2.
Main
Parts
Location
....ccccessccesssssssssssscesecsssessesessssees
1-1
1-3.
Removing/Installing
the
Cabinet
.......
te
sssecesesssseseeeee
1-1
1-3-1.
TOP
COVED
sisssrssssccsocssenscnecgicnstoscssccnsosponsscetsnessesoavers
1-1
1-3-2.
Front
Panel
Subassembly
............ccsssessseecseseeseeees
1-2
1-3-3.
Rear
Panel
::cctsvssscscceotasctsivssastcsssesseedonsavessetacorssestncses
1-2
1-4.
Replacing
the
Main
Parts...
we
1-3
1-4-1.
Switching
Regulator/DC
Fan
.........cessssessseersesees
1-3
1-4-2.
Mechanical
Deck
Assembly
.............sccsssssssseesesseees
1-3
1-4-3.
Thermal
Head
.......
scenes
1-4-4,
Stepping
Motor/DC
Motor
1-4-5,
Cam
Shaft
Assembly
.........cccssscsssscscssseeessseseees
1-4-6.
Pinch
Arm
Assembly
.
wee
L-7
1-4-7.
Platen
Roller
........cssscsssssssscsesssseseesecnsssssssreenssseese
1-7
1-4-8.
Timing
Belt:
..icccacsseccseassssescevosncaccdeceacctssoaceconscereseuns
1-8
1-5.
Procedure
Required
for
Replacement
..........ccssssessessesee
1-9
1-6.
Unleaded
Solder
2.
Electrical
Alignment
2-1.
Procedure
before
and
after
Adjustment
............
ccc
2-1
2-1-1.
Procedure
of
Printing
the
User
Setting
Record
(Before
AdjUStMent)
0...
ceseeessssetseeeeeressesseeees
2-1
2-1-2,
User
Setting
Check
Procedure
(After
Adjustment)
occ.
cssecsesssecerseseesesestens
2-1
2-1-3.
Factory
Setting
.......ccccescssssscsssnscessererressesserenses
2-1
2-2.
Calibration
and
Electrical
Conductivity
Check
..............
2-2
2-3.
Brightness
and
Contrast
Adjustment
...........ccssessseesesees
2-3
2-4.
Head
Voltage
Adjustment
0.0...
secesctcesersessteessreesees
2-4
2-5.
.
Initialization
of
Print
Count
History
00.00...
eeeseseeeeeees
2-5
2-6.
Firmware
Version
Upgrade
.........cccessscsssssssesssesesseseeees
2-6
UP-897MD
3.
Circuit
Description
3-1.
System
Control
BIOCK
........cecesesssscereesscseseeseserscssrsenes
3-1
3-1-1.
QOUtHithe
wesicscsccscecads
Rede
sacsevde
hoteles
octane
eds
3-1
3-1-2.
Block
Diagram
of
Electrical
Block
........
cesses
3-1
3-2.
Head/Mechanical
Control
Block
........
ee
cesesseseeeeneeeeeee
3-1
3-2-1.
Outline
........cceceeeeeeee
3-2-2.
Platen
Motor
Control
3-2-3.
Thermal
Head
UP/DOWN
Control
...........ccccseseee
3-1
3-2-4.
Monitoring
of
Door
Sensor
3-2-5.
Monitoring
of
Paper
Sensor
3-2-6.
Monitoring
of
Head
Temperature
Sensor..............
3-2
3-2-7.
Control
of
Head
Fan
Motor
(for
Head
Cooling)
...3-2
3-2-8.
Read
Of
Buttons
sicv.sccccsstescasecosdectscessecdssssevestescetesess
3-3
3-3.
Video
Circuit
BIOCK
0...
eee
esseecessceeseesessesesnereesesessenees
3-3
3-3-1.
Outline
13
ieecieidackicd
ei
iaeanatete
3-3
3-3-2,
Control
of
Video
Circuit
BIOCK
00...
ceesesecessetene
3-3
3-3-3.
Control
of
Brightness
and
Contrast
...........ssesee
3-3
3-3-4,
A/D
and
D/A
Conversion
......cssccesssecsssseeeseseseseree
3-4
3-3-5.
Clock
Generation
Circuit
BIOCK
0...
csesesseseeeeeee
3-4
S45,
USB
Interface
in
cstessecccassccescscvccecssbeassstiacsetivccnseunesdieesvavenes
3-4
3-5.
Thermal
Head
Bock
.......ctessscsessesssesscsssesssesenscessssssserees
3-4
3-5-1.
SOUCULING
Saves
scdeceiecisdacatesteasacdebcteasesseisbcstesieedicveels
3-4
3-5-2,
Basic
Operationyasss
sascsessecsstdviceeccceseagedessestateessseaeuces
3-4
3-5-3.
Temperature
Correction
.......ccscsssseseerssesessnseesevens
3-5
3-5-4,
Correction
of
Resistor
Count
.......ccessesssssesseenenees
3-5
4.
Troubleshooting
4-1.
Print
result
is
not
SatisfactOry
........ssscscsseeseesscesseneeeenes
4-1
4-2.
Print
result
density
is
too
high
or
LOW
..........sssesssseseeeseees
4-2
4-3.
Trouble
of
determining
presence
or
absence
of
paper
....4-3
4-4.
Thermal
head
UP/DOWN
operation
trouble
.............004
4-3
4-5.
Feed
operation
trouble
4-6.
Trouble
of
determining
door
open/close
.........
eee
4-4
5-1.
5-2.
5-3.
5-4.
5-5.
5-6.
5-7.
5-8.
5-10.
5-11.
5-12.
5-13.
5-14.
5-15.
5-16.
6-1.
6-3.
6-4.
7.
8.
Service
Mode
(Self-diagnosis
Function)
Startup
Procedure
.........csssecssccsessecsseccsseseseecsstsesseesseseeeses
Service
Mode
Menu
Test.Pattert
Primtins
s.:..secececosncsucbsasicvsescosstpsceadssonseceneesens
5-1
Test
Pattern
Print
Count
........cccscecsscssessscesssssreceseseseeoes
5-3
LCD
Lighting
Check
00.0...
cssssesssesssesseseressesesesesceseesenees
5-3
LED
Lighting
Check
......ccscssscsscsesseeecrscensssssssssnscsnecs
5-4
Front
Panel
Volume
Calibration
oc.
esssssseeestsseeeerons
5-4
LOwW-Pass
Filter
.......ecscsssesscesessesessssnsssnseessssssssssceseensene
Log
Printing
Initialization
of
Setting
Switching
of
Continuous
Setting
(C)
in
Number
Of
Printed
Sheets
(QTY)
....scscscsccssesseerssesterstscssesessenseseees
5-5
Switching
of
REMOTE
capture
timing...
cseeseesees
5-5
Temperature
Indication
.......cecececeseseseeeerseeeeeceeeeeseeeereree
DO
Switching
of
Toshiba
Mode...
2
5-6
FEED
Operation
......c..cessssescsssssescecscsoneseeesessseeesssneseeseees
5-6
Moen
LOCK
irs.
ccticieteesscccssesdstasncsnctss
stegestenestooucyncsapiaoansaaes
5-6
Spare
Parts
Notes
on
Repair
Parts
.......cssscsssssesesesscsessssssscessscseneseees
6-1
Exploded
Views
Electrical
Parts
List
........c.ssssscsssssssssessssssssseesersssoreseceseees
6-7
Supplied
ACCESSOTIES
.......scscsseressssesseeseeeeeseensereeeeeeenes
6-14
Block
Diagram
Overall
ice
ceeds
ccSescee
sek
ccecsvedesdanate
tench
eStcdudasveinsbsencsateathssviaiesees
7-1
Schematic
Diagrams
9.
Board
Layouts
SE
76D
sarc
ictas
beso
acta
es
esi
das
bcos
tavntiteitadaouctaecentaain
9-1
SUSU
cercscsusasiedeattasssahedeecsduscpatdens
dabacscix
dvadsceuctdacensseaaneneen
9-1
MAWT3
2.
csscsceascissciscesssssavasehascinnssedesicnnsesetcceebsiSiasensesteasase
9-2
UP-897MD

Manual
Structure
Purpose
of
this
manual
This
manual
is
the
service
manual
of
Video
Graphic
Printer
UP-897MD.
This
manual
describes
the
information
on
maintenance
and
the
service
information
such
as
service
overview,
electrical
alignment,
circuit
description,
troubleshooting,
and
service
mode
(self-diagnosis
function).
Related
manuals
In
addition
to
this
“Service
Manual”,
this
unit
is
provided
with
the
manual
below.
*
“Operating
Instruction”
PDF
(Included
in
the
CD-ROM
Supplied
for
products.)
Part
No.:
3-863-306-0X
These
manuals
describes
the
information
required
for
the
actual
management
and
operation
of
this
unit.
“Semiconductor
Pin
Assignments”
CD-ROM
(Available
on
request)
This
“Semiconductor
Pin
Assignments”
CD-ROM
allows
you
to
search
for
semiconductors
used
in
B&P
Company
equipment.
Part
number:
9-968-546-XX
UP-897MD
3


Section
1
Service
Overview
1-1.
Board
Location
1-3.
Removing/Installing
the
Cabinet
1-3-1.
Top
Cover
MA-132
board
SU-112
board
1.
Remove
the
five
M3
case
securing
screws,
then
KY-572
board
remove
the
top
cover.
Top
cover
ee
M3
case
M3
case
securing
screw
g
securing
screws
&
0
l
O
IS
.
00°
A
iS)
ee
ie
as
board
Ne
SE-769
board
°°
M3
case
securing
1-2.
Main
Parts
Location
Switching
regulator
Thermal
head
2.
Attach
the
top
cover
in
the
reverse
order.
UP-897MD
4-1

1-3-2.
Front
Panel
Subassembly
1-3-3.
Rear
Panel
1.
Remove
the
top
cover.
(Refer
to
Section
1-3-1.)
1.
Remove
the
top
cover.
(Refer
to
Section
1-3-1.)
2.
Release
the
lock
arm
of
the
mechanical
deck
block
2.
Remove
the
three
screws
(PS3
X
6)
and
the
screw
(bottom
surface)
in
the
direction
of
the
arrow,
then
(BTP3
X
8),
then
remove
the
rear
panel.
open
the
door
panel.
3.
Remove
the
two
hooks
in
both
directions
of
the
arrows.
4.
Disconnect
the
flexible
flat
cable
from
the
connector
(CN201)
on
the
MA-132
board.
|
>
|
|
5
J
Rear
pane)
3.
Attach
the
rear
panel
in
the
reverse
order
of
steps
1
and
2.
Door
panel
5.
After
closing
the
door,
remove
the
two
screws
and
five
hooks,
then
remove
the
front
panel
subassembly.
Front
panel
subassembly
6.
Attach
the
front
panel
subassembly
in
the
reverse
order
of
steps
1
to
5.
-2
UP-897MD

1-4.
Replacing
the
Main
Parts
1-4-1.
Switching
Regulator/DC
Fan
There
are
two
types
of
DC
fan
mounting
connectors.
Connect
the
harness
of
the
DC
fan
for
power
supply
to
the
connector
(CN601).
The
connector
(CN603)
is
provided
for
mounting
the
optional
DC
fan
for
cooling
the
thermal
head.
1.
Remove
the
top
cover.
(Refer
to
Section
1-3-1.)
2.
Remove
the
front
panel
subassembly.
(Refer
to
Section
1-3-2.)
3.
Remove
the
rear
panel
assembly.
(Refer
to
Section
1-3-3.)
4.
Remove
the
mechanical
deck
assembly.
(Refer
to
Section
1-4-2.)
5.
Disconnect
all
harnesses
and
flexible
flat
cables
from
the
MA-132
board.
6.
Remove
the
four
screws
(BVTT2.6
X
6),
then
remove
the
MA-132
board,
shield
piate
(analog)
and
earth
plate
jack.
7.
Remove
the
electric
heating
sheet
(A),
electric
heating
sheet
(B)
and
electric
heating
sheet
(C)
from
the
shield
plate
(analog).
8.
Remove
the
two
screws
(P3
X
10),
then
remove
the
DC
fan.
9.
Remove
the
four
screws
(PS3
X
6),
then
remove
the
insulating
sheet
(MA)
and
switching
regulator.
wags
BVTT
2.6X6_-
rf
dee
Earth
plate
Electric
heating
;
jack
sheet
(C)
MA-132
board
Shield
plate
(analog)
Electric
heating
sheet
(A)
Insulating
A.
sheet
(MA)
PROS
Os
Switching
Ss
10.
Attach
the
switching
regulator
in
the
reverse
order
of
steps
1
to
9.
UP-897MD
1-4-2.
Mechanical
Deck
Assembly
—
°
Remove
the
top
cover.
(Refer
to
Section
1-3-1.)
Remove
the
front
panel
subassembly.
(Refer
to
Section
1-3-2.)
Remove
the
switch
rod
retainer,
then
remove
the
power
switch
rod.
Disconnect
the
three
harnesses
from
the
connectors
(CN204,
CN205
and
CN602)
on
the
MA-132
board.
Disconnect
the
two
flexible
flat
cables
from
the
connectors
(CN206
and
CN302)
on
the
MA-132
board.
Remove
the
three
screws,
then
remove
the
mechanical
deck
assembly.
Power
switch
rod
Mechanical
deck
Flexible
flat
cables
assembly
&
BVTT2.6
x6
Attach
the
mechanical
deck
assembly
in
the
NE
order
of
steps
|
to
6.
7

1-4-3.
Thermal
Head
After
replacing
the
thermal
head,
perform
the
head
voltage
adjustment.
For
the
adjustment
procedure,
refer
to
Section
2-4,
1.
Remove
the
top
cover.
(Refer
to
Section
1-3-1.)
2.
Remove
the
front
panel
assembly.
(Refer
to
Section
1-3-2.)
3.
Remove
the
mechanical
deck
assembly.
(Refer
to
Section
1-4-2.)
4.
Remove
the
two
screws
(BVTT2.6
X
6),
then
remove
the
MD
top
chassis
and
three
head
springs.
When
removing
the
MD
top
chassis,
be
sure
to
remove
it
slowly
in
the
direction
of
the
arrow
A
to
prevent
the
head
springs
from
popping
out.
5.
Release
the
lock
arm
in
the
direction
of
the
arrow,
then
open
the
MD
door
chassis.
6.
Remove
the
heat
sink
in
the
direction
of
the
arrow
B.
7.
Remove
the
two
screws
(PSW3
X
8),
then
remove
the
thermal
head.
8.
Disconnect
the
two
flexible
flat
cables
from
the
thermal
head.
BVTT
MD
top
chassis
Head
springs
Heat
sink
,
Flexible
'
ia
flat
cables
9.
Attach
the
thermal
head
in
the
reverse
order
of
steps
1
to
8.
When
connecting
the
flexible
flat
cables,
route
them
under
the
cam
shaft.
UP-897MD

1-4-4,
Stepping
Motor/DC
Motor
Removal
1.
Remove
the
top
cover.
(Refer
to
Section
1-3-1.)
Remove
the
front
panel
assembly.
(Refer
to
Section
1-3-2.)
3.
Remove
the
mechanical
deck
assembly.
(Refer
to
Section
1-4-2.)
4.
Remove
the
helical
extension
spring
from
the
tension
arm
assembly.
5.
Remove
the
four
screws
(BVTT2.6
X
6),
then
remove
the
stepping
motor
bracket.
6.
Remove
the
two
screws
(PS3
X
4),
then
remove
the
DC
motor.
7.
Remove
the
two
screws
(PS3
X
6),
then
remove
the
stepping
motor.
Tension
arm
assembly
Helical
extension
UP-897MD
Installation
8.
Attach
the
DC
motor
with
the
two
screws.
9.
Insert
the
head
up
lever
shaft
(L)
into
the
hole
[A]
and
insert
the
speed
reducing
gear
shaft
(L)
into
the
hole
[B],
then
attach
with
the
three
screws.
10.
Hang
the
timing
belt
on
the
stepping
motor
gear.
Tension
arm
Stepping
assembly
motor
gear
Speed
reducing
gear
shaft
(L)
Stepping
motor
Stepping
motor
eget
biel
:
bracket
;
Head
up
lever
shaft
(L)
11.
Assemble
this
unit
in
the
reverse
order
of
steps
1
to
4.

1-4-5.
Cam
Shaft
Assembly
Removal
1.
2.
Remove
the
top
cover.
(Refer
to
Section
1-3-1.)
Remove
the
front
panel
assembly.
(Refer
to
Section
1-3-2.)
Remove
the
mechanical
deck
assembly.
(Refer
to
Section
1-4-2.)
Remove
the
thermal
head.
(Refer
to
Section
1-4-3.)
Remove
the
paper
holder
assembly.
(Refer
to
step
4
of
Section
1-4-7.)
Remove
the
two
bearings
by
rotating
them
in
the
direction
of
the
arrows
A.
Remove
the
cam
shaft
assembly
in
the
direction
of
the
arrow
B.
Remove
the
cam
(R),
cam
gear,
cam
(L),
noise
reducing
spring
(30)
and
three
parallel
pins
from
the
cam
shaft.
Cam
gear
Cam
(L)
Noise
reducing
spring
(30)
~)
Cam
shaft
RS
Parallel
pin
Cam
(R)
9.
Attach
the
cam
shaft
assembly
in
the
reverse
order
of
steps
6
to
8.
10.
Insert
the
portion
A
of
noise
reducing
spring
(30)
into
the
hole
of
chassis,
then
insert
the
portion
B
into
the
hole
of
cam
(L)
by
rotating
it
in
the
direction
of
the
arrow.
Noise
reducing
Hole
of
cam
(L)
spring
(30)
Portion
B
Portion
A
Chassis
Cam
(L)
Cam
(R)
Cam
gear
11.
Assemble
this
unit
in
the
reverse
order
of
steps
1
to
5.
UP-897MD

1-4-6.
Pinch
Arm
Assembly
When
replacing
the
pinch
arm
subassembly,
be
extremely
careful
not
to
touch
it
with
bare
hands
or
dirty
gloves.
If
the
pinch
arm
subassembly
is
contaminated,
clean
it
with
the
ethyl
alcohol.
1.
Remove
the
top
cover.
(Refer
to
Section
1-3-1.)
Remove
the
front
panel
assembly.
(Refer
to
Section
1-3-2.)
3.
Remove
the
mechanical
deck
assembly.
(Refer
to
Section
1-4-2.)
4.
Remove
the
thermal
head.
(Refer
to
Section
1-4-3.)
5.
Remove
the
paper
holder
assembly.
(Refer
to
step
4
of
Section
1-4-7.)
6.
Remove
the
three
helical
extension
springs.
7.
Remove
the
four
bearings,
then
remove
the
door
lock
assembly
and
pinch
arm
assembly
in
the
direction
of
the
arrow.
8,
Remove
the
pinch
arm
assembly
from
the
door
lock
assembly.
Pinch
arm
assembly
Door
lock
i
}
assembly
Be
Helical
4
extension
¢
asa
Helical
e
\
..
extension
Helical
5
!
=o
|
spring
Bearings
9.
Attach
the
pinch
arm
assembly
in
the
reverse
order
of
steps
1
to
8.
After
attaching
the
pinch
arm
assembly,
clean
it
with
alcohol.
UP-897MD
1-4-7.
Platen
Roller
|
When
replacing
the
platen
roller,
be
extremely
careful
not
to
touch
it
with
bare
hands
or
dirty
gloves.
If
the
roller
is
contaminated,
clean
it
with
the
ethyl
alcohol.
1.
Remove
the
top
cover.
(Refer
to
Section
1-3-1.)
Remove
the
front
panel
assembly.
(Refer
to
Section
1-3-2.)
3.
Remove
the
mechanical
deck
assembly.
(Refer
to
Section
1-4-2.)
4.
Remove
the
two
screws,
then
remove
the
paper
holder
assembly.
5.
Remove
the
helical
extension
spring
from
the
tension
arm
assembly.
Paper
holder
assembly
e7
Helical
extension
Tension
arm
assembly

6.
Remove
the
two
platen
bearings
by
rotating
them
in
the
direction
of
the
arrow
A.
7.
Remove
the
platen
roller
in
the
direction
shown
by
the
arrow
B.
8.
Remove
the
platen
pulley
and
parallel
pin
from
the
platen
roller.
Platen
pulley
Platen
roller
9.
Attach
the
platen
roller
in
the
reverse
order
of
steps
1
to 8.
Timing
belt
[A]
1-4-8.
Timing
Belt
1.
Remove
the
top
cover.
(Refer
to
Section
1-3-1.)
2.
Remove
the
front
panel
assembly.
(Refer
to
Section
1-3-2.)
3.
Remove
the
mechanical
deck
assembly.
(Refer
to
Section
1-4-2.)
4.
Remove
the
paper
holder
assembly.
(Refer
to
step
4
of
Section
1-4-7.)
"5.
Remove
the
two
screws,
then
remove
the
oil
damper.
6.
Remove
the
damper
gear.
7.
Remove
the
door
releasing
spring
from
the
hole
of
MD
door
chassis,
then
remove
the
MD
door
chassis
assembly.
8.
Remove
the
fulcrum
spacer,
then
remove
the
door
releasing
spring.
9.
Pull
out
the
fulcrum
shaft
from
the
MD
door
chassis
assembly
in
the
direction
of
the
arrow.
10.
Remove
the
timing
belt
[A]
and
timing
belt
[B].
11.
Attach
the
timing
belt
[A]
and
timing
belt
[B]
in
the
reverse
order
of
steps
1
to
10.
1-8
UP-897MD

1-5.
Procedure
Required
for
Replacement
When
replacing
the
following
parts,
perform
each
required
process
according
to
the
table
below.
For
the
procedure
before
and
after
performing
the
required
process,
refer
to
Section
2-1.
Parts
Required
process
Reference
MA-132
board
Firmware
Version
Upgrade
Section
2-6
1C103
(MA-132
board)
KY-572
board
Calibration
and
Electrical
Conductivity
Check
Section
2-2
Switching
regulator
Head
Voltage
Adjustment
Section
2-4
Thermal
head
1-6.
Unleaded
Solder
Boards
requiring
use
of
unleaded
solder
are
printed
with
a
lead
free
mark
(LF)
indicating
the
solder
contains
no
lead.
(Caution:
Some
printed
circuit
boards
may
not
come
printed
with
the
lead
free
mark
due
to
their
particular
size.)
[Mp]
.
LEAD
FREE
MARK
*
Be
sure
to
use
the
unleaded
solder
for
the
printed
circuit
board
printed
with
the
lead
free
mark.
*
The
unleaded
solder
melts
at
a
temperature
about
40
°C
higher
than
the
ordinary
solder,
therefore,
it
is
recommended
to
use
the
soldering
iron
having
a
temperature
regulator.
*
The
ordinary
soldering
iron
can
be
used
but
the
iron
tip
has
to
be
applied
to
the
solder
joint
for
a
slightly
longer
time.
The
printed
pattern
(copper
foil)
may
peel
away
if
the
heated
tip
is
applied
for
too
jong,
so
be
careful.
UP-897MD


Section
2
Electrical
Alignment
2-1.
Procedure
before
and
after
Adjustment
Print
out
the
record
of
user
setting
before
performing
the
board
replacement
and
adjustment.
For
the
procedure
of
printing
out
the
record,
refer
to
Section
2-1-1.
If
the
history
record
of
user
setting
cannot
be
printed
due
to
the
failure
of
this
unit,
reset
the
unit
to
the
factory
setting
after
performing
the
board
replacement
and
adjustment.
(Refer
to
Section
2-1-3.)
2-1-1.
Procedure
of
Printing
the
User
Setting
Record
(Before
Adjustment)
Print
out
the
top
menu
record
of
setting
(last
setting)
and
the
list
of
all
setting
in
the
following
procedure.
After
completing
the
board
replacement
and
adjustment,
if
the
setting
is
different
from
the
contents
of
record
printed
before
adjustment,
adjust
the
setting
so
that
it
becomes
the
same
as
the
setting
before
adjustment.
Complete
the
procedure
by
adjusting
the
setting
to
the
contents
of
top
menu
record.
Procedure
1.
Turn
on
the
[POWER].
“READY”
is
displayed
on
LCD
of
this
unit.
Press
the
button
to
open
the
door
panel.
Set
the
thermal
paper
and
close
the
door
panel.
Press
the
jog
dial.
Print
out
the
record
of
the
top
menu
(last
setting)
displayed
on
LCD.
6.
Rotate
the
jog
dial
to
display
“MENU”
on
LCD,
then
press
the
jog
dial.
All
settings
are
printed
on
the
thermal
paper.
Be
sure
to
keep
the
printed
sheets
(user
setting)
because
they
are
used
as
the
reference
to
check
the
setting
after
adjustment.
OY
UP-897MD
2-1-2.
User
Setting
Check
Procedure
(After
Adjustment)
After
completing
the
adjustment,
reset
this
unit
to
the
user
setting
in
the
following
procedure.
Procedure
1.
Print
out
the
setting
of
this
unit.
(Refer
to
steps
1
to
6
of
Section
2-1-1.)
2.
Compare
the
setting
list
printed
in
step
1
with
the
setting
list
(used
as
reference)
printed
in
step
6
of
Section
2-1-1.
If
there
is
any
difference
between
the
settings,
adjust
to
the
reference
setting
using
the
jog
dial.
If
there
is
no
difference,
press
the
jog
dial.
(Setting
is
completed.)
3.
After
adjusting
the
setting
to
the
reference
setting,
press
the
jog
dial.
The
adjusted
setting
is
displayed
on
LCD.
4.
Check
that
the
contents
of
setting
are
correct,
then
press
the
jog
dial.
2-1-3.
Factory
Setting
Procedure
1.
Turn
on
the
while
pressing
the
button.
|
The beep
sound
is
made
immediately
after
turning
on
the
and
after
that
again.
2.
Release
the
button,
then
press
the
button.
Press
the
button
within
3
seconds
after
the
second
beep
sound
in
step
1
is
made.
3.
Check
that
this
unit
becomes
the
following
state.
(Change
to
the
factory
setting)
(1)
Backlight
is
off.
(2)
Backlight
lights
in
green.
(3)
Backlight
lights
in
red.
(4)
Flashes
two
times
automatically.
(5)
Beep
sound
is
made.
2-1

2-2.
Calibration
and
Electrical
Conductivity
Check
After
replacing
the
KY-572
or
MA-132
board,
perform
the
calibration
of
brightness
and
contrast
volumes,
and
perform
the
electrical
conductivity
check
of
each
button.
1.
Turn
on
the
power
while
pressing
the
|
PRINT
|
button
and
button
simultaneously.
The
service
mode
starts.
Do
not
release
the
button
and
button
before
the
beep
sound
is
made.
2.
Press
the
jog
dial
two
times.
“SVC”
and
then
“PATAN?”
are
displayed
on
LCD
in
order.
3.
Rotate
the
jog
dial
to
display
“BR:CAL”.
4.
Press
the
jog
dial.
The
calibration
mode
of
brightness
starts.
(1)
Rotate
the
BRIGHT
volume
fully
to
the
left
in
the
state
that
“BR:LEP”
is
displayed
on
LCD,
then
press
the
jog
dial.
(2)
Rotate
the
jog
dial
to
display
“BR:RIG”
and
rotate
the
BRIGHT
volume
fully
to
the
right
in
the
state
that
“BR:RIG”
is
displayed
on
LCD,
then
press
the
jog
dial.
,
(3)
Rotate
the
jog
dial
to
display
“BR:CEN”
and
return
the
BRIGHT
volume
to
the
center
in
the
state
that
“BR:CEN”
is
displayed
on
LCD,
then
.
press
the
jog
dial.
5.
Rotate
the
jog
dial
to
display
“BACK”,
then
press
the
jog
dial.
6.
Rotate
the
jog
dial
to
display
“CO:CAL”.
7.
Press
the
jog
dial.
The
calibration
mode
of
contrast
starts.
(1)
Rotate
the
CONT
volume
fully
to
the
left
in
the
state
that
“CO:LEF’
is
displayed
on
LCD,
then
press
the
jog
dial.
(2)
Rotate
the
jog
dial
to
display
“CO:RIG”
and
rotate
the
CONT
volume
fully
to
the
right
in
the
state
that
“CO:RIG”
is
displayed
on
LCD,
then
press
the
jog
dial.
(3)
Rotate
the
jog
dial
to
display
“CO:CEN”
and
return
the
CONT
volume
to
the
center
in
the
state
that
“CO:CEN”
is
displayed
on
LCD,
then
press
the
jog
dial.
9.
10.
Check
the
electrical
conductivity
of
the
[FEED
button.
Press
the
button.
The
error
beep
sound
is
made.
The
electrical
conductivity
of
other
buttons
can
be
checked
by
calibration.
Check
the
electrical
conductivity
of
the
button.
Press
the
button.
The
front
door
is
opened.
Turn
off
the
power.
UP-897MD

2-3.
Brightness
and
Contrast
Adjustment
After
replacing
the
MA-132
board,
perform
the
following
adjustment
procedure.
Required
equipment
*
Monitor
*
Digital
voltmeter
*
10
step
signal
generator
(Equivalent
to
Tektronix
1410
(NTSC
signal))
Connection
*
Input
signal:
10
step
signal
*
Connect
this
unit
and
the
monitor.
Procedure
1.
Reset
this
unit
to
the
factory
setting.
(Refer
to
Section
2-1-3.)
2.
Rotate
the
jog
dial
to
display
“VOLME”
on
LCD,
and
then
press
the
button.
The
adjustment
mode
starts.
3.
Check
that
the
CONTRAST
volume
and
BRIGHT
volume
are
displayed
at
the
center.
OK
NG
4.
An
oblong-shaped
frame
is
displayed
almost
at
the
center
of
each
step.
UP-897MD
5.
Adjust
with
@RV503
and
@RV504
while
checking
the
monitor
until
the
specification
is
satisfied.
A
E
12
09--14--18
B
CD
F
GH
BSASD
(A=C
is
ideal.)
FSESH
(E=G
is
ideal.)
13
13
09--13--18
09--14--18
6.
Check
that
“OK”
is
displayed
at
the
bottom
of
the
screen.
2-3

After
replacing
the
thermal
head
or
the
switching
regulator,
perform
this
adjustment.
Before
starting
the
replacement,
print
out
the
stairstep
test
pattern
which
is
used
as
the
reference
of
adjustment.
Before
replacing
the
switching
regulator,
measure
the
voltage
of
TP302
on
the
MA-132
board
and
take
a
note
of
the
value.
State
during
adjustment
Adjustment
point
@RV201/
Switching
Do
not
release
the
buttons
before
checking
that
regulator
the
backlight
blinks.
*
Input
signal:
None
*
Set
the
|POWER|
switch
to
ON
while
pressing
the
[PRINT|
and
|COPY
buttons.
*
When
pressing
the
jog
dial
three
times,
a
eee
eee
“SVC”,
“PATAN”,
and
“PA:CRS”
are
os
displayed
in
order.
Rotate
the
jog
dial
in
this
state
to
display
““PASTP”
and
press
the
jog
dial.
Then,
the
stairstep
test
pattern
is
printed.
Switching
regulator
(right
side)
UP-897MD
Front
Test
pattern
After
replacing
the
switching
regulator
Adjust
@RV201
so
that
the
voltage
becomes
the
same
as
the
voltage
of
TP302
measured
before
adjustment.
Print
out
the
stairstep
test
pattern
after
adjustment
and
check
that
it
is
in
the
same
level
as
the
test
pattern
printed
before
adjustment.
After
replacing
the
head
Adjust
@RV201
so
that
the
stairstep
test
pattern
becomes
the
same
level
as
the
test
pattern
printed
before
adjustment.
2-4
¢
UP-897MD
Other manuals for UP-897MD
2
Table of contents
Other Sony Printer manuals

Sony
Sony DPP-F700 - Digital Photo Printer/frame Manual

Sony
Sony UP-CR10L User manual

Sony
Sony UPA-PC105 User manual

Sony
Sony UP25MD User manual

Sony
Sony DPP-FP97 User manual

Sony
Sony SNAPLAB UP-CR20L Assembly instructions

Sony
Sony UP-21MD User manual

Sony
Sony UP-2100 User manual

Sony
Sony SNAPLAB UP-CR20L Instruction manual

Sony
Sony UPD25MD User manual

Sony
Sony UP-DR250 Manual

Sony
Sony SpectaProof UP-D9500 User manual

Sony
Sony UP25MD User manual

Sony
Sony UP-D897 User manual

Sony
Sony SNAPLAB UP-CR20L User manual

Sony
Sony CVP-M3 User manual

Sony
Sony UP-DF500 User manual

Sony
Sony UP-20 User manual

Sony
Sony LPR-1000MD User manual

Sony
Sony FilmStation UP-DF750 User manual