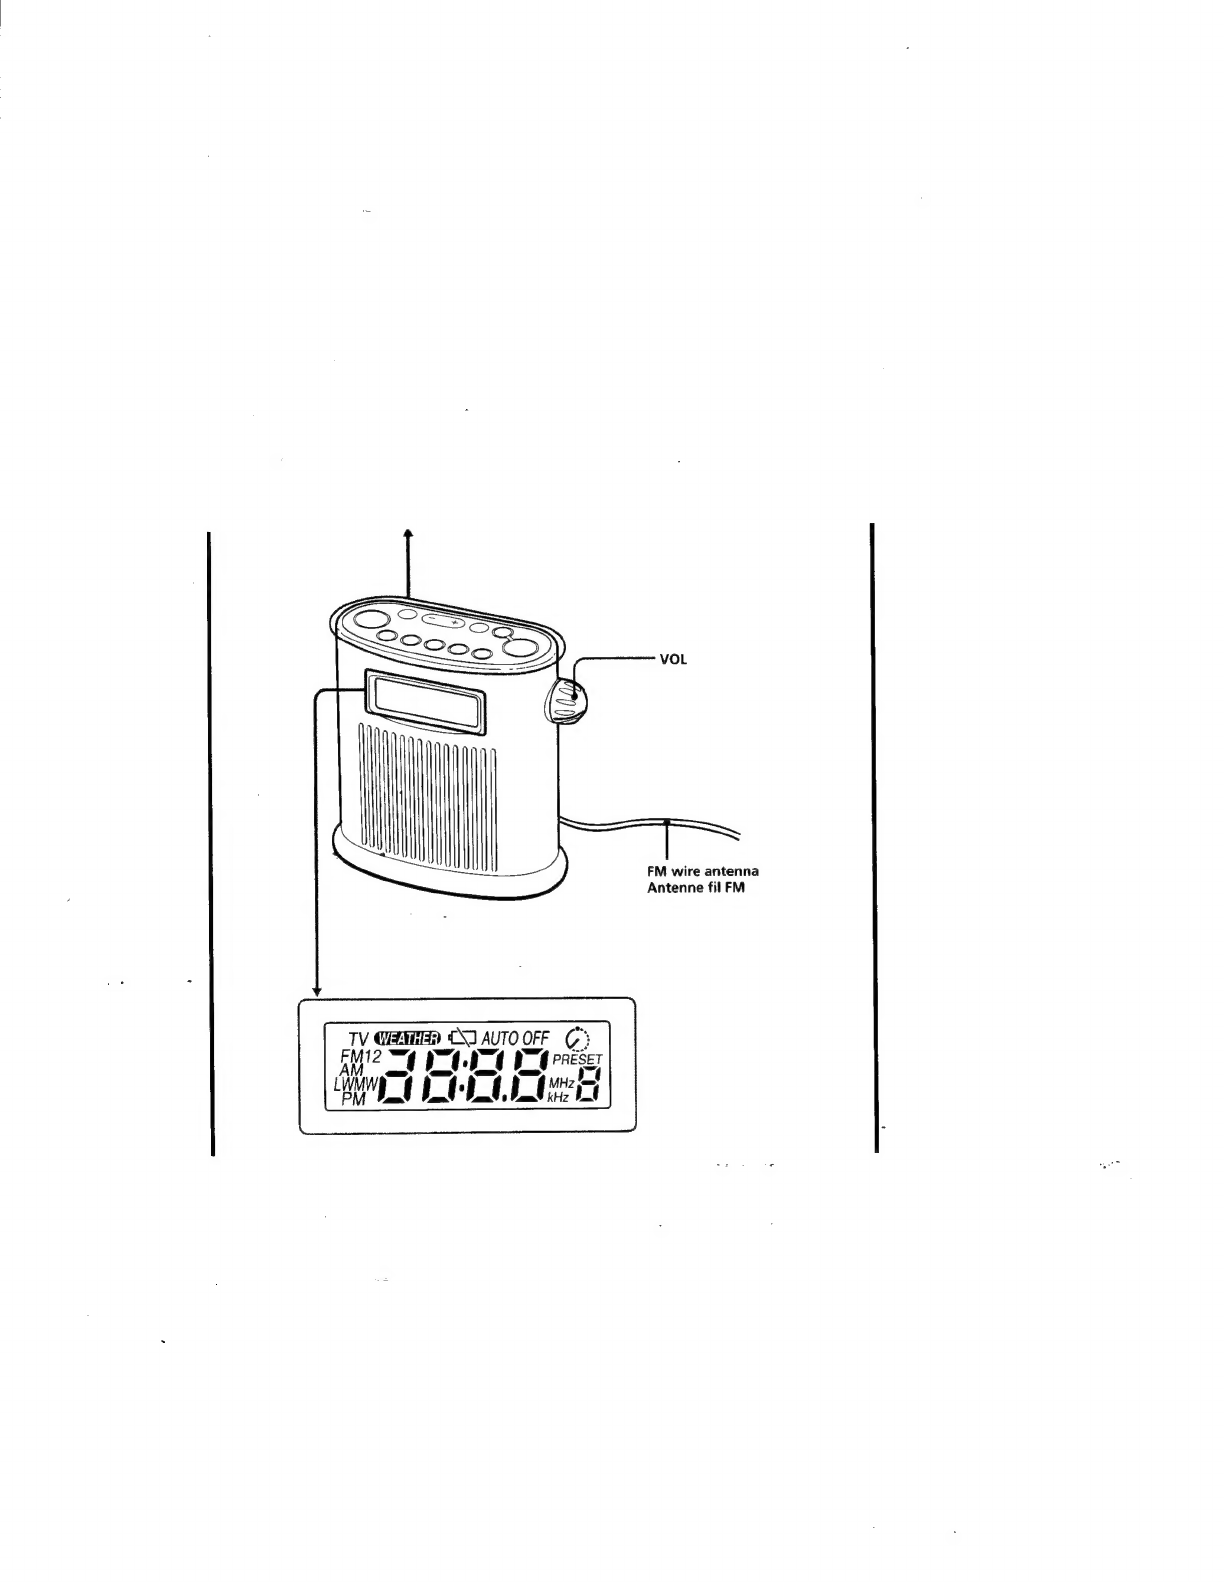
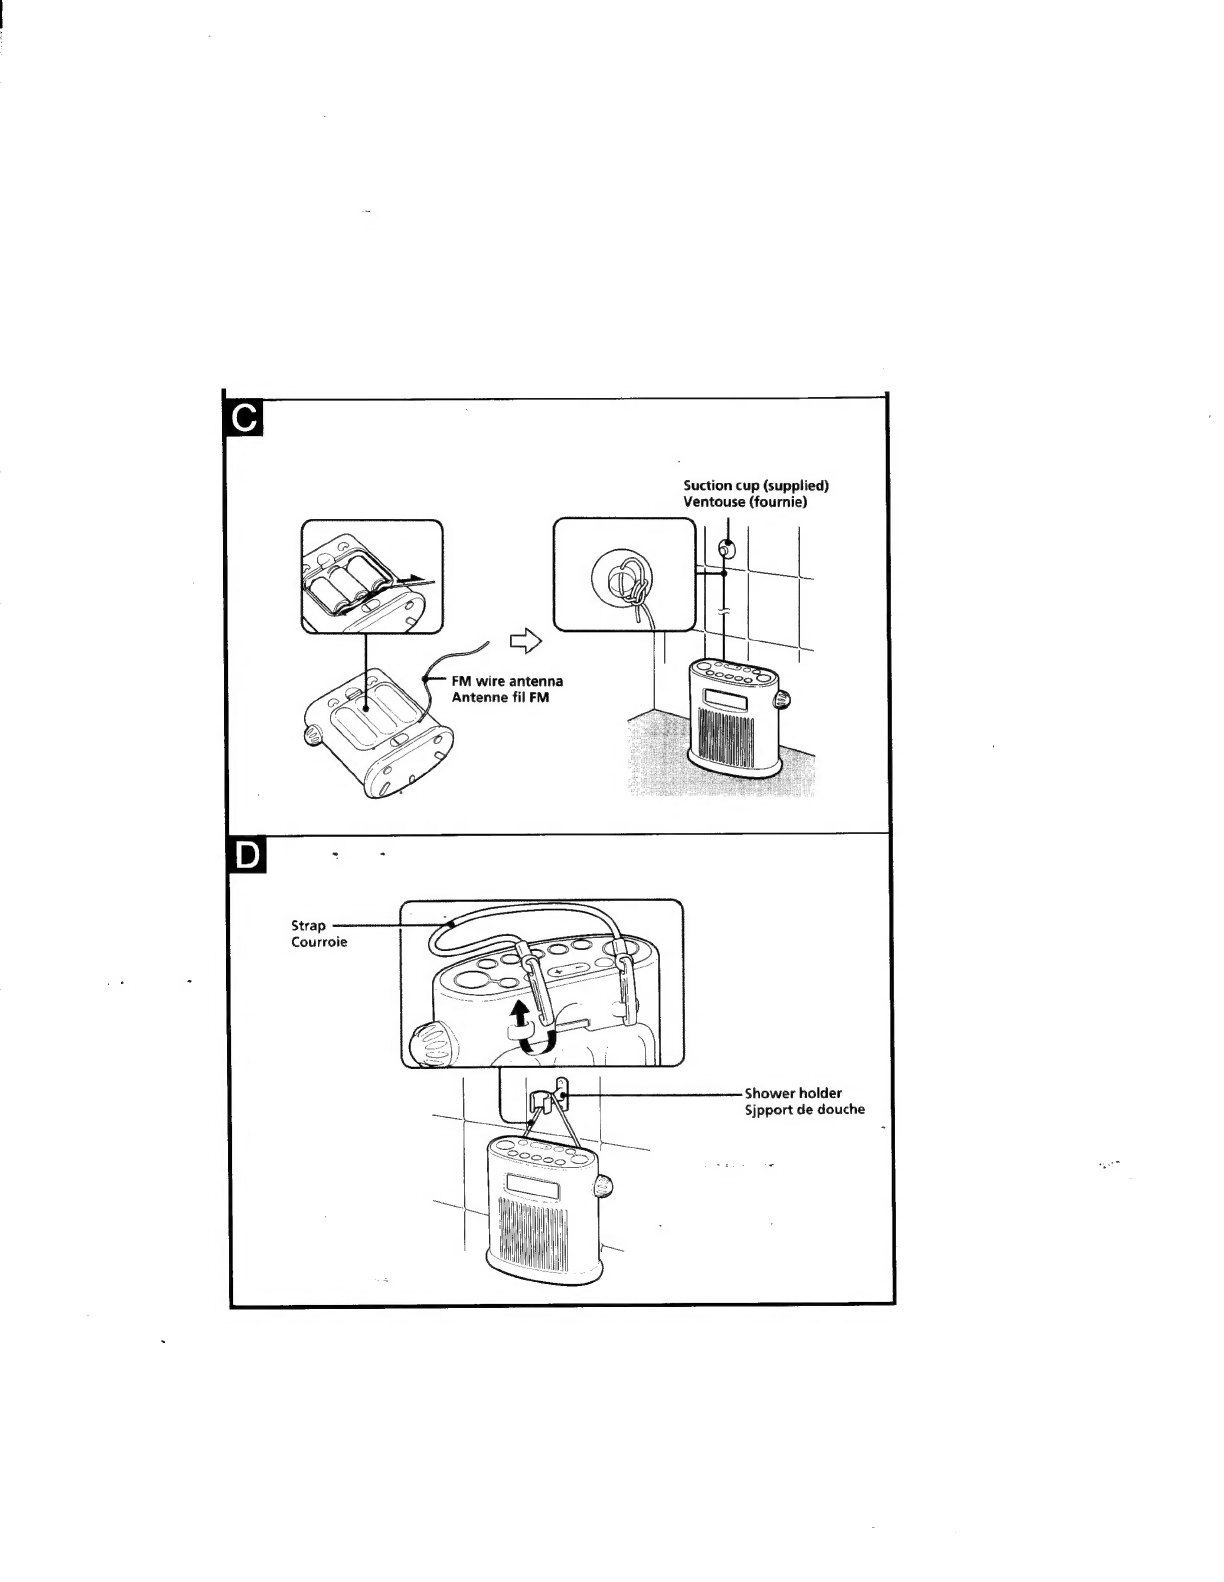
Sony Shower Mate ICF-S79 User manual
Other Sony Radio manuals

Sony
Sony ICF-304 User manual

Sony
Sony ICF-303 User manual

Sony
Sony ICF-C1200 User manual

Sony
Sony XDR-S41D User manual

Sony
Sony CRF-5080 User manual

Sony
Sony ICF-306 User manual

Sony
Sony ICF-B01 User manual

Sony
Sony SRF-18 User manual

Sony
Sony SRF-M37W User manual

Sony
Sony S2 Sports Walkman SRF-H11 User manual

Sony
Sony XDR-S1 User manual

Sony
Sony ICF-M600 User manual

Sony
Sony XDR-S50 User manual

Sony
Sony Walkman ICF-S10MK2 User manual

Sony
Sony ICF-F1 User manual

Sony
Sony ISF-904L User manual

Sony
Sony ICF-M88B - S2 Sports Bicycle Radio User manual

Sony
Sony Walkman SRF-M607 User manual

Sony
Sony XDR-S10DAB User manual

Sony
Sony XDR-S1 User manual