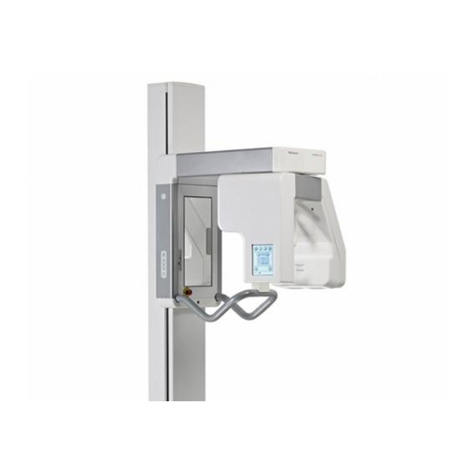
Soredex Cranex Novus e User manual

Service Manual
for the
CRANEX®Novus e
Dental X-ray Unit
208710 rev. 1 (2013-01)


CRANEX®Novus e Contents
Service manual III
Service Manual for the
CRANEX®Novus e
Dental X-ray Unit
Medical Device Directive
93/42/EEC
Number 208710 rev. 1 (2013-01)
Original approved English language version
Manufactured by SOREDEX, PaloDEx Group Oy
Nahkelantie 160,Tuusula
FI-04300 Tuusula
Finland
Tel. +358 45 7582 2000
Fax. + 358 9 701 5261

IV Service manual
Contents CRANEX®Novus e
SOREDEX®/ CRANEX®/ DIGORA®/ SCANORA®are registered trade-
marks of SOREDEX.
SOREDEX endeavours to produce product documentation that is ac-
curate and up to date. However, our policy of continual product devel-
opment may result in changes to products that are not reflected in the
product documentation. Therefore, this document should not be regard-
ed as an infallible guide to current product specifications.
SOREDEX maintains the right to make changes and alterations without
prior notice.

CRANEX®Novus e Contents
Service manual V
Contents
1. General Information .......................................................................................... 1
1.1 Introduction ................................................................................................... 1
1.2 Associated documentation ............................................................................ 1
1.3 Service precautions and warnings................................................................ 1
Servicing precautions.................................................................................... 1
Warning - Radiation Safety........................................................................... 2
Warning - Mechanical safety......................................................................... 2
Warning - Electrical Safety............................................................................ 2
Caution - electrostatic discharge................................................................... 3
Warning - Explosion hazard.......................................................................... 4
Warning - Cleaning the unit........................................................................... 4
1.4 Unauthorized Modifications........................................................................... 4
1.5 Disclaimer ..................................................................................................... 4
1.6 Yearly maintenance....................................................................................... 5
mA test.......................................................................................................... 5
kV test........................................................................................................... 6
Beam alignment test .................................................................................... 6
Ground test .................................................................................................. 6
Motor movements......................................................................................... 7
Position detectors ......................................................................................... 7
Patient Positioning Lasers ............................................................................ 7
Mains power supply cable............................................................................. 7
Tubehead...................................................................................................... 8
Covers and Labels........................................................................................ 8
Fire risk......................................................................................................... 8
1.7 Disposal ........................................................................................................ 9

VI Service manual
Contents CRANEX®Novus e
2. Unit description............................................................................................... 10
2.1 The CRANEX®Novus e .............................................................................. 10
2.2 The main parts and assemblies ..................................................................11
2.3 Unit dimensions........................................................................................... 14
2.4 Mechanical description................................................................................ 15
2.5 Electrical description................................................................................... 17
Circuit boards.............................................................................................. 17
Power supply .............................................................................................. 17
Main fuses .................................................................................................. 17
Unit control ................................................................................................. 18
Motors and motor control............................................................................ 18
Exposure logic ............................................................................................ 19
Position control ........................................................................................... 20
A overview of the Imaging Chain ................................................................ 20
2.6 Wiring diagrams - overview......................................................................... 22
2.7 Block diagram .............................................................................................25
2.8 Fuse diagram.............................................................................................. 26
3. Circuit Boards.................................................................................................. 27
3.1 L900, Display adapter................................................................................. 27
3.2 L1200 CPU Board....................................................................................... 29
3.3 L1500, CCD Power Supply......................................................................... 32
3.4 L1600, Z-Motor Driver................................................................................. 36
3.5 L1700 Connector Board.............................................................................. 40
3.6 L1800, Generator Board ............................................................................. 43
3.7 P1910, PFC Board...................................................................................... 47
3.8 L1300 Interface Board ................................................................................ 51
3.9 L2100 Rotation Position Sensor Board ...................................................... 53
3.10 R5100, 3-Phase Microstepper Driver........................................................ 55
3.11 CCD Sensor / Filter board......................................................................... 57

CRANEX®Novus e Contents
Service manual VII
4. Troubleshooting .............................................................................................. 61
4.1 Initial checks................................................................................................ 61
Restarting the unit....................................................................................... 61
Error Codes................................................................................................. 61
Checking circuit boards............................................................................... 61
Checking cables and connectors................................................................ 62
Power supply problems............................................................................... 62
4.2 Problems during start up............................................................................. 63
Nothing happens when the unit is switched on........................................... 63
Error E 3 (CFG Data lost) ........................................................................... 65
Error E 5 (Line voltage out of limits)............................................................ 65
Error E 8 (File system failure)..................................................................... 66
Error E16 (Z lift not allowed due to duty cycle)........................................... 66
Error E 18 (Display not connected)............................................................. 66
Error E 19 (Exposure switch stuck down)................................................... 67
Error E20 (PCF: POWERGOOD signal is down) ....................................... 67
Error E22 (Button stuck) ............................................................................. 67
4.3 Problems while preparing the unit for an exposure..................................... 68
Image of emergency button appears on main display................................ 68
The side control panel Return key does not work....................................... 68
Error E 7 (Opto or r-motor failed during r-movement)................................. 68
Rotating unit stop rotating, no error code.................................................... 69
Patient positioning light(s) do not come on................................................. 69
Up/down (Z-motor) keys do not work.......................................................... 70
4.4 Problems during exposure.......................................................................... 72
Nothing happens when the exposure button is pressed............................. 72
Error code H1 (Exposure interupted).......................................................... 72
Error codes E0, E1 and E2......................................................................... 73
Error E 10 (CCD initialization/configuration failure) .................................... 75
Error E 11 (CCD power failure)................................................................... 75
Error E 12 (CCD line failure)....................................................................... 76
Error E 13 (CCD configuration checksum failure)....................................... 76

VIII Service manual
Contents CRANEX®Novus e
4.5 Problems after exposure............................................................................. 77
Error E 4 (Tubehead too hot)...................................................................... 77
Vertical white stripes on the image .............................................................77
Horizontal white stripes on the image......................................................... 77
4.6 Bad quality images...................................................................................... 78
Incorrect patient positioning........................................................................ 78
A badly aligned unit..................................................................................... 78
The CCD sensor is not calibrated............................................................... 78
5. S2terminal and service commands ............................................................... 79
5.1 Using the S2terminal................................................................................... 79
5.2 The Service commands...............................................................................82
6. Updating unit firmware, core and display graphics..................................... 91
6.1 Firmware zip file.......................................................................................... 91
6.2 Upgrading the unit firmware........................................................................ 91
7. Replacing parts................................................................................................ 92
7.1 Removing covers ........................................................................................92
7.2 Replacing the tubehead.............................................................................. 93
Tools required ............................................................................................ 93
Replacement parts...................................................................................... 93
Replacing the tubehead.............................................................................. 93
Calibrating the tube head and checking the alignment............................... 95
7.3 Replacing the CCD sensor.......................................................................... 96
7.4 Replacing the collimator.............................................................................. 96
7.5 Replacing circuit boards.............................................................................. 96
L900 Display adaptor - additional instructions............................................ 96
L1800 Generator board - additional instructions......................................... 97
L1700 Connector board - additional instructions ........................................ 97
L1200 CPU board - additional instructions ................................................. 97
L1500 Power Supply board - additional instructions................................... 97
L1910 PFC board - additional instructions.................................................. 97
7.6 Replacing the z-motor................................................................................. 98

CRANEX®Novus e Contents
Service manual IX
8. Aligning the unit ............................................................................................ 104
8.1 Removing the covers ................................................................................104
8.2 Checking and Aligning the CCD Sensor ................................................... 104
8.3 Checking and adjusting the position of the collimator............................... 106
8.4 Checking and adjusting the Chin Support.................................................109
8.5 Checking and adjusting the focal trough....................................................111
8.6 Recheck the alignment...............................................................................113
8.7 Calibrating the CCD sensor .......................................................................113

CRANEX®Novus e 1. General information
Service manual 1
1. General Information
1.1 Introduction This manual describes how to service the CRANEX®
Novus e Digital Panoramic X-ray Unit (hereinafter re-
ferred to as the unit).
1.2 Associated documentation
The unit user's manual.
The unit installation manual.
The unit spare-parts manual.
1.3 Service precautions and warnings
Servicing precautions
Only service personnel trained and approved by the
manufacturer of the unit are allowed to service the unit.
Before attempting to service the unit make sure that you
know how to operate it. Read the unit user's manual.
Read and familiarize yourself with the warnings and
precautions listed in the unit user's manual.
Only use original SOREDEX®spare parts when repair-
ing the unit or replacing parts.
The unit can operate using voltages:
100 to 120 VAC or 220 to 240 VAC.
The only difference between the two versions is the
supplied power cable.

2 Service manual
1. General Information CRANEX®Novus e
Warning - Radiation Safety
Before servicing the unit familiarize yourself with local
and national radiation safety standards and require-
ments relating to dental x-ray equipment.
When taking test exposures take adequate precautions
to protect yourself from radiation. Stand behind a suit-
able radiation shield positioned at least two metres (six
feet) from the unit.
Warning - Mechanical safety
Disconnect the unit from the main power supply before
removing any covers.
Disconnect the unit from the main power supply before
repairing or replacing mechanical parts or installing ac-
cessories.
Be careful when operating the unit not to get body parts
or clothing trapped between moving parts.
During operation some surfaces and components may
become hot. Take precautions to avoid burning yourself.
The aperture plate in the collimator is made of lead (Pb)
which is toxic. Do not touch it with your bare hands.
Do not open the tubehead. There are no serviceable
parts, mechanical or electrical, inside the tubehead.
Warning - Electrical Safety
Disconnect the unit from the main power supply before
replacing circuit boards or other electrical components.
If there are capacitors on a circuit board or electrical
component wait ten (10) minutes, after disconnecting
the unit from the power supply, before handling the
board or component.

CRANEX®Novus e 1. General information
Service manual 3
If you have to leave the unit unattended during servicing
or maintenance, disconnect the unit from main power
supply to protect people, who may touch the unit, from
electric shock.
This unit should be used only in areas that are provided
with a protective earth connection to ensure an equipo-
tential ground connection.
Caution - electrostatic discharge
Electrostatic Discharge (ESD) can damage or destroy
electronic components.
When servicing the unit take precautions to avoid elec-
trostatic build up and discharge (ESD). Follow the rec-
ommendations for the prevention of ESD that are used
in the country in which you are working. If no recom-
mendations are available, follow the guidelines below:
- Leave all new or replacement circuit boards and
electrical parts in their protective packaging until the
boards are needed.
- Before handling circuit boards and electrical parts
make sure that any static electricity charge that has
built up in you body is discharged.
- When examining and checking circuit boards use an
antistatic wrist wrap which is connected to a ground
point through a 1 Mohm current limiting cable. For a
ground point use water pipes, radiators or other ob-
jects that are known to be connected to the ground.
Also use a cable to connect the unit to the same
ground potential as the wrist wrap.
- When handling circuit boards hold them by their
edges and do not touch any components or connec-
tors.
- If an antistatic mat is used, connect the wrist wrap
to the mat and the mat to the ground potential.
- Wash the wrist wrap and check that it is in good
condition frequently.

4 Service manual
1. General Information CRANEX®Novus e
Warning - Explosion hazard
Certain disinfectants and cleaning agents may vaporize
to form an explosive vapour. If such chemicals are used
the vapour should be allowed to disperse before switch-
ing the unit on.
Warning - Cleaning the unit
Switch the unit off and disconnect it from the main
power supply before cleaning or disinfecting the unit.
1.4 Unauthorized Modifications
Unauthorized changes or modifications to any part of
the unit or its equipment can have hazardous conse-
quences. Changes or modifications must not be made
unless specifically authorized by the manufacturer of
the unit.
When properly assembled with a compatible beam-lim-
iting unit, the diagnostic source assembly will fully meet
the United States of America Federal Performance
Standards for Diagnostic X-Ray Systems and Their
Components (21 CFR 1020. 30-32) provided no compo-
nents or parts are removed from the unit and no unau-
thorized adjustments are made to the beam-limiting unit
or tube housing assembly.
Never remove or remanufacture any part of the tube
housing assembly or beam-limiting unit.
Never adjust any part of the beam-limiting unit unless
under the direction of the manufacturer of the unit or
their authorized distributor(s).
1.5 Disclaimer The manufacturer of the unit shall have no liability for
consequential damages, personal injury, loss, damage
or expense directly or indirectly arising from the use of
its products. No agent, distributor or other party is au-
thorized to make any warranty or other liability on behalf
of the manufacturer of the unit with respect to its prod-
ucts.

CRANEX®Novus e 1. General information
Service manual 5
1.6 Yearly maintenance
The following tests and inspections must be carried out
annualy by an authorized service person to verify that
the unit meets the specifications and performance crite-
ria essential for correct and safe operation.
When taking measurements that require a multimeter,
always use a digital multimeter (DMM).
mA test WARNING: X-rays are generated when this test is car-
ried out. PROTECT YOURSELF FROM RADIATION.
1. Connect the +probe of a DMM to test pin TP18
(mAfb) and the -probe to TP17(GND) on the L1800
Generator board.
2. Select service command exp and an exposure time
of 2000 ms (refer to section 4 Service assistant and
service functions, in this manual).
3. Protect yourself from radiation and take an expo-
sure. Check the feedback values from the DMM.
The feedback values must be within the tolerance.
Selected mA mAfb (V) Tolerance (V)
8 1.58 ±0.15 (1.43 - 1.73)
10 2.0 ±0.15 (1.85 - 2.15)
If the value is not within the tolerance, recalibrate
the Generator board, see section 5.2 Service Com-
mands (the calib command).

6 Service manual
1. General Information CRANEX®Novus e
kV test WARNING: X-rays are generated when this test is car-
ried out. PROTECT YOURSELF FROM RADIATION.
1. Connect the +probe of a DMM to test pin TP14
(kVfb) and the -probe to TP17(GND) on the Genera-
tor board.
2. Select service command exp and an exposure time
of 2000 ms (refer to section 4 Service assistant and
service functions, in this manual).
3. Protect yourself from radiation and take an expo-
sure. Check the feedback values from the DMM.
The feedback values must be within the tolerances.
Selected kV kVfb Tolerance (V)
63 2.86 ±0.1 (2.76 - 2.96)
66 3.00 ±0.1 (2.90 - 3.10)
70 3.18 ±0.1 (3.08 - 3.28)
73 3.32 ±0.1 (3.22 - 3.42)
77 3.50 ±0.1 (3.40 - 3.60)
If the values are not within the tolerances, recali-
brate the Generator board, see section 5.2 Service
Commands (the calib command).
Beam alignment test
Check the beam alignment. Refer to the Installation and
set-up manual for information on how to do this.
Ground test Disconnect the unit from the main power supply before
carrying out this test.
For ME EQUIPMENT with anAPPLIANCE INLET the
impedance between the earth pin in the APPLIANCE
INLET and any part that is PROTECTIVELY EARTHED
shall not exceed 0.1 ohm. The grounding resistance is
measured between APPLIANCE INLET ground pin and
any metal part of the unit.
The resistance MUST be <0.1 ohm.

CRANEX®Novus e 1. General information
Service manual 7
Motor movements
Switch the unit off and then manually rotate the rotating
unit to check that the stepper motor moves freely and
without any looseness.
Switch the T-mode "test" and then take an exposure to
check that the motors operate smoothly and without any
noise.
Press the up/down keys to check the Z-motor (vertical
carriage movement). The motor must operate smoothly
and without any noise.
Position detectors
Press the up key and drive the unit up. Make sure that
the unit stops moving at its uppermost position.
Press the down key and drive the unit down. Make sure
that the unit stops moving at its lowermost position.
Manually rotate the rotating unit to one of its end posi-
tions and then press the return button and make sure
that the rotating unit returns to the ready position. Re-
peat the test for the other end position.
Use service command optotest, see section 5.2 Ser-
vice Commands, to check the rotating unit optosensors.
Manually turn the rotating unit in one direction and then
press return. Repeat for the other direction.
Patient Positioning Lasers
Check that the patient positioning lasers work and are
positioned correctly. Refer to the Installation and set-up
manual for information on how to do this.
Mains power supply cable
Check the condition of main power supply cable and
replace it if damaged.

8 Service manual
1. General Information CRANEX®Novus e
Tubehead Make sure that oil is not leaking from the tubehead. If
the tubehead shows signs of oil leakage, replace it.
Covers and Labels
Check that all covers are correctly installed and in good
condition. Also check that all the labels are attached to
the unit and that they are all legible.
Fire risk WARNING: Disconnect the unit from the main power
supply before carrying out the next task.
Use a vacuum cleaner to remove all dust that has accu-
mulated inside the unit and cover air vents to eliminate
the risk of fire. Remove all dust from the circuit boards,
and pay special attention to the Generator board L1800
and PFC P1910.

CRANEX®Novus e 1. General information
Service manual 9
1.7 Disposal At the end of useful working life of the unit, its spare
and replacement parts and accessories make sure that
you follow all local, national and international regula-
tions regarding the correct and safe disposal and/or
recycling of the unit, its spare and replacement parts
and accessories.
The unit and its spare parts and accessories may in-
clude parts that are made of or include materials that
are non-environmentally friendly or hazardous. These
parts must be disposed of in accordance with all lo-
cal, national and international regulations regarding the
disposal of non-environmentally friendly or hazardous
materials.
The following hazardous materials and substances can
be found in the unit, its spare and replacement parts
and assemblies:
- Lead (Pb):
circuit boards, tubehead, collimator,
CCD sensor assembly
- Cadmium (Cd):
none
- Mercury (Mg):
none
- PBB Polybrominated biphenyls:
none
- PBDE polybrominated diphenyl ethers:
none
Other materials and substances in the unit, its spare
parts and assemblies that could be hazardous and are
non-environmentally friendly are:
- Mineral oil:
tubehead

10 Service Manual
2. Unit Description CRANEX®Novus e
2. Unit description
2.1 The CRANEX®Novus e
The CRANEX®Novus e extraoral x-ray unit is designed
to take exposures of the dento-maxillofacial region.
The unit cannot be used to take x-ray exposures of any
other part of the human anatomy.
The unit can be used to take adult panoramic (full
width), child panoramic (reduced width), TMJ and bitew-
ing images.
The unit can operate using voltages:
from 100 to 120 VAC or 220 to 240 VAC
The unit is used with a PC in which Scanora®or
Digora®for Windows or some other MDD approved
dental imaging software are installed.
For information on how to use the unit refer to the User
Manual.

Service Manual 11
CRANEX®Novus e 2. Unit Description
2.2 The main parts and assemblies
1 Motorized carriage
2 Emergency stop button - Press to stop, rotate to release
3 Exposure switch
4 On / Off switch (rear of the column)
5 Column
6 CCD sensor
7 Tubehead
Tubehead (7) + CCD sensor (6) = Rotating unit
8 PC with MDD approved dental imaging software
Other manuals for Cranex Novus e
2
Table of contents
Other Soredex Medical Equipment manuals
Popular Medical Equipment manuals by other brands

Animas
Animas vibe quick start guide

Weinmann
Weinmann Prisma2Cloud WM 100 MW Instructions for use

Otto Bock
Otto Bock Malleo Sprint light Instructions for use

baxter
baxter PrisMax V2 quick start guide

Dr. Clark
Dr. Clark VariZapper instruction manual

Vispero
Vispero Enhanced Vision Merlin Elite Pro HD OCR user manual

Stryker
Stryker Rugged EZ-PRO R4 6092 Operation & maintenance manual

baxter
baxter EASYSPRAY Quick reference guide

Respironics
Respironics 950 Instruction and service manual

React Health
React Health PO2BLK user manual

Respironics
Respironics Portable Battery Pack user guide

3M
3M Littmann Classic III user manual