manuals.online logo
Brands
  1. Home
  2. •
  3. Brands
  4. •
  5. SOUNDMASTER
  6. •
  7. Clock Radio
  8. •
  9. SOUNDMASTER URD 820 User manual

SOUNDMASTER URD 820 User manual

DE 1
Modell: URD 820
German Dutch
English Romanian
France
ENGLISH
ENG 1
LOCATION OF CONTROLS
1) Stop Button ■
2) Play/Pause ◄
3) Power ON/OFF
4) CD Mode
5) CD Program
6) Sleep Button
7) Alarm 1 Set
8) Alarm 2 Set
9) Time Set
10) Skip Forward >>| / Hour Button
11) Skip Backward |<< / Minute Button
12) Snooze Button
13) Function Switch
14) Band Switch
15) CD Door
16) Volume Control
17) Tuning Contol
18) AUX IN Jack
19) Stereo Headphone Jack
20) FM Wire Antenna
21) Speaker Left
22) Speaker Right
23) LED Display
24) Power ON/OFF Indicator
25) CD Program Indicator
26) CD Repeat Indicator
27) CD Random Indicator
28) FM ST. Indicator
29) PM Indicator
30) Alarm 1 Indicator
31) Alarm 2 Indicator
32) Dial Pointer
33) Battery Compartment
Specification:
FM Frequency: 87,5 – 108 MHz
AM Frequency: 540 – 1600 KHz
Power Consumption: 10 W
AC Power Source: AC 230V 50Hz
Power Reserve: 9V (006P) Block battery - Clock Back Up
ENGLISH
ENG 2
POWER SUPPLY
This unit operates from a mains supply. Connect AC power cord to the AC household mains outlet.
Ensure voltage on the set corresponds to the voltage of your local area.
Remarks:
1) In case of malfunction due to electrostatic discharge (ESD), reset unit by reconnecting the AC cord
again to resume to normal operation.
2) When not in use, unplug AC power cord completely from AC mains supply.
3) The mains plug is used as the disconnection device; the disconnection device shall be readily
operable.
Battery Backup for Power Failure Protection
This unit has a battery back up circuit that will keep the correct time and alarm settings in the event of a
temporary power interruption.
During power interruption, the back up battery will keep track of the time and store the alarm setting until
the power returns. The battery will not operate the LED clock display, radio, CD player or alarm function.
Install a 9-volt battery (type 6F22/006P), not included, into the BATTERY COMPARTMENT locates at the
bottom of the unit
Note: We recommend an alkaline battery for longer usable life. Change batter 9 to 12 months for the best
result and to avoid possible battery leakage.
Select the Clock System (12/24 Hours)
1) Connect the AC Power Cord, LED Display will show “12:00” and
flash continuously.
2) Press TIME SET Button (9) for 3 seconds, LED Display will change to “24H”, then “0:00” and flash
3) Press and hold SKIP FORWARD >>|/HOUR BUTTON (10) to select the hour
4) Press and hold SKIP BACKWARD |<</MINUTE BUTTON (11) to select the minute
5) Press the TIME SET BUTTON (9) to store the time
Note: You may change the clock at any time after pressing the TIME SET BUTTON (9)
Select Alarm / Wake Up
You can set two different alarm times, ALARM 1 and ALARM 2, such that the alarm timer operates twice a
day (Dual alarm)
Alarm 1 operation
1) Set the FUNCTION SWITCH (13) to your desired wake up sound mode: Buzzer/CD/Radio
a.To wake up by radio, first tune in the desired station and adjust the volume
b.To wake up by CD first insert a CD in the CD compartment. In case there has no disc inside
you will be waked up by BUZZER automatically
2) Press ALARM 1 SET BUTTON (7), ALARM 1 INDICATOR (30) will light up while the LED DISPLAY
will blink
3) Press SKIP FORWARD >>| for set the hour, press SKIP BACKWARD |<< for set the minute
4) Press the Alarm 1 SET BUTTON (7) again to store the wake up time. LED Display will return to the
current time automatically
5) When the alarm time comes, ALARM 1 INDICATOR will blink while ON/OFF INDICATOR will light up
together with the wake up sound mode. (max. 60 minutes)
6) To switch off the alarm, press the ALARM 1 SET BUTTON (7) once.
7) To cancel Alarm 1 wake up setting, press ALARM 1 SET BUTTON (7) again. INDICATOR (30) will
disappear from the LED Display.
Alarm 2 operation all procedures the same as above for Alarm 1 operation.
Snooze Function
When alarming, press SNOOZE BUTTON (12) will temporary turn off the alarm for about 6 minutes.
Afterwards the alarm will resume again.
ENGLISH
ENG 3
Radio Operation
1) Slide the FUNCTION SWITCH (13) to “RADIO” position
2) Slide the BAND SWITCH (14) to your desired waveband
3) Press the POWER ON/OFF BUTTON (3) to start the unit; Indicator ON/OFF (24) will light up
4) Turn the TUNING KNOB (17) to your desired radio station
5) Adjust the sound level by turning the VOLUME CONTROL (16)
6) To turn off the radio, press the POWER ON/OFF (3) button; Indicator ON/OFF (24) will disappear
FM stereo indicator
Slide the BAND SWITCH (13) to FM ST. position. The FM ST. INDICATOR (28) will light up when listening
to a strong station that is broadcasting in “Stereo”. When FM stereo reception is weak, slide the BAND
SWITCH to FM position.
Antennas
For the best FM reception, fully extend the external FM WIRE ANTENNA (20) For MW/AM reception, the
unit has a built-in antenna, rotate the whole unit horizontally for the best reception.
CD Operation (CD-R/RW playback compatible)
1) Set the FUNCTION SWITCH (13) to “CD” position
2) Press the POWER ON/OFF BUTTON (3) to turn on the unit
3) Open the CD DOOR (15) and put a disc into the CD compartment
4) Close the CD DOOR gently, total track number will be shown on the LED display for 3 seconds
5) Press PLAY/PAUSE (2) for start the CD; LED display will show “01” for 3 seconds and go to current
time
6) For interruption while CD is playing, press PLAY/PAUSE button (2) once, to resume press it again
7) To stop the CD, press STOP button (1)
Note: No-matter which CD button is pressed during CD operation, LED display will always show the
current clock time after 3 seconds.
Skip and Search Mode
1) Press SKIP FORWARD >>| (10) or BACKWARD |<< (11) to go to the next or back to the beginning of
the track
2) Press and hold SKIP FORWARD >>| (10) or BACKWARD |<< (11) to search the track with high
audible speed forward or backward playback
Repeat/Random Play Mode
Press 1x MODE (4) for repeat current track Repeat Indicator (26) will flash
Press 2x MODE (4) for repeat all tracks Repeat Indicator (26) will light
Press 3x MODE (4) for random play Random Indicator (27) will light
Program Mode (max. 20 Tracks)
1) During in STOP mode, press the PROGRAM button (5). Indicator (25) and display will flash (“00”)
2) Press SKIP FORWARD >>| (10) or SKIP BACKWARD |<< (11) to select your desired track
3) Press the PROGRAM button (5), to store this track
4) Repeat steps 2-3 until all desired tracks have been programmed
5) Press PLAY/PAUSE (2) to start the program playback
6) To cancel the program, press STOP button (1) – Indicator (25) will disappear
Sleep Function
This function enables you to go to sleep by listening to the RADIO or CD
1) Start Radio or CD
2) Press the SLEEP button (6) to select the sleep time
a. Press once = 90 minutes
b. Press twice = 60 minutes
c. Press three times = 30 minutes
d. Press four times = 15 minutes
To turn off the RADIO or CD before SLEEP time reaches, press the ON/OFF button (3) and the lighted
ON/OFF Indicator will turn off
AUX Function
Connect the earphone socket from the Auxiliary unit (e.g. MP3 Player) into AUX-IN JACK (3.5 mm plug –
not supplied). Press ON/OFF button (3) and adjust the volume (16). The sound output of CD or Radio will
be cut automatically.
Copyright by Woerlein GmbH, 90556 Cadolzburg, www.woerlein.com
Other SOUNDMASTER Clock Radio manuals

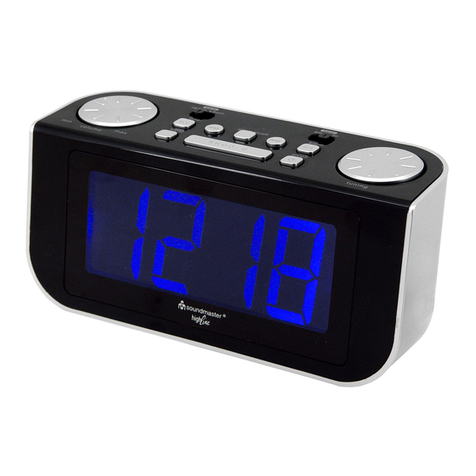
SOUNDMASTER UR8100 User manual

SOUNDMASTER

SOUNDMASTER UR8100 User manual

SOUNDMASTER UR122SW User manual

SOUNDMASTER

SOUNDMASTER UR122SW User manual

SOUNDMASTER UR-400 User manual

SOUNDMASTER

SOUNDMASTER UR-400 User manual

SOUNDMASTER UR270 User manual

SOUNDMASTER

SOUNDMASTER UR270 User manual

SOUNDMASTER IR5500 User manual

SOUNDMASTER

SOUNDMASTER IR5500 User manual

SOUNDMASTER Highline UR135 User manual

SOUNDMASTER

SOUNDMASTER Highline UR135 User manual

SOUNDMASTER FUR5005 User manual

SOUNDMASTER

SOUNDMASTER FUR5005 User manual

SOUNDMASTER iP4060BT User manual

SOUNDMASTER

SOUNDMASTER iP4060BT User manual

SOUNDMASTER Highline URD840 User manual

SOUNDMASTER

SOUNDMASTER Highline URD840 User manual

SOUNDMASTER UR800SW User manual

SOUNDMASTER

SOUNDMASTER UR800SW User manual

SOUNDMASTER DAB450 User manual

SOUNDMASTER

SOUNDMASTER DAB450 User manual

SOUNDMASTER UR800 User manual

SOUNDMASTER

SOUNDMASTER UR800 User manual

SOUNDMASTER URD480SW User manual

SOUNDMASTER

SOUNDMASTER URD480SW User manual

SOUNDMASTER BR 30 User manual

SOUNDMASTER

SOUNDMASTER BR 30 User manual

SOUNDMASTER Highline UR 8680 User manual

SOUNDMASTER

SOUNDMASTER Highline UR 8680 User manual

SOUNDMASTER highline FUR 6000 User manual

SOUNDMASTER

SOUNDMASTER highline FUR 6000 User manual

SOUNDMASTER BT-1308 User manual

SOUNDMASTER

SOUNDMASTER BT-1308 User manual

SOUNDMASTER UR106 User manual

SOUNDMASTER

SOUNDMASTER UR106 User manual

SOUNDMASTER Highline FC-1000 User manual

SOUNDMASTER

SOUNDMASTER Highline FC-1000 User manual

SOUNDMASTER UR101 User manual

SOUNDMASTER

SOUNDMASTER UR101 User manual

SOUNDMASTER High Line UR 108 User manual

SOUNDMASTER

SOUNDMASTER High Line UR 108 User manual

SOUNDMASTER UR-2010 User manual

SOUNDMASTER

SOUNDMASTER UR-2010 User manual

SOUNDMASTER UR-501 User manual

SOUNDMASTER

SOUNDMASTER UR-501 User manual

SOUNDMASTER UR6600 User manual

SOUNDMASTER

SOUNDMASTER UR6600 User manual

Popular Clock Radio manuals by other brands

Timex T313 owner's manual

Timex

Timex T313 owner's manual

iHome iBT31 instruction manual

iHome

iHome iBT31 instruction manual

Philips AJ3110 Specifications

Philips

Philips AJ3110 Specifications

Radio Shack 63-973 owner's manual

Radio Shack

Radio Shack 63-973 owner's manual

Medion LIFE E66130 instruction manual

Medion

Medion LIFE E66130 instruction manual

anko 43032983 quick start guide

anko

anko 43032983 quick start guide

Teufel iTeufel Dock v3 Technical description and operating instructions

Teufel

Teufel iTeufel Dock v3 Technical description and operating instructions

DAB Sandstrom SJUTBL14E instruction manual

DAB

DAB Sandstrom SJUTBL14E instruction manual

Goodmans GCRUSB03 user manual

Goodmans

Goodmans GCRUSB03 user manual

Jensen JCR-275 user manual

Jensen

Jensen JCR-275 user manual

Reflexion CLR32 user manual

Reflexion

Reflexion CLR32 user manual

Oregon Scientific RRA200 user manual

Oregon Scientific

Oregon Scientific RRA200 user manual

RCA RP5420 user manual

RCA

RCA RP5420 user manual

Oregon Scientific RM912TCN user manual

Oregon Scientific

Oregon Scientific RM912TCN user manual

Panasonic RC-CD600 operating instructions

Panasonic

Panasonic RC-CD600 operating instructions

RCA RC150I user manual

RCA

RCA RC150I user manual

Philips AJ3225 user manual

Philips

Philips AJ3225 user manual

Sony Walkman ICF-CD2000 operating instructions

Sony

Sony Walkman ICF-CD2000 operating instructions

manuals.online logo
manuals.online logoBrands
  • About & Mission
  • Contact us
  • Privacy Policy
  • Terms and Conditions

Copyright 2025 Manuals.Online. All Rights Reserved.