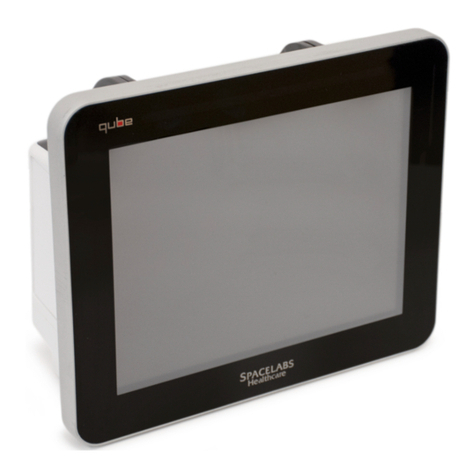
Spacelabs qube 91390 User manual

SERVICE MANUAL
070-2451-01 Rev. F | www.spacelabshealthcare.com October 2014
91390

91390 QUBE
www.spacelabshealthcare.com
©2014 Spacelabs Healthcare
All rights reserved. Contents of this publication may not be reproduced in any form without the
written permission of Spacelabs Healthcare. Products of Spacelabs Healthcare are covered by U.S.
and foreign patents and/or pending patents. Printed in U.S.A. Specifications and price change
privileges are reserved.
Spacelabs Healthcare considers itself responsible for the effects on safety, reliability and performance
of the equipment only if:
• assembly operations, re-adjustments, modifications or repairs are carried out by persons
authorized by Spacelabs Healthcare, and
• the electrical installation of the relevant room complies with the requirements of the standard in
force, and
• the equipment is used in accordance with the operations manual.
Spacelabs Healthcare will make available, on request, such circuit diagrams, component part lists,
descriptions, calibration instructions or other information which will assist appropriately qualified
technical personnel to repair those parts of the equipment which are classified by Spacelabs
Healthcare as field repairable.
Spacelabs Healthcare is committed to providing comprehensive customer support beginning with
your initial inquiry through purchase, training, and service for the life of your Spacelabs Healthcare
equipment.
CORPORATE OFFICES
Corporate Headquarters
Spacelabs Healthcare, Inc.
35301 SE Center Street
Snoqualmie, WA 98065
U.S.A.
Telephone: (1) 800-287-7108
Telephone: (1) 425-396-3300
Authorized EC Representative
Spacelabs Healthcare, Ltd.
43 Moray Place
Edinburgh, EH3 6BT
Scotland
Telephone: 44 (0) 131 240 6481
Fax: 44 (0) 131 240 6459
Please refer to http://www.spacelabshealthcare.com/en/company/trademarks for a full listing of
Spacelabs Healthcare trademarks.Other brands and product names used herein are trademarks of
their respective owners.
•Rx Only U.S. Federal law restricts the devices documented herein to sale by or on
the order of a physician.
• Before use, carefully read the instructions, including all warnings and cautions.

www.spacelabshealthcare.com I-I
Table of Contents
1Introduction
Overview.............................................................................................................................. 1-1
Warnings, Cautions, and Notes.................................................................................. 1-2
Product Specifications .................................................................................................. 1-3
Electrical Specifications................................................................................................ 1-5
Classification ............................................................................................................. 1-5
Environmental Requirements ..................................................................................... 1-6
Transport and Storage ........................................................................................... 1-6
Operating ................................................................................................................... 1-6
Expected Service Life.................................................................................................... 1-6
Monitor Options............................................................................................................... 1-7
Product Overview ........................................................................................................... 1-7
Monitor Assembly and Module Housing ........................................................... 1-7
External AC Power Supply ................................................................................... 1-8
Batteries ...................................................................................................................... 1-8
Display ................................................................................................................................. 1-8
LCD Display ............................................................................................................... 1-8
Video Subsystem ..................................................................................................... 1-8
Basic Components .......................................................................................................... 1-9
Battery Indicators ................................................................................................... 1-10
Energy Saving Mode (Battery) .......................................................................... 1-13
Signal Strength Indicator ..................................................................................... 1-13
Batteries and Recharging Batteries ........................................................................1-14
To change batteries without interruptions while operating on battery
power ...........................................................................................................................1-15
Battery Power Level .................................................................................................1-15
Architecture......................................................................................................................1-16
Directory of Keys............................................................................................................1-17
2Setup
Unpack the Monitor........................................................................................................ 2-1
Display Assembly ........................................................................................................... 2-2
Input/Output Connections (Internal and External) .......................................... 2-3
Power LED ................................................................................................................ 2-9
Battery Status LED ................................................................................................. 2-9
Alarms ......................................................................................................................... 2-9
Cables ................................................................................................................................. 2-9
Maximum Cable Lengths ...................................................................................... 2-9
SDLC External Devices ......................................................................................... 2-9
SDLC Cable Interconnection ...............................................................................2-15
SDLC Bus Termination ................................................................................................2-15
Alarm Relay for option A .................................................................................... 2-15
Power-ON Test...............................................................................................................2-17
Configure the Monitor .................................................................................................2-17
Privileged Access Menus ..................................................................................... 2-17

91390 QUBE
www.spacelabshealthcare.com
I-II
3Theory
CPU PCB ............................................................................................................................. 3-1
Battery Charger and Power Supply Subsection (on CPU PCB) ..................3-4
Li-Ion Batteries................................................................................................................3-5
Battery Switch PCBA for Options B and C .......................................................... 3-7
Monitor Docking PCBA and Connector PCBA.................................................... 3-8
Front Bezel Assembly .................................................................................................. 3-9
Pod Interface PCB........................................................................................................ 3-10
Interconnect PCB ......................................................................................................... 3-10
4 Maintenance
Overview.............................................................................................................................4-1
Required Test Equipment .................................................................................... 4-2
Mechanical Inspection .................................................................................................. 4-2
Tests for Electrical Safety ...........................................................................................4-2
Definitions ................................................................................................................. 4-2
Equipment Required ................................................................................................4-3
Ground Resistance ................................................................................................. 4-3
Chassis Leakage Current Tests .......................................................................... 4-4
Patient Lead Leakage Current Tests (Patient Modules) ........................... 4-4
Preventive Maintenance ..............................................................................................4-4
Touchscreen Calibration ...................................................................................... 4-4
To perform touchscreen calibration.................................................................4-4
Functional Tests..............................................................................................................4-5
Monitor Self-Test .................................................................................................... 4-5
Monitor Functional Tests ..................................................................................... 4-5
Verification of Monitor Functions ....................................................................... 4-5
Optional Recorder Assembly for Options A and B ......................................4-6
External Alarm Relay Output for Option A .....................................................4-6
Ethernet (Wired) .......................................................................................................4-7
Assembly/Disassembly Procedures........................................................................4-7
Required Tools and Parts .................................................................................... 4-7
Setup for Disassembly .......................................................................................... 4-7
For Option A..............................................................................................................4-8
For Options B and C...............................................................................................4-8
Remove the Bezel Assembly .............................................................................. 4-8
Reassembly ................................................................................................................ 4-10
CPU PCB .................................................................................................................... 4-11
Restore Data to the Monitor .............................................................................. 4-14
Option 1: Exchange the USB Drive PCBAs .................................................... 4-14
Option 2: Format the USB Drive ....................................................................... 4-14
Complete Main Chassis Removal ..................................................................... 4-17
Reinstall the Chassis ............................................................................................. 4-18
SDLC Interface PCB .............................................................................................. 4-19
Speaker ................................................................................................................... 4-20
Mon-Dock PCB ........................................................................................................ 4-21
Battery Door for Option A ................................................................................ 4-22
Connector Board PCB ......................................................................................... 4-23
Replace the Battery Contact PCB .................................................................. 4-24
Replace and Align the Module Door .............................................................. 4-25
Handle ....................................................................................................................... 4-26
Reinstall the Rear Handle Assembly .............................................................. 4-26
Fan ............................................................................................................................. 4-27
Install or Replace the Optional Recorder Assembly ................................ 4-28
To install the recorder......................................................................................... 4-28
To replace the recorder ..................................................................................... 4-29

91390 QUBE
www.spacelabshealthcare.com I-III
Insert Recorder Paper ......................................................................................... 4-29
To insert a roll of paper...................................................................................... 4-29
Dock Connector Covers for Option A ........................................................... 4-29
Removal of Pod Interface PCBA for Options A and B ........................... 4-30
Reinstallation of the Pod Interface PCBA ................................................... 4-30
Docking Station PCBA Replacement Procedures for Option A ................ 4-31
Required Tools and Parts ................................................................................... 4-31
Docking Station ...................................................................................................... 4-31
Replace the Docking Station Latch ................................................................ 4-33
Replace the Docking Station Push Button .................................................. 4-34
Cleaning .......................................................................................................................... 4-35
5Troubleshooting
Overview............................................................................................................................. 5-1
Required Tools and Parts ..................................................................................... 5-2
System Startup................................................................................................................ 5-2
System ........................................................................................................................ 5-3
Power-ON Diagnostics................................................................................................. 5-3
Boot Menu.........................................................................................................................5-4
To access the Boot menu if the display is functional ................................ 5-4
Boot Parameters ..................................................................................................... 5-6
Extended Diagnostics................................................................................................... 5-7
Diagnostic Menus ........................................................................................................... 5-8
Main Diagnostic Menu ........................................................................................... 5-8
Individual Diagnostic Menu ................................................................................. 5-9
Memory Menu ......................................................................................................... 5-10
Video Menu ............................................................................................................... 5-11
Error Log............................................................................................................................5-11
View the Error Log ................................................................................................ 5-12
Diagnostics Failure Messages and Error Codes ............................................... 5-14
System Troubleshooting ............................................................................................5-16
Suggested Tools/Test Equipment ................................................................... 5-16
Qube Monitor Does Not Power ON ................................................................. 5-17
Qube Monitor Powers ON, But Fails System Startup ............................... 5-19
High-pitched Tones Heard from the qube Monitor and
No Display is Present ............................................................................................ 5-21
System Software Failure Window Shown
Immediately After System Startup ................................................................. 5-22
Monitor Fails Power-ON Diagnostics ............................................................. 5-23
Troubleshooting Method 1: Use the Touchscreen or Mouse ..................5-23
Troubleshooting Method 2: Use the Remote Terminal—Use When
No Display is Present .............................................................................................5-23
Monitor Fails System Functions ...................................................................... 5-24
Batteries/ Battery Charger ..................................................................................5-24
Touchscreen .............................................................................................................5-24
Module does not sign on when installed in an
external module housing .....................................................................................5-24
Module does not sign on when installed
in the monitor for options A and B ..................................................................5-25
Pod does not sign on ......................................................................................... 5-26
Module signs on but parameters do not function ................................... 5-26
Ethernet ................................................................................................................... 5-26
External Alarm Relay for Option A ................................................................. 5-27
Keyboard, Mouse, or Barcode Scanner ......................................................... 5-27
Touchscreen ........................................................................................................... 5-27
Ethernet/Network ................................................................................................ 5-28
External Alarm Relay/Nurse Alert for Option A ........................................ 5-28

91390 QUBE
www.spacelabshealthcare.com
I-IV
Keyboard, Mouse, or Barcode Scanner ......................................................... 5-29
6Parts
Overview............................................................................................................................. 6-1
Parts List ............................................................................................................................ 6-2
Option A .................................................................................................................... 6-2
Option B ..................................................................................................................... 6-4
Option C ..................................................................................................................... 6-7
Assembly Drawings and Schematics.................................................................... 6-10
7 Glossary
A Appendix A — Electromagnetic Compatibility
Electromagnetic Emissions .........................................................................................A-1
Electromagnetic Immunity .........................................................................................A-2
Separation Distances ................................................................................................... A-3
Mitigation ................................................................................................................... A-4
B Appendix B — Symbols

www.spacelabshealthcare.com 1-1
91390 QUBE
Introduction
Overview
Spacelabs Healthcare designs and manufacturers its products under
good manufacturing practices and in compliance with all applicable
regulatory requirements. To make sure that the product operates
correctly in accordance with these guidelines, trained technicians
using Spacelabs Healthcare authorized replacement parts maintain
this product.
The expected service life of the monitor is seven years from the date
of installation, but its service life can be extended. Many of the
monitor parts are replaceable. Calibration is not required, but
routine safety checks are required. Install a functional battery in the
unit for normal operation. Check the battery periodically and replace
it when necessary.
The qube™ monitor has a 26.2 cm (12.1 inches) LCD display with 1024
x 768 resolution. It has an intuitive user interface and a stylish,
compact design. The monitor includes a single module slot and
supports up to three Flexports® and four USB devices (a mouse,
keyboard, barcode scanner, etc.). Available options include an
integrated recorder and 802.11a/b/g wireless. Dual-battery slots
allow for its use as a transport monitor, as well as at the bedside.
The system has an improved performance and high-resolution LCD
display system. The touchscreen has built-in alarm lights, LED status
indicators (to show the power and battery state), and a power ON/
OFF switch.

www.spacelabshealthcare.com
1-2
91390 QUBE INTRODUCTION
Figure 1-1 91390 qube monitor configuration options
aqube with both printer and battery slots (option A)
bqube with only printer slot (option B)
cqube with no printer or battery slots (option C)
Note:
For more details refer to Table 1-1 on page 4.
Warnings, Cautions, and Notes
Warnings, cautions, and notes are used throughout this manual. The
formats below show how warning, cautions, and notes are identified.
Note:
Failure to observe notifications can result in unexpected
outcomes.
A
B C
Warning:
Alerts the user to potentially serious outcomes (death, injury, or serious
adverse events) to the patient or user.
Caution:
Alerts the user to actions to be taken to avoid non-serious injury to the
patient or user, or to adverse effects to the device.

www.spacelabshealthcare.com 1-3
91390 QUBE INTRODUCTION
Product Specifications
Refer to Basic Components on page 1-9 for more information.
* May not be included in the qube configuration option package.
For more details on configuration options, refer to Qube
Configuration Options on page 1-4.
Product Specifications
Physical Dimensions
Height 26.2 cm 10.3 inches
Width 31.5 cm 12.4 inches
Depth 13.2 cm 5.2 inches
Weight 4.1 kg 9 lbs
Display
Color thin film transistor (TFT) liquid crystal display (LCD), resistive touchscreen
Resolution 1024 x 768 pixels
Size- wide
- high
24.6 cm
18.4 cm 9.7 inches
7.3 i nch e s
Printer
Printing Method*Thermal array print head
Paper Heat-sensitive paper roll, 50 mm wide x 30 m long
Resolution Eight dots per mm (vertical) and 32 dots per mm
(horizontal) at 25 mm per second sweep speed
Prints Manual and automatic alarm recordings for waveforms,
vital sign data, trends, calculations, and full annotations
are included
Controls Continuous, Stop Recording, Compressed, Paper Advance
Indicators Paper out, Unit off
Sweep Speed Various speeds are available under module control.

www.spacelabshealthcare.com
1-4
91390 QUBE INTRODUCTION
Table 1-1 Qube Configuration Options
Connectors
Internal Recorder Slot 1 on right panel 1 on right panel not included
Front Integrated Alarm Light 1 on top, front, and back of
display 1 on front of display not included
Docking Station connection included not included not included
Integrated or Hot Swappable
Battery Slot
2 Lithium-Ion (Li-Ion), right
side below printer slot 2 Lithium-Ion (Li-Ion), fixed
non-removable 1 Lithium-Ion (Li-Ion), fixed
non-removable
Equipotential Terminal 1 on rear panel not included not included
DC Power Input 1 on rear panel 1 on rear panel 1 on rear panel
Ethernet 10/100 Base T
Connection
1 on rear panel 1 on rear panel 1 on rear panel
Serial Port 1 on rear panel 1 on rear panel 1 on rear panel
USB Ports 4 on rear panel 2 on rear panel 2 on rear panel
Video Output, DVI-D 1 on rear panel 1 on rear panel 1 on rear panel
SDLC Port 1 on rear panel 1 on rear panel 1 on rear panel
Remote Alarm Output-Nurse
Alert
1 on rear panel not included not included
Module Slot 1 on left panel 1 on left panel 1 on left panel
POD Connection 1 on rear panel 1 on rear panel not included
Power On/Off Button on right side of display on right side of display on right side of display
A
B
C

www.spacelabshealthcare.com 1-5
91390 QUBE INTRODUCTION
Electrical Specifications
Classification
• Class I - Requires outlet with Protective Earth (safety ground)
conductor
• Mains Power: 100 - 240 VAC, 50 - 60 Hz, 3 - 1.5 A
• Rated for continuous operation
• Isolation: Leakage currents meet ANSI/AAMI ES 60601-1, CSA
C22.2 No. 60601-1, and IEC 60601-1.
• Batteries: (For configuration options, refer to Qube
Configuration Options on page 1-4).
1 10.8 Volt (7.2-Ah Li-ion) smart battery. One battery
provides approximately 4 hours of operation. Two
batteries allow up to approximately 8 hours of operation.
There are approximately 300 charge/discharge cycles of
operation for each battery.
2 10.8 Volt (4.8-Ah Li-ion) smart battery. One battery
provides approximately 2 hours of operation. Two
batteries allow up to approximately 4 hours of operation.
There are approximately 300 charge/discharge cycles of
operation for each battery.
3 10.8 Volt (4.8-Ah Li-ion) smart battery. One battery
provides approximately 2 hours of operation. There are
approximately 300 charge/discharge cycles of operation
for each battery.
Note:
One battery charges in approximately two hours. Two batteries
charge in approximately four hours.
Warning:
• Use designated power supply only.
• Do not modify this equipment without the authorization of the
manufacturer.
• To avoid electric shock, connect this equipment only to a supply mains
with a protective earth conductor.

www.spacelabshealthcare.com
1-6
91390 QUBE INTRODUCTION
Environmental Requirements
Transport and Storage
Temperature: -25º to 60º C (-13º to 140º F)
Humidity: 95% (non-condensing)
Altitude: 0 to 12,192 meters (0 to 40,000 feet)
Operating
Operating Temperature: 0º to 40º C (32º to 104º F)
Humidity: 95% (non-condensing)
Altitude: 0 to 4,572 meters (0 to 15,000 feet)
Expected Service Life
The expected service life is seven years from the date of first use.
Spacelabs Healthcare recommends regular replacement of the
following parts to extend service life:
•LCD
• LCD backlights
• batteries
•fan
Replace the listed items especially if you use them beyond the
service life range. Perform safety checks and maintenance of the
monitor on regular schedules. Spacelabs Healthcare offers a
refurbishment program for equipment that has passed its expected
service life. Contact your local service representative for more
information.
To protect the environment, properly dispose of all
batteries, electronic assemblies, plastics, and metals.
Follow your internal procedures or local (provincial)
laws regarding disposal or recycling.

www.spacelabshealthcare.com 1-7
91390 QUBE INTRODUCTION
Monitor Options
Product Overview
Monitor Assembly and Module Housing
The monitor is a portable product that provides physical mounting,
electrical connection, and power for a plug-in module. It also
provides power and SDLC I/O for externally connected flexports
and other devices. The monitor provides interfaces for:
• internal and optional external displays
• connections for a mouse, keyboard, barcode reader using USB
• remote control through IR remote control: option A
(SL number 90360-01)
• the required video signals for an external display
A separate external power supply powers the monitor. All voltage
conversion that is required to support the modules and the internal
electronics is provided inside the product. Provisions are provided
for detection of an AC line failure to provide for an orderly power
off.
Table 1-2 91390 Monitor Options
Option Definition
DPerioperative: provides customizable, user-specific display
setups and start case and end case functions
NVital Signs Calculations (Hemodynamics, Oxygenation,
Ventilation, and Renal)
QData Shuttle®supports the transfer for up to 96 hours of trend
information
RPatient Data Logger (PDL); presents an ASCII data stream of
patient name and vital sign data to the serial port in a pre-
defined format
SDynamic Network Access (DNA); Spacelabs Healthcare
proprietary version of the Citrix ICA Client connects and
interacts with remote applications hosted on Citrix servers.
Citrix server software and other associated licenses and
applications must be purchased separately.
UPrinter; one printer slot, refer to the product specifications
section for details
VFull View; supports simultaneous display of 12 ECG leads
WFull Bed Review; provides a multi-parameter view for any
monitored patient on the network (up to seven waveforms)
XWireless; 802.11a/b/g

www.spacelabshealthcare.com
1-8
91390 QUBE INTRODUCTION
External AC Power Supply
The external AC supply that powers the monitor meets worldwide
safety and EMC requirements. The external AC supply provides
20 VDC. The external AC supply provides 20 VDC at 4.5 Amps. The
external power supply (an AC/DC converter) has a 6pin rectangular
connector (P/N 119-0552-00).
Batteries
The option A monitor accommodates the use of two removable
internal batteries. At least one battery must be installed for normal
operation.
The option B monitor has two fixed (non-removable) batteries. The
option C monitor has one fixed (non-removable) battery.
For more information, refer to Batteries and Recharging Batteries on
page 1-14.
Display
LCD Display
For options A and B, the LCD display assembly provides multicolor
visual alarm notification based on the severity of the alarm. The
software controls the operation of the alarm lights. There is a red
light for high priority, a yellow light for medium priority, and a cyan
light for low priority and technical alarms.
The alarm lights are visible directly above the display screen on
options A and B, and on the rear of the monitor above the handle on
option A.
Video Subsystem
The primary display is a 12.1-inch color TFT LCD. The video interface
is 24-bit Flat Panel Display Link (FPD-Link) using LVDS.
The display has an LED backlight supplied with 12-volt power. A
PWM control signal controls the brightness of the LED backlight.
The power supply microcontroller generates the PWM control signal
under the direction of the host application.
The secondary display is an external monitor compatible with
standard Digital Visual Interface (DVI) signaling. The interface is
DVI-D which supports digital-only, single-link.
The secondary display has the same image and resolution as the
primary display.

www.spacelabshealthcare.com 1-9
91390 QUBE INTRODUCTION
• Resolution 1024 x 768
• Active Lines 768
• Active Pixels 1024
Basic Components
Figure 1-2 Front and Right Side of the Qube Option A
Table 1-3 Display Specifications
Parameter Minimum Typical Maximum Unit Remarks
Video Clock Rate 60.0 15.385 68.0 nS 65-MHz typ.
Horizontal Rate 19.67 20.676 22.4 uS 48.363-KHz typ.
Vertical Rate 13.3 16.666 18.5 mS 60-Hz typ.
1
2b
2a
33
4
Callout
Number Description Symbol
1 Power On/Off Button-Press and hold the
power button for at least three seconds to turn
the monitor off. System shutdown progress is
shown below the green power symbol.
Note:
Hold the power On/Off for 3 seconds,
or the monitor will not power off. Figure 1-3 System shutdown
progress

www.spacelabshealthcare.com
1-10
91390 QUBE INTRODUCTION
* Not all of the qube configuration options include these items.
For more details, refer to Qube Configuration Options on
page 1-4.
Battery Indicators
Notes:
• The battery provides power to the monitor when it is
separated from the AC power.
• Batteries charge when the monitor is connected to the AC
power.
• The monitor auto-switches to battery operation when
separated from the AC power.
• Remove batteries if the monitor is not likely to be used for
some time.
• Remove batteries from the monitor before storage or
shipment.
2a Integrated Battery Slot closed* Refer to To change batteries
without interruptions while
operating on battery power on
page 1-15 for details.
2b Hot Swappable Battery Slot open with battery
partially pulled out.*
Refer to To change batteries
without interruptions while
operating on battery power on
page 1-15 for details.
3 Internal Recorder Slot* N/A
4 Front Integrated Alarm Light* N/A
Callout
Number Description Symbol
Warning:
At least one battery should always be installed in the monitor. The
battery is a critical component of the electrical system. It improves EMC
immunity performance when the monitor is connected to the AC power.

www.spacelabshealthcare.com 1-11
91390 QUBE INTRODUCTION
Figure 1-4 Battery charger and AC/DC power indicators
2
1
Table 1-4 Power Indicators (only shown when AC is connected)
Description Symbol on panel
1AC/DC Power Indicator - External power supply is connected
to the monitor and the AC mains. When the AC power
indicator comes on, the connection is good.
Refer to Figure 1-4.
2 Battery Charge Status Indicator-
Shown if a battery is present. The left light shows if the top
battery is installed. The right light shows if the bottom
battery is installed.
Flashing (rate of 1 second on and 1 second off) shows the
battery is charging.
Steady ON shows the battery is charged.
Flashing, rapid or erratic shows the battery is faulty and must
be replaced.
Refer to Figure 1-4.
Note:
The option C monitor has one battery, so only one
battery charge indicator shows.

www.spacelabshealthcare.com
1-12
91390 QUBE INTRODUCTION
Figure 1-5 Back Panel of Qube*
1
12
11
2
10
98 7 66 5 4 3
Description Symbol on panel
1 Integrated Alarm Light*N/A
2 POD Connection such as Capnography Pod.* N/A
3 Remote Alarm Output - Nurse Alert*
Refer to Alarm Relay for option A on page 2-15 for
details.
4 SDLC Ports
Refer to SDLC Bus Termination on page 2-15 for details.
5 Video Output, DVI-D
Digital only
6 USB Ports
qty= 4 for option A
qty= 2 for options B and C
7 Serial Port
8 Ethernet 10/100 Base T Connection
9 DC Power Input
119-0552-00
10 Equipotential Terminal*
used for grounding the monitor

www.spacelabshealthcare.com 1-13
91390 QUBE INTRODUCTION
* Not all of the qube configuration options include these items.
For more details, refer to Qube Configuration Options on
page 1-4.
Energy Saving Mode (Battery)
The qube has an energy saving mode. Energy saving mode lets the
monitor dim after 30 seconds of no interaction. If you enable this
mode, do not touch the monitor for 30 seconds to see it dim. The
monitor does not dim if you use a mouse with the monitor or an
alarm event occurs. Refer to the XPREZZON and qube System
Administration Manual (P/N 070-2380-xx) for more details.
Signal Strength Indicator
Monitors equipped with option X (an embedded 802.11a/b/g
transceiver) are labeled at the factory. A separate label is provided
with the option X kit for field installation (Refer to Figure 1-6).
Figure 1-6 P/N 334-6134-01, LABEL,MOD,S/
N,OPT,REG,WIRELESS,91390
11 75 mm VESA Mounting Pattern N/A
12 Handle N/A
Description Symbol on panel
Caution:
The only other indication for the presence of option X is the wireless field
strength icon that shows when the ethernet cable is removed and the
wireless option is enabled (Refer to Figure 1-7).

www.spacelabshealthcare.com
1-14
91390 QUBE INTRODUCTION
Monitors with wireless network communication show a wireless
signal strength indicator while they communicate over the wireless
network. To use the wireless feature, disconnect the wired network
connector. Not all qube monitors include the wireless option.
The wireless signal strength shows between the Admit Patient
button and alarm buttons. The signal strength shows a green
antenna with vertical bars on a black background. The number of
bars show the strength level. One bar is low strength. The strongest
signal is five bars. The signal changes to yellow when the network
connection is lost. For more information, refer to the XPREZZON and
qube System Administration Manual (P/N 070-2380-xx).
Figure 1-7 Wireless signal strength indication
Batteries and Recharging Batteries
For option A, the monitor uses smart batteries, and at least one
battery must be installed for normal operations. If it uses two fully
charged batteries in a standard configuration, the monitor operates
up to eight (8) hours. With one fully-charged battery in a standard
configuration, the monitor operates up to four (4) hours.
The battery icon shows if the batteries are inserted. This icon shows
how much charge the batteries have. The icon updates every six
seconds and is to the left of the audio icon on the lower-right
section of the monitor. Refer to Table 1-5 on page 1-15.
Charge temperature limits are ≤80% RH.
The battery must be capable of continuous charge at 12.6 V. To
charge the battery, only use a dedicated level II or level III smart
battery charger. When you use a level II or level III smart battery
charger, the battery requests the appropriate charging voltage and
current.
The FULLY_CHARGED bit in the Battery Status is set when the
charging current tapers down to under 240 µA, while charging at
12.6 V.
Notes:
• The battery life greatly depends on usage, age, and the
environment. The battery operating life decreases over time.
Caution:
Signal strength and radio system congestion can contribute to waveform
gaps over the wireless network. Should this be a persistent issue, consult
with a Spacelabs Healthcare field service representative.
Table of contents
Other Spacelabs Measuring Instrument manuals
