Spectrum Technologies WatchDog 3450 User manual

Cellular Alert
(Standard Version)
PRODUCT MANUAL
Item #3450, #3450H,
#3450W, #3450P120/24/12
®

2
This manual will familiarize you with the features and operation of
your new WatchDog Cellular Alert. Please read this manual
thoroughly before using your instrument. For customer support, or
to place an order, call Spectrum Technologies, Inc. at 800-248-
8873 or 815-436-4440 between 7:30 am and 5:30 p.m. CST,
FAX at 815-436-4460, or E-Mail at info@specmeters.com.
www.specmeters.com
Spectrum Technologies, Inc
12360 S Industrial Dr . East
Plainfield, IL 60585
CONTENTS
General Overview 3
Specifications 4
Standard Model Setup 5
Programming the Control Panel 10
Output Relay Function Setup 12
LED Light Definition 13
Installation 13
Warranty 16
Repositioning Actuator Arm 15
Important Cell Phone Information 4
Contents 3
Sensor Setup 9
Power Alert Installation 14

3
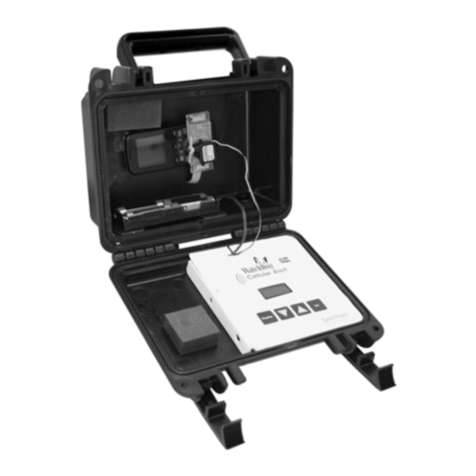
Thank you for purchasing a WatchDog Cellular Alert.
This manual describes how to use your WatchDog Cellular Alert (Model
#3450, #3450H, #3450W, #3450P) and keep it working accurately for
many years.
This manual will describe how to use the standard version which is
used with a cell phone.
Features:
• Control Panel with key pad for user control
• LCD display
• Relay terminal connections to control an external device
• NEMA 4 (IP66) enclosure
• LED light with red and green indicators
• Presses the phone button to make a voice call
Note: Requires user-provided basic cell phone (flip phone or flat phone;
not a touch-screen Smart Phone) (not included)
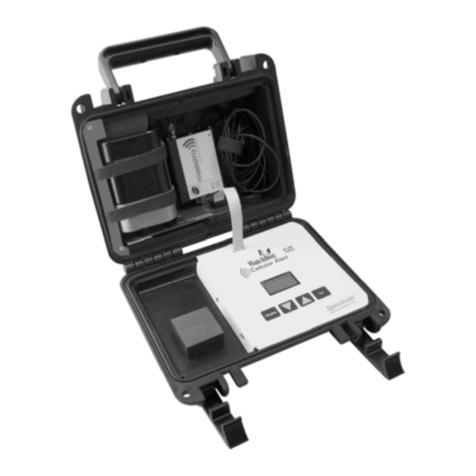
• Cellular Alert Enclosure with cell phone dialer, relay switch, and
mounting components
• Control Panel with LCD display
• External Sensor
• U-Bolt (used for mounting)
• Battery Compartment
General Overview
3450 Temperature Sensor with 6 ft (2m) cable
3450H Humidity sensor with radiation shield and mounting bracket
3450W Water Sensor with 6 ft (2m) cable (Item #3666 Leaf Wetness)
3450P12 12V Power Sensor Relay with cable
3450P24 24V Power Sensor Relay with cable
3450P120 120V Power Sensor Relay with cable
CONTENTS

4
Specifications
Hard Case with Handle—8 3/4” x 7” x 4” deep
Relay Specifications: Internal relay 250 V, 1 Amp AC or DC
Maximum switching power 60 W or 60 VA.
Operating Temperature Range: Limited by the batteries being used.
Most Alkaline batteries have a recommended operating range of -.4°F
to 131°F (-18°C to 55°C)
Uses 4-AA batteries (not included) to power the electronic controls and
display (but not the cell phone)
If a prepay phone is running low on funds, the alert phone call might be
intercepted by the low funds notification.
On prepaid accounts, some carriers send a text message or voice call
after the first call of the day. Be sure to test how your service works.
If your phone supports it, the speed dial option is preferable to the re-
dial option. Redial calls the last number dialed or the last number that
called the phone. This may cause it to dial an incorrect number.
Speed dial will always call the pre-programmed number.
Important cell phone information
Temperature Range -40° to 140°F (-40° to 60°C)
Accuracy ±1.1ºF (±0.6°C) at -4 to 122°F (-20 to 50°
C), else ±2.2°F (±1.2°C)
Humidity Range 0% - 100%
Water Range 0 (dry) to 15 (wet), typical threshold level
for irrigation events is 5.00

5
The standard model is designed to dial a pre-programmed number or
the last dialed number on the cell phone (not included). Please refer to
your phone manual to setup the number to be dialed.
Phone Setup —To view setup video, visit www.specmeters.com
Position mounting plate on phone to determine which slots on either
end should be used for weaving the tie strap. The rough side of the
mounting plate should be facing up.
See figure 1.
The smooth side (back) of the mounting
plate has an indentation, so when it is
sitting on top of the phone buttons it will
not touch them. To test if the mounting
plate is in the proper place, press on
the sides of the plate to ensure the
phone is not activated. If the phone
does light up, then reposition the
mounting plate over the phone buttons.
Weave tie strap through the mounting plate slots that are closest to the
phone and then through the hole in the strap itself. See figure 2.
Put extra piece of Velcro (fuzzy strip)
on back of phone so the tie strap can
adhere to it and secure mounting
plate in place.
If it is difficult to attach the mounting
plate without it contacting the buttons
then contact Spectrum Technical
Support for suggestions and solu-
tions.
Standard Model Setup
Figure 1
Figure 2

6
Secure mounting plate to phone. See figures 3 and 4.
The secure mounting plate should resemble the following picture.
Again ensure the plate is in the correct position by pressing on the
sides of the mounting plate and verifying the mounting plate is not
pressing on the buttons.
There
should be a 1/16th inch gap between the mounting plate and the ‘talk’
TALK
Speed
Dial
Figure 3 Figure 4

7
Installation and
Placement
Attach the actuator to the mounting plate so the arm lines up with
the ‘talk’ or speed dial button. The actuator should snap onto
the mounting plate. Test that the actuator is lined up properly by
pushing down the arm gently and having it touch the button. This
will not harm the arm.
Plug the actuator cable into the
actuator power cable that is
attached to the control panel.
A set-up instruction video can be
found on www.SpecMeters.com.
Actuator Lined Up
for Talk Button Actuator Lined Up
for Speed Dial

8
Battery Setup
Place the batteries into the battery pack. Once the batteries are
in properly, the LCD display will turn on (for 30 seconds and turn
off automatically). The firmware version number will appear on
the LCD display when the module is first activated.
Testing Actuator
After plugging the actuator cables together, test the actuator by
pressing the DISPLAY button on the control panel until it reads
‘TEST’. Press the SET button. The actuator will rotate, press
the button and initiate the dialing of the phone.
NOTE:
If the actuator arm is not positioned so that its able to press
the button, follow directions on page 14 to reposition the ac-
tuator arm.
The second piece of Velcro
can be used to attach the
phone into the bottom of the
case.
Remove the protective cover
from the Velcro and stick to
the back of the phone, posi-
tion the phone in the case,
and stick it down. Allow a few
minutes for the adhesive to
stick to the case before re-
moving the phone.

9
Sensor setup
Sensor Setup for Temperature, Water, and Humidity
Run the sensor plug into the case through the gland nut. Pass
the cable through the cable hook on the panel. Using the cable
hook keeps the wire from tangling with the dialer mechanism.
Tighten the gland nut once the cable is positioned.
Plug the sensor into the sensor port on the side of the control
panel. Place the sensor where you want to measure.
Power Alert Setup
See the Power Alert Installation (page 14).
WIRE HOOK

10
Programming the
Control Panel
Pressing the DISPLAY button will activate the LCD. When the LCD is
on, the DISPLAY button is used to scroll through the various modes.
These modes are Off, Test, Setup, Run. Once the desired mode is
displayed, select it by pressing the SET button.
Off Mode—Turns the cellular alert off—Cancels Run Mode.
Test Mode—Used to test the alert function. When the Test Mode is
chosen, it will attempt to initiate the chosen alert action(s).
Setup Mode— Used to set the type of sensor, limits for the alert and
the type of alert desired. One sensor at a time can be attached to the
alert. The Setup mode involves moving through a sequence of different
levels to define each option. The arrow buttons are used to scroll
through options, the Set button is used to select options, and the
Display button is to move back to the previous level. The first level of
options is 'Sensor', 'Limit', and 'Alert'. Details about each option are
given below. The default programming sequence is to select the
Sensor type, then the threshold Limit, and finally the Alert type.
However, it is possible to skip straight to the Limit or Alert options from
the initial Setup Mode screen. Use the arrow button to scroll to the
desired option and select it by pressing the SET button.
Sensor— In sensor setup mode, the choices are: Temperature
in Fahrenheit, Temperature in Celsius, Humidity, Wetness, and
Voltage. Use the up and down arrows to scroll through the
choices. Once the desired sensor is displayed, select it by
pressing the SET button. The display will switch to Limit mode.
Press SET again to enter Limit setup mode.
Limit— The Alert will monitor if the sensor value crosses above
or below an adjustable threshold. Select Above or Below using
the up and down arrow buttons. Press SET to select your
choice. The display will then allow you to set the threshold
value. Use the arrow buttons to change the value. Save the
value by pressing the SET button. For a fast scroll, hold the
SET button down. For the power unit, set the sensor type to
Voltage and the Limit to 1.0 Below.

11
Alert— There are three alert choices:
REDIAL will trigger the actuator to press the button on the
phone three times to make the call.
SPD DIAL will trigger the actuator arm to press the button on
the phone once (holding it for 3 seconds) to make the call.
(Based on the type of phone that is being used, one, two or
three presses of the talk or speed dial button will result in the
phone call).
RELAY is only used to trigger a switch that will perform an ac-
tion such as sound a horn, turn on a fan, or turn on an irrigation
system. It will not trigger the actuator to make a call. (See Re-
lay Function Setup on page 12) All three Alert devices will acti-
vate the relay.
Once the threshold has been crossed for 30 seconds, the alert
action will be triggered. If the sensor value returns into the ac-
ceptable range for 30 seconds the unit will be reset. The Cellu-
lar Alert will then initiate another alert action if the threshold is
re-crossed. An alarm will also be generated if the meter does
not detect the sensor.
Run Mode— If the Cell Alert is not actively monitoring the sensor, the
Run Mode screen will display the text "Push SET". Press the Set but-
ton to start monitoring. When the unit is in monitoring mode, the LCD
screen will display the current reading from the sensor. This reading is
updated every 5 seconds. You should verify the sensor is reading an
accurate value. Pressing the SET button will turn off the display screen
but will not de-activate monitoring. To deactivate monitoring, press the
Display button to transition to the OFF option. Press the SET button to
turn off the device and deactivate monitoring.
Tip: If you have multiple cellular alerts, you might want to program
the phone you are calling to identify the Alert number. For ex-
ample, phone # 815-436-4440 could be given the name
‘North40’.
Important: If the receiving cell phone has a keyboard lock, this may
require a special key combination to be pressed after the
phone turns off the display. Make sure this function is turned
off or the actuator will not be able to make a call.

12
Output Relay Function
SETUP
The Cellular Alert has a relay that may be used to trigger an ac-
tion such as turning on a fan or turning on an irrigation system.
This action will be triggered when the sensor crosses above or
below the threshold that was determined when programming the
control panel.
The internal relay is limited to 250 V, 1 Amp AC or DC. Higher
voltage or current than this will require an interface relay. The
maximum switching power is 60 W or 60 VA.
The terminal block for the
relay appears to the right of
the WatchDog logo on the
control panel. It contains
three wire terminals,
NO—NormallyOpen
COM—Common
NC—Normally Closed.
To insert the wires, press on the white button and insert the wire
into the corresponding terminal. Release the button when the
wire is in place to lock it. To avoid shorting, ensure that no
bare wire is exposed above the terminal block.

13
LED Light Definition
Light Pattern Mode
Short green flash each 5 sec-
onds Run mode, sensor in normal
range
Short green flash, followed im-
mediately by short yellow flash
each 5 seconds
Run mode, sensor in normal
range, battery low
Short red flash each second Run mode, sensor beyond limit
Short red flash, followed imme-
diately by short yellow flash
each 5 seconds
Run mode, sensor beyond limit,
battery low
Short red and green flash each
second Run mode, sensor beyond limit,
alarm active
A U bolt is included with each Alert. Using the U bolt , attach it to the
handle of the case. The case can then be attached to a pole.
In frost alert mode (Item #3450), the Cellular Alert should be installed
in the area that is most likely to have the first frost. The temperature
sensor should be at least three inches from the ground for an accurate
temperature.
In humidity mode (Item #3450H), the sensor
should be placed in an area that gives a rep-
resentative reading. The sensor and radiation
shield should also be attached to the pole us-
ing the bracket supplied.
In water mode (Item #3420W), the sensor
should be placed in a furrow. Take care that
the sensor grid is not touching the soil. Con-
tact with damp soil could trigger the alert con-
dition.
There is an LED light that shows through the outside of the case. The
light indicates what mode the cellular alert is in. The following chart
shows the patterns:
Installation

14
Power Alert Installation
Feed the power cord through the gland.
Plug the sensor cord into the sensor
port. Adjust the relay/housing to fit in
the case. Tighten the gland nut.
Close the case.
Plug (P120) or wire (P24, P12) the
power cord into the circuit you want to
monitor. For setup limit, set the volt-
age limit to alert below 1 Volt.
Insert Relay/ Housing Here
Sensor Port
The P120 (120VAC) model includes a
protective housing for the sensor relay.
Once fed through the gland, the power
cord must be connected to the sensor
relay.
Open the protective housing (using a
Phillips screwdriver, not included).
Plug the two power wires onto the A and B
spades on the relay.
Place the relay into the
protective housing. Reas-
semble the protective
housing using the 4
screws.

15
Repositioning
Actuator Arm
Is, after assembling the actuator to the phone, the arm does not rotate
enough to depress the phone button, the arm should be repositioned on
the actuator hub.
Note the position of the actuator after Test mode has been used.
Disassemble the arm from the actuator by removing the center screw
and pulling the arm off. Note the hub has ‘teeth’ that hold the actuator in
position.
Reassemble the arm by repositioning the arm rotated clockwise one
tooth.
Reassemble the actuator assembly to the phone and re-test.

16
Warr anty
12360 S. Industrial Dr. E
Plainfield IL 60585
(800) 248-8873 or (815) 436-4440
Fax (815) 436-4460
www.specmeters.com
This product is warranted to be free from defects in material or work-
manship for one year from the date of purchase. During the warranty
period Spectrum will, at its option, either repair or replace products that
prove to be defective. This warranty does not cover damage due to
improper installation or use, lightning, negligence, accident, or unau-
thorized modifications, or to incidental or consequential damages be-
yond the Spectrum product. Before returning a failed unit, you must
obtain a Returned Materials Authorization (RMA) from Spec-
trum. Spectrum is not responsible for any package that is returned
without a valid RMA number or for the loss of the package by any ship-
ping company.
Rev. 8/12
This manual suits for next models
5
Table of contents
Other Spectrum Technologies Security System manuals
Popular Security System manuals by other brands

Listen
Listen LA-490 user manual
Risco
Risco LightSYS Installation and programming manual
M-system
M-system AS4V instruction manual

XCESS
XCESS SX 3 Installation & operation instructions
KRAMBLE INDUSTRIES
KRAMBLE INDUSTRIES 6 Series Installation and operating manual

Bosch
Bosch APC-AMC2-4W installation manual
