Spitzer LIGHTING PARKING LOT LIGHT Series User manual
PARKING LOT LIGHT SERIES
PARKING LOT LIGHT 2ND GENERATION WITH PHOTOCELL
INSTALLATION MANUAL
SAFETY INFORMATION
BE SURE THE POWER IS OFF! RISK OF ELECTRICAL SHOCK: Always use the switch to power off. Do not perform
any operations while this unit is powered on. The electrical system you want to connect the device to must be
grounded. Read the instructions before using or powering this device. The safety instructions must remain with
the unit in case of transfer. Any damage to the device linked to an inappropriate use is excluded from support by
the warranty. Before connecting, make sure that the current and voltage are compatible with this device. We highly
recommend that all installations are made by QUALIFIED ELECTRICIAN. We are NOT responsible by any means for
the use or misuse of the following information. We are NOT responsible in whole or part for any harm or damage
that may or may not be caused. We reserve the right to revise the components of any product, due to part availability
or change ETL, CUL, UL standards without assuming any obligation or liability to modify any products previously
manufactured and without notice. These instructions do not cover all details of variations in equipment, nor do they
provide every possible contingency to be met. Turn off / unplug power when installing or service device.
WARNING: Read all safety precautions and installation instructions carefully before installing or servicing this
xture. Failure to comply with these instructions could result in a potentially fatal electric shock, re, and/or
property damage.
• To prevent personal injury or product damage, only licensed electricians should install
• To avoid electric shock or component damage, disconnect power before attempting installation or servicing
• This product must be installed in accordance with the national electric code (NEC) and all applicable federal, state,
and local electric codes and safety standards
• Disconnect product and allow cooling prior to servicing
• Any alteration or modification of this product is expressly forbidden as it may cause serious personal injury, death,
property damage and/or product malfunction
• To prevent product malfunction and/or electrical shock this product must be properly grounded
• This luminaire is designed to operate in ambient temperatures ranging from -22°F to 104°F and to be horizontally
mounted with the LEDs facing down
WARNING
FCC WARNING
WARNING: Changes or modications to this unit not expressly approved by the party responsible for compliance
could void the user authority to operate the equipment.
NOTES: This equipment has been tested and found to comply with the limits for a Class B digital device, pursuant to
Part 15 of the FCC Rules. These limits are designed to provide reasonable protection against harmful interference in
a residential installation. This equipment generates, uses and can radiate radio frequency energy and, if not installed
and used in accordance with the instructions, may cause harmful interference to radio communications.
However, there is no guarantee that interference will not occur in a particular installation. If this equipment does
cause harmful interference to radio or television reception, which can be determined by turning the equipment off
and on, the user is encouraged to try to correct the interference by one or more of the following measures:
•Reorient or relocate the receiving antenna.
•Increase the separation between the equipment and receiver.
•Connect the equipment into an outlet on a circuit different from that to which the receiver is connected.
•Consult the dealer or an experienced radio/TV technician for help.
PRE - INSTALLATION
•Carefully remove the fixture from the carton.
•Before beginning assembly, installation, or operation of product, make sure all parts
are present. Compare parts with package contents list and diagram on previous
page. If any part is missing or damaged, do not attempt to assemble, install or
operate the product. Contact customer service for replacement parts.
•Tools required for assembly (Not Included): screwdriver, phillips screwdriver, pliers,
electrical tape, wire cutters, safety glasses, ladder, wire stripper.
ARM MOUNT INSTALLATION (Caution: Before beginning installation turn off the circuit breaker and light switch)
PRODUCT PARAMETER
INPUT VOLTAGE 120 - 277V
DRIVER SOSEN POWER
MATERIAL ALUMINUM & PC
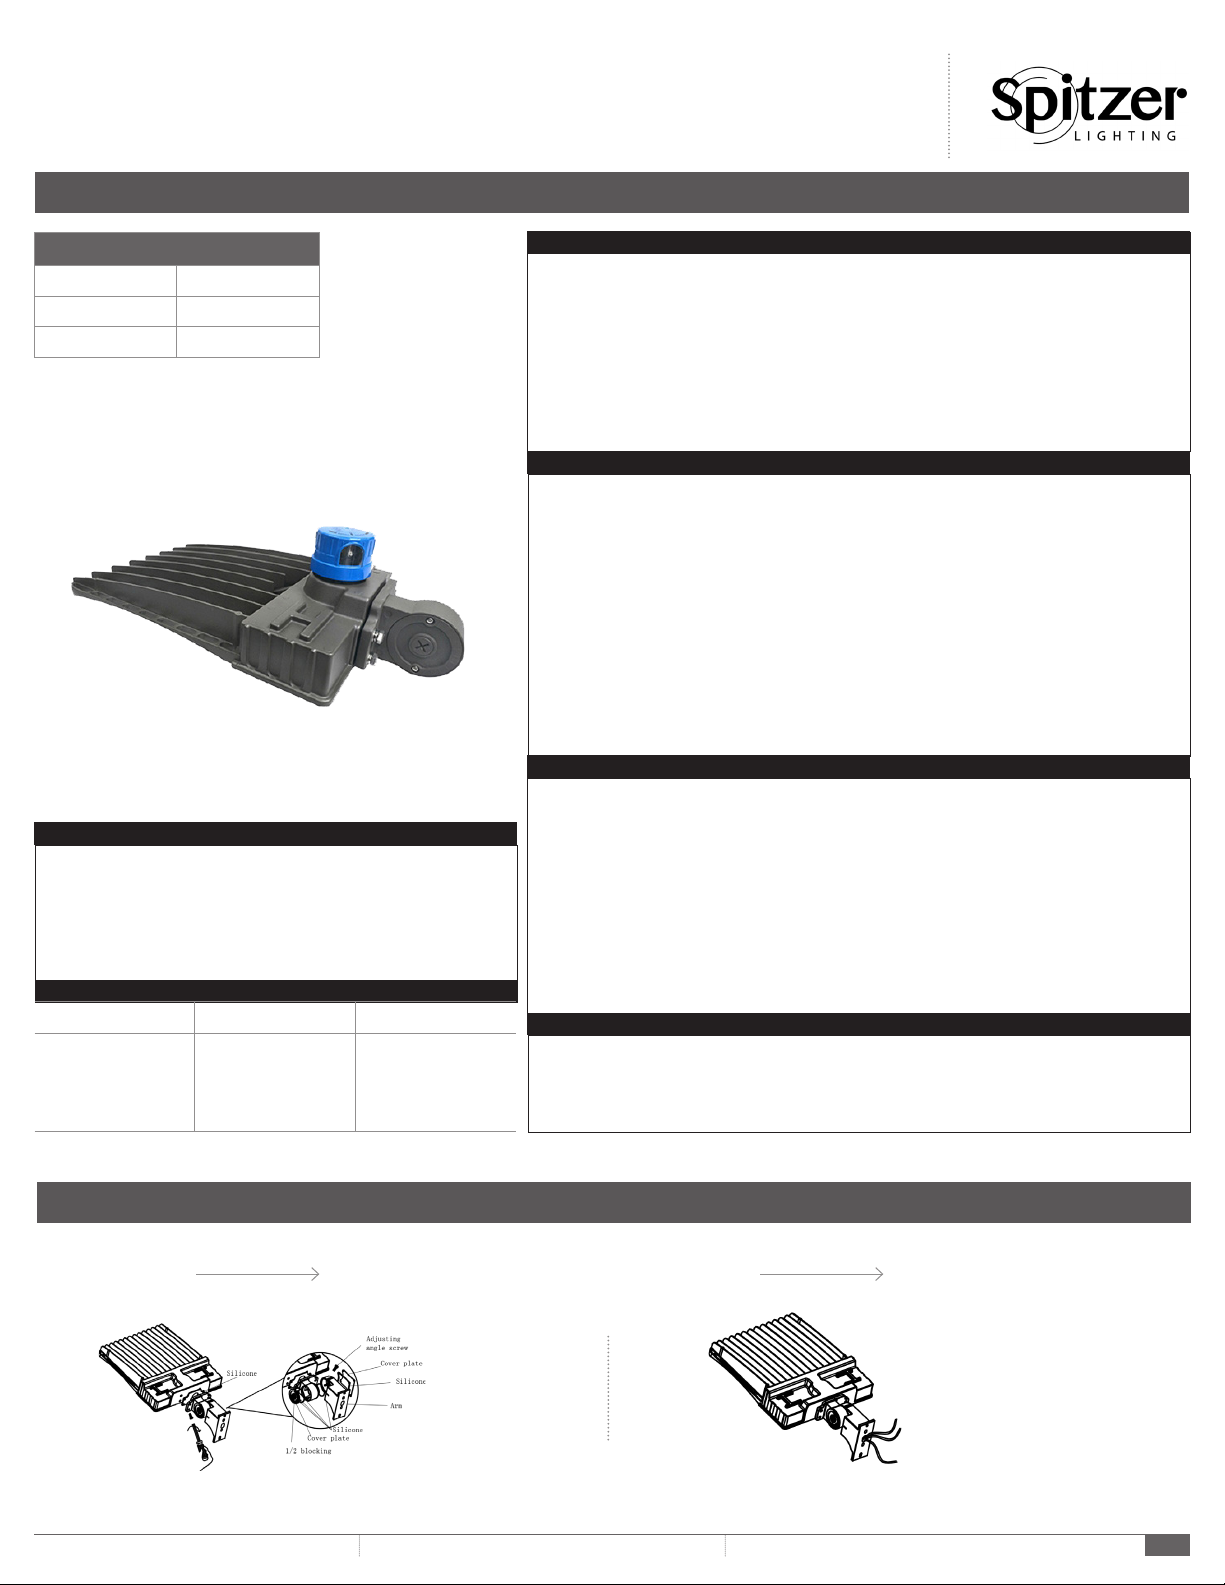
STEP 1 STEP 2
Install arm adapter onto
the lamp and tighten the
adjusting angle screw for
the axle hole.
(Shown in the photo)
Install the attachments
and tighten the screws
according to the blown up
photo.
(Shown in the photo)
www.spitzerlighting.com 702 Interchange Blvd., Newark, DE 19711 Specication is subject to change without notice 1/2
CARE AND MAINTENANCE
CAUTION: Before attempting to clean the xture, disconnect the power to the xture by turning the breaker off or
removing the fuse from the fuse box. This LED light xture is made from quality materials that will last many years
with minimum care and maintenance. You may want to clean the xture with a soft cloth periodically. To maintain
the best appearance of the xture, do not use cleaners with chemicals, solvents or harsh abrasives. Do not use
liquid cleaner on the LEDs, LED driver, or wiring inside the light xture.
TROUBLE SHOOTING
PROBLEM POSSIBLE CAUSE SOLUTION
Light will not come on A. Light switch is turned
off.
B. Fuse is blown or circuit
breaker is turned off.
C. Incorrect circuit wiring
A. Turn light switch on
B. Replace fuse or turn
circuit breaker on
C. Verify that xture is
wired properly

Install the sliptter adapter
on the Parking Lot Light 2
and x it with four screws.
(Shown in the photo)
Install the attachments
and tighten the screws
according to the blown up
photo.
STEP 1 STEP 2
PARKING LOT LIGHT SERIES
PARKING LOT LIGHT 2ND GENERATION WITH PHOTOCELL
INSTALLATION MANUAL
POLE MOUNT INSTALLATION (Caution: Before beginning installation turn off the circuit breaker and light switch)
SLIPFITTER INSTALLATION (Caution: Before beginning installation turn off the circuit breaker and light switch)
TRUNNION INSTALLATION (Caution: Before beginning installation turn off the circuit breaker and light switch)
www.spitzerlighting.com 702 Interchange Blvd., Newark, DE 19711 Specication is subject to change without notice 2/2
STEP 1
STEP 1
STEP 2
STEP 2 STEP 3
Install the pole mount
adapter on the Parking Lot
Light 2 and x it with four
screws.
(Shown in the photo)
Install the waterproof
connector and tighten it
with a wrench.
(As shown in photo)
Install the attachments
and tighten the screws
according to the blown up
photo.
Install the U-brackets to
the Parking Lot Light 2
and tighten the screws.
(As shown in photo)
Install another U-bracket
on the 1st U-bracket,
tighten the rotary screw
and the positioning angle
screw.
Pole Mount
This manual suits for next models
1
Other Spitzer LIGHTING Lighting Equipment manuals

Spitzer LIGHTING
Spitzer LIGHTING HIGH BAY Series User manual

Spitzer LIGHTING
Spitzer LIGHTING DSKL6-15WCC-M User manual

Spitzer LIGHTING
Spitzer LIGHTING DOWNLIGHT Series User manual

Spitzer LIGHTING
Spitzer LIGHTING WALL PACK Series User manual

Spitzer LIGHTING
Spitzer LIGHTING CANOPY Series User manual

Spitzer LIGHTING
Spitzer LIGHTING STR-22-25W-CCT User manual

Spitzer LIGHTING
Spitzer LIGHTING HIGH BAY Series User manual

Spitzer LIGHTING
Spitzer LIGHTING STRIP LIGHT Series User manual

Spitzer LIGHTING
Spitzer LIGHTING DSKL10-18WCC-S User manual

Spitzer LIGHTING
Spitzer LIGHTING WRAPAROUND Series User manual


