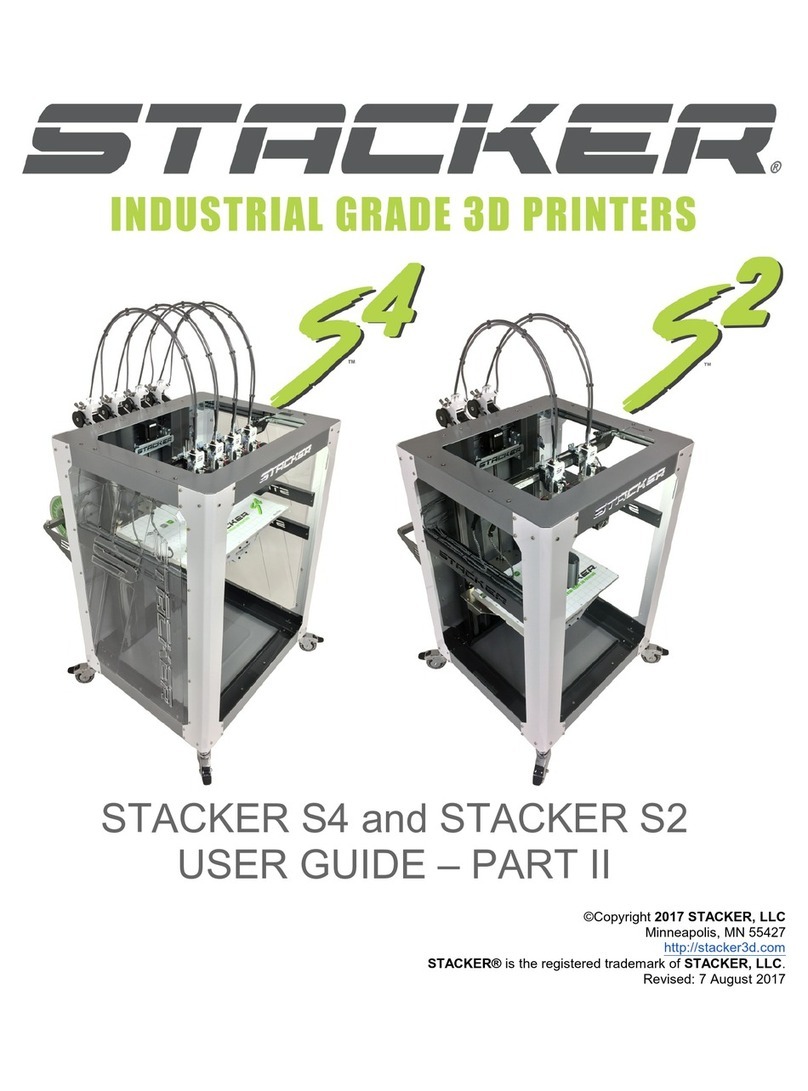
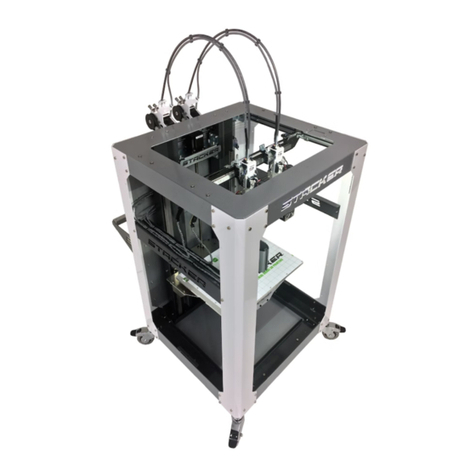
STACKER 500 User manual

UserGuide
MODEL500(2015KS)
©Copyright2016STACKER,LLC
Minneapolis,MN55427
http://stacker3d.com
STACKER®istheregisteredtrademarkofSTACKER,LLC.
Revised:20February2016

STACKER500KSUSERGUIDE2
UserGuide
MODEL500(2015KS)
TABLEOFCONTENTS
1. Introduction
2. Warnings
3. UnpackingandFinalAssembly
3.1. LocateHardwareboxes&FilamentRail
3.2. UniversalFilamentRailInstallation
3.3. FilamentDriveIdlerAssemblyHardwareInstallation
3.4. FinalTapeRemoval
3.5. CableTies
3.6. BlowerFans
4. DownloadSTACKERRUNSoftware
5. PrinterSetup
5.1. PowerUpPrinter
5.2. LevelThePrintBed
5.3. AdjustingNozzleHeight
5.4. ChangingNozzles&FilamentGuideTube
5.5. LoadingFilament
5.6. ManualcontrolviaSTACKERRUN
5.7. SDCardPrinting
5.8. FirstPrint
5.9. MultiPartPrinting
5.10. MultiMaterialPrinting
5.11. SlicingEngine
6. TurningOffyourPrinter
7. VolumetricCalibration
8. Calibrationofx/y/zaxis
8.1. VrefSettings
9. UsefulInfo
9.1. PowerSupplyDataSheet
9.2. InstallingtheLCDSmartController
9.3. FilamentSettingsGuide
10. TermsandConditions

STACKER500KSUSERGUIDE3
1.Introduction
TheSTACKERModel500isahighperformance3Dprintercapableofproducingeverythingfrom
oneoffprototypestomultiplepartproductionruns.Togetthemostoutofyourprinter,pleaseread
throughthisUserGuidebeforeoperating.
ItisalsohelpfultobefamiliarwithsolidmodelingCADapplicationsinordertocreateand
manipulatethepartsyouwanttoprint.Forexample,asimpledesignmodificationorsplittinga
modelintosectionswillallowyoutoprintitfaster,better,andwithouttheneedforsupportmaterials.
ThefollowinglistofCADappsisagoodbalanceofpowerandvalue,someofwhicharefreeand
haverobustonlinetrainingandusercommunities.Nearlyalloftheseappswillexportyourmodels
tothepreferred.stlfileformat.
● Sketchup
● Autodesk123DappsincludingMeshmixerandTinkercad
● openSCAD,netfabstudiobasic,GeomagicDesign
● Fusion360,SolidWorks,Inventor,SolidEdge
Beforemakingyourfirstprintsyouwillbedirectedtodownloadsoftwareandviewonlinetraining
materialsatthelocationsbelow.
● Printersetupsupporthttp://stacker3d.com/kickstartersupport
●STACKERRUNsoftwaredownloadhttp://stacker3d.com/kickstartersupport
●STACKERRUNdocumentationhttp://www.repetier.com/#documantation

STACKER500KSUSERGUIDE4
2.Warnings
STACKER3Dprintersareindustrialmachinesthatshouldneverbeoperatedaroundchildrenorleft
unattended.Carefulsetupandtrainingisrequiredforoptimalresults.Readthroughthisguideand
viewonlineresourcesbeforeturningonyourprinter.
Note,thisprintedcopyoftheUserGuidemaynotbethemostcurrentversion.Werecommend
downloadingtheUserGuidefromourwebsitetoconfirmyouhavethelatestversion.Therevision
dateisnotedonthecoverpage.
PleasereadandtakeseriouslyallWarnings.Unsafeoperationofa3Dprintercanresultindamage
toyourprinterandseriousinjurytoyourself.TheWarningspagesareincludedintheboxwithevery
printerandarealsoavailableatthiswebsiteaddress:
● http://stacker3d.com/kickstartersupport

STACKER500KSUSERGUIDE5
3.UnpackingandFinalAssembly
IfyouhaveaSTACKER500Desktopmodel,youmustfirstcompleteallthestepsofthepagetitled
“UnboxingAssemblyInstructionsforDesktopModel500.”Ifthispagewasmissingfromyourprinter
pleasedownloadithere:
●http://stacker3d.com/pdf/desktopstartstkr500ks.pdf
Ifyouhaveafullheightmodelthatarrivedonapallet,carefullycutawaythepackagingandsetthe
unituprightonitscasters.
3.1.Locatethetwohardwareboxesanduniversalfilamentrail
TwosmallboxesandtheUniversalFilamentRailareeitherlocatedatthebottomofyourboxifyou
havethedesktopmodelorattachedtoyourprinterwithstretchwraponfullheightmodels.
Box#1containstheRightandLeftUniversalFilamentRailBrackets,shownbelow.

STACKER500KSUSERGUIDE6
Box#2containsthreemainhardwarebags:

STACKER500KSUSERGUIDE7
3.2.Attachtheuniversalfilamentrailassembly.
Step1.LocatetheUniversalFilamentRail,thetwoFilamentRailBrackets,andthetwoFilament
RailScrews.
Step2.Removethefour5mmx16mmSocketHeadCapScrewsthatalsosecuretheplasticwire
harnessesclamps(seephotobelow).Thesescrewsarelocatedonthebluecoloredcorner
brackets.YouwillreusethesescrewstomounttheFilamentRailBracketsinthenextstep.Usethe
supplied3mmhexwrenchandan8mmwrench/socket/pliers(notprovided).
Step3.Attachthefilamentrailbracketsusingthehardwareyouremovedinthepriorstep.Notethe
orientationintheimagebelow.Also,makesureallfourscrewsgobackthroughthewireharness
clamps.Failuretosecurethewireharnessescouldresultinseriousdamagetoyourprinterduring
operation.Repeattheinstallationonboththerightandleftsidesoftheprinter.

STACKER500KSUSERGUIDE8
3.3.Installthefilamentdrivehardware.
Step1.Locatethefilamentdriveidlerassemblyhardware.Eachfilamentdriverequires(2)
compressionsprings,(2)M4x30mmSocketHeadCapScrews,and(2)M4Thumbnuts,asshown.
NotetheredcoatingontheScrews,thisredcoatingwillpreventthethumbnutsfrombackdriving.
Step2.Attachthefilamentdriveidlerassemblyhardwaretoeachofyourprinter’sfilamentdrives,
asshownbelow.Thesmallknobsshouldbeflushtotheendofthescrews.Usethesupplied3mm
hexwrenchtoholdthescrewswhileyouhandtightentheknobs.

STACKER500KSUSERGUIDE9
3.4.Removethepackagingtape.
Toprotectyourprinterduringshipping,weattachedseveralpiecesoflowtacktapetotheXgantry,
YShaft,ZShaft,andglassbed.YouMUSTremoveallofthispackingtapebeforecontinuing.
Cleanoffanyresiduewithanalcoholwipe,ifnecessary.
3.5.Attachthecabletiesonyourfilamentguidetubes.
Usethesuppliedziptiestosecurethewireharnessesandguidetubestogether,asshownbelow.
Usefourtiesperguidetubethreeasshownandoneziptiethroughthespecialbracketmounted
oneachfilamentdrive.

STACKER500KSUSERGUIDE10
3.6.Attachtheblowerfans.
YourSTACKERcomeswithoneormore50mmblowerfanpreinstalledatthefactoryfortesting
purposes.Pleaseusethispreinstalledfanasareferencetoinstallyourotherblowerfans.Itis
criticalthatyourblowerfansarepositionedcorrectlyduringtheoperationofyourprinter!If
thefansarepositionedintheintheincorrectposition(seeimagesbelow),theblowerfanswillcrash
intotheframeofyourprinterwhenyouhometheYaxis.Topreventpossibledamagetoyour
printer,besuretolowerthefansandkeepthemcorrectlypositioned.
IMPORTANT!Theblowerfanwillcrashintotheprinter’sframeif
incorrectlypositioned.

STACKER500KSUSERGUIDE11
AttachingtheBlowerDuct:Theimagesaboveshowthe50mmblowerductattachedtothefan.
Theseblowerductswerenotincludedwithyourprinter,butanSTLfileoftheblowerductsis
availableonourwebsite,soyoucanprintyourown:http://stacker3d.com/kickstartersupport
Whenattachingtheblowerduct,makesureitisattachedwiththeproperorientation,otherwisethe
blowerductcancrashintothebedwhenhomingtheZaxis.
Ourblowerductprintsa“T”onthetopoftheducttohelpidentifythetop.
Iftheblowerductisinstalledupside,itcancrashintoyourbedwhenhomingtheZaxis.Ifyou
chooseprintandinstallblowerducts,besurethattheyareinstalledcorrectly.

STACKER500KSUSERGUIDE12
4.DownloadSTACKERRUNsoftware
Beforeturningonyourprinter,pleasedownloadSTACKERRUNsoftware.Itisavailablefor
downloadfromourKickstarterSupportPage.
●http://stacker3d.com/kickstartersupport
DownloadSTACKERRUNandfollowtheinstallationinstructions.Builtintotheprogramareother
onlineresourcesforlearninghowtousethissoftware.Pleasefamiliarizeyourselfwiththesoftware
beforecontinuing.
STACKERRUNsoftwareisanenhancedversionofRepetierHost,somostofthedocumentation
availablefromtheirwebsitewillbehighlyapplicable.Youshouldalsopaynotetotheinstruction
manualsavailablehere:
●http://www.repetier.com/documentation/repetierhost/rhinstallationandconfiguration/

STACKER500KSUSERGUIDE13
5.PrinterSetup
5.1.PowerUpPrinter
BeforeyouturnonyourprinteryoumustconnectthepowercordandUSBcable.
YourprintershipswithaNorthAmerican10ampcordwithaC13/14connector.Thisisacommon
“computer”typepowercord.TheC13/14plugiswidelyavailablealmostanywhereintheworldtofit
yourspecificpoweroutlets.IfyouarenotusingNorthAmerican115vACpowerandoutlets,please
purchaseapropercordatyourlocalcomputerorelectronicsstore.
Note:thepowersupplycanaccept115to230voltsofACpower.Thepowersupplyisauto
switchingwhichmeansthatitwillinternallyadjusttoyouroutlet’svoltageautomatically.Wehave
attachedadatasheetforthispowersupplytohelpyouproperlyconnectittoyourpowersource
anddeterminecompatibility.PleasereferencethisdatainSection9.1.
Wealsostronglyrecommendusinganuninterruptiblepowersupply(UPS)withyourprinter.Any
suddenlossofpower,nomatterhowbrief,willlikelycausetheelectronicsinthisprintertoreset,
andthiswillruinyourprint.Ifyouwanttopreventthepainandsufferingassociatedwithlosinga
multihourlongprint,thenwerecommendaUPS.Furthermore,powerspikesandbrownoutscan
damagetheprinter’selectronics.AnygoodqualityUPSwillsaveyoufrommomentarypowerlossor
brownouts.Wecannotstressenoughtheimportanceofthisveryinexpensiveinsurance.
Uninterruptiblepowersupplies(UPS)arewidelyavailableatyourcomputerorelectronicsstore.
TheprovidedUSBcableconnectsyourprintertoacomputer.PleaseconnecttheUSBcabletothe
controllerhousingasshown.

STACKER500KSUSERGUIDE14
YourprinterispoweredonbyutilizingthepowerswitchlocateddirectlyabovetheC14powerinlet
foryourpowercable.
Beforeturningonyourprinterforthefirsttime,confirmthattheUSBcableisinstalledcorrectlyand
thatyourSTACKERRUNsoftwareisupandrunningonyourcomputer.
5.2.LevelThePrintBed
Yourbedispreleveledatthefactorywhichenablesustomakeatestprint.Duringshippingyour
bedlevelingcanchange,soyouneedtomakesureyourbedislevel.Wegiveyouanaluminum
setupblocktohelpyousafelylevelthebedwithoutcrashingyourprintheadsintotheglass.For
mostusersthebedwillstillbelevel,andallyouwillhavetodoisperformafinaltest.
Ifyourbediswayoutofadjustmentyouwillneedtofollowthefulladjustmentprocess.Youbegin
thisprocessbyhomingthezaxisonthealuminumsetupblock,andthenyoulevelthebedtothe
nozzles.Then,youhomethezaxisonthesetupblockagaintoadjustthegapbetweenthenow
levelbedandthenozzles.Finally,youhomethezaxiswithoutthesetupblockanddoafinaltest
withabusinesscard,a0.007”feelergaugeora0.20mmfeelergauge.Microadjustmentswillbe
madewiththeadjustmentknobonthezprobe.
Levelingyourprintbedisamandatoryfirststep
beforeyoucanprint.Ifthebedistoofaraway
fromyournozzletheprintwillnotsticktothebuildplate.Ifthenozzleistooclosetothebuildplateit
willpreventthefilamentfromflowingoutofthenozzle,andthiswilleventuallycausethefilamentto
jambecausethefilamentwillstripoutinsidethefilamentdrive.

STACKER500KSUSERGUIDE15
VIDEOALERT!Pleasewatchtheshortvideo“BedLeveling”locatedonourKickstarterVideo
SupportPage.
●http://stacker3d.com/kickstartervideopage/
FULLADJUSTMENTPROCESS
Step1.ConnectyourprintertoSTACKERRUNsoftware.ClicktheConnectbuttonlocatedin
theupperleftcorner.Adropdownmenuwillallowyoutoselectthecorrectmodel,asshownbythe
arrow.
Step2.HometheZaxisonthealuminumsetupblock.
PlacethealuminumsetupblockunderthezprobeadjustmentscrewBEFOREhomingthezaxis,
asshownbelow.
Next,opentheManualControlTabandpresstheZhomebutton inSTACKERRUN.
NOTE:Youmustusethesetupblockunderthezprobeasshownabove.Ifyoudonotuse
theblock,youcouldcrashyourbedintothenozzlesandcausedamagetoyourprinter.

STACKER500KSUSERGUIDE16
IMPORTANT:Thesuppliedsetupblockisonlyusedduringbedleveling!Oncethebedis
level,youdoNOTusetheblockwhenhomingtheZbedpriortoprinting.
Inthenextstepyouwillremovetheblockfromunderthezprobeandmovetheblocktodifferent
locationsonthebed.Thesetupblockisusedasagaugetosetthebedtothesameplaneasthe
nozzles.Youarenot“leveling”thebedwithalevel.Youaresettingthebedtothesameplaneas
thex/ygantry.
Step3.MovetheX/Ygantrytothebackofyourprintbedandpositiontheheads,asshown
below.ThepreferedmethodformovingthegantryisviaManualControl.Pressthebuttonuntilthe
gantryhasmovedtotheback.
Positionheadsoneandtwoontheleftsideofthegantry,andifyouhavea4headmodelpush
headsthreeandfourtothefarrightsideofthegantry,asshownbelow.Youusehead2for
levelingthebed.

STACKER500KSUSERGUIDE17
Step4.Adjustthetwobacklevellingscrews.Movethesetupblockandtrytoslidetheblock
andcardunderthenozzleofhead2.Ifyournozzleismorethan.100”or2.5mmaboveorbelowthe
setupblock(whichisunlikely)youmayneedtoadjustthezprobescreworzprobebracket;these
adjustmentproceduresareatendofthisstep,shoulditbenecessary.
Beginbyadjustingthebackleftlevelingscrew(foundunderneaththebed)withthesupplied7mm
nutdriver.Note:Therearethreelevelingscrewswithheavydutysprings.Whenyouadjustthe
leveleryourareactuallymovingthe4mmhexnut.Fornow,onlyadjusttheleftbacklevelingscrew.
Turnthenutdriverclockwiseorcounterclockwiseuntiltheblockandbusinesscardslideunderthe
nozzle.Theblockshouldmakeslightcontactwiththenozzletip.
Next,slidehead2tothefarrightofthegantry,asshownbelow.Adjusttherearrightlevelingscrew
untilthenozzlemakesslightcontactwiththesetupblock,justlikeyoudidontheleftside.

STACKER500KSUSERGUIDE18
Next,slidehead2backtotheleftsideofthegantryandrepeatthelevelingprocess.Finally,slide
head2totherightagain,andonceagain,repeatthelevelingprocess.
ZProbeHeightAdjustmentScrew.Seesection5.7laterintheguide.
ZProbeBracketAdjustment.Whenlevelingyourbed,itispossibletorunoutoftravelonyour
zprobeheightadjustmentscrewand/oryourlevelingsprings.Ifthishappens,youcanmakemacro
heightadjustmentsbymovingtheentirezprobebracketupordown,seebelow.
IMPORTANT:IfyoumakeanyadjustmentstotheZprobebracketorheightadjustment
screw,gobacktoStep2!
Step5.AdjustthefrontLevelingScrew.Whenthebackareaofyourbedislevel,movethe
gantryallthewaytothefrontbyhomingtheYaxis.
MAKESUREYOURBLOWERFANSAREDOWNANDINTHECORRECTPOSITION!

STACKER500KSUSERGUIDE19
Pressthe buttoninthemanualcontroltabinSTACKERRUN.OnlyhometheYaxis!Now
thattheheadsareallthewaytothefrontofthebed.Now,placehead2inthecenterfrontofthe
bed.Asbefore,usethesetupblockwhileadjustingthelevelingscrewsothatthenozzlemakes
slightcontactwiththeblock.
Step6.Movethegantrybacktotherearandreadjustifnecessary.Repeatthelevelingprocess
inStep4,butyoushouldonlyneedverysmalladjustments,ifatall.
Step7.Finalcheckandadjustmentwithsetupblock.Youmustnowrehomethezaxisonyour
setupblockandretestthelevelness.Fineadjust,ifnecessary.Usethesameproceduresassteps5
and6above.IMPORTANT!Ifyouneedtoadjustthegapbetweenthenowlevelbedandthe
nozzlesyouneedtoadjustthezprobemountingbracketupordownaccordingly.Seeabove.
Step8.Finalcheckandadjustmentwithbusinesscard,a0.07”feelergauge,or0.20mm
feelergauge.Youmustnowrehomethezaxiswithoutthesetupblock.Useabusinesscardor
feelergaugetocheckthegapbetweenyourbedandnozzles.
IMPORTANT:todialintheperfectlayerheight,simplyturntheadjustmentscrewonthe
zprobeandrehomethezaxis.Seesection5.7FirstPrintformoredetails.

STACKER500KSUSERGUIDE20
5.3.NozzleHeightAdjustment.
Allthenozzlesmustbeatthesameheight.However,duringthelevelingprocessyoumaydiscover
thatoneormoreofthenozzlesneedsaslightupordownadjustment.Theeasiestwaytoadjustis
thenozzlesistorehometheZAxis,anduseabusinesscardor0.07”/0.20mmfeelergauge.Note,
thismethodonlyworksifyourbedhasbeenleveled.
Usethesupplied7mmnutdrivertoloosenthetwonutsonthefrontofthehotend,shownbelow.
Looseningthesetwonutswillenableyoutomovetheentirehotendupordownaccordingly.Allow
thenozzleheighttobesetbythethicknessofthebusinesscardorfeelergauge.Whenretightening
thetwonuts,besuretomovebackandforthbetweenthetwonutsandtightenthemgraduallyand
equally.Donotovertighten!
5.4.ChangingNozzles&FilamentGuideTube
YournewSTACKERprintercomeswithfour0.50mmmidtempnozzlesandguidetubes
preinstalledatthefactory.Togetprintingrightawayyouonlyneedtoinstallthefilamentguidetube
intothefilamentdriveandloadfilament.
Thefollowingstepswillinstructyouonhowtoproperlyremoveandreinstallnewnozzlesand
filamentguidetubes.PleasefollowthesestepsVERYCAREFULLY.Yournozzleswillnotwork
properlyiftheguidetubesarenotproperlyseatedintothenozzles.
VIDEOALERT!Pleasewatchtheshortvideo“ChangingNozzlesandFilamentGuideTubes”
locatedonourKickstarterSupportPageunderSTACKER500TrainingVideos.
●http://stacker3d.com/kickstartersupport
This manual suits for next models
1
Table of contents
Other STACKER 3D Printer manuals
