Stage right 612756 User manual

STAGE RIGHT
60-Watt COB LED Ellipsoidal Stage Light with Manual Zoom
P/N 612756
User's Manual

2
CONTENTS
SAFETY WARNINGS AND GUIDELINES.......................................................................................................................................3
Power .................................................................................................................................................................................................................3
Environment.................................................................................................................................................................................................3
Maintenance................................................................................................................................................................................................4
INTRODUCTION................................................................................................................................................................................................4
FEATURES..............................................................................................................................................................................................................5
CUSTOMER SERVICE....................................................................................................................................................................................5
PACKAGE CONTENTS.................................................................................................................................................................................6
MENU DISPLAY AND CONTROLS.....................................................................................................................................................6
DMX CONTROL ................................................................................................................................................................................................ 7
MASTER/SLAVE MODE ............................................................................................................................................................................. 7
DIMMING AND STROBE CONTROL.................................................................................................................................................8
Dimmer Mode.............................................................................................................................................................................................8
Strobe Mode................................................................................................................................................................................................8
MANUAL CONTROL .....................................................................................................................................................................................9
Shutters............................................................................................................................................................................................................9
Focus...................................................................................................................................................................................................................9
Zoom...................................................................................................................................................................................................................9
TECHNICAL SUPPORT...............................................................................................................................................................................10
SPECIFICATIONS............................................................................................................................................................................................10
REGULATORY COMPLIANCE...............................................................................................................................................................11
Notice for FCC ...........................................................................................................................................................................................11
Notice for Industry Canada............................................................................................................................................................11

3
SAFETY WARNINGS AND GUIDELINES
Power
Use this light fixture with a constant voltage power supply only. Using it with a
dimmer can result in unexpected operation and damage to the fixture.
Unplug this device from the power source when not in use.
Prior to operation, check the unit and power cord for physical damage. Do not use if
physical damage has occurred.
Before plugging the unit into a power outlet, ensure that the outlet provides the
same type and level of power required by the device.
This device uses a grounded power cord and requires a ground connection for safe
operation. Ensure that the power source has a proper ground connection. Do not
modify the plug or use a "cheater" plug to bypass the ground connection.
Do not allow the power cord to be crimped, pinched, stepped on, etc. Ensure that
the power cord does not present a tripping hazard.
Never unplug the unit by pulling on the power cord. Always grasp the connector
head.
Ensure that power is turned off and disconnected before making any electrical
connections.
Environment
Avoid direct eye exposure to the light from this device.
When installing this device, ensure that the mount is sufficiently robust to support
the weight of the unit and to prevent unwanted movement.
Do not subject the product to extreme force, shock, or fluctuations in temperature
or humidity.
This device is intended for indoor use only.

4
Do not expose this device to rain, water, or moisture of any kind. Do not use in
extremely dusty environments. Do not touch the device or power cord with wet
hands.
When installing this device, ensure that there are no flammable materials within
about 8 feet above and on all sides. Ensure that there is at least 2 feet of clearance
between the unit and any walls.
This device ventilates excessive heat through the slots and openings in the case. Do
not block or cover these openings. Ensure that the device is in an open area where
it can get sufficient airflow to keep from overheating.
Maintenance
Clean using a soft, dry cloth only. Do not use chemical cleaners, solvents, or
detergents. For stubborn deposits, moisten the cloth with warm water.
Keep away from corrosive materials.
Keep the original packaging material for use when transporting the device.
This device has no user serviceable parts. Do not attempt to open, service, or
modify this device.
INTRODUCTION
Thank you for purchasing this LED stage light!
This light fixture features a single, 60-watt 3200K white LED and a 13°-35°adjustable beam
angle. It allows for manual control over the beam size, using four independently adjustable
shutters, focus, and zoom, as well as 3-channel DMX512 control for the dimmers and built-
in programs. It includes built in Strobe, Fade, and Auto programs and can be configured as
a DMX Slave light.

5
FEATURES
60-watt 3200K white LED
Produces up to 3300 Lux at 2 meters
13°-35° adjustable beam angle
Adjustable beam size using four independently adjustable shutters
Manual focus control
Manual zoom control
3-channel DMX control
Built-in Strobe, Fade, and Auto programs
CUSTOMER SERVICE
The Monoprice Customer Service department is dedicated to ensuring that your ordering,
purchasing, and delivery experience is second to none. If you have any problem with your
order, please give us an opportunity to make it right. You can contact a Monoprice
Customer Service representative through the Live Chat link on our website
www.monoprice.com during normal business hours (Mon-Fri: 5am-7pm PT, Sat-Sun: 9am-
6
PACKAGE CONTENTS
Please take an inventory of the package contents to ensure you have all the items listed
below. If anything is missing or damaged, please contact Monoprice Customer Service for a
replacement.
1x 60-Watt COB LED ellipsoidal light
1x AC power cord (NEMA 5-15P to IEC 60320 C13)
1x User's manual
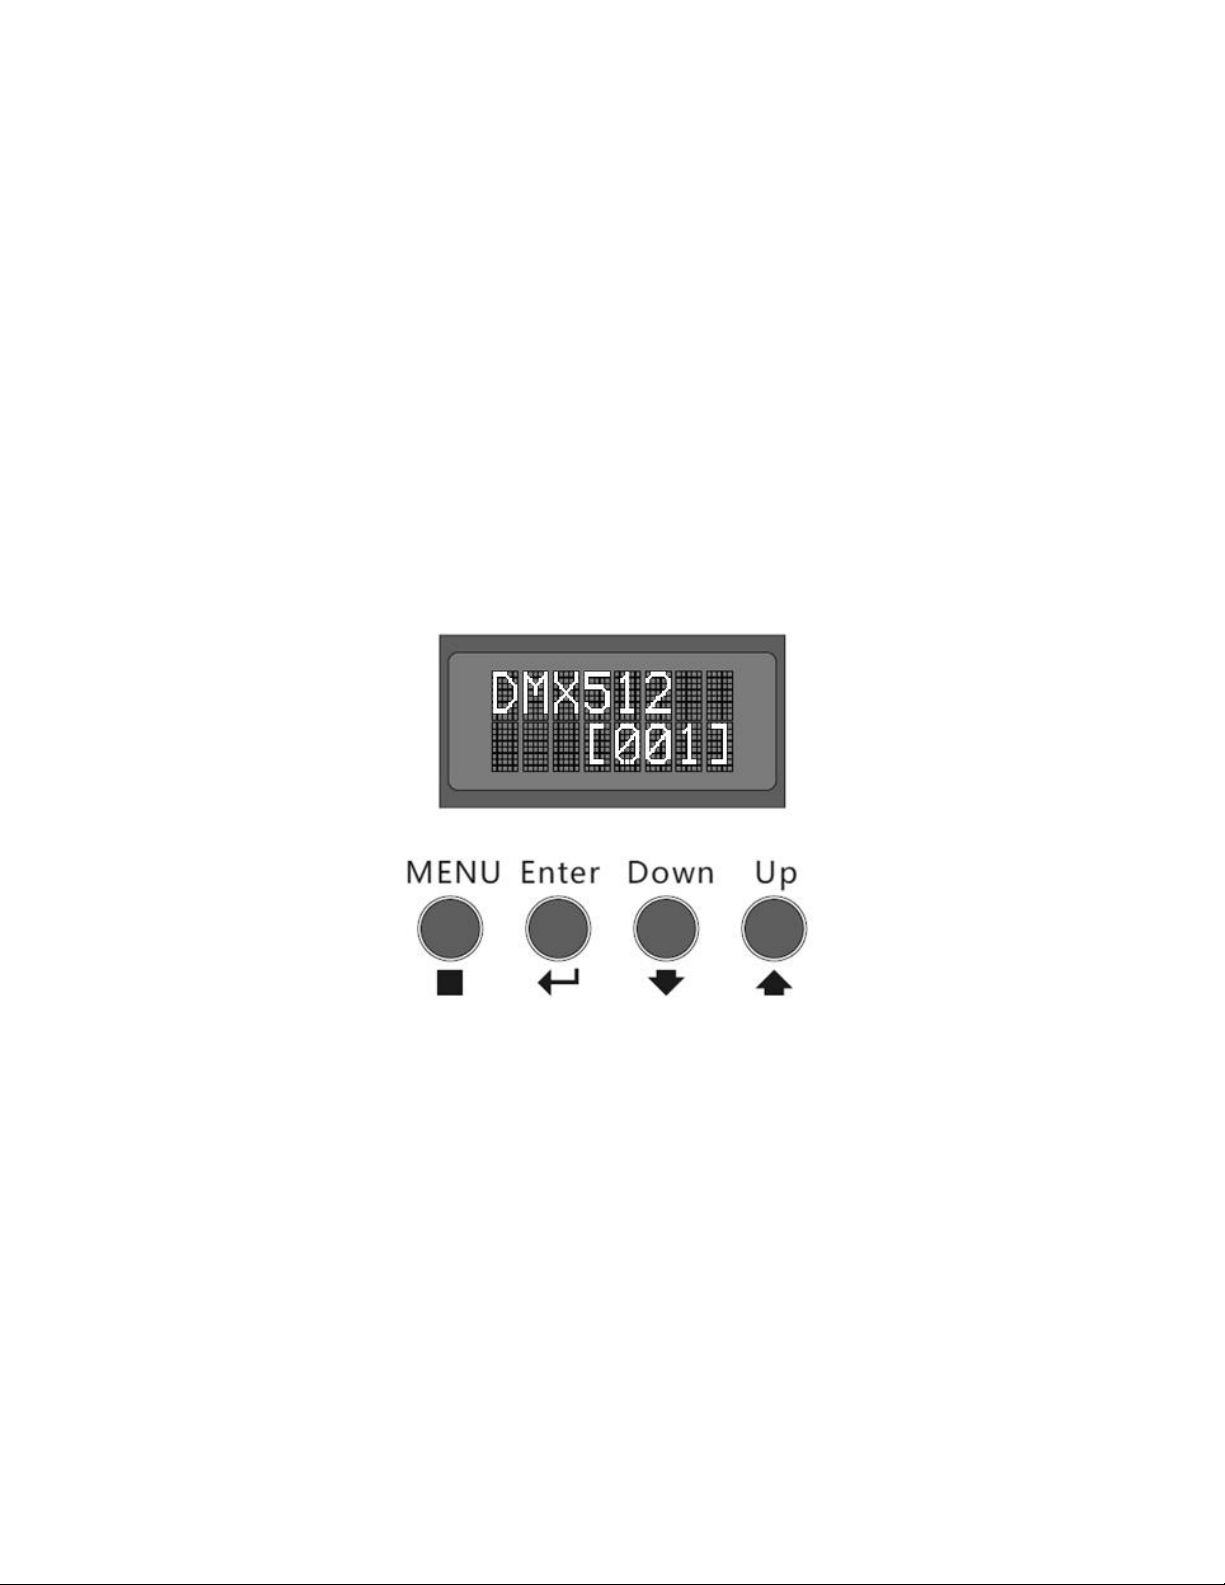
MENU DISPLAY AND CONTROLS
MENU: Press the MENU button to cycle through the DMX512, Dimmer, Strobe, Fade, and
Auto modes. After setting a value, press the MENU button to accept the setting.
Enter: Press the Enter button to edit the value for the display mode.
Down: Press the Down button to decrease the displayed value. Press and hold the button
to rapidly decrease the displayed value.
Up: Press the Up button to increase the displayed value. Press and hold the button to
rapidly increase the displayed value.

7
DMX CONTROL
A single light fixture can be connected to and controlled by a DMX512 controller. To use
the light with a controller, repeatedly press the MENU button until DMX512 [MODE] is
displayed, then press the Enter button to edit the value.
Use the Up and Down buttons to select a channel from 001-512. Note that when you enter
DMX512 mode, the built-in programs are disabled.
The nine channels control the following functions with the listed values:
Channel
Function
Value
Control
1
Dimmer
0-255
0-100% brightness
2
Strobe Speed
0-10
No effect
11-255
Strobe speed 5-20Hz
3
Dimmer Speed
0-64
Real time
65-128
Fast controlled response*
129-192
Medium controlled response
193-255
Slow controlled response
*The Fast controlled response option is recommended for use with less expensive DMX512
controllers.
MASTER/SLAVE MODE
When using one of the built-in programs, the fixture is considered to be in Master mode.
You can then daisy-chain additional fixtures configured as Slaves to perform the same
actions as the Master.
To configure a fixture as a Master, set the light to any mode except DMX mode.
To configure a fixture as a Slave, enter DMX mode and set the channel to 001.
Note that you cannot use a DMX controller when connecting multiple lights in
Master/Slave mode.

8
DIMMING AND STROBE CONTROL
Dimmer Mode
The Dimmer function controls the light's brightness. To enter Dimmer Mode, press the
MENU button repeatedly until Dimmer [MODE] is displayed, then press the Enter button to
edit the value.
Use the Up and Down buttons to adjust the displayed value. The dimmer can be set to any
value between 0(off) and 4096 (maximum brightness).
Note that when Dimmer [MODE] is displayed, the light will not strobe.
When set to its highest value (4096), the light will produce the illumination levels and
beam diameters at the listed distances.
Distance (m)
2
3
4
5
6
Lux at Center at 13°
3300
1400
820
508
345
Beam Diameter at 13° (cm)
50
75
110
125
160
Lux at Center at 35°
1490
685
400
295
230
Beam Diameter at 35° (cm)
85
115
150
180
215
Strobe Mode
To enter Strobe Mode, press the MENU button repeatedly until Strobe [MODE] is
displayed, then press the Enter button to edit the displayed value.
Use the Up and Down buttons to adjust the displayed value. The strobe speed can be set
to any value between 0(5 flashes per second) and 12 (20 flashes per second). The light will
continue to strobe as long as the display shows either Strobe [xx] or Strobe [MODE], where
xx is a value between 0 and 12.

9
MANUAL CONTROL
In addition to the DMX or built-in electronic controls, you can control the size of the light
beam as well as its focus.
Shutters
Four shutter levers are located on the top, bottom, and on each side. The shutters are used
to crop the light from the opposite side of the fixture, so the top shutter crops the light
beam from the bottom of the fixture, the bottom crops from the top, the left crops from
the right, and the right crops from the left.
Focus
Loosen the knobs on the sides of the fixture closest to the middle to adjust the focus. Push
the knobs forward or pull them backward to adjust the focus. When you are done adjusting
focus, tighten the knobs to prevent accidental changes.
Zoom
Loosen the two knobs on the sides of the fixture closest to the end to adjust the zoom.
Push the knobs forward to zoom in to tighten the beam to a minimum of 13° or pull them
backward to get a wider beam to a maximum of 35°. When you are done adjusting zoom,
tighten the knobs to prevent accidental changes.

10
TECHNICAL SUPPORT
Monoprice is pleased to provide free, live, online technical support to assist you with any
questions you may have about installation, setup, troubleshooting, or product
recommendations. If you ever need assistance with your new product, please come online
to talk to one of our friendly and knowledgeable Tech Support Associates. Technical
support is available through the online chat button on our website www.monoprice.com
during regular business hours, 7 days a week. You can also get assistance through email by
sending a message to tech@monoprice.com
SPECIFICATIONS
Model
612756
Light Source
1x 60-watt 3200K white LED
Minimum Beam Angle
13°
Maximum Beam Angle
35°
DMX Control
3-channels
DMX Input/Output
3-pin XLR input and pass-through output
Maximum Power Consumption
60 watts
Input Voltage
100 ~ 240 VAC, 50/60 Hz
Dimensions
13.8" x 7.1" x 6.3" (35 x 18 x 16 cm)
Weight
10.5 lbs. (4.8 kg)

11
REGULATORY COMPLIANCE
Notice for FCC
This device complies with Part 15 of the FCC rules. Operation is subject to the following two
conditions: (1) this device may not cause harmful interference, and (2) this device must accept any
interference received, including interference that may cause undesired operation.
Modifying the equipment without Monoprice’s authorization may result in the equipment no
longer complying with FCC requirements for Class B digital devices. In that event, your right to use
the equipment may be limited by FCC regulations, and you may be required to correct any
interference to radio or television communications at your own expense.
This equipment has been tested and found to comply with the limits for a Class B digital device,
pursuant to Part 15 of the FCC Rules. These limits are designed to provide reasonable protection
against harmful interference in a residential installation. This equipment generates, uses and can
radiate radio frequency energy and, if not installed and used in accordance with the instructions,
may cause harmful interference to radio communications. However, there is no guarantee that
interference will not occur in a particular installation. If this equipment does cause harmful
interference to radio or television reception, which can be determined by turning the equipment
off and on, the user is encouraged to try to correct the interference by one or more of the
following measures:
Reorient or relocate the receiving antenna.
Increase the separation between the equipment and receiver.
Connect the equipment into an outlet on a circuit different from that to which the receiver
is connected.
Consult the dealer or an experienced radio/TV technician for help.
Notice for Industry Canada
This Class B digital apparatus complies with Canadian ICES-003.
Cet appareil numérique de la classe B est conforme à la norme NMB-003 du Canada.
Table of contents
Other Stage right Dj Equipment manuals


Popular Dj Equipment manuals by other brands

Blizzard Lighting
Blizzard Lighting Hypno Beam manual

Harman
Harman Martin THRILL Compact PAR 64 LED user guide

thomann
thomann Thon Studio DJ Table 1500 Assembly instructions

Ibiza
Ibiza LBM10BAT-BL user manual

EuroLite
EuroLite LED IP STRIP SET 45 RGB user manual

ChamSys
ChamSys QuickQ Series Service document

Beamz professional
Beamz professional MadMax 5x10W COB LED Matrix instruction manual

Chauvet
Chauvet COLORado 1 VW Quick reference guide

Cameo
Cameo SUPERFLY XS user manual

Great Stage Light
Great Stage Light GLM007-280 user manual

Elumen8
Elumen8 Virtuoso 1000 Profile WW user manual

American DJ
American DJ X-Color LED Plus User instructions


