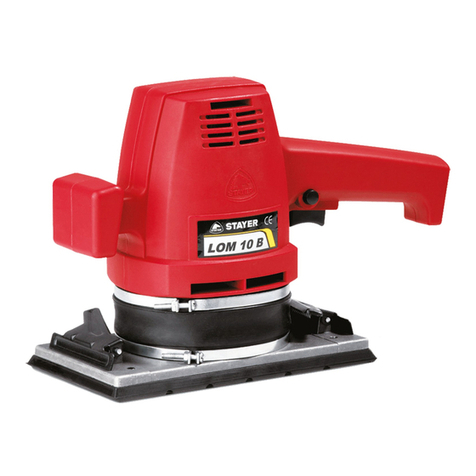
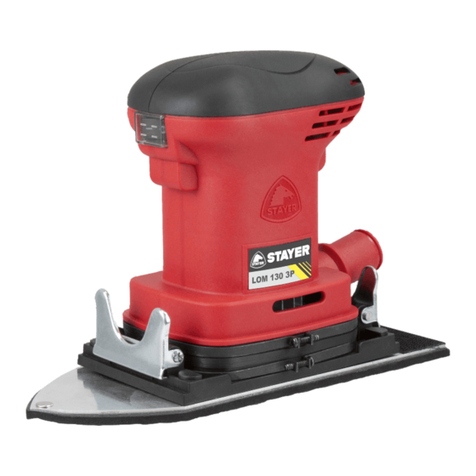
stayer LOM 230 User manual

es
gb
Manual de instrucciones LOM 230
Área Empresarial Andalucía - Sector I
Calle Sierra de Cazorla nº7
C.P: 28320 Pinto (Madrid) SPAIN
info@grupostayer.com www.grupostayer.com
Operating instructions

5
LOM230
W400
min-1 12000
mm 230x115
Kg 2.9
LPA dB(A) 85
LWA dB(A) 16
m/s24
EN 60745
W
rpm
DATOS TÉCNICOS

- 3 -
es
gb
Este manual es acorde con la fecha de fabricación de
su máquina, sí como la información que encontrará
en la tabla de datos técnicos de la maquina adquiri-
da, busue actualizaciones de manuales de nuestras
maquinas en la página web: www.grupostayer.com
¡ ATENCIÓN! Antes de utilizar el aparato, lea
atentamente el manual de instrucciones y
las normas generales de seguridad que se
incluyen en la caja.
1_INSTRUCCIONES ESPECIFICAS DE
SEGURIDAD
Esta herramienta no es apta para ser usada por
los niños.
Antes de realizar cualquier operación de reparación,
asistencia o mantenimiento en la máquina, desco-
néctela de la toma de corriente.
Si el aparato se cae, compruebe que no haya sufrido
ningún tipo de daño.
Estas herramientas no requieren un tercer cable
para la conexión a tierra.
No exponer a la humedad ni a la lluvia.
Mantener lejos del alcance de los niños.
CONEXIÓN A LA RED ELÉCTRICA
Antes de enchufar el aparato, asaegúrese de que la
tensión de la red sea la misma que se indica en la
placa de datos del mismo.
CONDICIONES DE USO
Esta máquina está particularmente indicada para car-
pinteros o en general, para lijar cualquier tipo de su-
percie de madera y para quitar pintura.
OPTIMIZAR EL RENDIMIENTO
Una colocación inadecuada de las hojas de papel, el
abrasivo o el paso sobre aristas metálicas pueden da-
ñar el plato.
Elegir el grano del papel abrasivo según el tipo de
lijado que se haya de realizar. Para lograr un buen
acabado, utilizar siempre papel abrasivo de grano jo.
No ejercer demasiada presión sobre la máquina, ya
que se podría dañar la supercie de trabajo.
No utilizar la lijadora con agua.
No lijar nunca madera y metal con la misma hoja de
papel abrasivo.
Accesorios de serie
1 hoja de papel abrasivo
1 acople para tubo de aspiradora
1 reducción
1 bolsa aspiración de virutas
2_MONTAJE
Las hojas de abrasivo se jan con 2 garras.
Levantar completamente (a 90º) las dos palancas de
la base de la máquina y colocar el papel de lija centra-
do y doblado por los extremos, asegurando que queda
supercie para ser sujetado por las garras. Bajar la
garras para dejar la lija sujeta y lista para trabajar.
Asegurarse de que los agujeros del papel de lija coin-
ciden con los agujeros de aspiración de polvo del plato
de goma vibratoria.
Para asegurar la jación del abrasivo, se aconseja
doblar los extremos de la hoja a n de aumentar el
espesor.
Controlar siempre que las supercies de contacto
entre la hoja y el plato estén perfectamente libres de
suciedad. De no ser así, limpiarlas con un cepillo de
nylon.
ARRANQUE Y PARADA
Para arrancar la máquina, Apretar el pulsador en el
mango principal de la máquina. Para trabajos largos
puede usar el botón de enclavamiento situado al lado
del pulsador principal. Para accionarlo apriételo mien-
tras está apretado el pulsador principal.
Para apagar la máquina suelte el pulsador principal o
púlselo brevemente si está accionado el pulsador de
enclavamiento.
Tubo colector de polvo
La utilización del tubo colector de polvo permite reali-
zar operaciones de lijado limpias y recoger facilmente
el polvo.
Para colocar el tubo colector de polvo, encaje la bo-
quilla de entrada de el tubo en la boquilla de aspira-
ción de la herramienta. El diámetro del adaptador es
de 40 mm.
3_INSTRUCCIONES DE MANTENIMIENTO
Y LIMPIEZA
MANTENIMIENTO
Antes de realizar cualquier operación de manteni-
miento, quitar el enchufe de la toma de corriente. Se
aconseja limpiar periódicamente el interior del motor
con aire comprimido a través de las ranuras de as-
piración, para garantizar una ventilación ecaz. Esta
operación es de extrema importancia luego de traba-
jar con mármol, piedra, ladrillos o tejas, elementos que
exigen una mayor frecuencia de limpieza.
Limpiar regularmente la hoja de papel abrasivo
- 4 -
es
golpeando ligeramente su supercie.
Pieza de repuesto y asistencia
Todas nuestras herramientas están cubiertas por una
garantía. Existen Centros de Asistencia Autorizados
distribuidos por todo el territorio nacional que ofrecen
una ecaz asistencia posventa y montan, solo exclusi-
vamnete piezas de repuesto originales STAYER.
GARANTÍA
Tarjeta de Garantía
Entre los documentos adjuntos, encontrará la tarjeta
de garantía con el espacio dedicado a colocar la fac-
tura de compra.
Si no la encuentra, solicítela inmediatamente a su
punto de venta.
Todas las herramientas STAYER están cubiertas por
una garantía que tiene vigencia a partir de la fecha de
venta de la herramienta en cuestión.
Otros documentos que demuestran la compra son:
Factura de compra, albarán de entrega, recibo de
caja.
STAYER está obligada a reparar o sustituir gratuitam-
nete, sólo el producto o las partes del mismo que re-
sulten defectuosas tras un examen de sus Técnicos.
La garantía se considera limitada únicamente a los
defectos de fabricación o de elaboración, y pierde su
validez en caso de que las piezas devueltas se ha-
yan desmontado, manipulado o reparado fuera de la
fábrica.
La garantía tambien prescribe en el momento en el
que la máquina se utiliza de manera impropia o cuan-
do se utilizan accesorios no adecuados para el uso
previsto por el fabricante.
Todos los gastos de transporte y desmontaje correrán
a cargo del cliente.
El Cliente adquiere el compromiso de facilitar la tarea
de nuestros técnicos facilitándoles una descripción de
las anomalías que ha detectado en la herramienta du-
rante la utilización.
5_MARCADO NORMATIVO
CARACTERÍSTICAS TÉCNICAS
W
rpm
= Potencia nominal absorbida
= Nº de revoluciones. De marcha en vacío
= Plato
= Masa
Niveles acústicos típicos en evaluación A:
LPA = Nivel de presión acústica
LWA = Nivel de potencia acústica
= Aceleración evaluada típicamente en la zona
mano/brazo
El nivel acústico durante los trabajos puede sobrepa-
sar los 85 dB(A).
Estos datos son válidos para tensiones nominales de
[U] 230/240 V ~ 50/60 Hz - 110/120 V ~ 60 Hz. Los va-
lores pueden variar si la tensión fuese inferior, y en las
ejecuciones especícas para ciertos países. Preste
atención al nº de artículo en la placa de características
de su aparato, ya que las denominaciones comercia-
les de algunos aparatos pueden variar.
DECLARACIÓN DE CONFORMIDAD CE
El que suscribe:
STAYER IBERICA, S.A.
Con dirección:
Calle Sierra de Cazorla, 7
Área Empresarial Andalucía - Sector 1
28320 PINTO (MADRID)
Tel.: +34 902 91 86 81 / Fax: +34 91 691 91 72
CERTIFICA
Declaramos bajo nuestra responsabilidad, que el pro-
ducto descrito bajo “Datos técnicos” está en confor-
midad con las normas o documentos normalizados
siguientes: EN 60745 de acuerdo con las regulaciones
2006/42/CE, 2004/108/CE.
Ramiro de la Fuente
Director Manager
Enero 2019

es
gb
- 5 -
This manual corresponds to the manufacturing date,
the information displayed in the technical data sheet
and the manual itself may be updated in our webpage:
www.grupostayer.com
¡ WARNING! Before using this tool, carefully
read this manual and the general safety ru-
les included in the packaging.
1_SPECIFIC SAFETY INSTRUCTIONS
This tool is not suitable for children use.
Before any reparing, assisting or maintenance actions,
unplug it from its power source.
If the tool falls down check it for any kind of damage.
This tool does not require a third cable as a ground
connection.
Do not expose to humidity or rain.
Keep away from children.
CONNECTION TO THE ELECTRICITY GRID
Before plugging the tool, make sure the grid tension is
the same as the one displayed in the labels.
USE CONDITIONS
This tool is specially aimed to carpenters and general
wood working, sanding any kind of wood surface and
removing paint.
WORKFLOW OPTIMIZATION
An inappropiate sanding placement, or the metallic
claws may damage the tool.
Choose the sanding grain according to the task. To
achieve a good nish always use xed sanding papers.
Do not excessively press the tool against the working
surface as it may get damaged.
Do not use this sander with water.
Never sand wood and metal with the same sanding
paper.
Included accesories
1 sanding sheet
1vacuum cleaner adapter
1 reduction
1 dust bag
2_ASSEMBLY
Sanding sheets are secured with two claws.
Completely lift (up to 90º) the two levers in the tool
base and place the sanding paper on the center with
both sides folded so the claws can rmly hold the pa-
per. Take down the levers to secure the paper.
Make sure the sanding sheet holes t the vacuum
wholes placed in the vibratory rubber plate.
To improve the sheet's setting it is advised to fold both
paper edges to increase its thickness.
Always make sure the space between the rubber plate
and the sanding sheet is clean. If it were not use a
nylon brush to clean it.
SWITCH ON/OFF
To switch on the tool press the button in the main
handle. For long tasks you can use the set button next
to the main button. To activate it press it while the main
button is already pressed.
To switch o the tool simply release the switch button
or briey press it if you activated the set button.
Dust collecting tube
The dust collecting tube allows clean sanding tasks
with dust easily cleared from the workplace.
To place the tube, t in the mouthpiece into the tool's
vacuum adapter. The adaper's diameter is 40 mm.
3_CLEANING AND MAINTENANCE
INSTRUCTIONS
MAINTENANCE
Before any reparing, assisting or maintenance actions,
unplug it from its power source. It is advised to periodi-
cally clean the inner engine with compressed air throu-
gh the vacuum sockets to grant the best ventilation.
This task is of upmost importance after working with
marble, stone, bricks or tiles, as this materials require
more cleaning maintenances.
Consistently clean the sanding sheet by slightly hitting
its surface.
Spare parts and assistance
All of our tools are warranty protected. There are
Authorized Assistance Centers scattered all around
the country which oer an ecient service using ex-
clusively original STAYER spare parts.
WARRANTY
Warranty card
Included in the tool documentation you will nd a
warranty card where you must place your purchase
invoice.
If you can not nd it immediatly request it to your seller.
All the STAYER tools are under warranty valid from
the sale date.
Other documents to prove your purchase:
Purchase invoice, elivery note, ox bill.
STAYER is required to repair or substitute for free the
product or parts of it which may be defective after its
technician examination.
The warranty is limited to production and manufacture

gb
- 6 -
defects and loses its validity if the returned tool or pie-
ces were manipulated, dismantled or repaired outside
the factory.
The warranty also expires if the tool was used in an
inappropiate way or if unsuitable unexpected by the
manufacturer accesories were used.
All the transportation and dismantling costs will be at
the client's expense.
The client acquires the compromise of easening our
technician's task by providing every detail and descrip-
tion of the tool anomalies detected during its usage.
5_NORMATIVE MARKING
TECHNICAL SPECIFICATIONS
W
rpm
= Rated input power
= No-load spins
= Plate
= Mass
Typical noise levels in evaluation A:
LPA = Acoustic pressure level
LWA = Acoustic power level
= Acceleration typically evaluated in the hand/
arm
The noise level when working can exceed 85 dB (A).
The values given are valid for nominal voltages
[U] 230/240 V ~ 50/60 Hz - 110/120 V ~ 60Hz. For
lower voltage and models for specic countries, these
values can vary. Please observe the article number on
the type plate of your machine. The trade names of the
individual machines may vary.
We reserve the right to change related to technical
advance.
EC DECLARATION OF CONFORMITY
The undersigned:
STAYER IBERICA, S.A.
With address at:
Calle Sierra de Cazorla, 7
Área Empresarial Andalucía - Sector 1
28320 PINTO (MADRID)
Tel.: +34 902 91 86 81 / Fax: +34 91 691 91 72
CERTIFIES
We declare under our sole responsibility that this
product is in conformity with the following standards
or standardized documents: EN 60745-1, EN 60745
2-3, EN 55014-1, EN 55014-2, EN 61000-3-2, EN
61000-3-3 according to EU Regulations 2006/42/EC,
2014/30/EU, 2011/65/EU.
Ramiro de la Fuente
Director General
January 2019

NOTES

Área Empresarial Andalucía - Sector I
Calle Sierra de Cazorla nº7
C.P: 28320 Pinto (Madrid) SPAIN
info@grupostayer.com
www.grupostayer.com
Table of contents
Languages:
Other stayer Sander manuals

stayer
stayer LR125C User manual

stayer
stayer RO5 BRUSHLESS User manual

stayer
stayer DS 125 User manual

stayer
stayer LU260E User manual

stayer
stayer ls1200 User manual

stayer
stayer LD141C User manual

stayer
stayer LH187C User manual

stayer
stayer RO125 User manual

stayer
stayer ls1200 User manual

stayer
stayer HP750E User manual

stayer
stayer LS 1200 B User manual

stayer
stayer HP1010 User manual

stayer
stayer LH187C User manual

stayer
stayer LEN751E User manual

stayer
stayer LU260E User manual

stayer
stayer LP600BE User manual

stayer
stayer AGL181 User manual

stayer
stayer LH187C User manual

stayer
stayer LH187B User manual

stayer
stayer RO150E User manual