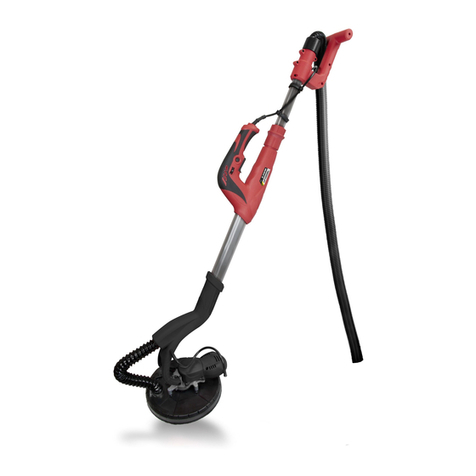
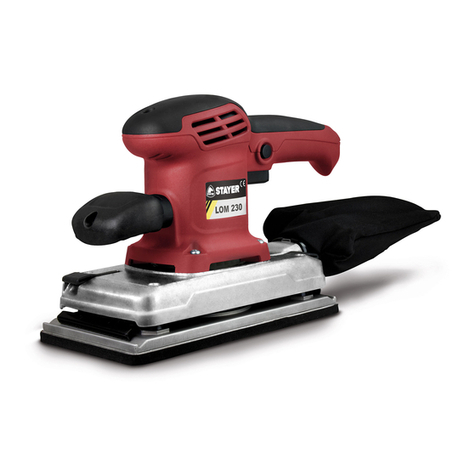
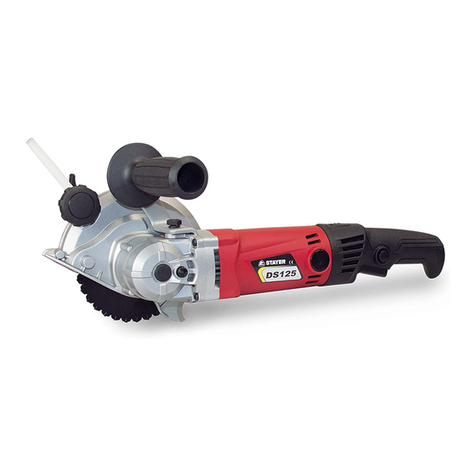
stayer LH187B User manual

www.grupostayer.com
LH187B
LH227E
LR125E
LD140
LD141
Manual de instrucciones
ES Istruzioni d’uso
IT Operating instructions
GB Bedienungsanleitung
DE Instructions d’emploi
FR
Área Empresarial Andalucía - Sector I
Calle Sierra de Cazorla nº7
C.P: 28320 Pinto (Madrid) SPAIN
Email: sales@grupostayer.com
Email: info@grupostayer.com

Área Empresarial Andalucía - Sector I
Calle Sierra de Cazorla nº7
C.P: 28320 Pinto (Madrid) SPAIN
Email: sales@grupostayer.com
Email: info@grupostayer.com

1 2
3 4
145
2
3
8786
4
32
8
9
9
9

EN60745, K = 3dB (LpA 2
, L ) K = 1,5 m/s (a )
WA h
LH227E
LR125E
LD140
LD141
LH187B
P1
W
280
420
180
180
140
n0
-1
min
0 - 12000
0 - 12000
13000
13000
11000
Ø .
mm
0.8
1.25
0.6
-
1.9
mm
227 x 115
ø 125
140 x 140 x 80
140 x 140 x 80
90x187
kg
2.1
2
0.9
0.9
1.4
L dB(A)
pA
78
80
76
76
83
L dB(A)
WA
88
91
85
85
96
ahw 2
m/s
4.6
3.1
4.2
4.2
4.2
6.1.

La herramienta eléctrica ha sido diseñada para lijar y pulir
en seco madera, plástico, metal y superficies
emplastecidas o pintadas. Es especialmente apropiada
para trabajar perfiles, esquinas o puntos difícilmente
accesibles.
Instruccionesdeseguridadespecíficas
ŸSolamente emplee la herramienta eléctrica para
lijar en seco. La penetración de agua en el aparato
eléctricocomportaunmayorriesgodeelectrocución.
Ÿ¡Atención! Peligro de incendio. Evite el
sobrecalentamiento de la pieza y de la propia
lijadora. Vacíe siempre el depósito de polvo antes
de cada pausa. El material en polvo acumulado en el
saco colector de polvo, Microfiltro, bolsa de papel (o la
bolsa filtrante o filtro del aspirador) puede llegar a
autoincendiarse bajo unas condiciones desfavorables,
como, p. ej., al proyectarse chispas al lijar metal. La
probabilidad de que esto ocurra es mayor si el material
va mezclado con partículas de pintura, poliuretano u
otras sustancias químicas y si éste se hubiese
calentandotrasunusointensodelaherramienta.
ŸAsegure la pieza de trabajo. Una pieza de trabajo
fijadaconunosdispositivosdesujeción,oenuntornillo
de banco, se mantiene sujeta de forma mucho más
seguraqueconlamano.
ŸMantenga limpio su puesto de trabajo. La mezcla de
diversos materiales es especialmente peligrosa. Las
aleacionesligerasenpolvopuedenarderoexplotar.
ŸNo utilice la herramienta eléctrica si el cable está
dañado.No toque uncabledañado, ydesconecteel
enchufe de la red, si el cable se daña durante el
trabajo.Uncabledañadocomportaunmayorriesgode
electrocución.
Descripcióndelfuncionamiento
Lea íntegramente estas advertencias de
peligro e instrucciones. En caso de no
atenerse a las advertencias de peligro e
instrucciones siguientes, ello puede ocasionar
una descarga eléctrica, un incendio y/o lesión
grave.
Por favor refiérase al manual adjunto para las
instruccionesdeseguridadgenerales.
Por favor lea y comprenda completamente las
instrucciones antes de ensamblar y utilizar este
equipo.
Montaje
Instalacióndelabolsadepolvo(Fig.2)
¡Aviso! Por razones de salud es estrictamente obligatorio
elusodelabolsarecolectoradepolvo.
ESPAÑOL
3
3
Instalacióndelpapeldelijado/desbastado(Fig.4)
- Desconecteprimeroelenchufedealimentación
- Inserteelpapeldelijado/desbastadoenelflejeabierto
ycierreelfleje
- Presente el papel de lijado / desbastado sobre el plato
de soporte asegurándose de que está bien tenso y
acabedefijarlomedianteelotrofleje.
- Asegúrese de que las perforaciones del papel de lijado
/desbastecoincidenconlasdelplatosoporte.
Descripcióndefunciones(Fig.1)
1. Agarrefrontal
2. Mandodearranque/parada
3. Controldevelocidad
4. Mandodeenclavamiento
5. Agarreprincipal
6. Bolsadepolvo
7. Platodelijado
8. Dispositivodesujecióndelalija
9. TomadeAspiración
Colocaciónyprueba
Mandodearranque/parada(Fig.3)
Paraarrancarelmotor:Presioneelmando2
Para operar continuamente: Presione el botón 4 mientras
aprietaelmando2
Para detener el motor: Suelte el mando 2 o en cado de
trabajo continuo simplemente presione brevemente el
mando2
CambiodeHerramienta
Escobillasdelmotor
- En caso de excesiva chispa en interior de la máquina o
funcionamiento irregular las escobillas deberán ser
revisadas obligatoriamente por un técnico acreditado.
No se autoriza la manipulación a nadie que no sea un
técnicoacreditado.
Mantenimiento
Advertencia! Desconecte siempre el enchufe de
alimentación antes de iniciar cualquier labor de
mantenimiento.
Limpieza
- Mantenga todos los dispositivos de seguridad,
conductos de aire y carcasa limpios de polvo y
suciedad tanto como sea posible y adquiera el
hábito de limpiarlos inmediatamente después de
usarlos.
- Limpie el equipo con un pincel de pelo semirrígido y
un paño ligeramente humedecido en una solución
jabonosasuave.
- No moje el interior ni use agentes de limpieza
agresivos.

4
ESPAÑOL
4
ServiciodeReparación
Elserviciotécnicoleasesoraráenlasconsultasquepueda
Ud. tener sobre la reparación y mantenimiento de su
producto, así como sobre piezas de recambio. Los dibujos
dedespieceeinformacionessobre las piezas derecambio
laspodráobtenertambiéneninternetbajo:
info@grupostayer.com
Eliminación
Es obligatorio que las herramientas eléctricas, accesorios
yembalajesseansometidosaunprocesoderecuperación
querespeteelmedioambiente.
SóloparalospaísesdelaUE:
¡Noarrojelasherramientaseléctricasalabasura!
Conforme a la Directriz Europea 2002/96/CE
sobre aparatos eléctricos y electrónicos
inservibles, tras su transposición en ley
nacional,deberánacumularseporseparadolas
herramientas eléctricas para ser sometidas a
unreciclajeecológico.
Reservadoelderechodemodificación.
MarcadoNormativo
CaracterísticasTécnicas
=Potencia
=Velocidadrotación
=Desplazamientodelaorbita
=Plato
=Masa
=Niveldepotenciaacústica
=Niveldepresiónacústica
=Vibración
Ramiro de la Fuente
Director Manager
ø
n0
P1
LWA
LpA
Declaracióndeconformidad
Declaramos bajo nuestra sola responsabilidad que este
producto está en conformidad con las normas o
documentos normalizados siguientes: EN60745 de
acuerdo con las regulaciones 2006/42/CE, 2004/108/CE,
2006/95/CE

Attenzione! Per motivi di salute è assolutamente
necessariousareilsacchettoperraccoltapolvere.
Descrizionedell’apparecchio(Fig.1)
1. Impugnaturaanteriore
2. InterruttoreON/OFF
3. Regolatoredelnumerodigiri
4. Pulsantedibloccaggio
5. Impugnatura
6. Saccodiraccoltadellapolvere
7. Piastradilevigatura
8. Dispositivodiserraggio
9. Presadiaspirazione
Ilposizionamentoetest
InterruttoreON/OFF(Fig.3)
Accensione:premetel’interruttore2
-
.
.
Fissaggiodeifogliabrasivi(Fig.4)
- Staccatelaspinadallapresadicorrente.
- Inserite il foglio abrasivo nel dispositivo di serraggio
apertoechiudetelo.
- Mettete il foglio sopra la piastra oscillantein modo teso
efissatelodinuovo.
- Fate attenzione che le forature corrispondano al disco
oscillante.
Esercizio continuo: fissate l’interruttore 2 con il pulsante di
bloccaggio4
Spegnimento: premete brevemente l’interruttore 2, Potete
prescegliere il numero dei giri girando líapposita vite
godronatasulpulsante2.
Cambioutensile
Spazzolealcarbone
In caso di uno sviluppo eccessivo di scintille fate
sostituirelespazzolealcarbonedaunelettricista.
Attenzione! Le spazzole al carbone devono essere
sostituitesolodaunelettricista
Pulizia, manutenzione e ordinazione dei pezzi di
ricambio
Prima di qualsiasi lavoro di pulizia staccate la spina dalla
presadicorrente.
Pulizia
- Tenete il più possibile i dispositivi di protezione, le
fessure di aerazione e la carcassa del motore liberi da
polvereesporco.Strofinatel’apparecchioconunpanno
pulito o soffiatelo con l’aria compressa a pressione
bassa
- Consigliamo di pulire l’apparecchio subito dopo averlo
usato.
- Pulite l’apparecchio regolarmente con un panno
asciutto ed un po’ di sapone. Non usate detergenti o
solventiperchéquestiultimipotrebberodanneggiare le
partiinplasticadell’apparecchio.
L'elettroutensile è adatto per la levigatura e la lucidatura a
secco di superfici in legno, di materie plastiche, di metallo,
di superfici stuccate e superfici verniciate. Lo stesso è
adatto in modo particolare per profili, angoli o punti
difficilmenteaccessibili.
Istruzionidisicurezzaspecificheperlamacchina
Ÿ
Ÿ
Ÿ
Ÿ
Ÿ
Utilizzare l’elettroutensile esclusivamente per
levigatura a secco. L’eventuale infiltrazione di acqua
in un elettroutensile va ad aumentare il rischio
d’insorgenzadiscosseelettriche.
Attenzione: Pericolo d’incendio! Evitare un
surriscaldamento del materiale in lavorazione e
della levigatrice. Prima di iniziare una pausa
svuotare sempre il contenitore per la polvere. La
polvere di abrasione nel sacchetto raccoglipolvere, nel
Microfilter, nel sacchetto raccoglipolvere in carta (o nel
sacchettoraccoglipolvereonelfiltrodell’aspirapolvere)
può prendere fuoco in caso di condizioni sfavorevoli
come la scia di scintille prodotta durante la levigatura
del metallo. Una situazione particolarmente pericolosa
si viene a creare quando la polvere di smerigliatura si
mischia con resti di vernice e poliuretano oppure con
altri materiali chimici ed il materiale in lavorazione si
riscalda troppo nel corso di una lavorazione di lunga
durata.
Assicurare il pezzo in lavorazione. Un pezzo in
lavorazione può essere bloccato con sicurezza in
posizione solo utilizzando un apposito dispositivo di
serraggiooppureuna morsa aviteenon tenendolo con
lasemplicemano.
Mantenerepulitalapropriazonadilavoro.Misceledi
materiali di diverso tipo possono risultare
particolarmentepericolose.Lapolveredimetallileggeri
puòessereinfiammabileedesplosiva.
Mai utilizzare l’elettroutensile con un cavo
danneggiato. Non toccare il cavo danneggiato ed
estrarre la spina di rete in caso che si dovesse
danneggiare il cavo mentre si lavora. Cavi
danneggiati aumentano il rischio di una scossa di
correnteelettrica.
Descrizionedelfunzionamento
Leggere tutte le avvertenze di pericolo e le
istruzionioperative. Incasodimancatorispetto
delle avvertenze di pericolo e delle istruzioni
operative si potrà creare il pericolo di scosse
elettriche,incendie/oincidentigravi.
Lerelativeavvertenzedisicurezzasitrovanonell’opuscolo
allegato.
Leggete attentamente le istruzioni per l’uso prima del
montaggioedellamessainesercizio.
Montaggio
Montaggiodelsacchettoperraccoltapolvere(Fig.2)
ITALIANO
5
5

ITALIANO
6
6
- Fate attenzione che non possa penetrare dell’acqua
all’internodell’apparecchio.
ServiziodiRiparazione
Il servizio tecnico l'aiuterà a risolvere i suoi dubbi sulla
riparazionee la manutenzionedel suoprodotto, così come
sui pezzi di sostituzione. I disegni di sezioni e le
informazioni sui pezzi di sostituzione si potranno ottenere
ancheinInternetin:info@grupostayer.com
Smaltimentoericiclaggio
Smaltimento
Avviare ad un riciclaggio rispettoso dell'ambiente pistola a
spruzzo,unitàelettrica,accessoriedimballaggiscartati.
SoloperiPaesidellaCE:
Nongettareelettroutensilidismessitrairifiutidomestici!
Conformemente alla norma della direttiva CE
2002/96 sui rifiuti di apparecchiature elettriche
ed elettroniche (RAEE) ed all'attuazione del
recepimento nel diritto nazionale, gli
elettroutensili diventati inservibili devono
essere raccolti separatamente ed essere inviati
adunariutilizzazioneecologica.
Conogniriservadimodifichetecniche.
Normativa
CaratteristicheTecniche
=Potenza
=Velocitàorbitale
=Spostamentodell'orbita
=Piatto
=Massa
=Livellodipotenzaacustica
=Livellodipressioneacustica
=Vibrazione
Dichiarazionediconformità
Assumendone la piena responsabilità, dichiariamo che
il prodotto è conforme alle seguenti normative ed ai
relativi documenti: EN60745 in base alle prescrizioni
delledirettive2006/42/CE,2004/108/CE,2006/95/CE
Ramiro de la Fuente
Director Manager
ø
n0
P1
LWA
LpA

The machine is intended for dry sanding and polishing of
wood, plastic, metal, filler, as well as for painted
surfaces. It is ist especially suitable for profiles, corners
or hard to reach locations.
Please refer to the booklet included in delivery for the
safetyinstructions.
Machine-specificSafetyWarnings
Use the machine only for dry sanding. Penetrationof
water into the machine increases the risk of an electric
shock.
Caution, fire hazard! Avoid overheating the object
being sanded as well as the sander. Always empty
the dust collector before taking breaks. In
unfavourable conditions, e. g., when sparks emit from
sanding metals, sanding debris in the dust bag, micro
filter or paper sack (or in the filter sack or filter of the
vacuum cleaner) can self-ignite. Particularly when
mixedwithremaindersofvarnish,polyurethaneorother
chemical materials and when the sanding debris is hot
afterlongperiodsofworking.
Secure the workpiece. A workpiece clamped with
clamping devices or in a vice is held more secure than
byhand.
Keep your workplace clean. Blends of materials are
particularly dangerous. Dust from light alloys can burn
orexplode.
Never use the machine with a damaged cable. Do
not touch the damaged cable and pull the mains
plug when the cable is damaged while working.
Damagedcablesincreasetheriskofanelectricshock.
FunctionalDescription
Read all safety warnings and all instructions.
Failure to follow the warnings and instructions
may result in electric shock, fire and/or serious
injury.
Pleasereadtheoperating instructions carefully before
assemblingandusing.
Assembly
.
-
-
-.
-.
Ÿ
Ÿ
Ÿ
Ÿ
Ÿ
Fittingthedustbag(Fig.2)
Important! For health safety reasons it is imperative that
youuseadustbag
Fasteningthesanding/grindingpaper(Fig.4)
Pulloutthepowerplugfirst.
Insert the sanding/grinding paper into the open clamp
andclosetheclamp.
Lay the sanding/paper over the oscillating plate so
thatthepaperistautandclampitagain
Makesurethatthe perforations inthesanding/grinding
papercoincidewiththeoscillatingplate
ENGLISH
7
7
Layout (Fig. 1)
1.
2.
3.
4.
5.
6. D
7.
8.
9. Suctionoutlet
PlacementandTesting
Toolchange
-.
.
-.
-
-.
-
Disposalandrecycling
The machine, accessories and packaging should be sorted
forenvironmental-friendlyrecycling.
Fronthandle
ON/OFFswitch
Speedcontroller
Lockingknob
Handle
ustbag
Sanding/grindingplate
Clampingdevice
ON/OFFswitch(Fig.3)
Toswitchon:Pressswitch2
Continuousoperation:Secureswitch2withlockingknob4.
To switch off: Briefly hold down switch 2.You can preselect
thespeedbyturningtheknurledscrewinswitch2.
Carbonbrushes
Incaseofexcessivesparking,havethecarbonbrushes
checkedonlybyaqualifiedelectrician
Important! The carbon brushes should not be
remplacedbyanyonebutaqualifiedelectrician.
Cleaning, maintenance and ordering of spare
parts
Always pull out the mains power plug before starting any
cleaningwork
Cleaning
Keep all safety devices, air vents and the motor
housingfreeofdirtanddustasfaraspossible
Wipethe equipmentwith aclean clothor blowit with
compressedairatlowpressure.
We recommend that you clean the tool immediately
afteryouuseit
Clean the equipment regularly with a moist cloth
and some soft soap. Do not use cleaning agents or
solvents; these may be aggressive to the tool’s
plastic parts. Ensure that no water can get into the
interiorofthetool.
Repairservice
The technical service will provide you advice regarding
questions you may have on the repair and maintenance of
yourproduct as well as on spare parts.You may also obtain
exploded views and information on spare parts on the
internetunder:info@grupostayer.com

ENGLISH
8
8
OnlyforECcountries:
Do not dispose of power tools into household
waste! According the European Guideline
2002/96/EC for Waste Electrical and Electronic
Equipment and its implementation into national
right,powertoolsthatarenolongerusablemust
be collected separately and disposed of in an
environmentallycorrectmanner.
Subjecttochangewithoutnotice.
LegalRegulations
Technicalfeatures
=Powerinput
=Spinningspeed
=Displacementoftheorbit
=Sandingpad
=Mass
=Acousticpowerlevel
=Acousticpressurelevel
=Vibration
DeclarationofConformity
We declare under sole responsability that this product is in
coformity with the following standards or standardisation
documents: EN60745, according to the provisions of the
directives2006/42/CE,2004/108/CE,2006/95/CE
Ramiro de la Fuente
Director Manager
ø
n0
P1
LWA
LpA

Das Elektrowerkzeug ist bestimmt zum trockenen
Schleifen und Polieren von Holz, Kunststoff, Metall,
Spachtelmasse sowie lackierten Oberflächen. Es ist
besonders geeignet für Profile, Ecken oder schwer
zugängliche Stellen.
Gerätespezifische Sicherheitshinweise
ŸVerwenden Sie das Elektrowerkzeug nur für
Trockenschliff. Das Eindringen von Wasser in ein
Elektrogerät erhöht das Risiko eines elektrischen
Schlages.
ŸAchtung Brandgefahr! Vermeiden Sie eine
Überhitzung des Schleifgutes und des Schleifers.
Entleeren Sie vor Arbeitspausen stets den
Staubbehälter. Schleifstaub im Staubsack, Microfilter,
Papiersack (oder im Filtersack bzw. Filter des
Staubsaugers) kann sich unter ungünstigen
Bedingungen, wie Funkenflug beim Schleifen von
Metallen, selbst entzünden. Besondere Gefahr
besteht, wenn der Schleifstaub mit Lack-,
Polyurethanresten oder anderen chemischen Stoffen
vermischt ist und das Schleifgut nach langem Arbeiten
heiß ist.
ŸSichern Sie das Werkstück. Ein mit
Spannvorrichtungen oder Schraubstock
festgehaltenes Werkstück ist sicherer gehalten als mit
Ihrer Hand.
ŸHalten Sie Ihren Arbeitsplatz sauber.
Materialmischungen sind besonders gefährlich.
Leichtmetallstaub kann brennen oder explodieren.
ŸBenutzen Sie das Elektrowerkzeug nicht mit
beschädigtem Kabel. Berühren Sie das
beschädigte Kabel nicht und ziehen Sie den
Netzstecker, wenn das Kabel während des
Arbeitens beschädigt wird. Beschädigte Kabel
erhöhen das Risiko eines elektrischen Schlages.
Funktionsbeschreibung
Lesen Sie alle Sicherheitshinweise und
Anweisungen. Versäumnisse bei der
Einhaltung der Sicherheitshinweise und
Anweisungen können elektrischen Schlag,
Brand und/oder schwere Verletzungen
verursachen.
Die entsprechenden Sicherheitshinweise finden Sie im
beiliegenden Heftchen.
Bitte vor Montage und Inbetriebnahme die
Betriebsanleitungaufmerksamlesen
MontagedesStaubfangsack(Bild2)
Achtung! Benutzung des Staubfangsackes ist aus
Gesund-heitsgründenunbedingterforderlich.
Schleifpapierbefestigung(Bild4)
Netzsteckerziehen.
Schleifpapier in geöffnete Klemmvorrichtung einlegen
undschließen.
Straff über die Schwingplatte legen und abermals
klemmen.
.
Montage
-
-
-
DEUTSCH
9
9
-
1.
2.
3.
4.
5.
6.
7.
8.
9. Saugauslass
Placementund-prüfung
:Schalter2eindrücken
Dauerbetrieb:MitArretierknopf4Schalter2sichern
Ausschalten:Schalter2kurzeindrückenDurchDrehender
Werkzeugwechsel
-.
-
.
-.
-.
-
Reparatur-Service
Der technische Dienst wird Ihnen Beratung zu Fragen, die
Sie auf die Reparatur und Wartung Ihres Produktes sowie
auf Ersatzteile haben. Sie können auch erhalten
ExplosionszeichnungenundInformationenzuErsatzteilen
imInternetunter:
EntsorgungundRecycling
Elektrowerkzeuge, Zubehör und Verpackungen sollen
einer umweltgerechten Wiederverwertung zugeführt
werden.
Achten Sie darauf, daß die Lochungen mit der
Schwingplatteübereinstimmen.
Gerätebeschreibung(Bild1)
Frontgriff
Ein/Ausschalter
Drehzahlregler
Arretierknopf
Handgriff
Staubfangsack
Schleifplatte
Klemmvorrichtung
Ein-/Ausschalter(Bild3)
Einschalten
Rändelschraube im Schalter 2 können Sie die Drehzahl
vorwählen.
Kohlebürsten
Bei übermäßiger Funkenbildung lassen Sie die
KohlebürstendurcheineElektrofachkraftüberprüfen
Achtung! Die Kohlebürsten dürfen nur von einer
Elektrofachkraftausgewechseltwerden.
Reinigung,WartungundErsatzteilbestellung
ZiehenSievorallenReinigungsarbeitendenNetzstecker.
Reinigung
Halten Sie Schutzvorrichtungen, Luftschlitze und
Motorgehäuse so staub- und schmutzfrei wie
möglich.Reiben Sie das Gerät mit einem sauberen
Tuch ab oder blasen Sie es mit Druckluft bei
niedrigemDruckaus
Wir empfehlen, dass Sie das Gerät direkt nach
jederBenutzungreinigen
Reinigen Sie das Gerät regelmäßig mit einem
feuchtenTuchundetwasSchmierseife
Verwenden Sie keine Reinigungs- oder
Lösungsmittel; diese könnten die Kunststoffteile
desGerätesangreifen.
- Achten Sie darauf, dass kein Wasser in das
Geräteinneregelangenkann.
info@grupostayer.com

DEUTSCH
10
10
Nur für EU-Länder:
Werfen Sie Elektrowerkzeuge nicht in den
Hausmüll! Gemäß der Europäischen Richtlinie
2002/96/EG über Elektro- und Elektronik-
Altgeräte und ihrer Umsetzung in nationales
Recht müssen nicht mehr gebrauchsfähige
Elektrowerkzeuge getrennt gesammelt und
einer umweltgerechten Wiederverwertung
zugeführtwerden.
Änderungenvorbehalten.
GesetzlicheRegelungen
Technischewigenschaften
=Lelstung
=Schwingungszahl
=VerschiebungderUmlaufbahn
=Platte
=Gewicht
=Schallleistungspegel
=Schalldruckpegel
=Vibration
Konformitätserklärung
Wir erklären in alleiniger Verantwortung, dass dieses
Produkt mit den folgenden Normen oder normativen
Dokumenten übereinstimmt: EN60745, gemäß den
Bestimmungen der Richtlinien 2006/42/CE, 2004/108/CE,
2006/95/CE
ø
n0
P1
LWA
LpA
Ramiro de la Fuente
Director Manager

L’outil électroportatif est conçu pour le ponçage et le
polissage à sec des surfaces en bois, métal, mastic et
matières plastiques ainsi que pour des surfaces vernies.
Il est particulièrement approprié pour travailler des
profilés et des coins ou pour les endroits d’accès difficile.
Instructions de sécurité spécifiques à l’appareil
ŸN’utiliser l’outil électroportatif que pour un travail à
sec. La pénétration d’eau dans un outil électroportatif
augmente le risque d’un choc électrique.
ŸAttention ! Risque d’incendie ! Eviter la surchauffe
des matériaux travaillés et de la ponceuse. Vider
toujours le bac de récupération des poussières
avant de faire une pause de travail. Les particules de
poussière se trouvant dans le sac à poussières, le
microfiltre, le sac en papier (ou dans le sac à
poussières en tissu ou le filtre de l’aspirateur) peuvent
s’enflammer d’elles-mêmes dans des conditions
défavorables, p. ex. projection d’étincelles lors du
ponçage de pièces en métal, Ceci notamment lorsque
les particules de poussière sont mélangées à des
résidus de vernis, de polyuréthane ou d’autres
substances chimiques et que les matériaux travaillés
sont très chauds après avoir été travaillés pendant une
période assez longue.
ŸBloquer la pièce à travailler. Une pièce à travailler
serrée par des dispositifs de serrage ou dans un étau
est fixée de manière plus sûre que tenue dans les
mains.
ŸTenir propre la place de travail. Les mélanges de
matériaux sont particulièrement dangereux. Les
poussières de métaux légers peuvent être explosives
ou inflammables.
ŸNe jamais utiliser un outil électroportatif dont le
câble est endommagé. Ne pas toucher à un câble
endommagé et retirer la fiche du câble
d’alimentation de la prise du courant, au cas où le
câble serait endommagé lors du travail. Un câble
endommagé augmente le risque d’un choc électrique.
Description du fonctionnement
Lire tous les avertissements et indications.
Le non-respect des avertissements et
instructions indiqués ci-après peut entraîner un
choc électrique, un incendie et/ou de graves
blessures sur les personnes.
Voustrouverezlesconsignesdesécurité correspondantes
danslepetitmanuelci-joint
Veuillez lire attentivement le mode d’emploi avant le
montageetlamiseenservice
Montage
Montagedusacrécupérateurdepoussière(figure2)
Attention! Pourdesraisonsenrapportaveclasanté,ilest
absolument indispensable d’utiliser le sac récupérateur de
poussière
Fixationdupapierabrasif(figure4)
Retirezlafichedecontact
.
.
.
-
FRANÇAIS
-
-.
-.
1.
2.
3.
4.
5.
6.
7.
8.
9. Bouched'aspiration
Placementettest
Miseencircuit:Appuyezsurl’interrupteur2
Fonctionnement continu: Avec le bouton d’arrêt 4 bloquez
l’interrupteur2
Mise hors circuit: Appuyez brièvement sur l’interrupteur 2.
Changementd'outil
- .
.
-
-
-
Déposez le papier abrasif dans le dispositif de serrage
ouvertetfermezcedernier.
Tendez au-dessus de la dalle flottante et serrez de la
mêmemanière
Veillez à ce que les perçages correspondent à la dalle
flottante
Descriptiondel’appareil(figure1)
Poignéefrontale
InterrupteurMarche/Arrêt
Régulateurdevitessederotation
Boutond’arrêt
Poignée
Sacàpoussière
Patindeponçage
Dispositifdeserrage
InterrupteurMarche/Arrêt(figure3)
En tournant la vis moletée dans l’interrupteur 2, vous
pouvezprésélectionnerlavitesse.
Brossesàcharbon
Si les brosses à charbon font trop d’étincelles, fai tes-
lescontrôlerpardesspécialistesenélectricité.
Attention ! Seul un(e) spécialiste électricien(ne) est
autoriséàremplacerlesbrossesàcharbon.
Nettoyage, maintenance et commande de pièces
derechange
Retirezlafichedecontactavanttoustravauxdenettoyage
Nettoyage
Maintenez les dispositifs de protection, les fentes à
air et le carter de moteur aussi propres (sans
poussière) que possible. Frottez l’appareil avec un
chiffon propre ou soufflez dessus avec de l’air
compriméàbassepression.
Nous recommandons de nettoyer l’appareil
directementaprèschaqueutilisation.
Nettoyez l’appareil régulièrement à l’aide d’un
chiffon humide et un peu de savon. N’utilisez aucun
produit de nettoyage ni détergeant ; ils pourraient
endommager les pièces en matières plastiques de
l’appareil. Veillez à ce qu’aucune eau n’entre à
l’intérieurdel’appareil.
ServicedeRéparations
Le service technique vous conseillera pour les
consultations que vous pouvez avoir sur les réparations et
lamaintenancedevotreproduit,ainsiquesurdespiècesde
rechange. Les dessins des pièces de rechange et les
informations sur les pièces de rechange pourront être
obtenuessurinternetàtravers:
info@grupostayer.com
11
11

Elimination et le recyclage
Les outils électroportatifs, ainsi que leurs accessoires et
emballages, doivent pouvoir suivre chacun une voie de
recyclageappropriée.
Seulementpourlespaysdel'UnionEuropéenne:
Ne jetez pas votre appareil électroportatif avec les ordures
ménagères!
Conformément à la directive européenne
2002/96/CE relative aux déchets
d'équipements électriques et électroniques et
sa réalisation dans les lois nationales, les outils
électroportatifs dont on ne peut plus se servir
doivent être séparés et suivre une voie de
recyclageappropriée.
Sousréservedemodifications.
Normes
Caractéristiquestechniques
=Puissance
=Oscillation
=Déplacementdel'orbite
=Patin
=Mass
=Niveaudepuissanceacoustique
=Niveaudepressionacoustique
=Vibration
DéclarationdeConformité
Nous déclarons sous notre propre responsabilité que ce
produit est en conformité avec les normes ou documents
normalisés suivants: EN60745 conformément aux
réglementations2006/42/CE,2004/108/CE,2006/95/CE
ø
n0
P1
LWA
LpA
FRANÇAIS
12
12
Ramiro de la Fuente
Director Manager

Área Empresarial Andalucía - Sector I
Calle Sierra de Cazorla nº7
C.P: 28320 Pinto (Madrid) SPAIN
Email: sales@grupostayer.com
Email: info@grupostayer.com

www.grupostayer.com
Área Empresarial Andalucía - Sector I
Calle Sierra de Cazorla nº7
C.P: 28320 Pinto (Madrid) SPAIN
Email: sales@grupostayer.com
Email: info@grupostayer.com
This manual suits for next models
4
Table of contents
Languages:
Other stayer Sander manuals

stayer
stayer LH190E User manual

stayer
stayer BRUSHLESS LP1000E User manual

stayer
stayer HP1010 User manual

stayer
stayer LS 1200 B User manual

stayer
stayer LOM130PD User manual

stayer
stayer LU 260 CE User manual

stayer
stayer HP750E User manual

stayer
stayer LH187C User manual

stayer
stayer RO5 BRUSHLESS User manual

stayer
stayer LP600BE User manual

stayer
stayer LEN751E User manual

stayer
stayer ls1200 User manual

stayer
stayer LT1401EK User manual

stayer
stayer LP600BE User manual

stayer
stayer AGL181 User manual

stayer
stayer LU260E User manual

stayer
stayer RO125 User manual

stayer
stayer LH187C User manual

stayer
stayer LD141C User manual

stayer
stayer LOM 230 User manual