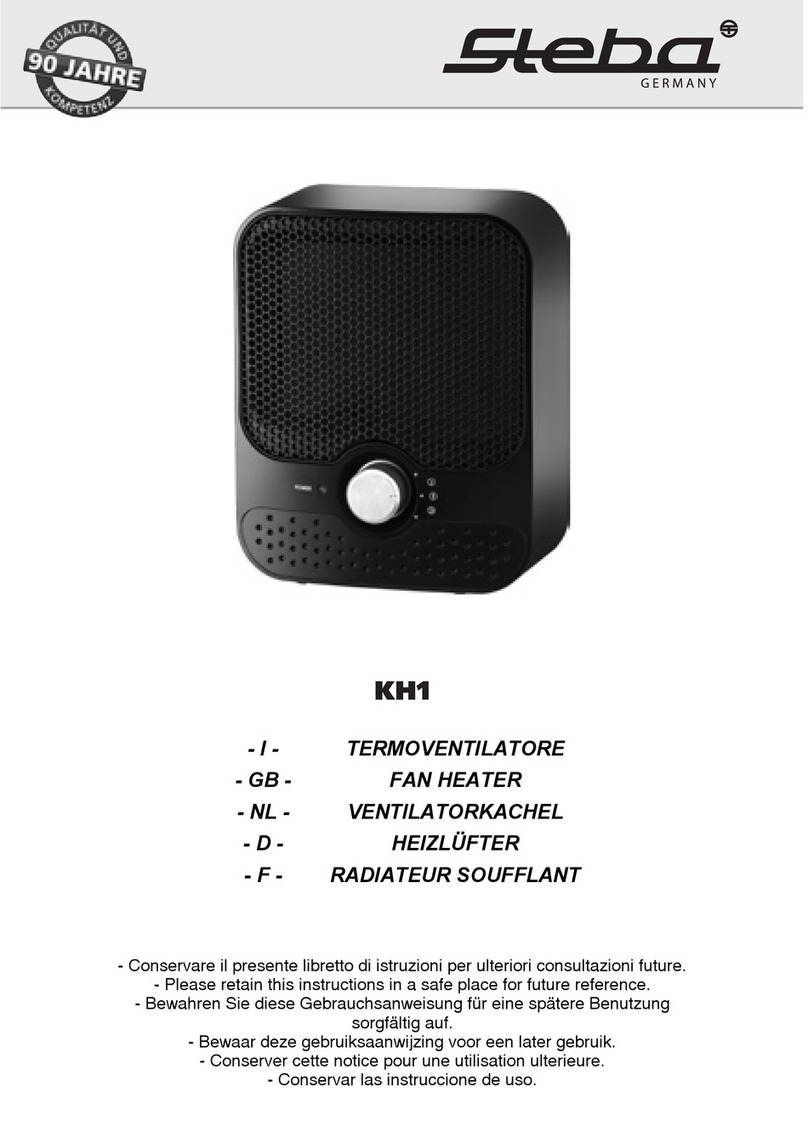
Steba QH 1800 User manual

www.steba.com
Quarzheizer QH 1800
Gebrauchsanweisung 4
Instructions for use 10
Mode d´emploi 16

2
UP
x 4 x 4
100 cm
180 cm
20 cm20 cm
40 cm
#1 #2
#3
#4 #5 #6

3
0°
40°
x 2
1
2
N
L
x 2
x 2
CLICK!
CLICK!
CLICK!
OK!
1
2
#7 #8
#9 #10
#11 #13#12

4
INSTALLATIONS UND BETRIEBSANLEITUNG
Um Schäden und Gefahrensituationen zu vermeiden lesen Sie vor
der Inbetriebnahme des Heizgerätes diese Anleitung sorgfältig
durch. Ein jeglicher Gebrauch, der von der in der Bedienungs-
anleitung vorgeschriebenen Verwendung des Heizkörpers ab-
weicht, kann Brände, elektrische Schläge und Verletzungen ver-
ursachen und führt zum Verlust sämtlicher Garantieansprüche.
Entfernen Sie vor der Inbetriebnahme die Verpackung und über-
prüfen Sie den Inhalt auf Vollständigkeit. Sollten Sie Fehler oder
Schäden feststellen, versuchen Sie nicht selbst diese zu reparie-
ren, sondern wenden Sie sich an Ihren Händler.
Lassen Sie Ihre Kinder nicht mit der Verpackung spielen und schüt-
zen Sie die Umwelt, indem Sie die Verpackung entsprechend den
nationalen Bestimmungen zur Müllverarbeitung entsorgen.
Bitte bewahren Sie diese Anleitung auf.
WICHTIGE SICHERHEITSANWEISUNGEN -
AUFMERKSAM DURCHLESEN
∙Dieses Gerät ist für den normalen Hausgebrauch und nicht zur-
Verwendung in kommerziellen/industriellen Bereichen, in Fahr-
zeugen oder ab Bord von Schiffen oder Flugzeugen bestimmt.
∙Dieses Gerät darf von Kindern ab dem Alter von 8 Jahren
undvon Personen mit verminderten körperlichen, senso-
rischen oder geistigen Fähigkeiten oder ohne ausreichende Er-
fahrungen und Kenntnisse verwendet werden, wurden diese
bezüglich der sicheren Verwendung des Gerätes betreut oder
angewiesen und sind sie sich der Risiken bewusst. Kinder dür-
fen nicht mit dem Gerät spielen. Die Reinigung und Wartung
darf nicht unbeaufsichtigt von Kindern vorgenommen werden.

5
∙Kinder unter dem Alter von 8 Jahren sollten von dem Gerät
ferngehalten werden, es sei denn, sie werden kontinuierlich be-
aufsichtigt.
∙Kinder unter 8 Jahren dürfen das Gerät nicht regulieren.
∙ACHTUNG: Einige Teile dieses Produktes können sehr
heiß werden und Verbrennungen verursachen. Beson-
dere Aufmerksamkeit ist in Anwesenheit von Kindern
und schutzbedürftigen Personen erforderlich.
∙Verwenden Sie den Heizkörper nicht mit einem programmier-
baren Schalter, Timer oder mit automatischen Umschalteinrich-
tungen aufgrund der Gefahren und/oder des Feuerrisikos, ist
der Heizerkörper bedeckt oder wurde er nicht in die richtige
Stellung gebracht.
∙WARNUNG: das Produkt ist nicht mit einem Raumtemperatur-
regler ausgestattet. Verwenden Sie den Heizkörper nicht in
kleinen Räumen, in denen sich Personen aufhalten, die nicht in
der Lage sind, eigenständig den Raum zu verlassen, es sei denn,
eine kontinuierliche Aufsicht seitens einer für ihre Sicherheit
verantwortlichen Person wird gewährleistet.
∙Stellen Sie sicher, dass Ihre Betriebsspannung den Angaben auf
dem Typenschild entspricht. 230V~, 50Hz.
∙Dieser Heizkörper ist wasserfest gemäss Standard IPX4. Er kann
daher in Badezimmern oder in anderen feuchten Bereichen
verwendet werden, SOLANGE ER NICHT INNERHALB DES UM-
KREISES VON BADEWANNEN ODER DUSCHEN INSTALLIERT
WIRD. Das bedeutet, dass er nicht in den Bereichen installiert
werden darf, die in Abbildung #3 mit Zone 1 gekennzeichnet
sind.

6
∙Bringen Sie den Heizer während des Betriebs in eine sichere Po-
sition:
∙mindestens 1m von brennbaren Gegenständen oder von
Möbeln entfernt;
∙vor dem Heizkörper muss ein Freiraum von mindestens 1m
gelassen werden;
∙er darf nicht direkt unter einer Steckdose montiert werden.
∙WARNUNG: Bedecken Sie den Heizkörper nicht, um eine Über-
hitzung zu vermeiden. Hängen Sie nichts an den Heizkörper
und bedeckend Sie ihn nicht während des Betriebs. Betreiben
Sie den Heizkörper nicht in Räumen mit explosivem Gas oder
während der Verwendung entzündlicher Lösungsmittel oder
Lacke oder Klebstoffe, oder in denen entzündliche Materialien
verwendet werden, wie beim Verlegen oder Versiegeln von
Parkett- oder PVC-Fussböden.
∙Dieses Produkt wird kabelfrei geliefert. Während der Installati-
on kann Ihr Elektriker das Gerät an das Stromnetz anschliessen,
indem er eine Verbindungsleitung verwendet (siehe Abschnitt
2 INSTALLATION).
∙Wird die Verbindungsleitung des Gerätes beschädigt und muss
gewechselt werden, tun sie das nicht selbst! Um jegliche Risiken
oder Gefahren zu vermeiden wenden sie sich an einen zugelas-
senen Kundendienst.
Positionierung
∙Das Produkt muss unter Einhaltung des in Abbildung #1 angegebenen Mindestab-
standes von der Zimmerdecke, vom Fussboden und von seitlichen Gegenständen
installiert werden.
∙Dieser wandmontierte Infrarotstrahler kann nur waagerecht an eine stabile senk-
rechte Wand montiert werden. Installieren Sie ihn niemals senkrecht oder an der
Zimmerdecke, wie in Abb. #2.
∙Das Produkt darf nicht auf entzündliche Oberflächen montiert werden, wie auf
Holz oder Kunststoff. Alle entzündlichen Materialien müssen mindestens 100 cm
von der Vorderfläche entfernt sein. Das ist ebenfalls der Mindestabstand, den der
Benutzer zum Produkt einhalten muss, denn das Frontgitter wird während des Be-
triebs heiss.

7
∙Montieren Sie das Gerät so, dass sich das Produkt und der Zugschnurschalter außer-
halb der Reichweite von Kindern befinden. Wird das Gerät im Badezimmer instal-
liert, sollte es so plaziert werden, dass es niemand aus der Badewanne oder aus der
Dusche heraus berühren kann.
∙Nach dem Betrieb empfehlen wir, das Produkt vor dem Berühren mindestens 10 –
15 Minuten abkühlen zu lassen.
Installierung
Wir empfehlen, vor der Ausführung der folgenden Schritte die Hauptstrom-
versorgung zu trennen.
∙Befestigen Sie die Wandhalterung, indem Sie diese als Schablone zum Bohren der
Löcher für die Spreizdübel verwenden.
∙Beachten Sie, dass sich die drei Löcher zur Befestigung des Gerätes in der in Abb. #4
dargestellten Position befinden sollten, NICHT umgekehrt.
∙Das Gerät kann auf zwei Stellungen ausgerichtet werden.
∙waagerecht
∙abwärts
∙Entsprechend der von Ihnen bevorzugten Ausrichtung, müssen Sie die Schrauben
in Position 1 befestigen, möchten Sie eine waagerechte Ausrichtung des Gerätes,
und in Position 2 bevorzugen Sie die Abwärtsneigung des Gerätes, wie in Abb. #7
dargestellt.
∙Entfernen Sie die Kunststoffabdeckung des Gerätes, wie in Abb. #8.
∙Entfernen Sie die Zugentlastung, wie in Abb. #9 dargestellt, und führen Sie die
elektrische Leitung von hinten durch die runde Öffnung unter dem Anschlussblock
und stellen Sie die Verbindungen gemäss Abb.#9 her. Verbinden Sie die 2 Phasen
mit dem Anschlussblock.
∙Die blaue Leitung wird mit dem N-Pol und die braune Leitung mit dem L-Pol ver-
bunden. Die Symbole L und N sind unter dem Anschlussblock gekennzeichnet.
∙Sichern Sie das Stromkabel mittels der Befestigung der Zugentlastung
∙Befestigen Sie erneut die hintere Kunststoffabdeckung an ihrer Position, wie in
Abb. #10 dargestellt.
∙Hängen Sie den Heizkörper in die Wandhalterung und ziehen Sie ihn nach untern,
um ihn sicher an der Halterung in Richtung der des Pfeils, siehe Abb. #11, zu befe-
stigen.
∙Überprüfen Sie die korrekte Befestigung des Gerätes. Es sollte sich nicht bewegen.
Elektrischer Anschluss
∙Der Produkte ist in zweifach elektrisch isoliert (Klasse II) und bedarf daher keiner
Erdung.
∙Das Gerät darf nur an eine 1/N/PE 230V AC 50 Hz -Speisung. Wird die Verbindungs-
leitung verwendet, empfehlen wir die Verwendung einer gummibeschichteten
Verbindungsleitung (Typ H05RR-F) mit einem Querschnitt von mindestens 2 x 1
mm².

8
Betrieb
∙●Durch Ziehen des Zugschnurschalters wird das Produkt in Betrieb genommen. Auf
dem vorderen Sichtfenster können Sie folgende Symbole sehen:
Product rating 0 I II III
230V 1800W OFF 600W 1200W 1800W
Wartung
∙Dieses Produkt bedarf keiner besonderen Wartung.
∙Reinigen Sie das Produkt mit einem trockenen Lappen alle 6 Monate.
∙Muss das Produkt repariert werden, wenden Sie sich an einen zugelassenen tech-
nischen Kundendienst.
∙Verwenden Sie bei einem Wechsel des Stromkabels den Typ 2x1,00mm² H05RR-F
HAR. Dieses Verfahren muss von Fachpersonal und darf niemals vom Endverbrau-
cher durchgeführt werden, um eine Beschädigung des Gerätes und die Gefähr-
dung der persönlichen Gesundheit zu vermeiden.

9
Korrekte Entsorgung dieses Produkts:
Ausgediente Geräte sofort unbrauchbar machen.
Innerhalb der EU weist dieses Symbol darauf hin, dass dieses Produkt nicht
über den Hausmüll entsorgt werden darf. Altgeräte enthalten wertvolle recy-
clingfähige Materialien, die einer Wiederverwertung zugeführt werden soll-
ten und um der Umwelt bzw. der menschlichen Gesundheit nicht durch un-
kontrollierte Müllbeseitigung zu schaden. Bitte entsorgen Sie Altgeräte deshalb über
geeignete Sammelsysteme oder senden Sie das Gerät zur Entsorgung an die Stelle,
bei der Sie es gekauft haben. Diese wird dann das Gerät der stofflichen Verwertung
zuführen.
Verpackungs-Entsorgung
Verpackungsmaterial nicht einfach wegwerfen, sondern der Wiederverwertung zu-
führen. Papier-, Pappe- und Wellpappeverpackungen bei Altpapiersammelstellen
abgeben. Kunststoffverpackungsteile und Folien sollten ebenfalls in die dafür vorge-
sehenen Sammelbehälter gegeben werden
In den Beispielen für die Kunststoffkennzeichnung steht: PE für
Polyethylen, die Kennziffer 02 für PE-HD, 04 für PE-LD, PP für Poly-
propylen, PS für Polystyrol.
Kundenservice:
Sollte Ihr Gerät wider Erwarten einmal den Kundendienst benötigen, wenden Sie
sich bitte an nachfolgende Anschrift. Wir werden dann im Garantiefall die Abholung
veranlassen. Das Gerät muss transportfähig verpackt sein.
Unfreie Pakete können nicht angenommen werden!
STEBA Elektrogeräte GmbH & Co KG
Pointstr. 2, 96129 Strullendorf / Germany
Vertrieb-Tel.: 09543 / 449-17 / -18,
Service-Tel.: 09543 / 449-44, Fax: 09543 / 449-19
E-Mail: elek[email protected] Internet: http://www.steba.com
Achtung! Elektrogeräte dürfen nur durch Elektro-Fachkräfte repariert werden, da
durch unsachgemäße Reparaturen erhebliche Folgeschäden entstehen können.

10
INSTALLATION AND OPERATING MANUAL
Before operating the heater, please read these instructions tho-
roughly to avoid damage and hazardous situations. Any use of
this heater other than that stipulated in this instruction manual
may cause fire, electric shock or injury, and voids all warranties.
Warranty does not apply to any defect, deterioration, loss, injury
or damage caused by, or as a result of, the misuse or abuse of this
heater. The rights dictated by State law are not prejudiced. None
of the terms of this warranty are to be taken as excluding any
conditions or warranties implied by State law, which cannot be
excluded or modified. Before any operation remove the packa-
ging and check product integrity. In case of defects or damages
do not try to repair it yourself but contact your dealer.
Do not let children play with the packaging and protect the en-
vironment by disposing of the packaging in accordance with the
national regulations for waste processing.
Please retain these instructions in a safe place for future
reference.
For your safety
∙This appliance is intended for normal household use and not
for use in commercial/industrial environment, in vehicles or on
board ships or aircrafts.
∙This appliance can be used by children aged from 8 years
and above and persons with reduced physical, sensory or
mental capabilities or lack of experience and knowledge if they
have been given supervision or instruction concerning use of
the appliance in a safe way and understand the hazards invol-
ved. Children shall not play with the appliance. Cleaning and
user maintenance shall not be made by children without super-
vision.

11
∙Children of less than 8 years should be kept away unless conti-
nuously supervised.
∙Children aged less than 8 years shall not regulate the appliance.
∙CAUTION: Some parts of this product can become very
hot and cause burns. Particular attention has to be gi-
ven where children and vulnerable people are present.
∙Do not use this heater with a programmable switch, timer or
any automatic switching device because of danger and/or fire
hazard if the heater is covered or not correctly positioned.
∙WARNING: the product is not equipped with a device to control
the room temperature. Do not use the heater in small rooms
when they are occupied by persons not capable of leaving the
room on their own, unless constant supervision is provided by a
person responsible for their safety.
∙Make sure that your supply rating corresponds to what speci-
fied on the rating plate: 230V~, 50Hz.
∙This heater is water resistant to IPX4. It can therefore be used
in bathrooms or other areas subject to humidity AS LONG AS IT
IS NOT INSTA LLED WITHIN THE PERIMETER OF BAT H TUBS OR
SHOWERS. This means that it cannot be installed in the areas
marked as VOLUME 1 in picture #3.
∙During function, place the heater in a safe position:
∙at least 1m far from inflammable objects or furnitures;
∙leaving not less than 1m of free space in front of the heater;
∙not located immediately below a socket-outlet.
∙WARNING: In order to avoid overheating, do not cover the he-
ater. Do not hang anything on the heater and do not cover it
while it’s working.

12
∙Do not use the heater in rooms with explosive gas, while using
inflammable solvents or varnish or glues or where inflammable
materials are being used, such as wood block or PVC flooring is
being laid or sealed.
∙If the cordset is damaged and you have to change it, do not do
the job yourselves! Take the product to an after sales authorised
repair centre or to a person with similar skill and knowledge, in
order to avoid any risk of danger.
∙The appliance must be positioned so that the plug is always
accessible.
Positioning
∙The product must be installed respecting the minimum distances from ceiling, floor
and objects at the sides indicated in picture #1. ● This infrared wall mounted heater
is only suitable for mounting horizontally on a solid vertical wall. Never install it
vertically or on the ceiling as indicated in picture #2.
∙The product must not be mounted on any inflammable surface such as wood or
plastic. Any inflammable materials must be at least 100 cm. away from the front
face. This is also the minimum distance the user has to keep from the product be-
cause during use the front grille gets hot.
∙Care should be taken to mount the appliance so that the product and the pull cord
switch are out of the reach of children. If it is installed in a bathroom, it should
be positioned so that it cannot be touched by anyone who is in the bath or in the
shower.
∙After use we recommend to leave the product cool down for at least 10 – 15 mi-
nutes before touching it.

13
Installation
∙We recommend to switch off the mains electricity supply before proceeding with
the following steps.
∙Fix the wall bracket using it as a template to drill holes for the rawplugs. Mind that
the 3 holes which hang the unit should be in the position shown in #4, NOT upside
down.
∙●The unit can be oriented in 2 positions.
∙Horizontally
∙Downwards
∙According to the orientation you prefer you have to fix the screws in position 1 if
you want the unit to be horizontal, position 2 if you want the unit to be inclined
downwards, as shown in #7.
∙Remove the back plastic cover from the unit, as shown in #8.
∙Remove the strain relief, as shown in #9 and feed the electric lead in from behind
through the round opening under the connection block and make connections
according to #9. Connect the 2 phases to the connection block. The blue wire to
the N pole, the brown wire to the L pole. L and N symbols are marked under the
connection block.
∙Secure the supply powercord fixing the strain relief.
∙Fix again in position the back plastic cover, as shown in #10.
∙Hang the heater to the wall bracket and pull it down to securely fix it to the bracket
in the direction shown by the arrow, as in #11.
∙Check that the unit is correctly fixed pulling it towards you; it shouldn’t move.
Connection to the mains electricity supply
∙This product has a double electrical insulation protection (class II) and therefore
does not require an earth connection.
∙The appliance may only be connected to a 1/N/PE 230V AC 50 Hz supply. If the cord-
set is to be used we recommend to use a rubber coated one (type H05RR-F) with at
least a 2 x 1 mm2 section.
Operation
Pulling the switch the product gets in function. You can see from the front viewing
window the following symbols:
Product rating 0 I II III
230V 1800W OFF 600W 1200W 1800W

14
Maintenance
∙This product does not require any special maintenance.
∙Clean the product with a dry cloth once every 6 months.
∙If the product requires repairing, contact an authorised technical service centre.
∙When replacing the power cable, use a 2x1,00mm2 H05RR-F HAR type. This opera-
tion must be performed by qualified personnel and never by the end user in order
to avoid damaging the appliance and jeopardising personal safety.
Correct Disposal of this product
This marking indicates that this product should not be disposed with other
household wastes throughout the EU. To prevent possible harm to the envi-
ronment or human health from uncontrolled waste disposal, recycle it re-
sponsibly to promote the sustainable reuse of material resources. To return
your used device, please use the return and collection systems or contact the retailer
where the product was purchased. They can take this product for environmental safe
recycling.
Packaging disposal: Do not throw away the package materials. Please put it in the
recycling bin.
Gift box: Paper, should be put to the old paper collection point.
Plastic packaging material and foils should be collected in the spe-
cial collection containers.
Service and Repair:
If the appliance must be repaired, please get in touch with your trader or with the
manufacturer:
STEBA Elektrogeräte GmbH & Co KG
Pointstr. 2, 96129 Strullendorf / Germany
Distribution-Tel.: 09543 / 449-17 / -18,
Service-Tel.: 09543 / 449-44, Fax: 09543 / 449-19
e-Mail: elektro@steba.com Internet: http://www.steba.com

15

16
MANUEL D’INSTALLATION ET D’UTILISATION
Avant d’utiliser le chauffage veuillez lire attentivement ces in-
structions afin d’éviter de l’endommager et les situations dan-
gereuses. Tout usage de cet appareil de chauffage autre que ce-
lui indiqué dans ce manuel d’instruction risque d’être à l’origine
d’un incendie, une électrocution ou de blessures et annule toutes
les garanties.
La garantie ne s’applique pas si aux défauts, détériorations,
pertes, blessures ou dommages causés par l’usage impropre ou
excessif de cet appareil de chauffage. Les droits dictés par la loi
nationale restent toujours en vigueur. Aucune condition de cette
garantie ne doit être considérée comme excluant d’autres condi-
tions ou garanties impliquées par la loi nationale, qui ne peuvent
être ni exclues ni modifiées.
Avant d’utiliser l’appareil, retirez l’emballage et vérifiez si le pro-
duit est en parfait état. S’il présente des défauts ou des dom-
mages, n’essayez pas de le réparer mais adressez-vous à votre
revendeur. Ne laissez pas les enfants jouer avec l’emballage et
respectez l’environnement en l’éliminant conformément aux rè-
glements en vigueur sur l’élimination des déchets.
Veuillez ranger ces instructions en lieu sûr afin de pouvoir
les consulter par la suite.
INSTRUCTIONS DE SÉCURITÉ IMPORTANTES
– VEUILLEZ LES LIRE ATE NTIVEMENT
∙Cet appareil est conçu pour un usage domestique ordinaire et
ne doit pas être utilisé dans un environnement commercial/in-
dustriel, ni à bord de véhicules, de bateaux ou d’avions.
∙Cet appareil peut être utilise par les enfants de plus de 8
ans et par les personnes ayant des capacités physiques,
sensorielles ou mentales réduites ou manquant d’expérience et
de connaissance à condition d’être surveillés ou d’avoir été in-
struits sur l’utilisation sûre de l’appareil et de comprendre les

17
risques impliqués. Les enfants ne doivent pas jouer avec
l’appareil. Les enfants ne doivent ni nettoyer, ni utiliser l’appareil
s’ils ne sont pas surveillés.
∙Les enfants de moins de 8 ans doivent être tenus à l’écart à moi-
ns d’être constamment surveillés.
∙Les enfants entre 8 ans ne doivent ni régler l’appareil.
∙ATTENTION: Certaines parties de cet appareil devi-
ennent très chaudes et peuvent causer des brûlures.
Faites très attention en présence d’enfants et de perso-
nnes vulnérables.
∙N’utilisez pas cet appareil de chauffage avec un interrupteur
programmable, une minuterie ou un dispositif d’extinction au-
tomatique car il existe un risque de danger et/ou d’incendie si
l’appareil est couvert ou mal positionné.
∙AVERTISSEMENT: cet appareil n’est pas équipé de dispositif de
contrôle de la température ambiante. N’utilisez pas cet appareil
dans une pièce de petites dimensions s’il s’y trouve des perso-
nnes incapables de sortir de la pièce par elles-mêmes, à moins
qu’elles ne soient constamment surveillées par une personne
responsable de leur sécurité.
∙Vérifiez si votre alimentation électrique correspond à celle indi-
quée sur la plaque signalétique : 230V~, 50Hz.
∙Cet appareil de chauffage a une étanchéité à l’eau IPX4. Vous
pouvez donc l’utiliser dans une sale de bains ou un endroit hu-
mide À CONDITION QU’IL NE SOIT PAS INSTALLÉ DANS LE PÉ-
RIMÈTRE D’UNE BAIGNOIRE OU D’UN DOUCHE. Cela signifie
que vous ne pouvez pas l’installer dans les endroits indiqués
comme VOLUME 1 sur la figure #3.
∙Pendant le fonctionnement, placez l’appareil de chauffage
dans un endroit sûr.
∙à au moins 1 mètre de tout objet inflammable ou meuble;
∙laissez au moins 1 mètre d’espace libre devant l’appareil de
chauffage;
∙ne le placez pas juste au-dessous d’une prise-fiche.

18
∙AVERTISSEMENT: Pour éviter la surchauffe, ne couvrez pas
l’appareil de chauffage. Ne suspendez rien sur l’appareil de
chauffage et ne le couvrez pas lorsqu’il est en marche. N’utilisez
pas l’appareil de chauffage dans des pièces contenant des gaz
explosifs ou si vous utilisez des solvants, des peintures ou des
colles inflammables, ou de matériaux inflammables, par exem-
ple pendant la pose ou le scellage de sols en PVC ou de plan-
chers.
∙L’appareil est vendu sans cordon. Pendant le montage, votre
électricien peut brancher l’appareil sur le secteur à l’aide d’un
câble électrique (cf. chapitre 2 INSTALLATION). Si le câble est
endommagé pendant la durée de vie de l’appareil et que vous
devez le changer, ne le faites pas vous-même!! Adressez-vous à
un électricien professionnel ou à un service après-vente auto-
risé ou à une personne ayant des compétences et des connais-
sances similaires afin d’éviter tout risque de danger.
Placement
∙Installez cet appareil en respectant les distances minimum du plafond, du sol et des
objets placés sur les côtés, comme le montre la figure #1.
∙Cet appareil de chauffage à infrarouges mural ne peut être monté
qu’horizontalement sur une cloison verticale solide. Ne le montez jamais verticale-
ment ou au plafond comme le montre la figure #2.
∙Ne montez pas cet appareil sur une surface inflammable, telle que le bois ou le
plastique. Tous les matériaux inflammables doivent se trouver à 100 cm minimum
de l’avant de l’appareil. C’est aussi la distance minimum à laquelle l’utilisateur doit
se trouver parce que pendant l’utilisation la grille frontale devient très chaude.
∙Veillez à monter l’appareil de façon à ce que l’appareil et son cordon d’allumage
soient hors de portée des enfants. S’il est monté dans une salle de bains, il doit se
trouver dans un endroit où il ne puisse pas être touché par une personne se trou-
vant dans la baignoire ou sous la douche.
∙Après l’usage, nous vous recommandons de laisser refroidir l’appareil pendant au
moins 10 à 15 minutes avant de le toucher.

19
Installation
Nous vous recommandons de couper le courant avant d’accomplir les opérations su-
ivantes:
∙Fixez l’équerre murale à l’aide d’un gabarit pour percer les trous des chevilles. At-
tention, les 3 trous de suspension de l’appareil doivent se trouver dans la position
indiquée sur la figure #4 PAS dans l’autre sens.
∙L’appareil peut être orienté dans 2 sens:
∙Horizontalement
∙Vers le bas
∙Selon l’orientation choisie, vous devez fixer les vis dans la position 1, pour que
l’appareil soit à l’horizontale ou 2 si vous voulez qu’il soit incliné vers le bas, comme
le montre la figure #7
∙Retirez le panneau arrière en plastique de l’appareil, comme le montre la figure #8.
∙Retirez le dispositif anti-traction, comme le montre la figure #9 et le câble
d’alimentation électrique à l’arrière à travers l’orifice rond sous le bloc de connexi-
on et procéder aux connexions conformément à la figure #9. Branchez les phases
sur le bloc de connexion. Le conducteur bleu sur le pôle N, le marron sur le pôle L.
Les symboles L et N sont marqués sous le bloc de connexion.
∙Fixez solidement le câble d’alimentation à l’aide du dispositif anti-traction.
∙Remettez en place le panneau arrière en plastique, de la façon indiquée sur la
figure #10
∙Suspendez l’appareil de chauffage à l’équerre murale et tirez-le vers le bas pour
le fixer solidement. sur l’équerre dans le sens indiquée par la flèche, comme sur la
figure #11.
∙Vérifiez si l’appareil est correctement fixé. Il ne doit pas bouger.
Branchement Électrique
∙L’appareil dispose d’une double isolation électrique (classe II) et ne nécessite donc
d’aucune mise à la terre.
∙L’appareil ne peut être branché que sur une alimentation 1/N/PE 230V AC 50 Hz.
Si vous devez utiliser un câble nous vous recommandons de le choisir recouvert de
caoutchouc (type H05RR-F) avec une section minimum de 2x1 mm2.
Fonctionnement
Si vous tirez sur l’interrupteur l’appareil se met en marche. Vous pouvez voir sur la-
fenêtre de visualisation les symboles suivants:
Product rating 0 I II III
230V 1800W OFF 600W 1200W 1800W

20
Entretien
● Cet appareil n’a besoin d’aucune opération d’entretien spéciale.
● Nettoyez l’appareil avec un chiffon sec tous les 6 mois.
● Si l’appareil doit être réparé, adressez-vous à un service de dépannage autorisé
● Si vous remplacez le câble d’alimentation, utilisez un câble de type 2x1,00mm2
H05RR-F
HAR. Cette opération doit être accomplie par du personnel qualifié, jamais par
l’utilisateur
final, afin de ne pas endommager l’appareil et de compromettre la sécurité person-
nelle.
Table of contents
Languages:
Other Steba Heater manuals
Popular Heater manuals by other brands

Chromalox
Chromalox NOR FOUND PD445 Installation and maintenance instructions

Royal Sovereign
Royal Sovereign HFN-02 owner's manual

ApenGroup
ApenGroup QUEEN Series User, installation and maintenance guide

ORIGO
ORIGO FH-T18P instruction manual

Vitek
Vitek VT-2180 Manual instruction

Lumme
Lumme LU-FH713B user manual