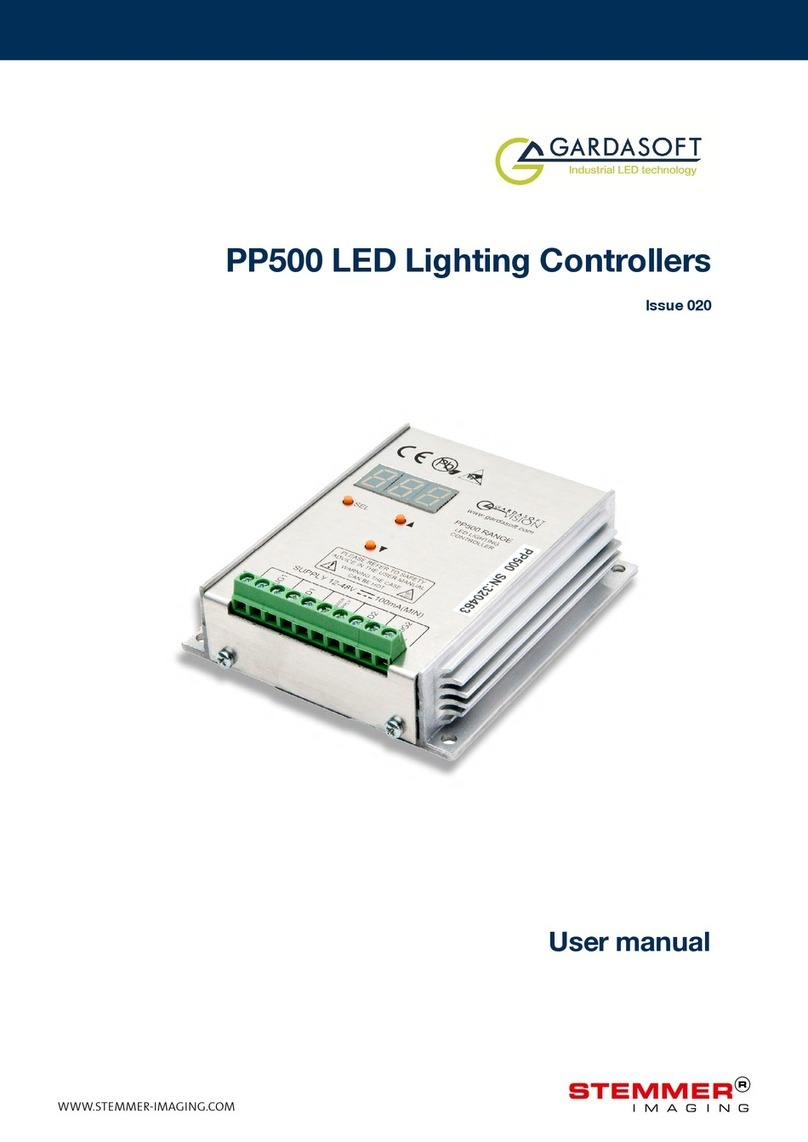
STEMMER IMAGING GARDASOFT PP8 Series User manual

PP8xx LED Controller
Issue 014
User manual
www.gardasoft.com
WWW.STEMMER-IMAGING.COM

PP8xx LED Controller -User Manual
Copyright and disclaimer notice
Except as prohibited by law:
All hardware, software and documentation is provided on an ‘as is’ basis. This
information is for guidance only. Installers must perform their own risk assessment
specific to each installation.
It is essential that the users ensure that the operation of the product is suitable for
their application.
The users must ensure that incorrect functioning of this equipment cannot cause any
dangerous situation or significant financial loss to occur.
Deliberate acts of endangerment and vandalism are not covered by this document and
must be considered by the installer.
While care has been taken in the preparation of this document Gardasoft Vision Ltd will
not accept any liability for consequential loss of any kind except those required by law.
All trademarks acknowledged. Hardware, software and documentation are Copyright
2002 –2017 Gardasoft Vision Ltd.
EC conformity declaration
The EC Certificate of Conformity is available from Gardasoft Vision Ltd on request
Issue status of this document: Issue 014 (March 2017)
WWW.STEMMER-IMAGING.COM

PP8xx LED Controller -User Manual
Copyright and disclaimer notice
Except as prohibited by law:
All hardware, software and documentation is provided on an ‘as is’ basis. This
information is for guidance only. Installers must perform their own risk assessment
specific to each installation.
It is essential that the users ensure that the operation of the product is suitable for
their application.
The users must ensure that incorrect functioning of this equipment cannot cause any
dangerous situation or significant financial loss to occur.
Deliberate acts of endangerment and vandalism are not covered by this document and
must be considered by the installer.
While care has been taken in the preparation of this document Gardasoft Vision Ltd will
not accept any liability for consequential loss of any kind except those required by law.
All trademarks acknowledged. Hardware, software and documentation are Copyright
2002 –2017 Gardasoft Vision Ltd.
EC conformity declaration
The EC Certificate of Conformity is available from Gardasoft Vision Ltd on request
Issue status of this document: Issue 014 (March 2017)
PP8xx LED Controller -User Manual
Contents
1Getting started 7
1.1 PP8xx features - a summary 7
2Safety 9
2.2 Heat 9
2.3 Electrical 9
2.4 General 10
2.5 Installation guidance (disclaimer) 10
3Sicherheit 11
3.1 Hitze 11
3.2 Elektrik 11
3.3 Allgemein 13
3.4 Installationsanleitung (Haftungsausschluss) 13
4Mesures de sécurité 14
4.1 Chaleur 14
4.2 Électricité 14
4.3 Général 16
4.4 Guide d'installation (clause de non-responsabilité) 16
5Mounting the PP8xx 17
5.1 Environmental considerations 17
6Heat dissipation and thermal guidance 18
6.1 Heat output per channel 18
6.2 Total heat dissipation and heat sinking 18
6.3 Minimising thermal dissipation 19
7Connecting the PP8xx 20
7.1 Power 20
7.2 Lighting output 21
7.3 Trigger input 21
7.4 Ethernet (PP82x) 22
7.5 RS232 (PP86x) 22
7.6 Connectors (general) 23
8Ethernet address 24
8.1 IPaddress 24
8.1.1 MAC address 25
8.1.2 DHCP 25
8.1.3 Fixed IPaddress 25
8.2 Automatic sensing 26
9Web page configuration 27
9.1 Main page 27
9.2 General setup page 27
9.3 Configuration page 28
10 Command configuration 29
10.1 Communication 29
10.2 Command structure 29
10.3 General commands 30
10.4 Lighting commands 32
10.5 Command summary 34
WWW.STEMMER-IMAGING.COM

WWW.STEMMER-IMAGING.COM
PP8xx LED Controller -User Manual
11 PP8xx reference information 35
11.1 Specifications and ratings 35
11.2 Error codes 36
WWW.STEMMER-IMAGING.COM

PP8xx LED Controller -User Manual
11 PP8xx reference information 35
11.1 Specifications and ratings 35
11.2 Error codes 36
PP8xx LED Controller -User Manual
1Getting started
Before you use this product, make sure that you have read and
understood Section 2, Safety,(or Section 3, Sicherheit,or Section 4,
Mesures de sécurité)and ,and that you have checked the PP8xx fulfils
your requirements. Throughout this manual, all versions of the controller
will be referred to as the PP8xx, unless specified otherwise.
Mount the PP8xx (see Section 5, Mounting the PP8xx)and connect it up
as required (see Section 7, Connecting the PP8xx).
Set up the PP8xx for the desired operation as described in Section 9,
Web page configuration or Section 10, Command configuration.
We recommend that you visit www.gardasoft.com for application notes on
this product. There is also asupport web page there, which has
information on trouble-shooting problems.
1.1 PP8xx features - a summary
The PP8xx product is an eight channel LED lighting controller for use in
machine vision applications that can deliver up to 20A per channel in pulse
mode. Other variants of the product family are described in the table
below.
Product Max.
Current Resolution Ethernet RS232
PP820 20A 100mA Y N
PP820C 20A 7mA Y N
PP821 2A 10mA Y N
PP821C 2A 0.5mA Y N
PP822 5A 25mA Y N
PP822C 5A 1.5mA Y N
PP860 20A 100mA N Y
PP860C 20A 7mA N Y
PP861 2A 10mA N Y
PP861C 2A 0.5mA N Y
PP862 5A 25mA N Y
PP862C 5A 1.5mA N Y
—7—
WWW.STEMMER-IMAGING.COM

WWW.STEMMER-IMAGING.COM
PP8xx LED Controller -User Manual
Three modes of operation can be provided independently to each
channel:
Continuous: In continuous mode, the output is constant.
Pulsed: Also referred to as 'strobed', this output mode produces one
pulse on the receipt of atrigger input. The pulse width can range from 1μs
to 300ms in 0.1μs steps. The delay can range from 4μs to 300ms in 0.1μs
steps.
Switched: In switched mode, atrigger input can be used to switch the
output current on and off. The output is only enabled when the input has a
voltage on it.
Triggers occur on the leading edge of the input, that is, on the transition
from logic 0to logic 1. Output 1is triggered from Input 1, output 2from
Input 2, and so on.
Configurations can be saved in non-volatile memory so that the PP8xx will
resume operation after apower cycle.
—8—
WWW.STEMMER-IMAGING.COM

PP8xx LED Controller -User Manual
Three modes of operation can be provided independently to each
channel:
Continuous: In continuous mode, the output is constant.
Pulsed: Also referred to as 'strobed', this output mode produces one
pulse on the receipt of atrigger input. The pulse width can range from 1μs
to 300ms in 0.1μs steps. The delay can range from 4μs to 300ms in 0.1μs
steps.
Switched: In switched mode, atrigger input can be used to switch the
output current on and off. The output is only enabled when the input has a
voltage on it.
Triggers occur on the leading edge of the input, that is, on the transition
from logic 0to logic 1. Output 1is triggered from Input 1, output 2from
Input 2, and so on.
Configurations can be saved in non-volatile memory so that the PP8xx will
resume operation after apower cycle.
—8—
PP8xx LED Controller -User Manual
2Safety
Read this before using the PP8xx. Always observe the following safety
precautions. If in doubt, contact your distributor or Gardasoft Vision. The
following symbols mean:
Warning: Read instructions to understand possible hazard
Warning: Surface may get hot.
Warning: Possible hazardous voltage.
Where these symbols appear in the manual, refer to the text for
precautions to be taken.
2.2 Heat
Ensure the PP8xx is mounted correctly (see Section 5, Mounting the
PP8xx), and that you do not exceed any of the ratings for the unit (see
Section 11, PP8xx reference information).
At its maximum ratings, the PP8xx’s enclosure can exceed 75°C which is
sufficient to cause aburn if touched. Place in aposition where personnel
cannot accidentally touch it and ensure there is afree flow of air around
the unit.
2.3 Electrical
The PP8xx produces high energy pulses. Take care to connect the
outputs correctly and protect the output wiring and load from any short
circuits. When switched off, energy remains stored in the PP8xx for about
15 seconds.
The PP8xx does not have complete tracking isolation of inputs (including
triggering and communications ports) and outputs, therefore, please
observe the following guidance:
Computer equipment that is connected to the communication or trigger
ports must be internally powered or separated from mains electricity by
double insulation/reinforced isolation or be approved to IEC 60950-1
standard. All other equipment connected to the triggers or other ports
must also have double insulation/reinforced isolation protection from the
mains supply.
The Power Supply Unit (PSU) used to energise the PP8xx must provide
double insulation/reinforced isolation from mains electricity and protected
against short circuits and overloads. We recommend using aPSU that
limits its output current to the appropriate rating of the controller by
design, by setting the current limit on the supply (if possible), or through
—9—
WWW.STEMMER-IMAGING.COM

WWW.STEMMER-IMAGING.COM
PP8xx LED Controller -User Manual
over current protection. The PSU should be approved to either IEC
60950-1, IEC 60335-1, IEC 61010-1, IEC61558-1,-2,-16. The PSU may
also be approved to equivalent or superior safety standards.
Any energised conductors derived from mains electricity must also have
Safety Extra Low Voltage (SELV) output. Refer to Section 11, PP8xx ref-
erence information for allowable voltage limits.
At maximum ratings the temperature of the enclosure can exceed 75°C.
Therefore, either all cabling must be rated to at least 100°C, or all cabling
must be additionally insulated by an appropriately rated heat resistant
sleeve or prevented from touching the metal enclosure of the controller, or
its heatsink where fitted.
Power supply cabling to the controller must be rated to at least 4A.
The cabling from the channel output to the load must be rated higher than
the maximum channel output current.
If the controller is set up incorrectly, or in the event of failure, the energy
provided by the power supply to the controller may become directly con-
nected to any or all output channels. You must consider this during install-
ation, and if necessary, provide adequate protection.
The DC power supply to controller must be externally fused to 4A using a
slow blow fuse (T4AH, 50V).
The installer must provide aclearly marked, nearby, and easily accessible
switch as part of the installation to allow the controller to be disconnected
from its power source on both conductors
Transients caused by inductive loads must be suppressed externally to
the PP8xx.
Warning: This is aClass Aproduct. Its use in residential areas may cause
radio interference, and such use should be avoided unless special
measures are taken by the user to restrict emissions to alevel that allows
the reception of broadcast transmissions.
2.4 General
The PP8xx must not be used in an application where its failure could
cause adanger to personal health or damage to other equipment.
If the equipment is used in amanner not specified by the manufacturer,
the protection provided by the equipment may be impaired.
2.5 Installation guidance (disclaimer)
This information is for guidance only. Installers must perform their own risk
assessment specific to each installation. While Gardasoft Vision Ltd has
taken every care in the preparation of this advice, Gardasoft Vision Ltd
and Gardasoft LLC accept no liability for damages of any kind except
those required by law. Deliberate acts of endangerment and vandalism
are not covered by this document and must be considered by the installer.
—10 —
WWW.STEMMER-IMAGING.COM

PP8xx LED Controller -User Manual
over current protection. The PSU should be approved to either IEC
60950-1, IEC 60335-1, IEC 61010-1, IEC61558-1,-2,-16. The PSU may
also be approved to equivalent or superior safety standards.
Any energised conductors derived from mains electricity must also have
Safety Extra Low Voltage (SELV) output. Refer to Section 11, PP8xx ref-
erence information for allowable voltage limits.
At maximum ratings the temperature of the enclosure can exceed 75°C.
Therefore, either all cabling must be rated to at least 100°C, or all cabling
must be additionally insulated by an appropriately rated heat resistant
sleeve or prevented from touching the metal enclosure of the controller, or
its heatsink where fitted.
Power supply cabling to the controller must be rated to at least 4A.
The cabling from the channel output to the load must be rated higher than
the maximum channel output current.
If the controller is set up incorrectly, or in the event of failure, the energy
provided by the power supply to the controller may become directly con-
nected to any or all output channels. You must consider this during install-
ation, and if necessary, provide adequate protection.
The DC power supply to controller must be externally fused to 4A using a
slow blow fuse (T4AH, 50V).
The installer must provide aclearly marked, nearby, and easily accessible
switch as part of the installation to allow the controller to be disconnected
from its power source on both conductors
Transients caused by inductive loads must be suppressed externally to
the PP8xx.
Warning: This is aClass Aproduct. Its use in residential areas may cause
radio interference, and such use should be avoided unless special
measures are taken by the user to restrict emissions to alevel that allows
the reception of broadcast transmissions.
2.4 General
The PP8xx must not be used in an application where its failure could
cause adanger to personal health or damage to other equipment.
If the equipment is used in amanner not specified by the manufacturer,
the protection provided by the equipment may be impaired.
2.5 Installation guidance (disclaimer)
This information is for guidance only. Installers must perform their own risk
assessment specific to each installation. While Gardasoft Vision Ltd has
taken every care in the preparation of this advice, Gardasoft Vision Ltd
and Gardasoft LLC accept no liability for damages of any kind except
those required by law. Deliberate acts of endangerment and vandalism
are not covered by this document and must be considered by the installer.
—10 —
PP8xx LED Controller -User Manual
3Sicherheit
Bitte lesen Sie vor Verwendung des PP8xx diese Informationen. Beachten
Sie immer die folgenden Sicherheitshinweise. Wenden Sie sich im
Zweifelsfall an Ihren Händler oder Gardasoft Vision. Die folgenden
Symbole haben die folgende Bedeutung:
Warnung: Lesen Sie die Hinweise, um eine mögliche Gefahr zu
verstehen
Warnung: Oberfläche kann heiß werden.
Warnung: Mögliche gefährliche Spannung.
Wenn diese Symbole in der Anleitung auftauchen, enthält der Text
Hinweise zu den zu ergreifenden Vorsichtsmaßnahmen.
3.1 Hitze
Stellen Sie sicher, dass der PP8xx korrekt montiert ist (siehe Section 5,
Mounting the PP8xx)und dass Sie die Grenzwerte für das Gerät nicht
überschreiten (siehe Section 11, PP8xx reference information).
Bei den maximalen Grenzwerten kann das Gehäuse des PP8xx 75°C
überschreiten, was ausreichend ist um bei einer Berührung zu
Verbrennungen zu führen. Positionieren Sie das Gerät so, dass eine
versehentliche Berührung durch das Personal ausgeschlossen ist und
stellen Sie sicher, dass Luft frei um das Gerät zirkulieren kann.
3.2 Elektrik
Das PP8xx erzeugt Impulse mit hoher Energie. Achten Sie darauf, die
Ausgänge korrekt anzuschließen und schützen Sie die
Ausgangsverkabelung und Last gegen Kurzschlüsse. Beim Ausschalten
bleibt Energie für etwa 15 Sekunden im PP8xx gespeichert.
Das PP8xx verfügt über keine vollständige Nachlaufisolierung der
Eingänge (einschließlich Trigger- und Kommunikationsports) und
Ausgänge. Beachten Sie daher unbedingt die folgenden Hinweise:
Computergeräte, die an die Kommunikations- oder Trigger-Ports
angeschlossen sind, müssen über eine interne Stromversorgung verfügen
oder vom Stromnetz durch eine doppelte Isolierung/verstärkte Isolierung
getrennt sein oder nach dem Standard IEC 60950-1zugelassen sein. Alle
anderen Geräte, die an die Trigger- oder andere Ports angeschlossen
sind, müssen ebenfalls durch eine doppelte Isolierung/verstärkte
Isolierung vom Stromnetz getrennt sein.
Das Netzgerät, das zur Stromversorgung des PP8xx dient, muss durch
eine doppelte Isolierung/verstärkte Isolierung von der Stromversorgung
—11 —
WWW.STEMMER-IMAGING.COM

WWW.STEMMER-IMAGING.COM
PP8xx LED Controller -User Manual
getrennt sein und gegen Kurzschlüsse und Überlastungen geschützt sein.
Wir empfehlen die Verwendung eines Netzgeräts, das den
Ausgangsstrom durch konstruktive Maßnahmen, durch Einstellen der
Stromgrenze an der Versorgung (wenn möglich) oder durch einen
Überstromschutz auf den geeigneten Nennstrom der Steuerung
begrenzt. Das Netzgerät muss nach IEC 60950-1, IEC 60335-1, IEC
61010-1oder IEC61558-1,-2,-16 zugelassen sein. Das Netzgerät kann
auch nach gleichwertigen oder höheren Standards zugelassen sein.
Alle stromführenden Leiter, die vom Stromnetz abgeleitet sind, müssen
ebenfalls Sicherheitskleinspannung (SELV) am Ausgang erzeugen.
Hinweise zu den zulässigen Spannungsgrenzwerten finden Sie im Section
11, PP8xx reference information.
Bei den maximalen Grenzwerten kann die Temperatur des Gehäuses 75
oC überschreiten. Daher muss entweder die gesamte Verkabelung für
mindestens 100 oC bemessen sein oder die gesamte Verkabelung muss
zusätzlich mit einer angemessen dimensionierten wärmebeständigen
Tülle isoliert sein oder gegen Kontakt mit dem Metallgehäuse der
Steuerung oder deren Kühlkörper, sofern angebracht, geschützt sein.
Die Verkabelung der Stromversorgung zur Steuerung muss für
mindestens 4 A bemessen sein.
Die Verkabelung vom Kanalausgang zur Last muss höher als der
maximale Kanalausgangsstrom dimensioniert sein.
Wenn die Steuerung falsch eingerichtet ist oder im Fall eines Fehlers, kann
es vorkommen, dass die von der Stromversorgung an die Steuerung
abgegebene Energie direkt mit einem oder allen Ausgangskanälen
verbunden wird. Sie müssen dies bei der Installation berücksichtigen und
gegebenenfalls für einen geeigneten Schutz sorgen.
Die Gleichstromversorgung der Steuerung muss extern durch eine träge
Sicherung (T4AH, 50V) bis 4 A gesichert sein.
Der Installationstechniker muss einen deutlich gekennzeichneten, leicht
zugänglichen Schalter als Teil der Installation in der Nähe vorsehen, mit
dem die Steuerung an beiden Stromleitern von ihrer Stromquelle getrennt
werden kann.
Durch induktive Lasten verursachte Einschaltstöße zum PP8xx müssen
extern unterdrückt werden.
Warnung: Es handelt sich hierbei um ein Produkt der Klasse A. Die
Verwendung in Wohngebieten kann zu Funkstörungen führen und eine
solche Verwendung sollte vermieden werden, es sei denn besondere
Maßnahmen werden vom Anwender ergriffen, um die Emissionen auf ein
Niveau zu begrenzen, das den Empfang von Rundfunkübertragungen
ermöglicht.
—12 —
WWW.STEMMER-IMAGING.COM

PP8xx LED Controller -User Manual
getrennt sein und gegen Kurzschlüsse und Überlastungen geschützt sein.
Wir empfehlen die Verwendung eines Netzgeräts, das den
Ausgangsstrom durch konstruktive Maßnahmen, durch Einstellen der
Stromgrenze an der Versorgung (wenn möglich) oder durch einen
Überstromschutz auf den geeigneten Nennstrom der Steuerung
begrenzt. Das Netzgerät muss nach IEC 60950-1, IEC 60335-1, IEC
61010-1oder IEC61558-1,-2,-16 zugelassen sein. Das Netzgerät kann
auch nach gleichwertigen oder höheren Standards zugelassen sein.
Alle stromführenden Leiter, die vom Stromnetz abgeleitet sind, müssen
ebenfalls Sicherheitskleinspannung (SELV) am Ausgang erzeugen.
Hinweise zu den zulässigen Spannungsgrenzwerten finden Sie im Section
11, PP8xx reference information.
Bei den maximalen Grenzwerten kann die Temperatur des Gehäuses 75
oC überschreiten. Daher muss entweder die gesamte Verkabelung für
mindestens 100 oC bemessen sein oder die gesamte Verkabelung muss
zusätzlich mit einer angemessen dimensionierten wärmebeständigen
Tülle isoliert sein oder gegen Kontakt mit dem Metallgehäuse der
Steuerung oder deren Kühlkörper, sofern angebracht, geschützt sein.
Die Verkabelung der Stromversorgung zur Steuerung muss für
mindestens 4 A bemessen sein.
Die Verkabelung vom Kanalausgang zur Last muss höher als der
maximale Kanalausgangsstrom dimensioniert sein.
Wenn die Steuerung falsch eingerichtet ist oder im Fall eines Fehlers, kann
es vorkommen, dass die von der Stromversorgung an die Steuerung
abgegebene Energie direkt mit einem oder allen Ausgangskanälen
verbunden wird. Sie müssen dies bei der Installation berücksichtigen und
gegebenenfalls für einen geeigneten Schutz sorgen.
Die Gleichstromversorgung der Steuerung muss extern durch eine träge
Sicherung (T4AH, 50V) bis 4 A gesichert sein.
Der Installationstechniker muss einen deutlich gekennzeichneten, leicht
zugänglichen Schalter als Teil der Installation in der Nähe vorsehen, mit
dem die Steuerung an beiden Stromleitern von ihrer Stromquelle getrennt
werden kann.
Durch induktive Lasten verursachte Einschaltstöße zum PP8xx müssen
extern unterdrückt werden.
Warnung: Es handelt sich hierbei um ein Produkt der Klasse A. Die
Verwendung in Wohngebieten kann zu Funkstörungen führen und eine
solche Verwendung sollte vermieden werden, es sei denn besondere
Maßnahmen werden vom Anwender ergriffen, um die Emissionen auf ein
Niveau zu begrenzen, das den Empfang von Rundfunkübertragungen
ermöglicht.
—12 —
PP8xx LED Controller -User Manual
3.3 Allgemein
Das PP8xx darf nicht in Anwendungen eingesetzt werden, bei denen es
durch einen Ausfall des Geräts zu einer Gefahr für die Gesundheit von
Personen oder zur Beschädigung anderer Geräte kommen könnte.
Wenn das Gerät in einer anderen als der vom Hersteller vorgesehenen
Weise verwendet wird, kann die Schutzvorrichtung des Geräts
beeinträchtigt werden.
3.4 Installationsanleitung (Haftungsausschluss)
Diese Informationen dienen nur zur Orientierung. Installationstechniker
müssen ihre eigene spezifische Risikobewertung für die jeweilige
Installation durchführen. Auch wenn Gardasoft Vision Ltd diese
Empfehlung mit größter Sorgfalt erstellt hat, übernehmen Gardasoft Vision
Ltd und Gardasoft LLC keine Haftung für Schäden jeglicher Art, außer in
dem gesetzlich erforderlichen Maße. Vorsätzliche Gefährdungs- oder
Zerstörungshandlungen werden in diesem Dokument nicht behandelt und
müssen vom Installationstechniker berücksichtigt werden.
—13 —
WWW.STEMMER-IMAGING.COM

WWW.STEMMER-IMAGING.COM
PP8xx LED Controller -User Manual
4Mesures de sécurité
Lisez ce document avant d'utiliser le PP8xx. Respectez les mesures de
sécurité suivantes en toutes circonstances. En cas de doute, contactez
votre distributeur ou Gardasoft Vision. Les symboles ci-dessous auront la
signification suivante:
Attention:Lisez les instructions pour comprendre quels sont les
risques éventuels.
Attention: La surface peut devenir chaude.
Attention: Risque d’électrocution.
Lorsque ces symboles apparaissent dans le manuel, reportez-vous aux
consignes pour connaître les précautions àprendre.
4.1 Chaleur
Veillez àce que le PP8xx soit monté correctement (voir Section 5,
Mounting the PP8xx)et àne dépasser aucune valeur nominale pour l'unité
(voir Section 11, PP8xx reference information).
Lorsqu'il atteint ses valeurs nominales maximales, le boitier PP8xx peut
dépasser les 75°C, ce qui est suffisant pour provoquer des brûlures en cas
de contact. Placez l'appareil àun endroit où le personnel ne risque pas de
le toucher par accident et veillez àce que l'air circule librement autour de
l'unité.
4.2 Électricité
Le PP8xx produit des impulsions d'énergie élevées. Veillez àbien
raccorder les sorties et àce que les câbles de sortie et la charge soient à
l'abri de tout court-circuit. Lorsque le PP8xx est éteint, de l'énergie
résiduelle reste dans l'appareil pendant environ 15 secondes.
Le PP8xx ne possède pas de système d'isolation complet des entrées
(notamment des ports de déclenchement et de communication) et des
sorties. Par conséquent, respectez les consignes suivantes :
L'équipement informatique connecté aux ports de communication et de
déclenchement doit être alimenté en interne ou séparé de l'alimentation
secteur par une isolation double/renforcée, ou être approuvé selon la
norme CEI 60950-1. Tous les autres équipements branchés aux
déclencheurs ou àd'autres ports doivent aussi posséder une isolation
double/renforcée pour être protégés de l'alimentation secteur.
Le boîtier d'alimentation utilisé pour mettre sous tension le PP8xx doit
fournir une isolation double/renforcée pour isoler le PP8xx de
l'alimentation secteur, et le protéger des courts-circuits et des
—14 —
WWW.STEMMER-IMAGING.COM

PP8xx LED Controller -User Manual
4Mesures de sécurité
Lisez ce document avant d'utiliser le PP8xx. Respectez les mesures de
sécurité suivantes en toutes circonstances. En cas de doute, contactez
votre distributeur ou Gardasoft Vision. Les symboles ci-dessous auront la
signification suivante:
Attention:Lisez les instructions pour comprendre quels sont les
risques éventuels.
Attention: La surface peut devenir chaude.
Attention: Risque d’électrocution.
Lorsque ces symboles apparaissent dans le manuel, reportez-vous aux
consignes pour connaître les précautions àprendre.
4.1 Chaleur
Veillez àce que le PP8xx soit monté correctement (voir Section 5,
Mounting the PP8xx)et àne dépasser aucune valeur nominale pour l'unité
(voir Section 11, PP8xx reference information).
Lorsqu'il atteint ses valeurs nominales maximales, le boitier PP8xx peut
dépasser les 75°C, ce qui est suffisant pour provoquer des brûlures en cas
de contact. Placez l'appareil àun endroit où le personnel ne risque pas de
le toucher par accident et veillez àce que l'air circule librement autour de
l'unité.
4.2 Électricité
Le PP8xx produit des impulsions d'énergie élevées. Veillez àbien
raccorder les sorties et àce que les câbles de sortie et la charge soient à
l'abri de tout court-circuit. Lorsque le PP8xx est éteint, de l'énergie
résiduelle reste dans l'appareil pendant environ 15 secondes.
Le PP8xx ne possède pas de système d'isolation complet des entrées
(notamment des ports de déclenchement et de communication) et des
sorties. Par conséquent, respectez les consignes suivantes :
L'équipement informatique connecté aux ports de communication et de
déclenchement doit être alimenté en interne ou séparé de l'alimentation
secteur par une isolation double/renforcée, ou être approuvé selon la
norme CEI 60950-1. Tous les autres équipements branchés aux
déclencheurs ou àd'autres ports doivent aussi posséder une isolation
double/renforcée pour être protégés de l'alimentation secteur.
Le boîtier d'alimentation utilisé pour mettre sous tension le PP8xx doit
fournir une isolation double/renforcée pour isoler le PP8xx de
l'alimentation secteur, et le protéger des courts-circuits et des
—14 —
PP8xx LED Controller -User Manual
surcharges. Nous recommandons d'utiliser un boîtier d'alimentation qui
limite le courant de sortie de l'appareil àla valeur nominale appropriée du
contrôleur, en réglant la limite de courant sur l'alimentation (si possible) ou
via la protection contre les surcharges. Le boîtier d'alimentation doit être
approuvé selon la norme CEI 60950-1, CEI 60335-1, CEI 61010-1ou
CEI61558-1,-2,-16. Le boîtier d'alimentation peut aussi être approuvé
selon des normes de sécurité équivalentes ou supérieures.
Tous les conducteurs sous tension dérivés depuis l'alimentation secteur
doivent aussi posséder une sortie àtension de sécurité extra-basse. Se
reporter àla Section 11, PP8xx reference information pour les limites de
tension autorisées.
Lorsqu'il atteint ses valeurs nominales maximales, le boîtier du PP8xx
peut dépasser les 75°C. Par conséquent, tout le câblage doit soit avoir
une capacité minimale de 100°C, soit être en plus isolé par une gaine
suffisamment résistante àla chaleur, soit ne pas toucher le boîtier en
métal du contrôleur ou son dissipateur thermique s'il est installé.
Le câblage d'alimentation vers le contrôleur doit avoir une capacité
minimale de 4A.
Le câblage reliant la sortie de la chaîne àla charge doit avoir une capacité
supérieure au courant de sortie maximal de la chaîne.
Si le contrôleur est mal réglé ou en cas de panne, l'énergie fournie par
l'alimentation au contrôleur peut devenir directement connectée à
n'importe quelle chaîne de sortie ou àtoutes les chaînes de sortie. Vous
devez prendre en compte ce paramètre durant l'installation et si
nécessaire, fournir une protection adéquate.
L'alimentation en courant continu vers le contrôleur doit être protégée par
un fusible 4A en externe, plus précisément un fusible àaction retardée
(T4AH, 50V).
Dans le cadre de l'installation, l'installateur doit fournir un interrupteur
clairement marqué, qui soit àproximité et facilement accessible, pour
permettre au contrôleur d'être déconnecté de sa source d'énergie sur les
conducteurs d'alimentation.
Les coupures causées par des charges inductives doivent être
supprimées de manière externe vers le PP8xx.
Attention: Il s'agit d'un produit de classe A. Son utilisation en zone
résidentielle peut causer des interférences radio. Ce type d'utilisation doit
être évité, sauf si des mesures particulières sont prises par l'utilisateur
pour restreindre les émissions àun niveau qui permet la réception des
transmissions diffusées.
—15 —
WWW.STEMMER-IMAGING.COM

WWW.STEMMER-IMAGING.COM
PP8xx LED Controller -User Manual
4.3 Général
Le PP8xx ne doit pas être utilisé dans une application où la santé des
personnes et l'intégrité des équipements seraient mises en danger s'il
venait àtomber en panne.
Si l'équipement est utilisé autrement qu'aux fins prévues par le fabricant,
la protection offerte par l'équipement pourrait en être altérée.
4.4 Guide d'installation (clause de non-responsabilité)
Ces informations sont seulement àtitre indicatif. Les installateurs doivent
effectuer leur propre évaluation des risques, pour chaque installation.
Même si Gardasoft Vision Ltd apréparé minutieusement ces conseils,
Gardasoft Vision Ltd et Gardasoft LLC décline toute responsabilité pour
tout dommage, quel qu'il soit, àl'exception de ceux requis par la loi. La
mise en péril volontaire ainsi que les actes de vandalisme ne sont pas
couverts par le présent document et doivent être pris en compte par
l’installateur.
—16 —
WWW.STEMMER-IMAGING.COM

PP8xx LED Controller -User Manual
4.3 Général
Le PP8xx ne doit pas être utilisé dans une application où la santé des
personnes et l'intégrité des équipements seraient mises en danger s'il
venait àtomber en panne.
Si l'équipement est utilisé autrement qu'aux fins prévues par le fabricant,
la protection offerte par l'équipement pourrait en être altérée.
4.4 Guide d'installation (clause de non-responsabilité)
Ces informations sont seulement àtitre indicatif. Les installateurs doivent
effectuer leur propre évaluation des risques, pour chaque installation.
Même si Gardasoft Vision Ltd apréparé minutieusement ces conseils,
Gardasoft Vision Ltd et Gardasoft LLC décline toute responsabilité pour
tout dommage, quel qu'il soit, àl'exception de ceux requis par la loi. La
mise en péril volontaire ainsi que les actes de vandalisme ne sont pas
couverts par le présent document et doivent être pris en compte par
l’installateur.
—16 —
PP8xx LED Controller -User Manual
5Mounting the PP8xx
The PP8xx can be mounted onto aflat surface using the M4 threaded
holes in the base, see the diagram below.
Note: Mounting studs must not protrude any further than 6mm from the
surface the PP8xx is to be fastened to.
The enclosure of the PP8xx is used to dissipate power in the form of heat.
For this reason the material to which the unit is attached must be suitable,
preferably metallic with ability to dissipate the produced heat. This is
particularly important if the power dissipation of the PP8xx (as defined in
Section 11.1, Specifications and ratings)exceeds 8Watts.
5.1 Environmental considerations
The PP8xx enclosure is afire enclosure as long as the following conditions
are met. The unit must be mounted either with the mounting face
horizontal or downwards or with the large face of the base horizontal and
downwards. All downwards facing holes must have ascrew in them.
If afire enclosure is used, the enclosure should be metal or plastic (with a
flammability rating of UL94 V1 or better) and with no holes below or to the
sides of the PP8xx when mounted. Cable entries below the PP8xx should
be through glands that also have aflammability rating of UL94V1. The
PP8xx should be at least 10mm from any other part or side of the
enclosure.
The PP8xx does not have an IP rating and should be mounted so that
moisture and dirt cannot enter the unit.
—17 —
WWW.STEMMER-IMAGING.COM

WWW.STEMMER-IMAGING.COM
PP8xx LED Controller -User Manual
6Heat dissipation and thermal guidance
The PP8xx has alinear circuit to produce the constant current output. This
means that it generates heat which needs to be dissipated.
For more information on this and aspreadsheet to calculate the heat
output, see application note APP941 at www.gardasoft.com.
6.1 Heat output per channel
For acontinuous output current, the heat dissipation is given by:
DH=IOx(VS-VL)
Where:
DHHeat dissipation in watts
IOOutput current in amps
VSSupply voltage in volts
VLVoltage across the lighting in volts
This is usually easy to calculate as the voltage across the lighting is
normally the voltage rating of the light given in its specification, or as
measured using avoltmeter.
For apulsed output, the heat dissipation is given by:
DH=IOxDuty Cycle x(VS-VL)
Where:
Duty Cycle =Pulse width (s) xTrigger Frequency (Hz)
When overdriving, the voltage across the lighting is more difficult to
determine. In most cases it is reasonable to use the voltage rating of the
light.
6.2 Total heat dissipation and heat sinking
The total heat dissipation for the PP8xx is given by adding together the
heat output for all channels, as calculated above.
To maintain normal operation, please adhere to the following thermal
guidance:
If the ambient temperature is below 40°C the maximum heat dissipation
may be 8W without any heat sinking.
If the ambient temperature is less than 25°C, the total heat dissipation
may be 16W without any heat sinking required.
If the controller is thermally bonded to aheat sink, then up to 24 watts may
be dissipated. The heat sink must be of sufficient size to maintain asteady
state internal temperature measurement of 60°C.
—18 —
WWW.STEMMER-IMAGING.COM

PP8xx LED Controller -User Manual
6Heat dissipation and thermal guidance
The PP8xx has alinear circuit to produce the constant current output. This
means that it generates heat which needs to be dissipated.
For more information on this and aspreadsheet to calculate the heat
output, see application note APP941 at www.gardasoft.com.
6.1 Heat output per channel
For acontinuous output current, the heat dissipation is given by:
DH=IOx(VS-VL)
Where:
DHHeat dissipation in watts
IOOutput current in amps
VSSupply voltage in volts
VLVoltage across the lighting in volts
This is usually easy to calculate as the voltage across the lighting is
normally the voltage rating of the light given in its specification, or as
measured using avoltmeter.
For apulsed output, the heat dissipation is given by:
DH=IOxDuty Cycle x(VS-VL)
Where:
Duty Cycle =Pulse width (s) xTrigger Frequency (Hz)
When overdriving, the voltage across the lighting is more difficult to
determine. In most cases it is reasonable to use the voltage rating of the
light.
6.2 Total heat dissipation and heat sinking
The total heat dissipation for the PP8xx is given by adding together the
heat output for all channels, as calculated above.
To maintain normal operation, please adhere to the following thermal
guidance:
If the ambient temperature is below 40°C the maximum heat dissipation
may be 8W without any heat sinking.
If the ambient temperature is less than 25°C, the total heat dissipation
may be 16W without any heat sinking required.
If the controller is thermally bonded to aheat sink, then up to 24 watts may
be dissipated. The heat sink must be of sufficient size to maintain asteady
state internal temperature measurement of 60°C.
—18 —
PP8xx LED Controller -User Manual
Sending the AN command to the controller reports the internal
temperature measurement.
If the thermal guidance isn’t followed the controller may over heat. There is
asafety cut out, which will turn the output channels off when the internal
temperature indicated by the AN command command exceeds 70°C.
6.3 Minimising thermal dissipation
There are several ways to reduce the heat output from the PP8xx:
Use pulse mode. If the output is only on when you need it then you can
dramatically reduce the heat output. Feed the camera trigger into the
PP8xx and pulse the lights.
Turn the light off when not needed. If you don't have precise timing of
when the camera will trigger, you can use switched mode to switch the
output off or on depending on the trigger input (or use remote commands
to turn the output on and off).
Reduce the output current if possible.
Reduce the supply voltage. Most PSUs have some adjustment in their
output voltage.
Connect lights in series instead of parallel. If you have an array of lights or
LEDs in parallel then changing the arrangement to serial will increase the
voltage across them but reduce the overall current.
Use two PP8xx's and use less channels from each. For high power
applications this may be the easiest solution.
—19 —
WWW.STEMMER-IMAGING.COM

WWW.STEMMER-IMAGING.COM
PP8xx LED Controller -User Manual
7Connecting the PP8xx
Refer to Section 11, PP8xx reference information for the ratings of the
connections. To prevent overload of output wiring, all power and output
cabling must be rated for acontinuous load current of 6.3A minimum.
However, this does not apply to the Ethernet, RS232 and trigger input
connections.
The PP8xx's connections are shown below:
7.1 Power
Any power supply derived from mains electricity must have aSafety Extra
Low Voltage (SELV) output. Route low voltage wiring to the PP8xx
controller separately from mains electricity wiring. Please refer to Section
2, Safety.
If this is not possible, make sure the low voltage wiring has an insulation
rating that is appropriate or supplementary insulation is used. The
connections are shown below:
Note:The case of the PP8xx is not connected to GND.
—20 —
WWW.STEMMER-IMAGING.COM

PP8xx LED Controller -User Manual
7Connecting the PP8xx
Refer to Section 11, PP8xx reference information for the ratings of the
connections. To prevent overload of output wiring, all power and output
cabling must be rated for acontinuous load current of 6.3A minimum.
However, this does not apply to the Ethernet, RS232 and trigger input
connections.
The PP8xx's connections are shown below:
7.1 Power
Any power supply derived from mains electricity must have aSafety Extra
Low Voltage (SELV) output. Route low voltage wiring to the PP8xx
controller separately from mains electricity wiring. Please refer to Section
2, Safety.
If this is not possible, make sure the low voltage wiring has an insulation
rating that is appropriate or supplementary insulation is used. The
connections are shown below:
Note:The case of the PP8xx is not connected to GND.
—20 —
PP8xx LED Controller -User Manual
7.2 Lighting output
The lighting output connections must not be shorted together by any
metallic object as the energy discharged generates heat within the PP8xx.
The connections are shown below:
Each power output connector has connections for two output channels as
follows:
Pin Function
1First channel positive
2First channel negative
3Second channel positive
4Second channel negative
7.3 Trigger input
The PP8xx has an opto-coupled trigger input for each channel. The
connection to the trigger inputs is through a9-way male D-type connector
as shown below:
Pin Function
1Input 4positive
2Input 3positive
3Input 2positive
—21 —
WWW.STEMMER-IMAGING.COM

WWW.STEMMER-IMAGING.COM
PP8xx LED Controller -User Manual
Pin Function
4Input 1positive
5Input 0positive
6Common negative
7Input 7positive
8Input 6positive
9Input 5positive
The circuit for the trigger input is shown below:
Referring to the diagram above, the operating conditions for the trigger
inputs are:
Logic 15V <= VTRIG <= 24V
Logic 0 VTRIG <1V
VF1.5V typically
7.4 Ethernet (PP82x)
The RJ45 connector fitted to the PP82x controller requires astraight-
through cable to connect to anetwork switch, hub or router. The
connection is 10Base-Tand operates at 10MBits per second.
7.5 RS232 (PP86x)
The RS232 connector fitted to the PP86x controller is astandard
9-way female D-type. Astandard straight through cable can be used to
connect the controller to aPC serial port. The communications port
settings are 115Kbaud, no parity, 8data bits and 1stop bit.
The pin allocation for the serial connector is shown overleaf:
—22 —
WWW.STEMMER-IMAGING.COM
This manual suits for next models
12
Table of contents
Other STEMMER IMAGING Controllers manuals
