Stephan EVE User manual
EVE
Quick Guide

Fritz Stephan GmbH Medizintechnik · Kirchstraße 19 · 56412 Gackenbach · Germany
Tel. +49 6439-91 25-0 · Fax +49 6439-91 25-111 · info@stephan-gmbh.com · www.stephan-gmbh.com
Equipment is subject to technical modification
Valid as of: 04/2020
Version: V1.0
From Software version: 2.3
Artikel-Nr.: 107090078
Please read the detailed operating manual carefully.
The Quick Guide does not replace the operating manual.

Design and functional description
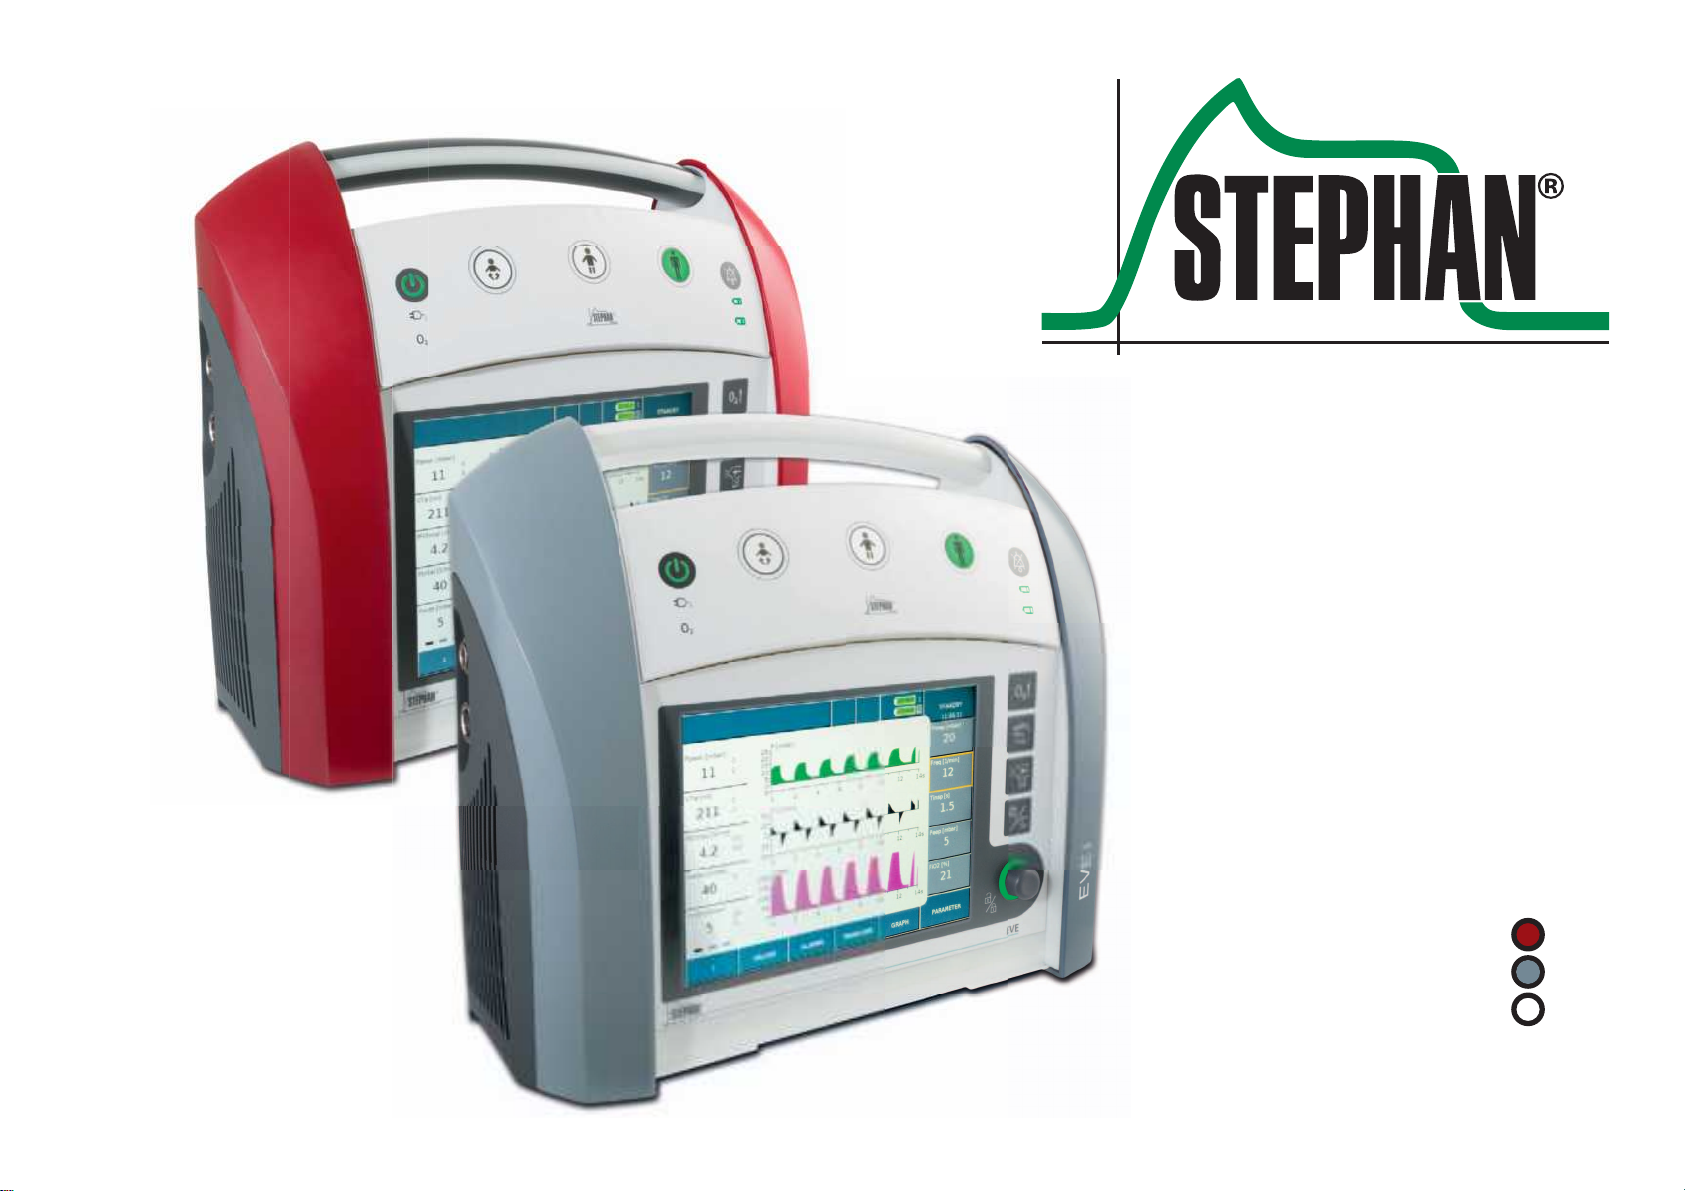
Control panel
1 On/O-Button
2 Mains power indicator
3 O2supply indicator
4 Fast tracking key „Preterm infants and
newborns“
5 Fast tracking key „Child“
6 Fast tracking key „Adult“
7 Charge indicator „Battery 2“
8 Charge indicator „Battery 1“
9 Acoustic alarm suppression

Design and functional description
On/O/Standby-Button
Press this button to switch the EVE
on/o or, in the case of ongoing
ventilation, to switch it to Standby
mode.
Fast tracking keys
To prevent operator errors, the desired fast
tracking key must be pressed for 0.5 s,
aer which it starts to flash green.
Pressing the key again for 0.5 s will then
start or switch to the selected ventilation
mode.
Acoustic alarm suppression
If the key is pressed again within 5 s,
the alarm suppression is canceled.
Pressing the key again aer 5 s has
passed will start an new 2 minute
countdown.
Battery charge indicator
: Capacity: 75 - 100%
: Capacity: 40 - 75%
: Capacity: 1 - 39%
, flashing: 0% or Error
Mains power indicator
When connected to the energy
supply, the mains power indicator is
green. The internal batteries are
charged automatically as needed.
The battery charge indicators tell
you the current battery level.
O2Oxygen supply indicator
The indicator is green when an
oxygen source with suicient fill
pressure is connected.

Design and functional description
Function buttons
1 Button „Preoxy“
2 Button „Inspiration Hold“
3 Button „Aerosol“
4 Toggle button „Day/Night“
5 Control knob „IGR“
6 Lock/Unlock touchscreen
Table of contents
Other Stephan Medical Equipment manuals


Popular Medical Equipment manuals by other brands


Getinge
Getinge Arjohuntleigh Nimbus 3 Professional Instructions for use

Mettler Electronics
Mettler Electronics Sonicator 730 Maintenance manual

Pressalit Care
Pressalit Care R1100 Mounting instruction

Denas MS
Denas MS DENAS-T operating manual

bort medical
bort medical ActiveColor quick guide

AccuVein
AccuVein AV400 user manual


