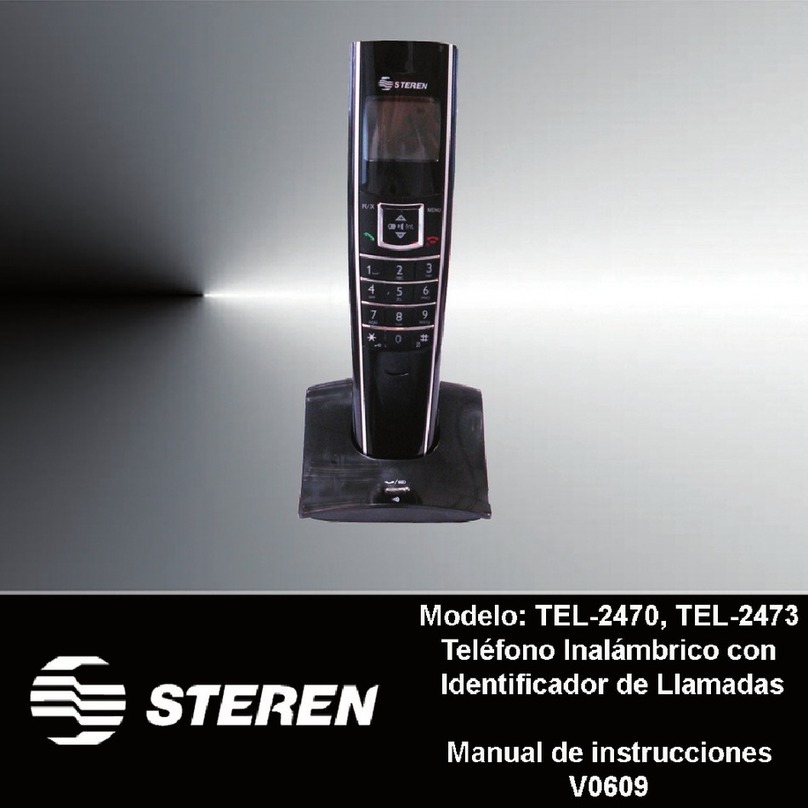
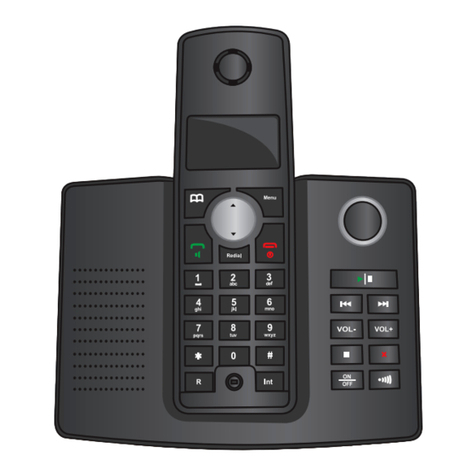
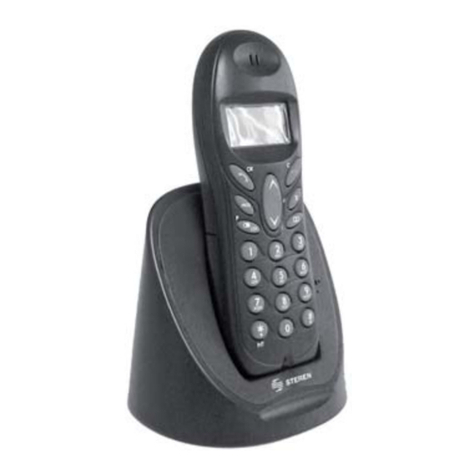
Steren TEL-2480 User manual

Product / Producto: 2,4GHZ
CORDLESS PHONE SYSTEM WITH
ANSWERING MACHINE / TELÉFONO
INALÁMBRICO DE 2,4GHZ CON
CONTESTADORA
Model / Modelo: TEL-2480
Brand / Marca: Steren
CONDICIONES
1. Para hacer efectiva esta garantía se requiere: La presentación de esta póliza y del producto, en el lugar en donde fue adquirido o en ELECTRONICA STEREN S.A. DE C.V.
2. ELECTRONICA STEREN S.A. DE C.V. se compromete a reparar el producto en caso de estar defectuoso sin ningún cargo al consumidor.
3. El tiempo de reparación en ningún caso será mayor a 30 días contados a partir de la recepción del producto en cualquiera de los sitios en donde pueda hacerse efectiva la
garantía.
4. El lugar donde puede adquirir partes, componentes, consumibles y accesorios, así como hacer válida esta garantía es: En cualquiera de las direcciones arriba mencionadas.
ESTA GARANTIA NO ES VALIDA EN LOS SIGUIENTES CASOS:
1. Cuando el producto ha sido utilizado en condiciones distintas a las normales.
2. Cuando el producto no ha sido operado de acuerdo con el instructivo de uso.
3. Cuando el producto ha sido alterado o reparado por personas no autorizadas por ELECTRONICA STEREN S.A. DE C.V.
Nota: El consumidor podrá solicitar que se haga efectiva la garantía ante la propia casa comercial, donde adquirió el producto. Si la presente garantía se extraviara, el
consumidor puede recurrir a su proovedor para que le expida otra póliza de garantía, previa presentación de la nota de compra o factura respectiva.
DATOS DEL DISTRIBUIDOR
DISTRIBUTION / NOMBRE / DISTRIBUIDOR:
ADDRESS / DOMICILIO:
PRODUCT / PRODUCTO: BRAND / MARCA:
MODEL / MODELO: SERIAL NUMBER / No. DE SERIE:
DATE OF DELIVERY / FECHA DE ENTREGA:
Call Center / Centro de Atención a Clientes
del Interior 01 800 500 9000
Mexico City / Cd. de México: 53 54 22 90
Warranty
CONDITIONS:
1. This warranty card with all the required information, the invoice or purchase ticket, the packing or package, must be presented with the product when warranty
service is required.
2. If product hasn’t exceed warranty period, the company will repair it free of charge including transportation charges.
3. The repairing time will not exceed 30 natural days, from the day the claim was received.
4. Steren sells parts, components, consumables and accessories to customer, as well as warranty service, at any of the following addresses:
THIS WARRANTY IS VOID ON THE NEXT CASES:
If the product has been damage by an accident, acts of God, mishandling, leaky batteries, failure to follow enclosed instructions, improper repair by unauthorized
personnel, improper safe keeping.
Notes:
a) The customer can also claim the warranty service on the purchase establishment.
b) If you lose the warranty card, we can reissue it just showing the invoice or purchase ticket.
Póliza de Garantía
This Steren product is guaranteed under
normal usage against defects in
workmanship and materials to the original
purchaser for one year from the date of
purchase.
Garantiza este producto por el término de
un año en todas sus partes y mano de obra
contra cualquier defecto de fabricación y
funcionamiento, a partir de la fecha de
entrega.
V1206

INSTRUCTIVO DE USO DE TELÉFONO INALÁMBRICO DE 2,4GHZ
CON CONTESTADORA
Modelo: TEL-2480
Marca: Steren
Antes de utilizar su nuevo Teléfono Inalámbrico con contestadora lea
este instructivo para evitar cualquier mal funcionamiento. Guárdelo
para futuras referencias.
Su nuevo teléfono inalámbrico de 2,4GHz le ofrece identificador de
llamadas (previa contratación del servicio), directorio de 20 memorias,
memoria de las últimas 10 llamadas recibidas, 8 timbres diferentes, así
como localizador de auricular y contestadora digital con hasta 10 minutos
de grabación.
Las baterías le permiten utilizar el equipo hasta por 10 horas en modo de
conversación y hasta 100 horas en modo de espera.
Tecnología DECT (Telecomunicación Inalámbrica Digital Mejorada).
Diseño moderno.
IMPORTANTE
Antes de comenzar a utilizar su nuevo teléfono asegúrese de instalar la
batería recargable de NiCd incluida.
El equipo se debe colocar en un lugar ventilado y seco.
El identificador de llamadas sólo funciona si Usted tiene contratado el
servicio con una compañía de telefonía local.
No exponga la pantalla de LCD directamente a la luz del sol.
Limpie con un paño seco. No utilice solventes.
CONTROLES
1.- Arriba / Abajo ................................ Permite ajustar el nivel de
volumen durante una llamada /
Permite desplazarse a través de
la lista de números almacenados
o los registros del identificador de
llamadas
2.- Comenzar llamada / OK ................ Iniciar / responde una llamada /
Confirma una opción
3.- Programación ................................ Inicia la programación / Durante
una llamada permite realizar una
entrada en la Libreta
4.- Remarcado / Pausa / CDS ............ Presione una vez para hacer un
remarcado de uno de los últimos
cinco números marcados /
presione dos veces para ver una
lista de registros del Identificador
de Llamadas / genera pausas
mientras se utiliza con un
conmutador telefónico
5.- Intercomunicador/Desplazamiento . Permite hace una llamada
interna (si cuenta con más de un
equipo) / muestra el total de
dígitos de un número
6.- Desplazamiento ............................. Muestra el total de dígitos de un
número telefónico
7.- Memoria ........................................ Guarda números telefónicos en
memoria / permite buscar
números telefónicos
almacenados
8.- Retención ...................................... Permite retener una llamada
telefónica / necesario cuando el
equipo está conectado a un
conmutador
9.- Colgar / Cancelar .......................... Presione por 1 segundo para
bloquear el teclado / presione por
3 segundos para encender y
apagar el equipo / borra dígitos
10.- Teclas numéricas
11.- Altavoz .......................................... Presione este botón para utilizar
la base como un altavoz durante
una conversación
12.- Teclas numéricas base
INSTRUCTION MANUAL FOR 2,4GHZ CORDLESS PHONE SYSTEM
WITH ANSWERING MACHINE
Model: TEL-2480
Brand: Steren
Before using your new Wireless Telephone please read this
instruction manual to prevent any damage. Put it away in a safe place
for future references.
Your new 2,4GHz wireless telephones offers you Caller ID function (you
must subscribe to the service), 20 entries phonebook, last 10 incoming
calls memory, 8 different ringtones, pager function and a digital answering
machine with up to 10 minutes of digital recording.
The battery can operates up to 10 hours in conversation mode, and up to
100 hours in stand-by mode.
DECT Technology (Digital Enhanced Cordless Telecommunication).
Modern design.
IMPORTANT
Before using your new Phone Set, assure to put the included NiCd
rechargeable battery into the battery compartment.
Phone must be placed in a cool, dry and ventilated place.
Caller ID function only works if you have subscribed for the service with
your local telecom company.
Do not expose LCD screen directly to sunlight.
Clean only with a soft, dry cloth. Do not use solvents.
CONTROLS
1.- Up / Down ...................................... Set the volume level while calling
/ Allow one to move through the
call entries and Caller ID stored
numbers
2.- Start call / OK ……………………… Start / Answer a call / Confirms an
option
3.- Program ......................................... Begins the programming / Allow
one to make a note of a
number in the phonebook, during
a call
4.- Redial / Pause / CDS .................... Press once to redial one of the
last five stored numbers / press
twice to review the Caller ID
stored numbers / insert pauses
while using the phone with a PBX
system
5.- Intercom / Displacement ................ Allow one to make an internal
phone call (if you have more than
one handset) / displays the total
digits contained in a number
6.- Displacement ................................. Displays the total digits contained
in a number
7.- Memory .......................................... Store up to 20 phone numbers on
memory / allow one to search
stored phone numbers / you need
this option when the equipment is
connected to a PBX
8.- Retention ........................................ Use this function to retain a
phone call
9.- Hang up / Cancel ........................... Press for 1 second to block the
keyboard / press for 3 seconds to
power on / off the equipment /
delete digits to correct
mistakes
10.- Numeric keys
11.- Speaker …………………………… Press this button to use the main
base as a speaker while you
talk
12.- Numeric keys (base)

13.- Indicador de uso ........................... Enciende cuando el equipo está
en uso
14.- Indicador de carga ........................ Enciende cuando la batería se
encuentra en proceso de carga
15.- Botón localizador .......................... Activa una alarma en el auricular
a fin de conocer su ubicación
16.- Volumen de altavoz ...................... Permite ajustar el nivel de
volumen del altavoz durante una
llamada
17.- Botones de la contestadora .......... Estos botones se explicarán
detalladamente más adelante
SÍMBOLOS EN PANTALLA
1.- Número de equipo .......................... Indica el número de auricular (en
caso de que tenga varios
equipos)
2.- Hora actual
3.- Número de base .............................. Indica el número de base
utilizado (en caso de que haya
registrado varias bases)
4.- Nivel de señal .................................. Muestra la potencia de señal
entre el auricular y la base
5.- Nueva llamada ................................. Aparece cuando existen llamadas
perdidas
6.- Llamada interna ............................... Parpadea mientras el auricular
timbra para establecer una
llamada interna
7.- Memoria / Guardar ........................... Aparece cuando está
almacenando números
telefónicos y cuando realiza
llamadas de números
almacenados en memoria
8.- Red indirecta .................................... Aparece cuando el portátil está
marcando un número no local por
una red telefónica alternativa
9.- Remarcado ...................................... Aparece cuando remarca un
número telefónico
10.- Identificador de llamada ................ Aparece cuando está
comprobando o marcando la lista
de registros de identificación de
Llamadas
11.- Teclado bloqueado ......................... Aparece cuando el teclado está
bloqueado o cuando intenta
marcar un número restringido
12.- Nivel de carga de batería
13.- In-use LED .................................... Lights on when the equipment is
in use
14.- Charging indicator ………………... Lights on when the equipment is
charging the battery
15.- Pager ............................................ Press this button to emit an alarm
in the handset and know where
the handset is
16.- Speaker volume keys ……………... Allow one to set the volume level
in the speaker while you talk
17.- Answering machine buttons ………. This buttons will be explained
later
ON SCREEN SYMBOLS
1.- Number of handset ......................... Indicate the number of handset
(in the case that you have more
than one handset)
2.- Current time
3.- Number of base ............................... Indicates the number of the used
base (in the case that you have
registered more than one base)
4.- Signal level ...................................... Displays the signal power
between the handset and the
base
5.- New incoming call ............................ Displays when had lost incoming
calls
6.- Internal call ....................................... The word blinks when someone
try to make an internal phone
call
7.- Memory / Save ................................. Displays when storing phone
numbers and when makes phone
calls using a phone number
stored on phonebook
8.- Indirect network ............................... Displays when dial a non-local
phone number through an
alternative network
9.- Redial .............................................. Display when redial a phone
number
10.- Caller ID ........................................ Displays when reviews or dialing
a phone number from the Caller
ID call entries
11.- Keyboard blocked ………………… Displays when the keyboard is
blocked or when you try to dial a
restricted number
12.- Battery charging level
1
23
4
56
7
89
10
12
13
14
15
16
17

INSTALACIÓN
1.- Elija el lugar donde desea colocar la base.
2.- Conecte el adaptador de corriente suministrado a un tomacorriente
casero y a la base del teléfono.
3.- Inserte la batería suministrada en el auricular. Asegúrese de colocarla
con la polaridad correcta.
4.- Coloque el auricular en la base, y deje cargando las baterías por 15
horas la primera vez.
5.- Una vez que las baterías se han cargado, conecte el cable de la línea
telefónica en la base.
Notas:
Si la calidad del sonido es mala durante una llamada, probablemente es
debido a que existe interferencia con otro equipo eléctrico o se encuentra
cerca de otro teléfono. Diríjase a otra posición.
Si la pantalla se encuentra en blanco, presione el botón de Colgar /
Cancelar por 5 segundos, el auricular se encenderá.
CÓMO REALIZAR UNA LLAMADA
1.- Levante el auricular de la base.
2.- Teclee el número telefónico que desee. Si comete algún error al
introducir el número telefónico, presione la tecla de Cancelar para borrar
los dígitos de la pantalla uno por uno.
3.- Presione el botón de Comenzar llamada.
4.- Una vez que haya terminado su conversación, presione el botón de
Colgar o coloque el auricular en la base.
Nota:
Durante una llamada, puede ajustar el volumen del auricular, utilizando los
botones de Arriba / Abajo.
REMARCAR EL ÚLTIMO NÚMERO (LNR)
1.- Levante el auricular de la base.
2.- Presione el botón de Remarcado (LNR).
3.- Presione el botón de Comenzar llamada.
Si desea remarcar uno de los últimos cinco números marcados:
1.- Levante el auricular de la base.
2.- Presione el botón de Remarcado (LNR).
INSTALLATION
1.- Choose the place where you want to put the base.
2.- Plug the supplied AC power adapter into an AC household outlet. Then
plug into the base, too.
3.- Place the rechargeable battery in the handset. Pay attention to polarity.
4.- Put the handset on the base, and charge the batteries for 15 hours
(only first time).
5.- Once the batteries are charged, plug the phone line cable into the
base.
Notes:
If the quality of the sound is poor, probably you receive interference from
another electrical device or maybe you’re too close of another handset.
Move to another position.
If the LCD screen displays in white or clear, press Hang up / Cancel button
for 5 seconds, the handset will switch on.
MAKING A CALL
1.- Pick the handset up.
2.- Enter the desired phone number. If you made a mistake while enter the
phone number, press the Cancel button to delete the digits one by one.
3.- Press Start call button.
4.- Once you have finished the conversation, press Hang up button or
place the handset on the base.
Note:
You can set the volume level while you’re in a conversation, use the Up /
Down buttons.
REDIAL THE LAST NUMBER (LNR)
1.- Pick the handset up.
2.- Press Redial button (LNR).
3.- Press Start call button.
If you want to redial one of the last five dialed numbers:
1.- Pick the handset up.
2.- Press Redial button (LNR).
INT LC CID
h1
14-13
b1
1
2
3
4
567891011
12

3.- Utilice los botones de Arriba / Abajo para mostrar el número que desee
remarcar.
4.- Una vez que ha encontrado el número a remarcar, presione el botón
de Comenzar llamada.
5.- Cuando haya terminado su conversación, presione el botón de Colgar
o coloque el auricular en la base.
Notas:
Sólo se almacenarán en memoria los números que marque manualmente.
Los números que hayan sido marcados desde la libreta de teléfonos y la
memoria del Identificador de llamadas no serán registrados.
Los números que marque más de una vez, se almacenarán solo una vez.
Cada vez que marque un número se borrará el más antiguo.
MEMORIAS
Su teléfono puede almacenar hasta 20 números telefónicos en la
memoria. Cada número puede tener hasta 24 dígitos.
Para almacenar un número telefónico
1.- Teclee el número telefónico que desee almacenar.
2.- Mantenga presionado el botón de Memoria durante 3 segundos.
3.- El número de teléfono se almacenará en la primera posición disponible
de la memoria. Si desea guardarlo en otra posición, utilice los botones de
Arriba / Abajo hasta localizar la posición en la que desee almacenarlo.
4.- Presione el botón de Comenzar llamada / OK para confirmar la acción.
Para realizar una llamada de un número almacenado en memoria
1.- Presione el botón de Memoria una vez. Dos líneas del lado izquierdo
de la pantalla comienzan a parpadear.
2.- Utilice los botones de Arriba / Abajo para encontrar el número que
desee marcar, o teclee un número de entrada de la memoria (01 al 20).
3.- Presione el botón de Comenzar llamada / OK para comenzar la
llamada.
Marcado en cadena
Utilice esta función para guardar una parte de un número telefónico en la
memoria. Es útil cuando desee guardar un prefijo de larga distancia.
Puede usar cualquier combinación de la memoria y del marcado manual
para hacer una llamada.
Editar un número de la memoria
1.- Presione el botón de Programación.
2.- Presione el botón de Memoria.
3.- Utilice los botones de Arriba / Abajo hasta que se muestre el número
que desee editar.
4.- Presione el botón de Colgar para eliminar dígitos, y utilice el teclado
numérico para introducir los nuevos dígitos.
5.- Presione el botón de OK para guardar los cambios en memoria.
Eliminar un número de la memoria
1.- Presione el botón de Memoria.
2.- Utilice los botones de Arriba / Abajo hasta que se muestre el número
que desee eliminar.
3.- Presione el botón de Colgar hasta que escuche un tono. El número
será eliminado de la memoria.
Nota:
Si desea eliminar todos los números de la memoria, mantenga presionado
el botón de Colgar durante 5 segundos.
Almacenar un número telefónico en la memoria durante una llamada
1.- Presione el botón de Programación.
2.- Presione el botón de Memoria.
3.- Presione los botones de Arriba / Abajo para encontrar una ubicación
libre en la memoria, o introduzca el número de la posición en la que desee
almacenar el número telefónico.
4.- Introduzca el número telefónico que desee guardar.
5.- Presione el botón de OK para almacenar en memoria el número
telefónico.
3.- Use the Up / Down buttons to display the desired number to redial.
4.- Once you have found the number to redial, press Start Call button.
5.- Once you have finished the conversation, press Hang up button or
place the handset on the base.
Notes:
Only will be stored the numbers which were manually dialed. If you dialed
a number from the phonebook or the Caller ID memory, they won’t be
stored in memory.
If you dialed a number more than once, only will be stored once.
Every time you dial a new number, the old one will be deleted from the
memory.
PHONEBOOK MEMORY
Your wireless phone can store up to 20 phone numbers on memory. Each
number can be formed by 24 digits.
To store a phone number:
1.- Enter the phone number that you want to store.
2.- Press and hold Memory button for three seconds.
3.- The phone number will be stored on the first available position of the
memory. If you want to store in other position, use the Up / Down buttons
until you found the position where you want to store the number.
4.- Press Start Call / OK button to confirm the action.
Making a call from a stored number on phonebook
1.- Press memory button, shortly. Two segments on the left side of the
screen, blinks.
2.- Use the Up / Down buttons to find the number to dial, or enter the
number of one of the memories in the phonebook (01 to 020).
3.- Press Start Call / OK button to confirm the action.
Concatenated dialing
Use this function to store a part of a phone number into memory. You can
use it when you need to dial a long distance prefix. You can use any
memory combination and manual dialing to make calls.
Editing a stored number
1.- Press Program button.
2.- Press Memory button.
3.- Use Up / Down buttons until you found the number to edit.
4.- Press Hang Up button to delete digits, and use the numeric keys to
enter new digits.
5.- Press OK button to store the changes in memory.
Deleting a stored number
1.- Press Memory button.
2.- Press Up / Down buttons until you found the number to delete.
3.- Press Hang up button until you heard a high tone beep. The selected
number will be deleted from the memory.
Note:
If you want to delete all the numbers stored on memory, press and hold
Hang Up button for five seconds.
Storing a phone number in memory during a call
1.- Press Program button.
2.- Press Memory button.
3.- Press Up / Down buttons to find a free space on memory, or if you
want, enter a number of a free position where you want to store the phone
number.
4.- Enter the number that you want to store.
5.- Press OK button to store the phone number in memory.

Nota:
Si desea salir de la memoria sin guardar un número, presione el botón de
Colgar por un segundo.
Guardar el último número remarcado en memoria
Mediante esta función puede mover un número de las memorias de
Remarcar Último Número (LNR) a una posición en la memoria
permanente.
1.- Presione el botón Remarcar / CDS.
2.- Utilice los botones de Arriba / Abajo hasta que se muestre el número
que desee almacenar.
3.- Mantenga presionado el botón de Memoria durante dos segundos. En
pantalla se muestra un lugar de memoria libre. Utilice los botones de
Arriba / Abajo para seleccionar un lugar diferente.
4.- Presione la tecla OK para guardar el número en memoria.
CÓMO CONTESTAR UNA LLAMADA
Cuando hay una llamada entrante, el número de teléfono aparece en la
pantalla, así mismo la base y el auricular comienzan a emitir una alarma.
Presione cualquier botón para contestar la llamada.
IDENTIFICADOR DE LLAMADAS
Para utilizar esta opción es necesario que previamente se haya
suscrito al servicio con su compañía telefónica local.
LLAMADAS ENTRANTES
Para revisar los números telefónicos de las llamadas que recibió, presione
el botón de Remarcado / CDS dos veces. En pantalla se muestra el último
número entrante. Presione el botón de Desplazamiento para visualizar la
hora y fecha de la llamada. Utilice los botones de Arriba / Abajo para
visualizar más registros.
Para devolver una llamada
1.- Presione el botón de remarcado dos veces.
2.- Utilice los botones de Arriba / Abajo para visualizar el número al que
desea devolver la llamada.
3.- Presione el botón de Comenzar Llamada para marcar el número.
Para eliminar registros del identificador de llamadas
1.- Presione el botón de remarcado dos veces.
2.- Utilice los botones de Arriba / Abajo para visualizar el número que
desea eliminar.
3.- Mantenga presionada la tecla de Colgar hasta que escuche un tono.
4.- Si desea borrar los 10 registros del Identificador de Llamadas
mantenga presionada la tecla de Colgar por 5 segundos.
Para almacenar registros del identificador de llamadas en una
posición de memoria permamente
1.- Presione el botón de remarcado dos veces.
2.- Utilice los botones de Arriba / Abajo para visualizar el número que
desea almacenar en memoria.
3.- Mantenga presionado el botón de Memoria por dos segundos.
4.- Presione el botón de OK para guardar en memoria el número
telefónico.
USO DEL SISTEMA DE MÚLTIPLES-AURICULARES
A través de este equipo puede conectar hasta 6 auriculares diferentes
registrados en una sola base.
Con dos o más auriculares usted podrá:
- Hacer llamadas internas de un auricular a otro
- Transferir una llamada exterior de un auricular a otro
- Alternar de una llamada exterior a una llamada interna
- Establecer una conferencia tripartita entre usted, una llamada
exterior y una llamada interna.
Notas:
Cada auricular tiene su propio número (h1 a h6).
Sólo un auricular puede estar conectado a la línea telefónica. Si intenta
realizar una llamada mientras otro auricular la está utilizando, escuchará
tono de ocupado.
Note:
If you want leave the program mode without store the number, press Hang
up button for one second.
Saving the last redialed number on memory
Use this function to store the last redialed number (LNR) into a free
available position in memory.
1.- Press LNR / CDS button.
2.- Use Up / Down buttons until you found the number to store.
3.- Press and hold Memory button for two seconds. Then you can see on
the screen one of the available spaces on memory. Use Up / Down buttons
to choose a different location.
4.- Press OK to store the number on memory.
ANSWERING INCOMING CALLS
When you receive an incoming call, the incoming phone number displays
on the screen. The base and the handset begins to ring. Press any button
to answer the call.
CALLER ID
You must subscribe to this service previously with your local
telecomy company.
INCOMING PHONE CALLS
To review all the received phone calls, press LNR / CDS twice. On screen
displays the last received call. Press Displacement button to visualize the
hour and the date of the incoming call. Use Up / Down buttons to visualize
more registers.
Re-dial
1.- Press Redial button twice.
2.- Use Up / Down buttons to visualize the number that you want to redial.
3.- Press Start Call button to redial the number.
Deleting Caller ID entries
1.- Press Redial button twice.
2.- Use Up / Down buttons to visualize the number that you want to delete.
3.- Press and hold Hang Up button until you heard a high tone beep.
4.- If you want to delete the 10 Caller ID entries, press and hold Hang Up
button for 5 seconds.
Storing Caller ID entries
1.- Press Redial button twice.
2.- Use Up / Down buttons to visualize the number that you want to store
in memory.
3.- Press and hold Memory button for two seconds.
4.- Press OK button to store the Caller ID entry in memory.
MULTIPLE – HANDSET SYSTEM
With this equipment you can add up to 6 different handsets, registered in
only one base.
With two or more handsets you can:
- Make internal call from one handset to other
- Transfer an external call from one handset to other
- Shift between one external call and an internal call
- Make a tri-way conference between you, an external call and
an internal call.
Notes:
Each handset has its own number to identify it (h1 to h6).
Only one handset can be connected to the phone line. You will hear a
busy tone if you want to make a phone call if another handset is using the
line.

Para realizar una llamada interna
1.- Presione la tecla de Intercomunicador hasta que la palabra INT
aparezca en pantalla, así como los números de todos los auriculares.
2.- Introduzca el número del auricular al que desea comunicarse, ó
introduzca el 9 para llamar a todos los auriculares ó introduzca el 0 para
llamar a la base principal.
3.- El auricular al que llamó comienza a emitir una alarma y el símbolo INT
parpadea en la pantalla.
4.- Cuando haya terminado su conversación, presione el botón de Colgar
o coloque el auricular en la base.
Para responder una llamada interna
El sonido del timbre de las llamadas internas es distinto al de las llamadas
externas. Cuando alguien le hace una llamada interna, el mensaje INT y el
número de auricular del que llaman aparece en pantalla, simplemente
presione cualquier tecla para responder a la llamada.
Cuando haya terminado su conversación, presione el botón de Colgar o
coloque el auricular en la base.
TRANSFERENCIA DE LLAMADAS
Cuando ha respondido o ha realizado una llamada externa y requiere
transferirla a otro auricular, siga los siguientes pasos:
1.- Presione el botón de Intercomunicador por dos segundos e introduzca
el número del auricular al que desee transferir la llamada o introduzca el
número 0 para transferir a la base principal.
2.- La llamada será retenida y el otro auricular (o la base) comenzará a
emitir una alarma.
3.- Cuando el usuario del otro auricular contesta, usted podrá comenzar a
hablar.
4.- Para transferir la llamada, simplemente presione el botón Colgar.
5.- Si el otro auricular no contesta, presione el botón de Intercomunicador
para regresar a la llamada retenida.
Nota:
Usted puede presionar la tecla de Colgar para colgar y transferir la
llamada antes de que el otro auricular responda a la llamada interna. Si el
usuario del otro auricular no responde en un lapso de 30 segundos, la
llamada externa volverá al primer auricular.
ALTERNAR ENTRE DOS LLAMADAS
Cuando tiene una llamada interna y llamada externa en curso, usted
puede alternar entre ambas, presionando el botón de Intercomunicador
por dos segundos para retener una llamada y poder contestar la otra.
Puede transferir la llamada externa a otro auricular, presionando la tecla
Colgar mientras usted está conectado a una llamada interna.
Nota:
Si presiona el botón de Colgar mientras tiene una llamada externa, ésta
se cortará.
CONFERENCIA TRIPARTITA
Cuando tiene una llama externa y una llamada interna en proceso, puede
realizar una conferencia tripartita, solo presione el botón de gato (#)
durante dos segundos.
Si desea suspender al usuario del otro auricular, presione la tecla de gato
(#) por dos segundos.
Usted permanecerá conectado a la llamada externa. Si el otro usuario no
ha colgado, puede ingresarlo de nuevo a la conferencia, presionando la
tecla de gato (#) una vez más.
Si desea salir de la conferencia y dejar al otro usuario en la llamada,
presione el botón de Colgar.
TONO DE LLAMADA NUEVA
Cuando se encuentre en una llamada interna y entra una llamada externa,
escuchará un tono advirtiéndole de que está entrando una llamada nueva.
Si desea responder la llamada externa, finalizando la llamada interna,
presione la tecla de Retención brevemente.
Si desea responder la llamada externa y retener la llamada interna,
presione el botón de Intercomunicador por dos segundos.
Making an internal calling
1.- Press Intercom button until the word INT displays on screen, also you
must see the numbers of every one of the connected handsets to the
base.
2.- Enter the number of the handset that you want to establish the
communication, or enter the number 9 to call to all the handsets.
3.- The other handset begins to ring, and the word INT blinks on screen.
4.- When you have finished the conversation, press Hang Up button or
place the handset on the base.
Answering an internal call
The ring tone for the internal calls is different from the external calls. If
anyone try to calls you internally, the message INT and the number of the
first handset displays on screen, just press any key to answer the call.
When you have finished the conversation, press Hang Up button or place
the handset on the base.
TRANSFERRING CALLS
When you answered a call or you made an external call and need to
transfer it to other handset, follow these steps:
1.- Press Intercom button for two seconds and enter the number of the
handset which you want to transfer the call or type the number 0 to
transfer it to the main base.
2.- The incoming call will be retained and the other handset (or base) will
emits a ring.
3.- When the other user answer the call, you can start to talk.
4.- To transfer the call, just press hang Up button.
5.- If the other handset is busy or don’t answer, press Intercom button to
back to retained call.
Note:
If you want to transfer the call before the other user answer the call, press
Hang Up button. If the other user don’t answer the cal in a period of time of
30 seconds, the retained call backs to the first handset.
SHIFTING BETWEEN TWO CALLS
When you have an internal call and an external call at the same time, you
can shift between both calls, pressing Intercom button for two seconds to
retain one call and then you can answer the other one. You can transfer
the external call to another handset, pressing Hang Up button while you’re
connected to the internal call.
Note:
If you press Hang Up button while you have an external call, this will cut
out.
TRI-WAY CONFERENCE
When you have an external call and an internal call in process, you can
make a tri-way conference, press hash (#) for two seconds.
If you want to suspend the user from the other handset, press hash (#)
button for two seconds.
You will stay connected to external call. If the other user is on the line yet,
you can add it to the conference, pressing hash (#) once again.
If you want to leave the conference and keeps the other user on the call,
press Hang Up button.
NEW INCOMING CALL TONE
While you’re in an internal call and incoming a new external call, you will
hear a tone warning you about the new incoming call.
If you want to answer the external call, finalizing the internal call, press
Retention button, shortly.
If you want to answer the external call and retain the internal call, press
Intercom button for two seconds.

REGISTRO DE UN AURICULAR NUEVO
Cuando adquiere un auricular nuevo, es necesario registrarlo en la base
principal.
Cada auricular puede ser registrado hasta en 4 bases diferentes.
No es necesario registrar los auriculares suministrados con la base,
únicamente aquellos que haya adquirido por separado.
1.- Presione el botón de Localizador hasta que escuche el tono de registro
(tonos espaciados)
2.- En el auricular presione el botón de programación e introduzca los
números 1 y 6 así como el número de la base. Si es la primer base en la
que se registra, el número de base es 1.
3.- Presione la tecla 0 (cero) 4 veces.
4.- Presione el botón de OK para mostrar los números de auricular
disponibles.
5.- Introduzca un número de auricular. En caso de que no presione ningún
botón, el auricular será registrado en la posición libre más cercana.
6.- Una vez que el auricular esté registrado, escuchará un tono de
confirmación.
Notas:
Cuenta con 30 segundos para registrar el auricular.
ELIMINAR EL REGISTRO DE UN AURICULAR
Utilice esta función cuando requiera reemplazar un auricular.
1.- Presione el botón de Programación.
2.- Introduzca los números 2 y 6. En pantalla se muestran los números de
todos los auriculares registrados.
3.- Introduzca el número de auricular que desea eliminar el registro.
4.- Una vez que haya introducido el número, el auricular será eliminado de
la base.
SELECCIÓN DE BASES
Si su auricular está registrado en más de una base, automáticamente
seleccionará la base de la cual puede obtener una mejor señal.
1.- Presione el botón de Programación.
2.- Introduzca los números 1 y 7.
3.- Utilice los botones de Arriba / Abajo para seleccionar una base. Las
bases están numeradas del 1 al 4. Si introduce el número 0, el auricular
seleccionará la base con la señal más fuerte.
4.- Presione el botón de OK para confirmar.
Nota:
Si sólo cuenta con una base, usted no requerirá utilizar esta función.
PERSONALIZANDO EL TELÉFONO
Contestación automática de llamadas entrantes
Utilice ésta función si desea contestar una llamada entrante únicamente
levantando el auricular de la base.
1.- Presione el botón de Programación.
2.- Introduzca los números 1 y 5.
3.- Utilice los botones de Arriba / Abajo para configurar el teléfono:
seleccione el 0 si desea desactivar la contestación automática, seleccione
1 si desea activar la función.
4.- Presione el botón de OK para confirmar los cambios.
Melodía y volumen de timbre
Su equipo cuenta con ocho niveles de volumen de timbre así como ocho
melodías.
Si desea cambiar el volumen del timbre:
1.- Presione la tecla de Programación.
2.- Introduzca el número 1 tres veces (1 1 1 ).
3.- Utilice los botones de Arriba / Abajo para cambiar el volumen.
4.- Presione el botón de OK para confirmar los cambios.
Si desea cambiar la melodía:
1.- Presione la tecla de Programación.
2.- Introduzca los números 1 1 2.
3.- Utilice los botones de Arriba / Abajo para cambiar la melodía.
REGISTERING A NEW HANDSET
When you acquire a new handset, it is necessary to register it in the main
base.
Each handset can be registered in 4 different bases.
It is not necessary to register the supplied handset with the base, you must
register only which you bought separately.
1.- Press the Pager button until you heard the register tone (slow tone).
2.- Press Program button in the handset and enter the numbers 1 and 6
and the number of the base. If you only have one base, the number of the
base is 1.
3.- Press key 0 (zero) 4 times.
4.- Press OK button to display the available handsets.
5.- Enter a number of handset. If you don’t press any button, the new
handset will be registered in the closest available position.
6.- Once the handset was registered, you will listen a confirmation tone.
Note:
You have 30 seconds to register a new handset.
ELIMINATING A REGISTERED HANDSET
Use this function when you want to replace the handset.
1.- Press Program button.
2.- Enter the numbers 2 and 6. All the numbers of the registered handsets
will be displayed on the screen.
3.- Enter the number of the handset that you want to eliminate the register.
4.- Once you have entered the number, the handset will be deleted from
the base.
SELECTING A BASE
If you handset is registered in more than one base, automatically select
the nearest in order to get the best signal.
1.- Press Program button.
2.- Enter the numbers 1 and 7.
3.- Use Up / Down buttons to choose a base. The bases are numbered
from 1 to 4. If you enter the number 0 (zero), the handset will choose the
base with strongest signal.
4.- Press OK to confirm the action.
Note:
You don’t need to do this process if you only have one base.
PERSONALIZING THE PHONE
Automatic incoming calls answering
If you want to answer an incoming call just picking the handset up, then
you need to configure this function.
1.- Press program button.
2.- Enter the numbers 1 and 5.
3.- Use Up / Down buttons to configure the phone: choose 0 (zero) if you
want to disable the automatic answering function, choose 1 if you want to
enable the function.
4.- Press OK to store the changes.
Ringtone and ring volume
You can choose one of the 8 different tones and you can adjust the volume
level in 8 segments.
If you want to set the tone volume level:
1.- Press Program button.
2.- Enter the number 1 three times.
3.- Use Up / Down buttons to set the volume level.
4.- Press OK button to store the changes.
If you want to change the ringtone:
1.- Press Program button.
2.- Enter the numbers 1 1 and 2.
3.- Use Up / Down buttons to change the ringtone.

4.- Presione el botón de OK para confirmar los cambios.
Nota:
Cuando el volumen está ajustado en el nivel 0, el auricular no emitirá
sonido alguno cuando entre una llamada nueva, pero en la pantalla se
mostrará el mensaje CALL o el número de teléfono entrante, si cuenta con
el servicio de Identificador de Llamadas.
Tono del teclado
Cuando presiona una tecla, escucha un tono. Si desea desactivar ese
tono, siga estos pasos:
1.- Presione la tecla de Programación.
2.- Introduzca los números 1 1 3.
3.- Utilice los botones de Arriba / Abajo para activar o desactivar el tono, 0
(cero) para desactivar, 1 para activar.
4.- Presione el botón de OK para confirmar los cambios.
Llamada directa
Cuando la función de llamada directa está activada, usted podrá presionar
cualquier botón –a excepción de PROG- para marcar a un número
previamente configurado.
Programación del número telefónico de llamada directa
1.- Presione la tecla de Programación.
2.- Introduzca los números 1 y 3.
3.- Introduzca el número telefónico que desee programar como llamada
directa.
4.- Presione el botón de OK para confirmar los cambios.
Activación y desactivación de la función de Llamada Directa
1.- Presione la tecla de Programación.
2.- Introduzca el número 1 y 2.
3.- Utilice los botones de Arriba / Abajo para configurar esta opción.
Seleccione 0 (cero) para desactivar la función de Llamada Directa ó
seleccione 1 si desea activar la Llamada Directa.
4.- Presione el botón de OK para confirmar los cambios.
Notas:
Cuando la función de Llamada Directa está activada, en la pantalla se
muestra un ícono de una llave, así como el número de Llamada Directa
programado.
Usted puede contestar llamadas entrantes de forma normal, aún cuando
se encuentre la función de Llamada Directa activada.
Con la función de Llamada Directa NO se pueden hacer llamadas a
servicios de emergencia, a menos que haya programado un número de
emergencia en la función de Llamada Directa.
BORRADO DEL TOTAL DE MEMORIAS
Utilice esta función para borrar todos los números guardados en memoria,
así como los números de Remarcado y el número de Llamada Directa, en
caso de que lo hubiera programado.
1.- Presione el botón de Programación.
2.- Introduzca los números 1 y 9.
3.- Presione el botón de OK para confirmar el borrado.
Nota:
Las memorias de Identificador de Llamadas se borran al reiniciar la base.
REINICIAR EL AURICULAR
Utilice ésta función para regresar a la configuración de fábrica.
Volumen de timbre: 7
Melodía de timbre: 4
Tono del teclado: activado
Red indirecta: desactivado
Contestación automática: desactivado
Selección de base: automático
1.- Presione el botón de Programación.
2.- Introduzca los números 1 y 0 (cero).
3.- Presione el botón de OK para confirmar la acción.
4.- Press OK button to store the changes.
Note:
When the volume level is in position 0, the handset won’t emits any sound
when receive a new incoming call, but in the display you will see the word
CALL or the incoming phone number. This function only works if you have
Caller ID service.
Keytone
When you press a key, you can hear a beep. If you want to deactivate this
tone, follow these steps:
1.- Press Program button.
2.- Enter the numbers 1 1 and 3.
3.- Use Up / Down buttons to activate or deactivate the tone, choose 0
(zero) to deactivate it, choose 1 to activate the tone.
4.- Press OK button to store the changes.
Babysitter number
When the babysitter function is enabled, you can press any button –except
PROG- to dial a phone number previously configured.
Storing babysitter number
1.- Press Program button.
2.- Enter the numbers 1 and 3.
3.- Enter the number for the babysitter function.
4.- Press OK button to store the changes.
Configuring babysitter number
1.- Press Program button.
2.- Enter the numbers 1 and 2.
3.- Use Up / Down buttons to configure this option. Choose 0 (zero) if you
want to disable the babysitter function, or choose 1 if you want to enable
babysitter function.
4.- Press OK button to store the changes.
Notes:
When the babysitter function is enabled, a key icon displays on the screen,
and the programmed Babysitter number, too.
You can answer incoming calls in a normal way, even if you have the
babysitter function activated.
While using babysitter function, you cannot make emergency calls. You
can make emergency calls only if you have programmed an emergency
number in the babysitter function.
DELETING ALL ENTRIES
Use this function to delete all the entries stored in memory, redial numbers
memory and the Direct Call number.
1.- Press Program button.
2.- Enter the numbers 1 and 9.
3.- Press OK button to confirm the action.
Note:
Caller ID entries will be deleted when restart the base.
RESTARTING THE HANDSET
Use this function to back to default configuration.
Ringtone volume: 7
Ringtone: 4
Key tone: enabled
Indirect Network: disabled
Automatic answering: disabled
Base selection: automatic
1.- Press Program button.
2.- Enter the numbers 1 and 0 (zero).
3.- Press OK to back to default configuration.

Activación y desactivación de la función de cierto tipo de llamadas
1.- Presione el botón de Programación.
2.- Teclee los números 2 2 1.
3.- Introduzca el número del auricular que desee restringir.
4.- Utilice los botones de Arriba / Abajo para seleccionar una opción: 0=
restringe llamadas externas, 1= restringe llamadas internacionales, 2=
desactiva la restricción, todas las llamadas están permitidas.
5.- Presione el botón de OK para guardar los cambios.
Fecha y hora
Configure la hora y fecha actual de tal forma que aparezca la información
correcta en los mensajes del Identificador de Llamadas.
1.- Presione el botón de Programación.
2.- Teclee los números 2 y 3.
3.- Introduzca la fecha como un número de seis dígitos, ejemplo: 13 de
octubre de 2006, empiece por el día, mes y año: 131006.
4.- Presione el botón de OK para guardar los cambios.
5.- Introduzca la hora como un número de cuatro dígitos, ejemplo:
2:15pm, 1415.
6.- Presione el botón de OK para guardar los cambios en memoria.
Borrado de memorias en el Identificador de Llamadas
1.- Presione el botón de Programación.
2.- Introduzca los números 2 y 9.
3.- Presione el botón de OK para iniciar el borrado.
REINICIAR LA BASE
Utilice ésta función para regresar a la configuración de fábrica.
Volumen de timbre: 9
Melodía de timbre: 4
Tono del teclado: activado
Restricciones: desactivado
Memoria del Identificador de llamadas: vacío
Prefijos de red indirecta: ninguno
1.- Presione el botón de Programación.
2.- Introduzca los números 2 y 0 (cero).
3.- Presione el botón de OK para confirmar la acción.
RED INDIRECTA
Utilice esta función si realiza algunas de sus llamadas a través de una red
diferente de que le suministra su línea externa. Utilizando un acceso
indirecto, puede ahorrar dinero en conferencia y llamadas internacionales.
Cuando se suscribe a un proveedor alternativo de telefonía, le enviarán un
código de acceso a la red.
Para enviar las llamadas a través de la red alternativa, tiene que ingresar
el código de acceso cada vez que realice una llamada. Su equipo le
permite hacerlo automáticamente cuando marque una conferencia o una
llamada internacional (empezando por 0).
Para llamadas locales (números que no empiecen con 0), el equipo no
marcará el código de acceso a la red, así que estas llamadas se enviarán
a través de la red local.
Así mismo puede configurar dos prefijos locales, empezando por 0, por lo
que el código de acceso no será marcado.
El código de acceso y los prefijos adicionales de marcado local están
programados en la base y se aplica a todos los auriculares registrados.
Una vez que haya configurado el código y los prefijos es necesario activar
la función de Red Indirecta.
Programación del código de acceso a la red
1.- Presione el botón de Programación.
2.- Teclee los números 2 4 y 0.
3.- Introduzca el código de acceso a la red (hasta seis dígitos).
4.- Presione el botón de OK para guardar los cambios.
Programación de prefijos de llamada local adicionales
1.- Presione el botón de Programación.
2.- Teclee los números 2 4 y 1.
3.- Introduzca el primer prefijo (hasta seis dígitos).
4.- Presione el botón de OK para almacenar el primer prefijo.
5.- Teclee los números 4 y 2.
6.- Introduzca el segundo prefijo (hasta 6 dígitos).
Enabling and disabling Specific Calls restriction function
1.- Press Program button.
2.- Enter the numbers 2 2 1.
3.- Enter the number of the handset that you want to configure.
4.- Use Up / Down buttons to choose one option: 0= restrict external calls,
1= restrict international calls, 2= disable the function, all the calls are
allowed.
5.- Press OK button to store the changes.
Date and time
If you have Caller ID service and want to displays date and time correctly,
you must set the current hour.
1.- Press program button.
2.- Enter the numbers 2 and 3.
3.- Enter the current date as a six digit number: i.e. October 13, 2006,
begins by day, month and year: 131006.
4.- Press OK to store the changes.
5.- Enter the hour as a 4 digit number, i.e. 2:15pm, 1415.
6.- Press OK to store the date and time on memory.
Deleting Caller ID entries
1.- Press Program button.
2.- Enter the numbers 2 and 9.
3.- Press OK button to start deleting.
RESTARTING THE BASE
Use this function to back to default configuration.
Ringtone volume: 9
Ringtone: 4
Key tone: enabled
Restriction: disabled
Caller ID entries memory: empty
Indirect Network prefix: empty
1.- Press Program button.
2.- Enter the numbers 2 and 0 (zero).
3.- Press OK to back to default configuration.
INDIRECT NETWORK
Use this function if you want to make calls through a different network
instead of the normal telecom network. If you use an indirect access code,
you can save money in a conference or international calls. When you
subscribe to an alternative telecom provider, they’ll send you a code to
access into the network.
To send calls through the alternative network, you must enter the access
code every time you make a call. The equipment can be do that
automatically when make a conference or international call (starting with
0).
For local calls (numbers that don’t begins with 0), the equipment won’t dial
the network access code, and the local calls will be dialed using the local
network.
At the same way, you can configure two local prefix, starting with 0, so the
equipment won’t dial network access code.
The access code and the additional local prefix are programmed in the
base and they will be applied to whole registered handsets. Once the
access code and the prefix had been programmed, it is necessary to
activate the Indirect Network function.
Access Code programming
1.- Press Program button.
2.- Enter the numbers 2 4 and 0.
3.- Enter the Network Access Code (up to six digits).
4.- Press OK to store the changes in memory.
Additional local call prefix programming
1.- Press Program button.
2.- Enter the numbers 2 4 and 1.
3.- Enter the first prefix (up to six digits).
4.- Press OK button to store in memory the first prefix.
5.- Enter the numbers 4 and 2.
6.- Enter the second prefix (up to 6 digits).
7.- Presione el botón de OK una vez más para almacenar el segundo
prefijo.
Activación de la Red Indirecta
1.- Presione el botón de Programación.
2.- Teclee los números 1 y 4.
3.- Utilice los botones e Arriba / Abajo para configurar las opciones: 0=
desactivar la red, 1= activar la red Indirecta.
4.- Presione el botón de OK para confirmar los cambios.
Notas:
Este proceso deberá realizarlo en cada uno de los auriculares.
Para que pueda utilizar la función de Red Indirecta, deberá marcar el
número de teléfono antes de presionar el botón de Comenzar Llamada.
Cuando utilice la función de Red Indirecta, el mensaje LC aparece en
pantalla.
USO DE CONMUTADOR
Si desea insertar de forma automática una pausa de 2 segundos después
de que marca un código de línea externa en un conmutador:
1.- Presione el botón de Programación.
2.- Inserte los números 2 5 y 0.
3.- Presione el botón de OK para confirmar los cambios.
USANDO LA BASE COMO ALTAVOZ
La base de su equipo cuenta con un altavoz integrado, lo podrá utilizar
mientras esté en una conversación.
Para realizar una llamada con el altavoz activado:
1.- Presione el botón del altavoz localizado en la base para obtener tono
de llamada.
2.- Introduzca el número telefónico al que desee marcar o utilice el botón
de remarcado en la base (LNR) para marcar el último número utilizado.
3.- Una vez que haya terminado la conversación, presione nuevamente el
botón de altavoz en la base.
Para contestar una llamada:
Cuando el teléfono comienza a timbrar y desea contestar la llamada,
simplemente presione el botón de altavoz y comience la conversación,
una vez que termine, presione nuevamente el botón de altavoz.
Nota:
Si desea cambiar el volumen del altavoz, utilice los botones de volumen
localizados en un costado de la base.
LLAMADAS INTERNAS Y TRANSFERENCIA DE LLAMADAS ENTRE
LA BASE Y EL AURICULAR
Mediante el uso de esta opción usted podrá:
- Realizar llamadas internas entre la base principal y el
auricular.
- Transferir una llamada externa entre la base principal y el
auricular.
Transferir una llamada de un auricular a la base principal:
1.- Presione el botón de Intercomunicador por dos segundos, el mensaje
INT aparecerá en la pantalla del teléfono así como el número de la base
(0) y el número de los otros auriculares registrados.
2.- Presione el botón de 0 (zero) para llamar a la base principal ó presione
el botón 9 para llamar a todos los auriculares registrados.
3.- La base comenzará a emitir una alarma, cuando el usuario conteste,
usted estará conectado.
4.- Para contestar una llamada en la base, presione el botón de altavoz.
5.- Cuando termine la conversación, presione nuevamente el botón de
altavoz.
Transferir una llamada de la base principal a un auricular:
1.- Presione el botón de Intercomunicador en la base por dos segundos.
2.- Introduzca el número de auricular al que desee transferir la llamada (1
si solamente cuenta con un auricular) o presione el botón 9 para llamar a
todos los auriculares registrados.
7.- Press OK once to store the second prefix in memory.
Indirect network activation
1.- Press Program button.
2.- Enter the numbers 1 and 4.
3.- Use the Up and Down buttons to choose one of this options: 0=
deactivate the network, 1=activate the indirect network.
4.- Press OK to store the changes in memory,
Notes:
You must do the same process in every handset.
In order to start to use the Indirect Network, you must dial the phone
number before to press the Start Call button.
When the Indirect Network is in-use, the word LC displays on the
screen.
USING THE EQUIPMENT WITH A PBX
If you want to insert a 2 seconds pause for an external code in a PBX
system, automatically:
1.- Press Program button.
2.- Enter the numbers 2 5 and 0.
3.- Press OK button to confirm the changes.
USING THE MAIN BASE AS SPEAKER
The base of the equipment includes a built-in speaker, and you can use it
while you are speaking.
To make a phone call using the speaker:
1.- Press the Speaker button (located in the base) to get call tone.
2.- Enter the desired phone number or use the Redial button located in the
base (LNR) to dial the last phone number.
3.- Once you have finished the conversation, press the Speaker button
again.
To answer a call:
When the phone starts to ring and you want to answer the call, just press
the Speaker button and begin the conversation, once you have finished,
press the Speaker button once again.
Note:
If you want to change the speaker volume level, use the buttons located in
one side of the base.
INTERNAL CALLS AND TRANSFERRING CALLS BETWEEN THE
MAIN BASE AND THE HANDSET
With this option you can:
- Make internal call between main base and one handset.
- Transfer an external call between the main base and the
handset.
Transferring a call from a handset to the main base:
1.- Press the INT button for two seconds, the word INT displays in the LCD
screen, and the number of the base (0), too, and the number of another
registered handsets.
2.- Press 0 (zero) button to call to the main base or press 9 button to call
all the registered handsets.
3.- The base begins to emit an alarm, when the other user answer, you will
connected.
4.- To answer a call in the base, press Speaker button once.
5.- When you have finished the conversation, press the Speaker button
once again.
Transferring a call from the main base to a handset:
1.- Press the INT button, located in the base, for two seconds.
2.- Type the number of the handset that you want to transfer the call (1 if
you only have one handset) or press 9 button to call all the registered
handsets.

3.- El auricular comenzará a emitir una alarma y en pantalla se mostrará el
mensaje INT, cuando el usuario conteste, usted estará conectado.
4.- Para contestar una llamada presione cualquier botón.
5.- Cuando termine la conversación, presione el botón de Colgar o
coloque el auricular en la base principal o base de carga.
CONTESTADORA AUTOMÁTICA
Durante el proceso de programación, si demora mucho tiempo entre un
paso y otro, automáticamente el equipo saldrá del modo de programación
y tendrá que empezar de nuevo.
Configuración de la hora, número de timbrados y código de
seguridad remoto
1.- Presione por 5 segundos el botón de Reloj / Timbrado / Código. En el
altavoz de la base escuchará Set Day. Una vez que suelte el botón
también escuchará el día actual (está información se proporciona en
inglés).
2.- Presione el botón de Adelantar o Regresar en la base del teléfono
continuamente para seleccionar el día correcto, usted escuchará el día en
el altavoz.
3.- Presione una vez más el botón de Reloj / Timbrado / Código. En el
altavoz podrá escuchar la frase Set Hour, y escuchará la hora actual
(información en inglés).
4.- Utilice los botones de Adelantar o Regresar hasta que escuche en el
altavoz la hora correcta.
5.- Presione una vez más el botón de Reloj / Timbrado / Código. En el
altavoz podrá escuchar la frase Set Minutes, así como los minutos
actuales (información en inglés).
6.- Utilice los botones de Adelantar o Regresar hasta que escuche en el
altavoz los minutos correctos.
7.- Presione una vez más el botón de Reloj / Timbrado / Código. En el
altavoz podrá escuchar la frase Set Rings, así como el día, y la hora
configuradas por usted. El número de timbrados también se escuchará en
el altavoz (información en inglés).
8.- Presione los botones de Adelantar y/o Regresar para cambiar el
número de timbrados.
9.- Presione una vez más el botón de Reloj / Timbrado / Código. En el
altavoz escuchará el número de timbrados programados y la frase Set
Security Code y el código de seguridad remoto actual.
10.- Utilice los botones de Adelantar o Regresar para configurar el primer
código de seguridad.
11.- Presione el botón de Reloj / Timbrado / Código. Repita el paso 10 y
11 para programar los dos dígitos de seguridad restantes.
12.- Una vez que haya presionado el botón de Reloj, escuchará el código
de seguridad programado.
Notas:
Si desea comprobar todos los datos programados, presione una vez el
botón de Reloj / Timbrado / Código.
Para que la máquina contestadora se accione, es necesario programar un
número de timbrados entre 2 a 9. Si no configura esta opción la
contestadora se accionará después de 5 timbrados.
Si acostumbra revisar sus mensajes de forma remota, puede configurar la
opción Revisión de Mensajes (Toll Saver), de esta forma la contestadora
se accionará después de dos timbrados si existen mensajes nuevos. De
esta forma si la contestadora no se ha accionado después de dos
timbrados, podrá colgar para ahorrar en el costo de la llamada.
MENSAJES PREGRABADOS
La contestadora cuenta con 2 mensajes pregrabados, pero podrá grabar
su propio mensaje. Cada mensaje debe tener un mínimo de 3 segundos y
un máximo de 1 minuto. Si habla menos de 3 segundos el mensaje no
será grabado.
Nota:
Los mensajes pregrabados se encuentran en inglés, se recomienda
grabar sus propios mensajes.
Grabación de mensaje 1
1.- Presione el botón de Encendido / Detener y manténgalo presionado
hasta que escuche en el altavoz la frase Answering On y la pantalla
cambiará de - - a 00.
3.- The handset will emit an alarm and you can see the word INT in the
screen, when the user answer the phone, you will be connected.
4.- To answer a call, press any button.
5.- When you have finished the conversation, press Hang Up button or
place the handset in the main base or charge base.
AUTOMATIC ANSWERING
If you take many time between step and step, while you are programming,
the equipment automatically exits from this mode and you must begin
again.
Updating hour, ring numbers and remote security code
1.- Press Clock / Ring / Code button for 5 seconds. You will hear the
message Set Day in the speaker. Once you release the button, you’ll hear
the current day (this information is provided in English).
2.- Press Forward or Backward buttons located in the main base,
continuously, to select the correct day, you will hear the day in the
speaker.
3.- Press Clock / Ring / Code button once again. You will hear the phrase
Set Hour in the speaker, the you’ll hear then current hour (this information
is provided in English).
4.- Use Forward or Backward button until you hear the correct hour.
5.- Press Clock / Ring / Code button once again. You will hear the phrase
Set Minutes in the speaker, then you’ll hear the current minutes (this
information is provided in English).
6.- Use Forward or Backward button until you hear the correct
minutes.
7.- Press Clock / Ring / Code button once again. You will hear the phrase
Set Rings in the speaker. You can hear the day and time previously
programmed by you. Also, you can hear the number of rings (this
information is provided in English).
8.- Use Forward or Backward button to change the number of rings.
9.- Press Clock / Ring / Code button once again. You will hear the
programmed number of rings and the message Set Security Code and the
current security code.
10.- Use Forward or Backward button to set the first security code
number.
11.- Press Clock / Ring / Code button and repeat steps 10 and 11 to set
the next two code number.
12.- Once you have pressed the Clock button, you will hear the
programmed Security Code.
Notes:
If you want to check all the programmed data, press Clock / Ring / Code
once.
To activate the answering machine, you need to program the number of
rings, between 2 to 9. If you don’t do this, the answering machine will be
activated after 5 rings.
If you check your messages remotely, you can configure the Toll Saver
option. With this option, the answering machine will activate after two rings
if you have new messages. If you hear more than two rings, you don’t
have new messages and you can cut the call, to save money in it.
OUTGOING MESSAGES
The answering machine includes 2 pre-recorded outgoing messages, but
you can record your own message. Each message must record with at
least 3 seconds (with a maximum of 1 minute). If you speak less than 3
seconds, the message won’t be stored.
Note:
All the pre-recorded outgoing messages are in English. We recommend
you record your own messages.
Recording message 1
1.- Press and hold On / Stop button until you hear the message Answering
On, then the screen change from – to 00.

2.- Presione el botón OGM y manténgalo presionado hasta que escuche
un bip y en pantalla se mostrarán unas líneas rotando.
3.- Comience a grabar su mensaje, hable claramente a una distancia de
15cm del micrófono de la base principal.
4.- Una vez que haya terminado de hablar, presione el botón de
Encendido / Detener para detener la grabación. La contestadora
comenzará a reproducir el mensaje previamente grabado. Podrá escuchar
el mensaje en cualquier momento, presionando una vez el botón de OGM.
Grabación de mensaje 2
1.- Presione el botón de Encendido / Detener y manténgalo presionado
hasta que escuche en el altavoz la frase Answering On y en la pantalla
cambiará de o2 a Ro.
2.- Presione el botón OGM y manténgalo presionado hasta que escuche
un bip y en pantalla se mostrarán unas líneas rotando.
3.- Comience a grabar su mensaje, hable claramente a una distancia de
15cm del micrófono de la base principal.
4.- Una vez que haya terminado de hablar, presione el botón de
Encendido / Detener para detener la grabación. La contestadora
comenzará a reproducir el mensaje previamente grabado. Podrá escuchar
el mensaje en cualquier momento, presionando una vez el botón de OGM.
CÓMO UTILIZAR LA CONTESTADORA
Para encender la contestadora, presione el botón de Encendido / Detener
y manténgalo presionado hasta que escuche el mensaje Answering On.
Cuando enciende la contestadora, el mensaje uno es seleccionado
(OGM1), de esta forma las personas que hablen podrán dejar mensajes.
En pantalla se mostrará el número de mensajes nuevos o el número total
de mensajes en caso de que no hubiera mensajes nuevos.
Cuando la contestadora está apagada, y después de 10 timbrados, se
reproducirá el mensaje 2 (OGM2). Usted puede cambiar entre los
diferentes mensajes de forma remota, consulte la sección más adelante.
Cambiar entre los mensajes grabados
Para cambiar entre el mensaje 1 y mensaje 2, presione una vez el botón
de Encendido / Detener. Cuando el mensaje 2 es seleccionado, en la
pantalla se mostrará la palabra Ro (esta opción sólo reproducirá el
mensaje, pero las personas no podrán dejar mensajes).
Cuando cambie de mensaje, la contestadora reproducirá el mensaje
seleccionado.
Grabación de Notas de voz
Utilice esta función para grabar una nota de voz con una duración de
entre 3 segundos y 2 minutos, esta nota se reproducirá una vez que se
haya dejado una grabación en la contestadora.
1.- Presione el botón de Memo y manténgala presionada hasta que
escuche un bip.
2.- Grabe la nota de voz, hablando claramente a una distancia de 15cm
del micrófono de la base principal.
3.- Una vez que haya terminado de hablar, presione el botón de
Encendido / Detener para concluír la grabación.
Reproducción de mensajes
Cuando tiene mensajes nuevos o notas de voz en espera, el equipo
desplegará en pantalla el número de mensajes nuevos.
1.- Presione el botón de Reproducir / Pausa para reproducir todos los
mensajes y notas de voz. Escuchará cuantos mensajes nuevos tiene, así
como el día y la hora en que fue registrado (siempre y cuando haya
configurado la hora y la fecha anteriormente).
2.- Si desea realizar una pausa durante la reproducción, presione el botón
de Reproducir una vez, en la pantalla se mostrará el mensaje PA, si no
presiona el botón de Reproducir después de 2 minutos, el equipo
comenzará a reproducir nuevamente los mensajes.
3.- Una vez que se han reproducido los mensajes nuevos, puede
presionar el botón de Reproducir nuevamente para reproducir todos los
mensajes.
4.- Si desea repetir el mensaje, presione el botón de Regresar una vez.
5.- Si desea repetir un mensaje anterior, presione el botón de Regresar
dos veces.
2.- Press and hold OGM button until you hear a beep, on screen displays
some segments around it.
3.- Start to record the message, talking clearly to the microphone, in a
distance from 15cm from the main base.
4.- Once you have finished to talk, press On / Stop button to stop the
record. The answering machine will start to play the recorded message.
You can hear it any time, just pressing Ogm button once.
Recording message 2
1.- Press and hold On / Stop button until you hear the message Answering
On, then the screen change from o2 to Ro.
2.- Press and hold OGM button until you hear a beep, on screen displays
some segments around it.
3.- Start to record the message, talking clearly to the microphone, in a
distance from 15cm from the main base.
4.- Once you have finished to talk, press On / Stop button to stop the
record. The answering machine will start to play the recorded message.
You can hear it any time, just pressing OGM button once.
HOW TO USE THE ANSWERING MACHINE
To switch the answering machine on, press and hold On / Stop button until
you hear the message Answering On.
When turns the machine on, OGM1 is selected by default, in this mode, all
the people who calls, can leave you a message. In the screen you can see
the number of new messages, if there are not new messages, then
displays the total number of messages.
If the answering machine is off, after 10 rings, automatically starts to play
the OGM2. You can switch between both messages remotely, check the
corresponding section.
Switching OGMs
To switch between OGM1 and OGM2,press On / Stop button once. When
the OGM2 is selected, in the screen you will see the word Ro (this option
only can play the message, but people cannot leave messages).
When you change the OGM, automatically the answering machine will
play the selected message.
Recording Memos
Use this function to record a memo. You can record from 3 seconds to 2
minutes, and this note will play after a person leaves a message in the
machine.
1.- Press and hold Memo button until you hear a beep.
2.- Record the memo, speaking clearly in a distance of 15cm from the
microphone, located in the main base.
3- To finalize the recording, press On / Stop button.
Playing messages
When you have new messages or new notes, the machine will display the
number of new messages.
1.- Press Play / Pause to play all the messages and memos. You will hear
how many new messages you have, and the day and time was recorded
(previously you must configure the correct day and time to use this
function).
2.- If you want to make a pause while playing a message, press Play
button once, you can see the word PA in the screen, if you don’t press Play
button after 2 minutes, the equipment will start to play the messages
again.
3.- Once all messages have been played, you can press Play button, to
listen all the messages again.
4.- If you want to repeat the message, press Backward once.
5.- If you want to repeat a previous message, press Backward twice.

6.- Si desea saltar al siguiente mensaje, presione el botón de Adelantar
una vez.
7.- Para detener la reproducción de un mensaje presione el botón de
Encendido / Detener.
Borrado de mensajes
Presione el botón de Borrar durante la reproducción del mensaje. Si es un
mensaje nuevo, tendrá que escucharlo por completo y posteriormente
borrarlo; si es un mensaje previamente reproducido, durante la
reproducción, presione el botón de Borrar y automáticamente se detendrá
y se borrará.
Si desea borrar todos los mensajes, presione el botón de borrar por 3
segundos después de la reproducción.
Interceptar una llamada mientras se esta grabando
Si desea contestar una llamada mientras la contestadora está grabando
un mensaje, presione el botón de Comenzar Llamada en el auricular o
presione el botón de Altavoz en la unidad principal, automáticamente la
grabación se detendrá y podrá continuar con la conversación.
Regresar a los mensajes pregrabados
Si ya no desea utilizar los mensajes grabados por usted, puede regresar a
los mensajes pregrabados y volver a grabar nuevos mensajes si así lo
requiere.
1.- Presione el botón de Encendido / Apagar una vez para seleccionar el
mensaje que desee borrar.
2.- Presione el botón de OGM para reproducir el mensaje.
3.- Mientras el mensaje se está reproduciendo, presione el botón de
Borrar.
Escuchar mensajes de forma remota
Utilice esta opción para escuchar sus mensajes, mientras esté fuera de su
casa.
Simplemente marque a su casa e introduzca el código de tres dígitos
programado, el código preestablecido de fábrica es 321, pero puede
cambiarlo por el código que usted desee (ver Configuración de Seguridad
Remoto).
1.- Utilice un teléfono de tonos, y marque el teléfono de su casa u oficina
(donde se encuentre ubicado el TEL-2480).
2.- Cuando escuche el mensaje de la contestadora, presione el botón de
Asterisco, usted escuchará el mensaje Security Code y un bip.
3.- Introduzca el código de seguridad, utilizando el teclado numérico del
teléfono. Una vez que termine escuchará un bip largo.
4.- Presione el número 2 para reproducir sus mensajes o utilice una de las
teclas mencionadas posteriormente.
Notas:
Una vez que ha logrado la comunicación con su teléfono, sólo contará con
10 segundos cada vez que necesite introducir un código o presionar una
tecla, de otra forma se cortará la llamada automáticamente.
Sólo cuenta con tres oportunidades de introducir su código de seguridad
correctamente, de otra forma, se cortará automáticamente la llamada.
Después de reproducir mensajes por 2 ½ minutos, el equipo pasará a
modo de Pausa y escuchará bips cortos, si desea continuar la
reproducción, presione cualquier tecla en un lapso no mayor de 10
segundos, de otra forma se cortará la llamada.
Encendido de la contestadora de forma remota
Si la contestadora se encuentra apagada, ésta comenzará a reproducir los
mensajes pregrabados después de 10 timbrados.
Si desea encender la contestadora de forma remota:
1.- Espere a escuchar el mensaje pregrabado y presione el botón de
Asterisco.
2.- Cuando escuche el mensaje Security Code y un bip, introduzca su
código de seguridad.
3.- Presione la tecla 9 para encender la contestadora de forma remota.
6. if you want to jump to next message, press Forward once.
7.- If you want to stop playing a message, press On / Stop button
once.
Deleting messages
Press Delete button while playing a message. If it’s a new message, you
must listen it completely before delete it; if it’s a played message, while
you play, press Delete button, and automatically stops and will be
deleted.
If you want to delete all messages, press Delete button for three seconds
after playing.
Intercepting a call
If you want to answer an incoming call while the machine is recording,
press Start Call button in the handset or press Speaker button in the main
base, the recording will stops automatically, and you can continue with the
conversation.
Backing to default OMGs
If you don’t want to use the own recorded OMGs, you can back to the
pre-recorded OMG and then you can record your own messages,
again.
1.- Press On / Off button to choose the desired message to delete.
2.- Press OGM button to play the message.
3.- While you are playing a message, press Delete button.
How to listen messages remotely
Use this function to listen your new messages, remotely, while you are out
of home.
Dial your home number and enter the programmed security code (three
digits), the pre-established code is 321, but you can change it in accord to
your necessities (see Updating hour, ring numbers and remote security
code section).
1.- Use a tone dialing phone and dial your home / office phone number
(where the TEL-2480 has been placed).
2.- When you hear the answering machine message, press Star (*) button,
you will hear the message Security Code and one beep.
3.- Enter your security code, using the numeric keyboard on the handset.
After that, you will hear a high long tone beep.
4.- Press number 2 to play the messages or use one of the keys
mentioned in the next pages.
Notes:
Once you have connected to your home phone, you just have 10 seconds
each time you need to enter a code or press a key, otherwise the call will
cut.
You have only three chances to enter a correct security code, otherwise,
the call will cut automatically.
When you play messages for 2 ½ minutes, the equipment will switch to
Pause mode and you will hear short beeps, if you want to continue, press
any key in a period of time less than 10 seconds, otherwise the call will
cut.
Switching on remotely
If the answering machine is off, it will start to play the OGM after 10
rings.
If you want to switch on the equipment, remotely:
1.- Wait until you hear the OGM, then press Star (*) button.
2- When you hear the message Security Code and a beep, enter your
security code.
3.- Press button 9 to switch the machine on.

TECLAS A UTILIZAR EN LA OPERACIÓN REMOTA
PROBLEMAS Y SOLUCIONES
KEYS TO PRESS DURING REMOTE OPERATION
TROUBLESHOOTING
8
Interrumpir o desviar el mensaje de salida
Interrupt or bypass the outgoing message
Reproducir nuevos mensajes
Play new messages
Hacer una pausa durante la reproducción de un mensaje
Make a pause while playing a message
Saltar al siguiente mensaje
Skip to next message
Repetir el mensaje actual
Repeat the current message
Regresar al mensaje anterior
Back to previous message
Detener la reproducción o la grabación
Stop playback or recording
Borrar el mensaje actual
Delete the current message
Borrar todos los mensajes
Delete all messages
Reproducir un mensaje pregrabado (OGM1 u OGM2)
Play an outgoing message (OGM1 or OGM2)
Grabar un nuevo mensaje de salida (OGM1 u OGM2)
Record a new outgoing message (OGM1 or OGM2)
Grabar una nota de voz
Record a memo
Encender la contestadora
Switch the answering machine on
Apagar la contestadora
Switch the answering machine off
*
1
11
2
3
6
7
0
4
5
#
9
2
Problema Solución
Trouble Solution
No salen / entran llamadas Revise que el adaptador de corriente está correctamente conectado
Asegúrese de que las baterías del auricular tienen suficiente carga, en
caso contrario, colóquelo en la base para su recarga
Desconecte el adaptador de corriente del tomacorriente, espere unos
segundos y vuelva a conectarlo
Cannot make or receive phone calls Check the AC power adaptor is correctly plugged
Make sure the batteries have enough charge, otherwise, put the handset
on the base to begin charging
Unplug the AC power adaptor from the outlet, wait a few seconds and
then, try to plug again
No se pueden realizar llamadas Revise que la función de Bloquear Teclado no está activada
Revise que la función de Restricción de Llamadas no está activada
Cannot make phone calls Check the Key Block function is not activated
Check the Phone Call Restriction is not activated
No se pueden realizar llamadas, Acerque el auricular a la base
aun cuando los dígitos aparecen en la Compruebe que la base no está colocada cerca de equipos eléctricos
pantalla Revise que la función de Restricción de Llamadas no está activada
Cannot make a phone call Put the handset near to the base
even if the digits displays on Check the base is not placed near to electrical devices
the screen Check the Phone Call Restriction is not activated

PROBLEMAS Y SOLUCIONES (Cont.) TROUBLESHOOTING (Cont.)
Problema Solución
Trouble Solution
El timbre del teléfono no se oye Revise que el adaptador de corriente está correctamente conectado
Asegúrese de que el nivel de volumen no se encuentra en el nivel 0
Cannot hear the phone ring Check the AC power adaptor is correctly plugged
Make sure the volume level is higher than 0
La llamada se cortó por estar fuera de Coloque el auricular en la base antes de volver a intentar hacer
rango. No se puede realizar otra llamada otra llamada
Lost the call because I'm out of range Place the handset on the base before to try to make other
Cannot make another phone call phone call
Existe ruido o interferencias durante Coloque el auricular en otra posición
las llamadas Revise que la base no se encuentra cerca de otro equipo electrónico
Hear some noise or interference while Place the handset in other position
calling Check the base is not placed near to electrical devices
Se oyen bips durante las llamadas Podría estar saliendo del rango de cobertura de la base
Compruebe que las baterías tienen suficiente carga
Hear some bips while calling May be out of range
Check the batteries have enough charge
El Identificador de llamadas no funciona Compruebe que está suscrito al servicio de Identificador de Llamadas
El número entrante podría ser privado
El número entrante podría ser internacional
Caller ID don't works Make sure you're subscribed to Caller ID service
Incoming phone call maybe private
Incoming phone call maybe out of range - international
Se oye tono de ocupado cuando se intenta Si cuenta con mas de un auricular compruebe que no se esté
realizar una llamada llevando a cabo una llamada a través de otro auricular
Hear a busy tone when try to make a If you have more than one handset, check that the other one
phone call is not in a call while you try to dial a number
No se puede transferir una llamada Asegúrese de que el auricular al que desea transferir la llamada esté
en el rango de cobertura de la base
Asegúrese de que está marcado el número de auricular correcto
Cannot transfer a phone call Make sure the handset which you want to transfer the call is on
the range of the base
Make sure you dial the right handset number
Las baterías duran una o dos horas La primera vez que se carga el teléfono, tiene que ser por 15 horas para
lograr el mejor aprovechamiento de las baterías, en caso de que no lo
haya hecho podría disminuir el nivel de carga de las baterías
Reemplaze las baterías
Limpie los contactos de carga de la batería con paño seco
Compruebe las conexiones entre la base y la toma de corriente
Battery charge works for one or two hours When you charged the phone by the first time, you must do it for
15 hours in order to get the best performance of the batteries. If you
didn't the battery charge may decrease considerably
Replace the batteries
Clean the battery charge contacts with a dry cloth
Check the connections between the base and AC outlet
La función de Red Indirecta no funciona Asegúrese de que está suscrito a un proveedor de Red Alternativa
Compruebe que la función está activada
Indirect Network function don't works Make sure you have already subscribed to Alternative Network supplier
Make sure the funcion is activated
La función de retención no funciona Mantenga presionado el botón de Retención por 2 segundos
Retention function don't works Press and hold Retention button for 2 seconds

PROBLEMAS Y SOLUCIONES (Cont.)
ESPECIFICACIONES
Base Principal
Entrada: 9V 500mA
-48V (línea telefónica)
Dimensiones: 185 x 130 x 55mm
Peso: 271,4g
Teléfono
Entrada: 3,6 V (3 x AAA paquete) baterías
incluidas
Dimensiones: 155 x 55 x 30mm
Peso: 130,3g (con batería)
Convertidor
Entrada: 120 V ~ 60Hz 10W
Salida: 9V 500mA 4,5W
Nota:
El diseño del producto y las especificaciones pueden cambiar sin previo
aviso.
TROUBLESHOOTING (Cont.)
SPECIFICATIONS
Main base
Input: 9V 500mA
-48V (phone line)
Dimensions: 185 x 130 x 55mm
Weight: 271,4g
Handset
Input: 3,6 V (3 x AAA package) batteries are
included in the package
Dimensions: 6,1 x 2,1 x 1,1in
Weight: 130,3g (with battery)
AC power adaptor
Input: 120 V ~ 60Hz 10W
Output: 9 V 500mA 4.5W
Note:
Product design and specifications are subject to change, without notice.
Problema Solución
Trouble Solution
La contestadora no graba mensajes Revise la pantalla de la base, si la palabra Fu aparece, significa que necesita
borrar algunos mensajes para obtener mayor espacio libre
Asegúrese de que la contestadora esté encendida
Compruebe que tiene seleccionado el mensaje 1 (OGM1) si tiene seleccionado
el mensaje 2 (OGM2) no podrá grabar mensajes
Answering machine won't record messages Check the base unit's display if the word Fu displays, you must delete some
messages to get more free space
Make sure answering machine is already On
Check that you have selected message 1 (OGM1), if you have selected
message 2 (OGM2) you cannot record messages
La operación remota no funciona Asegúrese de que está utilizando el código de seguridad correcto
Compruebe que está utilizando un teléfono de tonos
Remote operation doesn't works Make sure that you are using the correct security code
Check that you are using a suitable tone-dialing phone
Other manuals for TEL-2480
1
Table of contents
Other Steren Cordless Telephone manuals

Steren
Steren TEL-2485 User manual

Steren
Steren TEL-615 User manual

Steren
Steren TEL-2490 User manual

Steren
Steren TEL-620 User manual

Steren
Steren TEL-2410 User manual

Steren
Steren TEL-600 NE User manual

Steren
Steren TEL-225 User manual

Steren
Steren TEL-2492 User manual

Steren
Steren TEL-800 User manual

Steren
Steren PLATINUM TEL-2010 User manual